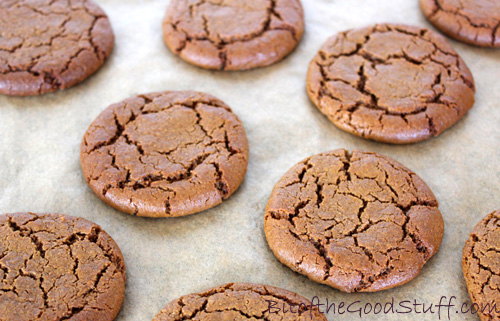
The waffle obsession continues! And for this month’s Suma Blogger’s Network entry, I thought I’d share another one of our favourite vegan waffle recipes. Filled with the warming spices of cinnamon, ginger and Blackstrap molasses, these waffles are perfect for this time of year ♥
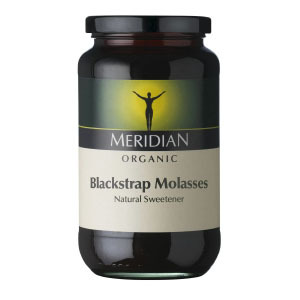
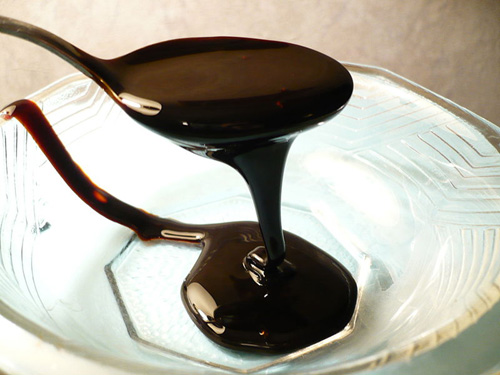
I wrote about the amazing nutritional profile of Blackstrap molasses in this Gingerbread Cookie post. With just one tablespoon containing 3.6 mg of iron (more iron than 1/2 cup of cooked lentils, beans or spinach), it’s easily one of my favourite ways to boost iron levels.
The recipe is largely an amalgamation of our favourite gingerbread and banana pancake recipes, with a slight reduction of the liquid to make a sturdier batter. Banana acts as a great binder for the waffles and adds a touch of extra sweetness.
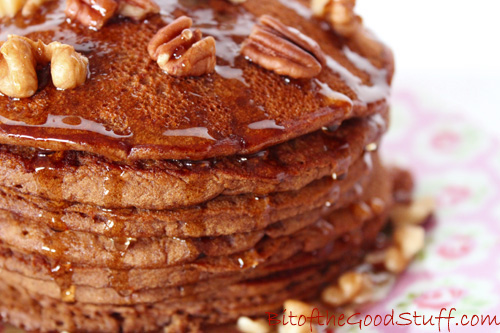
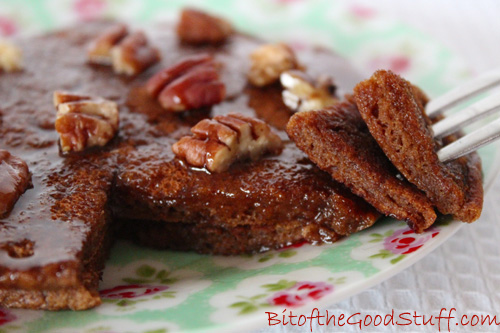
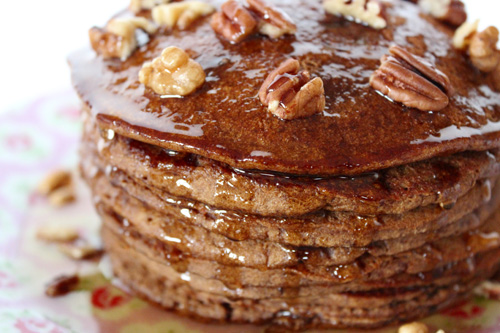
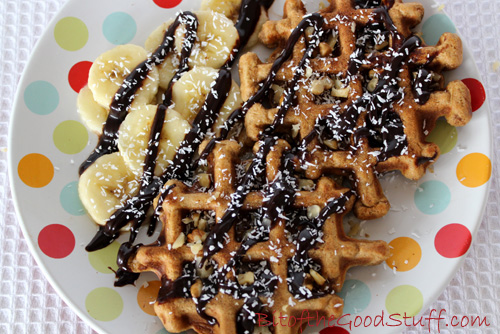
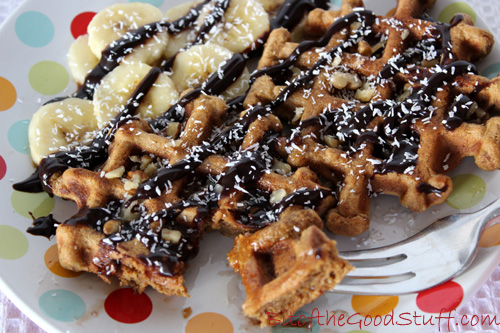
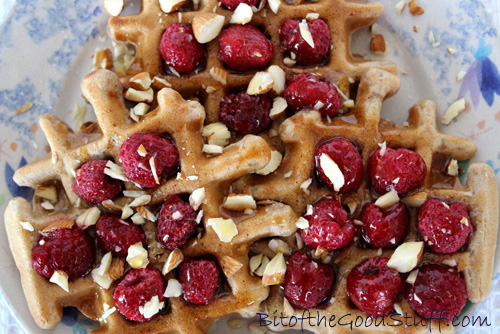
I’ve really enjoyed reading about your favourite waffle toppings under last week’s Easy Vegan Waffle Post. As I would have expected, maple syrup came out on top. Nuts, banana and chocolate were very popular too, and I’m totally with you on those. One of my favourite lazy Sunday breakfast/brunches is these Gingerbread waffles, served with banana slices, chopped walnuts and pecans, and a big drizzle of chocolate sauce.
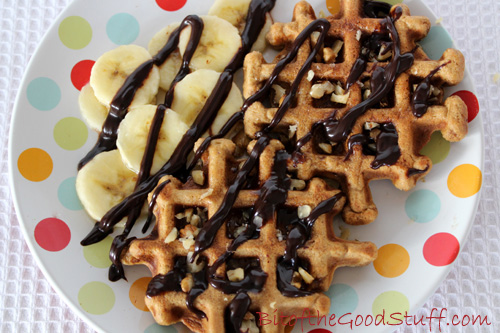
Sometimes I make the chocolate sauce myself, other times I simply grab a bottle of Sweet Freedom Choc Shot. Have you tried Choc Shot before? As well as tasting yummy, I love the fact that it contains all natural ingredients, is free from cane sugar and has a low glycaemic load (GL). Can you see how shiny it is too? It’s got the most awesome sheen!
And if I’m going all out, I’ll also top them with a sprinkling of desiccated coconut.
Pure. Waffle. Heaven ♥
[print_this]
Makes around 10-12 waffles
Hands on time: 20 minutes Ready in: 20 minutes
Waffle Batter
1 ripe banana, sliced (or ¾ cup frozen banana slices)
180ml / 6 fl oz / ¾ cup soya milk
140g / 5 oz / 1 cup wholemeal (wholewheat) or chapatti flour (or GF flour mix e.g. Doves Gluten-Free Brown Bread Flour or Doves Gluten-Free Plain White Flour)
50g / 1¾ oz / ½ cup rolled oats (use certified GF, if needed)
2 TBSP Blackstrap molasses
1 TBSP maple syrup
1 tsp ground cinnamon
1 tsp ground ginger
1 tsp baking powder
¼ tsp salt
1 tsp oil or coconut butter, for greasing
Suggestion toppings
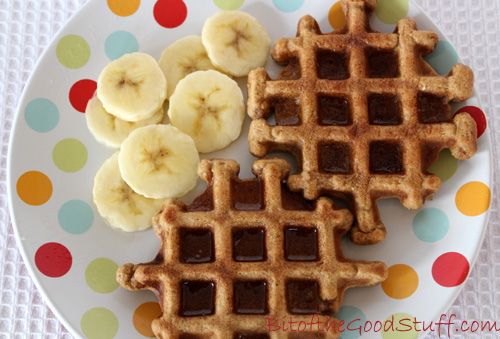
Banana slices
Chopped walnuts and pecans
Chocolate sauce
Desiccated Coconut
Method
Place the milk and banana in a high speed blender and blend until smooth (alternatively you can use a bowl and hand blender). Add all the remaining batter ingredients and blend to combine. The batter should be thick, but pourable. (If you’re using GF flour, you will need up to 4 tablespoons of extra liquid). Pour the batter into a bowl and leave to rest for a few minutes (this can happen while the waffle maker heats up).
When the waffle maker is hot, brush with oil or coconut butter using a silicone brush. Add the appropriate amount of batter according to your waffle maker’s instructions. (I have a VonShef Quad Waffle Maker and drop two tablespoons of batter into each of the four waffle quads). Close the lid and leave to cook for 3 minutes before checking (with my waffle maker, I leave the waffles until the green light goes out). If the waffles are golden brown, they are ready. Transfer them to a wire cooling rack while you prepare the remaining waffles.
Serve warm with your favourite toppings.
Any leftover waffles can be stored in the fridge for up to 3 days or frozen for weeks. Heat them through in the toaster before serving.
[/print_this]
Products used in this recipe
Doves Farms Gluten Free Brown Bread Flour or Doves Farm Gluten Free Plain White Flour
Meridian Organic Blackstrap Molasses
Sweet Freedom Choc Shot
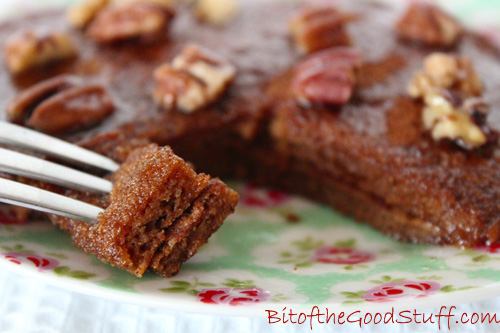
And now for my favourite part of the photo shoot. Tucking in time! 😛
")
")
")
")