Birthday Celebrations & a Chocolate and Lime Vegan “Cheesecake”

This week it was my birthday.  I never imagined that birthdays would be as much fun at the ripe old age I am now, but how wrong I was.  I actually think this was my best birthday yet! I had a fantastic day, made all the better by the fact that M was able to take the day off work 😀

During the day, we managed to fit in lots of my favourite activities (as you’ll see, eating crops up a lot 😉 )  We started off with one of my favourite bike rides, along the Kennet & Avon Canal to Limpley Stoke where we stopped at the Angel Fish Cafe for a toasted tea bun and cup of coffee.  We then continued through Monkton Coombe, the Two Tunnels, Bear Flat, Widcome and into the centre of Bath.

Me on my Birthday 2013

Along the way, we saw lots of wildlife, including this very cute baby rabbit

Baby Rabbit

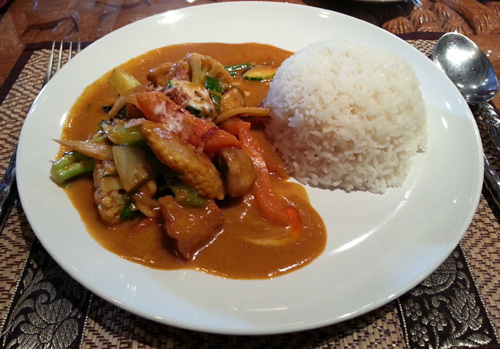
For lunch, we went to one of my favourite restaurants in Bath – Thai Basil on Walcot Street – where I had a Thai red vegetable curry.  It was creamy and full of delicious fragrant flavours.  This has got to be one of my favourite curries ever!

Thai Basil - Thai Red Curry

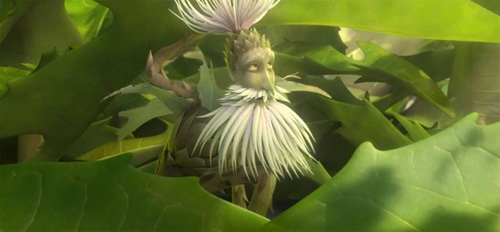
After school, we went to the cinema with Lil’ L to see Epic.  On the way, we stopped off at Hotel Chocolat to buy some vegan chocolate (I can highly recommend the Gianduja Bombe Selector – it’s totally lush!)

Epic the Movie 2013

[Source]

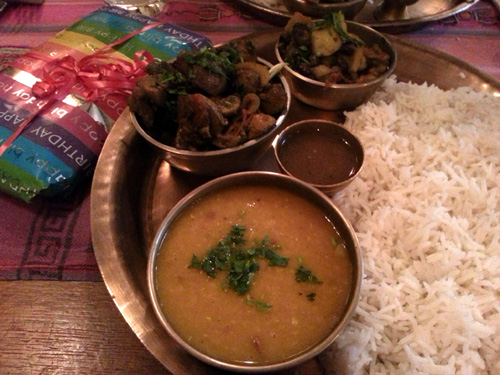
For dinner, we went to another one of my favourite restaurants, the Nepalese Yak Yeti Yak, where we had the delicious Dal Bhat Tarkari (vegetarian/vegan set menu).

Yak Yeti Yak - Vegetarian Platter

Even though I was full up, I couldn’t leave without having the Kir dessert.  This is one of my favourite desserts ever.  It’s a creamed coconut rice pudding lightly spiced with cardamom. I’m going to have to try at make this at home one day. It’s so yummy!

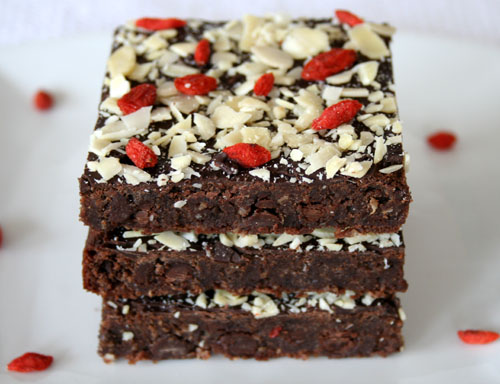
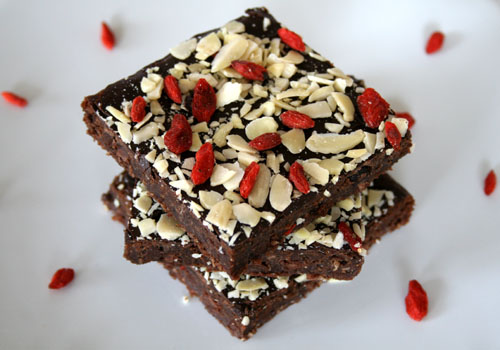
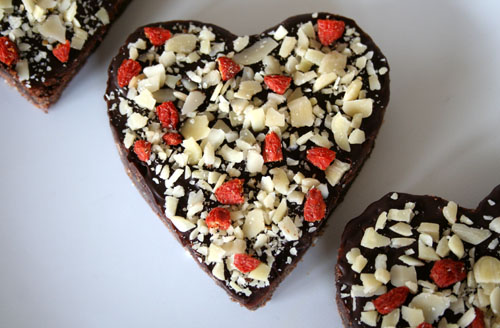
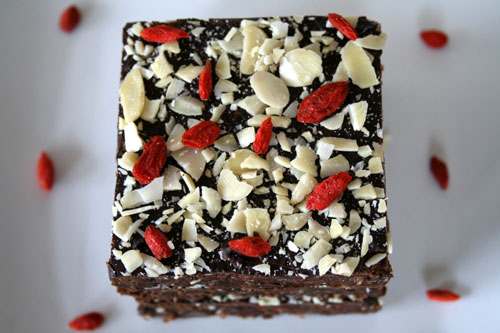
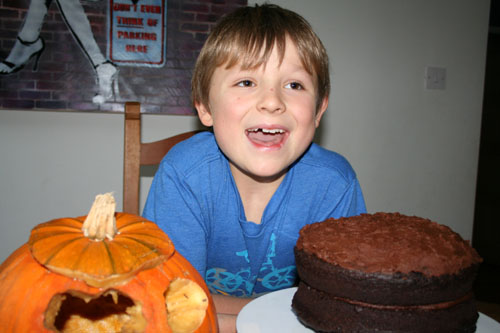
For my birthday cake, I chose to make one of my all-time favourites – Chocolate and Lime Vegan “Cheesecake”.  I much prefer these ‘no bake’ cheese cakes to any kind of baked cake, plus they’re almost impossible to fail at.  You simply throw the ingredients in the food processor, whizz it together then freeze!

Raw / No Bake Chocolate and Lime Cashew "Cheese" Cake

Here’s how I made it…

[print_this]

Chocolate & Lime Vegan “Cheesecake”

Serves: 12
Hands on time: 20 minutes
Freezing time: 2 hours

Ingredients

Crust
150g / 5¼ oz / 1 cup raw unsalted almonds (or use a mix of almonds and pecans)
180g / 6¼ oz / 1 packed cup soft, pitted dates*
5 tbsp raw cacao powder (or regular cocoa powder)
1 tbsp maple syrup (or other liquid sweetener such as agave syrup. I used Clarks Original Maple Syrup)
1 tsp vanilla extract
pinch of salt

* If your dates aren’t soft, soak them in hot water for 2-3 minutes, then drain

Lime Layer
150g / 5¼ oz / 1 cup unsalted cashews
80ml / 2¾ fl oz / ¼ cup maple syrup (or agave syrup)
60ml / 2 fl oz / ¼ cup freshly squeezed lime juice (approximately 2 limes)
½ tsp vanilla extract
53ml / 2 fl oz / ¼ cup virgin coconut oil, liquefied

Chocolate Layer
150g / 5¼ oz / 1 cup unsalted cashews
80ml / 2¾ fl oz / ¼ cup maple syrup (or agave syrup)
37g / 1¼ oz / 1/3 cup raw cacao powder (or regular cocoa powder)
60ml / 2 fl oz / ¼ cup water
½ tsp vanilla extract
53ml / 2 fl oz / ¼ cup virgin coconut oil, liquefied

Grated dark chocolate or cacao nibs, for sprinkling

Method

Preparation

1.   Soften the cashews for the chocolate and lime layers by pre-soaking them for 4-6 hours, or boiling them in a pan of water for 15 minutes.  Drain and set to one side.

2.    Grease a shallow, loose bottom 20 cm (8 inch) or 23 cm (9 inch) tin and line the bottom with non-stick baking paper.

 Crust:

3.    Place the almonds in a food processor and process until they are crumbs.  Add the remaining ingredients and pulse until combined. You want the crumbs to be slightly moist and sticky.  Test them by pressing a small amount between your thumb and finger. If they stick together, they’re ready. If not, continue to pulse for a little longer.

4.    Tip the crumbs into the prepared tin. Use the back of a greased metal spoon to firmly press down the crumbs to form a crust.

Lime Layer

5.    Divide the cashews in two, and place half of them in a food processor or powerful high speed blender along with the liquid sweetener, lime juice and vanilla extract. Process until the cashews are completely grinded into a creamy mixture, stopping now and then to scrape down the bowl. Add the liquefied coconut oil and continue blending until the mixture is completely smooth.

6.    Tip the mixture on top of the crust and smooth with a knife. Place in the freezer whilst you prepare the next layer.

Chocolate Layer

7.    Place the remaining cashews in the food processor or blender along with the cacao/cocoa powder, liquid sweetener, water and vanilla extract. Process until the cashews are creamy, stopping now and then to scrape down the bowl. Add the liquefied coconut oil and continue blending until the mixture is completely smooth.  Taste test and add more cacao/cocoa powder or sweetener, to taste.

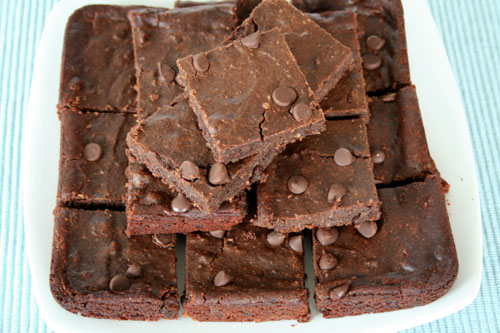
8.    Tip the mixture on top of the lime layer and freeze for about two hours, or until firm. Cut the cake into 12 slices and serve with a sprinkling of grated chocolate or cacao nibs on top.  This dessert will last up to a week in the fridge, or weeks in the freezer.  If you’re not planning on eating the dessert in one go, simply remove the required slices and store the remainder in the freezer.

[/print_this]

Note: Almonds and cashews tend to be much cheaper in Asian supermarkets or in the World Aisle of large supermarkets.  For this dessert, I used Aasani almonds and cashews, which are available from the larger UK Tesco stores.


We finally got round to eating a slice of birthday cake yesterday and it was absolutely gorgeous!  All three of us loved it and, even though Lil’ L went back for seconds, there’s still plenty in the freezer to share with friends and family (if they’re lucky 😉 )

Have a wonderful weekend everyone! xx

What would be your ultimate birthday cake?

Do you still enjoy your birthdays as much as when you were a kid? (or even enjoy them more, like me!)


Maple Pecan Granola Clusters

Today, I’d like to share one of Lil’ L’s all-time favourite breakfasts.

I started making home-made granola about five years ago in response to Lil’ L’s dislike for the dried fruits that appear in shop-bought granolas.  After a week of picking out the raisins from a granola before serving it to him, I decided that life was far too short to waste time picking out dried fruit and that I would have a try at making my own granola instead!  By making it myself, I would be able to tailor the granola to suit all our tastes.  Lil’ L loves nutty granola, I love a mix of nuts and dried fruits, while Mark will eat anything.

Maple Pecan Granola

By making our own, we could also omit the refined sugars and oils that are found in shop-bought granolas and replace them with healthy, natural alternatives.

Maple Pecan Granola Ingredients

For breakfast, we love serving this granola with non dairy milk or yoghurt.

Maple Pecan Granola

It is also delicious layered with yoghurt and berries in a parfait (we use frozen berries as they turn the yogurt a beautiful colour as they thaw!)  These can be served as breakfast, dessert or even a post-school snack.

Berry Granola Parfait

Please note that the recipe below has been updated in 2018 to bring it into line with the recipe that appears in the Bit of the Good Stuff cookbook.

[print_this]

It’s so simple to make your own granola. In fact, with very little assistance, the kids could easily make their own! Lil’ L prefers his granola to be “chunky cluster” and we’ve found a simple method of doing this which we’ve set out below.  

Makes approximately 5 cups (10 servings)
Hands on time: 10 minutes    Ready in: 60 minutes

Ingredients

300g / 3 cups rolled oats (use GF oats, if needed)

100 g / ½ cup buckwheat groats* (washed and drained)
40g / 4 TBSP fine wholemeal (whole wheat pastry) flour, chapatti flour or gluten-free flour
30g / ⅓ cup dessicated coconut

60g / ½ cup pecans, roughly chopped

30g / ¼ cup flaked almonds

30g / 3 TBSP coconut sugar or unrefined caster sugar

½-1 tsp ground cinnamon

pinch of ground nutmeg

¼ tsp sea salt

150ml / ½ cup maple syrup (or other natural liquid sweetener. I use Clarks Original Maple Syrup which is a carob and maple blend)

3 TBSP virgin coconut oil, melted

*I add buckwheat to my granolas as it’s a great source of protein and adds another dimension of texture. In the UK, it’s available in the wholefoods section of Tesco and from health food stores.  If you can’t get hold of buckwheat, you can substitute with another ½ cup of oats or other grain.

 Method

1.  Preheat the oven to 150C (130C fan) / 300F. Line a large baking tray (38 x 26cm / 15 x 10 inches) with non-stick baking paper. If your coconut oil is solid, place it in a heat-proof howl in the oven for a couple of minutes to melt it (be careful when you remove it as the container will be very hot!)

2.  In a large bowl, mix together the oats, buckwheat, dessicated coconut, nuts, sugar, cinnamon, nutmeg and salt. Stir in the maple syrup. Pour in the coconut oil and stir until the grains are thoroughly coated.

3.  Spread the granola out evenly on the prepared baking tray and press down hard so that the mixture sticks together as if you were making a thin granola bar. Bake for 40 minutes, until the granola has lightly browned. Remove from the oven and allow to completely cool (it will firm up as it cools).

4. Break up the granola into clusters. (Don’t worry if the pieces from the centre of the tray feel a little soft as I find they firm up over time). Stored in an airtight container in a cool place, the granola will keep for weeks.

5.This granola is delicious served with non-dairy milk or yoghurt, and a sprinkling of your favourite dried fruits, nuts and seeds. I often add a sprinkling of chopped walnuts and ground linseed for an omega-3 boost and goji berries for vitamin C.

[/print_this]

Pin for later ⬇️

Last Christmas, I thought I’d treat Lil’ L to some “luxury” shop-bought granola.  I bought two different brands for him, both of which included a selection of his favourite nuts and no dried fruits.  It turns out he didn’t like either of them as they were “way too sugary”!  Instead, he asked whether he could have some of our home-made granola.  Since we’d run out, he was even prepared to postpone his Christmas Day breakfast for 45 minutes until a fresh batch was baked!  I wasn’t expecting to be making granola on Christmas morning but I was happy to oblige. Thank goodness it only takes a few minutes to prepare!  We won’t be buying shop-bought granolas any more.  Home made is best by a long shot!

And if you like chocolate, how about trying our chocolate clusters? Totally scrumptious and perfect for breakfasts, snacks and desserts 🙂

Have a great weekend everyone xx

Do you make your own granolas?  If so, what is your favourite flavour combination? If you have any published recipes, please do link up below. 

Vegan Lemon Drizzle Cake (Dairy-free / Egg-free)

What colour do you associate with Spring?

For me, it has got to be yellow ♥ 

Everywhere I look at the moment, I’m seeing this beautiful, fresh colour.

In my garden the yellow primroses are in bloom…

Crocuses & Primroses

as are the sweet little narcissus.

Narcissus

It won’t be long before the daffodils are in full bloom too 🙂

Daffodils

As well as being the colour of spring, yellow also happens to be my mum’s favourite colour

Here in the UK, it’s Mother’s Day on Sunday.  I haven’t seen my mum since Christmas so I’m really looking forward to spending the day with her.  Inspired by her favourite colour, I’ve chosen to bake a Lemon Drizzle Cake to give her on Sunday as a little home-made treat.

With its light texture, zingy citrus flavour and flecks of bright yellow zest, I think this is the perfect cake for this season.

Vegan Lemon Drizzle Cake (Dairy Free / Egg Free)

Since I’m giving this cake as a gift, I haven’t ‘healthified’ it to the extreme (I’m sure my mum will appreciate that 😉 ).  However, it is free from dairy and eggs, so will be suitable for anyone with those allergies.

To make the cake super zingy and moist, once it was cooked I pierced it all over with a toothpick and drizzled over the juice from a freshly squeezed lemon mixed in with a couple of tablespoons of granulated sugar (which gives the top of the cake a great, crunchy texture).

Vegan Lemon Drizzle Cake (Dairy Free / Egg Free)

Just in case you fancied trying it for yourself, here’s how I made it:

[print_this]

Serves 8 -10
Hand on time: 15 minutes    Ready in: 2 hours

Ingredients
200g / ¾ cup + 3 tbsp unrefined cane sugar (e.g. golden caster sugar)
2 TBSP maple syrup (or maple blend. I use Clarks Original).
70ml / ⅓ cup organic rapeseed (canola) oil (or other neutral-flavoured oil, like sunflower oil)
240ml / 1 cup soya milk
2 tsp apple cider vinegar
30ml / 2 TBSP freshly squeezed lemon juice
zest of 2 unwaxed/organic lemons
250g / 1¾ cups plain (all purpose) flour
2 tsp baking powder
¼ tsp salt

Drizzle
2 TBSP freshly squeezed lemon juice
2 TBSP Demerara (or turbinado) sugar

Method

1. Grease and line a 2lb loaf tin with non-stick baking paper (or use a non-stick loaf liner).  Preheat the oven to 190c (170C fan) / 375F.

2. In a mixing bowl, whisk together the sugar, syrup, oil, milk, vinegar and lemon juice using a balloon whisk until fully combined. Stir in the lemon zest.

3. Sift one third of the dry ingredients (flour, baking powder, salt) into the bowl and whisk by hand to combine. Repeat with the remaining two thirds, whisking each time.

4. Tip the mixture into the prepared tin.  Place on the middle shelf in the oven and bake for 50 minutes, or until a skewer inserted into the middle comes out clean.

5. Meanwhile, place 2 TBSP juice from a freshly squeezed lemon in a small bowl with the Demerara sugar.  Stir to combine.

6. When the cake is baked, remove from oven and pierce all over with a toothpick or skewer.  Spoon the lemon drizzle evenly over the top of the cake.  Allow to cool in the tin for at least an hour (it will firm up as it cools) then transfer to a wire wrack.

7. Once completely cooled, slice and serve or transfer to an airtight container. The cake will keep up to a week in the  refrigerator.  It also freezes well.

[/print_this]

Have a wonderful weekend everyone


READER REMAKES ❤️

————————————————-

You might also like… Orange Drizzle Cake with Poppy Seeds 🍊

SaveSave

CCK’s Black Bean Brownies (Dairy Free / Wheat Free / Vegan)

I am a huge fan of Chocolate Covered Katie.  And who wouldn’t be?  This girl takes our favourite sugary, fat-laden treats and transforms them into healthy desserts.  Katie’s a vegan, so all her desserts are dairy and egg free, and most are gluten free and free of refined sugar.

What I find really amazing is that Katie’s healthy versions of classic treats often taste far better than the original.  And they definitely leave you feeling better inside.  No stomach aches, no sugar hangover, and no guilt!

One of my all-time favourite CCK recipes is her No Flour Black Bean Brownie.  I love the idea of adding healthful ingredients such as beans into desserts, but when you have children around, it’s important that said ingredients can’t be detected.  I can assure you that even the fussiest of kids will be unable to detect the goodness that lies in these brownies.  So let’s keep the beans a secret okay 😉

CCK's Black Bean Brownie - Vegan & Wheat Free

I’ve been making and eating A LOT of these brownies in the past couple of weeks.  I’ve made them for coffee mornings with friends, lunch box treats for M and Lil’ L, and for my Tuesday night study group.  I’ve also made a batch for Valentine’s Day 😉

Valentines Chocolate Black Bean Brownie with Almonds & Gojis

My current favourite way of serving these brownies is with a topping of dark chocolate, flaked almonds and gojis.  It adds another dimension to the texture and flavour, as well as adding even more goodness and nutrition.  They also look pretty, don’t you think?

Black Bean Brownie 3 - Vegan & Wheat Free - 500

Since I’ve eaten one of these brownies every day so far this week, it seems fitting to dedicate today’s WIAW post in their honour.  Thank you, as always, to the lovely Jenn over at Peas and Crayons for hosting this fabulous food fest.

Katie’s original Black Bean Brownie post and recipe can be found here.  Do check it out as her pictures of the brownies are stunning!  Katie gives a few ingredient options in her post.  Here’s how I make them …

[print_this]

Makes: 9-12 brownies
Hands-on time: 8 minutes    Cooking time: 18 minutes

Ingredients
1 x 400g / 14oz can black beans, rinsed and drained well (or 250g / 9oz / 1½ cups cooked beans)
2 heaped TBSP cocoa powder
50g / 1¾ oz / ½ cup rolled oats
50ml / 1¾ fl oz / ¼ cup organic rapeseed (canola) oil or other neutral tasting oil
100ml / 3½0z / 1/3 cup maple syrup or agave syrup (I use Clark’s Original Maple Syrup or organic agave syrup)
2 TBSP sugar (I use coconut sugar)
2 tsp pure vanilla extract
½ tsp baking powder
¼ tsp salt
100g / 3½ oz / ½ cup choc chips

Optional topping:
50g / 1¾ oz / ½ bar dark chocolate
flaked almonds
goji berries

Method

  1. Preheat oven to 180C / 350 F (I have a fan oven and still keep it at 180C). Grease a 20cm / 8″ square pan and line the bottom with non stick baking paper.
  2. Place all the ingredients (except the choc chips) in a food processor and blend for a few minutes until completely smooth, stopping now and then to scrape down the bowl.
  3. Stir in the choc chips, then pour the mixture into the prepared pan. Gently spread the mixture using a spatula or knife until it reaches the edges.
  4. Bake for 18 minutes.  Remove from the oven and let it cool completely before cutting.  (When you remove the brownie from the oven it will feel soft, but it firms up as it cools).
  5. Optional topping: Melt the chocolate in a bain marie or microwave.  Cut the brownies into squares, or use a shaped cookie cutter (hearts are good!). Spread the chocolate on top and sprinkle with flaked almonds and gojis.  Lightly press down so they stick to the chocolate.
  6. Store in the refrigerator for up to 5 days or freezer for a few weeks.

[/print_this]

Black Bean Brownie 2 - Vegan & Wheat Free - 500

Have you tried any of Chocolate Covered Katie’s recipes?  If so, which are your favourites? 
Next on my list to try is her Lil’ Lemon Poppy Seed Muffins.  Lil’ L loves this combo so this could be a great lunch box treat for him 🙂

Birthday Celebrations

On Friday, Lil’ L celebrated his 9th birthday. I’m still in shock that he’s 9 already. Where did all that time go???

For the first time in his life, his birthday actually fell on a school day. He wasn’t too impressed about this to begin with, but it turned out to be a really fun day. It was the last day of the term and and they spent the afternoon making Victorian cam toys.  It sounded really cool!

He’d decided to save most of his presents until he got home from school, and he was just so excited and delighted about everything he opened. I loved watching his facial expressions as he ripped the paper off.

Check out his face when he discovered that his Nan had bought him the Nerf Supersoaker Scatter Blast Water Gun!

I couldn’t believe how many presents he’d been given. That boy was seriously spoilt 😉

Reading is still one of his passions and he’s recently got into graphic novels, which are inspiring his imagination and artwork.

He’s also loving the Tom Gates series. From what I can tell, it’s along the lines of The Wimpy Kid but with more graphics.  Here’s the ‘blurb’ (as Lil’ L calls it)….

“Brilliant comedies from a Roald Dahl Funny Prize winning series.  Tom Gates is a master of excuses, expert doodler, comic story writer extraordinaire – and the bane of his grumpy teacher, Mr Fullerman. And in his wacky journals, you’ll find all sorts of comic craziness to make you groan with glee! Tom’s battered homework diaries are crammed with his scribbles, stories and cartoons – as well as comments from the long-suffering Mr Fullerman. What with his awful big sister Delia, his band Dogzombies (rock stars in the making) AND the school disco, Tom’s life isn’t always easy. But it is laugh-out-loud hilarious!”


(If anyone’s got a 9-11 year old that would enjoy these books, I’ve spotted a great deal on the Scholastic site, where you can buy 3 Tom Gates books for £10. Here’s the link).

Once the presents were opened, it was time to light the candles on his cake and sing Happy Birthday 🙂

I tried a new vegan chocolate cake recipe for this year’s birthday cake. It was okay, but not outstanding. However, what I did love about the cake was the topping and filling. I could have just eaten a plate of those and skipped the cake 😉  Both were made without any refined sugar and they tasted scrumptious! I will definitely use them again. Here’s how I made them…

[print_this]

Chocolate Date Fudge Cake Topping (dairy-free / can be made raw with no refined sugar)

Ingredients
26 dates (about 1 cup’s worth), soaked for 1 hour in water to soften, then drained
100g / 3.5 oz / 1 bar of good quality dark chocolate or 1 cup of dark choc chips (you can make this topping raw and sugar-free by using raw chocolate. I make my own and the recipe can be found here.)

Method

  1. Gently melt the chocolate using a bain marie. Place the dates in a food processor and pulse to finely chop. Add the melted chocolate and process until completely smooth, pausing now and then to scrape down the bowl.
  2. Use a knife to spread the date fudge on the top of the cake. It will firm up slightly when cool, giving it a lovely fudgey texture.

Raw Chocolate Cashew Cream Cake Frosting / Filling
(raw / no refined sugar / dairy free)

Ingredients
1 cup raw cashews, soaked for at least 3 hours (preferably overnight), then drained
3 tbsp raw cacao powder (regular cocoa powder will work too)
1 tbsp virgin coconut oil, gently melted into liquid form
2 tbsp agave syrup
1 tsp pure vanilla extract

Method

  1. Place the cashews in the food processor and pulse until finely chopped. Add the remaining ingredients and process until smooth, pausing now and then to scrape down the bowl.
  2. Using a knife, spread half the mixture onto each of the cakes, then assemble the cakes, one on top of the other. Gently press down to secure the cakes together.

[/print_this]

In the evening, for a third birthday in a row, Lil’ L chose to go to his favourite Indian restaurant, Rajpoot in Bath. We all had onion bhajis, mango chutney and poppadoms as starters, then Lil’ L and I chose to share three side dishes as our main course…
– Dall Roshun (Mosur Lentils seasoned with garlic)
– Bagun Bhajee (gently spiced aubergines)
– Mushroom Bhajee
… along with some boiled rice. Lil’ L also had a naan.
M chose to have the Navaratan Pulao (a nutty, fruity vegetable pulao).
All the food was absolutely delicious!

And, to top it off, the staff gave Lil’ L an amazing chocolate ice cream dessert as a birthday treat. Check out the huge sparkler that’s stuck in it.  It was awesome!

The birthday celebrations continued all weekend long. On Saturday, he went to the cinema with his best friend to see Madagascar 3. We let them go into the cinema alone (a first for Lil’ L… he was so excited!) while M and I enjoyed some time together in the foyer coffee shop 🙂

The cinema trip was followed by a picnic on the lounge floor, a Lego Star Wars film, then lots of lego building, general larking about, book reading in their sleeping bags and then, at nearly midnight, there was silence as the boys finally fell asleep 😉

Lil’ L had such a fantastic birthday weekend and thank you so much to everyone for all the kind birthday wishes, cards and presents he’s been sent. The ‘thank you’ cards are in production 🙂

Take care everyone!

I hope you’re having a great week so far 🙂 xx

Scrumptious Healthy Chocolate Brownies (with a Secret Ingredient!) (Vegan / Dairy Free / Gluten Free)

When I saw that Chocolate Covered Katie (CCK for short) had posted a recipe on her blog for healthy chocolate brownies I got very excited. In the past I’ve attempted to make a healthy version of these dark little beauties, but they’ve always been a flop. Never one to throw out food, I would turn the unset gloop into a chocolate pudding instead 😉

However, when I saw that Katie had perfected her chocolate brownie, I knew the recipe would be a winner. She is, after all, the Queen of the Healthy Chocolate World or, as I like to call her, my ‘Fairy Chocolate Mother‘ 🙂

Yesterday I finally got round to trying out her recipe. And oh my gosh it was good!

It was a little soft when it came out the oven but, as Katie states, you need to leave it at least 10 minutes before you trying cutting it. I left it at least half an hour and it had firmed up beautifully by then. I even managed to get it out of the tin in one piece.

Lil’ L couldn’t wait to tuck in…. but I told him I needed to take a couple of shots first.  This was followed by a sinking of the shoulders and a big sigh. I promised I wouldn’t take long. The photos aren’t great but I was under extreme pressure to get them finished in 30 seconds flat.

Seriously, just look at how moist these brownies are.

Katie’s shots are way better than mine, so you must check them out.

So how do they taste? Oh my word! Without a shadow of a doubt, they are the best brownies I’ve tasted in my life! Sweet, chocolatey and beautifully moist.  Lil’ L loved them and said that they were as good as his regular, favourite brownie from a certain coffee shop (that’s good right?)

As well as being dairy free, they can also be made gluten free, as they don’t contain any flour.

However, they do contain a secret ingredient.  Here’s a clue…

Yep, a whole tin of black turtle beans!  My favourite beans in a chocolate brownie. You can’t imagine how much that makes me smile 🙂

Lil’ L, on the other hand, was a bit disgusted, so maybe don’t tell your kids, partners or friends about the secret ingredient unless they’re bean lovers like me. They’ll never detect them.  I promise!

Here’s Katie’s recipe with my notes (in purple). Do make sure to check out her original post. As well as the beautiful shots, she also provides the nutritional facts and calories per slice.

[print_this]

CCK’s Black Bean Chocolate Brownie (dairy free, gluten free, vegan)

 Ingredients

  • 1 1/2 cups black beans (1 15-oz can, drained and rinsed very well) (250g after draining) Our cans are metric (400g / 240g drained) but this reduced amount worked fine
  • 2 tbsp cocoa powder- dutch or regular (10g) (add a little extra if desired)
  • 1/2 cup quick oats (40g) I used Mornflake Superfast Oats. Any porridge oats should be okay as they get blended. Use GF oats, if needed.
  • 1/4 tsp salt
  • 1/3 cup pure maple syrup or agave (Honey will work, but not for strict vegans.) (75g) I used agave.
  • 2 nunaturals stevia packs or 2 tbsp sugar (or omit and increase maple syrup to 1/2 cup) I used unrefined caster sugar. Next time I’ll try coconut palm sugar.
  • 1/4 cup coconut or vegetable oil (40g) I used rapeseed (canola) oil
  • 2 tsp pure vanilla extract
  • 1/2 tsp baking powder
  • 1/2 cup to 2/3 cup chocolate chips (115-140g) (Not optional. Omit at your own risk.) I used 115g.
  • optional: more chips, for presentation

Preheat oven to 350 F (I have a fan oven and still kept it at 180C). Combine all ingredients except chips in a good food processor (I’ve got one of those now! 🙂 ), and blend until completely smooth. Really blend well. (A blender can work if you absolutely must, but the texture—and even the taste—will be much better in a food processor.) Stir in the chips, then pour into a greased 8×8 pan. Optional: sprinkle extra chocolate chips over the top. Cook 15-18 minutes (I baked it for the full 18 minutes), then let cool at least 10 minutes before trying to cut (I left it half an hour or so). Makes 9-12 brownies. I actually cut it into 16 pieces. This size is great for lunch boxes… or if you don’t want to feel guilty about going back for a second slice 😉 )

[/print_this]


Thank you so much Katie for sharing your amazing recipe. You truly are my Fairy Chocolate Mother 😉

Time for a cuppa and another slice of chocolate brownie heaven 🙂