Chocolate-Coated ‘Strawberry Coconut Ice’ (Vegan / Dairy-free)

When I was young, I used to love the tins of Quality Street that we shared as a ‘treat’ at Christmas. My eyes lit up every time I opened the lid and saw all those shiny, bright wrappings. Usually people have a Quality Street ‘favourite’ but not me… I loved all of them bar one… and that was the hard toffee penny in the gold wrapper. In fact, I’m wondering whether anyone actually likes those toffees. In my house, they were always the last ones left in the tin.

Quality Street

[Source]

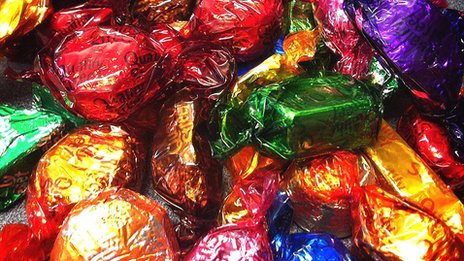
My taste buds have changed a lot since I was a kid and now, even the thought of eating a Quality Street chocolate makes me feel queasy. I just don’t like the taste of cane sugar anymore, nor the nauseating feeling it leaves me with for hours after I’ve eaten it. However, as you’ll have seen on my blog, I do still love chocolates A LOT. It’s just that these days, I prefer to make my own and fill them with ingredients that make me (and everyone else) feel great.

Strawberry Coconut Ice Chocs

This week I’ve been having fun creating a new chocolate to share with friends and family this weekend. I daren’t admit how many I’ve eaten this week but it’s well into double figures. Good thing I’m running a lot at the moment!

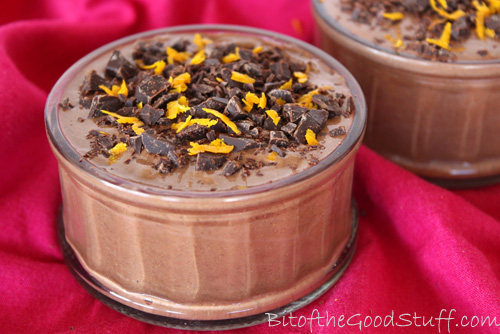
This new chocolate is a healthy hybrid of two of my favourite Quality Street chocs – the Strawberry Delight and Coconut Eclair.  Its flavour and texture is not dissimilar to ‘coconut ice’ (or a strawberry flavoured bounty!) but it tastes fresh and ‘real’ rather than sugary and processed. It’s really yummy!

Strawberry Coconut Ice

It’s super easy to make too! It’s simply a case of whizzing coconut and strawberries together in a food processor, popping them in the freezer to firm up, then coating in dark chocolate. I like to make my own raw chocolate, but you could easily melt down a bar of chocolate or some choc chips if you prefer.

Strawberry Coconut Ice Chocs

At Christmas time, I was really lucky to win a Twitter giveaway hosted by Sevenhills Organics. The prize was £250 worth of superfoods! In my amazing haul, was some beautiful cacao powder and cacao butter, which I used to make these chocs.

Cacao Powder & Butter

I’ve never seen cacao butter in buttons before. As well as being super cute, they’re much easier to use than the solid blocks that I normally buy. You simply pop them straight in the double boiler – no messing about with chopping or grating. I’ll definitely be buying these again!

The sweetener I used for these chocolates was Clarks Carob Fruit Syrup. If you’ve read my other raw choc posts, you’ll know that I love the subtle flavour of carob fruit syrups in my chocs. I’ve used Sweet Freedom before and the Clarks Carob Fruit Syrup is similar in taste, though much lighter and thinner in texture. It’s a fairly new product and currently only available from Ocado (I was sent some samples to trial). If you can’t get hold of carob fruit syrup, or you wish to make the chocolates raw, then organic agave nectar is a good substitute.

Strawberry Coconut Ice Chocs

[print_this]

Makes about 20 chocolates (freezable)
Hands on time: 30 minutes    Freezing time: 1 hour 30 minutes
Ready in: 2 hours

Ingredients

Strawberry ‘Coconut Ice’
100g / 3½ oz / 1 cup desiccated coconut
3 TBSP virgin coconut oil, melted
2½ TBSP carob fruit syrup (or organic agave nectar)
1 tsp pure vanilla extract
37g / 1¼ oz / ¼ cup fresh or frozen strawberry slices

Raw Chocolate
55g / 2 oz / ½ cup & 2 TBSP cacao powder
60g / 2 oz / ½ cup cacao butter (finely chopped or grated if in a solid block)
2½ – 3 TBSP carob fruit syrup (or organic agave nectar)

Method
Whizz the desiccated coconut in a food processor for a few seconds to make it finer. Add the remaining ingredients and process until completely combined and it starts to stick together (this will take a couple of minutes). Stop now and then to scrape down the bowl.

Transfer the mixture to a sheet of parchment paper and shape into a rectangle about 1cm / ½ inch thick. (I aim for a rectangle 18cm x 9cm (7 x 3½ inches) so it’s easy to divide into equal pieces). If your mixture is too firm to smooth and level by hand, place another sheet of paper on top and use a rolling pin. Freeze for at least an hour.

To make the chocolate, prepare a double boiler by placing a small amount of water in a saucepan and a heat-proof bowl on top. Gently heat the water. Place the cacao butter in the bowl and leave it to melt. Once melted, whisk in the cacao powder followed by the syrup. Taste test and add more sweetener, if needed.

Remove the ‘coconut ice’ from the freezer and slice into squares. Drop one square into the chocolate bowl and quickly coat it in chocolate (I use two teaspoons for this). Shake off the excess, then place it back on the parchment paper. Repeat until all the pieces are coated in chocolate. Place in the fridge or freezer until set. They will keep for up to five days in the fridge or for weeks in the freezer stored in an airtight container. Remove from the freezer and leave for a couple of minutes to defrost before eating.

[/print_this]

Products used in this recipe (UK stockists)
East End Desiccated Coconut
Essential Organic Virgin Coconut Oil
Clarks Carob Fruit Syrup (Sweet Freedom and Organic Agave Nectar will work too)
Steenburgs Organic Fairtrade Vanilla Extract
Sevenhills Organic Cacao Powder
Sevenhills Organic Cacao Butter
Magimix Food Processor

Did you have a favourite Quality Street as a kid? If so, let me know as I’d love to try my hand at recreating it at home! 😀

Gingerbread Men (Dairy-free / Vegan)

The recipes I most often share are firm family favourites that I’ve been refining over a number of years. So when I get inspired to create a new recipe that I want to blog now rather than in 5 years time, I end up obsessively testing it again and again over the course of a week or so to play catch up with the tweaks and refinements.

This week, the obsession has been these little guys…

Gingerbread Men

When Amy mentioned gingerbread under my waffles post, it reminded me that I hadn’t made gingerbread men in years. I decided it was high time I dusted off my old recipe notes and gave them another whirl.

So far this week, I’ve made 72 gingerbread men! Family and friends have kindly been helping me out with the testing. Lil’ L’s taken them to school, Mark’s taken them to work, and I’ve shared them with friends over coffee (not the classiest of cookies but hey it made them smile).

Making Gingerbread

All the batches got great feedback, but Mark thought they could be a bit ‘gingerier’ so the next batch had an extra ½ tsp of ginger. I’ve tested different thicknesses (the thicker men were the winners), different sugars and different oils/butters. All worked fine, so I’m guessing the recipe is pretty adaptable. I also tested different cooking times and I personally preferred the longer time as it made them firmer and crunchier round the edges.

Readers have also had great success using gluten-free flour to make these gingerbread men. Check out the Comments section below to see their feedback.

Gingerbread Men

Even though I’ve eaten a ridiculous amount of gingerbread men this week, I’m still totally in love them and will be happily munching my way through more this weekend. Fortunately, as cookies go, these are pretty healthy as they’re wholegrain, plus they’ve got an extra boost of iron from the molasses. As well as coffee, they’re delicious with a cup of ginger tea. This has got to be the ultimate winter warmer. I can literally feel myself warming up from the inside out as I sip a cup

Gingerbread Men

[print_this]

Makes about 18 cookies (depending on cutter size)

Hands on time: 20 minutes   Chilling time: 1 hour (can be left up to 2 days)
Cooking time: 10-12 minutes    Ready in: 1 hour 35 minutes

Ingredients
100g / ½ cup organic rapeseed (canola) oil, dairy-free spread or aroma-free coconut butter
85g / ½ cup soft brown sugar or coconut sugar
4 TBSP molasses (black treacle or blackstrap)
2 TBSP non dairy milk
280g / 2 cups fine wholemeal (whole wheat pastry) or chapatti flour (see Comments section below for reader feedback on gluten-free options)
½ tsp bicarbonate of soda (baking soda)
½ tsp salt
1½ – 2 tsp ground ginger
1 tsp ground cinnamon
Pinch of ground nutmeg

Method
Place the oil/spread/butter in a pan with the sugar, molasses and milk. Gently heat over a low heat. As it warms, whisk to combine.

Sift the flour, bicarbonate of soda, salt, ginger, cinnamon and nutmeg into a large bowl. Give it a mix to make sure it is combined. Pour in the contents of the pan and stir until it comes together to form a dough. This will take some elbow grease as it’s a stiff dough. (If you’re using coconut butter, you may need to add 1-2 TBSP more milk to form a smooth non crumbly dough).

Shape the dough into a ball, wrap in clingfilm (plastic wrap) and chill for 1 hour. The dough can be chilled for up to 2 days but, if left for more than 1 hour, remove from the refrigerator 10 minutes before rolling.

When ready to bake, preheat the oven to 180C (160C fan) / 350 F. Line 2 large baking sheets with non-stick baking paper.

Place the dough on a silicone mat or lightly floured work surface. Place a sheet of non stick baking paper on top and roll to a thickness of ½ cm (just under ¼ inch). Press out the dough using a metal cookie cutter and transfer to the prepared baking sheet. Combine the dough scraps into a ball and roll out again. Repeat until all the dough is used.

Place in the oven and bake for 10-14 minutes. (I check mine after 10 minutes and then bake for another 2-4 minutes as I like mine firmer and crunchier). Leave to cool and firm up for a few minutes, then transfer to a wire rack to completely cool. The cookies will last about a week in an airtight container, or for weeks in the freezer. If freezing, place in a single layer in a freezer bag. Press out all the air before tying or zip locking.

Freshly baked, these gingerbread men are crispy round the edges with a soft centre. Over time, they become softer and chewier, but delicious nonetheless.

[/print_this]

If you try the recipe and make any adjustments, do let me know. I always love to hear your feedback!

love

Vegan Gingerbread Waffles

The waffle obsession continues! And for this month’s Suma Blogger’s Network entry, I thought I’d share another one of our favourite vegan waffle recipes. Filled with the warming spices of cinnamon, ginger and Blackstrap molasses, these waffles are perfect for this time of year  

Suma-Bloggers-Network-Logo 300

I wrote about the amazing nutritional profile of Blackstrap molasses in this Gingerbread Cookie post. With just one tablespoon containing 3.6 mg of iron (more iron than 1/2 cup of cooked lentils, beans or spinach), it’s easily one of my favourite ways to boost iron levels.

The recipe is largely an amalgamation of our favourite gingerbread and banana pancake recipes, with a slight reduction of the liquid to make a sturdier batter. Banana acts as a great binder for the waffles and adds a touch of extra sweetness.

Gingerbread Waffles

I’ve really enjoyed reading about your favourite waffle toppings under last week’s Easy Vegan Waffle Post. As I would have expected, maple syrup came out on top. Nuts, banana and chocolate were very popular too, and I’m totally with you on those. One of my favourite lazy Sunday breakfast/brunches is these Gingerbread waffles, served with banana slices, chopped walnuts and pecans, and a big drizzle of chocolate sauce.

Gingerbread Waffles with Chocolate Sauce

Sometimes I make the chocolate sauce myself, other times I simply grab a bottle of Sweet Freedom Choc Shot. Have you tried Choc Shot before? As well as tasting yummy, I love the fact that it contains all natural ingredients, is free from cane sugar and has a low glycaemic load (GL). Can you see how shiny it is too? It’s got the most awesome sheen!

And if I’m going all out, I’ll also top them with a sprinkling of desiccated coconut.

Pure. Waffle. Heaven

Gingerbread Waffles with Chocolate Sauce

[print_this]

Makes around 10-12 waffles
Hands on time: 20 minutes Ready in: 20 minutes

Waffle Batter
1 ripe banana, sliced (or ¾ cup frozen banana slices)
180ml / 6 fl oz / ¾ cup soya milk
140g / 5 oz / 1 cup wholemeal (wholewheat) or chapatti flour (or GF flour mix e.g. Doves Gluten-Free Brown Bread Flour or Doves Gluten-Free Plain White Flour)
50g / 1¾ oz / ½ cup rolled oats (use certified GF, if needed)
2 TBSP Blackstrap molasses
1 TBSP maple syrup
1 tsp ground cinnamon
1 tsp ground ginger
1 tsp baking powder
¼ tsp salt

1 tsp oil or coconut butter, for greasing

Suggestion toppings
Banana slices
Chopped walnuts and pecans
Chocolate sauce
Desiccated Coconut

Method
Place the milk and banana in a high speed blender and blend until smooth (alternatively you can use a bowl and hand blender). Add all the remaining batter ingredients and blend to combine. The batter should be thick, but pourable. (If you’re using GF flour, you will need up to 4 tablespoons of extra liquid). Pour the batter into a bowl and leave to rest for a few minutes (this can happen while the waffle maker heats up).

When the waffle maker is hot, brush with oil or coconut butter using a silicone brush. Add the appropriate amount of batter according to your waffle maker’s instructions. (I have a VonShef Quad Waffle Maker and drop two tablespoons of batter into each of the four waffle quads). Close the lid and leave to cook for 3 minutes before checking (with my waffle maker, I leave the waffles until the green light goes out). If the waffles are golden brown, they are ready. Transfer them to a wire cooling rack while you prepare the remaining waffles.

Serve warm with your favourite toppings.

Any leftover waffles can be stored in the fridge for up to 3 days or frozen for weeks. Heat them through in the toaster before serving.

[/print_this]

Products used in this recipe
Doves Farms Gluten Free Brown Bread Flour  or Doves Farm Gluten Free Plain White Flour
Meridian Organic Blackstrap Molasses
Sweet Freedom Choc Shot

And now for my favourite part of the photo shoot. Tucking in time! 😛

Gingerbread Waffles with Chocolate Sauce

Quinoa Super Salad with Ginger Lime and Sweet Chilli Dressing

When The Health Bay invited me to take part in a January healthy recipe challenge, I knew which recipe would be perfect for sharing this month. It’s one of my family’s all-time favourite salads, packed with vibrant colours, contrasting textures and dressed in the most delicious tangy vinaigrette. It also happens to be brimming with antioxidants, vitamins and minerals, so it’s great for keeping our immune systems strong and warding off those nasty Winter bugs.

Quinoa Rainbow Salad

Forget chips and chocolate, this is the food I most often crave. Every time I eat it, I feel so energized. My body feels like it’s literally zinging from all that goodness. Lil’ L absolutely loves it too and it sure does brighten up his lunchbox!

The salad contains two complete sources of protein – quinoa and edamame beans – which, combined with the healthy fats in the dressing, help to keep you feeling full up for longer. You don’t normally think of salads as being filling, but this one definitely is!

Quinoa is widely available these days. You can even buy ready-cooked pouches, which could be a useful starting point if you’re a newbie to this super seed. Though more expensive and a little more difficult to find, I love the tri-colour quinoa. Not only is it pretty, but it also has a lovely, slightly crunchy texture.

Tri Colour Quinoa

To save time in the week, I often cook a double batch of quinoa, then we use one batch for salad and the other for a hot main meal. However, if you’re starting this salad from scratch, you can prepare the other ingredients and dressing while the quinoa is cooking.

Boil or steam a cup of edamame beans for 3 minutes.

Edamame Soya Beans

Deseed and finely chop a sweet romano or bell pepper.

Sweet Romano Pepper

Finely julienne a carrot.

Carrot Julienned

Roughly chop some fresh coriander leaves and spring onions.

Coriander Leaves

Whizz all the dressing ingredients together until smooth.

Ginger, Lime & Sweet Chilli Dressing

Once the quinoa is cooked, I like to stir through a couple of teaspoons of extra virgin olive oil. I find this greatly enhances the texture and flavour of the quinoa.

Quinoa Cookied

You then simply need to combine all the salad ingredients and stir in the dressing until the quinoa is fully coated.

Time to tuck in!

Quinoa Rainbow Salad

[print_this]

Serves 4
Hands on time: 20 minutes   Cooking time: 15-20 minutes
Ready in: 30 minutes
(These times apply for cooking the quinoa from scratch)

Quinoa Super Salad
200ml / 7 fl oz / 1 cup quinoa, thoroughly washed
1 TBSP apple cider vinegar
500ml / 17 fl oz / 2 cups water
2 tsp extra virgin olive oil
145g / 5 oz / 1 cup frozen edamame (soya) beans
1 sweet romano or bell pepper, deseeded and finely chopped
1 medium carrot, finely julienned
2 spring onions (scallions), thoroughly washed to remove any grit, then finely sliced
1 handful fresh coriander leaves (cilantro), roughly chopped

Dressing
4 TBSP extra virgin olive oil
2 TBSP reduced salt soy sauce (or tamari sauce for a GF option)
1½ TBSP rice vinegar
5cm / 2 inch piece of root ginger, peeled and finely grated*
1 garlic clove, minced
2 TBSP coconut sugar (or soft brown sugar)
2 TBSP freshly squeezed lime juice
2 tsp sweet chilli sauce

Method
First, wash the quinoa to remove the bitter saponin coating: place in a bowl, cover in water and agitate with a fork. Tip the quinoa into a fine mesh sieve and rinse under running water until the water turns clear.

Add the quinoa to a pan along with the apple cider vinegar and water. Bring to the boil, then reduce the heat, cover with a lid and simmer for 15-20 minutes until the quinoa is cooked through and the water has been absorbed. Remove from the heat and stir in 2 teaspoons of oil.

While the quinoa is cooking, boil or steam the edamame beans for about 3 minutes, until cooked through but still retain a bite. Chop the remaining salad ingredients.

Prepare the dressing: Add all the ingredients to a blender (I use the bowl attachment on my hand blender) and whizz until smooth. Taste test and adjust to suit your palate.

When the quinoa is ready, add all the remaining salad ingredients and stir through. When ready to serve, drizzle 1 TBSP of dressing per salad serving and stir until the quinoa is thoroughly coated.

Stored in airtight containers, the salad will keep for about 3 days in the refrigerator, and the dressing for up to a week. Keep the salad and dressing separate and combine them just before serving. Any leftovers make a wonderful addition to school and work lunchboxes.

*Tip: I find the easiest way to peel fresh ginger is to scrape the skin off using a teaspoon.

[/print_this]

Easy Vegan Waffles & VonShef Waffle Maker UK Giveaway

I have always loved waffles. There’s something about those cute indented squares that makes them such a pleasure to eat. I especially love them this time of year, warm straight from the waffle maker or toaster. They make such a yummy breakfast or mid-afternoon snack.

Lil’ L shares my love of waffles and can easily get through a dozen a week. He says there are two Autumn/Winter foods that he’ll never get sick of and that’s apple crumble and waffles!

Easy Vegan Waffles (GF Option)

These vegan waffles are so easy to make! It’s simply a case of blending up the ingredients (I use my Froothie for this job), scooping the batter into the waffle maker and waiting 3-4 minutes. And then they’re ready to eat!

We use a slightly thicker version of our breakfast pancake batter for these waffles. To replace the egg, we use a banana or two small-medium organic apples. On balance, I prefer the texture of the waffles made with banana as it’s slightly firmer and more robust. The riper the banana, the stronger the flavour will be in the waffles. For the mildest flavour, use ripe yellow bananas rather than brown ones.

The batter also includes wholegrain flour and oats for protein and slow release energy. The waffles happen to be fat free and cane sugar free too. This means they’re scrumptious and healthy, so perfect for treating the kids (and yourself!) Lots of Lil’ L’s friends have tried these waffles and they’ve all given them a big thumbs up.

While his friends tend to prefer them with a simple drizzle of maple syrup, Lil’ L loves to fill his squares with little pieces of chopped walnuts or pecans, for some crunch…

Vegan Waffles with walnuts and maple syrup

… while I love to top mine with raspberries and chopped almonds

The waffles in the photo below were made using GF flour. I was so delighted to find that the recipe works gluten-free too as it means all our GF friends can tuck in too 😀

Vegan Waffles with Raspberries & Almonds

We make the waffles small enough so that they’re easy to pick up, fit in the toaster, and so you can scoff two or three at a time (‘cause one waffle is never enough 😉 ). We often make them as an afterschool snack, then leftovers get stored in the fridge for breakfast the next day. A quick warm through in the toaster and they’re ready to be served.

Here’s how we make our basic vegan waffle…

[print_this]

Makes around 10 waffles
Hands on time: 20 minutes    Ready in: 20 minutes

Waffle batter
1 ripe banana, sliced
180ml / 6 fl oz / ¾ cup soya milk
140g / 5 oz / 1 cup wholemeal (wholewheat) flour (or use a GF flour mix if needed e.g. Doves GF Brown Bread Flour)
50g / 1¾ oz / ½ cup rolled oats (use certified GF, if needed)
1 tsp baking powder
½ tsp ground cinnamon
¼ tsp salt
2 TBSP maple syrup

1 tsp oil or coconut butter, for greasing

Suggestion toppings
Maple syrup
Chopped walnuts, pecans or almonds
Fresh or frozen berries

Method
Place the milk and banana in a high speed blender and blend until smooth (alternatively you can use a bowl and hand blender). Add all the remaining batter ingredients and blend to combine. The batter should be thick, but pourable. Add a touch more milk if needed, to attain the desired consistency. (If you’re using GF flour, you will need around 4 tablespoons of extra liquid). Pour the batter into a bowl and leave to rest for a few minutes (this can happen while the waffle maker heats up).

When the waffle maker is hot, brush with oil or coconut butter using a silicone brush. Drop two tablespoons of batter into each of the four waffle quads. Close the lid and leave to cook for 3-4 minutes before checking (with the VonShef Waffle Maker, I leave the waffles until the green light goes out). If the waffles are golden brown, they are ready. Transfer them to a wire cooling rack while you prepare the remaining waffles.

While the waffles are cooking, prepare your toppings.

Serve warm with a drizzle of maple syrup and a sprinkling of your favourite nuts and berries.

Any leftover waffles can be stored in the fridge for up to 3 days. Heat them through in the toaster before serving.

Products used in this recipe (UK Stockists)
Tesco Chapatti Flour, Doves Spelt Flour or Doves Farm Gluten Free Brown Bread Flour
Mornflake Superfast Oats, available from Tesco, Asda, Morrisons, The Co-operative
Clarks Original Maple Syrup, available from most major UK supermarkets

[/print_this]

Forks are optional 😉

Vegan Waffles with walnuts and maple syrup

We purchased our waffle maker last October while it was on sale, and we’ve been really happy with it. It’s easy to use and, even with all our batter experimenting, we’ve yet to have a single waffle fail (which is pretty incredible!) The machine’s simple to clean too… while it’s still warm (but not scorching hot) I just wipe it over with a piece of kitchen towel.

While I’ve seen the waffle maker selling at a range of prices these past couple of months (the RRP is £64.99) you can get some amazing offers if you keep a watch out. It’s currently selling for £24.99 on Amazon and, at this price, you can’t really go wrong. We use ours 3-4 times a week and have made hundreds of waffles, so we’ve definitely had our money’s worth.

Vegan Waffles & VonShef Wafflemaker

Giveaway Time!

I’m not sure how many of my readers have waffle makers, and it seemed a bit unfair to share a waffle recipe without giving you the opportunity to make some yourself, so I contacted Designer Habitat and they have kindly offered to give away a VonShef Quad Waffle Maker to one of my lovely readers

To be in with a chance of winning, simply leave me a comment under this blog post answering the question featured in the Rafflecopter below. Do make sure you tick the box in the Rafflecopter to register that you have done so. There are a number of additional ways you can enter in order to increase your chances of winning. You will find these listed in the Rafflecopter. All entries will be verified prior to the winner being selected.

This giveaway is open to UK residents aged 18 and over (sorry international readers)

The closing date is Friday 16th January 2014 at midnight GMT. The winner will be selected at random and notified by email. The winner will have 7 days to respond. If they fail to do so, another winner will be selected at random.

New to Rafflecopter? It’s pretty easy! Simply click on ‘Use Your Email’ and enter a name and your email address (rest assured it won’t be published anywhere). You can also log in using your Facebook account, if you wish. A quick demo of how to use Rafflecopter can be accessed here.

* If you experience any technical problems when trying to enter the Rafflecopter, let me know in the comments section below and I’ll submit your entry for you *

a Rafflecopter giveaway

Good luck everyone! xx


Chocolate Orange Chia Pudding

I first shared a recipe for chocolate orange chia pudding back in February 2012 and, to this day, it remains one of my family’s favourite desserts It’s such a simple pudding to make and, since I originally posted the recipe, I’ve refined the method so that it’s even quicker. Honestly, this recipe could not be more easy! The original photo I took doesn’t do this pudding justice, so I thought it was time for a re-post with the updated recipe and some shiny new photos.

Chocolate Orange Chia Pudding

Since that original post, chia seeds have become much more popular here in the UK. You can buy them in most health food shops, and even supermarkets have started stocking them. They’re also widely available (and often much cheaper) from online stores. I find they can vary a lot in price, so I always shop around for the best deal.

Since I use them daily in smoothies and puddings, lately I’ve been buying the Sevenhills 1kg bags as they work out much better value. You can buy them in a range of quantities though, so it’s probably a good idea to start with a smaller bag if you’re trying them for the first time (Holland & Barrett are currently selling a 100g bag for £2.49).

Chia Seeds

So why do I love chia seeds so much?

Well, there are two main reasons. The first is their amazing nutritional profile. Chia seeds are very high in dietary fibre, a good source of ‘complete’ protein, and rich in omega 3 essential fatty acids. They’re also hydrophilic and can absorb around 10 times their weight in water, thus helping to keep us nicely hydrated. Their fibre, fat and protein content, along with these hydrophilic abilities, means that the seeds are a great source of slow release energy, they help to balance blood sugar levels, and they keep us feeling full up for hours. Adding a spoonful to smoothies is a great way to keep hunger pangs at bay.

Chia Seeds

Chia seeds contain a range of trace minerals, and are especially rich in manganese, phosphorus and calcium, which are all important for good bone health. A 28g / 1 oz serving provides 30% of the manganese RDA, 27% of phosphorus, and 18% of the calcium RDA. The seeds also contain a multitude of antioxidants, including the flavonoid quercetin, which has anti-inflammatory and antihistamine properties.

The second reason I love chia so much is that they make the most incredible chocolate puddings! Once blended with some cacao or cocoa powder and a little liquid, they transform into a delicious, silky smooth pudding that will easily rival any shop-bought chocolate dessert. And unlike the shop-bought varieties that tend to be laden with sugar and little nutritional value, these chia puddings are refined sugar free and packed with nutrition.

Chia Seeds

I used to soak the chia seeds in liquid for an hour or so until they’d transformed into a gel-like substance before blending them up, but these days I literally throw all the ingredients straight in the blender. High speed blenders are best for this job as they’ll blend the seeds smooth in a matter of seconds. Since I’ve had the Froothie, making chia puddings has been a breeze.

Lil’ L absolutely loves these puddings and sees them as a real treat. It’s great to be able to treat him to something that’s so nutritionally packed and full of healthy goodness.

[print_this]

Serves 4
Hands-on time: 10 minutes   Ready in: 10 minutes

Ingredients
80ml / ⅓ cup freshly squeezed orange juice (1-2 juicy oranges)
300ml / 1¼ cups non dairy milk
64g / 6 TBSP chia seeds
30g / 4 TBSP cacao powder (or regular cocoa powder)
4 soft pitted dates (e.g. Medjool)
½ tsp orange extract
Maple syrup (or agave syrup), to taste

Suggested garnish
Dark chocolate, finely chopped or grated
Orange zest

Method
Place the orange juice and milk in a powerful high speed blender, followed by the remaining ingredients (I use my Froothie 9400). Give them a stir until they are coated in liquid, then blend until silky smooth. Stop now and then to scrape down the sides. Taste test and add a touch more orange extract or sweetener, if desired.

Pour into small ramekins or cups, sprinkle on the garnish and chill until ready to serve. It will keep for up to five days in the refrigerator.

[/print_this]

Chocolate Orange Chia Pudding

Have you tried chia puddings before? If so, what’s your favourite flavour combo? If you’ve posted any recipes or pics, please do share the links below x

SaveSave

SaveSave

SaveSave