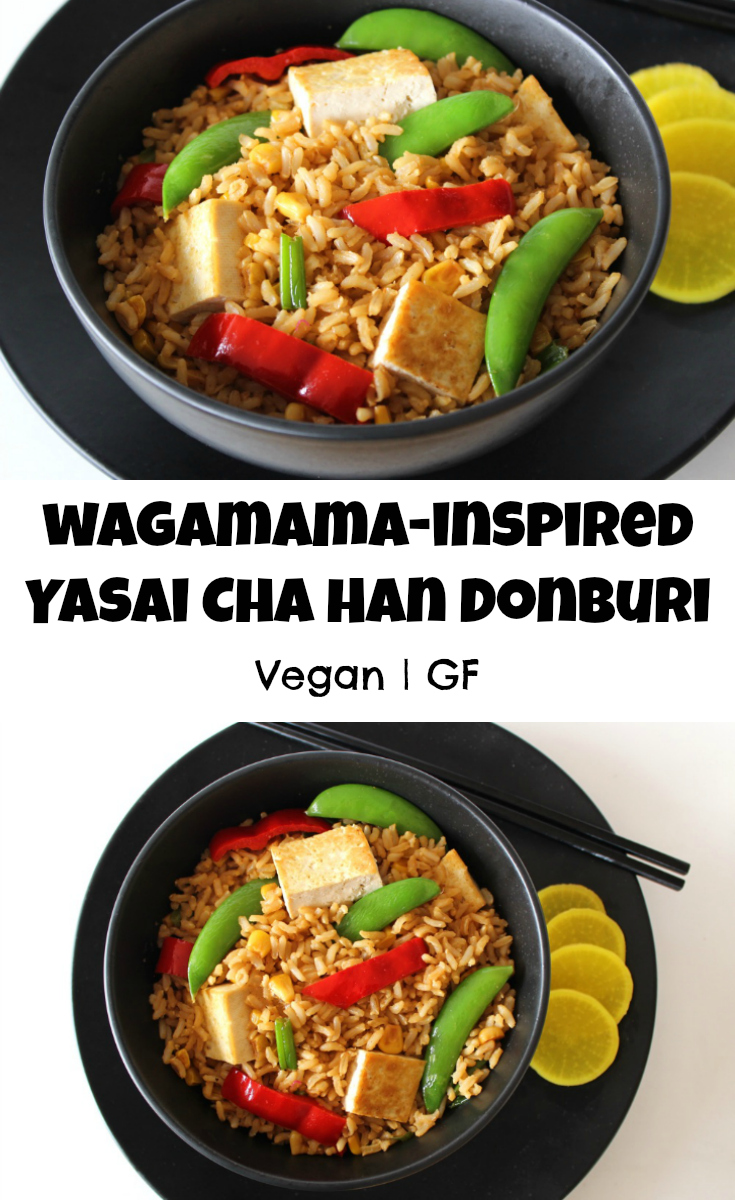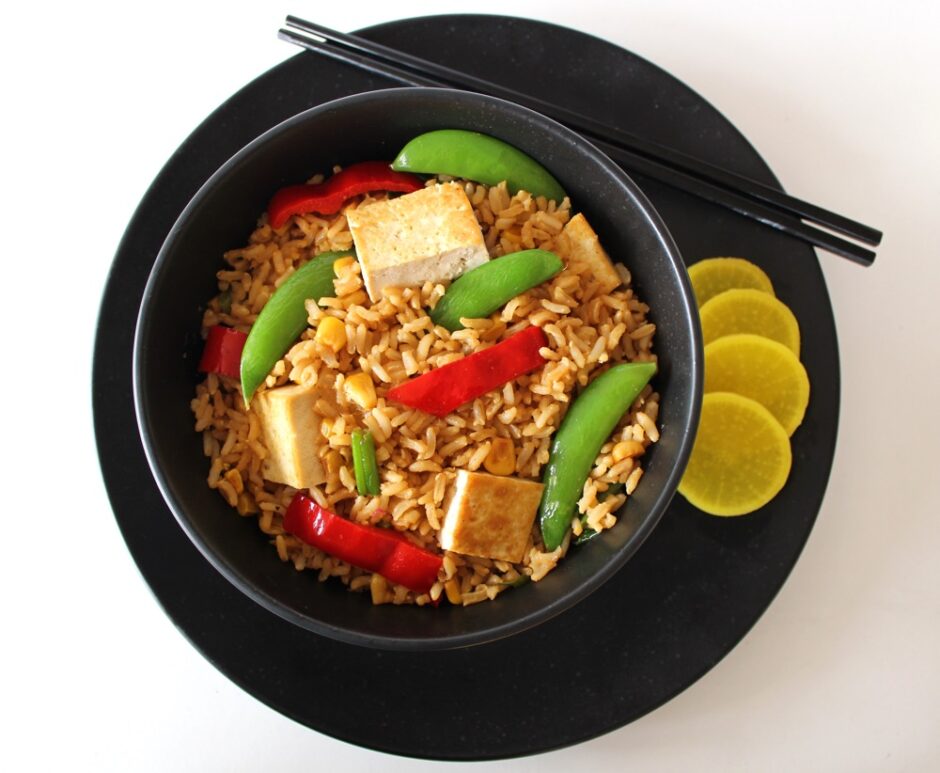
Wagamama-Inspired Yasai Cha Han Donburi (Brown Rice Bowl with Stir-Fried Veggies and Tofu)

Jump to Recipe

In early Summer, my family were eagerly anticipating a trip to Wagamamas. On the way there, we psyched each other up, talking about how much we were looking forward to tucking into our favourite Wagamama dish – the Yasai Cha Han Donburi. Upon arrival, the waiter showed us to our seats and handed us the menu. Our eyes immediately moved to the spot where the dish is usually listed, but it wasn’t there. We scanned both sides of the menu but it was nowhere to be seen. We called over the waiter and he explained that they had a new summer menu. Sadly, the Yasai Cha Han Donburi hadn’t made the cut.

Has that ever happened to you? Where you’re looking forward to tucking into your favourite dish at a restaurant, or you specifically go to that restaurant because you’re craving a dish… only to find that it’s been taken off the menu. It’s happened to my family a few times and it’s always such a bummer.
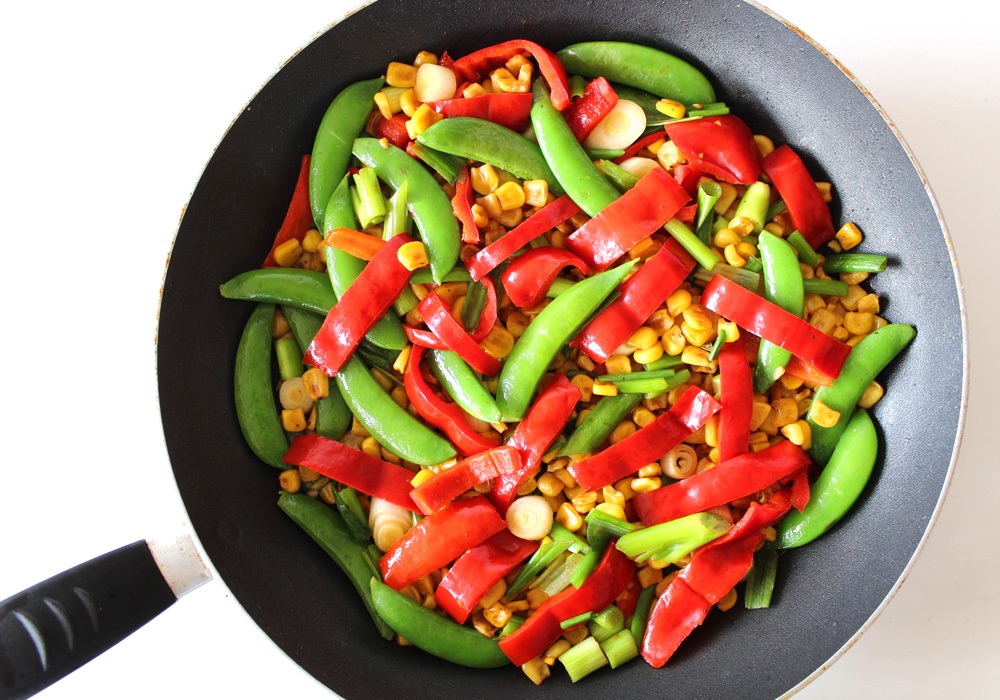
Stir Fry Veg

Well this time, I decided to look on the bright side. I’d been meaning to try my hand at making the Yasai Cha Han Donburi at home for a while, and now was the perfect opportunity. I could still remember what the bowl tasted like and its main components, so I set to work re-creating it.

One of my favourite parts of the bowl is the flavouring added to the rice, so I really wanted to nail this part. I chose to use two of my favourite pantry staples as the basis of the dressing – Clearspring Organic Tamari Sauce and Meridian Organic Toasted Sesame Oil. The tamari provides the ‘umami’ flavour, while the toasted sesame oil add a touch of smokiness. I then added a tablespoon each of maple syrup and rice vinegar for some ‘sweet ’n’ sour’ flavour, and finished it off with a sprinkling of garlic granules. I was extremely happy with the way the dressing turned out. For me, it’s the perfect compliment to a Japanese-inspired rice bowl.

For this dish, I prefer to use original tofu, which I press for 30 minutes then pan-fry. If you’ve not cooked tofu from scratch before, rest assured that it’s not difficult at all. I’ve given some tips in the recipe below of how I do it.
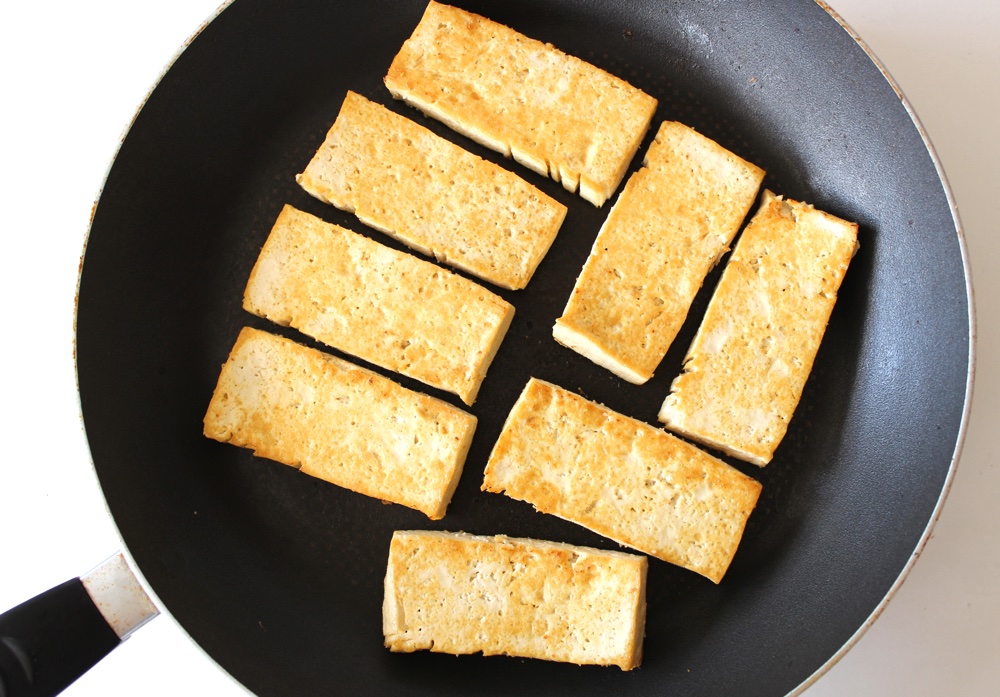
Pan Fried Tofu

I absolutely adore this rice bowl, and it’s been a huge hit with the rest of the family too. I’ve made it multiple times these past couple of months and we never tire of it. The flavour is as good (if not better, in my humble opinion hehe) than the Wagamama version. It’s far cheaper too!

Recipe Card
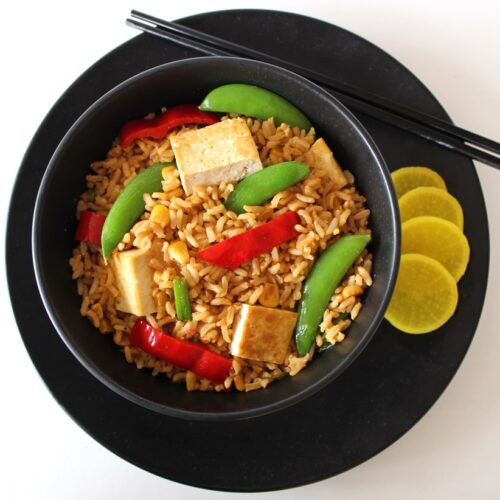
Yasai Cha Han

Wagamama-Inspired Yasai Cha Han Donburi (Brown Rice Bowl with Stir-Fried Veggies and Tofu)

This recipe was inspired by Wagamama’s Yasai Cha Han Donburi which, at the time of writing, has sadly been taken off their menu. No matter though, as this version is just as delicious and a fraction of the cost.
Hands on time 30 minutes
Total Time 1 hour 10 minutes
Course Dinner
Cuisine Japanese
Servings 3

Ingredients
 

  • 1 block firm tofu (about 400g / 14 oz)
  • 300 g / 1½ cups brown rice rinsed and drained
  • 750 ml / 3 cups water
  • ½-1 TBSP toasted sesame oil
  • ¼ tsp garlic granules or garlic powder
  • pinch of salt
  • 1 medium onion sliced
  • 175 g / 1 cup sweetcorn (I use canned)
  • 1 sweet romano pepper or red bell pepper
  • handful of sugar snap peas

Dressing

  • 3 TBSP tamari or reduced-salt soy sauce
  • 1 TBSP toasted sesame oil
  • 1 TBSP rice vinegar or substitute with another white vinegar
  • 1 TBSP maple syrup
  • ½ tsp garlic granules or powder
  • Slices of pickled radish for garnish (optional)

Instructions
 

  • Press the tofu for 30 minutes (See Note 1).
  • Cook the rice (see Note 2).
  • Prepare the dressing: Place all the dressing ingredients in a small bowl and whisk together with a fork.
  • Once pressed, slice the tofu into eight long rectangles. (I find it far easier and quicker to pan-fry and flip eight pieces of tofu rather than a panful of tofu cubes).
  • Heat ½ TBSP sesame oil in a large non-stick frying pan (skillet) on medium-high heat. Once the oil is hot, place the tofu in the pan (be careful as the oil may spit). Flip the tofu over, so that both sides are coated in oil. Sprinkle the garlic granules and a pinch of salt over the tofu. Leave to cook until golden brown on the underside, then flip over and cook until browned on the second side. Transfer to a plate and slice into bite-size pieces. Place in a warm oven while you prepare the veggies.
  • Add a splash more oil to the pan, if needed. Add the onion and stir fry on medium heat for 2 minutes. Add the sweetcorn and continue stir frying until it just starts to brown. Finally, add the sweet romano (or bell) pepper and sugar snap peas to the pan and stir fry until warmed through. Stir in 1 TBSP of the dressing and set aside.
  • Once the rice is ready, tip into a large bowl. Drizzle in the remaining dressing and stir through until thoroughly coated. Add the veggies and tofu and stir through. Divide between four bowls. Garnish with picked radish (if desired) and serve.
  • Any leftovers can be stored in the fridge for 24 hours. As with any rice dish, make sure the leftover rice is cooled quickly and refrigerated within an hour.

Notes

Note 1: Pressing tofu: Here’s my preferred way to do it (since I don’t have a tofu press): Slice the block of tofu through the middle into two equal halves. Place the tofu on a rimmed baking tray. Place a chopping board on top of the tofu, followed by a heavy object to weigh it down. The water collects in a pool round the tofu. After 30 minutes, drain off the liquid. Give the tofu a quick pat with kitchen paper to soak up any residual liquid, then it’s good to go.
Note 2: Cooking brown rice: My preferred way to do this is using the absorption method. Here’s how I do it: Place the rinsed rice in a large, heavy-bottomed saucepan along with the water. Bring to the boil, then reduce the heat and simmer uncovered for 10 minutes. Reduce the heat to very low, cover with a tight-fitting lid and cook for a further 20 minutes. When air pockets have appeared in the rice, it’s ready. Remove from the heat and leave to rest for 5 minutes, covered with the lid.
Keyword Dairy-Free, Easy Vegan Meals, Rice, Tofu, Vegan Dinners
Tried this recipe?Let us know how it was!

Pin for later ⬇️

Yasai Cha Han Donburi

Big thank you to Suma for supplying me with the gorgeous ingredients for this bowl. It’s hugely appreciated!

Much love,

Sharon xx

SaveSave

SaveSave

SaveSave

SaveSave

Vegan Pear and Yogurt Cake (Dairy-Free / Egg-Free)

Jump to Recipe

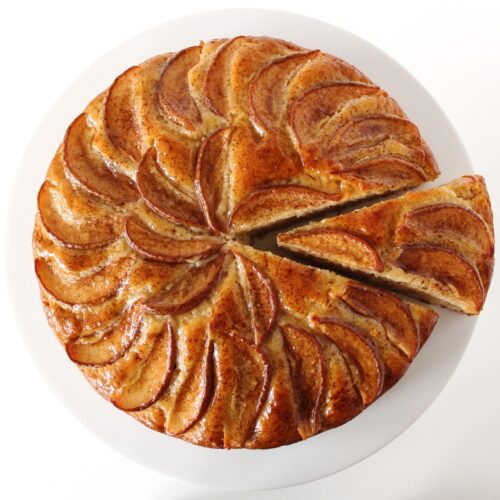
In today’s post, I’m sharing a recipe for a delicious Pear and Yogurt Cake. While simple to make, this cake looks pretty impressive with its glistening pear and cinnamon-speckled top. The cake itself has a beautifully moist, light and fluffy texture and is flavoured with hints of vanilla and almonds.

I know some people with gluten sensitivities are able to tolerate spelt flour and this cake works just perfectly with white spelt flour. Otherwise regular plain (all-purpose) flour or even a combination of half white/plain flour and half wholemeal or chapatti flour works great.

Vegan Pear and Yoghurt Cake

The inspiration for this cake was a visit during May half-term break to one of my favourite cafes in Bristol – Roll for the Soul. This community-run cafe also houses a cycle workshop and event space. It has a great atmosphere and lovely food and coffee, so I highly recommend a visit if you’re in the area [UPDATE: Sadly Roll for the Soul closed down in September 2017 ]

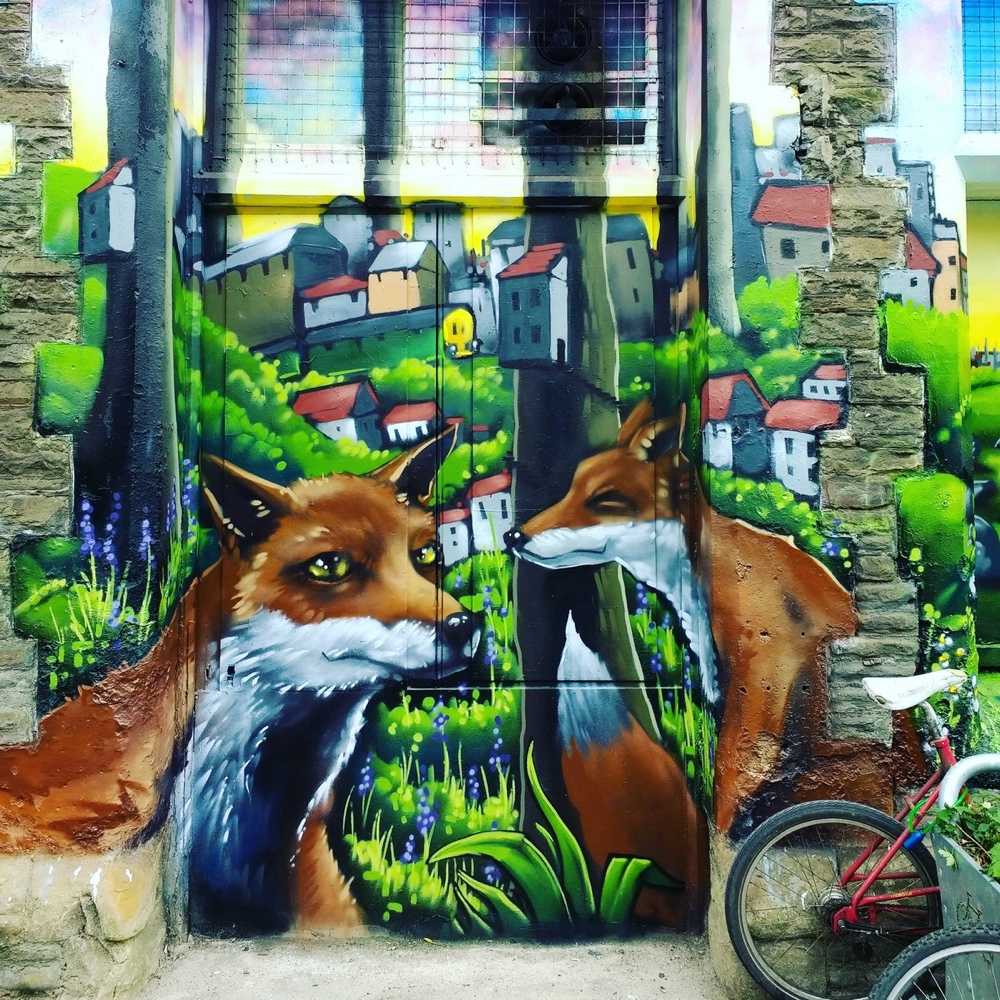
Roll for the Soul is in one of my favourite districts of Bristol. We often head over there to check out the street art. One of my favourite street artists is Silent Hobo and I actually bumped into him a few weeks ago at Montpelier Railway station where he was putting the finishing touches to this mural. Isn’t it beautiful?

Silet Hobo Mural Montpelier Bristol

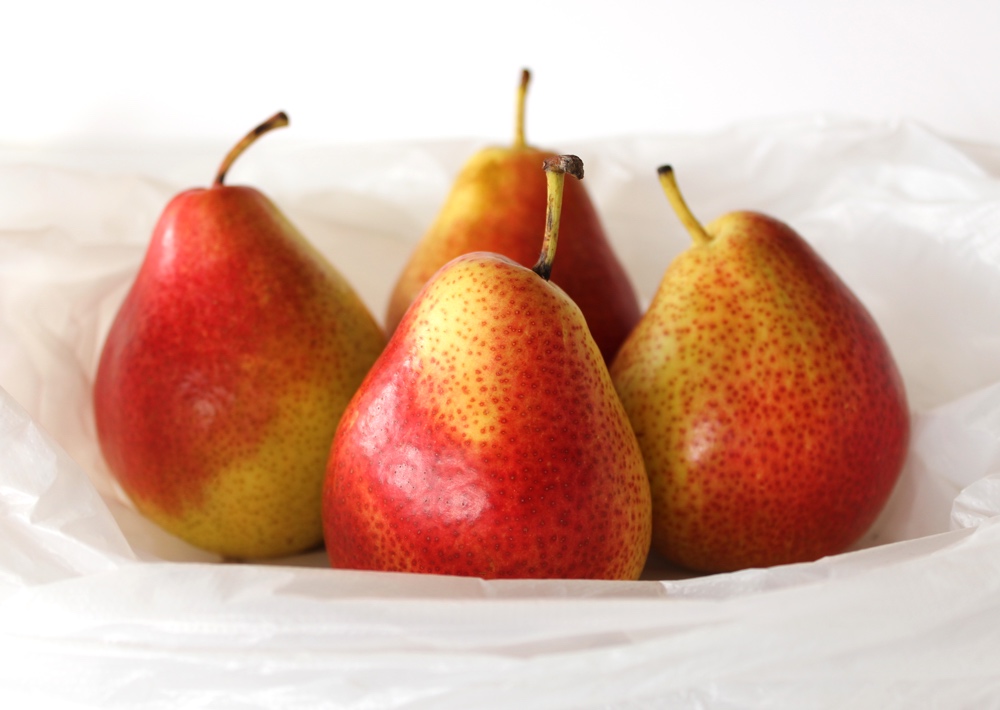
Last week, at Roll for the Soul, I had my first-ever slice of Pear Cake and it was so delicious that I couldn’t wait to try re-creating it at home. Back in Bath, I headed to the fruit & veg market stall in Kingsmead Square where I spotted these beauties which would be just perfect for topping a cake.

Pears

I’m pretty sure the Pear Cake I had at Roll for the Soul had a hint of almonds, so I decided to use my Orange & Almond Cake recipe (a reader favourite!) as the basis for creating my Pear Cake. I switched the milk for yogurt, reduced the amount of ground almonds to give it a more ‘spongy’ texture and tweaked the wet/dry ingredient ratio. The resulting cake turned out beautifully!

It slices well too. It can be picked up but, for me, this is the kind of cake that’s best eaten with a fork. Far more elegant that way!

Vegan Pear and Yoghurt Cake

Just in case it was a fluke or ‘beginner’s luck’, I made two more cakes to check the recipe. Again, both cakes came out perfect so I’m now happy to release the recipe into the world. I hope you have as much success with it as I have.

Recipe Card

Pear and Yogurt Cake (Dairy-Free / Egg-Free / Vegan)

This cake is simple to make, but looks pretty impressive with its glistening pear and cinnamon-speckled top. I’m sure it will wow your friends and family! It would be a great cake to take along to a dinner party or for afternoon tea.
Hands-on time 20 minutes
Total Time 2 hours
Course Afternoon Tea, Treat
Servings 10

Ingredients
 

Wet ingredients

  • 250 ml / 1 cup natural/plain soya yogurt (I use Alpro)
  • 2 tsp apple cider vinegar
  • 100 g / ½ cup golden caster (unrefined cane) sugar
  • 80 ml / ¼ cup maple syrup or maple blend. (I often use Clarks Original).
  • 100 ml / ½ cup organic rapeseed, canola oil or other neutral-tasting oil
  • 1 tsp almond extract
  • 1 tsp vanilla extract

Dry ingredients

  • 280 g / 2 cups white spelt flour (or substitute with plain (all-purpose) flour or half plain flour and half wholemeal (wholewheat) flour)
  • tsp baking powder
  • ½ tsp bicarbonate of soda (baking soda)
  • ½ tsp salt
  • 50 g / ½ cup ground almonds (almond meal)

Topping

  • 1-2 ripe pears
  • generous pinch of ground cinnamon

Glaze

  • 2 TBSP unrefined sugar
  • 4 TBSP water
  • ¼ tsp vanilla extract
  • 1 tsp cornflour (corn starch)

Instructions
 

  • Preheat the oven to 180C (160C fan) / 350F. Grease a 23cm / 9 inch cake tin and line the bottom with non-stick baking paper.
  • In a large mixing bowl, whisk together all the wet ingredients. Taste test and add a touch more almond extract, if desired.
  • In a separate bowl, mix together all the dry ingredients except the ground almonds.
  • Slice the pears ready for the topping. To do this, I slice the pears into halves, then quarters. Using a sharp knife, scoop out the core. Place the pears cut side down on a chopping board, and slice into even-sized thin slices.
  • Sift the dry ingredients into the wet ingredient bowl and stir through to combine (but do not overmix). Add the ground almonds and stir through.
  • Tip the batter into the prepared tin and use a silicone spatula to distribute it evenly. Arrange the pear slices on top, then add a light sprinkle of ground cinnamon.
  • Place on the centre rack in the oven and bake for 50-55 minutes, or until a skewer inserted through the middle comes out clean.
  • While the cake is cooling, prepare the glaze. In a small bowl, mix 1 TBSP water with the cornflour until dissolved. Add the remaining water, sugar and vanilla extract to a small pan over medium heat. Once the sugar has dissolved, whisk in the cornflour paste. Gently bring to the boil, whisking continuously. When the mixture has thickened slightly remove from the heat.
  • Use a silicone pastry brush to lightly coat the top in the glaze (you won’t need to use all the glaze). Leave the cake in the tin until it has completely cooled (it will firm up as it cools), then transfer to an airtight container. The cake will keep for 5 days in the refrigerator. It also freezes well.
Keyword Dairy-Free, Egg-Free, Vegan Baking, Vegan Cake
Tried this recipe?Let us know how it was!


Pin for later ⬇️

Vegan Pear and Yogurt Cake

I’m sharing this recipe with the Suma Blogger’s Network. Big thank you to the lovely people at Suma for supporting Bit of the Good Stuff and for supplying ingredients for my kitchen experiments.

If you bake this Pear and Yogurt cake, I’d love to hear your feedback and any suggestions for adaptations. Tag your photos with #bitofthegoodstuff on social media – I always love to see your creations! You can also connect with me on my social media channels here:  Instagram,  Facebook,  Pinterest.   

With love,

Sharon xx
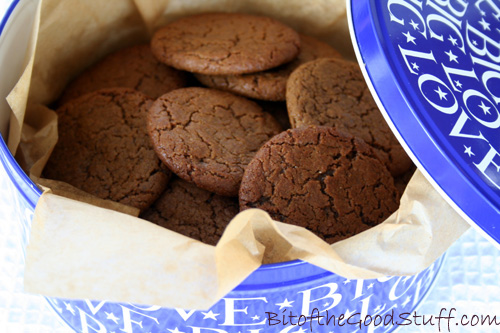
SaveSave

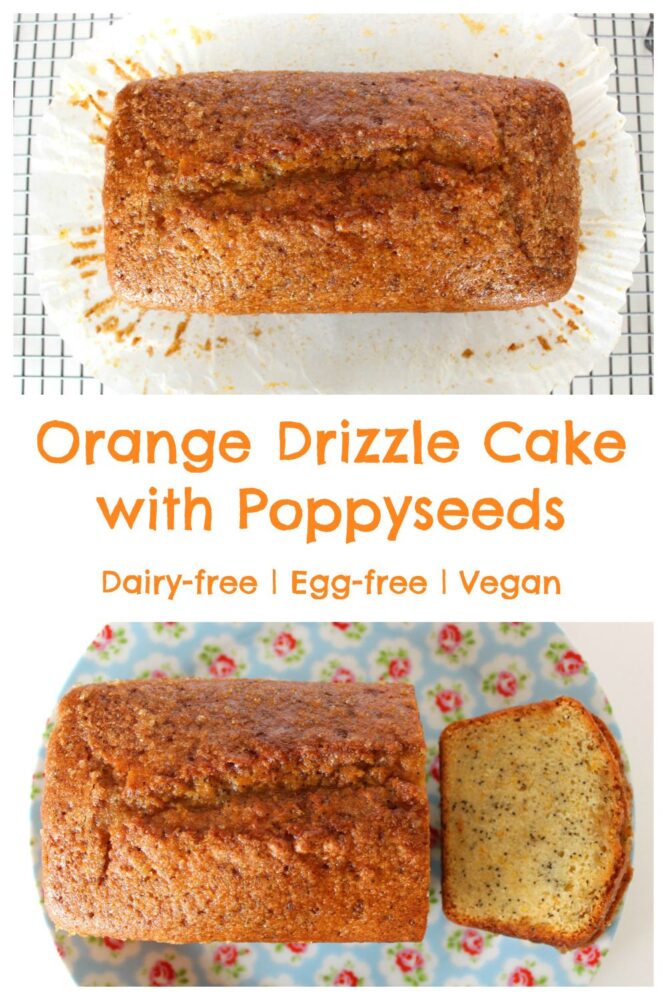
Orange Drizzle Cake (Vegan / Dairy-free / Egg-free)

Jump to Recipe

Back in 2013, I shared the recipe for a Lemon Drizzle Cake that I baked for my mum for Mother’s Day. It proved to be a big hit with my readers and, four years later, it’s still one of the most popular recipes on my blog!

Though I made it specifically with my mum in mind, the Lemon Drizzle quickly became my husband’s favourite cake. It’s the one he’s requested every birthday…  even though his birthday is a week before Christmas and Lemon Drizzle feels like a Spring-time cake (well, to me anyway!) Recently, however, I made an adaptation of the Lemon Drizzle and, after tasting it, my husband declared that THIS one may just be his new favourite!

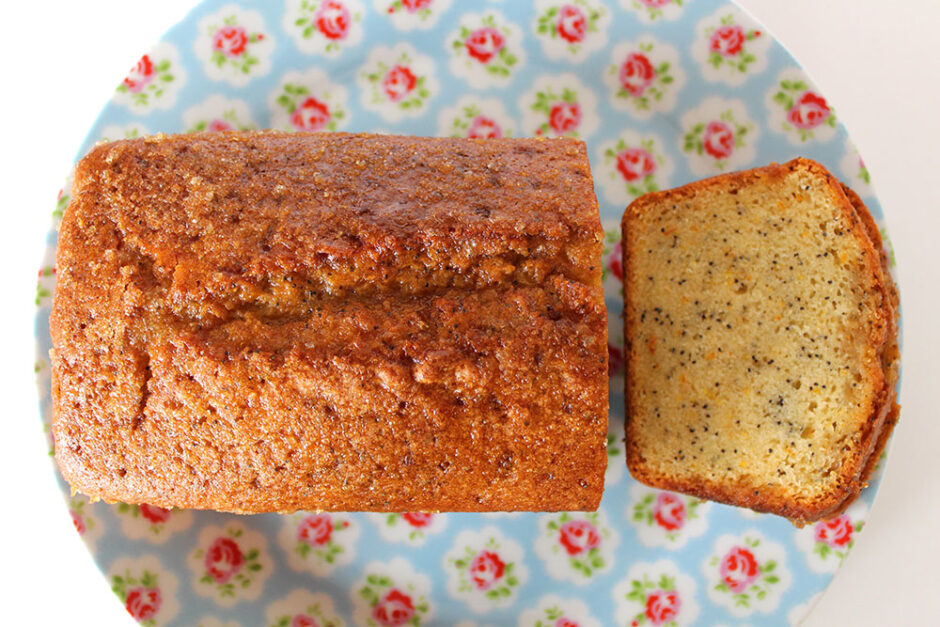
Vegan Orange Drizzle Cake (Dairy-Free)

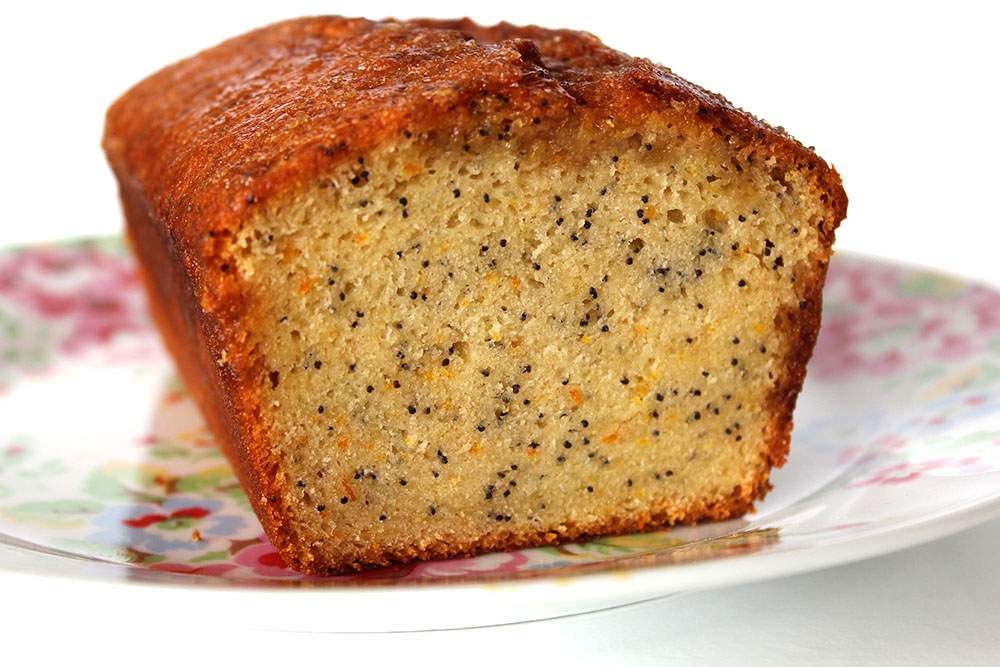
With a few little tweaks, I transformed the Lemon Drizzle into an Orange Drizzle speckled with poppy seeds  It still has the beautiful, moist consistency and light texture, but the flavour is of course orange rather than lemon. Rather than ‘zingy’ like the Lemon Drizzle, this one is more sweet and fruity. It reminds me of summer and sunshine. So maybe Lemon Drizzle will be my spring-time cake, and Orange Drizzle will be the summer-time version. But, of course, you can eat it whenever you like. I know we’ll be eating it in December 😉

Oh, and this cakes smells amazing as it’s baking. It fills the house with this beautiful orangey aroma!

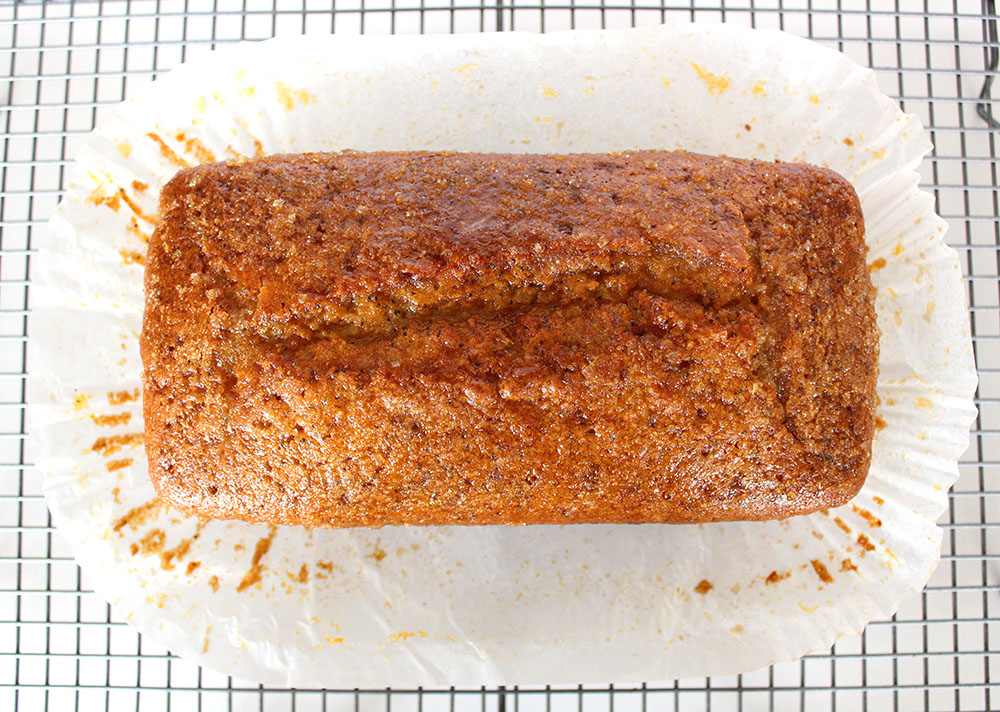
Vegan Orange Drizzle Cake (Dairy-Free)

I’ve made this cake at least five times in the past few weeks. I’ve given it as gifts, taken it on our travels when visiting family, and shared it with friends on coffee mornings. It’s always received great compliments. It’s also been road-tested and approved by my mum. I took it to her on our last visit to Dorset and she really enjoyed it! When I got home, she’d already emailed asking for the recipe.

I hope you love this recipe as much as we do!

Recipe Card

Vegan Orange Drizzle Cake (Dairy-Free)

Orange Drizzle Cake (Vegan / Dairy-free / Egg-free)

Wonderfully moist and citrus-kissed, this vegan orange drizzle cake with poppy seeds is simple to make using pantry staples. Tangy, sweet, and freezer-friendly—perfect for sharing, gifting, or enjoying anytime!
Hands on time 15 minutes
Total Time 2 hours
Course Afternoon Tea, Treat
Servings 8

Ingredients
 

  • 200 g / ¾ cup + 3 TBSP unrefined cane sugar (I use golden caster sugar)
  • 40 g / 2 TBSP maple syrup
  • 70 g / ⅓ cup organic rapeseed (canola) oil or other neutral-flavoured oil
  • 240 ml / 1 cup soya milk
  • 2 tsp apple cider vinegar
  • 1 tsp orange extract
  • 30 ml / 2 TBSP freshly squeezed orange juice
  • zest of 1 unwaxed/organic orange
  • 250 g / 1¾ cups white spelt flour or plain (all purpose) flour
  • 2 tsp baking powder
  • 1/4 tsp salt
  • 1 TBSP poppy seeds

Drizzle

  • 2 TBSP freshly squeezed orange juice
  • 2 TBSP Demerara or turbinado sugar

Instructions
 

  • Grease and line a 2lb loaf tin with non-stick baking paper (or use a non-stick loaf liner). Preheat the oven to 190C (170C fan) / 375F.
  • In a mixing bowl, whisk together the sugar, syrup, oil, milk, vinegar, orange extract and orange juice until fully combined. Stir in the orange zest.
  • Sieve one third of the dry ingredients (flour, baking powder, salt) into the bowl and whisk to combine. Repeat with the remaining two thirds, whisking each time. Stir in the poppy seeds.
  • Tip the mixture into the prepared tin. Place on the middle shelf in the oven and bake for 50 minutes, or until a skewer inserted into the middle comes out clean.
  • Whisk together the drizzle ingredients. When the cake is baked, pierce all over with a skewer. Distribute the drizzle evenly over the top of the cake. Allow to cool in the tin for at least an hour (it will firm up as it cools), then transfer to a wire rack.
  • Once completely cooled, slice and serve or transfer to an airtight container. The cake will keep for a week in the refrigerator (I find it tastes even better a day or two after it’s been baked!) It also freezes really well.
Keyword Dairy-Free, Egg-Free, Vegan Baking, Vegan Cake
Tried this recipe?Let us know how it was!

Pin for later ⬇️

Vegan Orange Drizzle Cake (Dairy-Free)

Here in the UK, it’s Mother’s Day on Sunday so, if anyone would like to bake their mums a cake, this Orange Drizzle would be a great option (or you could go for the trusty Lemon Drizzle).

Happy Mother’s Day to all the mums out there!  ❤️

With love,

Sharon xx
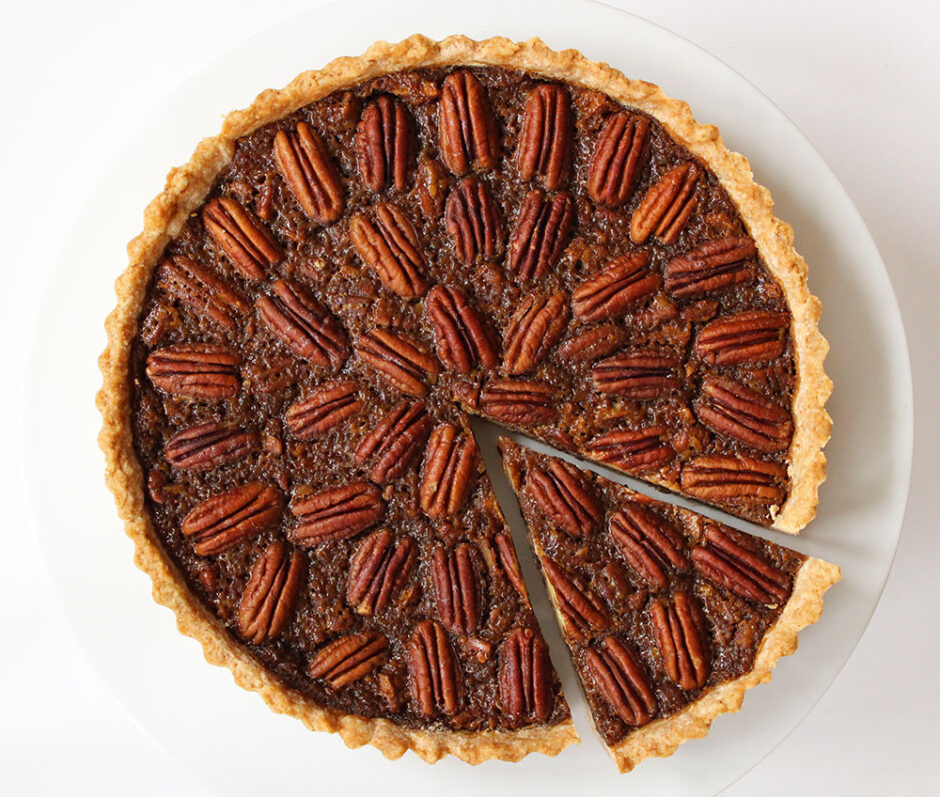
Vegan Pecan Pie

Jump to Recipe

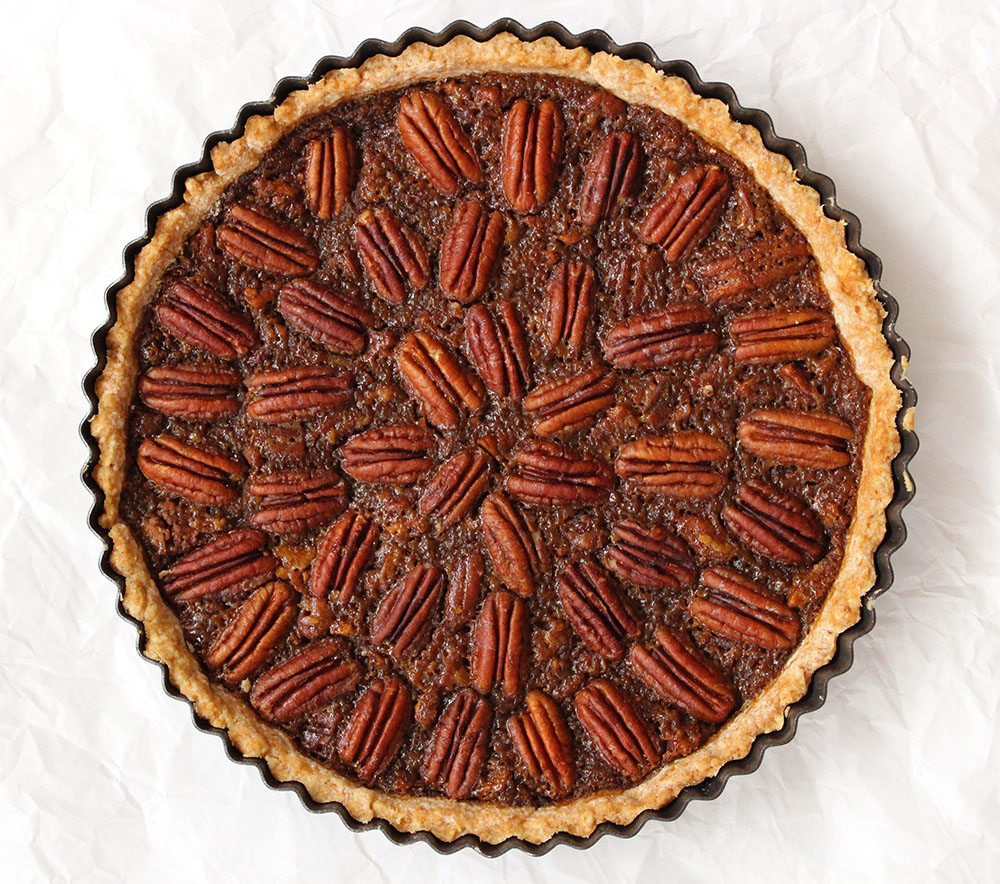
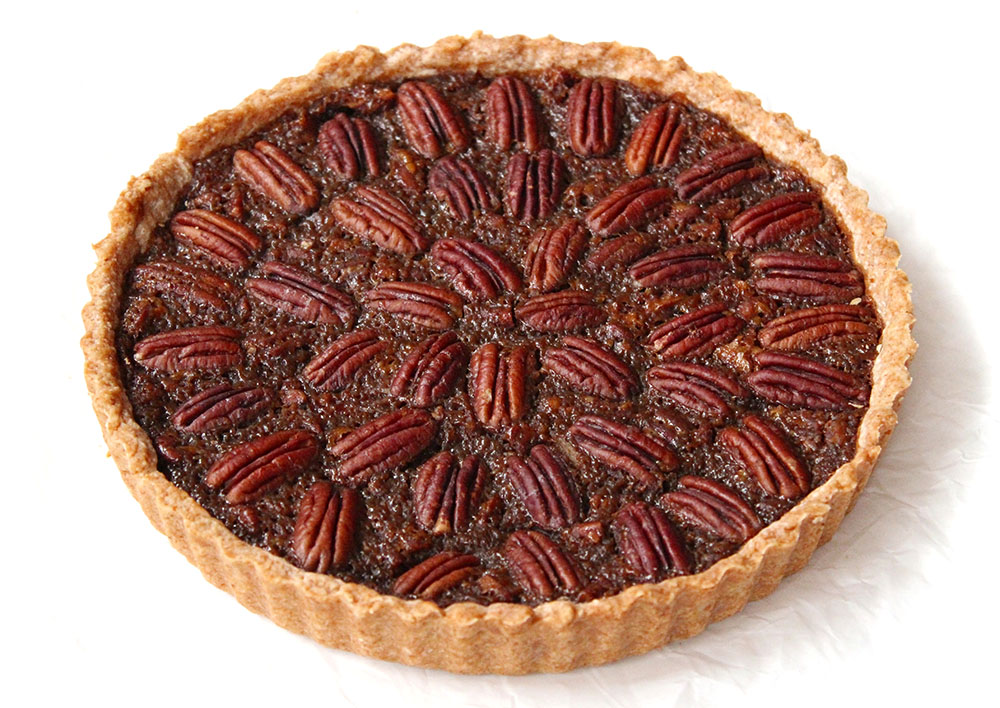
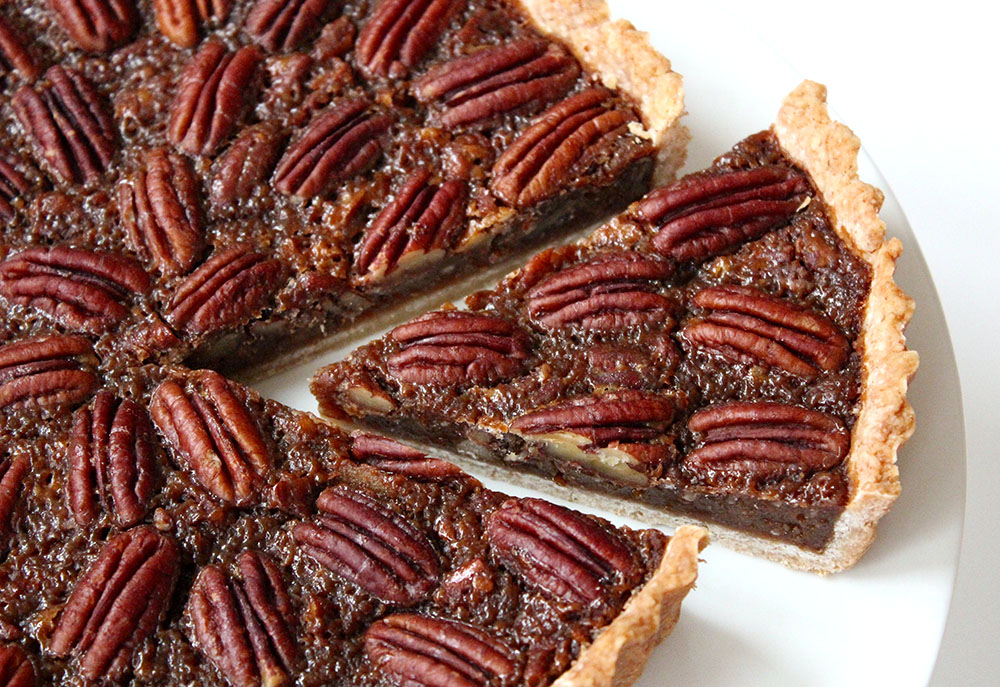
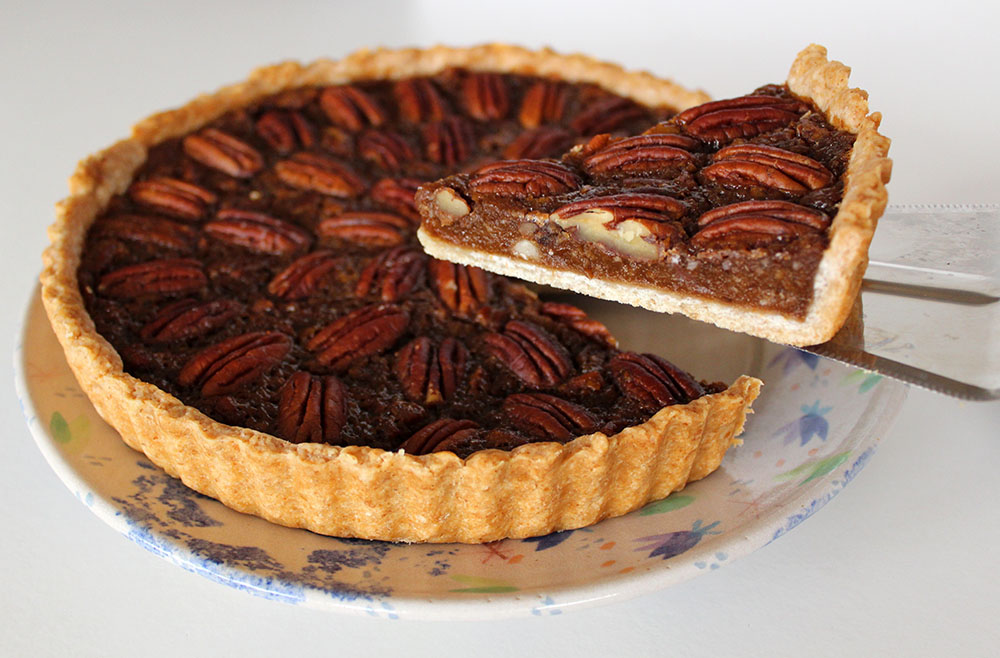
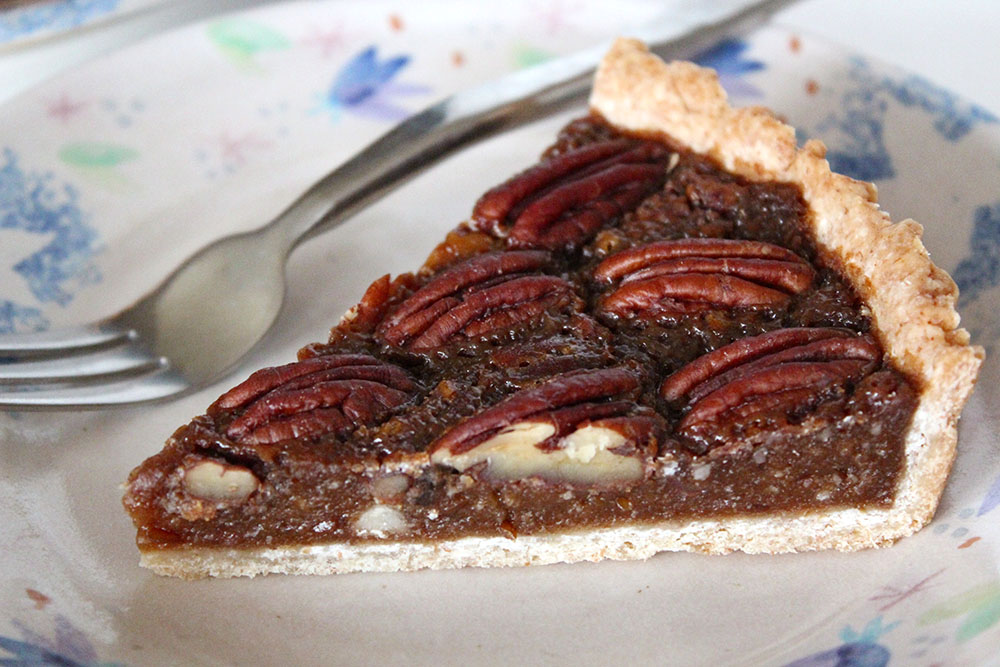
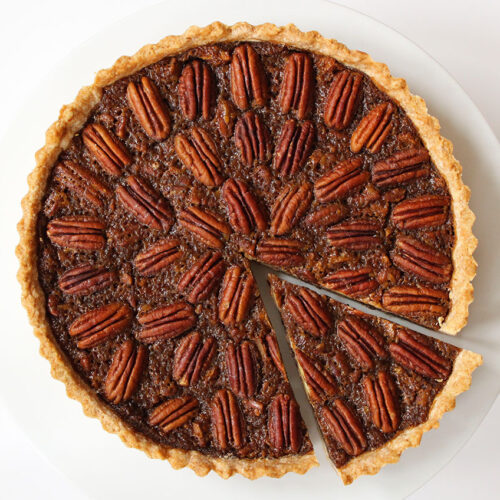
In today’s post, I’m sharing a recipe for an easy vegan pecan pie. This dish will be perfect for serving in the upcoming festive season. It looks impressive and slices beautifully.

Pecan pie hails from the southern US states. After a google search, I discovered that it’s traditionally made with eggs, butter, refined sugar and corn syrup. I decided to ditch all of these and use some of my favourite plant-based ingredients instead.

Vegan Pecan Pie

For the crust, I use my ‘go to’ sweet pastry recipe. I’ve never had a fail with this pastry and I love how crisp it turns out. Unlike many pastry recipes, it’s also palm-oil free as it uses coconut butter (the aroma-free/culinary kind) instead of dairy-free spread/vegan butter.

Vegan Pecan Pie

For the binder I replaced the chicken eggs with a couple of ‘flax eggs’ (a mix of ground linseed and warm water) and a couple of tablespoons of corn flour.

The butter was replaced with coconut cooking butter in the pastry and extra virgin coconut oil in the filling.

Vegan Pecan Pie

For the sweetener, I used a mix of maple syrup and coconut sugar. This gave the pie a delicious, caramel-like sweetness rather than the ‘sugary’ sweetness which you get from cane sugar. It also gave the pie a gloriously rich, dark brown hue.

Most of the traditional pecan pie recipes I’ve come across contain two cups of sugar in the filling. I used half this amount and still found it to be plenty sweet enough.

Vegan Pecan Pie

The pie is incredibly easy to make! In fact, I think it’s one of the simplest baked desserts that I’ve ever made… yet it looks like it took a lot of work. (It’ll be a great one for impressing your guests!) If you wanted to make it even easier, you could buy ready-made short-crust pastry (Jus-Rol does a vegan one) but, I promise you, it’s really easy to make pastry from scratch.

Vegan Pecan Pie

I’m sharing this recipe with the Suma Bloggers Network. Big shout out to my favourite wholefood wholesalers Suma, for supplying me with top quality ingredients. Suma products are stocked in independent healthfood shops and online.

Recipe Card

Vegan Pecan Pie

Vegan Pecan Pie

This is my plant-based version of the traditional southern US pecan pie. It’s perfect for serving in the festive season. It’s easy to make, but sure to impress your guests. You can use shop-bought pastry if you wish, but I promise you that it’s easy to make from scratch.
Hands-on time 30 minutes
Total Time 2 hours 30 minutes
Course Dessert
Cuisine American
Servings 8

Ingredients
 

Pastry

  • 90 g / ⅔ cup white spelt flour or plain (all purpose) flour
  • 90 g / ⅔ cup fine wholemeal (whole wheat pastry) flour or chapatti flour
  • 75 g / scant ½ cup aroma-free coconut cooking butter* (or substitute with dairy-free spread/vegan butter)
  • 2 TBSP golden caster (unrefined cane) sugar
  • pinch of salt
  • – 4 TBSP orange juice

Filling

  • 15 g / 2 TBSP ground linseed (flaxseed)
  • 90 ml / 6 TBSP warm water
  • 160 g / 1½ cups pecans divided
  • 100 g / ½ cup extra virgin coconut oil
  • 75 ml / ¼ cup maple syrup
  • 125 g / ¾ cup coconut sugar or golden caster (unrefined cane) sugar
  • 1 tsp vanilla extract
  • pinch of salt
  • 60 ml / 4 TBSP non-dairy milk
  • 15 g / 2 TBSP fine wholemeal (whole wheat pastry) flour or chapatti flour
  • 15 g / 2 TBSP corn flour (corn starch)

Instructions
 

  • Lightly grease an 20cm / 8 inch pie dish (or quiche tin) with oil. (I use a loose-bottomed tin for easy removal).
  • Prepare the pastry: Place the flour, coconut cooking butter (or dairy-free spread), sugar and salt in a food processor. Whiz until combined. While the machine is running, add orange juice a little at a time until the mixture starts to come together (I find I need about 3½-4 TBSP when using coconut butter and 2½ TBSP when using dairy-free spread). Scoop the mixture into a ball. Wrap in cling film (plastic wrap) and chill for 15-20 minutes.
  • Once the pastry has rested, place it on a lightly floured pastry mat and lay the cling film (plastic wrap) on top. Roll out the pastry into a circle large enough to fill the tin and the sides. Place the pastry in the tin and press it into the edges and up the sides. Slice off any excess pastry. If you have any holes in the pastry, you can patch it up using the scraps.
  • While the pastry is resting, prepare the filling. First, make the flax ‘egg’. Place the ground linseed in a small bowl with 90ml / 6 TBSP warm water. Whisk together with a fork then set aside for 10 minutes to gel up.
  • Set aside half of the pecan halves for decorating the top of the pie. Roughly chop the remaining pecans.
  • Preheat the oven to 190C (170C fan) / 375F.
  • Place the coconut oil, maple syrup, coconut sugar, vanilla extract and pinch of salt in a small saucepan over very low heat. As the oil melts, whisk to combine. When fully melted, remove from the heat.
  • In a small bowl, whisk together the milk, flour and corn flour until smooth. Pour it into the pan. Add the flax ‘egg’ and whisk until fully combined. Stir in the chopped pecans. Pour the mixture onto the pie crust (it will be very runny, but this is normal). Arrange the pecan halves on top.
  • Carefully place the pie on a baking sheet in the centre of the oven. Bake for 20 minutes at 190C (170C fan) / 375F. Reduce the heat to 130C (130C fan also) / 275F and bake for a further 40 minutes. Remove from the oven and leave to cool completely. (It will firm up as it cools).

Notes

* I used Tiana Organic Pure Coconut Cooking Butter
Storage Instructions: Stored in an airtight container in the refrigerator, the pie will keep for five days. I’m pretty confident this pie will freeze well but I haven’t tried it yet. As soon as I do, I’ll report back.
Keyword Dairy-Free, Egg-Free, Vegan Baking, Vegan Pecan Pie
Tried this recipe?Let us know how it was!

If you make this recipe, I’d love to hear about it! Leave me a comment below or tag your social media posts #BitoftheGoodStuff.  You’ll find me on Facebook and Pinterest and, as of this week… Instagram! I’m very late joining the Instagram party so if you’re already an Instagrammer, do pop by and say hi. I’d love to connect with you!

With love,

Sharon xx

Crunchy Nut Apple Crumble (Vegan / Dairy-free)

Jump to Recipe

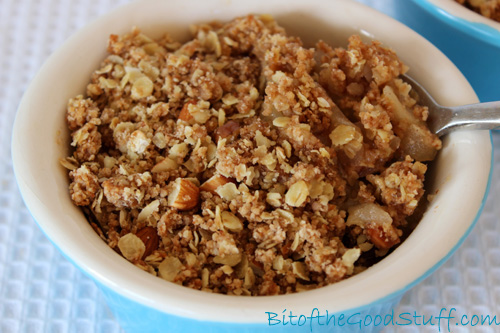
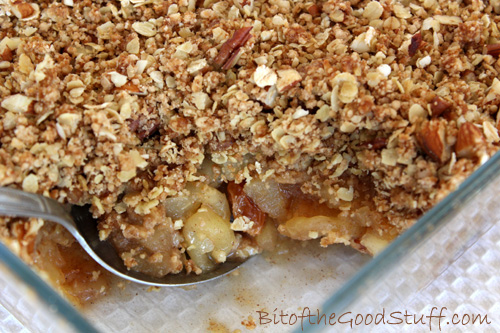
This healthy twist on the classic Apple Crumble is one of our all-time favourite autumnal desserts. With a spiced apple filling and golden, nutty topping, it’s comfort food at its best!

Apple Crumble is a quintessential British dessert. However, in contrast to the traditional version, which is typically loaded with refined sugar and white flour, I’ve created a more nourishing take using nutrient-rich ingredients. The white flour is replaced with wholegrain flour, oats, and chopped nuts, adding delicious texture, flavour, and heart-healthy goodness. And by using naturally sweet apples instead of tart Bramleys, I’ve been able to significantly reduce the sugar without sacrificing any of the flavour.

Vegan Apple Crumble

This year, our apple tree blessed us with a bumper harvest — over a hundred apples and counting! With so much fresh fruit to use, we’ve been enjoying lots of seasonal treats, and this Crunchy Nut Apple Crumble has been the standout favourite. It’s easy to make, wonderfully comforting, and loved by the whole family. We hope you enjoy it as much as we do!

Recipe Card

Vegan Apple Crumble

Crunchy Nut Apple Crumble

This healthy twist on the classic Apple Crumble is one of our all-time favourite autumnal desserts. With a deliciously spiced apple filling and a golden, crunchy topping packed with oats, nuts, and a hint of cinnamon, it’s the kind of treat we come back to again and again as the leaves begin to fall.
Hands on time 25 minutes
Total Time 45 minutes
Course Dessert
Servings 6

Ingredients
 

For the Apple Filling

  • 1 kg / 7 medium sweet apples (e.g. Gala) peeled, cored and sliced into 0.6cm / ¼-inch thick pieces
  • 60 ml / 4 tbsp water
  • 35 g / 3 tbsp coconut sugar or golden caster (unrefined cane) sugar
  • 1 tsp ground cinnamon
  • 60 g / ⅓ cup sultanas

For the Crumble Topping

  • 100 g / ¾ cup fine wholemeal (wholewheat pastry) flour or chapatti flour or gluten-free flour blend
  • 1 tsp baking powder
  • ½ tsp ground cinnamon
  • 75 g / ¾ cup rolled porridge oats (quick oats, not jumbo)
  • 50 g / 4 tbsp coconut sugar or unrefined cane sugar
  • 70 g / 4½ tbsp vegan butter or dairy-free spread
  • 30 g / ¼ cup pecans chopped
  • 40 g / ¼ cup almonds chopped
  • ½-1 TBSP Demerara (or turbinado) sugar for sprinkling

Instructions
 

  • Preheat your oven to 190°C (170°C fan) / 375°F.

Cook the apples:

  • Place the water, apples, sugar, cinnamon, and sultanas in a large saucepan. Stir, cover with a lid, and simmer over a low heat for around 15 minutes, stirring occasionally, until the apples are just tender but still hold their shape. Taste and add a little more sweetener, if needed.

Make the crumble topping:

  • In a large mixing bowl, combine the flour, baking powder, cinnamon, oats, and sugar. Add the vegan butter and rub it in with your fingertips until the mixture resembles coarse breadcrumbs. Stir in the chopped pecans and almonds.

Assemble the crumble:

  • Spoon the cooked apples into a 1.5-litre / 1½-quart ovenproof dish (approx. 22cm x 17cm x 6cm / 9” x 7” x 2½”). Level the surface and gently press down. Spoon the crumble topping evenly over the apples and sprinkle with Demerara sugar.

Bake:

  • Place in the preheated oven and bake for 20–25 minutes, until the topping is crisp and golden. Allow to rest for 5 minutes before serving.

Serving Suggestions:

  • This crumble is delicious served with dairy-free custard, cream, or yogurt
  • It can be served warm, or cold straight from the fridge (we actually love it this way as the topping becomes even crunchier!)!

Notes

Storage Tips:
Store in an airtight container for up to 5 days. It is also freezable.
Keyword Dairy-Free, Egg-Free, Gluten-Free Option, Vegan Apple Crumble, Vegan Baking
Tried this recipe?Let us know how it was!

If you make this Crunchy Nut Apple Crumble, I’d love to hear your feedback and any suggestions for adaptations! Leave a comment below or tag your photos with #bitofthegoodstuff on social media – I always love to see your creations! You can also connect with me on my social media channels here: Instagram, Facebook, Pinterest.   

With love,

Sharon xx

Vegan Gingerbread Cookies (Dairy-Free / Egg-Free)

Jump to Recipe

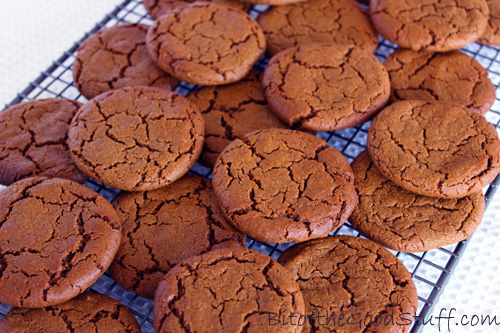
Today I’m delighted to share one of my family’s all-time favourite baked treats – Vegan Gingerbread Cookies! These spiced beauties are naturally dairy-free and egg-free, and they make the perfect treat for cosy afternoons, holiday gatherings, or anytime you fancy a wholesome sweet bite.

Vegan Gingerbread Cookies

I’m thrilled to be sharing this recipe with the Suma Bloggers’ Network. You might already be familiar with Suma Wholefoods — the UK’s largest independent vegetarian and vegan wholesaler. They’re a workers’ cooperative, which means the business is owned and managed jointly by the staff. Everyone is paid equally and shares responsibility for the day-to-day running of the business. I love what they stand for, so I was over the moon when they invited me to become one of the founding bloggers in their new Network!

Every couple of months, we’ll be sharing plant-based recipes featuring ingredients from the Suma range. You’ll find our creations on our blogs, social media, and a shared Pinterest board.

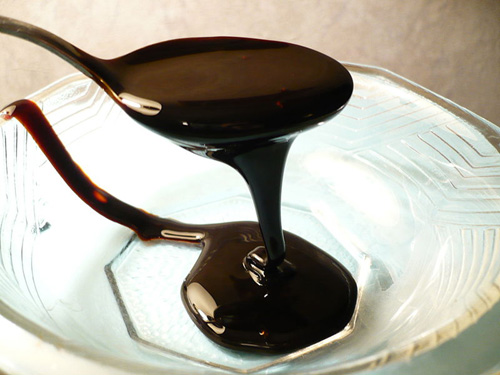
For my first recipe, I’m spotlighting one of my all-time favourite ingredients and unsung superfoods… blackstrap molasses!

Why Bake with Blackstrap Molasses?

Molasses is the rich, dark syrup that remains after sugar cane is processed to make refined sugar. While white sugar has no nutritional value, blackstrap molasses is brimming with nutrients — including vitamin B6, calcium, iron, magnesium, potassium, and selenium. It adds a beautiful depth of flavour and colour to baked goods, especially these spiced gingerbread cookies.

If you’ve got a jar lurking in your cupboard, this recipe is the perfect excuse to dust it off!

Blackstrap Molasses
[Source]

The Cookies

These vegan gingerbread cookies are crisp on the outside with a soft, chewy centre. The blackstrap molasses gives them a subtle liquorice-like flavour without being overpowering. You can use coconut sugar or an unrefined cane sugar for the dry sweetener. Coconut sugar is my favourite as it’s lower GI and has a lovely caramel note; my husband prefers the cane sugar ones (which are slightly sweeter), and Lil’ L says he can’t really tell the difference and loves both!

These cookies have been tried (and loved!) many times over with my family and friends, and I’ve been asked numerous times for the recipe. My standard reply is ‘sure, I’ll post it on the blog’. Well, it’s high time I kept my promise so here it is…

Recipe Card

Vegan Gingerbread Cookies

Vegan Gingerbread Cookies

These gingerbread cookies are infused with warming spices and rich blackstrap molasses. They’re dairy-free, egg-free, and simple to prepare. Perfect for festive treats, holiday baking, or as a cosy everyday snack!
Hands-on time 15 minutes
Total Time 35 minutes
Course Snack, Treat
Cuisine Vegan
Servings 12

Ingredients
 

  • 70 g / ⅓ cup golden caster (unrefined cane) sugar or coconut sugar
  • 50 ml / ¼ cup organic rapeseed (canola) oil or other neutral-flavoured oil
  • 65 g / 3 TBSP Blackstrap molasses or black treacle (molasses)
  • 22 g / 1½ TBSP soya or almond milk
  • ½ tsp vanilla extract
  • 120 g / ¾ cup + 2 TBSP fine wholemeal (whole wheat pastry) flour or chapatti flour
  • 1 – 1½ tsp ground ginger to taste
  • ½ tsp ground cinnamon
  • pinch of ground nutmeg
  • ¼ tsp baking powder
  • ¼ tsp bicarbonate of soda (baking soda)
  • ¼ tsp salt

Instructions
 

  • Preheat the oven to 200°C (180°C fan) / 400°F. Line two baking sheets with non-stick baking paper.
  • In a mixing bowl, whisk together the sugar, oil, molasses, plant milk, and vanilla extract until smooth.
  • In a separate bowl, combine the flour, spices, baking powder, bicarbonate of soda, and salt.
  • Add half the dry ingredients to the wet mixture and stir to combine. Add the remaining dry ingredients and stir until a dough forms.
  • Scoop slightly rounded tablespoons of dough and space six on each baking sheet. With damp hands, press each dough ball into a thin cookie shape.
  • Bake in the centre of the oven for 9 minutes, or until the tops are dry to the touch. (The cookies will still feel soft but will firm up as they cool).
  • Leave to cool on the baking sheets, then carefully transfer to a wire rack using a thin spatula.
  • Once fully cool, store in an airtight container. They’ll keep for up to two weeks. They can also be frozen in an airtight freezer bag.

Notes

Freshly baked, the cookies are crisp on the outside and chewy inside. Over time, they become softer but remain just as tasty.
Using black treacle or a milder molasses will create a gentler flavour; blackstrap adds a richer, more mineral taste.
All TBSP in the recipe are level.
These cookies freeze beautifully — just leave them at room temperature for 10 minutes before serving.
Keyword dairy-free cookies, holiday baking, vegan gingerbread cookies
Tried this recipe?Let us know how it was!

If you make these Vegan Gingerbread Cookies, I’d love to hear your feedback and any suggestions for adaptations! Leave a comment below or tag your photos with #bitofthegoodstuff on social media – I always love to see your creations! You can also connect with me on my social media channels here: InstagramFacebookPinterest.   

Wishing you a joyful day and happy baking!

With love,

Sharon xx

Disclaimer: I received some Suma’s products to use for recipe development but, as always, all opinions expressed are my own.