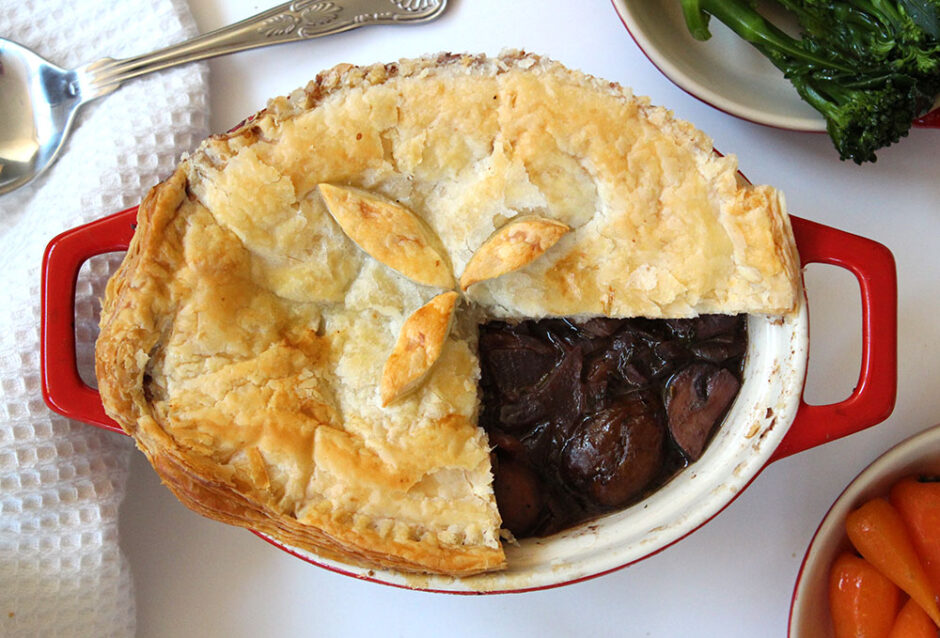
Chestnut and Mushroom Bourguignon Pie (Vegan with Gluten Free Option)

Jump to Recipe

In today’s post I’m sharing a recipe for a delicious pie that’s just perfect for serving in the cold weather months. It’s an adaptation of a recipe published by the Vegetarian Society back in 1995. We first tried this pie last month and it was a big hit with the family. Since then, we’ve already eaten it a couple more times as special weekend dinners. While it looks pretty impressive, it’s really easy to make and requires less than 30 minutes hands on time.

The original recipe states that it serves 4-6 people but we must be greedy guzzlers as we devoured the whole pie between the three of us. When I made it again, I increased the filling quantities just to make sure there was enough for 4.
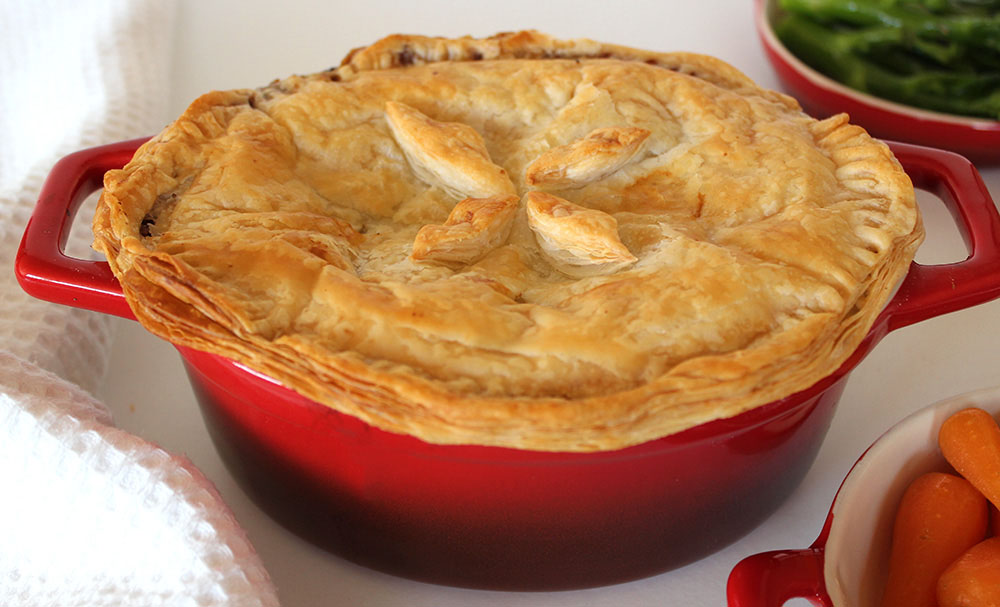
Vegan Chestnut Bourguignonne Pie

The base of the filling is a rich gravy, flavoured with red wine, stock, herbs, mustard and soy sauce. Since I don’t drink wine, I buy one of these cute 500ml bottles.
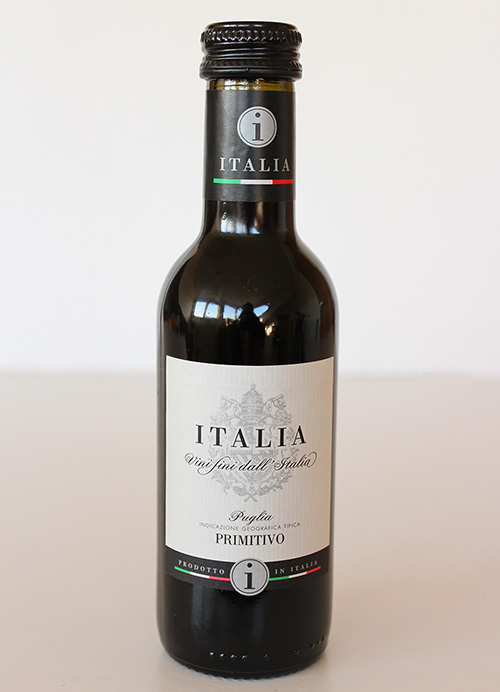
Red Wine

As you may already know, not all wines are vegan, or even vegetarian. When filtering wine (or beer) some companies use products such as isinglass (from fish bladders), gelatin, egg whites or sea shells as filtering agents. Companies can also add products such as dairy and honey into the final recipe. Fortunately there are plenty of vegan wines and beers available in our shops.

UK supermarkets are getting better at labelling their wines vegetarian or vegan. At the present time, the Waitrose, Sainsbury’s and Ocado websites are the easiest to use, as they state if a wine is suitable for vegetarians and/or vegans in their lifestyle/dietary choice tabs. There is also Barnivore, an online directory which lists all vegan beers, wines and spirits.
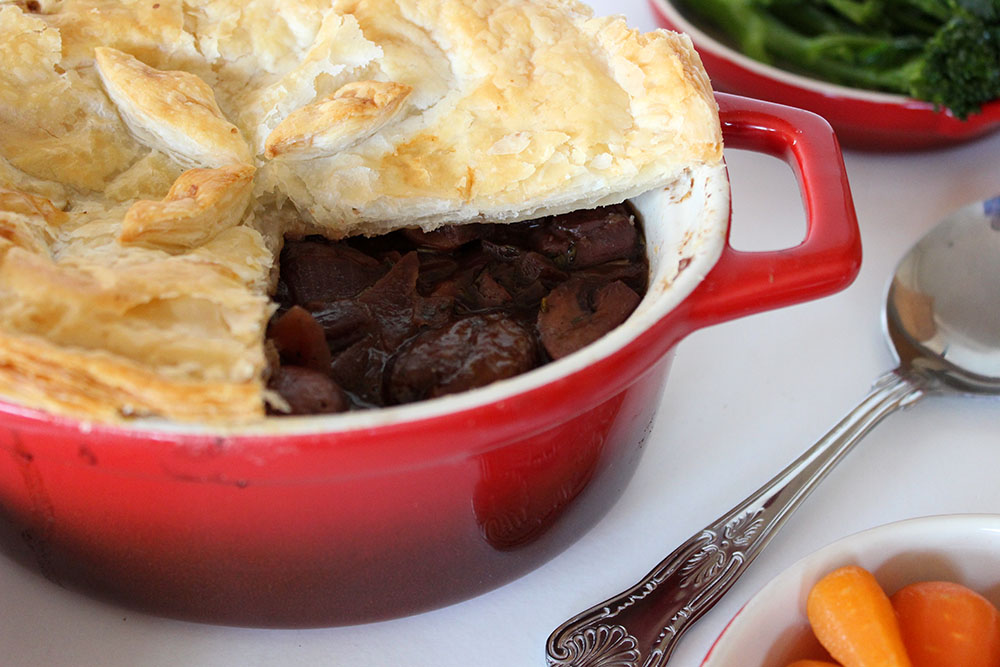
Vegan Chestnut Bourguignonne Pie

The original VegSoc recipe calls for 250g chestnuts, however the most common brand of cooked chestnuts in the UK (Merchant Gourmet) comes in a 187g pack. Since chestnuts are quite expensive, rather than buying a second pack and only using a portion of it, I reduced the quantity of chestnuts and bumped up the volume of chestnut mushrooms instead. I also added some thinly sliced carrot for an extra dimension of texture and flavour.

If you’re gluten-free, Jus-Rol are now selling a GF Vegan puff pastry sheet. I spotted it for sale in Tesco and Ocado. I haven’t tried it myself yet but, if you have, I’d love to hear what you think of it.

Recipe Card
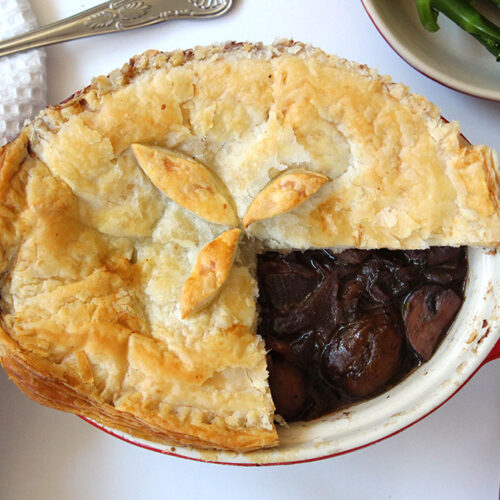
Vegan Chestnut Bourguignonne Pie

Chestnut and Mushroom Bourguignon Pie (Vegan with Gluten Free Option)

This pie is perfect for serving in the cold weather months. It makes a lovely special weekend dinner. It’s easy to make but sure to impress your dinner guests.
Hands-on time 25 minutes
Total Time 1 hour 10 minutes
Course Dinner
Servings 4

Ingredients
 

  • 25 g / 1½ TBSP dairy-free spread/vegan butter
  • 3 small red onions (about 250g) thinly sliced
  • 250 g / 3 cups chestnut (or crimini) mushrooms quartered or halved (depending on size)
  • 180 g / 1 heaping cup pre-cooked chestnuts halved
  • 187 ml / ¾ cup vegan red wine
  • 300 ml vegetable stock (broth)
  • 2 bay leaves
  • 1 tsp dried sage
  • 1 tsp dried thyme
  • ½ tsp dried parsley
  • 2 tsp Dijon mustard
  • 1 TBSP tamari or reduced-salt soy sauce
  • freshly ground black pepper to taste
  • 1 puff pastry sheet (about 300g / 10½ oz) thawed if frozen (use GF puff pastry, if needed)
  • soya milk for glazing

Instructions
 

  • Pre-heat the oven to 220C (200C fan) / 425 F.
  • Melt the dairy-free spread/butter in a large frying pan (skillet) and cook the onions on low/medium heat until lightly browned.
  • Add the mushrooms and cook for a further 4 minutes.
  • Add the chestnuts, red wine, stock (broth), bay leaves, dried herbs, mustard and tamari/soy sauce.
  • Bring to the boil, then reduce the heat and simmer for 20 minutes, or until the liquid has reduced somewhat.
  • Remove the bay leaves. Add black pepper to taste.
  • Spoon the mixture into a large pie dish or four individual/mini pie dishes.
  • Place the pastry on top. Leave a good margin hanging over the sides as the pastry will shrink as it cooks. Use a fork to press the pastry onto the rim of the dish to seal it. Use any leftover pastry to cut out some leaf shapes and arrange on top of the pie. Brush the pastry with soya milk. Pierce a couple of holes in the pastry to allow the steam to escape.
  • Bake for about 20 minutes or until golden.
  • If baked in a large pie dish, I recommend removing the pastry top, placing on a chopping board and slicing into four equal pieces. Spoon the filling onto plates and arrange the pastry on top. This way, you can cut the pastry neatly without it pushing down into the filling and becoming soggy.
  • Serve the pie with one or two veggie side dishes. We love to serve it with steamed baby carrots and steamed tenderstem broccoli tossed in a little soy sauce, or some sweet potato wedges. I also think potato mash or butter bean puree could work well with it.

Notes

The pie filling can easily be made in advance. Half an hour before you plan to serve, simply warm through, add the pastry topping and bake for 20 minutes.
The pie can also be re-heated. I’ve found the quickest way to do this is to remove the pastry lid and bake this on a tray in the oven for 15-20 minutes (that way it crisps up again). Meanwhile, gently heat through the filling in a saucepan covered with a lid.
The pie will keep for a couple of days in the refrigerator.
Recipe adapted from this Vegetarian Society recipe 
Keyword Dairy-Free, Egg-Free, Gluten-Free Option, Vegan Dinners, Vegan Pie
Tried this recipe?Let us know how it was!

If you make this Vegan Chestnut and Mushroom Bourguignon Pie, I’d love to hear your feedback and any suggestions for adaptations! Tag your photos with #bitofthegoodstuff on social media – I always love to see your creations! You can also connect with me on my social media channels here: Instagram, Facebook, Pinterest.   

With love,

Sharon xx
Vietnamese Summer Rolls (Vegan Style!) with Peanut Dipping Sauce + Step-by-Step Guide on How to Roll Rice Papers

Jump to Recipe

I absolutely love this time of year, with the trees full of blossom and the wisteria out in flower. Not only does it look stunning, but it smells glorious too! Here in Bath, the weather is finally starting to warm up and we’ve actually managed a few meals in the garden this past week. Our dinners have definitely shifted to lighter dishes, and I’m looking forward to sharing some of our favourites over the coming weeks.

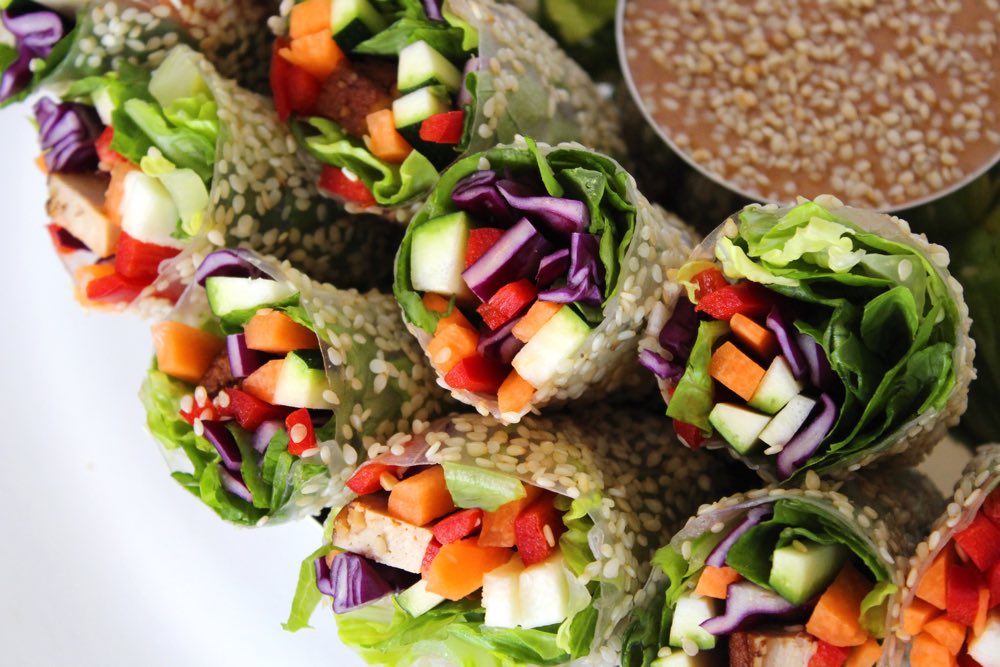
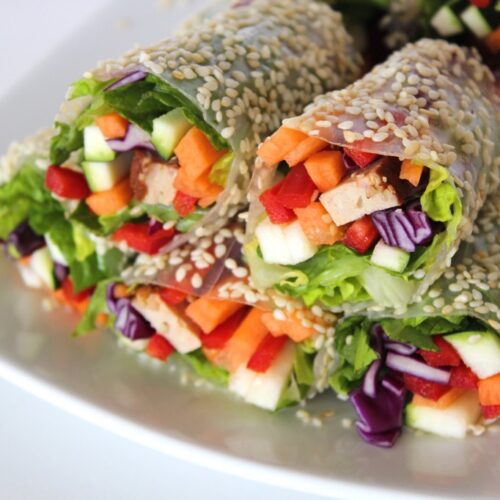
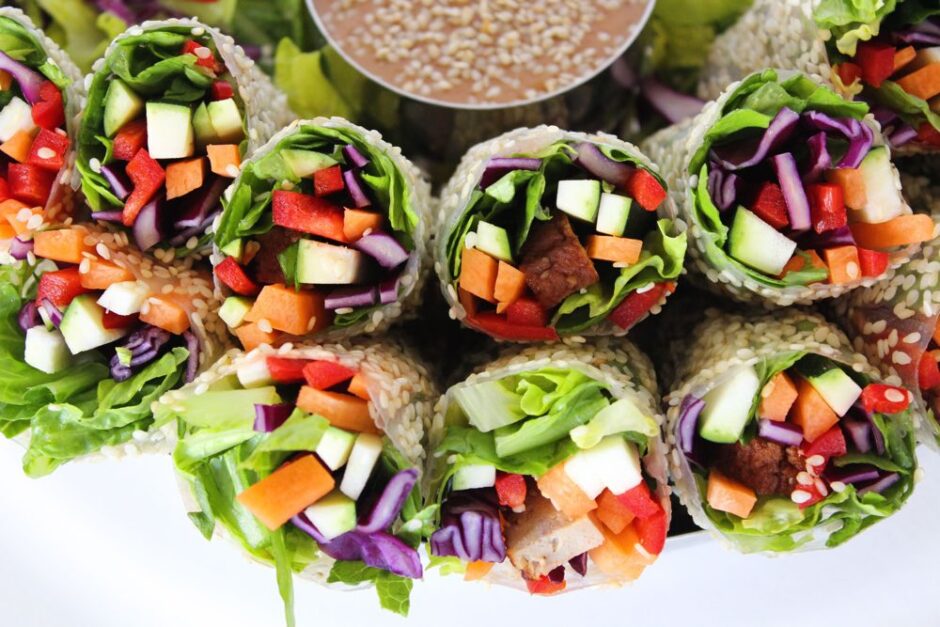
The rolls are a vegan twist on the classic Vietnamese summer roll. Instead of meat or prawns, the rolls are filled with a rainbow of fresh veggies, making them both visually beautiful and delicious.

Vietnamese Summer Rolls

My family loves Vietnamese summer rolls! We typically eat them as a light evening meal, enjoyed out in the garden, but they’re also great for buffets and picnics. We like to add strips of smoked or marinated tofu into the rolls for protein. When accompanied with a peanut dipping sauce, they’re surprisingly filling!

Have you ever tried making rice paper rolls before? I find that they fall into the category of ‘easy when you know how’. The first time I tried to make them, I got myself in a real tangle with the rice paper. I soaked it for too long then it folded in on itself and was beyond saving.

I was determined not to be defeated by a rice paper though, so I did some research and discovered that with a couple of easy steps, rolling is a cinch. I found this 37 second YouTube tutorial especially helpful.

I’ve rolled countless rolls now, and my only failure was that initial one. My rolls aren’t very neat (neatness isn’t a forte of mine!) but the rolls work. They taste good. And most importantly, Lil’ L loves them. I’ll keep working on the neatness.

Learning from my past mistakes, I thought I’d put together a step-by-step guide on how to successfully roll rice papers. Even if it helps one person out, I’ll be more than delighted.

So firstly, we need some rice papers…

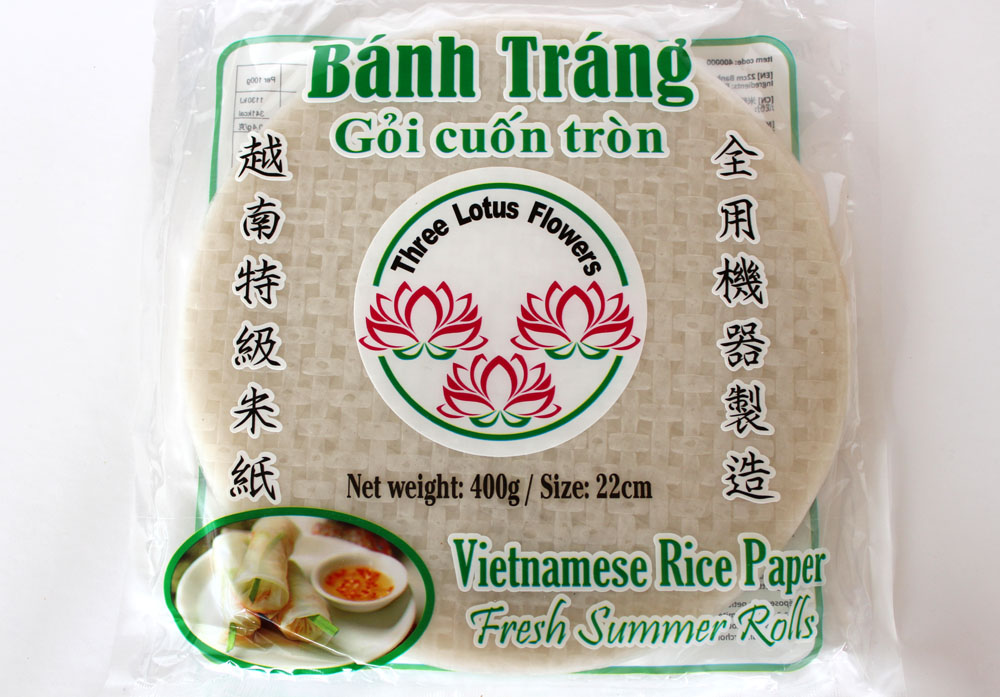
Rice Papers

You’ll find them widely available in oriental supermarkets. I buy Vietnamese Banh Trang from Hai Na Oriental Supermarket in Union Street in Bath. You get about 45 papers (22cm / 8½ inches in diameter) in a pack for £1.89, which is great value. Waitrose and Ocado also sell Blue Dragon Spring Roll Wrappers.

Summer Roll filling

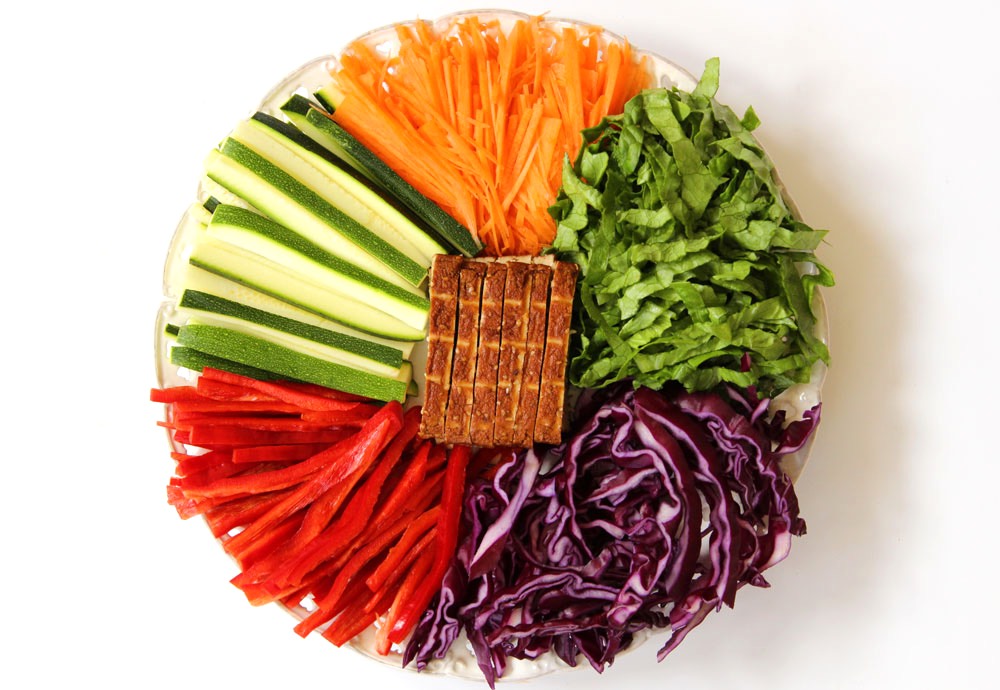
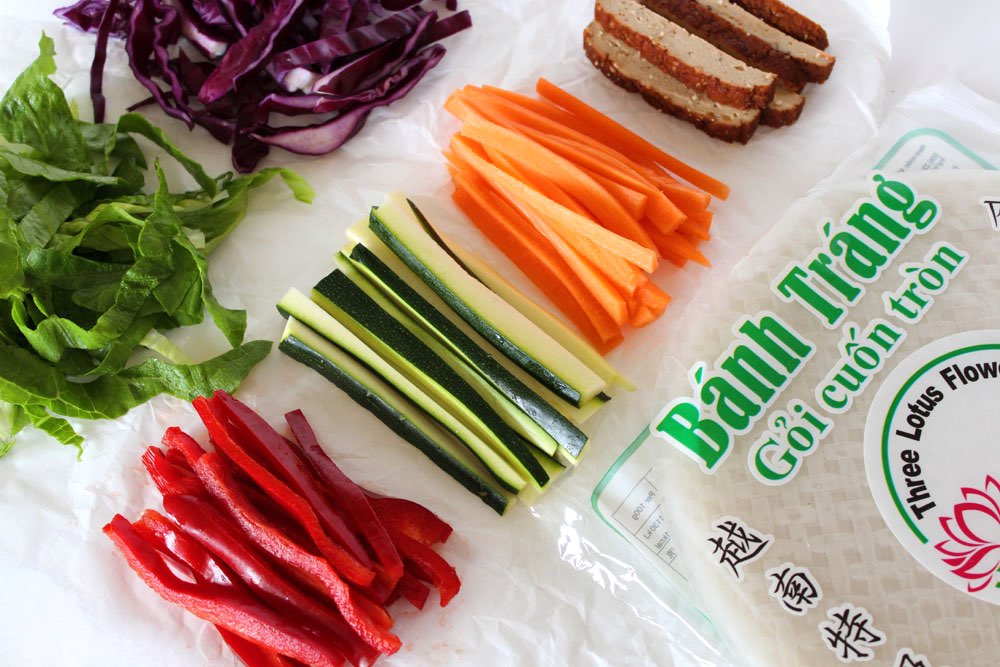
It’s important to prep all the ingredients before you start rolling (known as ‘mise-en-place’ if you happen to be French… or a chef!) I typically use a large carrot, small courgette (zucchini), sweet pointed romano pepper, some red cabbage and a romaine lettuce. For a protein kick, I add in strips of organic smoked or marinated tofu.

Summer Rolls Mise en Place

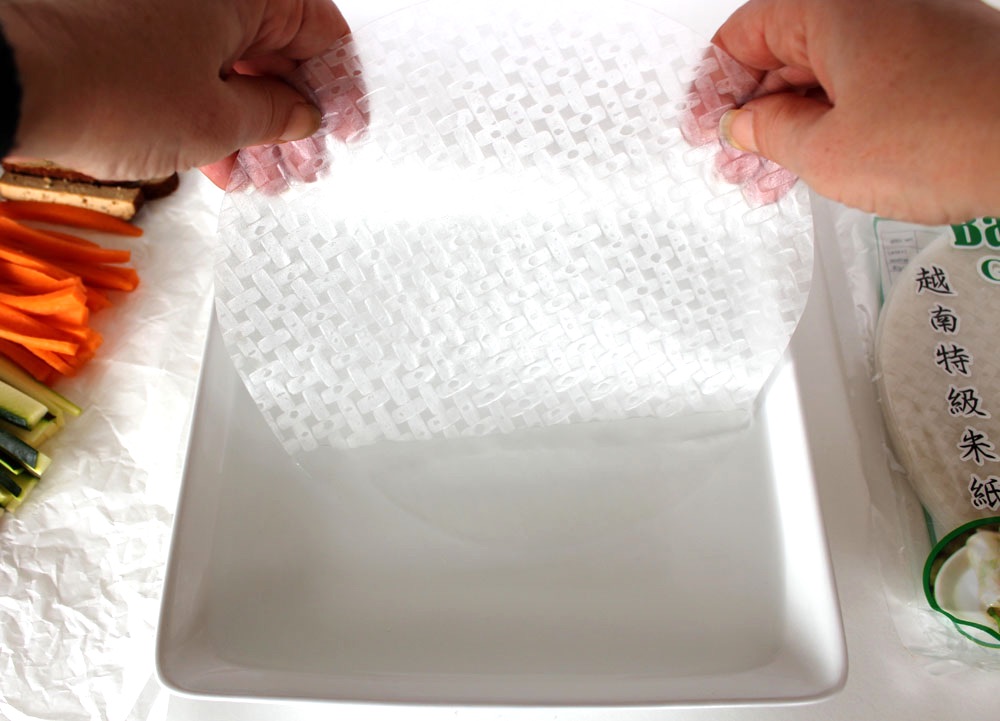
Once everything is ready, prepare a bowl of warm water. It doesn’t matter what kind of container you use, as long as it’s big enough to fit your rice paper.

Want to know something funny? To take the shot below I ended up pressing the shutter with my nose!! How ridiculous is that? You only dip for a second so no time to set up the timer!

Making Summer Rolls

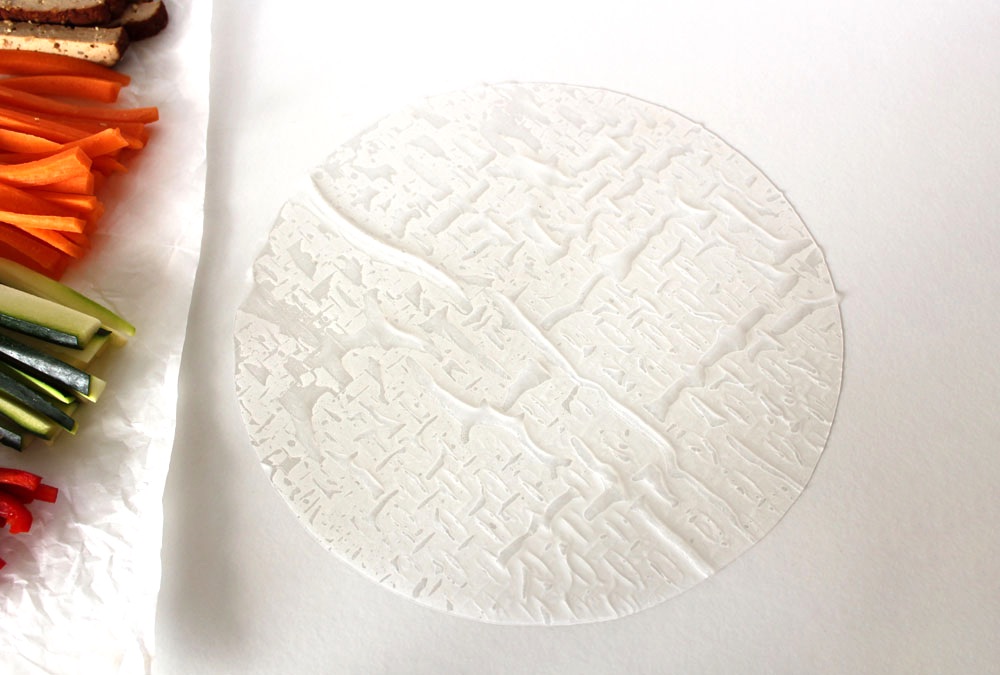
Anyway, back to the guide… Take a rice paper in both hands and dip half of it in the water. Quickly keep turning the paper in the water (like you’re turning a steering wheel) until the whole paper is wet. Shake off the excess water and lay the paper on a plastic chopping board or smooth work top (not wood as it sticks!) The paper is still quite firm when I remove it from the water but it continues to soften up as it absorbs the moisture. (I find that if you dip it for too long, it goes gloopy and impossible to control).

Making Summer Rolls

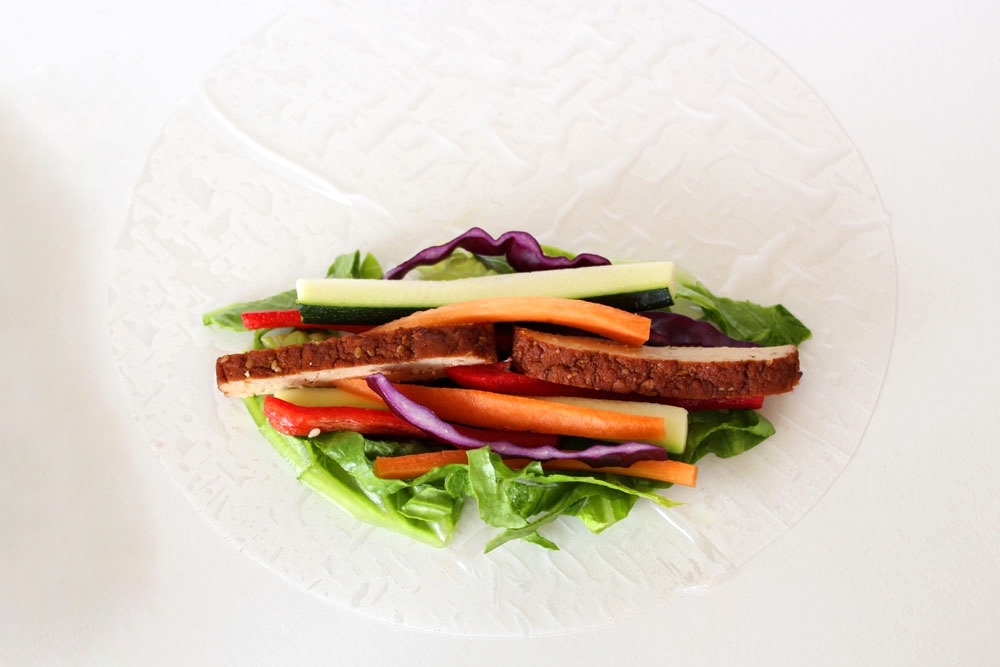
Arrange your veggies on one half of the rice paper, leaving a border either side. You want to make sure that there are no sharp edges poking out as the rice papers are delicate and easily tear.

Making Summer Rolls

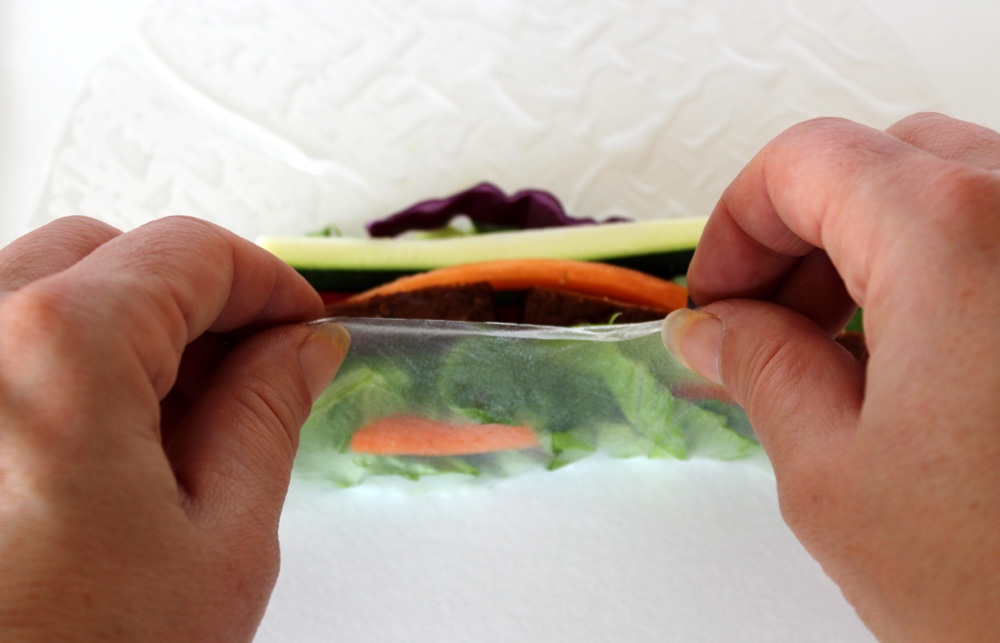
Squash the filling together then start rolling. Gently pull the rice paper up and over the vegetables, tuck in the edges as you roll. Try to keep it as tight as you can (like you’re rolling a burrito). Here comes another nose shutter shot!

Making Summer Rolls

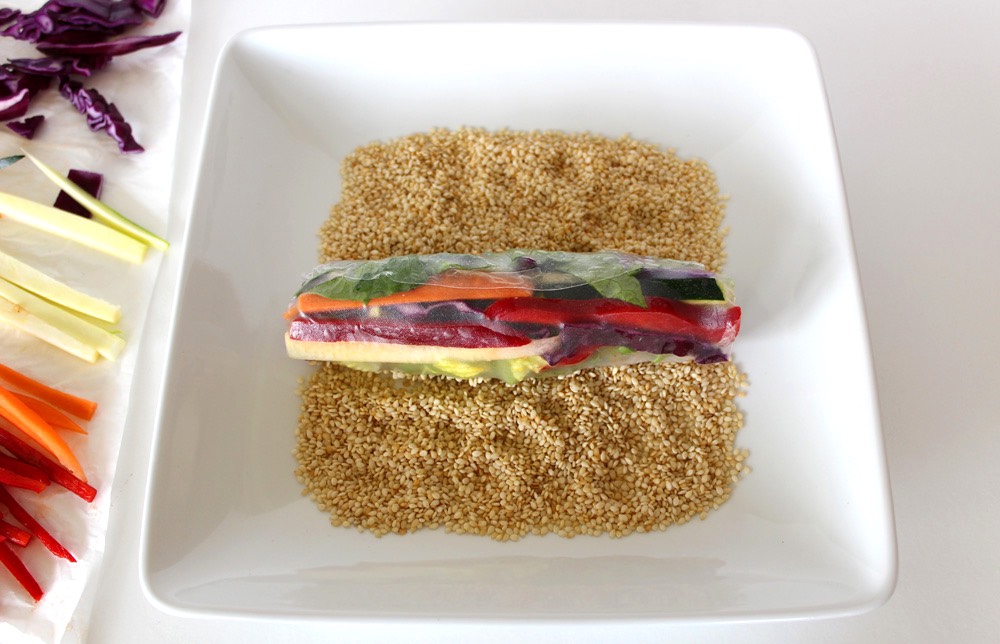
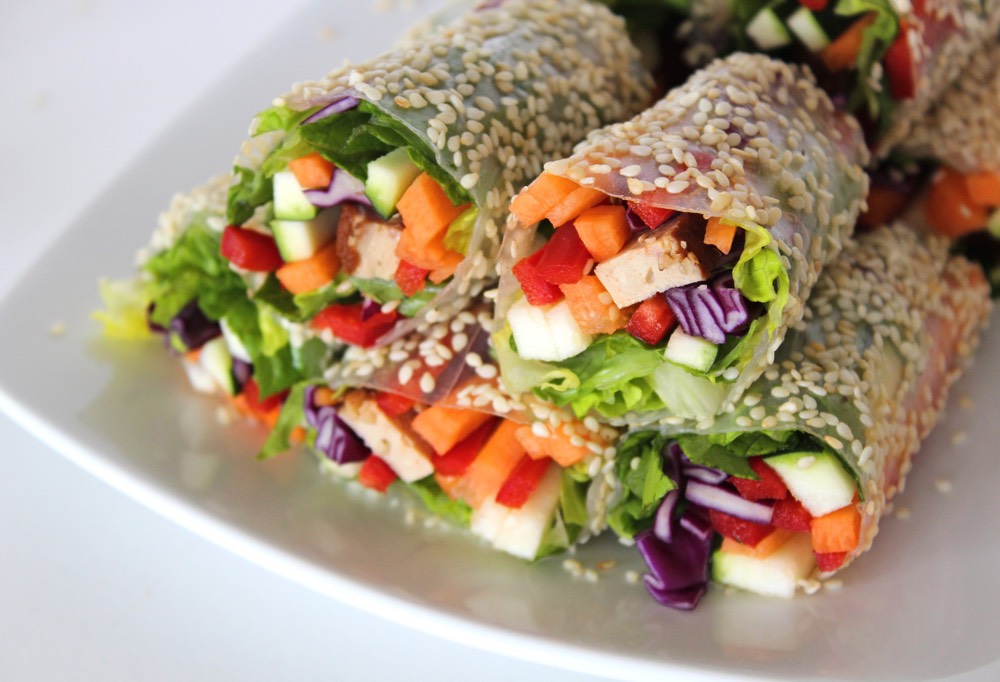
One thing that surprised me when I first made Vietnamese rolls is that they are sticky! I never saw this mentioned in recipes, so I googled it and, yes, they are meant to be sticky. Some people recommend wrapping each roll in cling film (plastic wrap) to stop them sticking together but I didn’t like the idea of the plastic waste (plus Mark was worried that he’d accidentally eat the cling film) so I found a way to get round the stickiness… roll them in toasted sesame seeds!

Making Summer Rolls

Not only do the rolls feel much nicer to hold when they’re covered in seeds, but the sesame coating actually boosts their nutritional profile too. Sesame seeds are nutritional powerhouses.

Once rolled and seeded, place the roll on a plate and repeat the process. I make eight rolls for four people, but if your rice papers are smaller than mine, you may want to roll more.

Just before serving, I cut the rolls in half. I give everyone their own little dipping bowl for the peanut sauce (so they can double dip to their heart’s content), then it’s time to tuck in!

Vietnamese Summer Rolls

Recipe Card

Vietnamese Summer Rolls (Vegan Style!) with Peanut Dipping Sauce

These Vietnamese summer rolls make a delicious light meal. Below I’ve listed the veggies that I normally use for the filling, but feel free to switch them up. The rolls are best eaten within 4 hours of being made so that they stay fresh. Any longer and the papers may start to dry out and crack.
Hands on time 35 minutes
Total Time 35 minutes
Servings 8 rolls

Ingredients
 

  • 1 large carrot finely sliced
  • 1 sweet pointed romano pepper or bell pepper deseeded and finely sliced
  • 1 small courgette zucchini, finely sliced
  • 120 g / 1½ cups red cabbage finely sliced
  • 1 romaine lettuce sliced into ribbons
  • 200 g / 7 oz smoked or marinated tofu thinly sliced
  • 8 rice papers spring roll wrappers or more, depending on their size
  • 75 g / ½ cup toasted sesame seeds

Peanut Dipping Sauce

  • 115 g / ½ cup natural smooth peanut butter
  • 2 TBSP tamari or low-sodium soy sauce
  • 1 TBSP white vinegar
  • 1 TBSP maple syrup
  • 60 ml / ¼ cup warm water
  • 2 tsp fresh ginger finely grated (or substitute with ½ tsp ground ginger)
  • Sesame seeds for garnish

Instructions
 

  • Chop the veggies and tofu into thin slices.
  • Tip the sesame seeds onto a large plate.
  • Fill a wide bowl with warm water.
  • Working with one rice paper at a time, take the paper in both hands and dip half of it in the warm water. Quickly rotate the paper for a few seconds (like turning a steering wheel) until the whole paper has been submerged in the water. Shake off the excess water, then lay the rice paper on a plastic chopping board or worktop (don’t use a wooden board as it will stick). The paper will continue to soften up as it absorbs moisture.
  • Arrange your veggies on one half of the rice paper, leaving a border either side. I use a few ribbons of lettuce, a few strands of red cabbage, then 2-4 strips each of tofu, carrot, pepper and courgette. Make sure that there are no sharp edges poking out as the rice papers are delicate and easily tear. Squash the filling together then start rolling.
  • Gently pull the rice paper over the filling. Tuck in the edges as you roll. Try to keep it as tight as you can (like you’re rolling a burrito).
  • Roll the summer roll in sesame seeds. Shake off the excess seeds and set the roll to one side. Repeat the process. I make eight rolls for four people, but if your rice papers are smaller than mine, you may want to roll more. Just before serving, cut the rolls into two.
  • To make the dipping sauce: place all the ingredients in a bowl and whisk together with a fork. Add a splash more water, if needed, to reach desired consistency. Taste test and adjust the vinegar, sweetness, ginger levels if desired. I give everyone their own little dipping bowl so they can double dip to their heart’s content! Just before serving, sprinkle on some sesame seeds for garnish.
Tried this recipe?Let us know how it was!

If you make these Vietnamese Summer Rolls, I’d love to hear your feedback and any suggestions for adaptations. Leave a comment below or tag your photos with #bitofthegoodstuff on social media – I always love to see your creations! You can also connect with me on my social media channels here: Instagram, Facebook, Pinterest.   

With love,

Sharon xx
Veggie Paella (Easy, One-Pot, Vegan)

Jump to Recipe

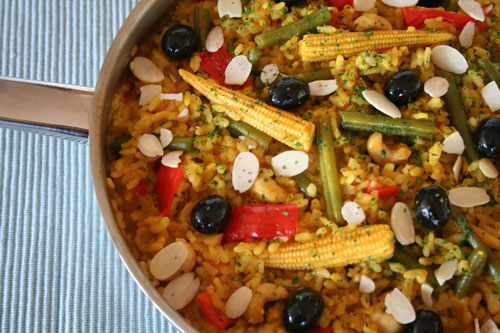
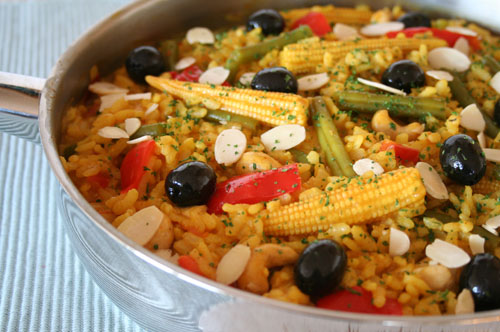
Looking for a nourishing one-pot meal that’s bursting with colour? This Spanish Veggie Paella is one of our absolute favourites! Packed with fresh vegetables, warming spices, and protein-rich nuts, it’s wholesome, satisfying, and incredibly simple to make. No need for multiple pots or fancy ingredients—just a single pan and a few pantry staples. Easy prep, easy clean-up!

When Lil’ L was four years old, we took a trip to the beautiful island of Majorca. It was there that he had his first encounter with paella—the enormous pans filled with mussels and crab claws left quite the impression! Thankfully, the restaurant also offered a veggie version, which was just as vibrant and flavourful, minus the seafood. Back home, I couldn’t wait to recreate the dish, and I was thrilled to discover how quick and easy it was to make. This version has become a firm family favourite!

Spanish Veggie Paella

Recipe Card

Spanish Veggie Paella

Spanish Veggie Paella

This Spanish-inspired vegan paella is bursting with colourful veggies, fragrant spices, and crunchy nuts. Easy to make in one pot, it’s perfect for a fuss-free midweek dinner.
Hands-on time 15 minutes
Total Time 30 minutes
Course Dinner
Cuisine Mediterranean, Plant-Based, Spanish, Vegan
Servings 4

Ingredients
 

  • 1 TBSP olive oil
  • 1 large brown onion (160g) finely diced
  • 2 tsp minced garlic
  • 1 red bell pepper (200g) deseeded and diced
  • 1 tsp ground cumin
  • 1 tsp sweet paprika
  • 300 g / 1⅓ cups Spanish paella rice
  • pinch of saffron* or substitute with ¼ tsp ground turmeric
  • 1 medium tomato (100g) diced
  • 1 litre / 4 cups hot vegetable stock (broth)
  • handful of fine green beans (about 100g) trimmed and halved
  • 6 –8 baby corn
  • 80 g / ½ cup cashews
  • salt to taste
  • ground black or cayenne pepper to taste
  • 16 black pitted olives
  • sprinkling of green nori flakes or dried parsley
  • 35 g / ⅓ cup toasted flaked almonds

Instructions
 

  • Infuse the saffron in a little hot water and prepare the vegetable stock.
  • In a large, deep-sided frying pan (skillet), gently heat the oil. Add the onion and cook until soft. Meanwhile, chop the remaining vegetables.
  • Add the garlic, bell pepper, cumin, and paprika. Cook for a minute, adding a splash of water if needed to prevent sticking.
  • Stir in the rice and saffron (or turmeric), followed by the tomato and hot stock. Bring to the boil, then reduce heat and simmer uncovered for 10 minutes.
  • Add the green beans, baby corn, and cashews. Simmer for another 10 minutes. Stir regularly towards the end of the cooking time. Add a little more stock or water, if needed.
  • While the rice is cooking, prepare any side dishes. (My family loves to serve this paella with some Crispy Garlic Bread, Toasted Tortilla Chips, or a large bowl of Crispy Kale).
  • Once the rice is tender but still has a slight bite, remove from the heat. Season to taste with salt and pepper.
  • Serve on warm plates with a scattering of olives, nori flakes or parsley, and toasted flaked almonds.

Notes

* Saffron gives paella its classic golden hue and nutty aroma, but it can be pricey. For a budget-friendly alternative, substitute with ½ tsp ground turmeric.
Storage Instructions:
Store leftovers in the fridge and eat within 24 hours. As with all rice dishes, make sure the rice is cooled quickly and refrigerated within an hour.
Keyword easy one-pot meal, easy vegan dinner, one pot vegan dinner, plant-based dinner, Spanish rice dish, vegan paella, veggie paella
Tried this recipe?Let us know how it was!

If you try this recipe, I’d love to hear how it went! Share your thoughts in the comments or tag me on social media using #bitofthegoodstuff or @goodstuffsharon. I always love seeing your creations! 💛 You can also connect with me on my social media channels here: Instagram, Facebook, Pinterest.   

Wishing you a joyful week!

With love,

Sharon xx