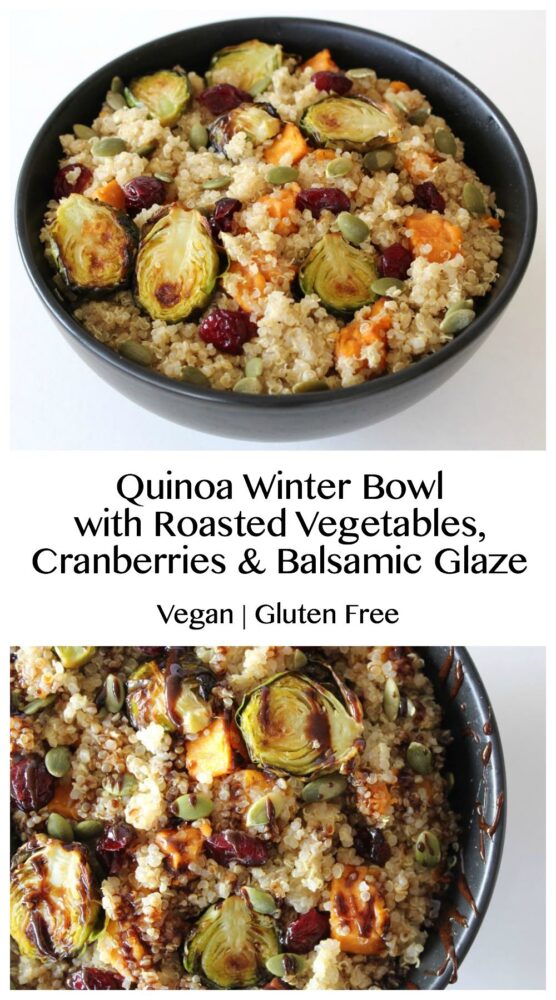
Quinoa Winter Bowl with Roasted Vegetables, Cranberries and Balsamic Glaze

Jump to Recipe

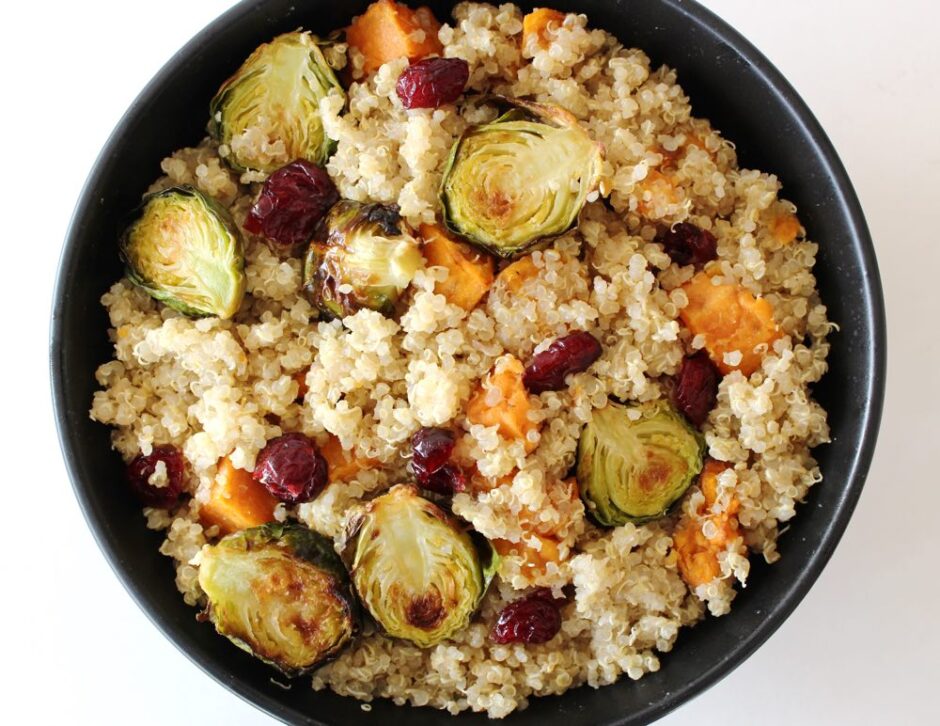
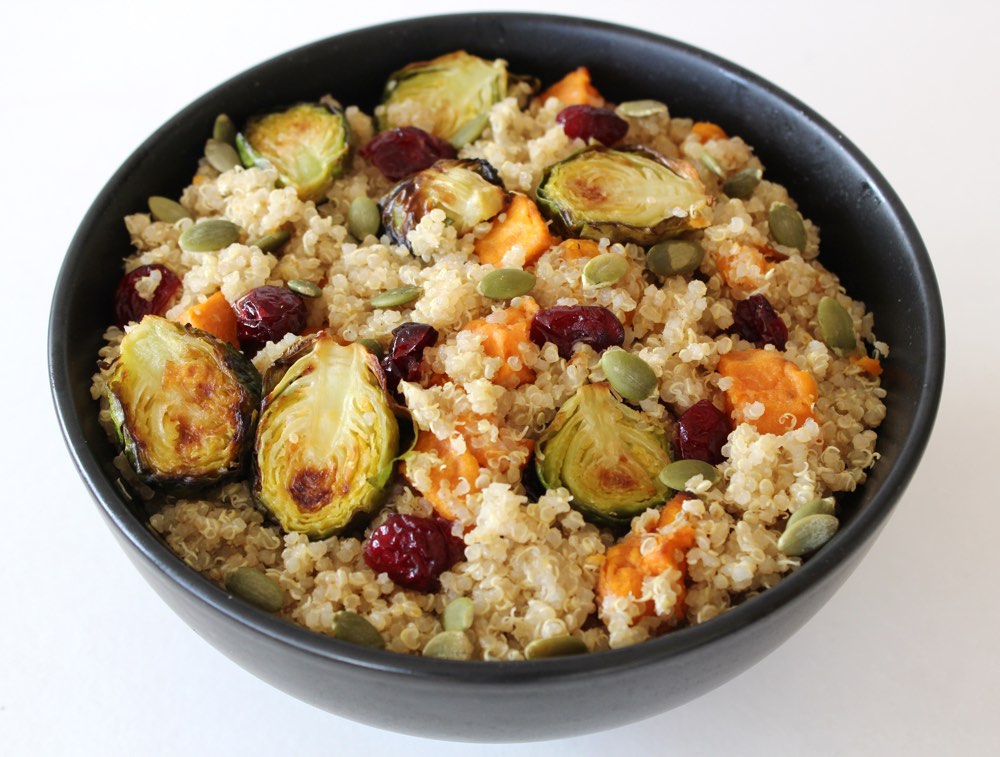
In today’s post, I’m sharing a recipe for a delicious quinoa bowl that’s just perfect for serving this time of year. It features roasted veggies, dried cranberries and crunchy pumpkin seeds, topped with a sweet balsamic glaze. We’ve been enjoying it as a light evening meal, with leftovers served for lunches later in the week. It can even be served cold, and Lucien’s been taking it to school in his lunchbox.
Quinoa Winter Bowl

I must admit that I never used to be a fan of quinoa. I found the texture and flavour of plain quinoa quite strange and not particularly appealing. However, I discovered a couple of key steps that make it much more palatable…

  1. Ensure the quinoa is thoroughly rinsed before cooking to remove the bitter saponin coating.
  2. Flavour the quinoa using seasoning or a dressing.

One of my favourite ways to flavour quinoa is using a combination of toasted sesame oil and sweet white miso. These seasonings not only add a delicious savoury flavour but they also enhance the texture of the grain.

Quinoa has lots of health benefits, so I’m happy that I found a way to really enjoy the grain, rather than just eating it because ‘it’s good for me’!
Quinoa Winter Bowl

For this Winter quinoa bowl, I use a combination of roasted sweet potato and brussels sprouts. This dish has been a great way to entice Lucien to eat more sprouts. He won’t touch the boiled or steamed varieties, but he’ll happily eat pan-fried or roasted sprouts. One of his favourite sprout recipes is the Brussels Sprout Hash with Balsamic Red Onions & Pecans but I think this one is a close second. Of course, if you’re not a fan of brussels sprouts in any shape or form, feel free to leave them out or substitute with another roasted vegetable.

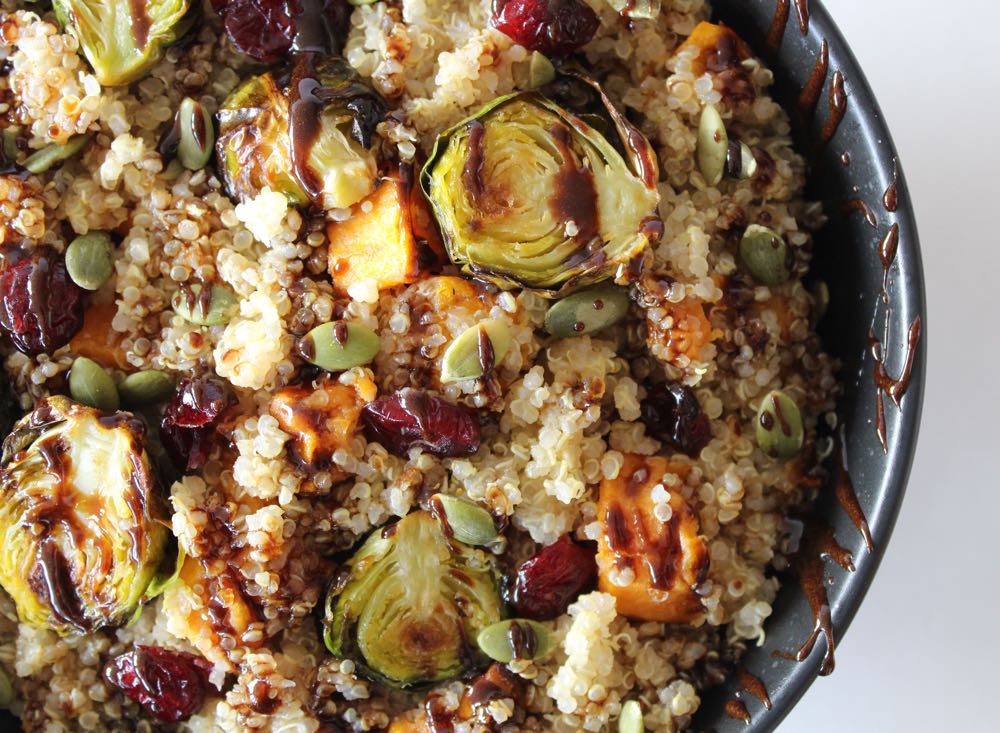
This bowl is super easy to prepare. While the veggies are roasting, I cook the quinoa and prepare the Balsamic glaze (if using a home-made one rather than shop-bought). Once everything is cooked through, it’s simply a case of mixing the quinoa, veggies, cranberries and pumpkin seeds together.
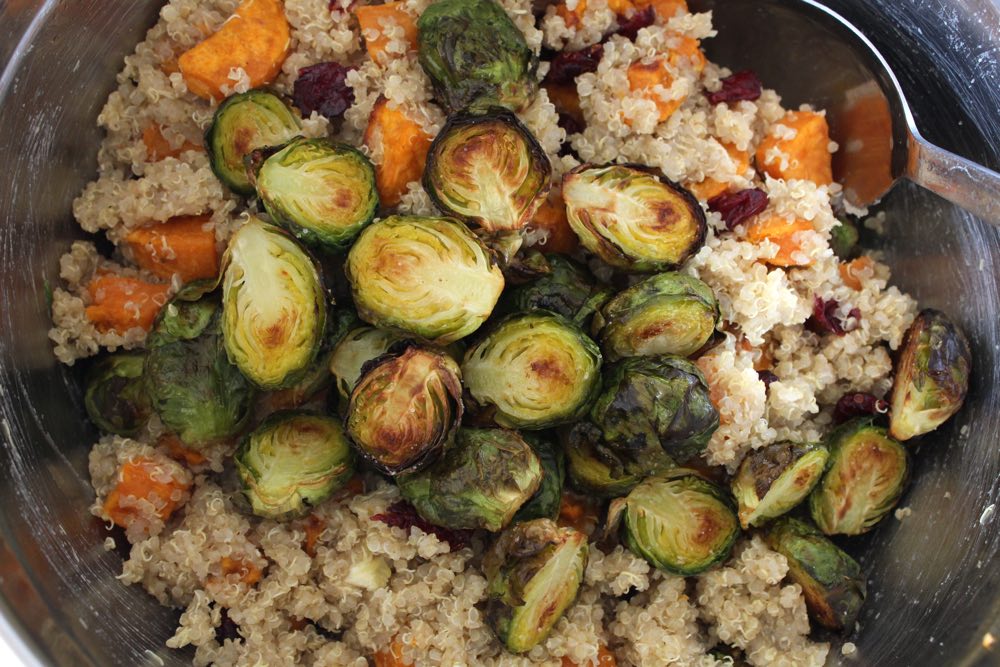
Quinoa Winter Bowl

I recently discovered that pumpkin seeds can vary enormously in flavour, size and colour. For this recipe, I used Suma’s organic pumpkin seeds which are smaller, lighter in colour and far tastier than the ones I’d previously bought from a big supermarket. I didn’t need to toast the Suma seeds to improve the flavour as they were tasty raw.
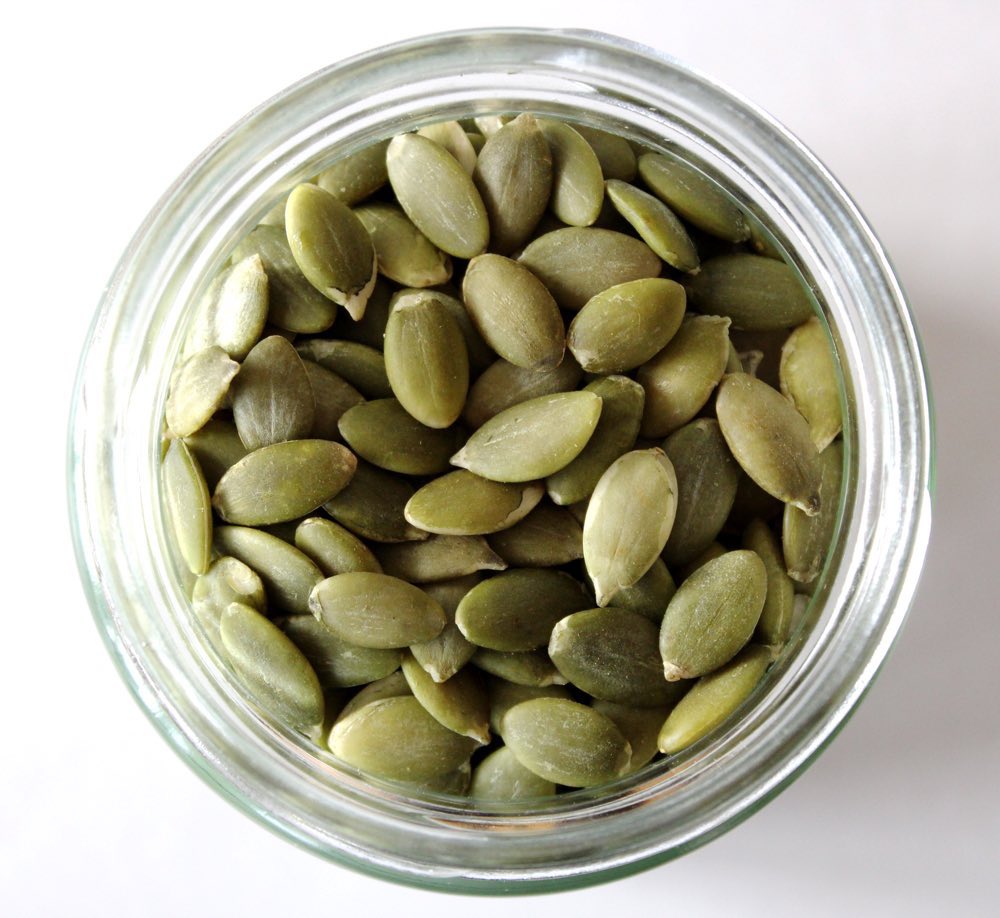
Pumpkin Seeds

Just before serving, the bowl is dressed with a drizzle of balsamic glaze, which adds a beautifully rich, sweet and tangy flavour. Balsamic glaze is widely available in UK food shops, however if you can’t get your hands on some, it’s easy to make your own. Check out the tips in the recipe below to see how I do it.

This bowl is not only tasty, but it’s packed full of nutrient-rich ingredients, which help to keep us in good health. In particular, this dish is a good source of…
– Protein, Complex Carbohydrates and Fibre
– Vitamins A, B, C & K
– Minerals Zinc, Magnesium, Copper, Manganese, Potassium and Iron
– Antioxidant Phytonutrients, including Glucosinolates, which help boost the immune system and protect against disease

Recipe Card
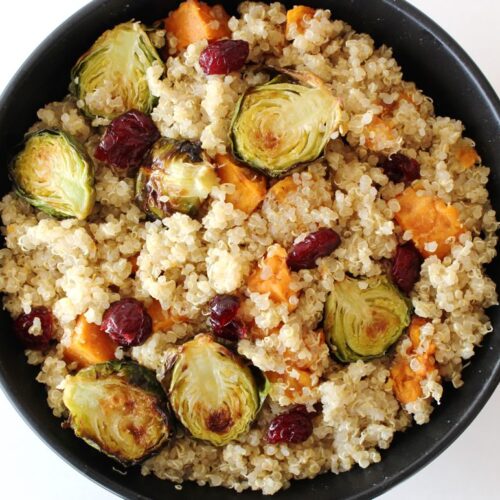
Quinoa Winter Bowl

Quinoa Winter Bowl with Roasted Vegetables, Cranberries and Balsamic Glaze

This Quinoa Winter Bowl is simple to prepare and is perfect for serving as a light evening meal or lunch. I find it makes a great ‘make ahead’ option and can be warmed through in a frying pan before serving. It can also be served cold and any leftovers make a great addition to lunchboxes.
Hands on time 20 minutes
Total Time 35 minutes
Course Dinner, Lunch
Servings 4

Ingredients
 

  • 500 g / 3 cups sweet potato peeled and diced into small pieces (about 2cm x 2cm x 1.5cm / ¾” x ¾” x ½”))
  • 2 TBSP olive oil divided
  • 16-20 brussels sprouts trimmed and halved lengthways
  • 300 g / 1½ cups quinoa
  • 720 ml / 3 cups water
  • 1 TBSP toasted sesame oil
  • 1-2 TBSP sweet white miso (I used Clearspring Sweet White Miso)
  • 55 g / ⅓ cup dried cranberries
  • 38 g / ¼ cup pumpkin seeds raw or toasted
  • Balsamic glaze for drizzling (See Note 2)
  • Salt and freshly ground black pepper

Instructions
 

  • Pre-heat the oven to 210C (190C fan) / 410F. Line two baking trays with non-stick baking paper.
  • Place the diced sweet potato in a large mixing bowl. Drizzle in 1 TBSP olive oil and stir until thoroughly coated. Transfer the potato to a prepared baking tray and distribute in a single layer. Season with salt. Roast for 30 minutes, or until cooked through.
  • Tip the brussels sprouts into the mixing bowl. Drizzle in 1 TBSP olive oil and stir through. Transfer the sprouts to the second baking tray. Arrange the sprouts cut side facing down. Season with salt (and black pepper, if desired).
  • When the sweet potatoes have roasted for 10 minutes, add the sprouts to the oven. Roast for 15 minutes, then flip them over and roast for a further 5 minutes, or until browned on both sides.
  • While the veggies are roasting, prepare the quinoa. First, rinse the quinoa (see Tip 1 below), then thoroughly drain and transfer to a saucepan. Add 3 cups water. Bring to the boil, then reduce the heat to low, cover with a lid and simmer for 15 minutes, or until the water has been absorbed and the quinoa is fluffy. Remove from the heat and leave to rest, covered with a lid, for 5 minutes. Drizzle in 2 tsp toasted sesame oil and stir through with a fork. Add 1-2 TBSP white miso and stir through until the quinoa is coated. Taste test and add more sesame oil/white miso if desired.
  • Tip the quinoa into the mixing bowl. Add the roasted veggies, cranberries and pumpkin seeds, and stir through. Transfer to bowls. Just before serving, add a drizzle of balsamic glaze.
  • This dish will keep for up to five days in the refrigerator.

Notes

Tip 1: To rinse quinoa, place it in a fine mesh sieve and rinse under cold running water, agitating it with your fingers for a couple of minutes.
Tip 2: If there is no shop-bought balsamic glaze on hand, I make my own by simmering ⅓ cup balsamic vinegar and 1 TBSP coconut sugar in a small pan, stirring from time to time. As soon as it starts to thicken, I remove it from the heat (it continues to thicken as it cools). I find this home-made version is best used immediately.
Keyword Dairy-Free, Easy Vegan Meals, Gluten-Free, Lunchbox Ideas, Quinoa, Vegan, Vegan Dinners, Vegan Lunch
Tried this recipe?Let us know how it was!

Pin for later ⬇️

Quinoa Winter Bowl

This recipe is being shared with the Suma Blogger’s Network. Big thank you to Suma for supplying the following products used in this recipe…

– Suma Organic Quinoa
– Suma Organic Pumpkin Seeds
– Clearspring Sweet White Miso
– Meridian Organic Toasted Sesame Oil
– Aspall Organic Balsamic Vinegar

If you make this Quinoa Winter Bowl, I’d love to hear your feedback and any suggestions for adaptations! Tag your photos with #bitofthegoodstuff on social media – I always love to see your creations! You can also connect with me on my social media channels here: Instagram, Facebook, Pinterest.   

With love,

Sharon xx
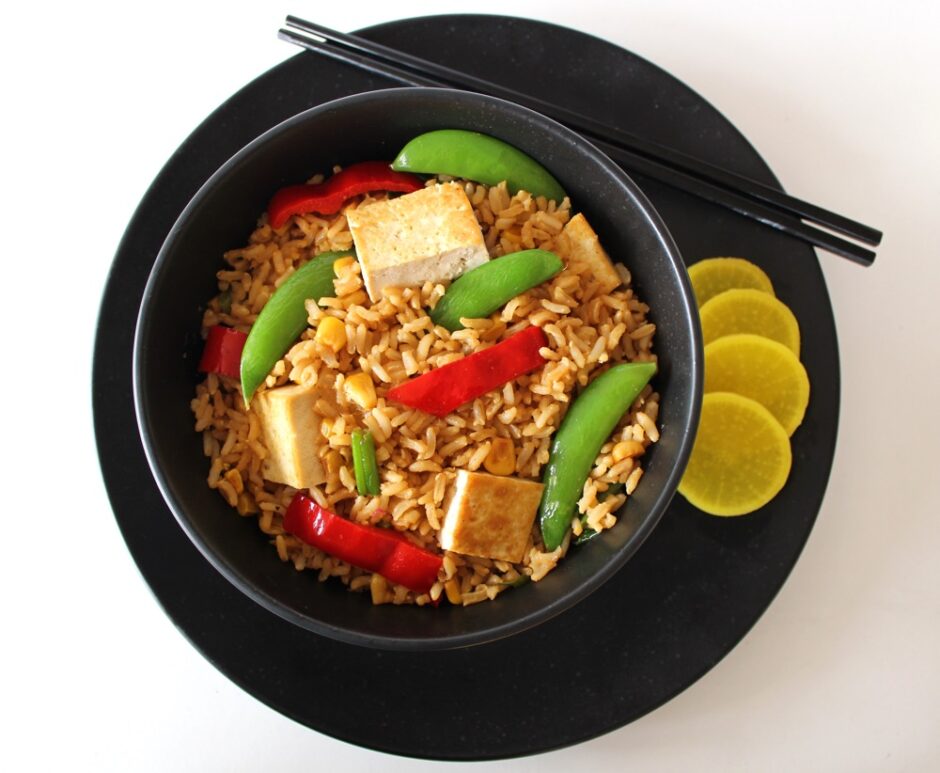
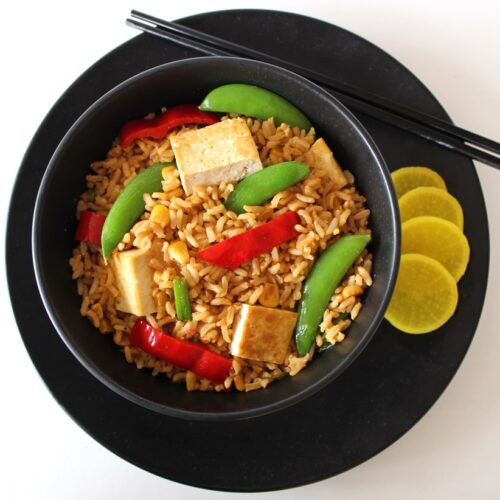
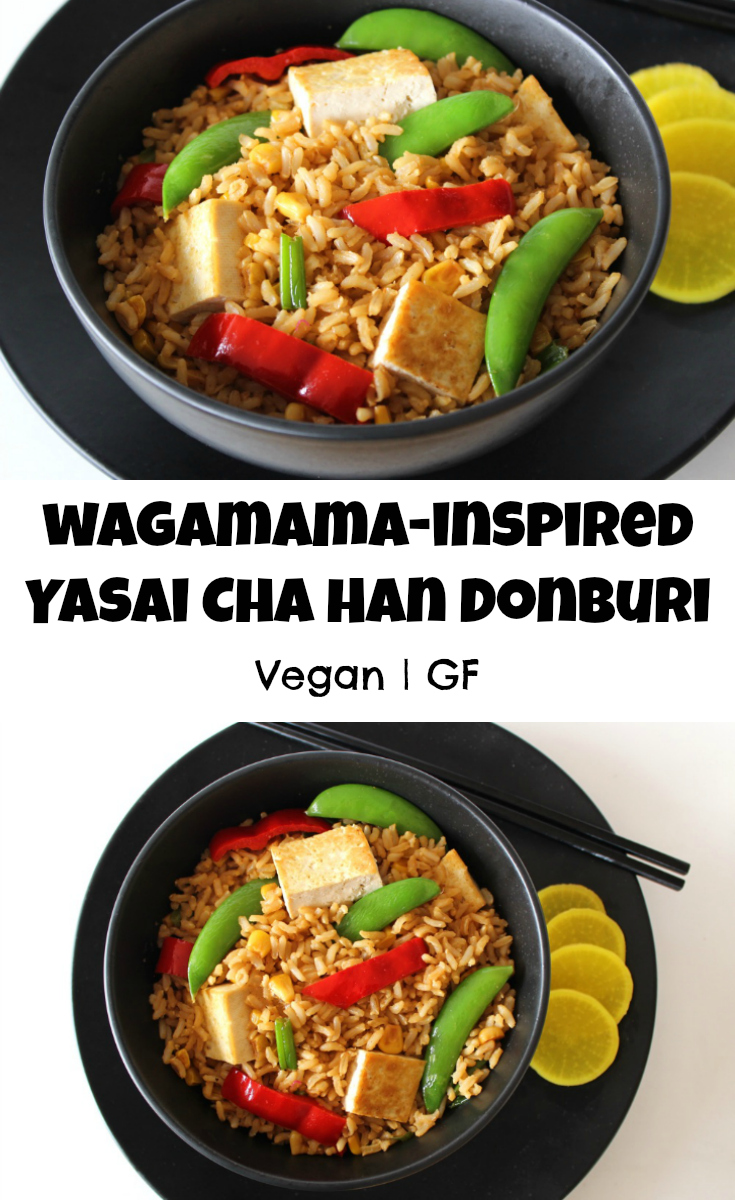
Wagamama-Inspired Yasai Cha Han Donburi (Brown Rice Bowl with Stir-Fried Veggies and Tofu)

Jump to Recipe

In early Summer, my family were eagerly anticipating a trip to Wagamamas. On the way there, we psyched each other up, talking about how much we were looking forward to tucking into our favourite Wagamama dish – the Yasai Cha Han Donburi. Upon arrival, the waiter showed us to our seats and handed us the menu. Our eyes immediately moved to the spot where the dish is usually listed, but it wasn’t there. We scanned both sides of the menu but it was nowhere to be seen. We called over the waiter and he explained that they had a new summer menu. Sadly, the Yasai Cha Han Donburi hadn’t made the cut.

Has that ever happened to you? Where you’re looking forward to tucking into your favourite dish at a restaurant, or you specifically go to that restaurant because you’re craving a dish… only to find that it’s been taken off the menu. It’s happened to my family a few times and it’s always such a bummer.

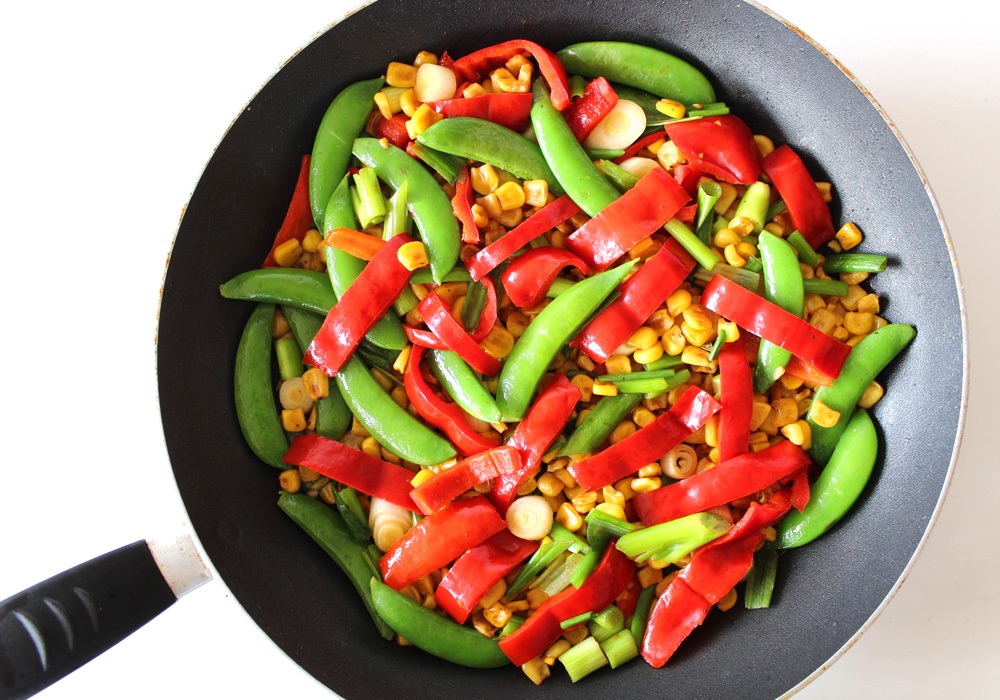
Stir Fry Veg

Well this time, I decided to look on the bright side. I’d been meaning to try my hand at making the Yasai Cha Han Donburi at home for a while, and now was the perfect opportunity. I could still remember what the bowl tasted like and its main components, so I set to work re-creating it.

One of my favourite parts of the bowl is the flavouring added to the rice, so I really wanted to nail this part. I chose to use two of my favourite pantry staples as the basis of the dressing – Clearspring Organic Tamari Sauce and Meridian Organic Toasted Sesame Oil. The tamari provides the ‘umami’ flavour, while the toasted sesame oil add a touch of smokiness. I then added a tablespoon each of maple syrup and rice vinegar for some ‘sweet ’n’ sour’ flavour, and finished it off with a sprinkling of garlic granules. I was extremely happy with the way the dressing turned out. For me, it’s the perfect compliment to a Japanese-inspired rice bowl.

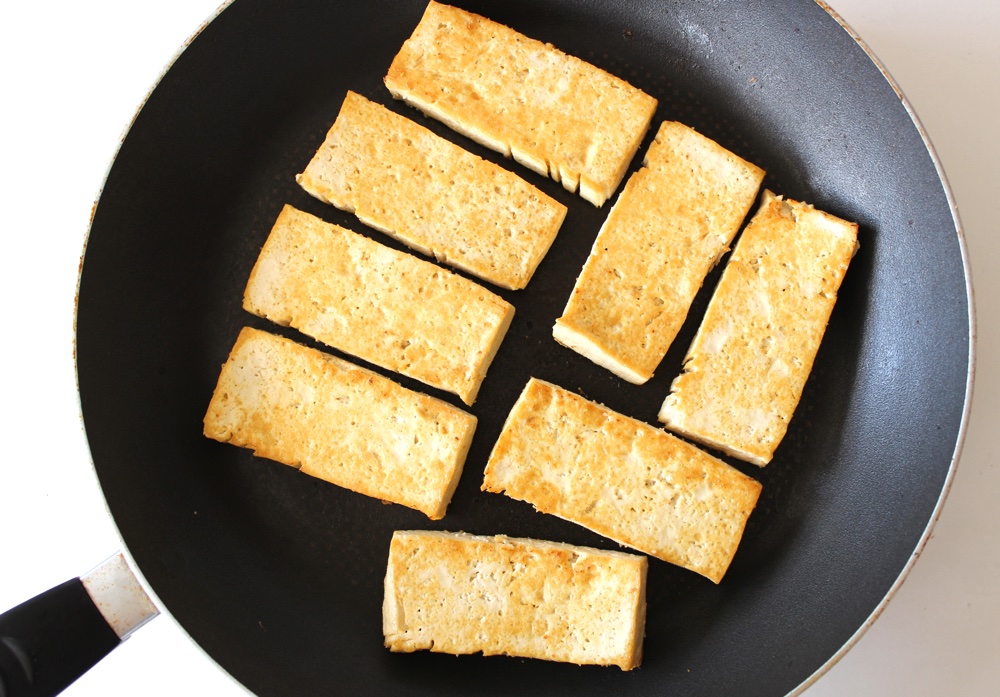
For this dish, I prefer to use original tofu, which I press for 30 minutes then pan-fry. If you’ve not cooked tofu from scratch before, rest assured that it’s not difficult at all. I’ve given some tips in the recipe below of how I do it.

Pan Fried Tofu

I absolutely adore this rice bowl, and it’s been a huge hit with the rest of the family too. I’ve made it multiple times these past couple of months and we never tire of it. The flavour is as good (if not better, in my humble opinion hehe) than the Wagamama version. It’s far cheaper too!

Recipe Card

Yasai Cha Han

Wagamama-Inspired Yasai Cha Han Donburi (Brown Rice Bowl with Stir-Fried Veggies and Tofu)

This recipe was inspired by Wagamama’s Yasai Cha Han Donburi which, at the time of writing, has sadly been taken off their menu. No matter though, as this version is just as delicious and a fraction of the cost.
Hands on time 30 minutes
Total Time 1 hour 10 minutes
Course Dinner
Cuisine Japanese
Servings 3

Ingredients
 

  • 1 block firm tofu (about 400g / 14 oz)
  • 300 g / 1½ cups brown rice rinsed and drained
  • 750 ml / 3 cups water
  • ½-1 TBSP toasted sesame oil
  • ¼ tsp garlic granules or garlic powder
  • pinch of salt
  • 1 medium onion sliced
  • 175 g / 1 cup sweetcorn (I use canned)
  • 1 sweet romano pepper or red bell pepper
  • handful of sugar snap peas

Dressing

  • 3 TBSP tamari or reduced-salt soy sauce
  • 1 TBSP toasted sesame oil
  • 1 TBSP rice vinegar or substitute with another white vinegar
  • 1 TBSP maple syrup
  • ½ tsp garlic granules or powder
  • Slices of pickled radish for garnish (optional)

Instructions
 

  • Press the tofu for 30 minutes (See Note 1).
  • Cook the rice (see Note 2).
  • Prepare the dressing: Place all the dressing ingredients in a small bowl and whisk together with a fork.
  • Once pressed, slice the tofu into eight long rectangles. (I find it far easier and quicker to pan-fry and flip eight pieces of tofu rather than a panful of tofu cubes).
  • Heat ½ TBSP sesame oil in a large non-stick frying pan (skillet) on medium-high heat. Once the oil is hot, place the tofu in the pan (be careful as the oil may spit). Flip the tofu over, so that both sides are coated in oil. Sprinkle the garlic granules and a pinch of salt over the tofu. Leave to cook until golden brown on the underside, then flip over and cook until browned on the second side. Transfer to a plate and slice into bite-size pieces. Place in a warm oven while you prepare the veggies.
  • Add a splash more oil to the pan, if needed. Add the onion and stir fry on medium heat for 2 minutes. Add the sweetcorn and continue stir frying until it just starts to brown. Finally, add the sweet romano (or bell) pepper and sugar snap peas to the pan and stir fry until warmed through. Stir in 1 TBSP of the dressing and set aside.
  • Once the rice is ready, tip into a large bowl. Drizzle in the remaining dressing and stir through until thoroughly coated. Add the veggies and tofu and stir through. Divide between four bowls. Garnish with picked radish (if desired) and serve.
  • Any leftovers can be stored in the fridge for 24 hours. As with any rice dish, make sure the leftover rice is cooled quickly and refrigerated within an hour.

Notes

Note 1: Pressing tofu: Here’s my preferred way to do it (since I don’t have a tofu press): Slice the block of tofu through the middle into two equal halves. Place the tofu on a rimmed baking tray. Place a chopping board on top of the tofu, followed by a heavy object to weigh it down. The water collects in a pool round the tofu. After 30 minutes, drain off the liquid. Give the tofu a quick pat with kitchen paper to soak up any residual liquid, then it’s good to go.
Note 2: Cooking brown rice: My preferred way to do this is using the absorption method. Here’s how I do it: Place the rinsed rice in a large, heavy-bottomed saucepan along with the water. Bring to the boil, then reduce the heat and simmer uncovered for 10 minutes. Reduce the heat to very low, cover with a tight-fitting lid and cook for a further 20 minutes. When air pockets have appeared in the rice, it’s ready. Remove from the heat and leave to rest for 5 minutes, covered with the lid.
Keyword Dairy-Free, Easy Vegan Meals, Rice, Tofu, Vegan Dinners
Tried this recipe?Let us know how it was!

Pin for later ⬇️

Yasai Cha Han Donburi

Big thank you to Suma for supplying me with the gorgeous ingredients for this bowl. It’s hugely appreciated!

Much love,

Sharon xx

SaveSave

SaveSave

SaveSave

SaveSave

Chestnut and Mushroom Bourguignon Pie (Vegan with Gluten Free Option)

Jump to Recipe

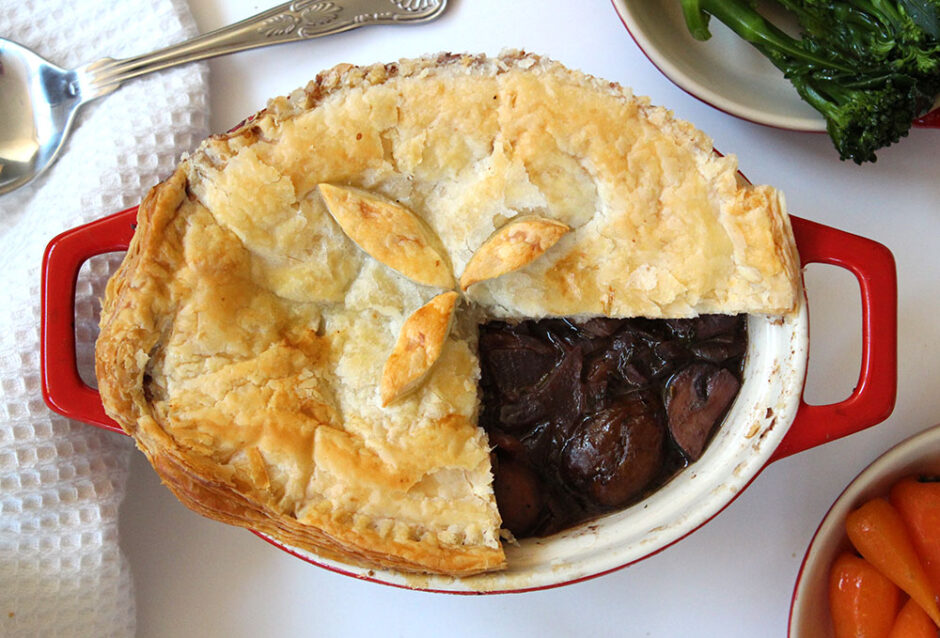
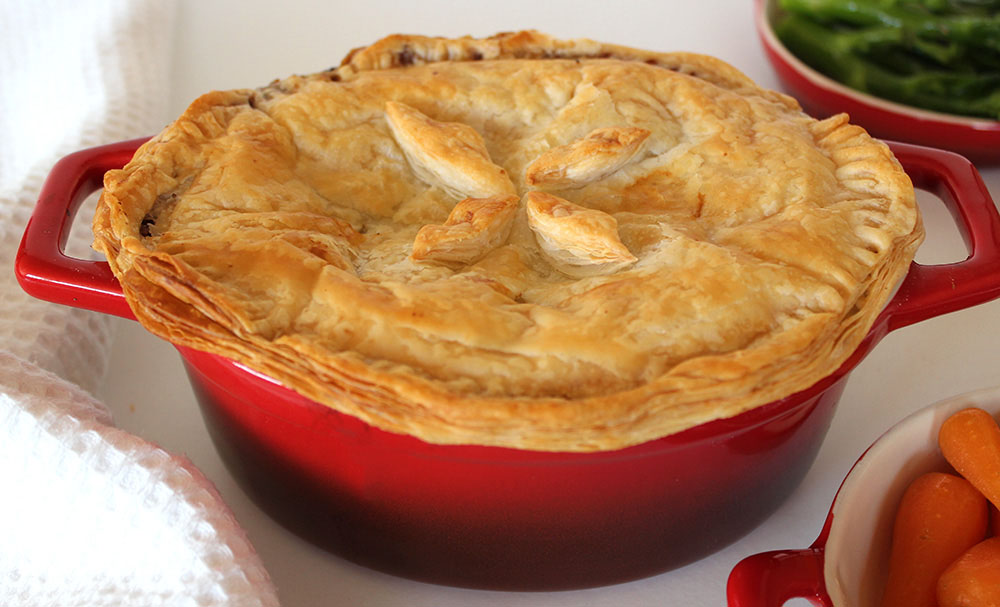
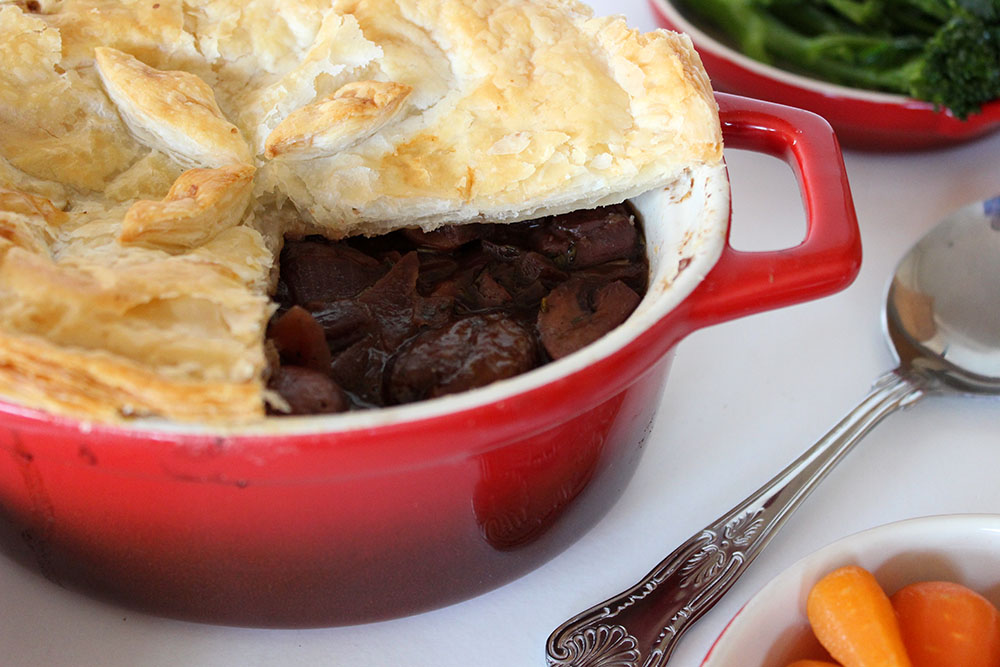
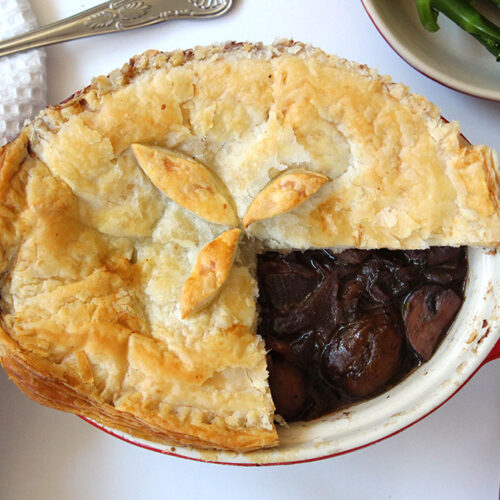
In today’s post I’m sharing a recipe for a delicious pie that’s just perfect for serving in the cold weather months. It’s an adaptation of a recipe published by the Vegetarian Society back in 1995. We first tried this pie last month and it was a big hit with the family. Since then, we’ve already eaten it a couple more times as special weekend dinners. While it looks pretty impressive, it’s really easy to make and requires less than 30 minutes hands on time.

The original recipe states that it serves 4-6 people but we must be greedy guzzlers as we devoured the whole pie between the three of us. When I made it again, I increased the filling quantities just to make sure there was enough for 4.

Vegan Chestnut Bourguignonne Pie

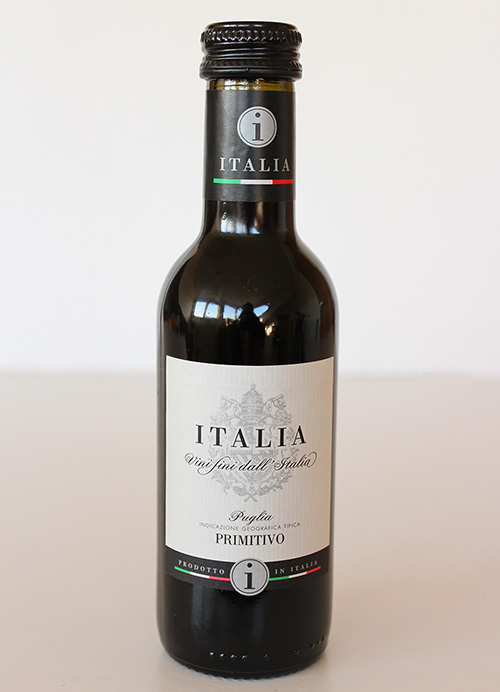
The base of the filling is a rich gravy, flavoured with red wine, stock, herbs, mustard and soy sauce. Since I don’t drink wine, I buy one of these cute 500ml bottles.

Red Wine

As you may already know, not all wines are vegan, or even vegetarian. When filtering wine (or beer) some companies use products such as isinglass (from fish bladders), gelatin, egg whites or sea shells as filtering agents. Companies can also add products such as dairy and honey into the final recipe. Fortunately there are plenty of vegan wines and beers available in our shops.

UK supermarkets are getting better at labelling their wines vegetarian or vegan. At the present time, the Waitrose, Sainsbury’s and Ocado websites are the easiest to use, as they state if a wine is suitable for vegetarians and/or vegans in their lifestyle/dietary choice tabs. There is also Barnivore, an online directory which lists all vegan beers, wines and spirits.

Vegan Chestnut Bourguignonne Pie

The original VegSoc recipe calls for 250g chestnuts, however the most common brand of cooked chestnuts in the UK (Merchant Gourmet) comes in a 187g pack. Since chestnuts are quite expensive, rather than buying a second pack and only using a portion of it, I reduced the quantity of chestnuts and bumped up the volume of chestnut mushrooms instead. I also added some thinly sliced carrot for an extra dimension of texture and flavour.

If you’re gluten-free, Jus-Rol are now selling a GF Vegan puff pastry sheet. I spotted it for sale in Tesco and Ocado. I haven’t tried it myself yet but, if you have, I’d love to hear what you think of it.

Recipe Card

Vegan Chestnut Bourguignonne Pie

Chestnut and Mushroom Bourguignon Pie (Vegan with Gluten Free Option)

This pie is perfect for serving in the cold weather months. It makes a lovely special weekend dinner. It’s easy to make but sure to impress your dinner guests.
Hands-on time 25 minutes
Total Time 1 hour 10 minutes
Course Dinner
Servings 4

Ingredients
 

  • 25 g / 1½ TBSP dairy-free spread/vegan butter
  • 3 small red onions (about 250g) thinly sliced
  • 250 g / 3 cups chestnut (or crimini) mushrooms quartered or halved (depending on size)
  • 180 g / 1 heaping cup pre-cooked chestnuts halved
  • 187 ml / ¾ cup vegan red wine
  • 300 ml vegetable stock (broth)
  • 2 bay leaves
  • 1 tsp dried sage
  • 1 tsp dried thyme
  • ½ tsp dried parsley
  • 2 tsp Dijon mustard
  • 1 TBSP tamari or reduced-salt soy sauce
  • freshly ground black pepper to taste
  • 1 puff pastry sheet (about 300g / 10½ oz) thawed if frozen (use GF puff pastry, if needed)
  • soya milk for glazing

Instructions
 

  • Pre-heat the oven to 220C (200C fan) / 425 F.
  • Melt the dairy-free spread/butter in a large frying pan (skillet) and cook the onions on low/medium heat until lightly browned.
  • Add the mushrooms and cook for a further 4 minutes.
  • Add the chestnuts, red wine, stock (broth), bay leaves, dried herbs, mustard and tamari/soy sauce.
  • Bring to the boil, then reduce the heat and simmer for 20 minutes, or until the liquid has reduced somewhat.
  • Remove the bay leaves. Add black pepper to taste.
  • Spoon the mixture into a large pie dish or four individual/mini pie dishes.
  • Place the pastry on top. Leave a good margin hanging over the sides as the pastry will shrink as it cooks. Use a fork to press the pastry onto the rim of the dish to seal it. Use any leftover pastry to cut out some leaf shapes and arrange on top of the pie. Brush the pastry with soya milk. Pierce a couple of holes in the pastry to allow the steam to escape.
  • Bake for about 20 minutes or until golden.
  • If baked in a large pie dish, I recommend removing the pastry top, placing on a chopping board and slicing into four equal pieces. Spoon the filling onto plates and arrange the pastry on top. This way, you can cut the pastry neatly without it pushing down into the filling and becoming soggy.
  • Serve the pie with one or two veggie side dishes. We love to serve it with steamed baby carrots and steamed tenderstem broccoli tossed in a little soy sauce, or some sweet potato wedges. I also think potato mash or butter bean puree could work well with it.

Notes

The pie filling can easily be made in advance. Half an hour before you plan to serve, simply warm through, add the pastry topping and bake for 20 minutes.
The pie can also be re-heated. I’ve found the quickest way to do this is to remove the pastry lid and bake this on a tray in the oven for 15-20 minutes (that way it crisps up again). Meanwhile, gently heat through the filling in a saucepan covered with a lid.
The pie will keep for a couple of days in the refrigerator.
Recipe adapted from this Vegetarian Society recipe 
Keyword Dairy-Free, Egg-Free, Gluten-Free Option, Vegan Dinners, Vegan Pie
Tried this recipe?Let us know how it was!

If you make this Vegan Chestnut and Mushroom Bourguignon Pie, I’d love to hear your feedback and any suggestions for adaptations! Tag your photos with #bitofthegoodstuff on social media – I always love to see your creations! You can also connect with me on my social media channels here: Instagram, Facebook, Pinterest.   

With love,

Sharon xx
Vietnamese Summer Rolls (Vegan Style!) with Peanut Dipping Sauce + Step-by-Step Guide on How to Roll Rice Papers

Jump to Recipe

I absolutely love this time of year, with the trees full of blossom and the wisteria out in flower. Not only does it look stunning, but it smells glorious too! Here in Bath, the weather is finally starting to warm up and we’ve actually managed a few meals in the garden this past week. Our dinners have definitely shifted to lighter dishes, and I’m looking forward to sharing some of our favourites over the coming weeks.

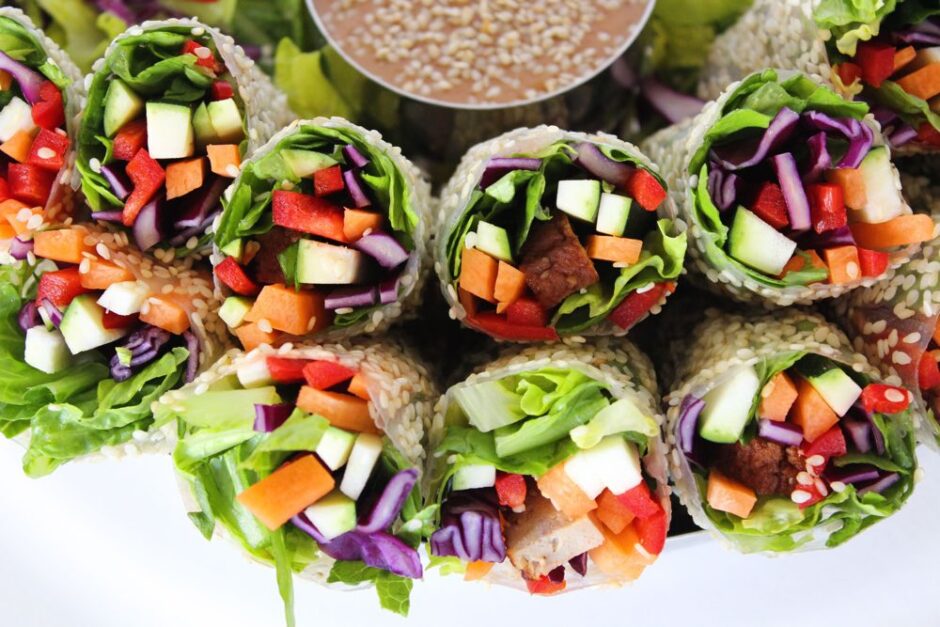
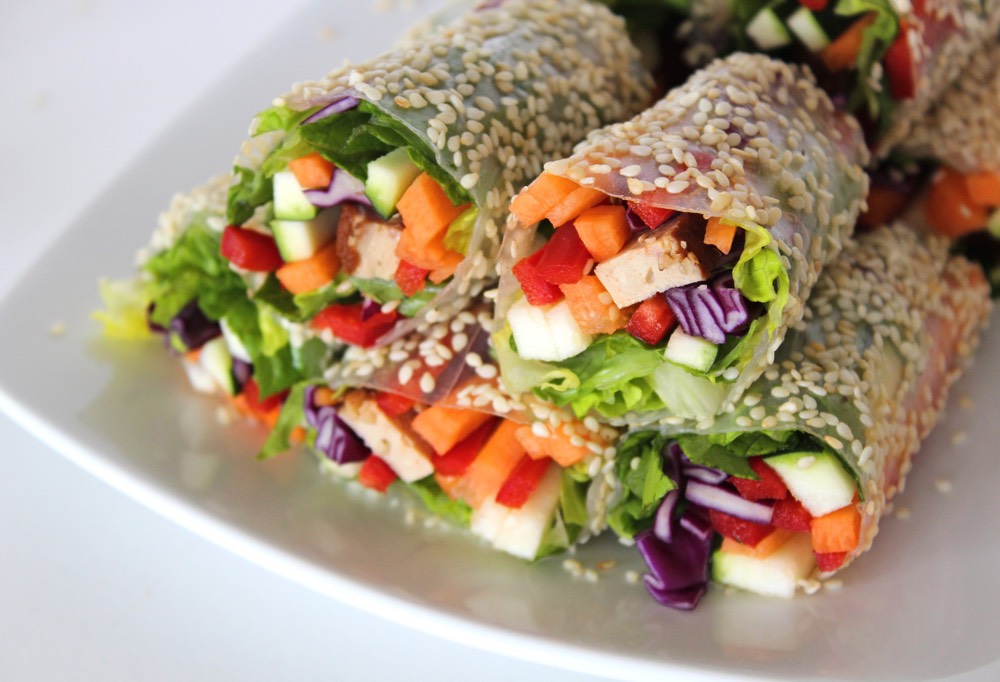
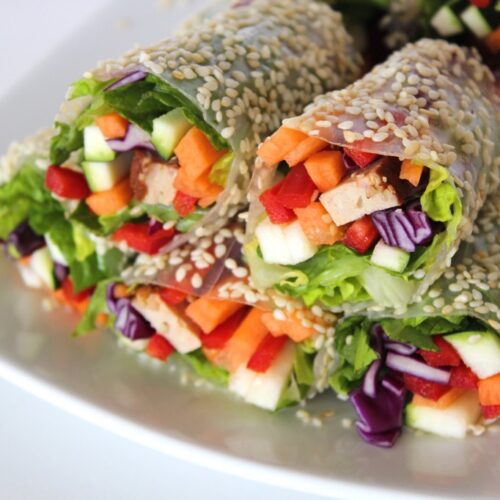
The rolls are a vegan twist on the classic Vietnamese summer roll. Instead of meat or prawns, the rolls are filled with a rainbow of fresh veggies, making them both visually beautiful and delicious.

Vietnamese Summer Rolls

My family loves Vietnamese summer rolls! We typically eat them as a light evening meal, enjoyed out in the garden, but they’re also great for buffets and picnics. We like to add strips of smoked or marinated tofu into the rolls for protein. When accompanied with a peanut dipping sauce, they’re surprisingly filling!

Have you ever tried making rice paper rolls before? I find that they fall into the category of ‘easy when you know how’. The first time I tried to make them, I got myself in a real tangle with the rice paper. I soaked it for too long then it folded in on itself and was beyond saving.

I was determined not to be defeated by a rice paper though, so I did some research and discovered that with a couple of easy steps, rolling is a cinch. I found this 37 second YouTube tutorial especially helpful.

I’ve rolled countless rolls now, and my only failure was that initial one. My rolls aren’t very neat (neatness isn’t a forte of mine!) but the rolls work. They taste good. And most importantly, Lil’ L loves them. I’ll keep working on the neatness.

Learning from my past mistakes, I thought I’d put together a step-by-step guide on how to successfully roll rice papers. Even if it helps one person out, I’ll be more than delighted.

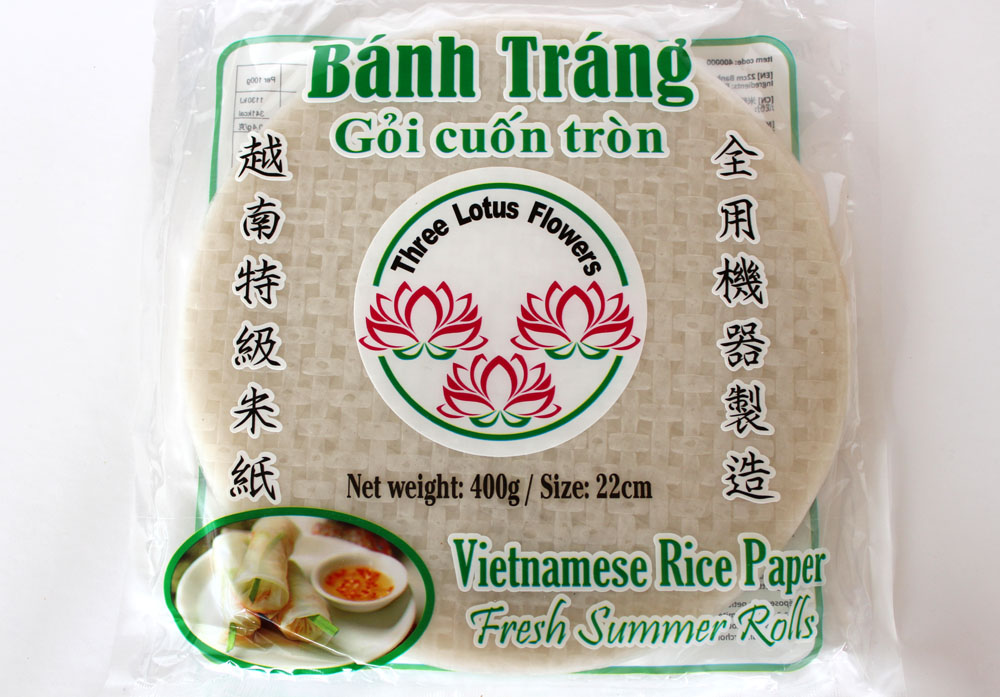
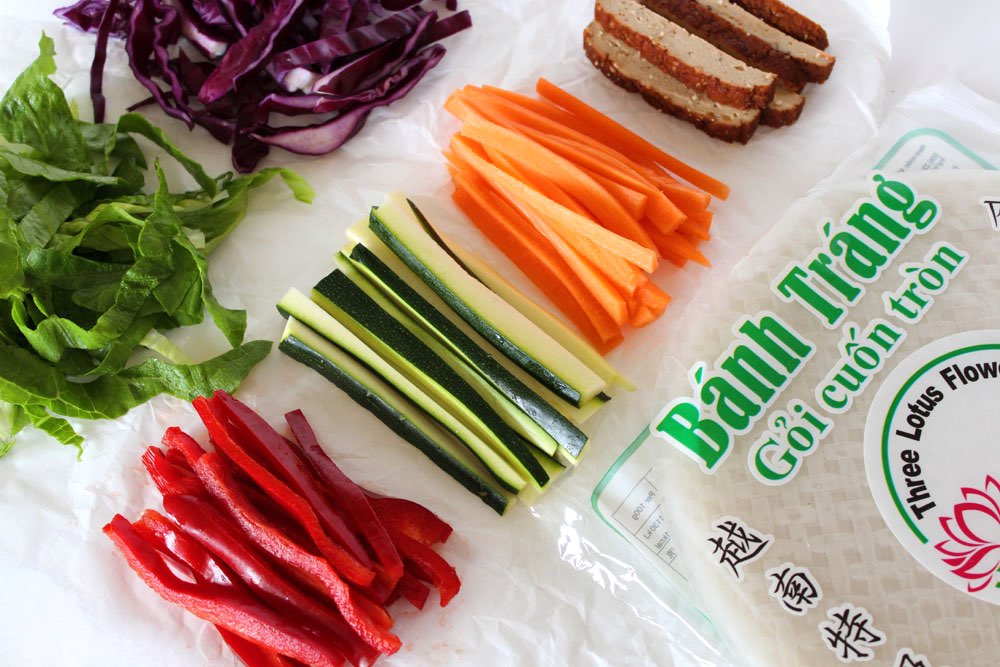
So firstly, we need some rice papers…

Rice Papers

You’ll find them widely available in oriental supermarkets. I buy Vietnamese Banh Trang from Hai Na Oriental Supermarket in Union Street in Bath. You get about 45 papers (22cm / 8½ inches in diameter) in a pack for £1.89, which is great value. Waitrose and Ocado also sell Blue Dragon Spring Roll Wrappers.

Summer Roll filling

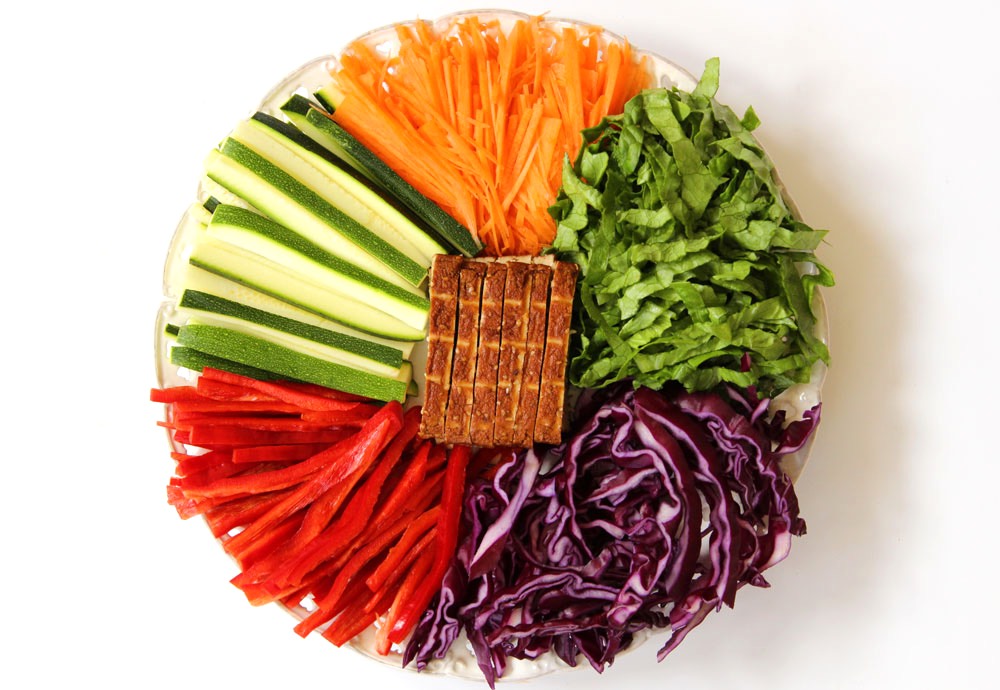
It’s important to prep all the ingredients before you start rolling (known as ‘mise-en-place’ if you happen to be French… or a chef!) I typically use a large carrot, small courgette (zucchini), sweet pointed romano pepper, some red cabbage and a romaine lettuce. For a protein kick, I add in strips of organic smoked or marinated tofu.

Summer Rolls Mise en Place

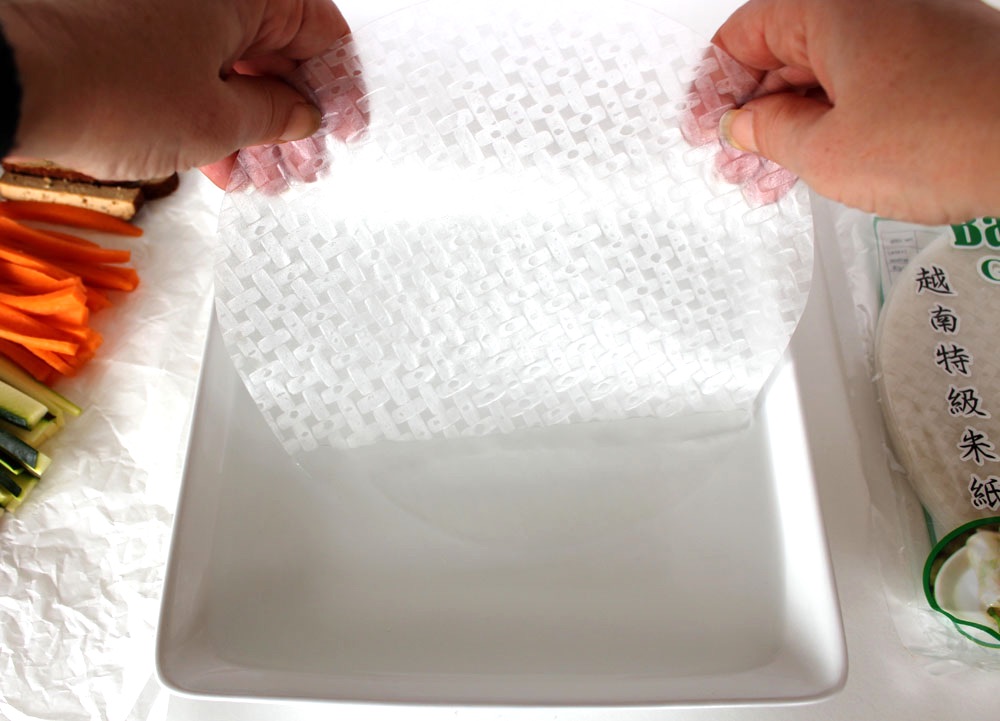
Once everything is ready, prepare a bowl of warm water. It doesn’t matter what kind of container you use, as long as it’s big enough to fit your rice paper.

Want to know something funny? To take the shot below I ended up pressing the shutter with my nose!! How ridiculous is that? You only dip for a second so no time to set up the timer!

Making Summer Rolls

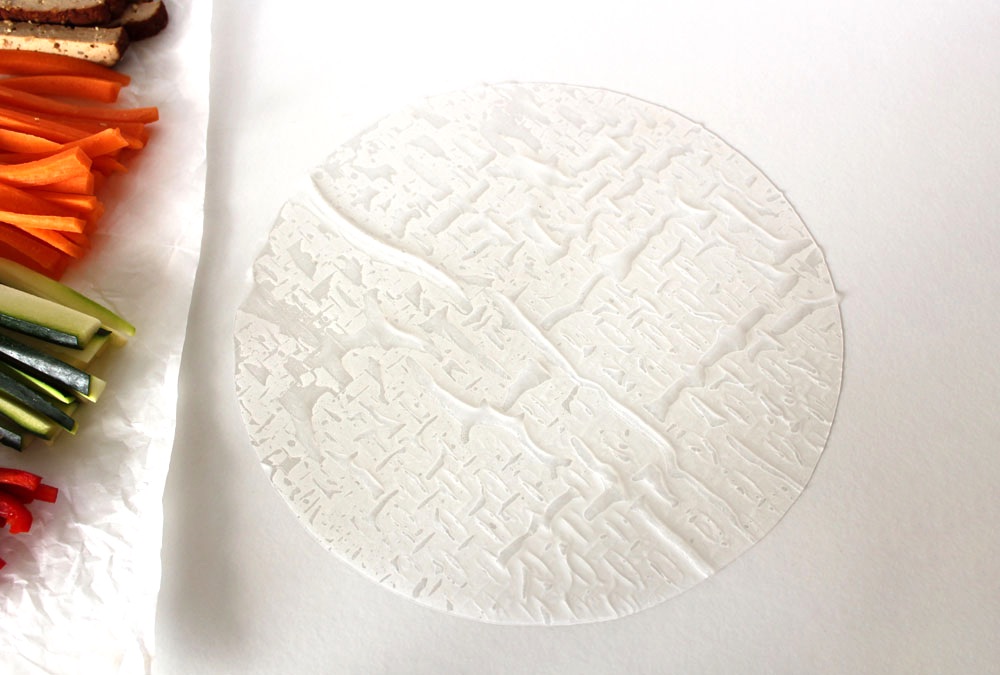
Anyway, back to the guide… Take a rice paper in both hands and dip half of it in the water. Quickly keep turning the paper in the water (like you’re turning a steering wheel) until the whole paper is wet. Shake off the excess water and lay the paper on a plastic chopping board or smooth work top (not wood as it sticks!) The paper is still quite firm when I remove it from the water but it continues to soften up as it absorbs the moisture. (I find that if you dip it for too long, it goes gloopy and impossible to control).

Making Summer Rolls

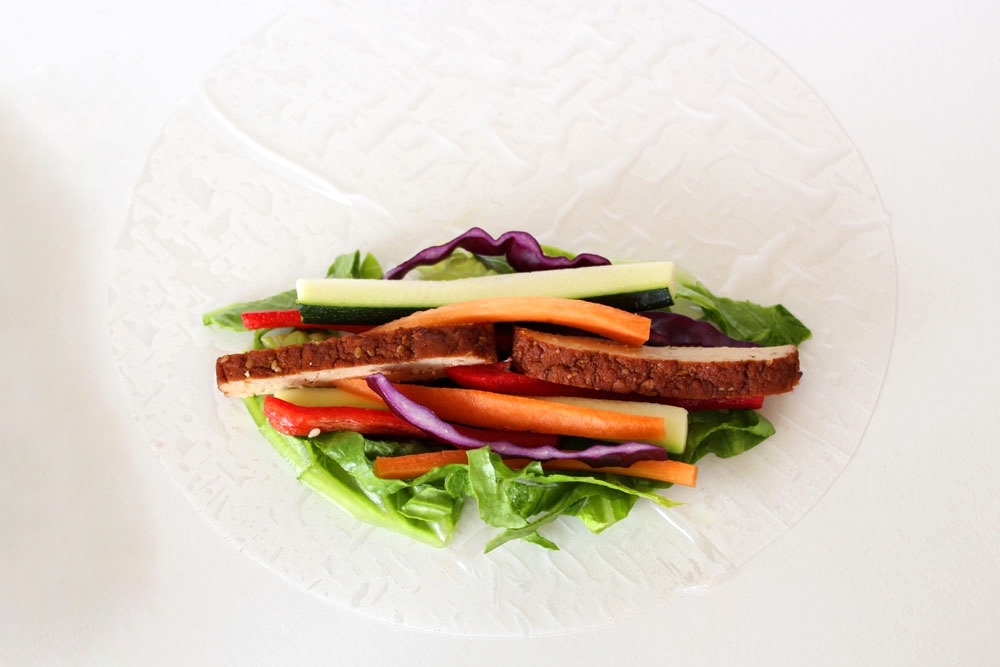
Arrange your veggies on one half of the rice paper, leaving a border either side. You want to make sure that there are no sharp edges poking out as the rice papers are delicate and easily tear.

Making Summer Rolls

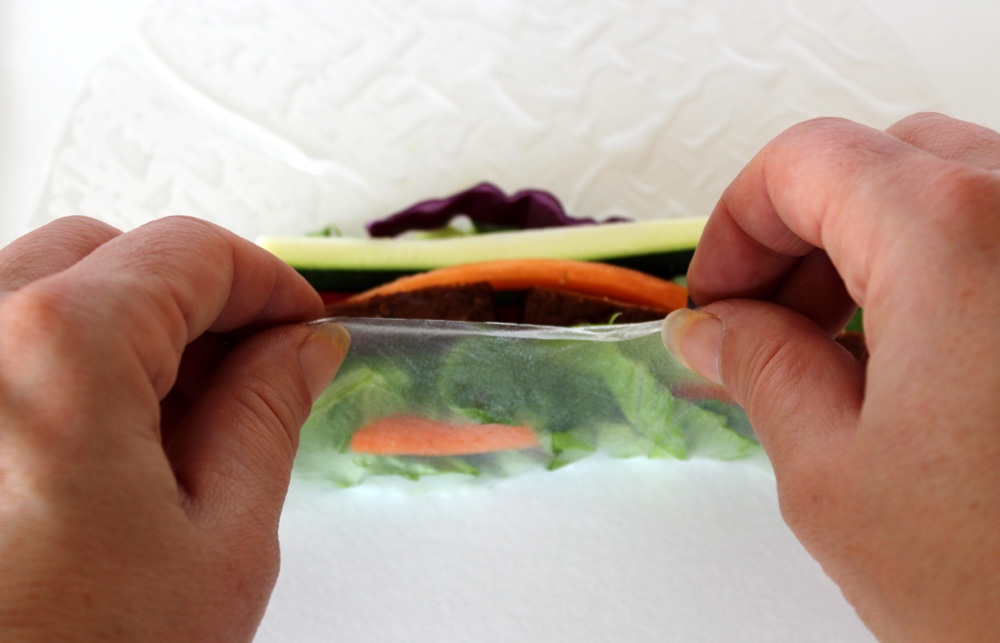
Squash the filling together then start rolling. Gently pull the rice paper up and over the vegetables, tuck in the edges as you roll. Try to keep it as tight as you can (like you’re rolling a burrito). Here comes another nose shutter shot!

Making Summer Rolls

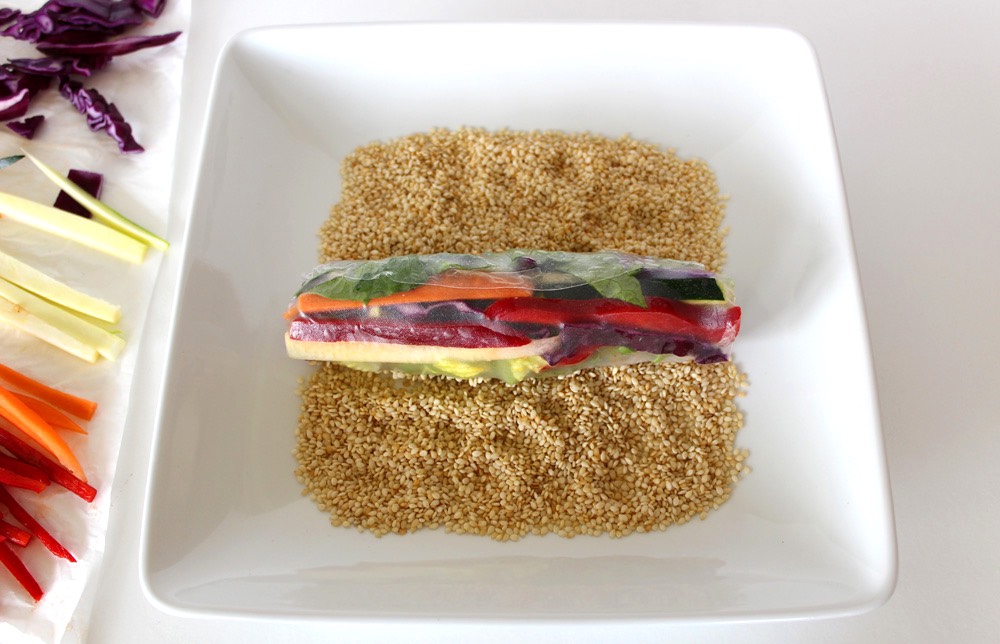
One thing that surprised me when I first made Vietnamese rolls is that they are sticky! I never saw this mentioned in recipes, so I googled it and, yes, they are meant to be sticky. Some people recommend wrapping each roll in cling film (plastic wrap) to stop them sticking together but I didn’t like the idea of the plastic waste (plus Mark was worried that he’d accidentally eat the cling film) so I found a way to get round the stickiness… roll them in toasted sesame seeds!

Making Summer Rolls

Not only do the rolls feel much nicer to hold when they’re covered in seeds, but the sesame coating actually boosts their nutritional profile too. Sesame seeds are nutritional powerhouses.

Once rolled and seeded, place the roll on a plate and repeat the process. I make eight rolls for four people, but if your rice papers are smaller than mine, you may want to roll more.

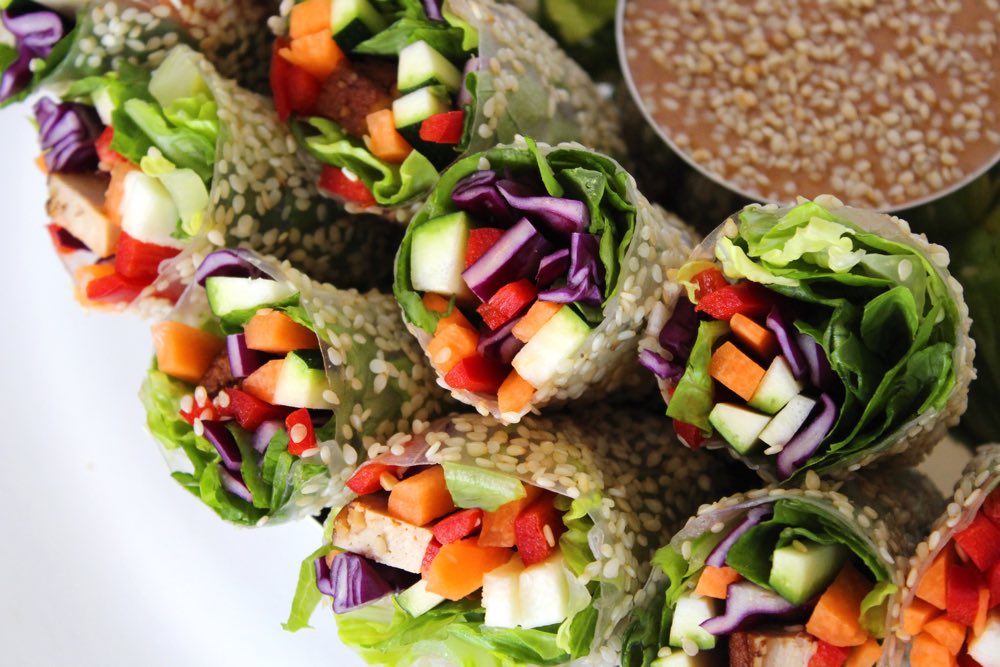
Just before serving, I cut the rolls in half. I give everyone their own little dipping bowl for the peanut sauce (so they can double dip to their heart’s content), then it’s time to tuck in!

Vietnamese Summer Rolls

Recipe Card

Vietnamese Summer Rolls (Vegan Style!) with Peanut Dipping Sauce

These Vietnamese summer rolls make a delicious light meal. Below I’ve listed the veggies that I normally use for the filling, but feel free to switch them up. The rolls are best eaten within 4 hours of being made so that they stay fresh. Any longer and the papers may start to dry out and crack.
Hands on time 35 minutes
Total Time 35 minutes
Servings 8 rolls

Ingredients
 

  • 1 large carrot finely sliced
  • 1 sweet pointed romano pepper or bell pepper deseeded and finely sliced
  • 1 small courgette zucchini, finely sliced
  • 120 g / 1½ cups red cabbage finely sliced
  • 1 romaine lettuce sliced into ribbons
  • 200 g / 7 oz smoked or marinated tofu thinly sliced
  • 8 rice papers spring roll wrappers or more, depending on their size
  • 75 g / ½ cup toasted sesame seeds

Peanut Dipping Sauce

  • 115 g / ½ cup natural smooth peanut butter
  • 2 TBSP tamari or low-sodium soy sauce
  • 1 TBSP white vinegar
  • 1 TBSP maple syrup
  • 60 ml / ¼ cup warm water
  • 2 tsp fresh ginger finely grated (or substitute with ½ tsp ground ginger)
  • Sesame seeds for garnish

Instructions
 

  • Chop the veggies and tofu into thin slices.
  • Tip the sesame seeds onto a large plate.
  • Fill a wide bowl with warm water.
  • Working with one rice paper at a time, take the paper in both hands and dip half of it in the warm water. Quickly rotate the paper for a few seconds (like turning a steering wheel) until the whole paper has been submerged in the water. Shake off the excess water, then lay the rice paper on a plastic chopping board or worktop (don’t use a wooden board as it will stick). The paper will continue to soften up as it absorbs moisture.
  • Arrange your veggies on one half of the rice paper, leaving a border either side. I use a few ribbons of lettuce, a few strands of red cabbage, then 2-4 strips each of tofu, carrot, pepper and courgette. Make sure that there are no sharp edges poking out as the rice papers are delicate and easily tear. Squash the filling together then start rolling.
  • Gently pull the rice paper over the filling. Tuck in the edges as you roll. Try to keep it as tight as you can (like you’re rolling a burrito).
  • Roll the summer roll in sesame seeds. Shake off the excess seeds and set the roll to one side. Repeat the process. I make eight rolls for four people, but if your rice papers are smaller than mine, you may want to roll more. Just before serving, cut the rolls into two.
  • To make the dipping sauce: place all the ingredients in a bowl and whisk together with a fork. Add a splash more water, if needed, to reach desired consistency. Taste test and adjust the vinegar, sweetness, ginger levels if desired. I give everyone their own little dipping bowl so they can double dip to their heart’s content! Just before serving, sprinkle on some sesame seeds for garnish.
Tried this recipe?Let us know how it was!

If you make these Vietnamese Summer Rolls, I’d love to hear your feedback and any suggestions for adaptations. Leave a comment below or tag your photos with #bitofthegoodstuff on social media – I always love to see your creations! You can also connect with me on my social media channels here: Instagram, Facebook, Pinterest.   

With love,

Sharon xx