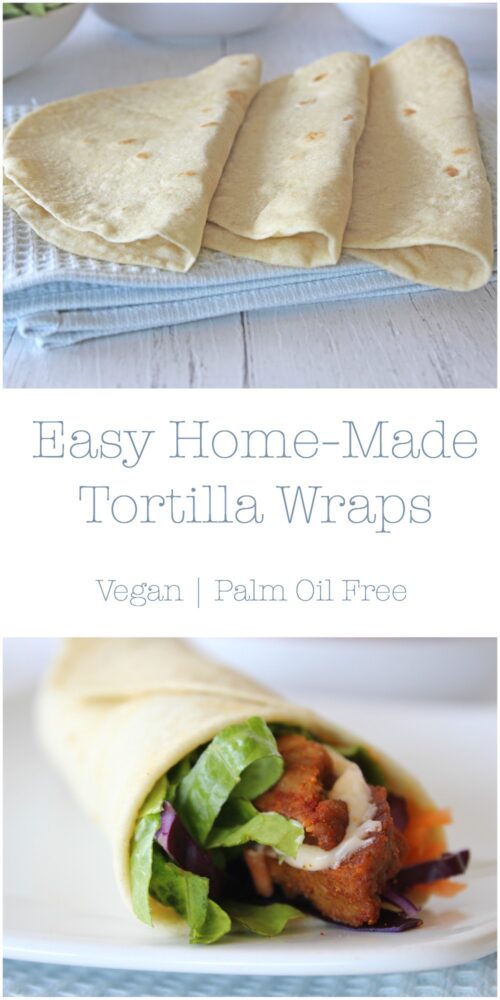
Easy Home-Made Tortilla Wraps

Jump to Recipe

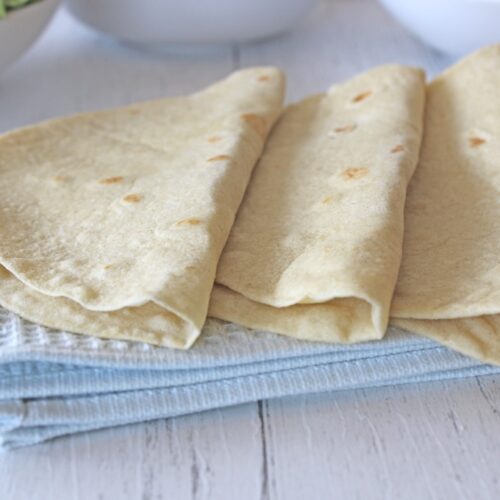
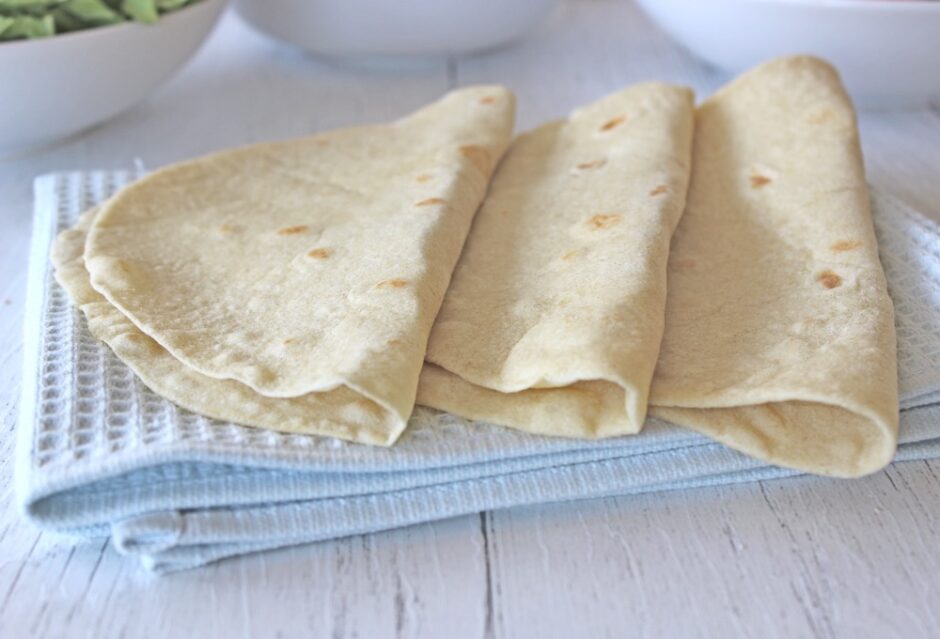
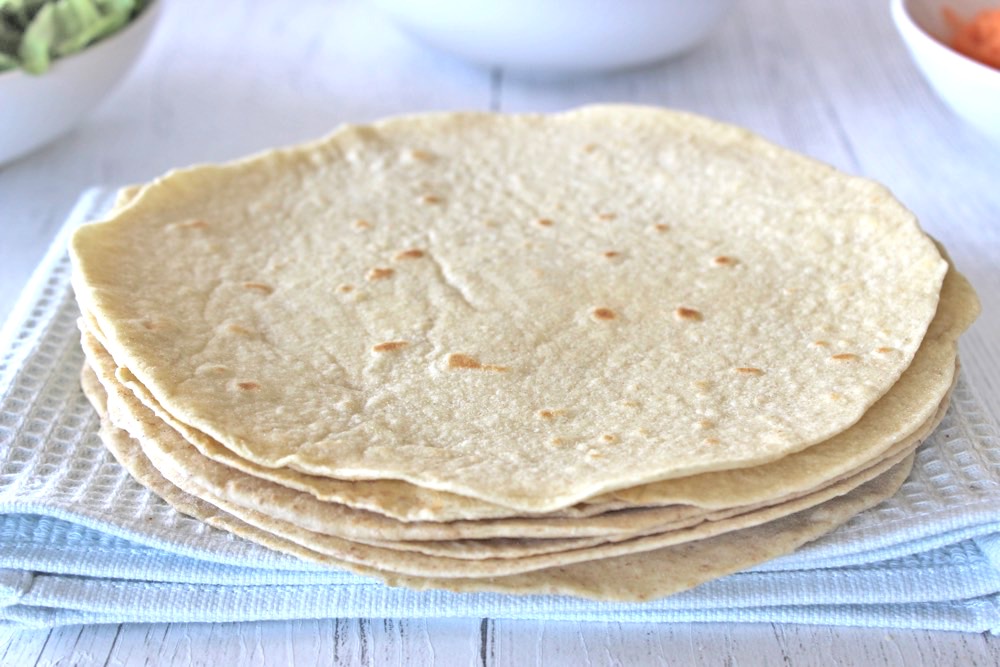
In today’s post, I’m sharing my recipe for easy home-made tortilla wraps. They contain just five ingredients and cost as little as 27p for six. Bargain!

Not only budget-friendly, they also taste far nicer and fresher than the shop-bought variety. One bite of a home-made tortilla and you’ll never want to go back to shop-bought again!

Home-made tortillas are easy and delicious!

Have you checked the ingredients lists on shop-bought tortillas? I was shocked when I saw how many ingredients they contain. I counted 12 ingredients in the basic Waitrose and Tesco tortillas, including emulsifiers, preservatives, stabilisers, humectants… and palm oil.

I never dreamed that they would be easy to make from scratch, however one day we were in the midst of making fajitas for dinner and realised that we didn’t have any tortillas on hand. Instead of abandoning the fajitas, we decided to have a go at making our own.

And you know what? Not only were they easy to make, but they were absolutely delicious! They tasted so fresh and ‘real’ compared to the shop-bought variety. In fact, Mark and Lucien loved them so much that they said they could never go back to shop-bought again. I was okay with this, on the proviso that they make the tortillas while I prepare the fillings. And they happily agreed to do so!
Tortilla Wraps

 Make it fun!

The kitchen is now filled with fun and lots of chat on kebab and fajita nights, as we all get stuck into preparing the meal. I prepare the filling, while Mark rolls the tortillas and Lucien cooks them. A helping hand means the tortillas are ready in half the time, which is a bonus!

The tortillas are best served fresh, however they can be stored in the fridge for up to a week. Sometimes, I’ll spend an hour preparing a triple or quadruple batch, which we then use through the week. I always make sure the music’s playing loud and I’m singing and dancing along, which makes the tortilla making much more fun.
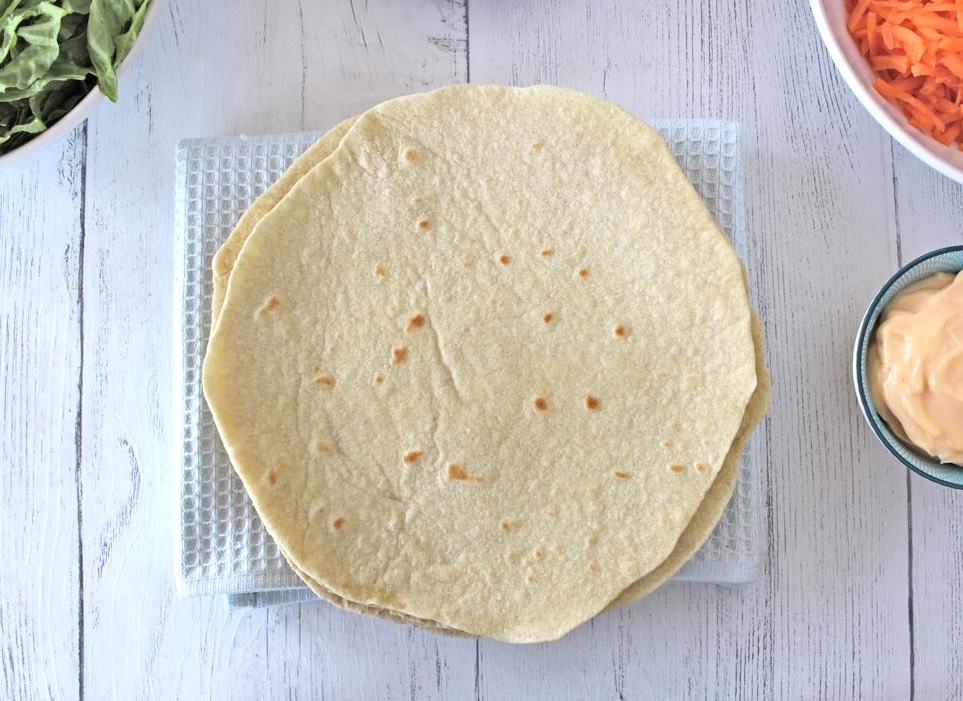
Tortilla Wraps

Perfecting my tortilla recipe

My first attempt at home-made tortillas was based on my chapatti recipe (also published on p119 of the Bit of the Good Stuff cookbook) and it was pretty good. Since then, however, I’ve been on a mission to ‘perfect’ my flour tortilla recipe. I’ve tried different ratios of dry ingredients and liquids; different amounts of oil (I wanted to keep the oil to a minimum, yet use sufficient oil to ensure the tortillas can be stored and reheated without drying out and cracking); and I’ve compared using water and plant milk as the main liquid. Tortillas are traditionally made with water, but I find plant milk can really enhance the flavour.

The recipe I’m sharing today is based on my fifth trial and they’ve got a huge thumbs up from the family. I hope you enjoy them too!
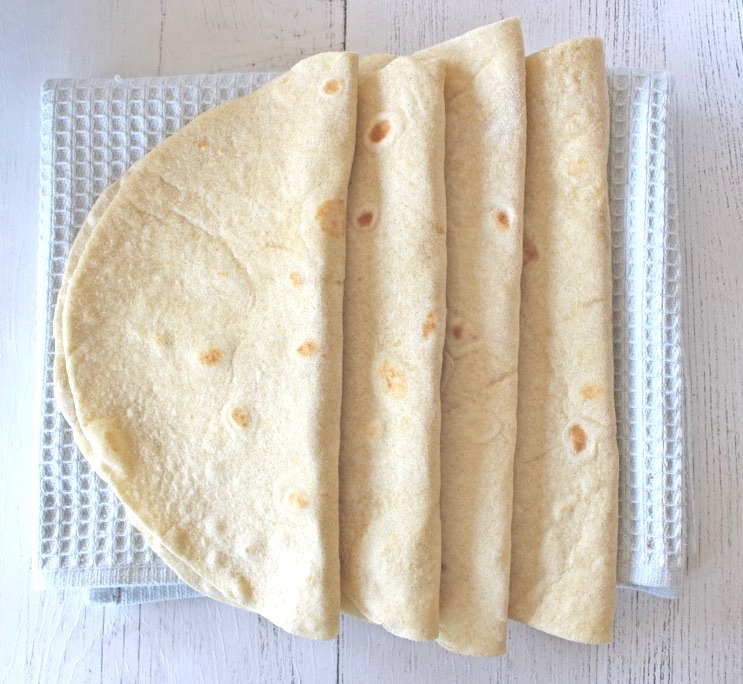
Tortilla Wraps

✧ My top tips for home-made tortillas

Making tortillas is far easier than you might imagine, but here are some tips that I’ve learnt along the way to help perfect the process:

✦  For tortillas, you want a light, slightly sticky dough. It’s easier to start with a dough that’s too sticky and add a little flour at a time until you reach the right consistency, rather than adding more liquid to a dough that’s too dry.

✦  It’s best to use warm liquid rather than cold. It makes it much easier to roll the tortillas.

✦  To roll a perfect circle, press the floured dough ball into a flat disk using your fingers, then use a rolling pin to roll the tortilla into a large circle, rolling anti-clockwise from the centre of the circle to the outer edge. With practice, the easier and quicker it becomes. I was rubbish at rolling to begin with, but can now roll a circular tortilla in 45 seconds.

✦  If you’re not using the tortillas immediately, store them flat in an airtight container in the fridge. They will stiffen up over time, but heating them through in a frying pan (skillet) returns them to their pliable state. Don’t try and fold the tortilla straight from the fridge otherwise it will break in half.
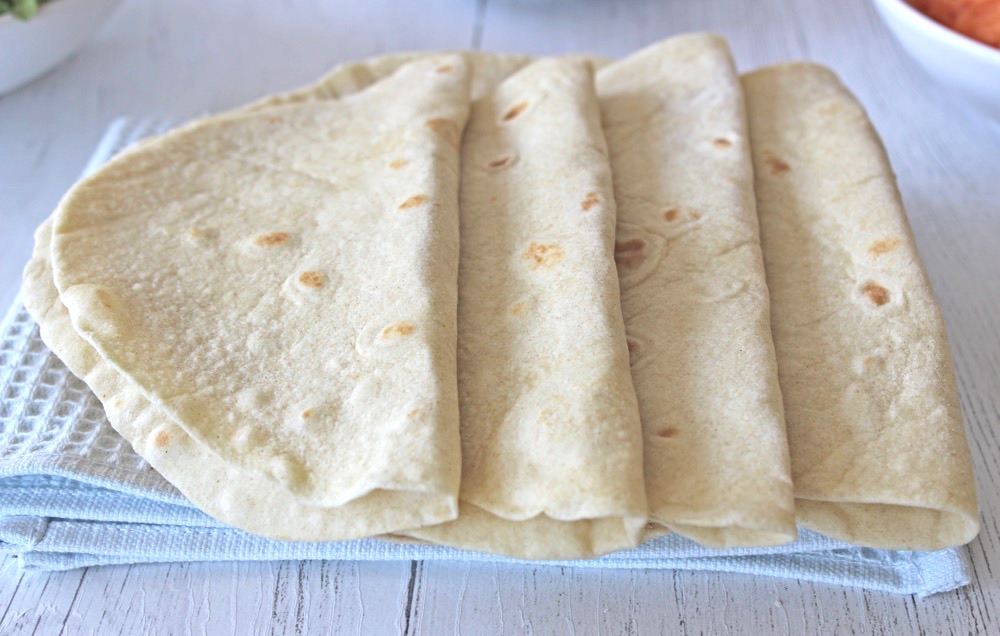
Tortilla Wraps

Recipe Card

Easy Home-Made Tortilla Wraps

These soft flour tortillas contain just five ingredients and are much tastier than the shop-bought variety. They’re easy to make and don’t take too long. See if you can recruit someone to cook them as you roll and this will halve the cooking time. The tortillas are best served the day they are made, but they can be stored in the fridge for up to a week. We love to use these tortillas for fajitas, burritos and vegan doner kebabs.
Hands on time 20 minutes
Total Time 35 minutes
Course Dinner, Lunch
Cuisine Mexican
Servings 6 tortillas

Ingredients
 

  • 120 g / ½ cup soya milk (can substitute with water, but I find the milk enhances the flavour of the wraps)
  • 2 TBSP extra virgin olive oil or oil of choice
  • 210 g / 1½ cups plain (all purpose flour) (or you can use 140g / 1 cup plain (all purpose) flour and 70g / ½ cup fine wholemeal (whole wheat) or chapatti flour)
  • ½ tsp salt
  • ½ tsp baking powder

Instructions
 

  • Gently heat the milk and oil in a small pan. Whisk with a fork to combine.
  • Place the flour, salt and baking powder in a mixing bowl. Pour in the warm liquid and stir with a spoon until it starts to come together. Continue to bring the dough together with your hands. You want the dough to be soft and slightly sticky. The consistency will vary depending on the type of flour and liquid you have used. If it’s too sticky, add a touch more flour. If it’s too dry, add a touch more liquid.
  • Turn out the dough onto a lightly floured surface and knead for 1-2 minutes, until smooth.
  • Divide into 6 equal pieces (I weigh mine to divide it equally). Use your hands to roll them into balls and place on a chopping board. Cover with a clean tea towel and leave to rest for 15 minutes.
  • Pre-heat a dry frying pan (skillet) on medium-high heat.
  • Take one dough ball and coat in flour. Place on a lightly floured surface and using your fingers, press it into a thin disk. Use a rolling pin to roll it into a circle with a 23cm / 9” diameter. (To achieve a circular shape, I roll from the centre of the circle to the outer edge, in an anti-clockwise motion).
  • Lay the rolled dough over the rolling pin and transfer to the hot pan. After a short while, the dough should start to bubble a little. When this happens, flip the tortilla over and continue cooking until brown spots appear on the underside. If the tortilla is browning too quickly, turn down the heat a touch. (I have an electric hob and I cook mine for 40 seconds on the first side, and 20 seconds on the second).
  • Transfer the cooked tortilla to a plate lined with a piece of kitchen paper or a clean tea cloth. Cover with a lid slightly larger than the plate (I don’t have a lid large enough so I use an upturned frying pan!) This will help to keep the steam in and prevent the tortillas from drying out.
  • Repeat the process with the remaining dough balls, adding them to the plate once cooked and covering with the lid.
  • If not using immediately, allow the tortillas to cool completely then store flat in an airtight container in the fridge, where they will keep for up to a week. They will stiffen up over time but heating them through will return them to their pliable state.
Keyword Dairy-Free, Flour Tortillas, Home-Made Tortillas, Tortilla Wraps, Vegan
Tried this recipe?Let us know how it was!

 Pin for later ⬇️

Home-Made Tortilla Wraps

If you make these Home-Made Tortilla Wraps, I’d love to hear your feedback and how you choose to fill them! You can leave a comment in the box below or tag your photos with #bitofthegoodstuff on social media – I always love to see your creations! You can connect with me on my social media channels here: Instagram, Facebook, Pinterest.   

With love,

Sharon xx
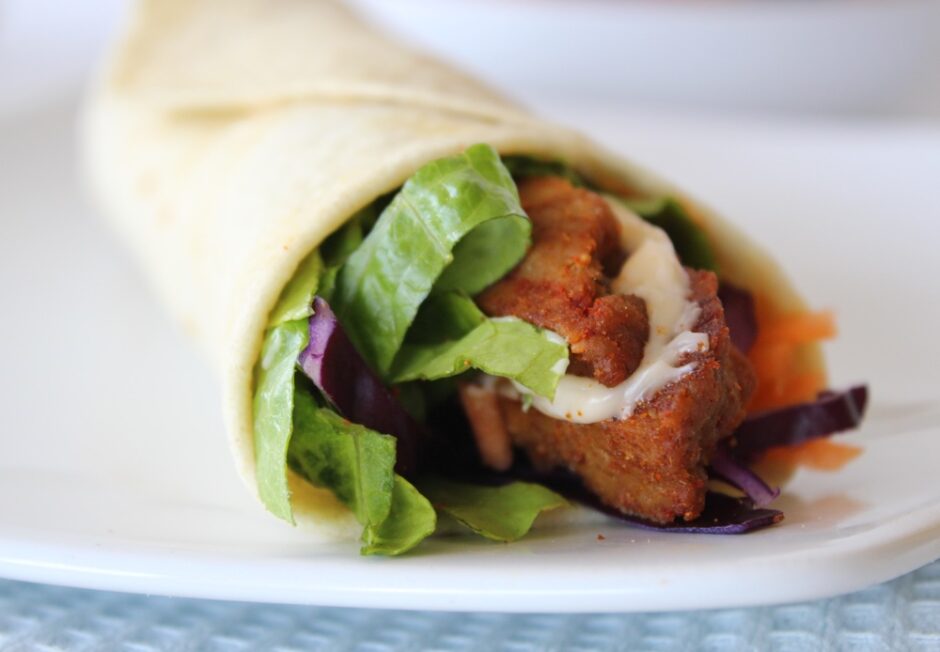
Vegan Doner Kebabs

Jump to Recipe

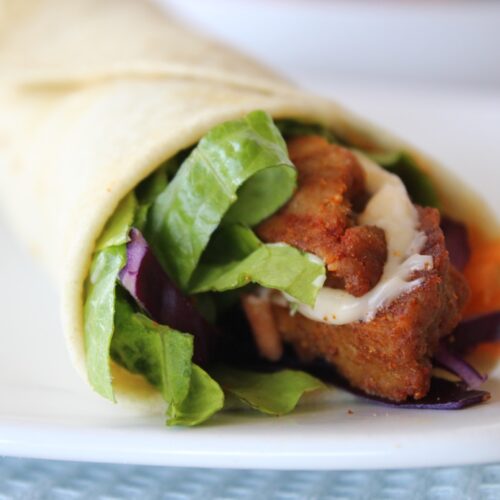
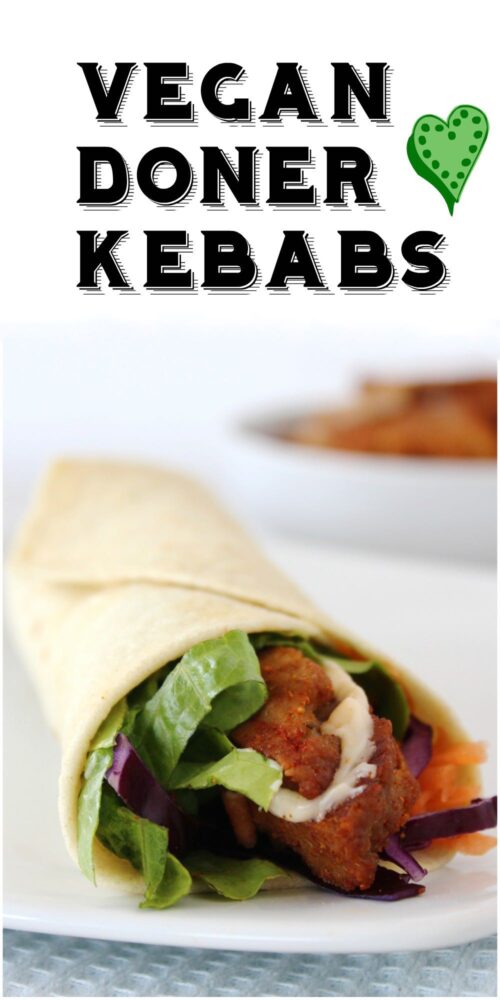
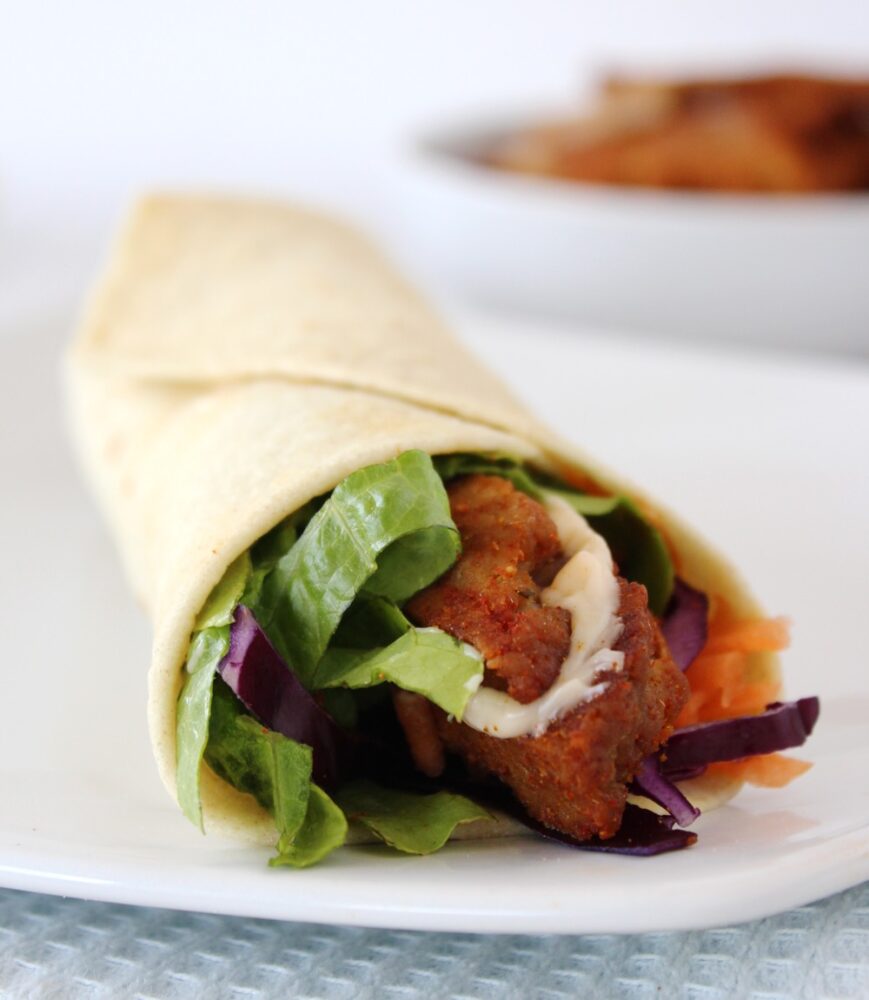
Today I’m sharing my veganized version of the Turkish doner kebab. This kebab is one of my family’s favourite ‘easy weekend’ meals and we love tucking into them while we’re watching a movie, or sitting in the garden on a warm summer’s evening. The kebabs are highly versatile, so feel free to switch the filling components to suit your own personal tastes.

Vegan Doner Kebab

Doner kebabs are a popular fast food here in the UK. Traditionally, they are made with processed lamb meat, heavily seasoned with spices. Apparently it’s hard to tell what kind of meat is actually in the doner kebab, and tests by UK Trading Standards have revealed that doner meats sometimes contain a mix of animals, such as chicken, beef and pork.

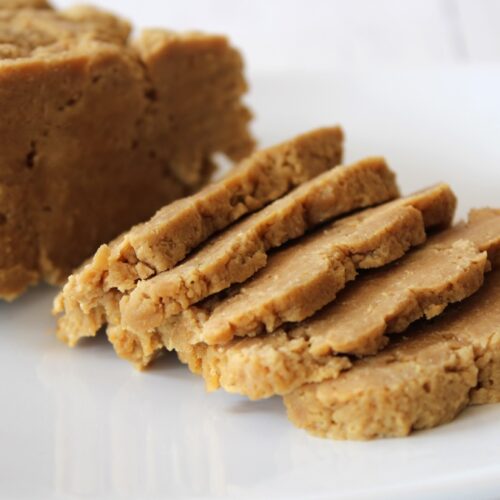
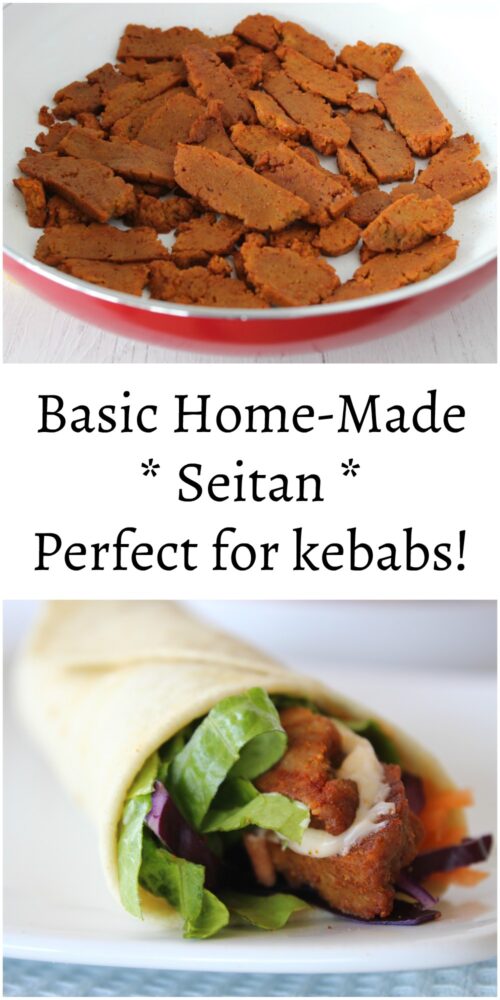
Home-Made Seitan

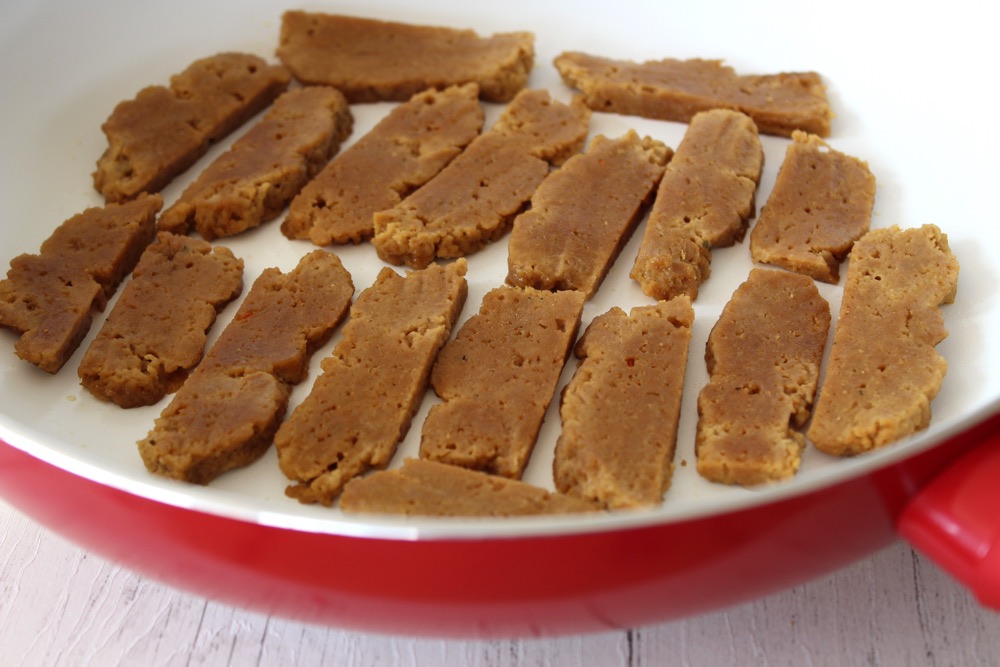
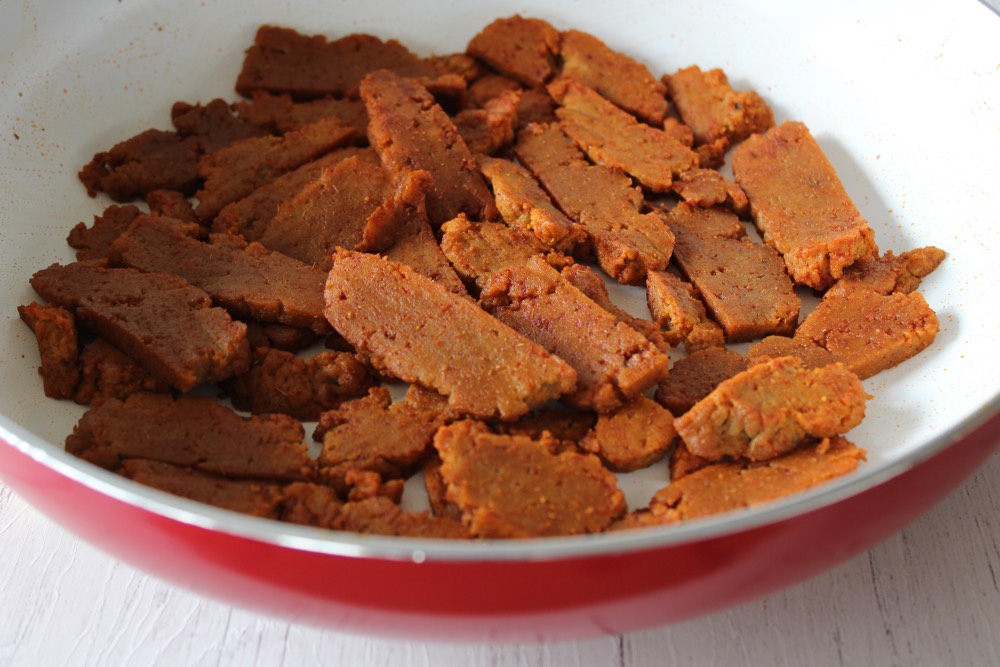
Pan Fried Seitan

Since the key thing with the doner meats is the seasoning and texture, they’re easy to replicate using plant-based meat alternatives. I like to use home-made seitan (my current favourite recipes are this Easy Seitan ‘Chicken’ and Basic Home-Made Seitan) as it tends to work out a lot cheaper, plus it gives me the flexibility to flavour it exactly how I wish. However there are also a range of store-bought alternatives now available, including these…

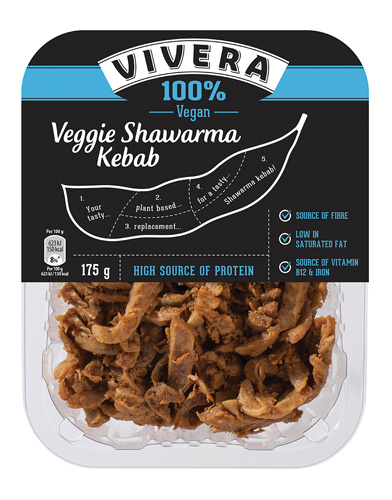
Vivera Shawarma Kebab pack

The Dutch company Vivera‘s Veggie Shawarma Kebab is now widely available in the major UK supermarkets – Tesco, Asda, Sainsbury’s and Waitrose. You’ll find it on the veggie/vegan chiller aisle.

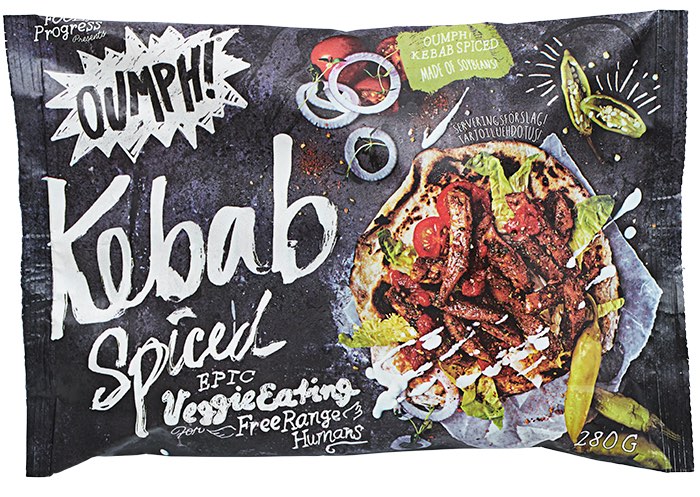
Oumph Kebab Spiced

The Swedish brand Oumph has recently made its way into UK health food shops and Tesco. As its name suggests, the Oumph ‘Kebab Spiced’ is just perfect for kebabs. You’ll find it in the veggie/vegan freezer cabinet.

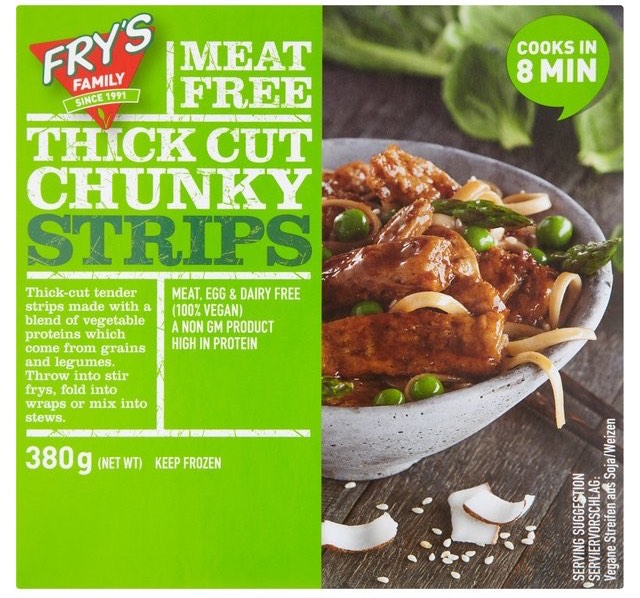
Fry's Thick Cut Chunky Strips

The South African family business Fry’s also sells Thick Cut Chunky Strips that work well in kebabs. (In the UK, these are available in health food shops, Morrison’s and Ocado in the freezer section).

Doner kebabs can be served in large flatbreads (such as flour tortillas) or pittas. Lately, my family has been making home-made flour tortillas as they taste so much nicer than the shop-bought ones (plus they literally cost a few pence to make).

Alongside the doner meat, the kebab contains a variety of salad vegetables. We tend to use romaine lettuce, red cabbage, carrot and sometimes red pepper and pickles, all of which adds beautiful colours and textures to the kebab.

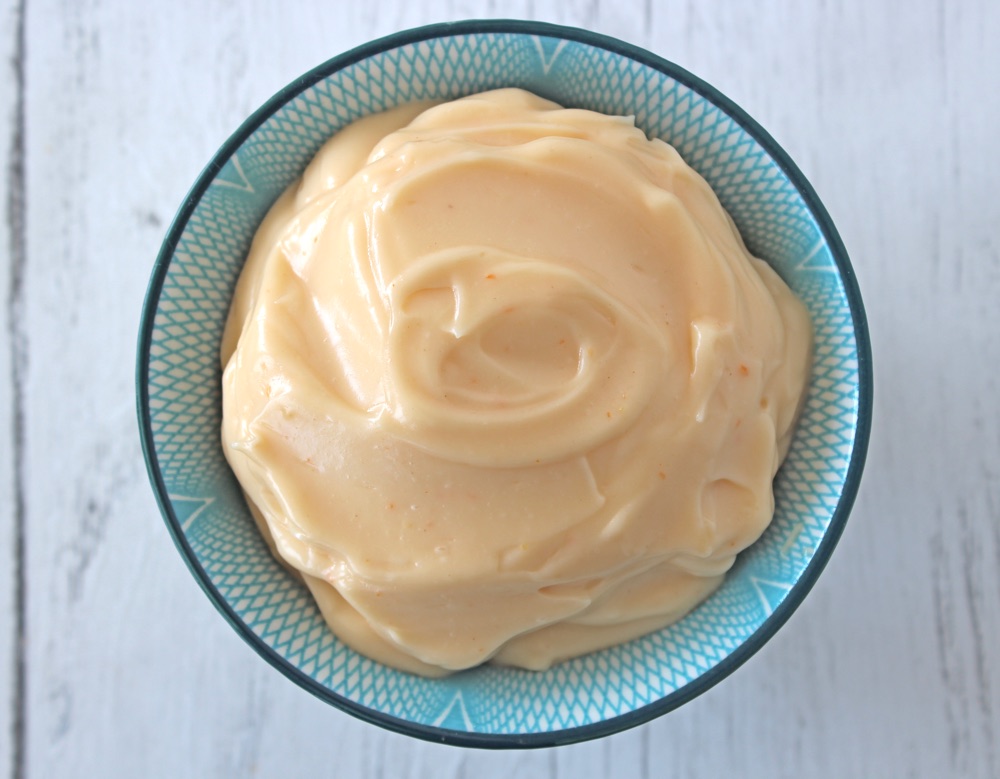
Easy Vegan Home-Made Chilli Mayonnaise

The final, important step is to add some kind of dressing or sauce. Our current favourite condiment for these kebabs is the home-made sweet chilli mayonnaise, which I posted earlier this week. It takes less than five minutes to make, is super cheap and tastes delicious (just as good, if not better than store-bought mayonnaise).

Vegan Kebab

Vegan Doner Kebab

Recipe Card

Vegan Doner Kebab

Vegan Doner Kebabs

These kebabs are quick and easy to prepare, making them perfect for busy weeknights and lazy weekends. They also make a great take-away lunch option, wrapped in foil or parchment paper to keep the filling neatly packed inside. They are highly versatile, so feel free to switch up the filling depending on what you desire or what needs using up in your fridge.
Hands-on time 20 minutes
Total Time 20 minutes
Course Lunch, Main Course
Cuisine Turkey
Servings 6 kebabs

Ingredients
 

  • 6 large flour tortillas, home-made* or shop-bought
  • 350 g / 12 oz home-made basic seitan** or shop-bought kebab meat alternative e.g. Oumph! Kebab Spiced or Fry’s Thick Cut Chunky Strips
  • 1 romaine lettuce head thinly sliced into ribbons
  • 1 packed cup red cabbage finely sliced
  • 1 large carrot peeled and grated
  • home-made chilli mayonnaise*** or shop-bought e.g. Vegenaise

Instructions
 

  • Pan fry the strips of seitan (or other meat-free alternative) in a little olive oil. Add seasonings, to taste. For kebabs, I like to flavour the home-made seitan with smoked paprika and ground cumin. I sprinkle 1 tsp of each spice over the seitan, a little at a time, stirring with a wooden spoon until evenly coated. If using shop-bought meat-free strips, cook according to the instructions on the packet.
  • Pre-heat a hot frying pan (skillet) and add one tortilla at a time, flipping onto both sides until warmed through and pliable.
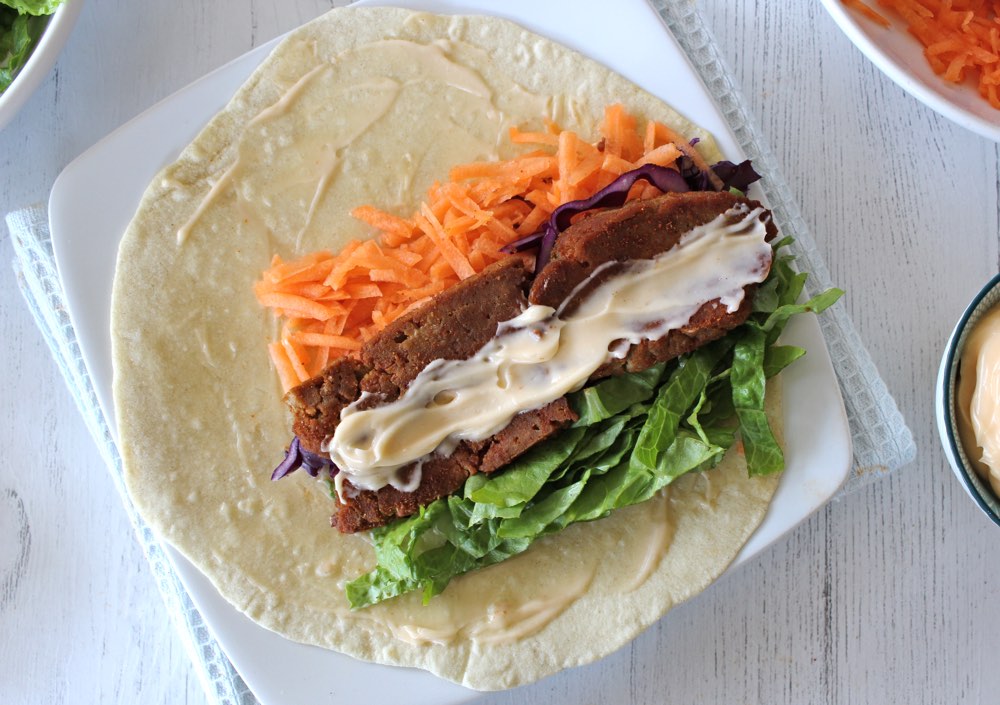
  • Coat the tortilla in a thin layer of mayonnaise.
  • Arrange the lettuce, red cabbage, carrot and vegan kebab 'meat' along the centre of the tortilla. Leave a border on one side (about 2 inches) which you can tuck in to form the bottom of the kebab (to prevent the filling falling out). Add a touch more mayonnaise on top of the filling.
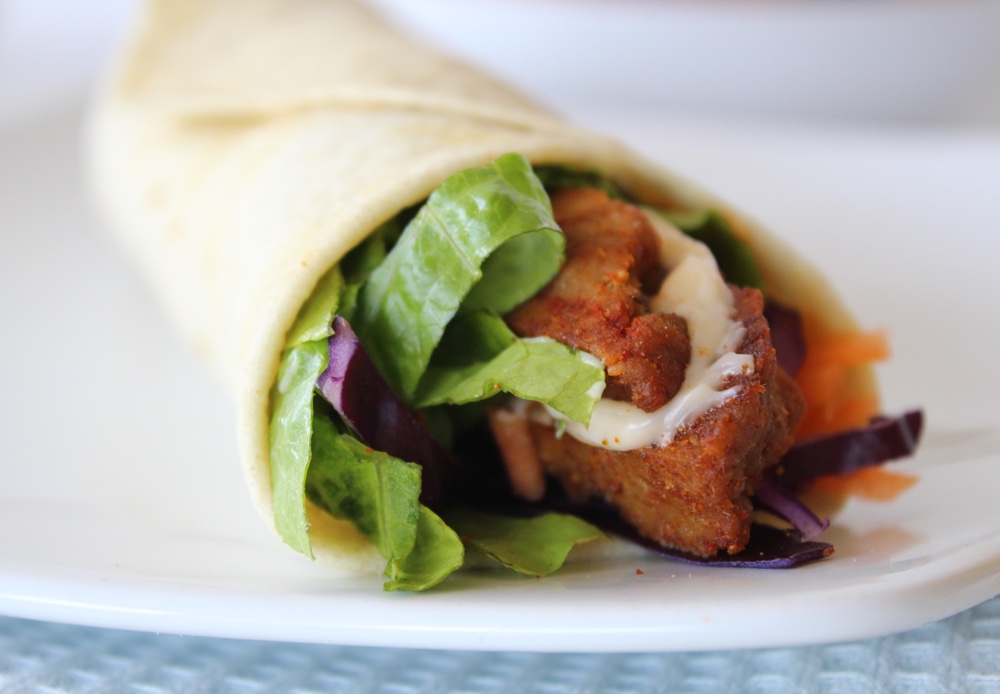
  • Fold in the tortilla along the border, then roll the tortilla as tightly as possible, holding in the filling with your fingers as you do so. Press down the edge seam of the tortilla to seal it. If you wish, you can wrap the end of the kebab in foil to keep it securely wrapped.
Keyword Plant-Based, Vegan Kebab
Tried this recipe?Let us know how it was!

Pin for later ⬇️

Vegan Doner Kebab

Big thank you to Suma for supplying me with their vital wheat gluten, spices and oils which I used to create my vegan doner ‘meat’!

If you make these Vegan Kebabs, I’d love to hear your feedback and any suggestions for adaptations. Tag your photos with #bitofthegoodstuff on social media – I always love to see your creations! You can also connect with me on my social media channels here: Instagram, FacebookPinterest.   

With love,

Sharon xx

SaveSave

Basic Home-Made Seitan

Jump to Recipe

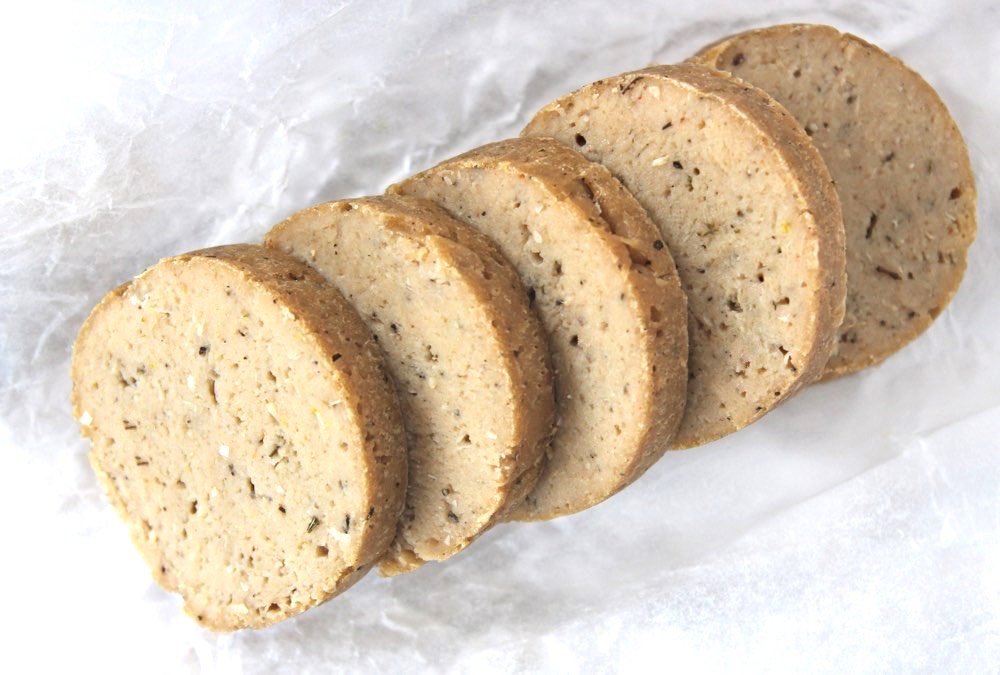
Seitan is one of my favourite meat-free alternatives. Cooked right, it has the most succulent, chewy texture which makes it perfect for adding to any kind of meal where meat typically takes centre stage, like kebabs and steak. Store-bought seitan can be expensive and not so easy to come by here in the UK, so I choose to make my own. In this post, I’m sharing my favourite basic seitan recipe. It’s really easy to prepare and takes only 15 minutes hands on time.

Home-Made Seitan

Seitan (also known as ‘wheat meat’) is made with vital wheat gluten, which is the protein part of the wheat seed, milled into flour. Per 100g, vital wheat gluten flour contains a whopping 75g protein. It’s also low in fat and contains zero cholesterol, making it a healthier alternative to animal products.

Here in the West, seitan’s had somewhat of a resurgence in the past couple of years (thanks to the explosion of plant-based lifestyles), but it’s been popular for centuries in Asian countries such as China and Vietnam. You may have seen ‘Mock Duck’, ‘Mock Beef’ and similar on the menu in your local Chinese restaurants and take-aways, or the canned varieties in Chinese supermarkets. These products are typically made with wheat gluten.

Seitan in the pan

There are a variety of ways to prepare seitan. You can boil, steam, bake and pan fry it. Each method produces a different texture. How you choose to prepare your seitan comes down to personal preference, so I highly recommend trying a few recipes and seeing what works best for you. A couple of years ago, I first tried my hand at making seitan, but I wasn’t keen on the flavour. The recipe included a fair amount of chickpea (gram) flour and this is what I could detect in the final product. Since then, I’ve chosen to omit the flour and I find the seitan tastes much more palatable.

While steaming is probably the most popular cooking method, I personally prefer to simmer it in a pan of broth. I don’t even wrap it in any foil. Boiling it direct in the broth, I find the seitan takes on a lovely flavour and soaks up the broth, leaving it succulent. When I’ve steamed it or wrapped the seitan before simmering, it does stay a neater shape, but it’s a bit drier and chewier. For me, the taste and texture is the most important features of seitan so I don’t mind it looking a bit ugly and bumpy on the outside. It doesn’t stay whole for long anyhow as I slice it into strips for kebabs or sandwiches

You can flavour seitan in myriad ways using different combinations of herbs and spices. The basic seitan I’m sharing today can be eaten as it is, without any additional flavouring, however pan-frying it in a little olive oil will enhance its flavour.

Pan Fried Seitan

When making my vegan version of doner kebabs, I like to spice up the seitan strips with smoked paprika and ground cumin, which I sprinkle in as I’m pan-frying it. I’ll be sharing my doner kebab recipe very soon, so I’ll link to it here once it’s ready… here it is

Vegan Doner Kebab

If it’s your first time making seitan, I would recommend making a half batch of the recipe below (no need to split the dough into two pieces; keep it as one) and see how you get on. (This is what I did for the first handful of times I made it, then I started to double the quantities). I tend to make one batch of seitan each week, which I store in the fridge in an airtight container. I have heard that seitan is freezable but I’ve yet to try it as ours never hangs around for very long!

Recipe Card

Home-Made Seitan

Basic Home-Made Seitan

This recipe produces a seitan that is succulent and versatile. It can be eaten as it is, or pan-fried in a little olive oil to enhance the flavour. For doner kebabs, I like to fry strips of seitan with 1 tsp each of smoked paprika and ground cumin. I sprinkle a little spice at a time – stir frying as I do so – to ensure the strips are evenly coated.
5 from 2 votes
Hands-on Time 15 minutes
Total Time 1 hour 15 minutes
Course Dinner, Lunch
Servings 700 g / 25 oz (approx)

Ingredients
 

Seitan Dough

Dry Ingredients

  • 270 g / 2 cups vital wheat gluten flour
  • 22 g / 6 TBSP nutritional yeast flakes
  • 2 tsp onion powder
  • 2 tsp garlic powder or fine garlic granules
  • 2 tsp vegetable bouillon powder

Wet Ingredients

  • 160 ml / ⅔ cup water
  • 4 TBSP soy sauce
  • 4 TBSP fresh lemon juice
  • 2 TBSP extra virgin olive oil

Broth

  • 1.9 litres / 8 cups water
  • 4 tsp vegetable bouillon powder
  • 2 TBSP soy sauce

Instructions
 

  • Fill a large saucepan or stockpot with the broth ingredients, cover with a lid and bring to the boil. Once boiling, reduce the heat to a very gentle simmer.
  • Place the dry seitan ingredients in a large mixing bowl and stir through to combine.
  • Add the wet ingredients to a jug and whisk with a fork to combine. Pour the liquid ingredients into the dry ingredient bowl and stir with a spoon until the mixture starts to come together. Use your hands to knead the mixture into a dough ball. Divide the dough into two equal pieces. Knead each piece for 3 minutes, then shape into a rectangle. Repeat with the second piece of dough.
  • Carefully lower the seitan into the broth. Partially cover with a lid and simmer for 45 minutes. Make sure that the water stays at a very gentle simmer. You should only see a bubble surface now and then. (If the water boils, the seitan will become very bubbly and holey on the inside).
  • After 45 minutes, turn the heat off, remove the lid and leave the seitan to rest in the broth for 15 minutes.
  • Place the seitan in a strainer to drain off the excess liquid. Once completely cool, transfer to an airtight container and store in the fridge, where it will keep for a week.
  • Before serving, pan fry the strips of seitan in a little olive oil. Add seasonings, to taste. For kebabs and curries, I like to flavour the home-made seitan with 1 tsp each of smoked paprika and ground cumin.

Notes

Recipe adapted from ‘Simple Seitan’ by Isa Chandra Moskowitz & Terry Hope Romero in Veganomicon
Keyword Seitan, Vegan Kebabs, Vegan Sandwiches
Tried this recipe?Let us know how it was!

Pin for later ⬇️

Home-Made Seitan

Big thank you to Suma for supplying me with their lovely products which I used to create this recipe!

And if you try this recipe, please do come back and leave a review. It’s so helpful to me (and other readers) to hear your experiences and ideas for variations! Thank you! ❤️

With love,

Sharon xx

———————–

YOU MAY ALSO LIKE…

Easy Seitan ‘Chicken’

Seitan 'Chicken'

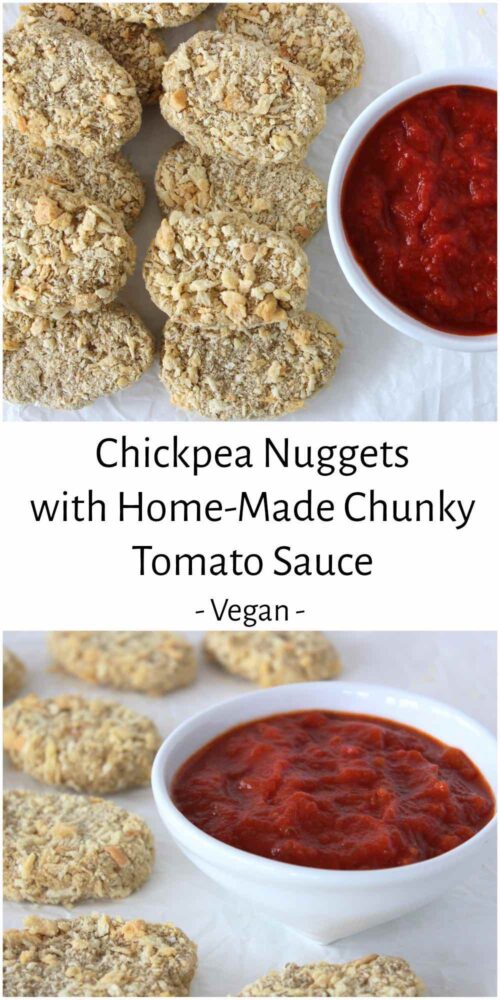
Chickpea Nuggets with Home-Made Chunky Tomato Sauce

Jump to Recipe

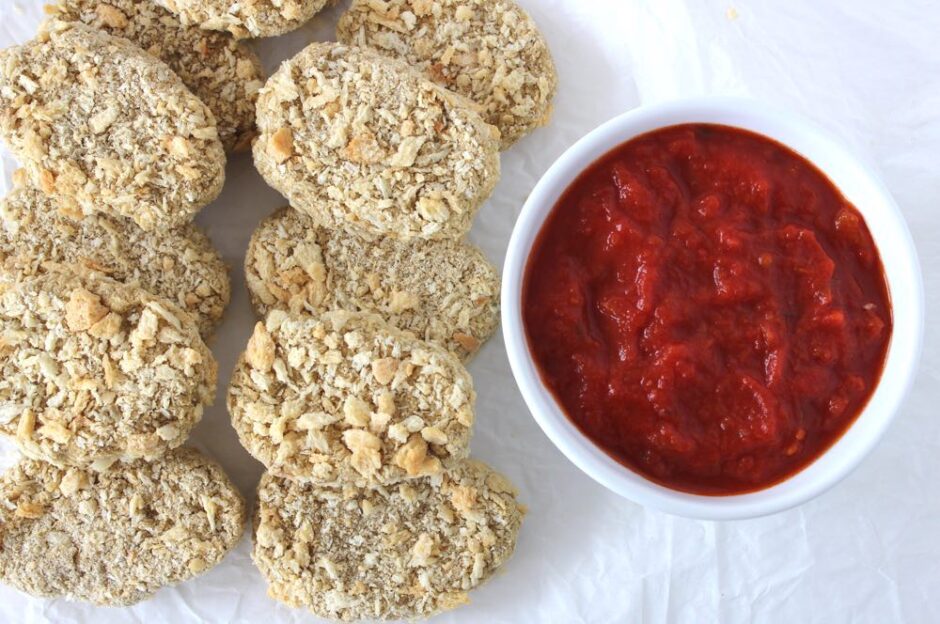
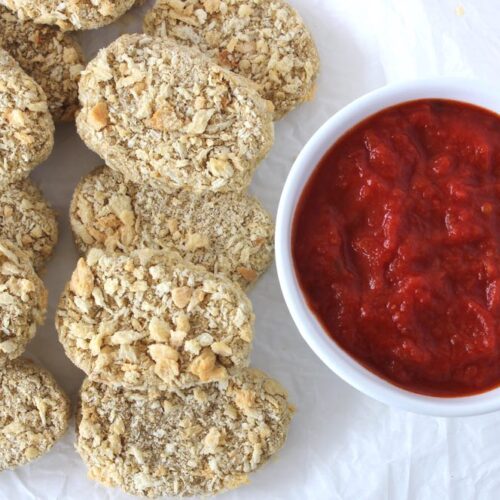
In today’s post, I’m sharing a recipe that caught my eye in this month’s Vegan Life magazine. These ‘Chickpea Nuggets’ have been a big hit with the family and we’ve made them multiple times in the past couple of weeks. They’re simple to prepare, packed full of nutritional goodness and budget-friendly too!

I had my first experience of vegan nuggets a couple of weeks ago at a fast food establishment in Valencia, Spain (yes, Valencia has vegan fast food joints! How cool is that?) The fast-food nuggets were okay, but the home-made variety win my vote. They just taste more like ‘real food’ to me. Plus they definitely make me feel better on the inside.

The main ingredients in these nuggets are oats and chickpeas. Both ingredients are packed full of nutrients including protein, complex carbs, dietary fibre, B vitamins, iron, zinc and magnesium.

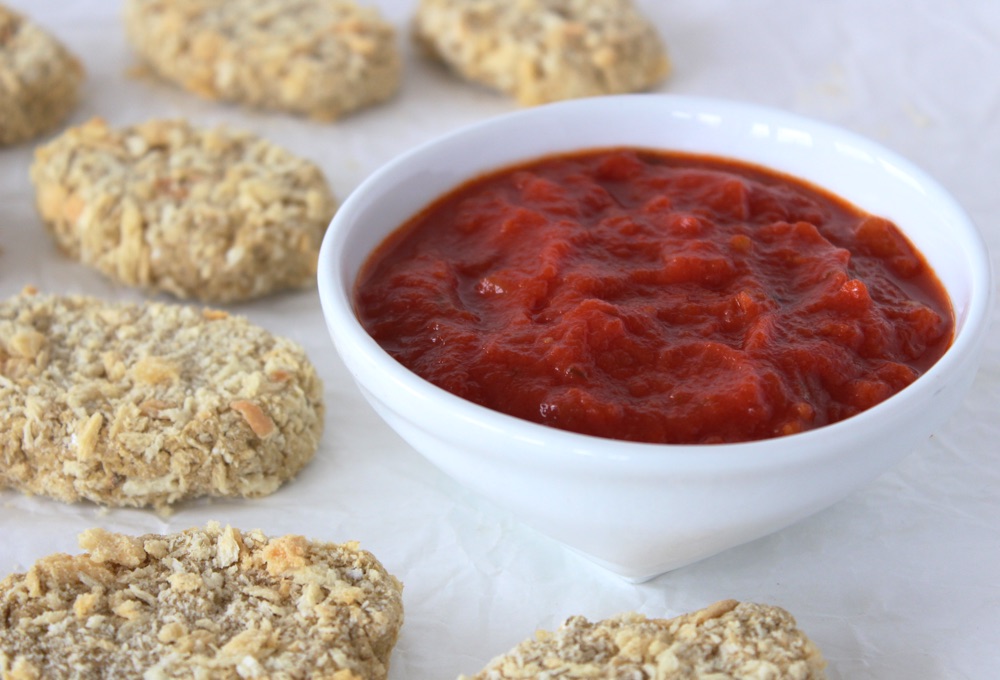
Chickpea Nuggets (Vegan)

The nuggets are great for dipping into all kinds of sauces. We love mayo, BBQ sauce, even hummus, but our current favourite has to be home-made chunky tomato sauce. I’ve posted the recipe below in case anyone else fancies trying it. I find it tastes much nicer than shop-bought tomato sauce (fresher and less processed) plus it’s rich in vitamin C, which helps our bodies absorb all the iron in the nuggets.

To make the outside of the nuggets nice and crispy, I used Panko breadcrumbs which can be found on the world food aisle in supermarkets (in the Japanese section). Onion powder is not currently available in UK supermarkets (such a shame as it’s really useful!) however you will find it in independent health food shops and online. (I buy mine in Harvest Coop in Bath).

Along with the onion powder, the nutritional yeast helps to give these nuggets a delicious, savoury flavour. I use the Marigold nutritional yeast flakes with added B12, available from the larger UK supermarkets, health food shops and online.

Recipe Card

Vegan Chickpea Nuggets

These nuggets are simple to make, packed full of nutritional goodness, budget-friendly and versatile! We love to serve them for lunch, as a healthy snack and as a main meal (alongside potato wedges, baked beans and a side salad). They are best served straight from the oven (when the outer coating is super crispy), however they can also be eaten cold and make a great addition to school and work lunchboxes.
Hands-on time 20 minutes
Total Time 30 minutes
Course Healthy Snacking, Light Dinner, Lunch
Servings 2

Ingredients
 

Chickpea Nuggets

  • 40 g / heaped ½ cup panko breadcrumbs
  • 50 g / ½ cup rolled oats
  • 400 g / 14 oz can chickpeas thoroughly drained (reserve the chickpea water aka ‘aquafaba’)
  • ½ tsp garlic powder or granules
  • 1 tsp onion powder
  • ½ tsp salt
  • 2 TBSP nutritional yeast flakes
  • 60 ml / ¼ cup 'aquafaba' (water from the chickpea can)

Chunky Tomato Sauce

  • 400 g / 14 oz can Italian vine-ripened chopped tomatoes
  • 2 TBSP tomato puree (paste)
  • 1 TBSP extra virgin olive oil
  • 1 tsp unrefined sugar
  • ½ tsp salt
  • 1 tsp dried oregano

Instructions
 

To make the chickpea nuggets:

  • Heat oven to 190C (180C fan) / 365F.
  • Place the oats in a food processor and process into a flour.
  • Add the chickpeas to the food processor, along with the garlic powder, onion powder, nutritional yeast and salt. Pulse until crumbly. Add the aquafaba (chickpea water) and continue to process until the contents form a ball. If the mixture feels a little wet, add more oats.
  • Divide the mixture into 12 equal portions and shape into nuggets. Coat each nugget completely in the panko breadcrumbs and place on a baking tray lined with baking paper.
  • Bake for 15-20 minutes, or until firm. Serve with your favourite dip.
  • Any leftover nuggets can be stored in the fridge for up to five days.

To make the chunky Tomato Sauce

  • Place all the ingredients in a pan and bring to the boil. Reduce the heat and simmer for 15 minutes, or until the mixture has thickened slightly. Use a wooden spoon to break up any large chunks of tomato. Taste test and adjust the seasoning to suit.
  • Stored in an airtight container, this sauce will keep for five days in the fridge.

Notes

Recipe lightly adapted from Heather Lawless and Jen Mulqueen’s ‘Chicknuggets’ in The Chickpea Revolution, featured in the April 2018 edition of Vegan Life magazine.
Keyword Easy Vegan Meals, Healthy Snacking, Vegan Lunchbox Ideas, Vegan Nuggets
Tried this recipe?Let us know how it was!

Pin for later ⬇️

Big thank you to Heather Lawless, Jen Mulqueen and Vegan Life magazine for the inspiration! This is definitely a recipe I’ll be making time and again.

And if you make these vegan nuggets, I’d love to hear your feedback and any suggestions for adaptations! Tag your photos with #bitofthegoodstuff on social media – I always love to see your creations! You can also connect with me on my social media channels here: Instagram, Facebook, Pinterest.   

With love,

Sharon xx
Roasted Summer Vegetable Pasta Dish with Mojo Sauce

Jump to Recipe

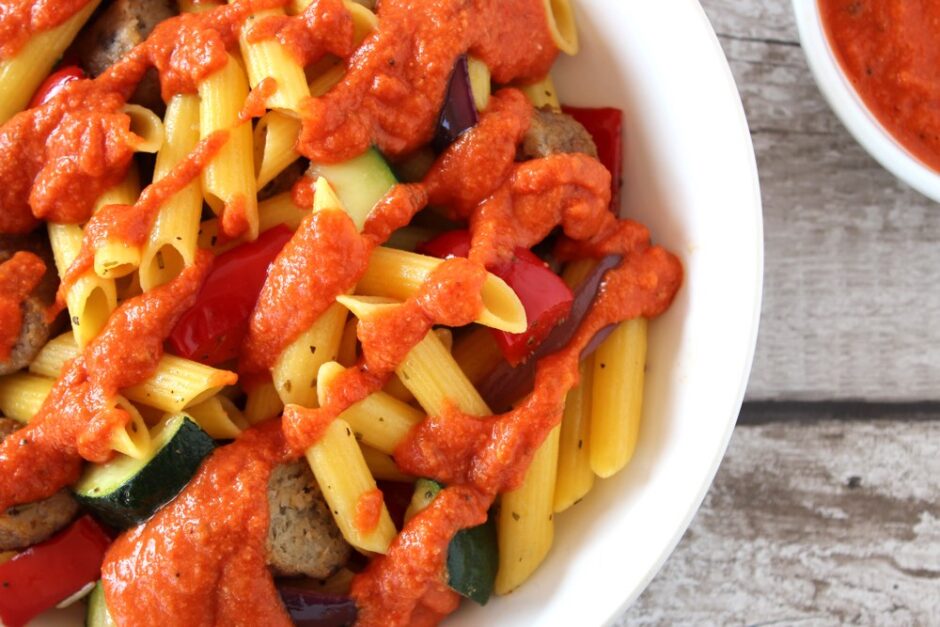
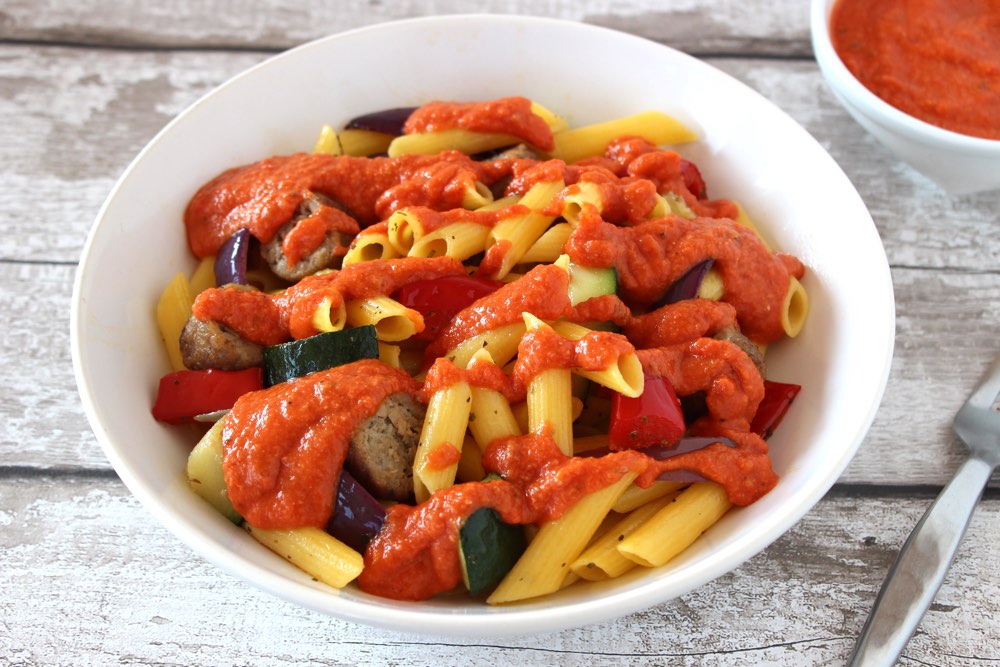
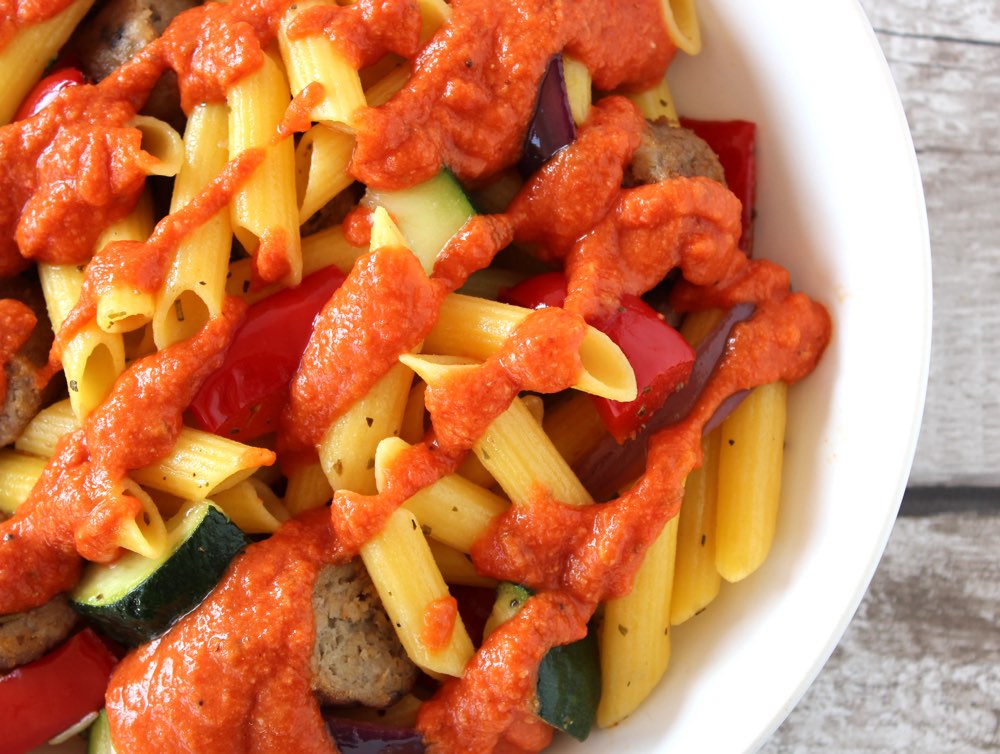
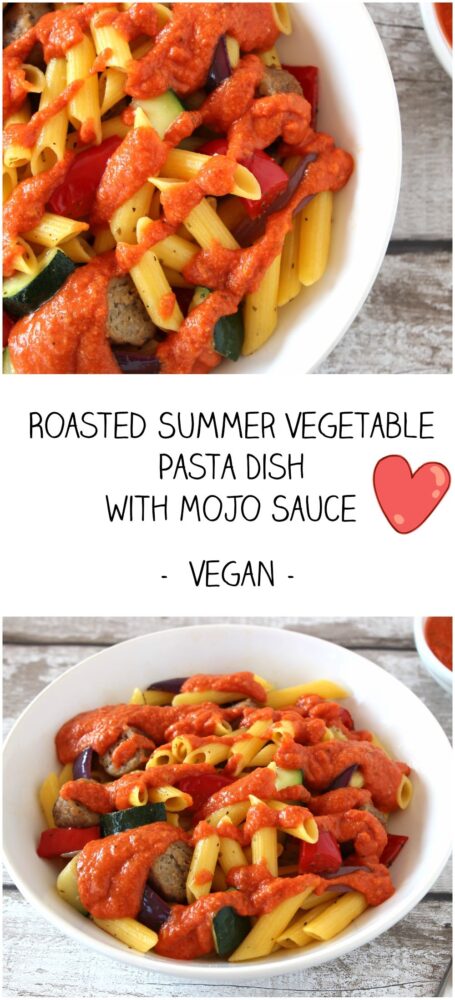
In today’s post, I’m sharing a recipe for a pasta dish that features colourful roasted veggies and chunks of sausage, coated in a delicious red pepper sauce. It’s easy to prepare and makes a great weeknight meal.

Roasted Vegetable Pasta with Mojo Sauce

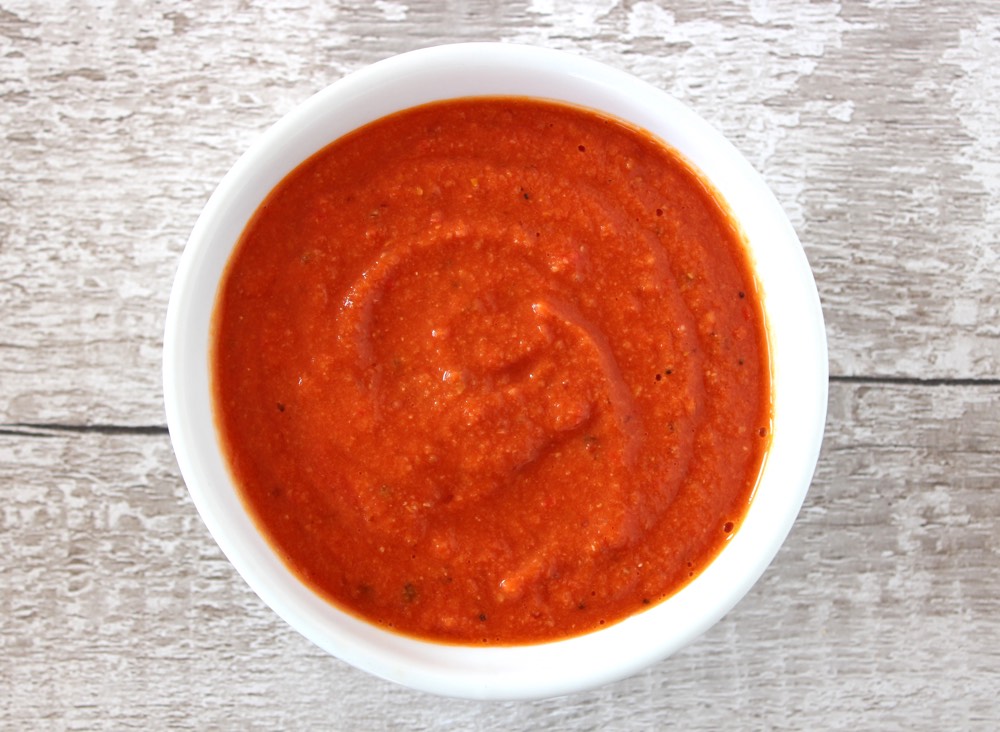
The mojo sauce really is the star of this dish, and takes it to a whole new level of deliciousness. I first discovered this sauce in a supermarket in La Palma, and it was just perfect for brightening up our simple home-cooked veggie meals. Back home, I’d been dreaming about this sauce and finally, nearly a year later, I set to re-creating it.

The main ingredient in mojo sauce is pepper. In La Palma, it is traditionally made with small red peppers called pimienta picona, which gives it a beautiful orangey-red colour and spicy flavour. According to Wikipedia, every Canarian family has its own recipe for mojo though, so it can vary greatly in flavour, spiciness and texture.

Mojo Sauce

I love that the sauce is so adaptable, and I really enjoyed creating my own rendition. I can’t claim that it’s in any way authentic, but it’s very similar to the colour, flavour and texture of the sauce we enjoyed last year.

While it’s packed full of flavour, I’ve kept the chilli heat to a minimum so that it’s suitable for all members of the family, including kids and spice wimps (like me!) Of course, you’re very welcome to crank up the heat by adding some fresh chillies into the mix.

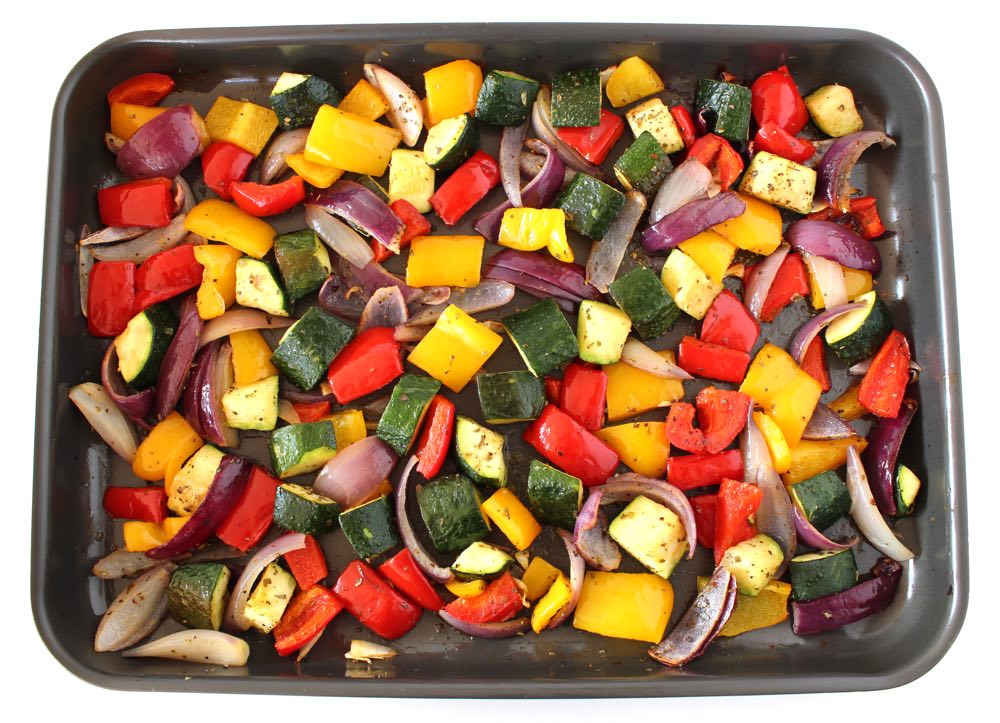
Roasted Veggie Tray

To prepare this pasta dish, I first roast a tray of colourful veggies. My favourite mix is bell peppers, courgette and red onion. Into the oven, I also add four or five vegan-friendly sausages.

While the veggies are roasting, I cook the pasta and prepare the mojo sauce. To make the sauce, it’s simply a case of throwing all the ingredients in a high speed blender, whizzing smooth, then gently heating through.

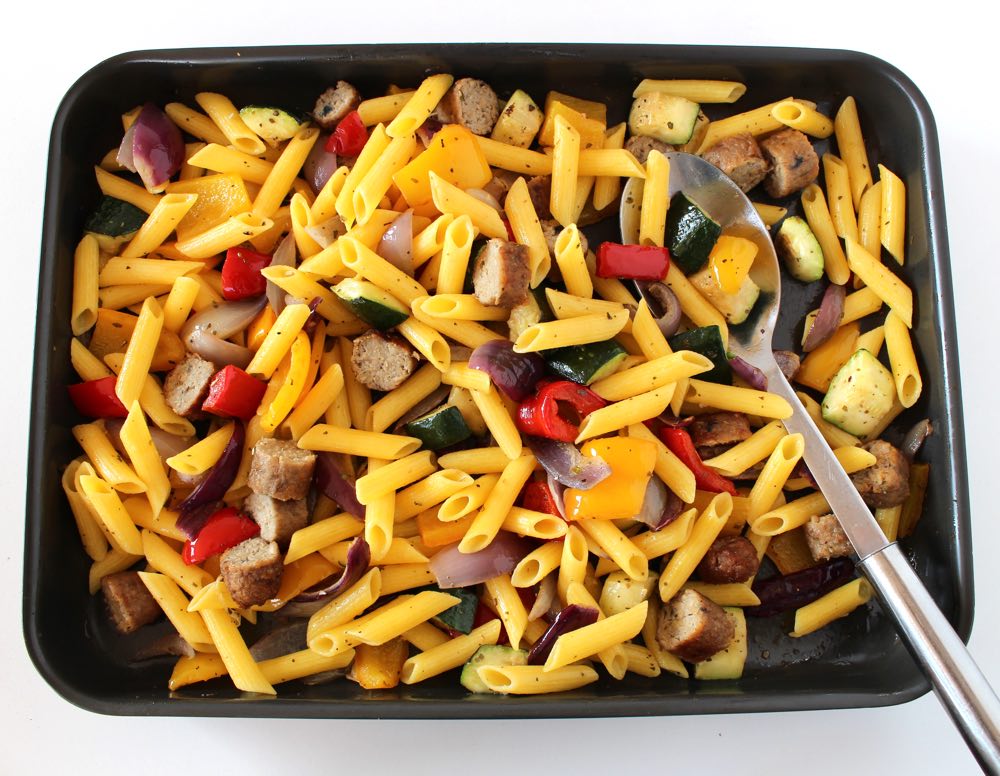
Once the veggies, sausages and pasta are ready, I stir them through to combine…

Roasted Vegetable Pasta Dish

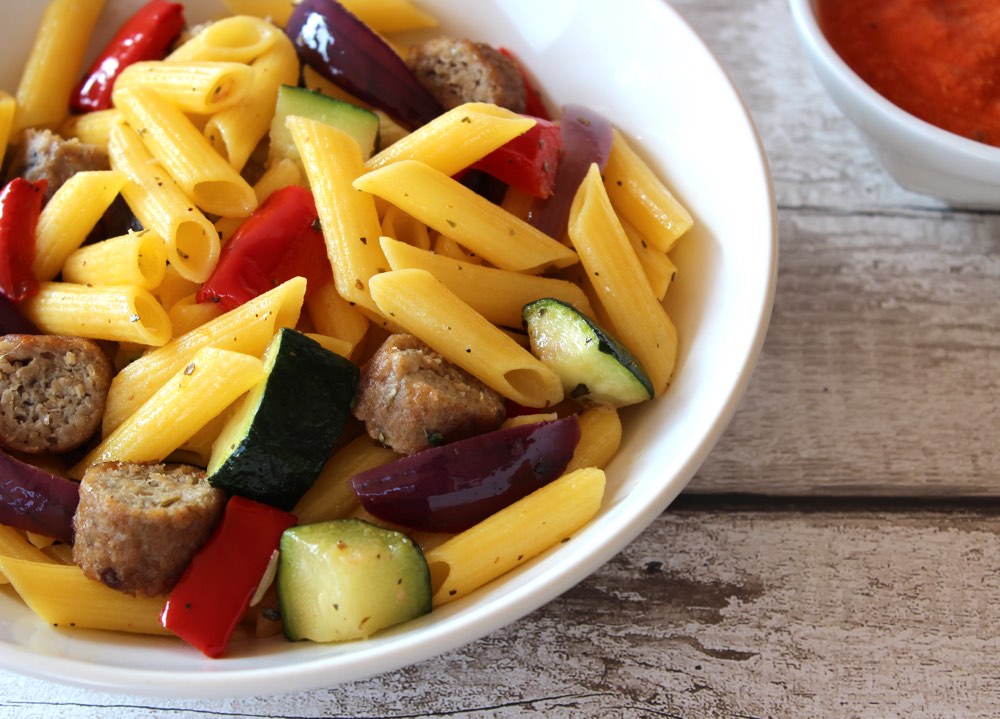
… transfer to warm bowls…

Roasted Veg Pasta with Mojo Sauce

… and invite the family to drizzle on the mojo sauce, before tucking in.

Roasted Veg Pasta with Mojo Sauce

So good!

Recipe Card

Roasted Summer Vegetable Pasta Dish with Mojo Sauce

This recipe was inspired by a visit to La Palma. It was on this beautiful Canary Island that I discovered mojo sauce. It’s a delicious, flavour-packed sauce, which you can use in myriad ways. I love drizzling it on pasta, rice and couscous dishes and stirring it through beans and veggies for burrito-style wraps. I also use it as a dressing for salads, dip for bread and topping for jacket potatoes.
Hands on time 30 minutes
Total Time 30 minutes
Course Dinner
Cuisine Spanish
Servings 4

Ingredients
 

  • 2 red medium onions sliced into chunks
  • 1 large courgette (zucchini) (about 325g) sliced into bite-size chunks
  • 2 sweet romano or bell peppers deseeded and sliced
  • 1 TBSP olive oil
  • 1 tsp dried oregano
  • pinch of salt
  • 6 vegan-friendly sausages I used Linda McCartney Chorizo & Red Pepper sausages which are vegan & gluten free
  • 350 g / 12.5 oz penne pasta (Use GF pasta, if needed)

Mojo sauce

  • 400 g / 14 oz can chopped tomatoes with chilli*
  • 2 tsp minced garlic (raw or pan-fried – see Note **)
  • 1 sweet romano or red bell pepper chopped
  • ½ tsp salt
  • ½-1 tsp ground cumin
  • 1 tsp unrefined sugar
  • 2 TBSP extra virgin olive oil
  • 2 slices of bread broken into pieces [see Note *** for a GF option]

Instructions
 

  • Pre-heat the oven to 200C (180C fan) / 400F.
  • Arrange the onions, courgette and pepper pieces in a large roasting tin. Drizzle in the olive oil and stir through to combine. Sprinkle on the oregano and a pinch of salt. Roast for about 16-20 minutes, until the vegetables are tender. Stir half way through the cooking time.
  • Cook the sausages as per the instructions on the packet (I pop them in the oven at the same time as the veggies). When cooked, slice into bite-size pieces.
  • Prepare a large pan of salted boiling water and cook the pasta until al dente. Drain, then return the pasta to the pan. Drizzle in a drop of olive oil and stir through to prevent the pasta sticking together.
  • Prepare the mojo sauce: Add all the ingredients to a jug blender. Initially begin with ½ tsp cumin and sugar, and 1 slice of bread. Blend from low to high speed, until smooth. Taste test and add more cumin and sweetener, if desired. Pour the sauce into a pan and gently heat through before serving.
  • Once the vegetables, sausages and pasta are cooked, combine them and transfer to warm pasta bowls. Drizzle the mojo sauce on top, and serve.
  • Any leftovers can be stored in the fridge for up to five days. Gently heat through before serving.

Notes

* If serving to children, use a can of plain chopped tomatoes or chopped tomatoes with basil.
** If, like me, you’re not a fan of raw garlic, pan-fry it in a splash of olive oil until it just starts to brown.
*** For a gluten-free mojo sauce, use 150g / ¾ cup butter beans to thicken the sauce instead of bread.
Keyword Easy Vegan Meals
Tried this recipe?Let us know how it was!

Pin for later ⬇️

Summer Roasted Vegetable Pasta with Mojo Sauce

Big thank you to Suma for supplying the following ingredients that I used in the recipe:

– Suma Organic Chopped Tomatoes with Chilli
– Suma Organic Italian Extra Virgin Olive Oil
– Suma Organic Corn Rice Penne Pasta
– Aspall Red Wine Vinegar

If you make this Roasted Summer Vegetable Pasta Dish, I’d love to hear your feedback and any suggestions for adaptations! Tag your photos with #bitofthegoodstuff on social media – I always love to see your creations! You can also connect with me on my social media channels here: Instagram, Facebook, Pinterest.   

With love,

Sharon xx

SaveSave

Creamy Butternut Squash Soup with Golden Pan-Fried Chickpeas

Jump to Recipe

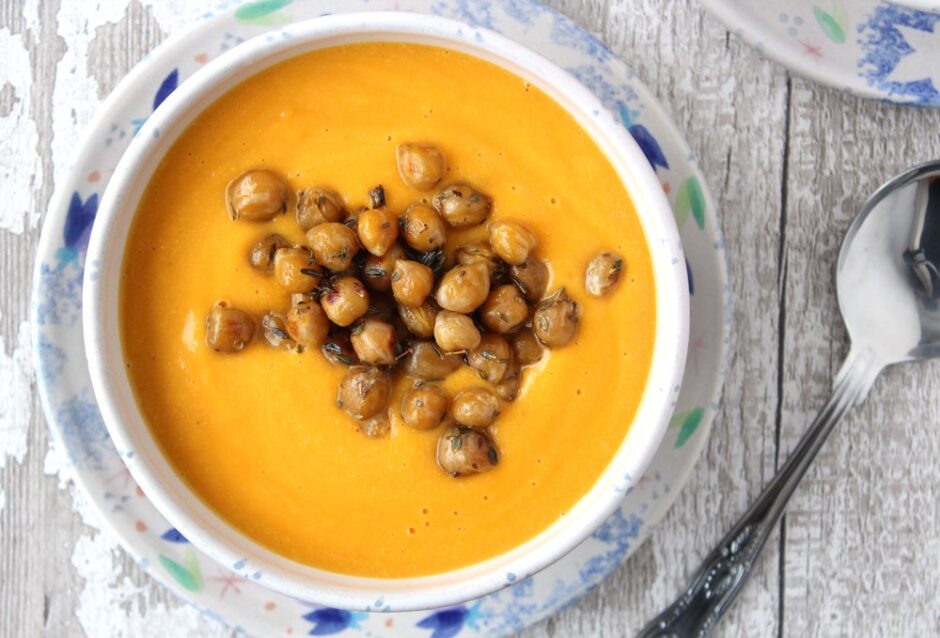
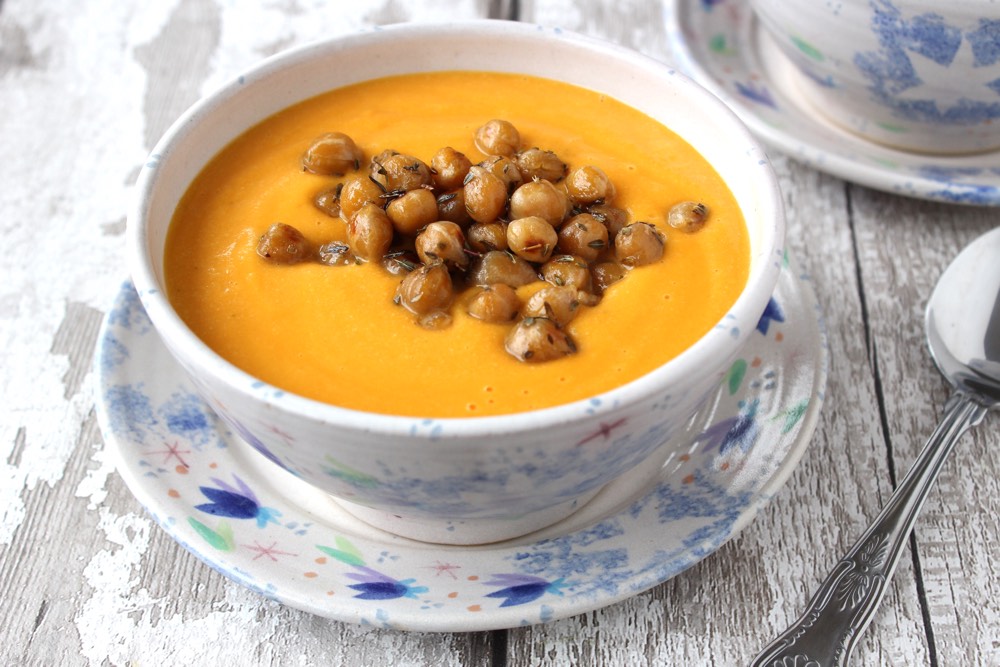
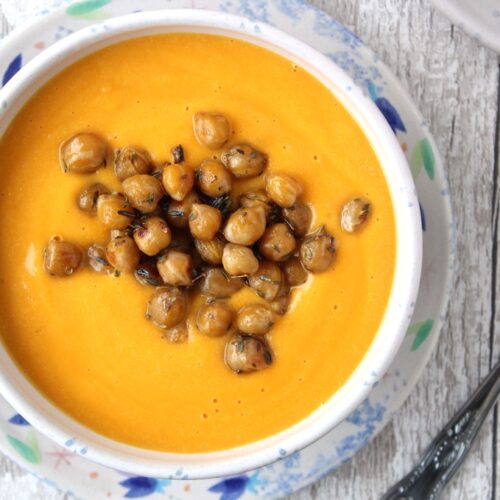
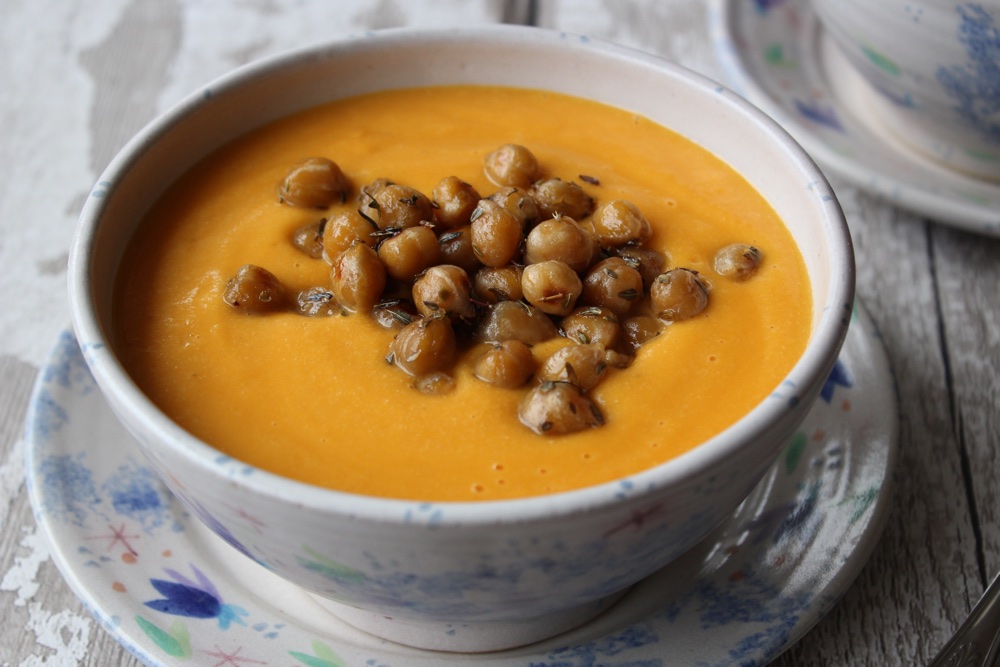
In today’s post, I’m sharing a recipe for the perfect Winter warmer – Creamy Butternut Squash Soup with Golden Pan-Fried Chickpeas 💛 With its delicious, sweet flavour and golden orange hue, this soup is so bright and cheery that it’s bound to put a smile on your face. It also happens to be packed full of immune-boosting nutrients to help keep those pesky Winter bugs at bay.

Creamy Butternut Squash Soup

Butternut squash is a fantastic immunity-booster. Of all the winter squashes, it contains the highest amount of vitamin C. It’s also packed with the vitamin A antioxidants alphacarotene and betacarotene.

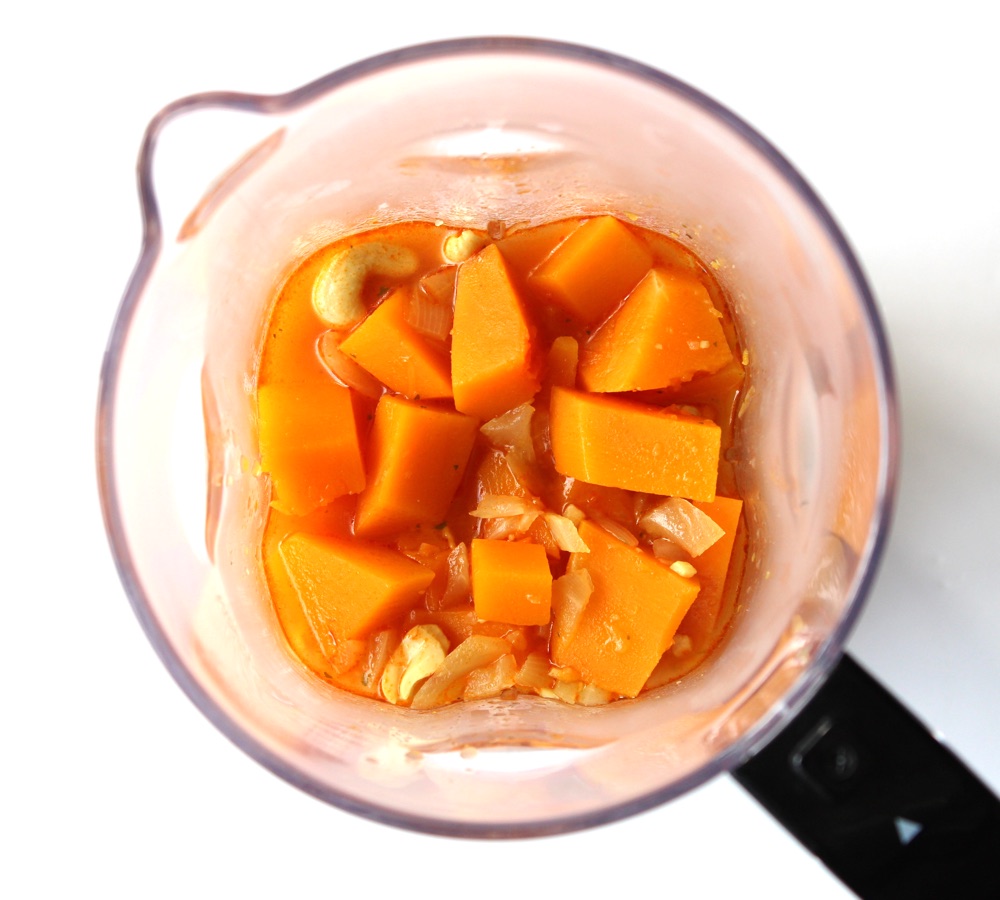
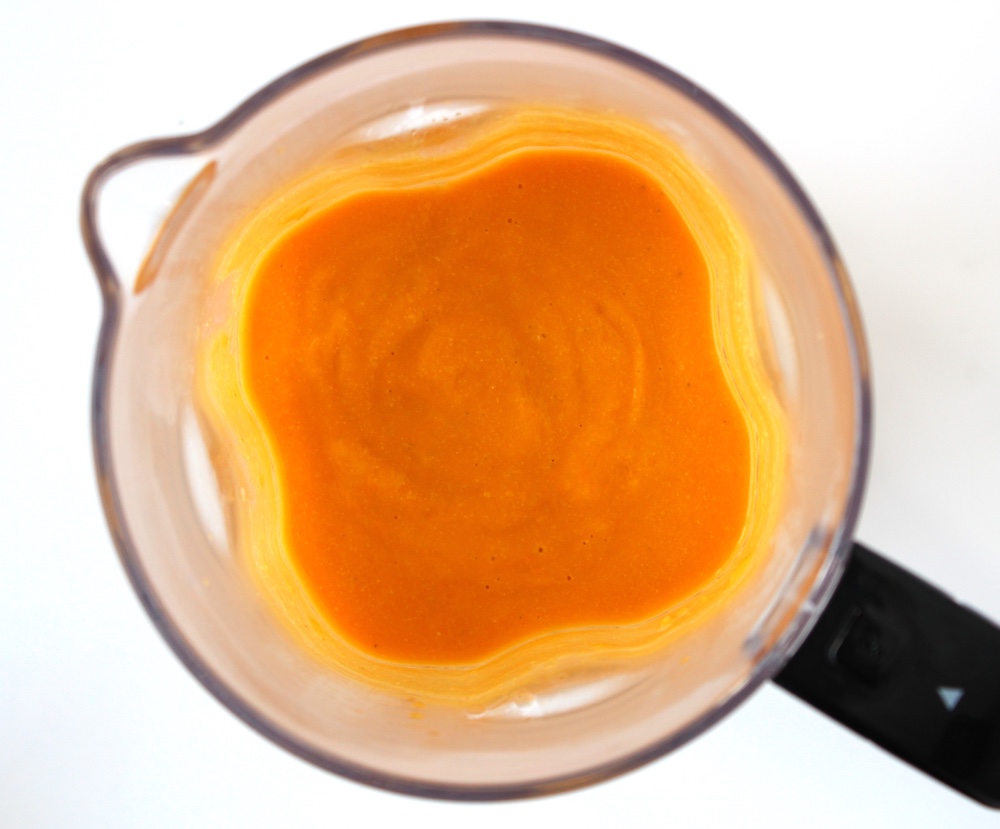
I love blending some cashews into this soup to make it thick and creamy. The cashews also provide protein and heart-healthy fats, which help us to feel full and satiated. Simmering the cashews in the soup softens them, making them easy to blend smooth in a high-speed blender.

Butternut Squash Soup in blender

Butternut Squash Soup in blender

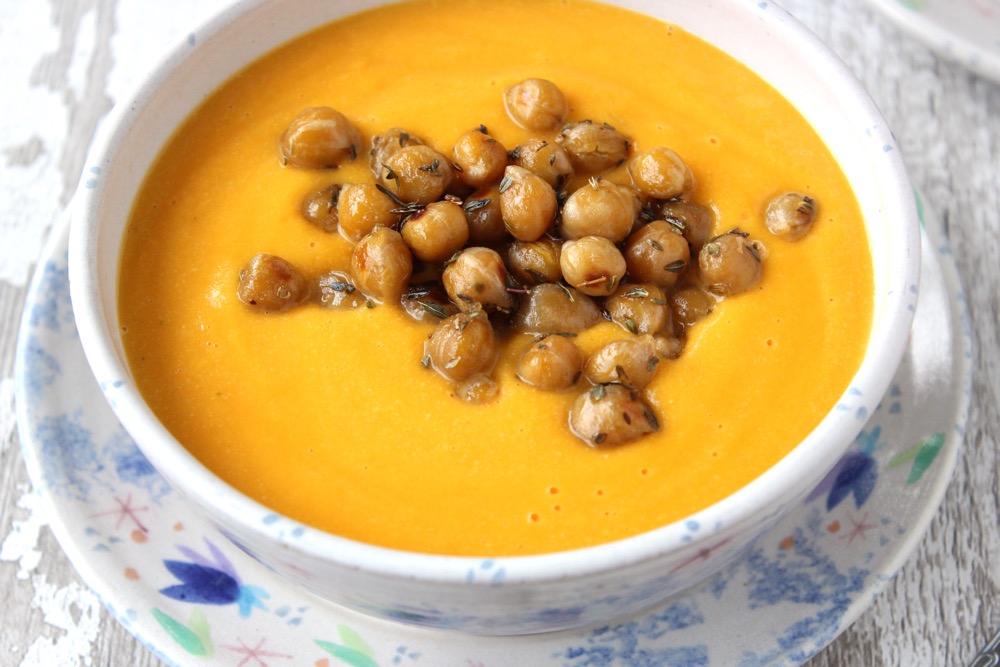
My family loves to serve this soup as a weekend lunch or weeknight supper. The Golden Pan-Fried Chickpeas that I posted last week, make the perfect topping.

Creamy Butternut Squash Soup

Recipe Card

Creamy Butternut Squash Soup

This soup is cheery, flavourful and packed full of immune-boosting nutrients. The addition of cashews makes it thick, creamy and filling. We love to top it with Golden Pan-Fried Chickpeas (recipe link in Notes below). These only take eight minutes to make, so we prepare them while the soup is simmering or cooling.
Hands on time 15 minutes
Total Time 30 minutes
Course Light Dinner, Lunch
Servings 4

Ingredients
 

  • ½ TBSP olive oil
  • 1 medium onion finely chopped
  • 2 tsp minced garlic
  • 750 ml / 3 cups vegetable stock (broth)
  • 800 g / 5 cups butternut squash deseeded and chopped into small, bite-size pieces
  • 1 TBSP tomato puree (paste)
  • 72 g / ½ cup cashews
  • salt & freshly ground black pepper to taste

Instructions
 

  • Gently heat the oil in a large saucepan. Cook the onion until it starts to soften (about 4 minutes). Add the garlic and cook for a further minute.
  • Add the vegetable stock, squash, tomato puree and cashews to the pan. (This is meant to be a thick soup, so the liquid should just be sufficient to cover the squash). Bring to the boil, then reduce the heat, cover with a lid and simmer for 15 minutes or until the squash is tender.
  • Leave to cool slightly then transfer to a high speed jug blender (due to the quantity of soup, I recommend blending half at a time). Start blending on low speed, then increase to high speed until silky smooth.
  • Transfer the soup back to the pan and gently heat through. Season with salt and freshly ground pepper, to taste.
  • This soup will keep for five days in the fridge. I haven’t tried it yet, but I’m pretty confident it will be freezable too.

Notes

My recipe for Golden Pan-Fried Chickpeas can be found here.
Keyword Budget Vegan Meals, Dairy-Free, Easy Vegan Meals, Vegan Soup
Tried this recipe?Let us know how it was!

As you can probably imagine, it’s pretty tricky taking food photos this time of year as the days are so short and the weather’s so changeable! It was certainly a fun challenge taking these soup photos. As I was shooting them, the sky suddenly clouded over, which totally changed the look and feel of the photos. Compare the photo below to the ones above. It looks pretty different, doesn’t it? It’s dark and gloomy, but kind of atmospheric too.

Creamy Butternut Squash Soup

If you make this Creamy Butternut Squash Soup, I’d love to hear your feedback and any suggestions for adaptations! Tag your photos with #bitofthegoodstuff on social media – I always love to see your creations! You can also connect with me on my social media channels here: InstagramFacebook, Pinterest.   

With love,

Sharon xx
SaveSaveSaveSave