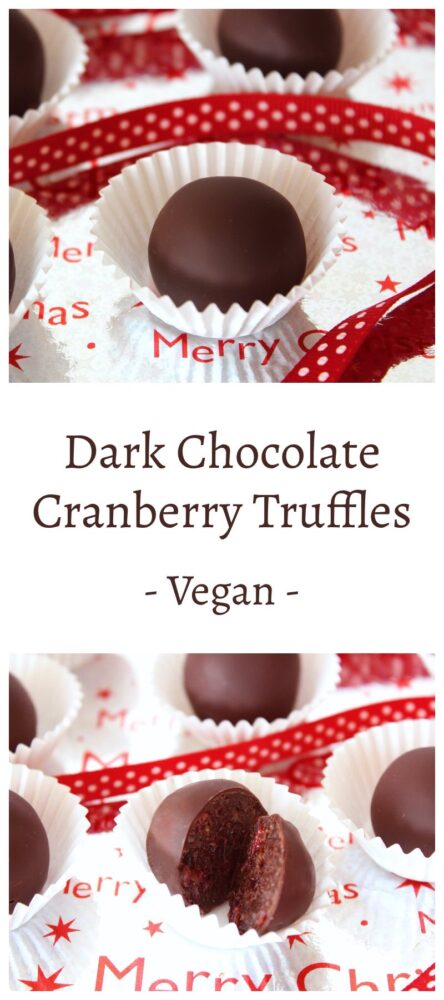
Today I’m sharing some delicious home-made vegan truffles that are really easy and quick to prepare. With a fudgy centre speckled with shiny red cranberries and a dark chocolate coating, these truffles are the perfect treat for the festive season. They also happen to be packed full of nutrient-rich ‘feel-good’ ingredients, making them one festive treat that you definitely won’t regret indulging in!
To make these treats, it’s simply a case of whizzing the filling ingredients in a food processor, rolling it into balls and then dipping them in melted chocolate. The hardest part is waiting for the chocolate to set before you can dive in!
These truffles make a lovely, thoughtful gift for sharing with friends, family and work colleagues. I love to buy cute little chocolate boxes that fit six truffles, which I then finish off with some festive ribbon and a home-made label.
I originally shared this recipe in the Bit of the Good Stuff cookbook back in 2016, and it’s received lots of lovely feedback! Since my cookbook is almost out of print, I thought I would share the recipe on the blog so more of our lovely readers can access it.
Recipe Card
Prevent your screen from going dark
Dark Chocolate Cranberry Truffles
Chocolate coated with a fudgy centre speckled with shiny red cranberries, these truffles are the perfect treat for sharing in the festive season. They also happen to be packed full of nutrient-rich 'feel-good' ingredients, making them one festive treat that you definitely won’t regret indulging in!
110g/ ½ cup soft, sticky dates (e.g. Medjool)pitted
20g/ 3 TBSP cocoa powder
1½tspvanilla extract
1tspmaple syrup
pinch of salt
35g/ 4 TBSP dried cranberries(preferably sweetened with fruit juice)
100g/ 3½ oz dark chocolatechopped into small pieces (or use dark choc chips)
Instructions
Whiz the nuts in a food processor to break them down. Add the dates, cocoa powder, vanilla extract, maple syrup and salt. Process until the mixture has formed crumbs that easily stick together when pressed between your thumb and forefinger. Add the cranberries and process until they are roughly chopped. Taste test and add a touch more cocoa or sweetener, if desired.
Line a tray with non-stick baking paper. Scoop ½ TBSP mixture and roll it into a ball, then place on the paper. Repeat with the remaining mixture.
Place the chocolate in a heat-proof bowl set over a pan of gently simmering water (make sure the water doesn’t touch the bowl). When the chocolate has melted, switch off the heat.
Using a metal spoon, quickly roll each truffle in the chocolate. Place the truffle on a fork and gently shake off the excess chocolate. Place the truffle back on the lined tray. Repeat with the remaining truffles. Chill in the refrigerator until set.
If you have any melted chocolate left over, pour it onto a piece of baking paper to form a chocolate ‘puddle’ then chill until set. You can save this for another recipe.
Stored in an airtight container, these truffles will keep for weeks in the refrigerator or freezer.
If you make these Dark Chocolate Cranberry Truffles (or any other recipes on our blog), I’d love to hear your feedback and any suggestions for adaptations! Tag your photos with #bitofthegoodstuff on social media – I always love to see your creations! You can also connect with me on my social media channels here: Instagram, Facebook, Pinterest.
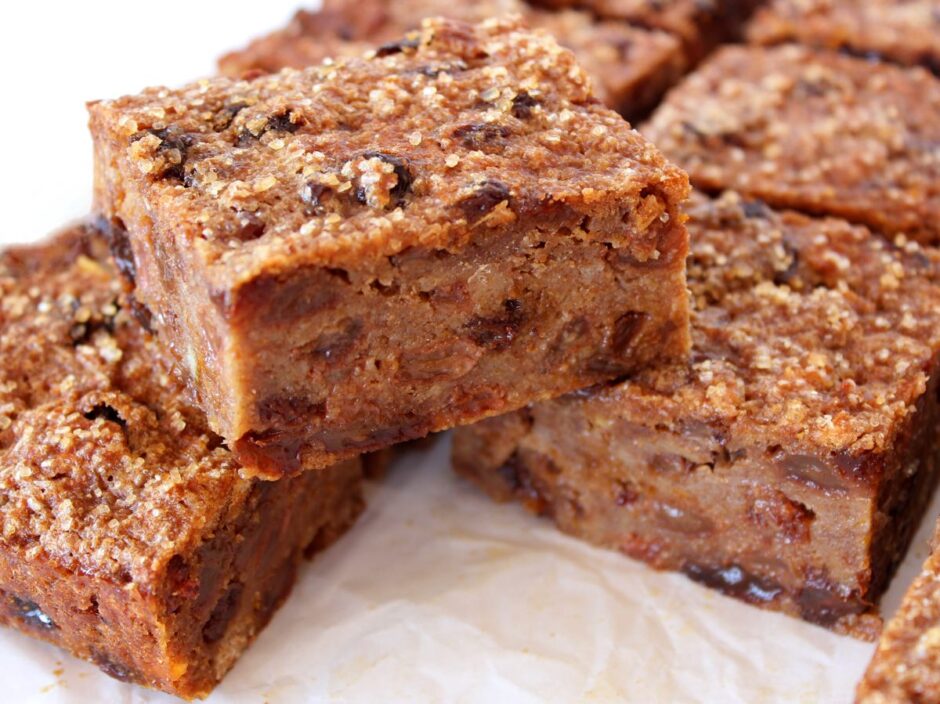
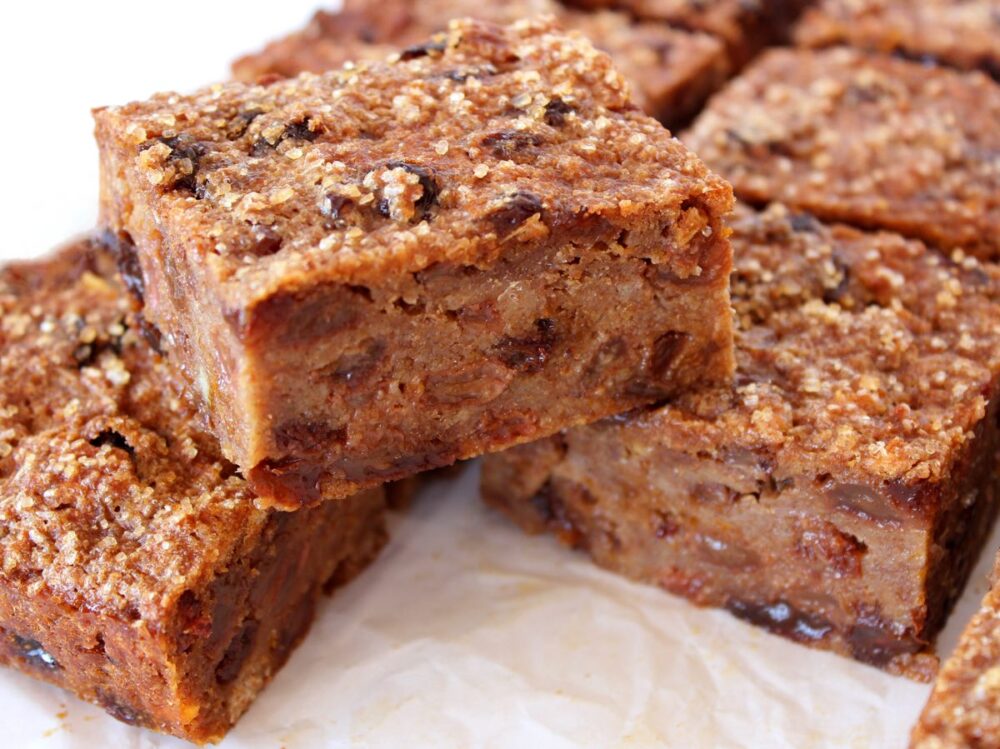
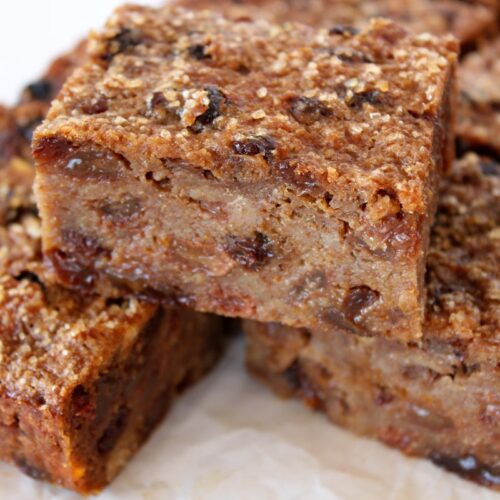
Today I’m delighted to be sharing the recipe for one of my favourite childhood treats – Old Fashioned English Bread Pudding. Its name certainly doesn’t do it justice though, as it tastes nothing like bread nor would I describe it as a pudding! Instead, it is more like a sweet, dense fruit cake. It is delicious served with a hot cuppa, and also makes a fantastic energy-boosting snack to stash in your backpacks for hikes and bike rides. I think this year, all of us have been spending a lot more time outdoors and we definitely need some tasty snacks to keep us fuelled and put a spring in our step. This bread pudding definitely fits that bill!
When I first went vegan, I thought that I was going to have to forego this favourite treat of mine, but it turns out that it was really easy to ‘veganise’ my family’s traditional bread pudding recipe. It was simply a case of switching the cow’s milk for plant milk (I use soya), switching the butter for oil, and ditching the egg. I honestly couldn’t tell the difference from the original. I was absolutely over the moon that my beloved bread pudding was back on the menu.
When I was selling my cookbook at local fairs, I would often take some trays of bread pudding to display on our stall, and they would go in a flash. It was a running joke that the bread pudding was our top sales person as people would often buy a slice, then come back to buy the book specifically for that bread pudding recipe!
Since my cookbook is almost out of print, I thought it would be useful to share the recipe here on the blog, so everyone can enjoy a slice or two of this tasty treat.
It is really easy to make and super cheap too! It is traditionally made with stale bread, but as bread never hangs around long enough in my house to go stale, I buy a cheap loaf of wholemeal bread instead. The supermarkets’ own brand medium-sliced bread only costs about 60p and you need less than a whole loaf to make 16 slices of bread pudding, making it an absolute bargain!
Recipe Card
Prevent your screen from going dark
Old Fashioned English Bread Pudding
Its name certainly doesn't do it justice, as bread pudding neither tastes like bread nor would I class it as a pudding! It's more like a sweet, dense fruit cake. It is delicious served with a cuppa and also makes a fantastic energy-boosting snack for hikes and bike rides. It's super filling, so be sure to cut those squares a modest size!
50ml/ ¼ cup neutral-flavoured oil (I use organic rapeseed (canola) oil)
100g/ ½ cup unrefined ('golden') caster sugar or coconut sugar
2TBSPDemerara or turbinado sugar
Instructions
Crumble the bread into a large mixing bowl. Pour in the milk and continue crumbling the bread until it has completely broken down. Stir in the mixed spice, cinnamon and dried fruits. Set aside for 30 minutes.
Preheat the oven to 180C (160C fan) / 350F. Grease and line a 20cm / 8 inch square baking tin with non-stick baking paper. Leave some paper overhanging the edges for easy removal.
Add the citrus zest, oil and sugar to the mixing bowl. Stir until thoroughly combined, then tip into the prepared tin. Press down and level with a spatula. Sprinkle the Demerara sugar evenly on top. Bake for 1½ hours, or until a skewer inserted through the middle comes out clean. Leave to cool completely, then remove from the tin and slice.
Stored in an airtight container in the fridge, the bread pudding will keep for a week. It also freezes well.
If you make this Old Fashioned English Bread Pudding, I’d love to hear your feedback and any suggestions for adaptations! Tag your photos with #bitofthegoodstuff on social media – I always love to see your creations! You can also connect with me on my social media channels here:Instagram, Facebook, Pinterest.
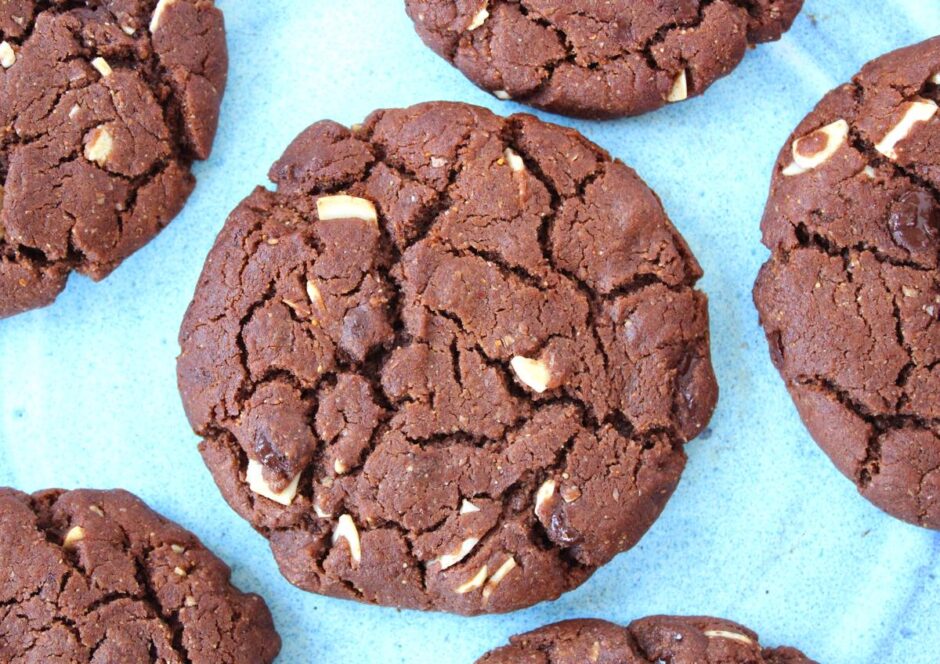
Happy Easter everyone! Today, I’m excited to be sharing with you the recipe for Pret’s world famous Dark Chocolate and Almond Butter Cookie! 🍪 This has to be one of the best cafe cookies available, and one of my personal favourites! Fresh from the oven, this decadent chocolate cookie is crunchy on the outer edge, gooey in the middle with melting chunks of dark chocolate and crunchy almond pieces throughout. It’s so good!
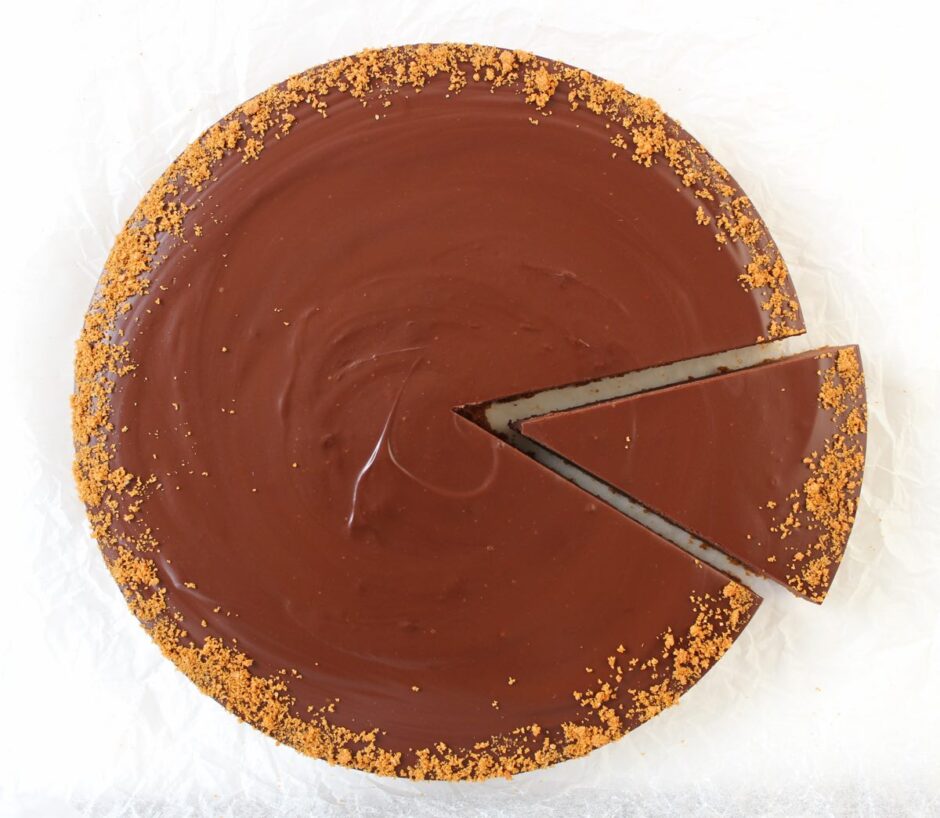
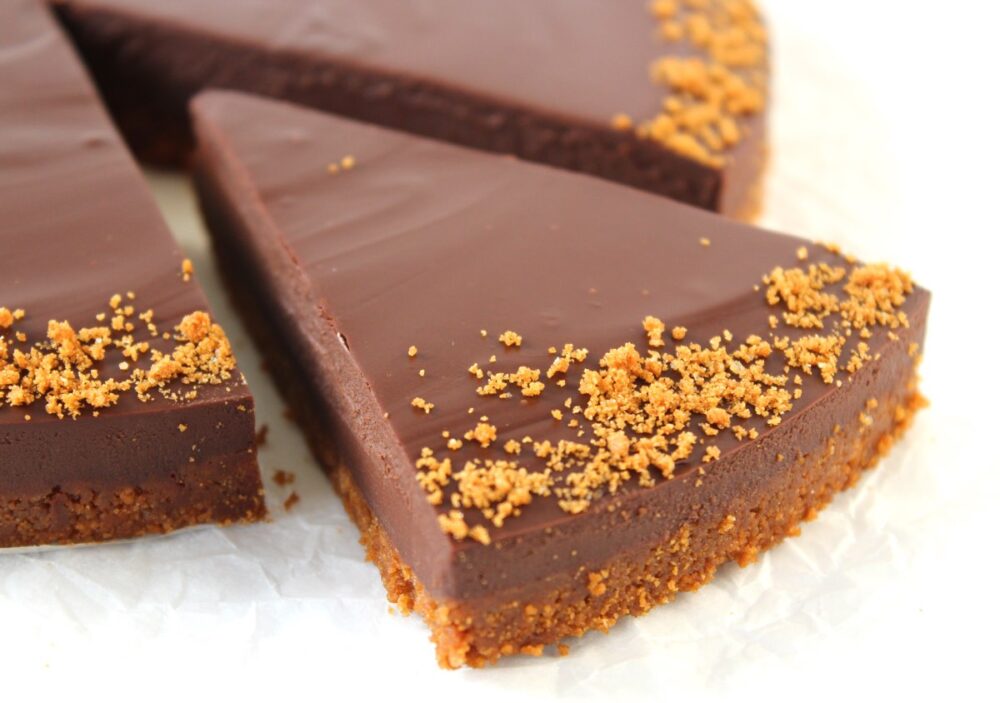
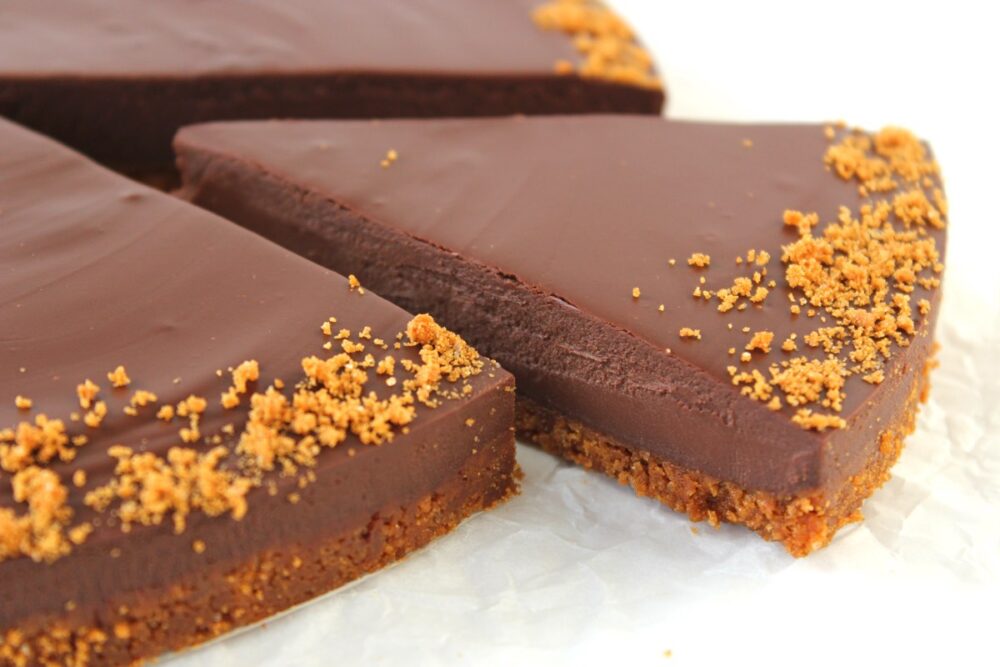
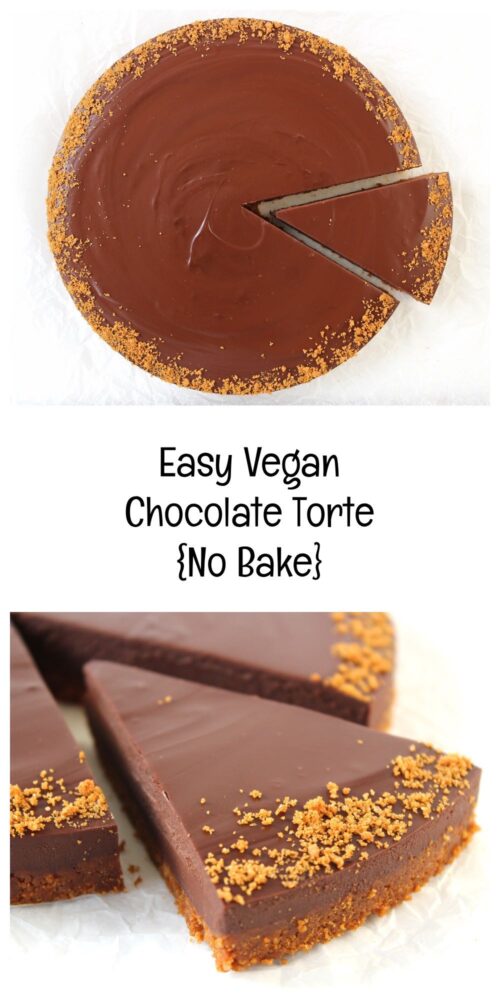
If you’re looking for a special occasion dessert that is super easy to make but has the ‘wow’ factor, then today’s recipe is for you! It’s a rich chocolate torte, consisting of a silky smooth ganache set on top of a biscuit base. There is no baking involved and it only takes around 20 minutes to prepare. The hardest part is waiting for it to set before you can dive in!
The inspiration for today’s recipe was a Dark Chocolate & Coconut Tart that I spotted in this month’s Vegan Life magazine. It looked so decadent and inviting! As I love playing around with recipes and creating my own take on them, I decided to switch the pastry for a biscuit base (to make it a ‘no bake’ recipe) and I experimented with different ingredients for the chocolate filling. I’m not personally a big fan of the chocolate coconut flavour, so I opted to use soya cream instead of coconut milk, and it worked really well!
For the biscuit base (aka cookies for our overseas friends!) I chose to use Lotus Biscoff biscuits. The sweet caramel flavour of these biscuits worked beautifully with the rich dark chocolate ganache. I added a little sprinkle of Biscoff crumbs on top to finish off the torte and it looked so pretty… like little flecks of gold!
If you’re gluten-free, you can easily switch the Lotus biscuits for a gluten-free biscuit/cookie instead. One of my favourites are the Nairn’s Gluten Free Biscuit Breaks and I think their Stem Ginger Biscuit could work well in this recipe. I’ll definitely have to give it a try.
I made this torte to share with friends and family over the festive holidays and so far, it’s going down a treat. Everyone that’s tried it has given it a big thumbs up!
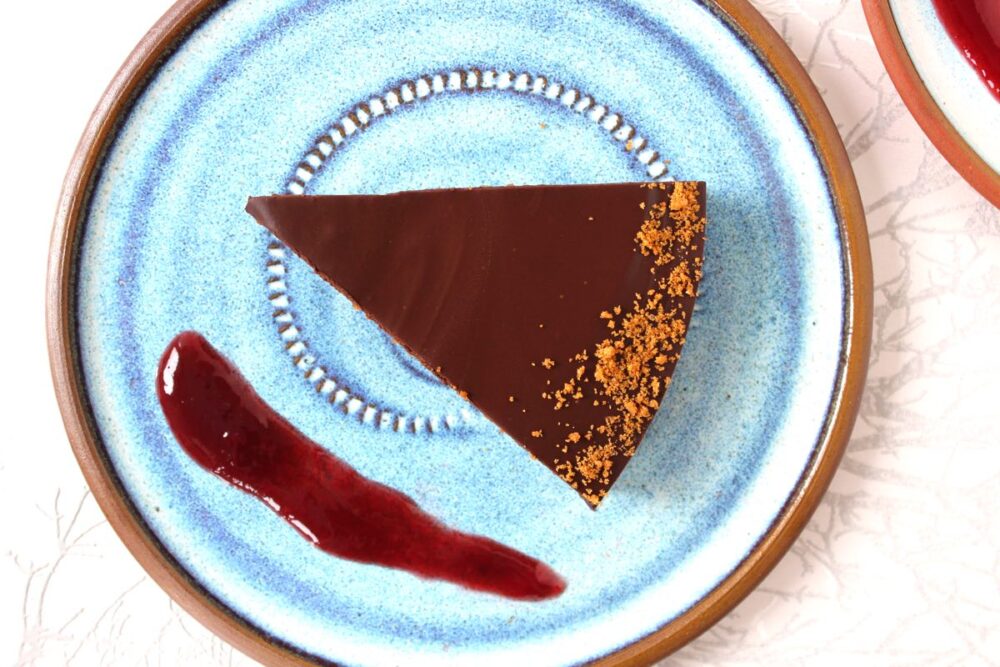
It is pretty rich and filling, so be sure to slice modestly. (The recipe below will easily serve twelve). I love to serve the torte with some fruit compote on the side. The fruit helps to cut through the richness of the chocolate. Cherry or raspberry compote are my favourites as I find their flavours pair really well with chocolate. Adding the compote also helps to ‘dress’ the serving plate (though I really need to work on my plating skills! 😂)
Recipe Card
Prevent your screen from going dark
Easy Vegan Chocolate Torte [No Bake]
This vegan chocolate torte is perfect for special occasions. It is really easy to make but looks impressive! It is rich, so a little goes a long way. I love to serve it with some compote on the side as the fruit helps cut through the richness of the chocolate. Cherry and raspberry are my favourites.
175gLotus Biscoff biscuits(or other vegan biscuits/cookies like digestives or ginger nuts. Use GF biscuits/cookies if needed)
75g/ 5 TBSP vegetable spread/vegan butter
Filling
300g/ 10½ oz dairy-free dark chocolate*chopped into small pieces
250ml/ 8½ fl oz soya cream**(or other plant-based cream)
1tspvanilla extract(or use some orange extract if you’d like to make a chocolate orange torte)
Suggested Decorations
Lotus Biscoff biscuit crumbs
Suggested Accompaniments
cherry or raspberry compote
Instructions
Line the bottom of a loose-bottomed 20 cm / 8 inch flan tin with non-stick baking paper.
Whizz the biscuits in a food processor until they resemble sand (alternatively place them in a sealed bag and bash with a rolling pin). Transfer to a mixing bowl.
Gently melt the vegetable spread/vegan butter in a saucepan. Pour into the mixing bowl with the biscuit crumbs and stir through until thoroughly combined. Transfer to the tin and press down firmly using the back of a metal spoon. Place in the fridge while you prepare the chocolate.
Gently heat the cream in a medium size saucepan. When it starts to simmer, remove from the heat. Stir in the vanilla extract and the chocolate. Continue stirring until the chocolate has fully melted. Taste test and add a touch more extract or some liquid sweetener, if needed.
Pour the chocolate filling over the biscuit base and tap the tin on the worktop to remove any air bubbles. Refrigerate until solid (about 1½ hours).
I like to decorate the torte with a sprinkling of Lotus biscuit crumbs round the edge and some cherry or raspberry compote on the side.
The torte will keep for 5 days in the fridge. It is also freezes well.
Notes
* I used Waitrose Belgian Dark Chocolate made with 72% cocoa.** I used Alpro Single Soya Cream. Readers have also had success using oat cream and coconut cream.
If you make this Easy Vegan Chocolate Torte, I’d love to hear your feedback and any suggestions for adaptations! Tag your photos with #bitofthegoodstuff on social media – I always love to see your creations! You can also connect with me on my social media channels here: Instagram, Facebook, Pinterest.
With love,
Sharon xx
P.S. A huge thank you to everyone who has left a comment or review on this recipe! Your feedback honestly means the world to me, and I love hearing about the creative twists and adaptations you’ve tried. It’s also so helpful for others in the community who come to make this torte, so please do keep sharing your experiences — I truly appreciate it! ❤️
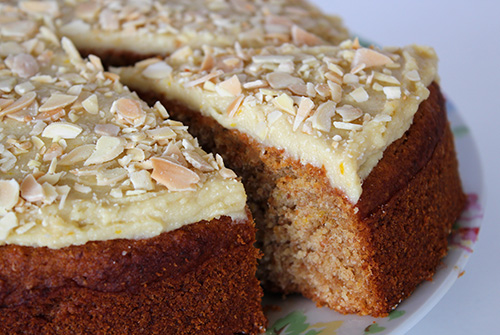
This beautifully moist and zesty Vegan Orange & Almond Cake is made with wholesome, nourishing ingredients. Lightly sweetened and infused with the sunny flavours of fresh orange and almond, it’s perfect for afternoon tea, gatherings, or as a wholesome treat any day of the week!
This cake was inspired by a scrumptious slice of orange and almond cake I once enjoyed at the Holburne Museum Garden Café here in Bath. Determined to recreate it at home with nourishing, plant-based ingredients, I set to work… and I’m delighted to say it turned out beautifully! Moist, flavourful, and subtly fragrant, it’s become one of our firm family favourites.
Unlike most cakes, this one is packed with goodness, including vitamin C, vitamin E, B vitamins, plant protein, and fibre – and provides slow-release energy thanks to the use of wholegrain flour and almonds.
AND it’s easy to make. Even for me! (And if I can bake it, you definitely will be able to).
It’s had great feedback from friends and family. I hope you love it as much as we do!
Why You’ll Love This Cake:
Deliciously moist with a fragrant orange-almond flavour
Naturally sweetened with maple syrup
Free from dairy, eggs & refined sugar
Nourishing & satisfying – perfect for an everyday treat
This beautifully moist and zesty Vegan Orange & Almond Cake is made with wholesome nourishing ingredients. Perfect for teatime, or as an everyday wholesome treat!
140g/ 1 cup fine wholemeal (whole wheat pastry) flour or chapatti flour
140g/ 1 cup plain (all purpose) flour
1½tspbaking powder
½tspbicarbonate of soda (baking soda)
½tspsalt
100g/ 1 cup ground almonds (almond meal)
100ml/ ½ cup organic rapeseed (canola) oil or other neutral-flavoured oil
150ml/ ½ cup + 2 TBSP soya or almond milk
200ml/ ⅔ cup maple syrup
½TBSPzest from an unwaxed / organic orange
60ml/ ¼ cup freshly squeezed orange juice
1tsporange extract
½tspalmond extract
Decorating suggestions:
Orange Cashew Cream Frosting (see recipe below) or apricot jam
3TBSPtoasted flaked almondscrushed
Instructions
Preheat the oven to 180C (160 fan) / 350F. Grease the sides of a 20cm / 8 inch loose-bottomed cake tin with oil and line the bottom with non-stick baking paper.
Sift the flours, baking powder, bicarbonate of soda and salt into a large bowl. Tip any remaining wheat germ into the bowl. Add the ground almonds and stir through to combine.
In a separate bowl, use a fork to whisk together the oil, milk, syrup, orange zest, orange juice, orange extract and almond extract until fully combined.
Make a well in the dry ingredients, pour in the wet ingredients and stir to combine (but do not over mix). Pour the batter into the prepared tin.
Bake for 45 minutes, or until the cake is browned and feels springy when lightly pressed. Leave the cake in its tin until completely cooled (it will firm up as it cools).
Decorate with frosting or apricot jam and sprinkle toasted flaked almonds on top. Lightly press down on the almonds so that they stick. Chill in the refrigerator before serving.
Stored in an airtight container in the refrigerator, this cake will keep for up to 5 days. It also freezes well.
In contrast to traditional frosting, this one is filled with nutrients including antioxidants, vitamins and minerals. It tastes delicious too! The cashews and coconut oil make it smooth and creamy, while the orange adds a zesty, fresh flavour. The quantities in the recipe below yield about ¾ cup frosting, which is sufficient to frost the top of a 20cm / 8 inch cake.
To soften the cashews, boil them in a pan of water for 15 minutes or soak in freshly boiled water for 30 minutes. Rinse in cold water and thoroughly drain.
Place the cashews in a food processor along with the syrup, zest, juice, orange extract and vanilla extract. Process until the cashews are ground into a creamy mixture. Stop now and then to scrape down the bowl. Add the melted coconut oil and continue blending for a few minutes until the mixture is completely smooth. Taste test for smoothness.
Scoop the frosting into a bowl and chill for one hour, or until firm enough to spread. The frosting will keep for five days in the refrigerator. It is also freezable.
If you make this Vegan Orange & Almond Cake, I’d love to hear what you think – and any creative twists you try! Tag your photos with #bitofthegoodstuff on social media – I always love seeing your creations! You can also connect with me on Instagram, Facebook, or Pinterest.