Rocky Road (Vegan Style!)

Jump to Recipe

Looking for the ultimate easy, kid-approved vegan treat? This no-bake Vegan Rocky Road is rich, chocolatey, and packed with crunchy biscuits and fluffy veggie marshmallows.

It’s perfect for kids’ parties, lunchbox snacks, or homemade edible gifts. Completely dairy-free, egg-free, and nut-free, it’s a brilliant option for allergy-friendly treats too. With just a handful of simple ingredients, this fun and freezer-friendly recipe is a joy to make with little ones – no oven needed!

Sorry I haven’t been very active on the blog these past few weeks, but I’ve been hanging out with Lil’ L. He’s growing up fast, and since this could be the last summer that he actually wants to hang out with me, I’ve been soaking up every moment we have together. We’ve had so much fun! We’ve been hiking, biking, playing tennis, picnicking in the park, trips to the cinema (How To Train Your Dragon 2 was a big hit!) and lots of fun playing in the kitchen 🙂

One of the highlights this week was making our own batch of Vegan Rocky Road—a super simple, no-bake treat that’s perfect for rainy days, birthday parties, or sweet little gifts. We’d just received a new The Vegan Kind subscription box and were thrilled to discover a bag of Freedom Mallows inside. These marshmallows are gelatine-free, dairy-free, egg-free, gluten-free, and nut-free, making them a brilliant vegan-friendly and allergy-friendly alternative to regular mallows.
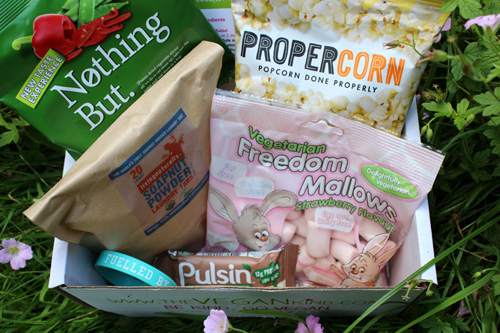
The Vegan Kind Box

And it’s incredible how similar they are to regular marshmallows, both in taste and texture. My mum loves marshmallows and even she couldn’t tell the difference!
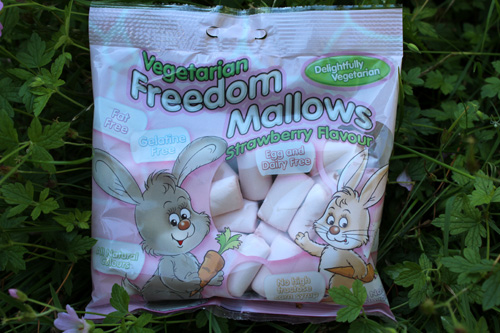
Freedom Mallows

With our stash of strawberry-flavoured mallows in hand, Lil’ L set to work:

Melting chocolate…
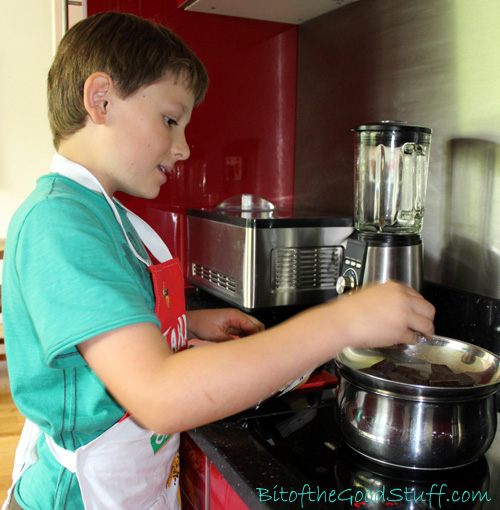
Making Vegan Rocky Road

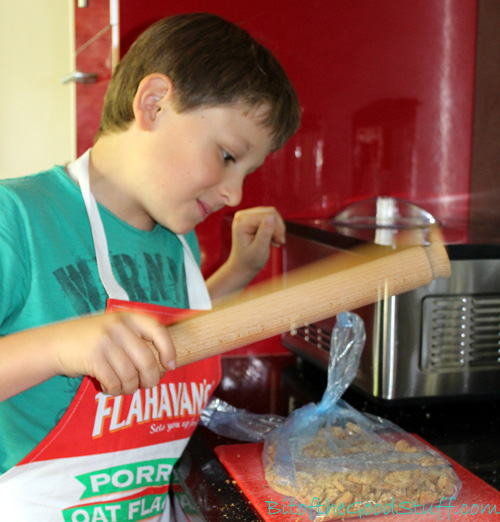
… and bashing biscuits

Making Vegan Rocky Road

… then adding the mallows and mixing it altogether. Since our mallows were strawberry flavoured, we thought it would be nice to finish off our Rocky Road with a sprinkling of freeze-dried strawberries.

After a couple of hours in the freezer, the Rocky Road was ready to slice and sample – and it got a big thumbs-up! Lil’ L has been enjoying it this week as a post-tennis treat, a cinema snack, and he’s also gifted some to friends!

Recipe Card
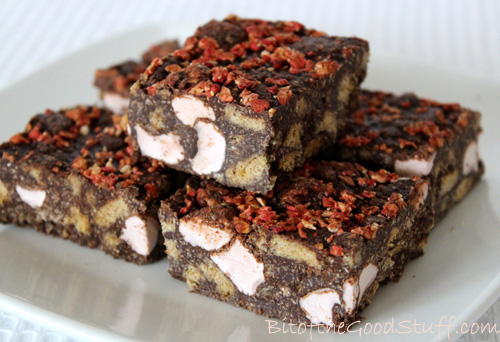
Vegan Rocky Road

Rocky Road (Vegan Style!)

This easy Vegan Rocky Road is the ultimate no-bake chocolate treat! Made with dairy-free chocolate, crunchy biscuits, and fluffy veggie marshmallows, it's perfect for kids' parties, picnics, lunchboxes or gifting! It’s easy and fun to prepare, and perfect for making with little ones.
Hands-on time 15 minutes
Total Time 2 hours 15 minutes
Course Snack, Treat
Cuisine Vegan
Servings 12

Ingredients
 

  • 200 g / 7oz vegan-friendly chocolate (use dark chocolate for a rich flavour or vegan milk chocolate for a sweeter, creamier treat – or a blend of both)
  • 2 TBSP virgin coconut oil plus extra for greasing
  • 200 g / 7oz Digestive biscuits or Rich Tea, Oreos or GF cookies
  • 75 g / 2½ oz veggie marshmallows e.g. Freedom Mallows
  • Optional: Freeze-dried strawberries or raspberries for topping
  • Icing sugar for dusting

Instructions
 

  • Grease and line a freezer-safe container (approx. 12 x 22cm / 5 x 8½ inches) with baking paper.
  • Break the chocolate into chunks and place in a heat-proof bowl along with the coconut oil. Gently melt over a pan of simmering water, stirring occasionally until smooth. (Be sure to make sure the bowl doesn't touch the water).
  • Meanwhile, place the biscuits in a sealed freezer bag and bash with a rolling pin into a mix of small chunks and crumbs.
  • If large, slice the marshmallows into halves or thirds.
  • Once the chocolate is melted, remove from the heat and stir in the crushed biscuits and marshmallows. Mix until everything is well coated.
  • Spoon into the prepared container and press down firmly with the back of a spoon to remove air pockets. Sprinkle with freeze-dried strawberries if using.
  • Freeze for around 2 hours, until solid. Slice into 4 cm (1½ inch) rectangles with a sharp knife. Dust with icing sugar before serving, if desired.
  • Store in an airtight container in the fridge or freezer, where it will keep for weeks.
Keyword dairy free rocky road, kid friendly vegan recipes, no bake vegan treat, vegan party food, vegan rocky road
Tried this recipe?Let us know how it was!

Where to find veggie marshmallows:
In the UK, Freedom Mallows are available from Holland & Barrett, independent health food stores (like Harvest in Bath), and online.

If you give this recipe a try, I’d love to hear how it goes! Leave a comment below or tag your photos with #bitofthegoodstuff on Instagram – I always love to see your creations! You can also connect with me on my social media channels here: InstagramFacebookPinterest.   

Have a sweet and joy-filled weekend!

With love,
Sharon xx
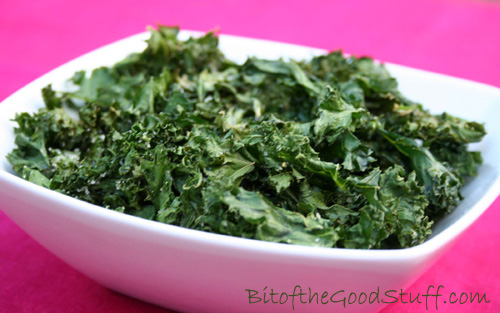
Crispy Kale (aka Kale Chips) with Homemade Gomasio

Jump to Recipe

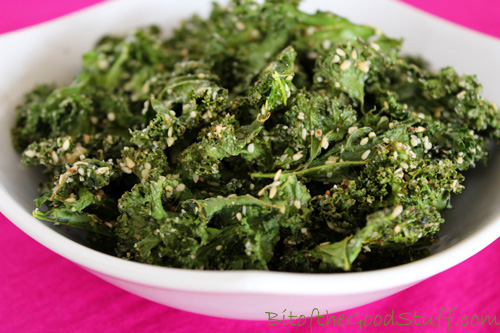
Looking for a healthy, kid-approved snack that’s packed with flavour and crunch? These crispy kale chips are oven-baked to perfection and sprinkled with homemade gomasio – a traditional Japanese seasoning made with toasted sesame seeds and salt.

They’re a long-time favourite in our house. In fact, this was one of the very first recipes I ever shared on the blog, way back in 2011, and it’s still one of my go-to snacks today.

While a lot of health food bloggers are currently enjoying raw kale salads or kale smoothies, my taste buds aren’t quite there yet. I do, however, LOVE crispy kale and will happily munch my way through handfuls of the stuff. And I’m not the only one!

Crispy kale is also one of the best ways I’ve found to encourage Lil’ L to eat kale. I often put a bowl out as a starter or as a side dish and, before I even get to sit down at the table, the whole lot will have been demolished!

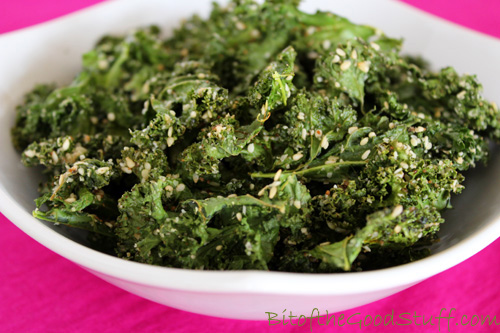
Crispy Kale

🌿 The Secret to Perfect Crispy Kale

Over the past three years, I’ve been fine-tuning my method for making crispy kale, to avoid the common pitfalls of burnt or soggy kale. The trick is to roast it low and slow. I started out baking it at 180°C, but the edges would burn before the centres crisped up. I now roast it at 150°C (130°C in a fan oven), which gives beautifully even, crispy leaves with no bitterness.

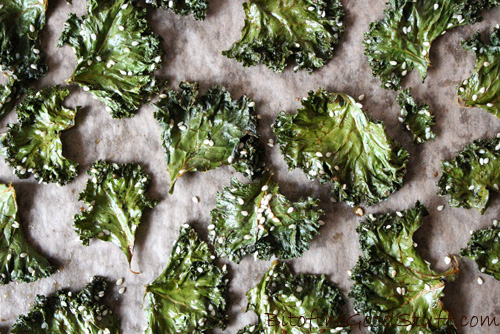
Another tip: let the kale dry thoroughly before baking – a salad spinner works wonders here. And make sure the leaves aren’t overlapping on the baking tray or they’ll steam instead of crisping up.

Stored in an airtight container, the kale stays crispy for days (not that we ever have leftovers!)

Crispy Sweet n Salty Kale

What is Gomasio?

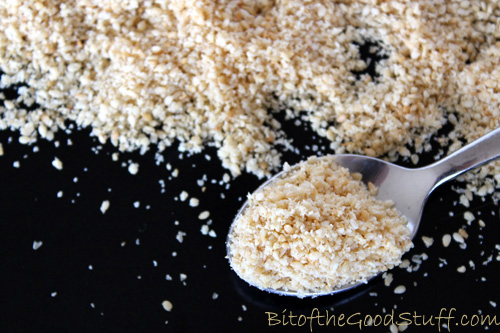
My favourite way of serving crispy kale is with a sprinkling of gosmasio, a traditional Japanese seasoning made from toasted sesame seeds and sea salt. It adds a rich, nutty flavour and just the right amount of saltiness.

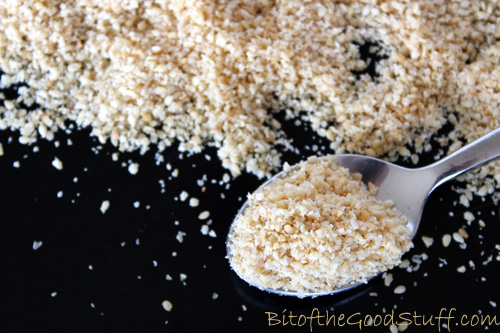
You can find gomasio in health food stores, but it’s so easy – and more affordable – to make at home. I like to grind the sesame seeds slightly, which helps them stick to the kale and also intensifies their flavour. I keep the salt content low so I can sprinkle liberally without overpowering the dish.

Gomasio

Recipe Card

Crispy Kale (aka Kale Chips)

These oven-baked kale chips are light, crispy, and seriously moreish! They make a healthy, delicious snack, appetiser, side dish, or lunchbox filler. We love to flavour them 'sweet and salty' and with a generous sprinkling of gomasio, but feel free to customise with your favourite spice blends.
Hands on time 6 minutes
Total Time 20 minutes
Course Appetizer, Healthy Snack, Lunchbox, Side Dish
Cuisine Japanese-Inspired, Vegan
Servings 3

Ingredients
 

  • 4 large handfuls curly kale (about 100g) thick stalks removed
  • ½ – 1 tbsp coconut sugar or golden caster (unrefined cane) sugar
  • ¼ tsp salt
  • ½ tbsp olive oil
  • 3 tbsp gomasio (see below for recipe) or sesame seeds

Instructions
 

  • Preheat the oven to 150°C (130°C fan) / 300°F. Line two large baking trays with non-stick baking paper.
  • Wash the kale and tear into large bite-size pieces (it will shrink as it cooks). Use a salad spinner (or kitchen paper) to dry thoroughly. Place in a large bowl and give it a final dab with kitchen paper.
  • Sprinkle over the sugar, salt, oil, and gomasio. Massage everything into the kale leaves until evenly coated.
  • Spread the kale out on the prepared trays in a single layer, ensuring the leaves don’t overlap (otherwise they will steam rather than roast). You may need to bake in two batches.
  • Bake for 14 minutes, then check for crispness. If needed, continue baking, checking every 2 minutes.
  • Crispy kale is most delicious eaten warm, straight from the oven. However, it can be stored in an airtight container where it will keep for up to a week.
Keyword baked kale chips, crispy kale, healthy vegan snack, kale chips, kid friendly vegan snack, oven baked kale
Tried this recipe?Let us know how it was!

Homemade Gomasio (Sesame Salt Seasoning)

Easy to make at home with just two ingredients, gomasio is a traditional Japanese seasoning made with toasted sesame seeds and sea salt. It adds a nutty, savoury boost to dishes like stir-fries, rice bowls, noodles, and crispy kale. Vegan, gluten-free.
Hands-on time 5 minutes
Total Time 10 minutes
Course Seasoning
Cuisine Japanese
Servings 12

Ingredients
 

  • 80 g / ¾ cup hulled sesame seeds
  • ¼ tsp salt

Instructions
 

  • Toast the sesame seeds in a dry frying pan (skillet) over medium heat, stirring continuously until golden and fragrant.
  • Transfer to a plate to cool.
  • Once cool, grind with the salt using a mortar and pestle or coffee/spice grinder. If using an electric grinder, pulse just once or twice – too much and you’ll end up with sesame paste!
  • Store in an airtight container in the fridge, where it will keep for several weeks.
Keyword homemade gomasio, sesame salt
Tried this recipe?Let us know how it was!

What’s Your Favourite Kale Chip Seasoning?

Do you make crispy kale at home? Have you tried flavouring it with Chinese, Indian, or Mexican spice blends? I’d love to hear your favourite combinations in the comments below!

With love,

Sharon xx
SaveSave

SaveSave

SaveSave

Vegan Gingerbread Cookies (Dairy-Free / Egg-Free)

Jump to Recipe

Today I’m delighted to share one of my family’s all-time favourite baked treats – Vegan Gingerbread Cookies! These spiced beauties are naturally dairy-free and egg-free, and they make the perfect treat for cosy afternoons, holiday gatherings, or anytime you fancy a wholesome sweet bite.

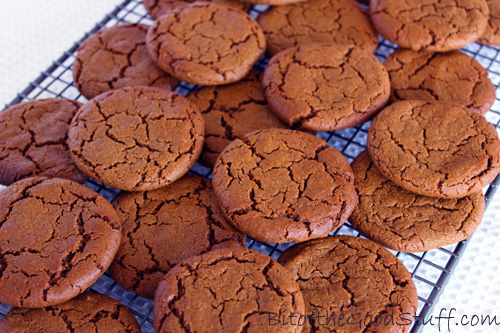
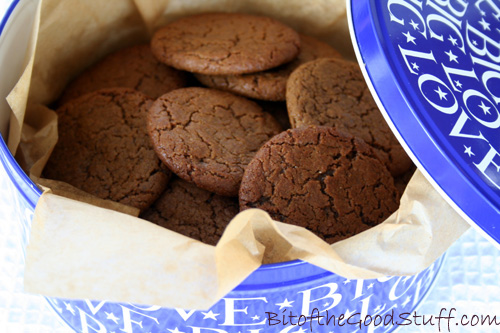
Vegan Gingerbread Cookies

I’m thrilled to be sharing this recipe with the Suma Bloggers’ Network. You might already be familiar with Suma Wholefoods — the UK’s largest independent vegetarian and vegan wholesaler. They’re a workers’ cooperative, which means the business is owned and managed jointly by the staff. Everyone is paid equally and shares responsibility for the day-to-day running of the business. I love what they stand for, so I was over the moon when they invited me to become one of the founding bloggers in their new Network!

Every couple of months, we’ll be sharing plant-based recipes featuring ingredients from the Suma range. You’ll find our creations on our blogs, social media, and a shared Pinterest board.

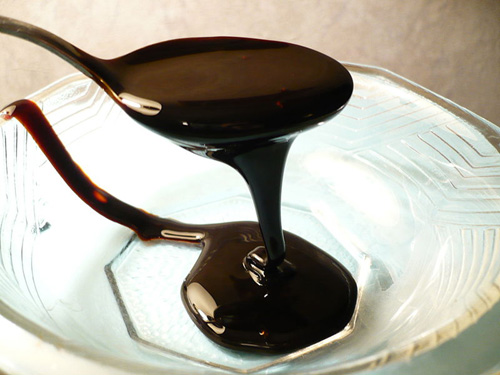
For my first recipe, I’m spotlighting one of my all-time favourite ingredients and unsung superfoods… blackstrap molasses!

Why Bake with Blackstrap Molasses?

Molasses is the rich, dark syrup that remains after sugar cane is processed to make refined sugar. While white sugar has no nutritional value, blackstrap molasses is brimming with nutrients — including vitamin B6, calcium, iron, magnesium, potassium, and selenium. It adds a beautiful depth of flavour and colour to baked goods, especially these spiced gingerbread cookies.

If you’ve got a jar lurking in your cupboard, this recipe is the perfect excuse to dust it off!

Blackstrap Molasses
[Source]

The Cookies

These vegan gingerbread cookies are crisp on the outside with a soft, chewy centre. The blackstrap molasses gives them a subtle liquorice-like flavour without being overpowering. You can use coconut sugar or an unrefined cane sugar for the dry sweetener. Coconut sugar is my favourite as it’s lower GI and has a lovely caramel note; my husband prefers the cane sugar ones (which are slightly sweeter), and Lil’ L says he can’t really tell the difference and loves both!

These cookies have been tried (and loved!) many times over with my family and friends, and I’ve been asked numerous times for the recipe. My standard reply is ‘sure, I’ll post it on the blog’. Well, it’s high time I kept my promise so here it is…

Recipe Card

Vegan Gingerbread Cookies

Vegan Gingerbread Cookies

These gingerbread cookies are infused with warming spices and rich blackstrap molasses. They’re dairy-free, egg-free, and simple to prepare. Perfect for festive treats, holiday baking, or as a cosy everyday snack!
Hands-on time 15 minutes
Total Time 35 minutes
Course Snack, Treat
Cuisine Vegan
Servings 12

Ingredients
 

  • 70 g / ⅓ cup golden caster (unrefined cane) sugar or coconut sugar
  • 50 ml / ¼ cup organic rapeseed (canola) oil or other neutral-flavoured oil
  • 65 g / 3 TBSP Blackstrap molasses or black treacle (molasses)
  • 22 g / 1½ TBSP soya or almond milk
  • ½ tsp vanilla extract
  • 120 g / ¾ cup + 2 TBSP fine wholemeal (whole wheat pastry) flour or chapatti flour
  • 1 – 1½ tsp ground ginger to taste
  • ½ tsp ground cinnamon
  • pinch of ground nutmeg
  • ¼ tsp baking powder
  • ¼ tsp bicarbonate of soda (baking soda)
  • ¼ tsp salt

Instructions
 

  • Preheat the oven to 200°C (180°C fan) / 400°F. Line two baking sheets with non-stick baking paper.
  • In a mixing bowl, whisk together the sugar, oil, molasses, plant milk, and vanilla extract until smooth.
  • In a separate bowl, combine the flour, spices, baking powder, bicarbonate of soda, and salt.
  • Add half the dry ingredients to the wet mixture and stir to combine. Add the remaining dry ingredients and stir until a dough forms.
  • Scoop slightly rounded tablespoons of dough and space six on each baking sheet. With damp hands, press each dough ball into a thin cookie shape.
  • Bake in the centre of the oven for 9 minutes, or until the tops are dry to the touch. (The cookies will still feel soft but will firm up as they cool).
  • Leave to cool on the baking sheets, then carefully transfer to a wire rack using a thin spatula.
  • Once fully cool, store in an airtight container. They’ll keep for up to two weeks. They can also be frozen in an airtight freezer bag.

Notes

Freshly baked, the cookies are crisp on the outside and chewy inside. Over time, they become softer but remain just as tasty.
Using black treacle or a milder molasses will create a gentler flavour; blackstrap adds a richer, more mineral taste.
All TBSP in the recipe are level.
These cookies freeze beautifully — just leave them at room temperature for 10 minutes before serving.
Keyword dairy-free cookies, holiday baking, vegan gingerbread cookies
Tried this recipe?Let us know how it was!

If you make these Vegan Gingerbread Cookies, I’d love to hear your feedback and any suggestions for adaptations! Leave a comment below or tag your photos with #bitofthegoodstuff on social media – I always love to see your creations! You can also connect with me on my social media channels here: InstagramFacebookPinterest.   

Wishing you a joyful day and happy baking!

With love,

Sharon xx
Disclaimer: I received some Suma’s products to use for recipe development but, as always, all opinions expressed are my own.

Vegan Chocolate Celebration Cake (Dairy-Free | Egg-Free)

Jump to Recipe

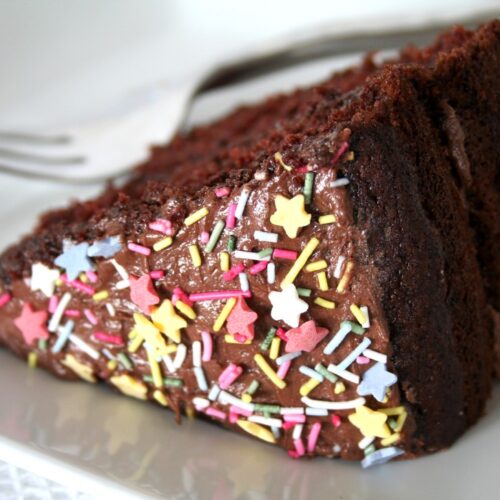
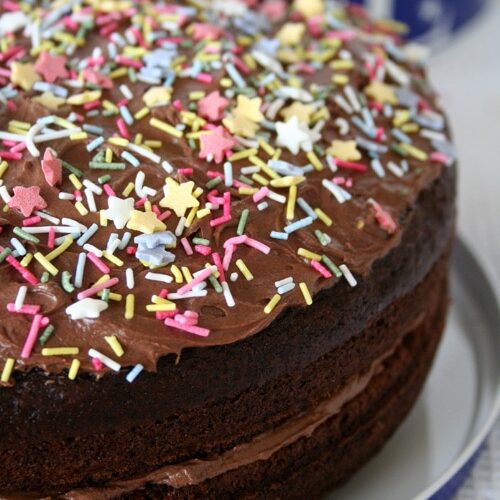
This easy vegan chocolate cake is light, moist, and made with simple pantry ingredients — perfect for birthdays, parties, and special occasions. A longtime family favourite, it’s loved by kids and adults alike!

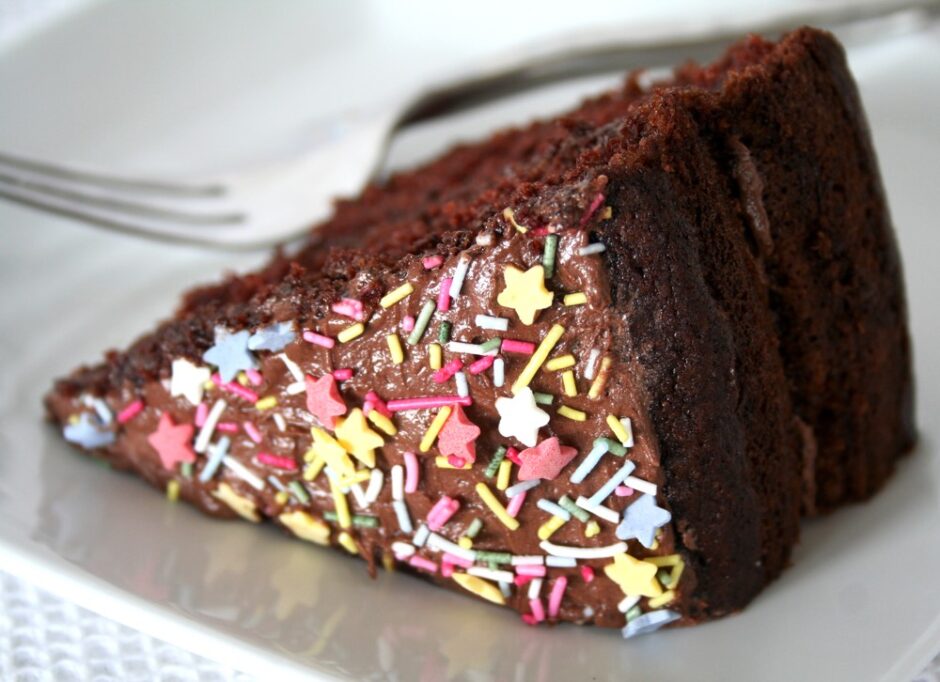
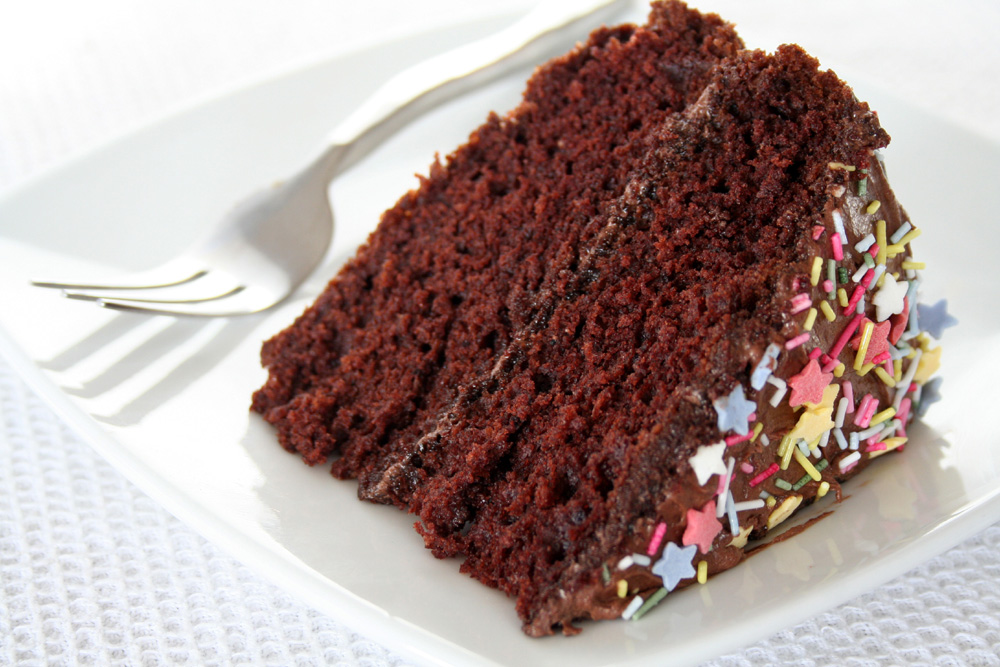
Vegan Chocolate Cake

There are some recipes that become part of your family story — passed from celebration to celebration, baked with love, and enjoyed by everyone. This chocolate cake is one of ours.

It’s the cake that my son, Lil’ L requests for every birthday. It’s also the one I’ve baked for my parents’ birthdays, family gatherings, and countless vegan festivals over the years. Without fail, it receives great reviews — even from people who say they’re “not cake people”! ☺️

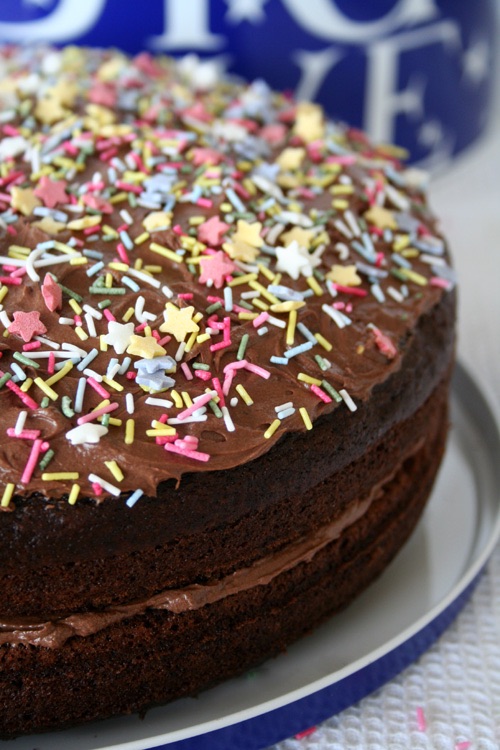
Vegan Chocolate Sandwich Cake

What makes this cake so special? It’s light, moist, and perfectly chocolatey — without being too rich or overly sweet. It’s made with simple pantry staples (no fancy ingredients required!) and it’s incredibly easy to whip up. It also holds together beautifully when sliced and keeps well for days, which makes it perfect for parties and prep-ahead occasions.

And let’s not forget the decorating fun. For birthdays, we love to frost and top it with colourful vegan-friendly sprinkles. For a more classic presentation, a layer of raspberry fruit spread and a dusting of icing sugar is beautifully elegant.

However you choose to dress it, this cake is a real crowd-pleaser. I hope you enjoy it as much as we do!

Recipe Card

Vegan Chocolate Cake

Vegan Chocolate Celebration Cake

This easy vegan chocolate cake is light, moist, and made with simple pantry ingredients — perfect for birthdays, parties, and special occasions. A longtime family favourite, it’s loved by kids and adults alike!
Hands-on time 20 minutes
Total Time 2 hours
Course Afternoon Tea, Celebration Cake, Treat
Cuisine Vegan
Servings 12

Ingredients
 

For the cake:

  • 480 ml / 2 cups soya milk
  • 2 tsp apple cider vinegar
  • 200 g / 1½ cups plain (all-purpose) flour
  • 200 g / 1½ cups fine wholemeal (wholewheat pastry) flour or chapatti flour
  • 60 g / ½ cup cocoa powder
  • 1 tsp baking powder
  • 1 tsp bicarbonate of soda (baking soda)
  • ½ tsp salt
  • 140 ml / ⅔ cup rapeseed (canola) oil or other neutral oil
  • 330 g / 1⅔ cups unrefined cane sugar (e.g. golden caster sugar)
  • 2 tsp vanilla extract

Decorating options:

  • Chocolate frosting (see recipe below) and vegan-friendly sprinkles (see Notes)
  • OR raspberry jam/fruit spread for filling and a dusting of icing (powdered sugar) on top

Instructions
 

  • Preheat the oven to 180°C (160°C fan) / 350°F. Lightly oil two 23cm (9-inch) springform or loose-bottomed cake tins and line the bases with non-stick baking paper.
  • In a large bowl, whisk together the milk and vinegar. Set aside for a couple of minutes.
  • In a separate large bowl, stir together the flours, cocoa powder, bicarbonate of soda, baking powder and salt.
  • To the milk mixture, add the oil, sugar, and vanilla extract. Whisk with a hand (balloon) whisk until fully combined. Sieve in the dry ingredients in three batches, whisking gently each time. Avoid over-mixing.
  • Divide the batter evenly between the tins and place them on oven racks as close to the centre of the oven as possible. Bake for 40–50 minutes, or until a skewer inserted in the centre comes out clean and the tops spring back when lightly pressed. (In my oven, the top rack cake is ready after 40 minutes; the lower one often needs 5-10 minutes more.) If both cakes are domed, decide which one will be the bottom tier, cover with a clean tea towel and gently press down to level.
  • Leave the cakes in their tins for at least an hour to cool (they’ll firm up as they cool), then transfer to a wire rack to cool completely.
  • Once cooled, sandwich with fruit spread or frosting and top with your chosen decoration. Chill before serving for clean slices.

Notes

Storage Tips:
The cake keeps beautifully in an airtight container in the fridge for up to a week. In fact, we find the flavour and texture improve after a day or two!
It also freezes well — simply wrap slices or the whole (undecorated) cake tightly and freeze for up to 3 months.
Baking Tips:
When it comes to vegan baking, I highly recommend weighing the ingredients rather than using cups (the results will be far more consistent). Electronic scales make baking a breeze. 
Tesco chapatti flour is my go-to for fine wholemeal baking — inexpensive and works beautifully.
Vegan-Friendly Sprinkles: Try Waitrose Rainbow Stars and Confetti, Sainsbury’s Sugar Stars, Morrisons Cosmic Stars, Asda Rainbow Star Sprinkles, or Dr Oetker Unicorn Confetti (all were vegan-friendly at the time of writing). Vegan sprinkles can also be purchased online.
Keyword dairy-free cake, easy vegan baking, egg-free cake, vegan chocolate cake, vegan party cake
Tried this recipe?Let us know how it was!

Vegan Chocolate Sandwich Cake

Vegan Chocolate Frosting

The recipe below is sufficient to frost the centre and top of a 23cm (9-inch) cake using a palette knife. If piping the frosting, I recommend at least doubling the quantities.
Hands-on time 8 minutes
Total Time 8 minutes

Ingredients
 

  • 150 g / 1 cup icing (powdered) sugar
  • 35 g / ¼ cup cocoa powder
  • 50 g / 4 TBSP dairy-free spread or vegan butter e.g. Vitalite, Flora, Pure
  • 1 – 1½ TBSP water

Instructions
 

  • Sieve the icing sugar and cocoa into a large bowl. Add the dairy-free spread/butter and 1 TBSP water. Stir with a metal spoon until it starts to combine, then beat with electric beaters until light and fluffy. If the frosting looks a little stiff, add another ½ TBSP water and keep beating.
  • This frosting will keep for a week in the fridge. It is also freezable.
Keyword chocolate sugar frosting, vegan cake frosting, vegan chocolate frosting
Tried this recipe?Let us know how it was!

If you make this Vegan Chocolate Celebration Cake, I’d love to hear your feedback and any suggestions for adaptations! Tag your photos with #bitofthegoodstuff on social media – I always love to see your creations! You can also connect with me on my social media channels here: InstagramFacebook, Pinterest.   

With love,

Sharon xx
 

SaveSave

SaveSave

SaveSave

SaveSave

SaveSave

SaveSave

SaveSave

SaveSave

SaveSave

SaveSave

SaveSave

SaveSave

Easy Vegan Cornbread (Dairy-free | Egg-free)

Jump to Recipe

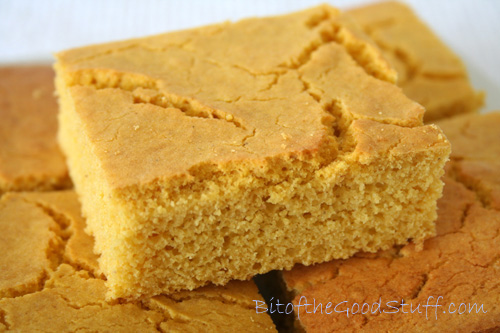
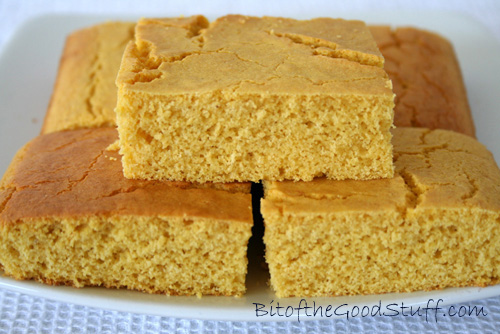
With its crisp golden crust and soft, fluffy interior, this easy vegan cornbread makes the perfect side dish for Mexican-inspired meals, hearty soups, and chillis. It’s quick to prepare, made with simple pantry ingredients, and is completely dairy-free and egg-free.

Over the past couple of years, I’ve trialled many cornbread recipes, but none of them quite suited my family’s tastes. They were either too sweet, too dry, or too overpowering in flavour.

Still, I was determined not to be defeated! This week, I returned to my old recipe and gave it a few tweaks—adding more liquid and a splash of apple cider vinegar to lighten the texture. I’m so happy to say it turned out beautifully. This latest batch had a lightly crisped exterior and a moist, tender crumb—perfect for dipping into soup or serving alongside a spicy chilli. It didn’t even need any butter!

Vegan Cornbread

This cornbread recipe may not be strictly authentic, but it’s got a lovely texture and flavour (plus it’s 100% plant-based!) It’s very easy to make, requires minimal hands-on time, and will be ready in about 60 minutes. Get it in the oven first and it can bake while you prepare the rest of your meal.

Recipe Card

Easy Vegan Cornbread (Dairy-free | Egg-free)

With its crisp golden crust and soft, fluffy interior, this easy vegan cornbread makes the perfect side dish for Mexican-inspired meals, hearty soups, and chillis. It’s easy to prepare, made with simple pantry ingredients, and is completely dairy-free and egg-free.
Hands-on time 15 minutes
Total Time 1 hour
Course Side Dish
Cuisine American, Mexican-Inspired, Vegan
Servings 6

Ingredients
 

  • 480 ml / 2 cups soya milk
  • 2 tsp apple cider vinegar
  • 140 g / 1 cup fine yellow cornmeal
  • 140 g / 1 cup fine wholemeal (wholewheat pastry) flour or chapatti flour
  • tsp baking powder
  • ½ tsp bicarbonate of soda (baking soda)
  • 1 tsp salt
  • 50 ml / ¼ cup organic rapeseed (canola) oil or other neutral-flavoured oil
  • 1 TBSP maple syrup or to taste*

Instructions
 

  • Preheat the oven to 180C (160C fan) / 350F. Grease a 20cm / 8-inch square baking pan and line the bottom with non-stick baking paper.
  • In a large mixing bowl, whisk together the milk and vinegar. Set aside for a couple of minutes to allow it to froth up.
  • In a separate bowl, stir together the cornmeal, flour, baking powder, bicarbonate of soda, and salt.
  • Whisk the oil and maple syrup into the milk mixture.
  • Sieve the dry ingredients into the wet ingredient bowl in three batches, whisking (with a hand/balloon whisk) between each addition until smooth. Stir through any remaining wheatgerm caught in the sieve.
  • Pour the batter into the prepared tin and bake for 30 minutes, or until a skewer inserted into the centre comes out clean.
  • Let cool for 15 minutes in the tin, then run a knife around the edge and invert onto a board. Peel off the baking paper.
  • Store in an airtight container for up to 5 days in the fridge or freeze for future meals. Warm through before serving.

Notes

* This cornbread is lightly sweetened. Feel free to adjust the maple syrup to taste.
Keyword dairy-free cornbread, easy vegan cornbread, egg-free cornbread, plant-based side dish, savoury vegan cornbread, vegan cornbread
Tried this recipe?Let us know how it was!

Have you tried cornbread before? Do you prefer it sweet or savoury? I’d love to hear your thoughts in the comments below!

Wishing you a beautiful weekend ☀️

With love,

Sharon xx
——————SaveSaveSaveSaveSaveSave

Crunchy Maple Pecan Granola Clusters (Vegan | Dairy-Free)

Jump to Recipe

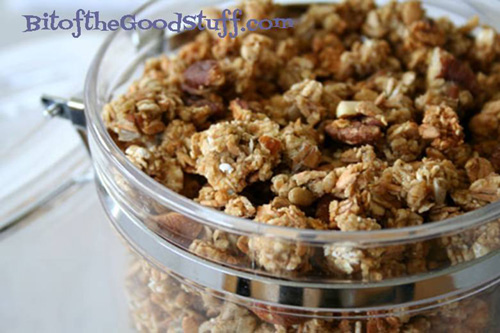
With crunchy clusters of oats, toasted pecans, and a hint of warm spice, this Maple Pecan Granola is one of my family’s all-time favourite breakfasts. Naturally vegan and dairy-free, it’s lightly sweetened with maple syrup and made with wholesome, nourishing ingredients. Best of all, it’s incredibly easy to make—just a few minutes of prep, then the oven does the rest. It’s so simple that even the kids can make their own!

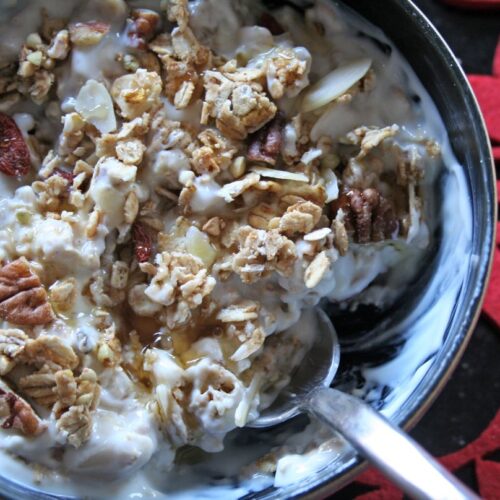
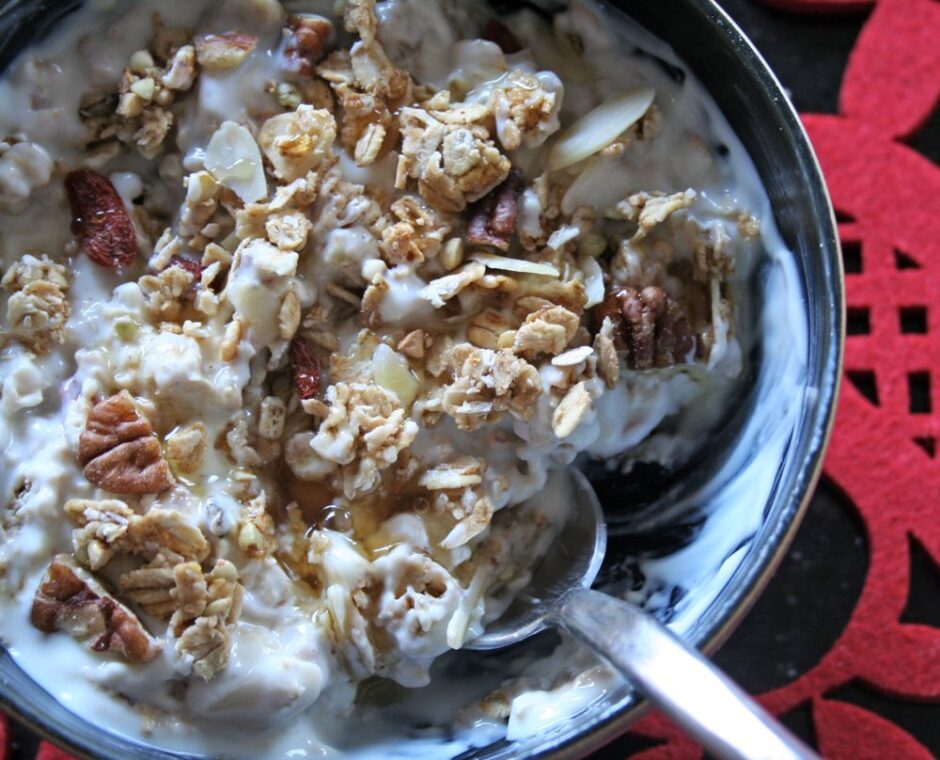
We love serving this granola with plant-based milk or yoghurt for breakfast, layering it into a vibrant berry parfait, or simply snacking on it straight from the jar!

Crunchy Maple Pecan Granola Clusters

I started making homemade granola about five years ago in response to Lil’ L’s dislike for the dried fruits found in shop-bought varieties. After a week of picking out the raisins before serving, I realised life was far too short for that kind of effort—and decided to try making our own instead!

This way, we could tailor it to suit all our tastes—nutty clusters for Lil’ L, a mix of nuts and dried fruits for me, and anything goes for Mark.

Making our own granola also meant we could skip the refined sugars and oils often found in shop-bought versions and opt for healthier, natural alternatives instead. The result? A crunchy, flavourful breakfast packed with ingredients we feel good about.

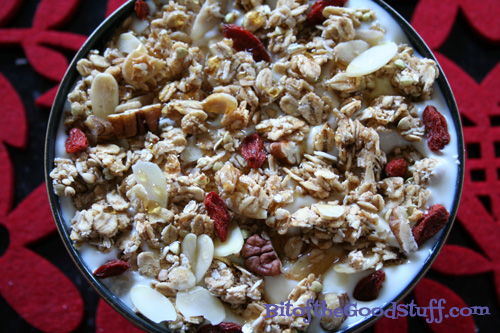
Maple Crunch Granola

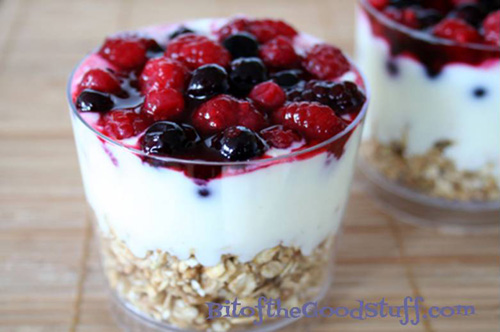
We love serving this granola with non-dairy milk or yoghurt for a nourishing breakfast. It also makes a beautiful addition to a granola parfait, layered with plant-based yoghurt and berries. We often use frozen berries, which slowly thaw and swirl their juices into the yoghurt, creating a gorgeous colour and a naturally sweet flavour. These parfaits make a wonderful breakfast, dessert, or even a post-school snack.

Berry Granola Parfait

Recipe Card

Maple Pecan Crunch Granola

Maple Pecan Granola Clusters

Crunchy, chunky granola clusters loaded with oats, pecans, and warm spices, sweetened with pure maple syrup. This vegan, dairy-free recipe is easy to make, and perfect for breakfasts, parfaits, or snacks.
Hands-on time 10 minutes
Total Time 1 hour
Course Breakfast, Healthy Snack
Cuisine Vegan
Servings 10

Ingredients
 

  • 300 g / 3 cups rolled oats use gluten-free oats if needed
  • 100 g / ½ cup buckwheat groats* washed and drained
  • 40 g / 4 tbsp fine wholemeal (whole wheat pastry) flour, chapatti flour or gluten-free flour
  • 30 g / ⅓ cup desiccated coconut
  • 60 g / ½ cup pecans roughly chopped
  • 30 g / ¼ cup flaked almonds
  • 30 g / 3 tbsp coconut sugar or unrefined cane sugar (e.g. golden caster sugar)
  • ½ –1 tsp ground cinnamon to taste
  • pinch of ground nutmeg
  • ¼ tsp sea salt
  • 150 ml / ⅔ cup maple syrup or another natural liquid sweetener
  • 3 tbsp virgin coconut oil melted

Instructions
 

  • Preheat the oven to 150 °C (130 °C fan) / 300 °F. Line a large baking tray (approx. 38 × 26 cm / 15 × 10 inches) with non-stick baking paper. If your coconut oil is solid, place it in a heat-proof bowl in the oven for a minute or two to melt. (Be careful when removing—it will be very hot!)
  • In a large mixing bowl, stir together the rolled oats, buckwheat groats, desiccated coconut, pecans, flaked almonds, coconut sugar, cinnamon, nutmeg, and sea salt.
  • Pour in the maple syrup and stir to combine. Drizzle in the melted coconut oil and mix well until everything is evenly coated.
  • Transfer the granola mixture to the prepared tray. Press down firmly with the back of a spoon, a spatula (or even your hands!) so it forms a compact, even layer—like a thin granola bar. (This step helps create those lovely chunky clusters.)
  • Bake in the preheated oven for 40 minutes, or until the granola is lightly golden. Once out of the oven, allow the granola to cool completely on the tray—it will crisp up as it cools.
  • Once cooled, break into clusters with your hands. Some pieces, especially from the centre, may feel a little soft at first, but they tend to firm up over time.
  • Store in an airtight container in a cool, dry place. It will keep well for weeks.

Notes

* Buckwheat adds protein and a lovely crunchy texture. (I buy mine from Tesco). If you can’t find it, simply substitute an extra ½ cup of oats or another grain of your choice.
Serving Suggestions:
Serve with your favourite plant-based milk or yoghurt. For added nutrition, sprinkle with chopped walnuts, ground flaxseed, or goji berries. It’s also delicious layered into a berry parfait or enjoyed as a snack straight from the jar.
Keyword dairy-free granola, healthy breakfast, homemade granola, maple pecan granola, Vegan Breakfast, vegan granola
Tried this recipe?Let us know how it was!

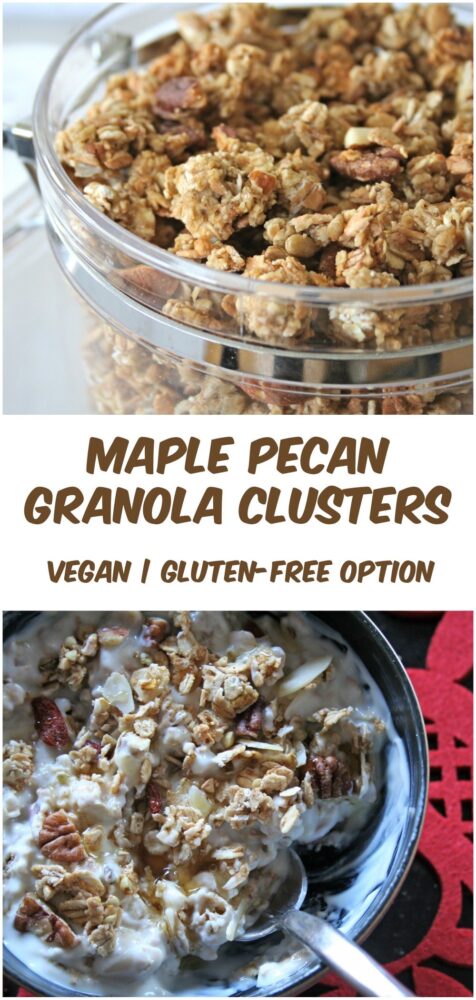
Pin for later ⬇️

Maple Pecan Granola Clusters Collage

Do you make your own granola? What’s your favourite flavour combination? I’d love to hear your ideas!

Have a great weekend everyone!

With love,

Sharon xx