Golden Pan-Fried Chickpeas (Quick Savoury Soup Topping)


Refreshed March 2026. Originally published 2018.

Jump to Recipe

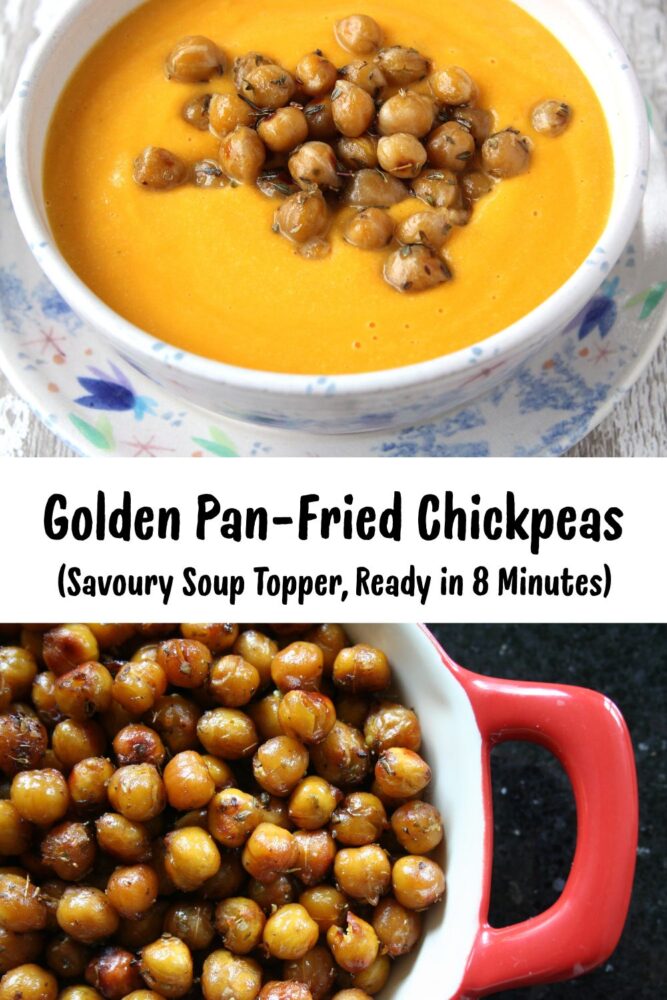
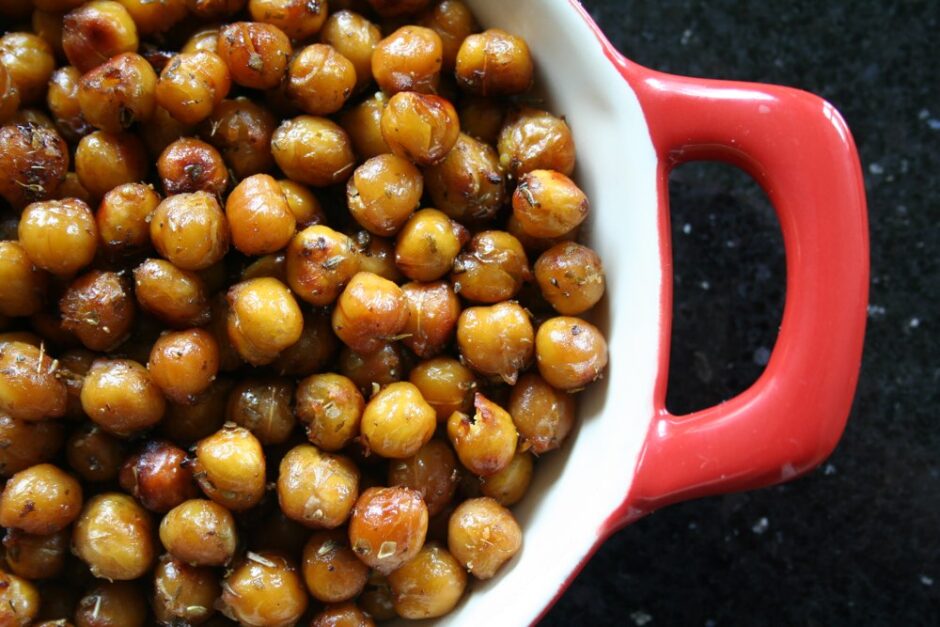
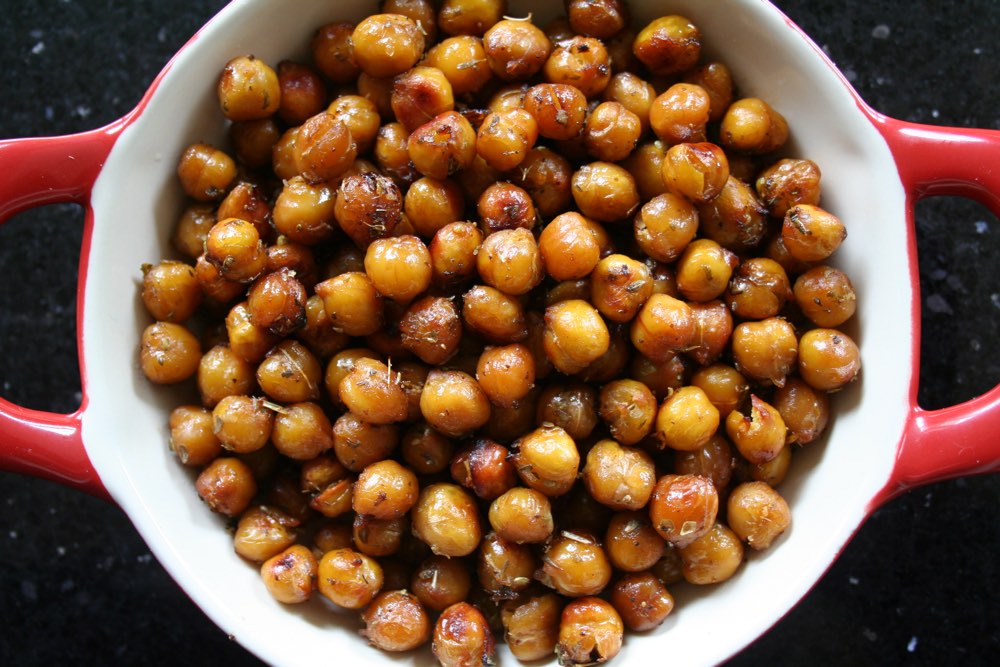
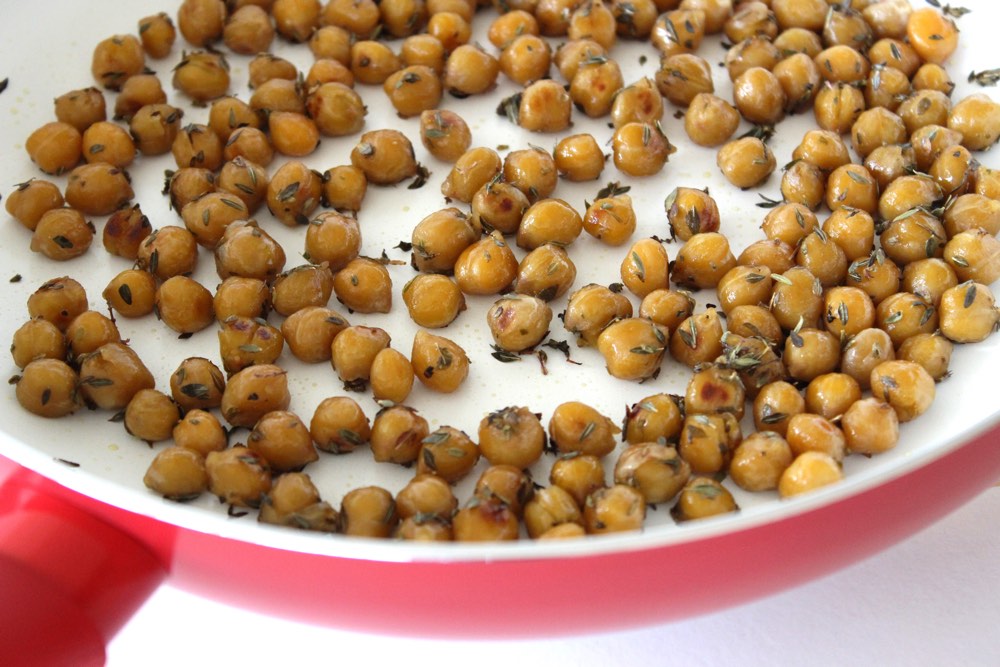
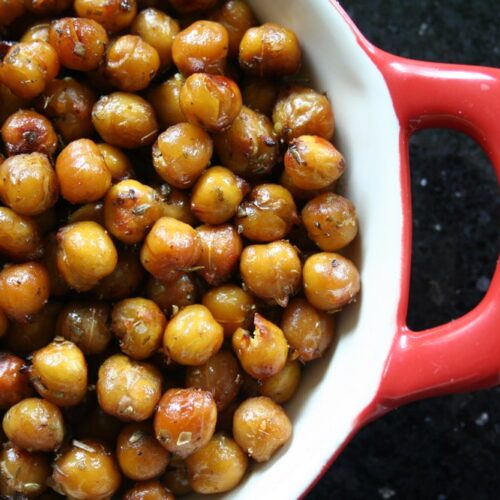
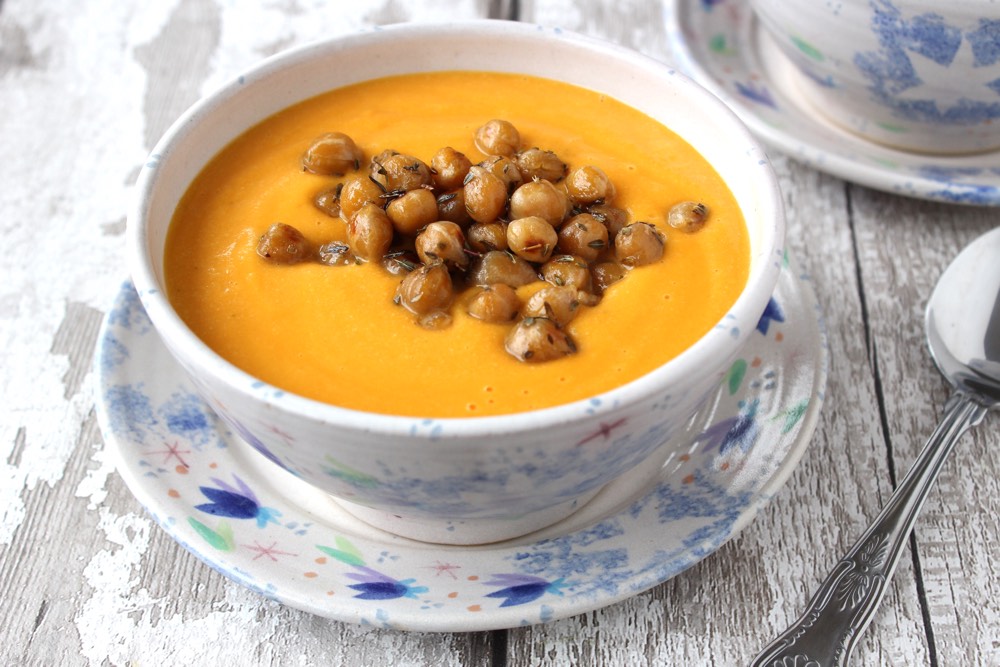
These golden pan-fried chickpeas are one of my favourite ways to transform a simple bowl of soup into a truly satisfying meal. Lightly glazed with soy sauce and a touch of maple syrup, they’re savoury, gently caramelised, and beautifully golden. We most often sprinkle them over creamy soups, such as our Cream of Mushroom Soup or Creamy Broccoli Soup, but they’re equally perfect for serving as a warm snack, straight from the pan.
Maple Glazed Chickpeas

I absolutely love chickpeas and eat them most days in some shape or form. The fact that they’re packed full of nutritional goodness makes me love them even more! They’re a good source of plant protein, dietary fibre, B vitamins and a whole array of minerals, including manganese, magnesium and iron. Chickpeas also contain an abundance of antioxidant phytonutrients, including flavonoids and phenolic acids, which boost the immune system and reduce inflammation.
Maple Glazed Chickpeas

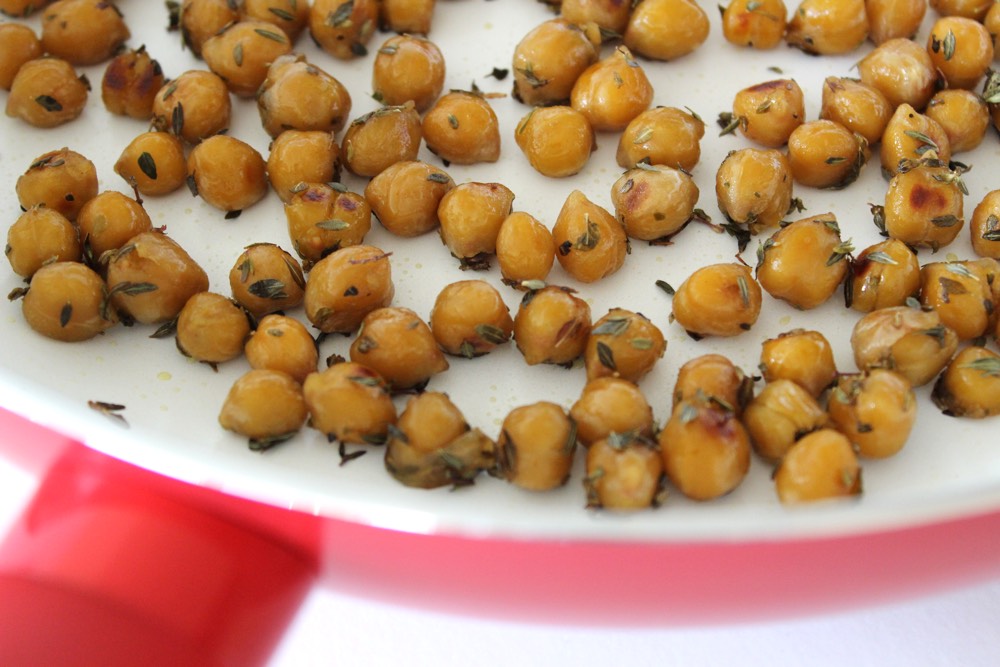
To make these golden chickpeas, you simply add the ingredients to a non-stick pan, give them a stir, then cook until the liquids have evaporated and the chickpeas are glossy and warmed through. They won’t be crunchy like oven-roasted chickpeas, but I actually prefer the texture of pan-fried chickpeas – they’re more succulent.

They’re also much quicker to make than oven-roasted chickpeas, ready in just 8 minutes. We often prepare them while the soup is cooking or warming through. They’re most delicious served fresh from the pan, when the glaze is still glossy and they have a slightly crisp exterior and a soft interior. 
Maple Glazed Chickpeas

They’re very moreish, so be warned. I probably shouldn’t admit this but one time I managed to polish off a whole panful before they’d had a chance to make their way into our soup bowls 😆

Recipe Card
Maple Glazed Chickpeas

Golden Pan-Fried Chickpeas

These golden pan-fried chickpeas are quick, easy, and nutritious, making them a perfect topping for creamy soups or a warm, savoury snack straight from the pan.
8 minutes
Total Time 8 minutes
Course Healthy Snacking, Soup Toppers
Cuisine Plant-Based, Vegan
Servings 4

Ingredients
 

  • 400 g / 14 oz can chickpeas drained and rinsed
  • ½ TBSP extra virgin olive oil
  • 1 tsp maple syrup
  • ½ TBSP low-sodium tamari or soy sauce (use tamari for a gluten-free option)
  • 1 tsp dried oregano
  • pinch of salt

Instructions
 

  • Heat the oil in a non-stick frying pan (skillet) on medium heat. Add the chickpeas and stir through to coat in the oil.
  • Stir in the maple syrup, tamari or soy sauce, dried oregano and a pinch of salt.
  • Continue cooking on medium heat, stirring regularly, until the chickpeas are golden and the liquid has evaporated, about 6–8 minutes.
  • Taste test and adjust the seasoning to suit.
  • When ready, serve immediately straight from the pan, whilst they’re still warm and glossy. 

Notes

tsp = teaspoon | TBSP = tablespoon
Storage: These chickpeas are best served fresh, straight from the pan. Leftovers can be stored in an airtight container in the fridge for up to 3 days, but they will firm up over time. Reheat gently in a pan in a splash of olive oil before serving.
Tip: If you’d like a sweeter glaze, add a little more maple syrup and reduce the tamari or soy sauce to taste.
Keyword Chickpeas, Gluten-Free Option, Healthy Snacking, Pan-Fried Chickpeas, Plant-Based, Soup Topper, Vegan
Tried this recipe?Let us know how it was!

Pin for later ⬇️

Golden Pan-Fried Chickpeas Image for Pinterest

Creamy Vegan Soups (Perfect with the Chickpea Topper)

Cream of Mushroom Soup
Creamy Broccoli Soup
Creamy Butternut Squash Soup
Lebanese Lentil Soup (Shorbat Adas)
Spiced Apple and Lentil Soup
Creamy Butternut Squash Soup


If you make these golden pan-fried chickpeas, I’d love to hear your feedback and any suggestions for adaptations! You can drop your comments in the section below. You can also connect with me over on InstagramFacebook and Pinterest. Please tag your photos with #bitofthegoodstuff on social media – I absolutely love seeing your creations! ❤️

With love,

Sharon xx
SaveSave

SaveSaveSaveSave

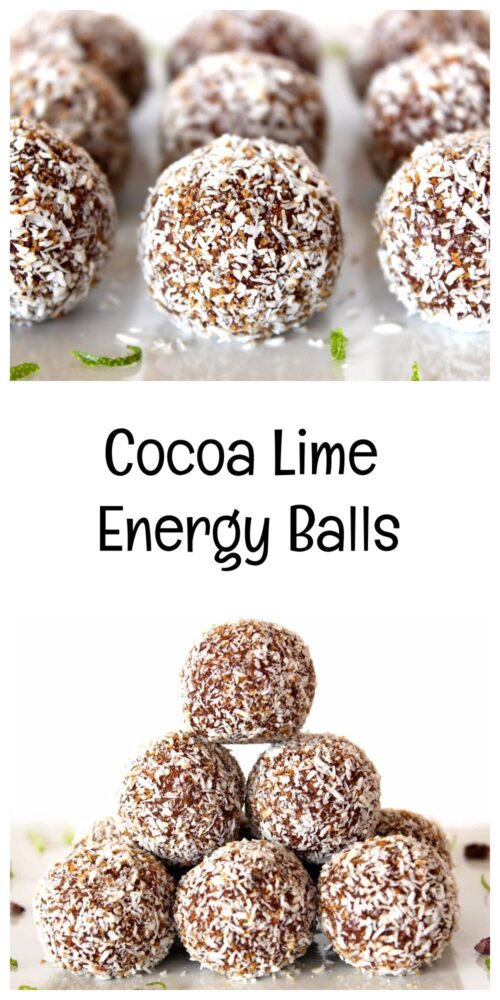
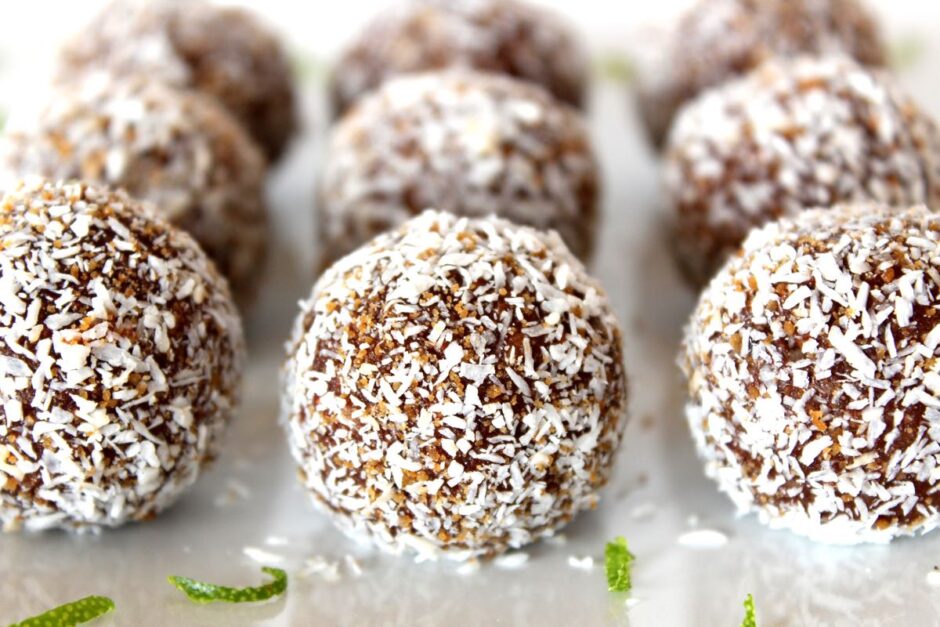
Cocoa Lime Energy Balls

Jump to Recipe

* This recipe was originally posted in March 2015. The page was updated in October 2019.

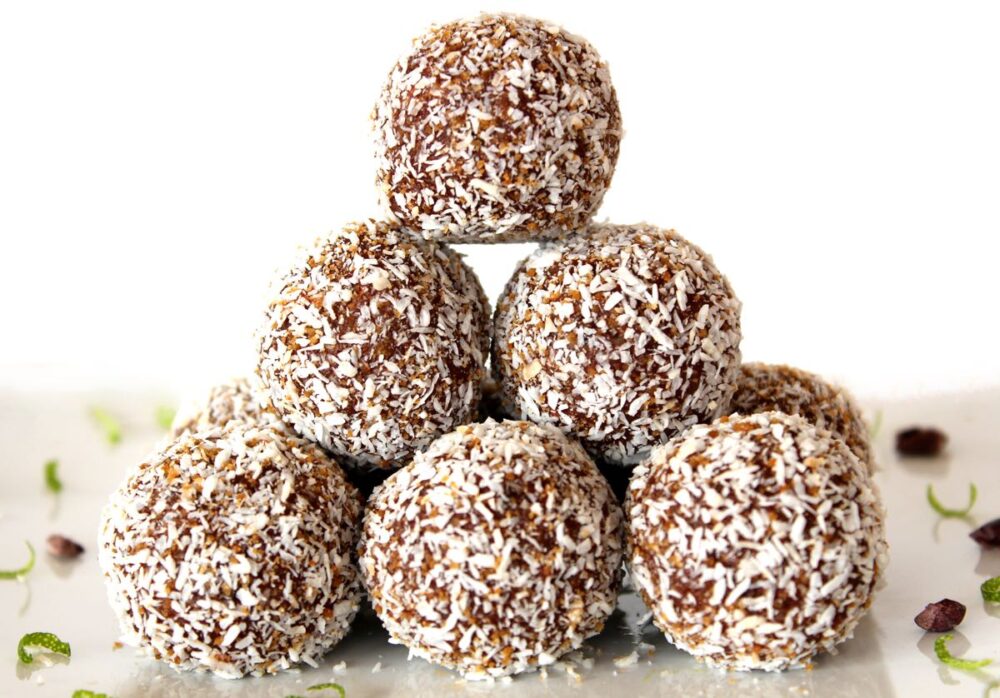
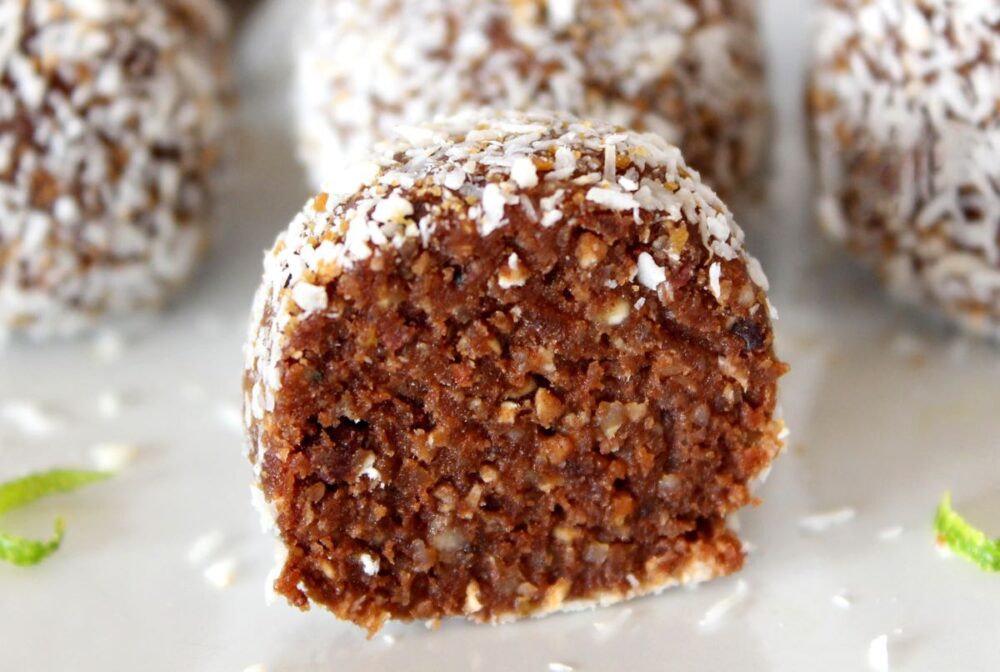
Have you ever tried making your own energy balls? It’s so easy! You simply throw all the ingredients in a food processor, whizz for a few seconds then shape the mixture into balls. It couldn’t easier! 

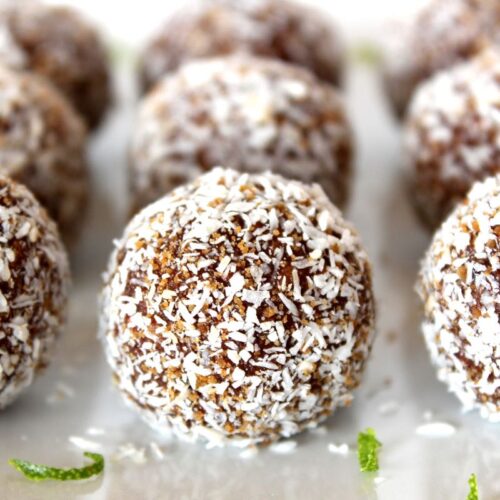
Cocoa Lime Energy Balls

What I especially love about these balls is that they taste decadent, yet they’re packed full of nutrient-rich ingredients that are not only going to increase our energy levels, but also boost our health in general. Each ball is filled with protein, heart-healthy fats, complex carbs, fibre, plus a whole host of minerals and antioxidant compounds. It’s amazing just how much goodness you can fit into one little ball!

And not only does it work out much cheaper to make your own rather than buying the branded versions, but it also means that you get to flavour them however you wish! In today’s recipe, I’m using one of my favourite flavour combinations – cocoa and lime. I love anything chocolatey, but especially when it’s combined with a citrus flavour like lime. It help cuts through the richness of the chocolate, and adds a delicious fresh, zesty taste to every bite.

Cocoa Lime Energy Balls

Since I originally posted this recipe back in 2015, I’ve made literally hundreds of these balls to share with friends, family and vegan festival goers, and they’ve proven to be a big hit with everyone that’s tried them. Even little kids have given them a thumbs up, which has made me super happy! These balls make a great after-school snack and (provided you carefully supervise the food processor part) children could easily help you make them. They could even experiment with their own flavour combinations!

Recipe Card

Cocoa Lime Energy Ball

Cocoa Lime Energy Balls

These Cocoa Lime Energy Balls are chocolatey but not too rich, fresh and zesty thanks to the lime, and lighter than the classic energy ball as I've reduced the nuts and used oats instead. Delicious, nutrient-rich and energy boosting, these balls make the perfect snack. Their handy size makes them easy to transport and stash in your bag for snacking 'on the go'.
Hands-on Time 15 minutes
Total Time 15 minutes
Course Snack
Servings 12

Ingredients
 

  • 22 g / ¼ cup desiccated coconut
  • 1 TBSP coconut sugar
  • 50 g / ½ cup rolled oats (quick oats, not jumbo)
  • 43 g / ¼ cup cashews
  • 35 g / ¼ cup walnuts
  • 2 TBSP cacao or cocoa powder
  • 120 g / ½ cup soft sticky dates, pitted
  • ½ – 1 tsp zest from an unwaxed/organic lime
  • 2 TBSP freshly squeezed lime juice
  • 1 tsp maple syrup
  • pinch of salt
  • 2 TBSP cacao nibs, optional

Instructions
 

  • Mix together the desiccated coconut and sugar in a shallow container.
  • Place the oats, cashews and walnuts in a food processor and whizz into crumbs. Add the cacao/cocoa powder, dates, lime zest, lime juice, maple syrup and salt. Process until the dates are broken down. Add the cacao nibs, and continue processing until the mixture comes together in a ball. Taste test and add a touch more cacao/cocoa, lime zest or sweetener, if desired.
  • Scoop level tablespoons of the mixture. Roll into balls, then roll in the coconut sugar mixture. Repeat until all the dough is used. Chill in the fridge (ss they chill, they will firm up).
  • Stored in an airtight container, these energy balls will keep for a week in the fridge, or for weeks in the freezer.
Keyword Healthy Snacking, Plant-Based, Vegan Snacks
Tried this recipe?Let us know how it was!

Nutritional Breakdown

N.B. The above values are estimates. The actual nutritional values will vary depending on the brands and ingredients used.

Pin for later ⬇️

Cocoa Lime Energy Balls

If you make these Cocoa Lime Energy Balls, I’d love to hear your feedback and any suggestions for adaptations! Tag your photos with #bitofthegoodstuff on social media – I always love to see your creations! You can also connect with me on my social media channels here: InstagramFacebook, Pinterest.   

With love,

Sharon xx
——————————–

YOU MAY ALSO LIKE…

Chocolate Orange Energy Balls

Chocolate Orange Energy Balls

Chickpea Nuggets with Home-Made Chunky Tomato Sauce

Jump to Recipe

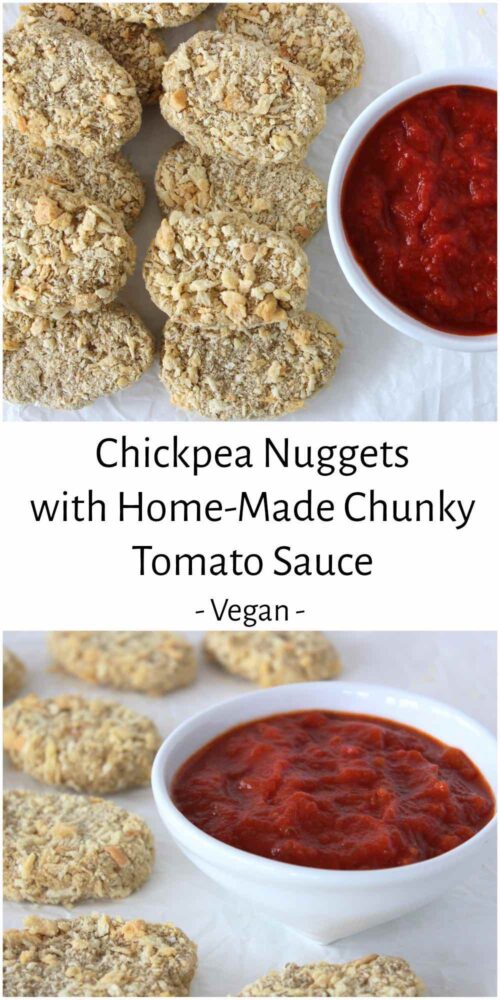
In today’s post, I’m sharing a recipe that caught my eye in this month’s Vegan Life magazine. These ‘Chickpea Nuggets’ have been a big hit with the family and we’ve made them multiple times in the past couple of weeks. They’re simple to prepare, packed full of nutritional goodness and budget-friendly too!

I had my first experience of vegan nuggets a couple of weeks ago at a fast food establishment in Valencia, Spain (yes, Valencia has vegan fast food joints! How cool is that?) The fast-food nuggets were okay, but the home-made variety win my vote. They just taste more like ‘real food’ to me. Plus they definitely make me feel better on the inside.

The main ingredients in these nuggets are oats and chickpeas. Both ingredients are packed full of nutrients including protein, complex carbs, dietary fibre, B vitamins, iron, zinc and magnesium.

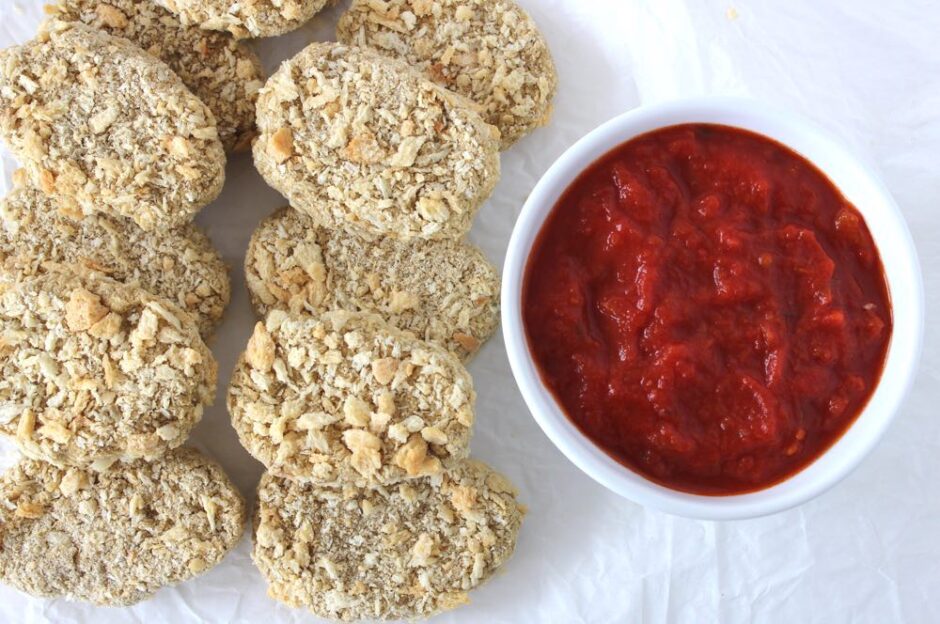
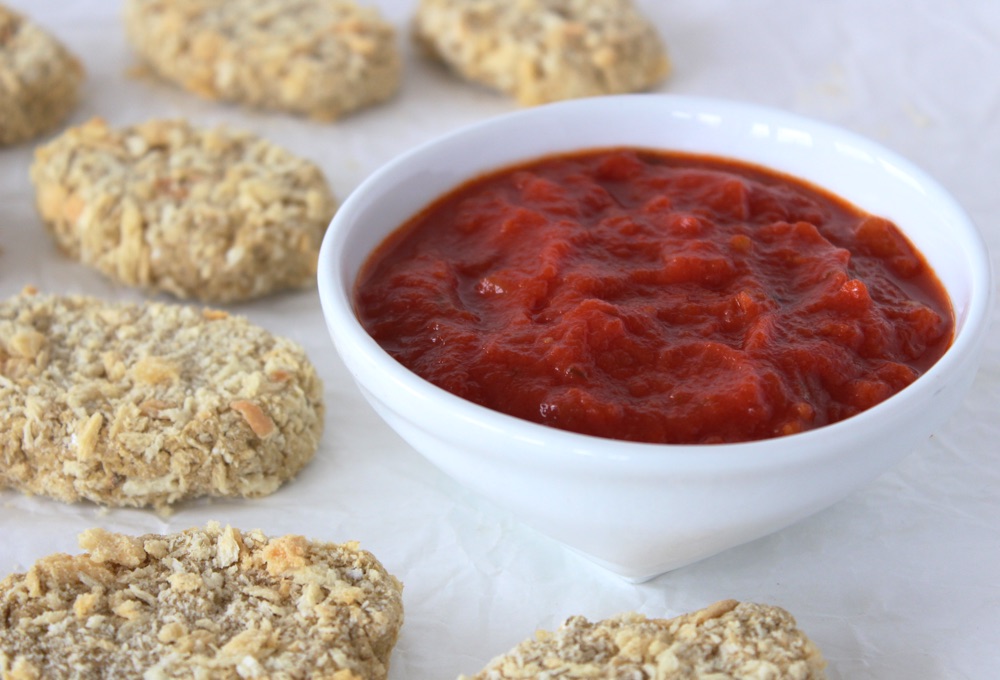
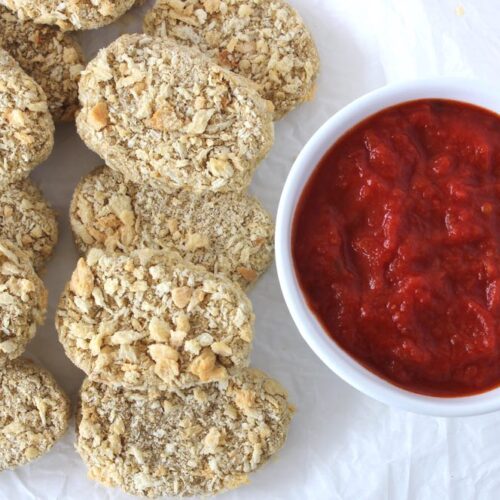
Chickpea Nuggets (Vegan)

The nuggets are great for dipping into all kinds of sauces. We love mayo, BBQ sauce, even hummus, but our current favourite has to be home-made chunky tomato sauce. I’ve posted the recipe below in case anyone else fancies trying it. I find it tastes much nicer than shop-bought tomato sauce (fresher and less processed) plus it’s rich in vitamin C, which helps our bodies absorb all the iron in the nuggets.

To make the outside of the nuggets nice and crispy, I used Panko breadcrumbs which can be found on the world food aisle in supermarkets (in the Japanese section). Onion powder is not currently available in UK supermarkets (such a shame as it’s really useful!) however you will find it in independent health food shops and online. (I buy mine in Harvest Coop in Bath).

Along with the onion powder, the nutritional yeast helps to give these nuggets a delicious, savoury flavour. I use the Marigold nutritional yeast flakes with added B12, available from the larger UK supermarkets, health food shops and online.

Recipe Card

Vegan Chickpea Nuggets

These nuggets are simple to make, packed full of nutritional goodness, budget-friendly and versatile! We love to serve them for lunch, as a healthy snack and as a main meal (alongside potato wedges, baked beans and a side salad). They are best served straight from the oven (when the outer coating is super crispy), however they can also be eaten cold and make a great addition to school and work lunchboxes.
Hands-on time 20 minutes
Total Time 30 minutes
Course Healthy Snacking, Light Dinner, Lunch
Servings 2

Ingredients
 

Chickpea Nuggets

  • 40 g / heaped ½ cup panko breadcrumbs
  • 50 g / ½ cup rolled oats
  • 400 g / 14 oz can chickpeas thoroughly drained (reserve the chickpea water aka ‘aquafaba’)
  • ½ tsp garlic powder or granules
  • 1 tsp onion powder
  • ½ tsp salt
  • 2 TBSP nutritional yeast flakes
  • 60 ml / ¼ cup 'aquafaba' (water from the chickpea can)

Chunky Tomato Sauce

  • 400 g / 14 oz can Italian vine-ripened chopped tomatoes
  • 2 TBSP tomato puree (paste)
  • 1 TBSP extra virgin olive oil
  • 1 tsp unrefined sugar
  • ½ tsp salt
  • 1 tsp dried oregano

Instructions
 

To make the chickpea nuggets:

  • Heat oven to 190C (180C fan) / 365F.
  • Place the oats in a food processor and process into a flour.
  • Add the chickpeas to the food processor, along with the garlic powder, onion powder, nutritional yeast and salt. Pulse until crumbly. Add the aquafaba (chickpea water) and continue to process until the contents form a ball. If the mixture feels a little wet, add more oats.
  • Divide the mixture into 12 equal portions and shape into nuggets. Coat each nugget completely in the panko breadcrumbs and place on a baking tray lined with baking paper.
  • Bake for 15-20 minutes, or until firm. Serve with your favourite dip.
  • Any leftover nuggets can be stored in the fridge for up to five days.

To make the chunky Tomato Sauce

  • Place all the ingredients in a pan and bring to the boil. Reduce the heat and simmer for 15 minutes, or until the mixture has thickened slightly. Use a wooden spoon to break up any large chunks of tomato. Taste test and adjust the seasoning to suit.
  • Stored in an airtight container, this sauce will keep for five days in the fridge.

Notes

Recipe lightly adapted from Heather Lawless and Jen Mulqueen’s ‘Chicknuggets’ in The Chickpea Revolution, featured in the April 2018 edition of Vegan Life magazine.
Keyword Easy Vegan Meals, Healthy Snacking, Vegan Lunchbox Ideas, Vegan Nuggets
Tried this recipe?Let us know how it was!

Pin for later ⬇️

Big thank you to Heather Lawless, Jen Mulqueen and Vegan Life magazine for the inspiration! This is definitely a recipe I’ll be making time and again.

And if you make these vegan nuggets, I’d love to hear your feedback and any suggestions for adaptations! Tag your photos with #bitofthegoodstuff on social media – I always love to see your creations! You can also connect with me on my social media channels here: Instagram, Facebook, Pinterest.   

With love,

Sharon xx
Book Review: Hummus Where the Heart Is by Dunja Gulin and Recipe for Pea & Basil Hummus

Jump to Recipe

In today’s post, I’m delighted to share with you a new book that’s dedicated to one of my favourite foods of all time… HUMMUS! This stylish book, humorously title ‘Hummus Where The Heart Is is the latest publication by cooking teacher and cookbook author, Dunja Gulin. It features over 50 vegan-friendly recipes, each one accompanied by a stunning photograph taken by London-based food & lifestyle photographer, Mowie Kay.

If you thought hummus was a bit dull and bland-looking, this book will completely change your perception. The pages are filled with a riot of colours, from the vibrant oranges of spicy lentil hummus, fresh greens of pea and basil hummus, through to the rich browns of cacao and rum hummus… yes there is even chocolate hummus in this book!

Hummus Where The Heart Is Front Cover

All the recipes have simple-to-follow instructions (with the ingredients listed in grams and cups). I was pleased to find that all the essential ingredients for the recipes are easily accessible in UK shops and when a recipe calls for a ‘specialist’ ingredient, it’s listed as an optional add-in.

Savoury hummus recipes are divided into three chapters depending on the main ingredient – Chickpeas – Beans and Lentils – Veggies and Nuts. So far, I’ve tried three recipes from these chapters – Pea and Basil Hummus, Cauliflower Hummus and Mediterranean Tomato Hummus. All three were delicious and easy to make.

If you have hummus that’s languishing in the fridge and needs using up (a rarity in our house!) then there’s a helpful chapter on how to use your leftover hummus to make burgers, salad dressings and much more besides.

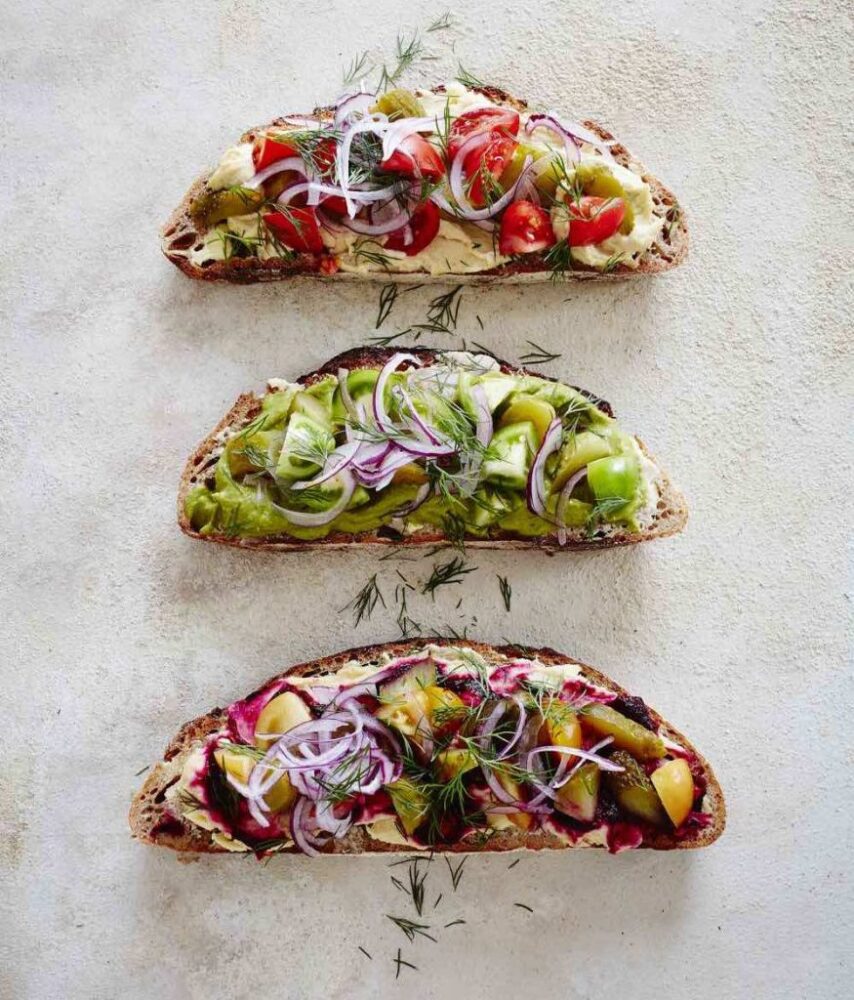
Hummus Where The Heart Is Open Sandwiches

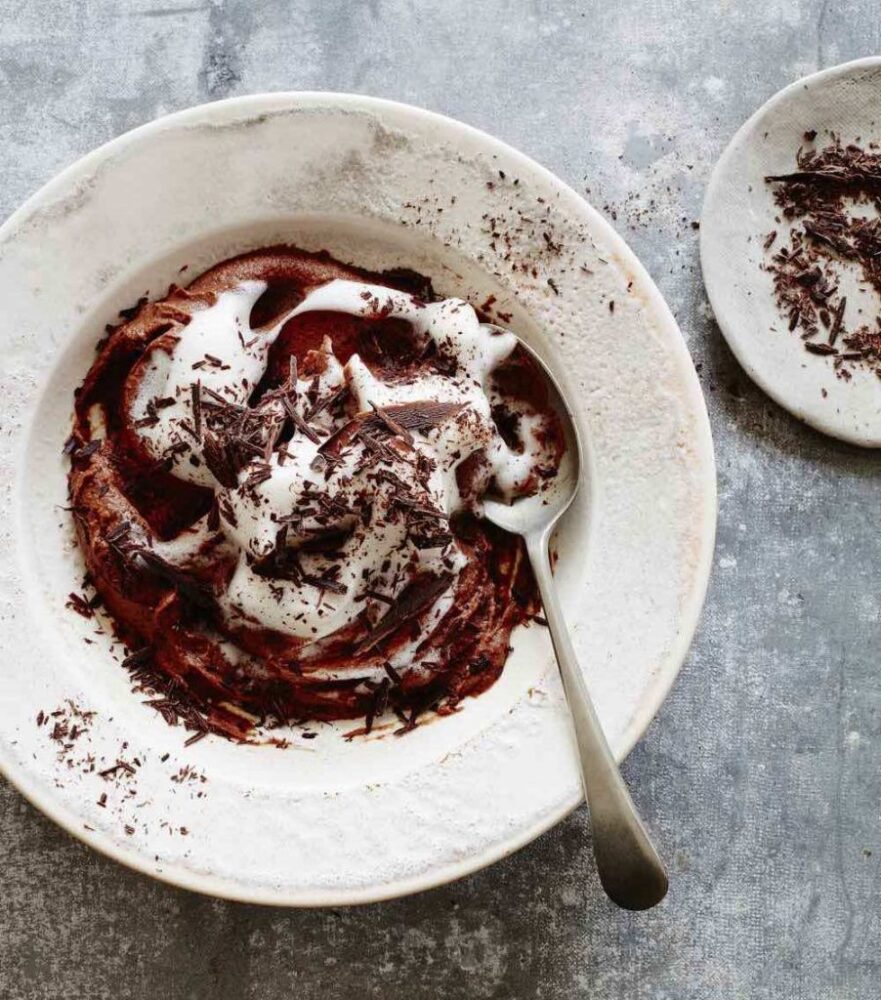
The final recipe chapter is ‘Sweet Treats’. I’ve never used chickpeas in desserts before and was intrigued to give it a try. The first recipe I made was the Cacao and Rum Hummus Pudding with Chickpea Cream. It may sound odd but it was very tasty indeed! I absolutely loved the flavour of this dessert and will definitely be making it again. I think it would be a great dessert to serve to children too (just don’t tell them what the ‘secret ingredient’ is unless they’re okay about beans featuring in their sweets).

Hummus Where The Heart Is Cacao Pudding

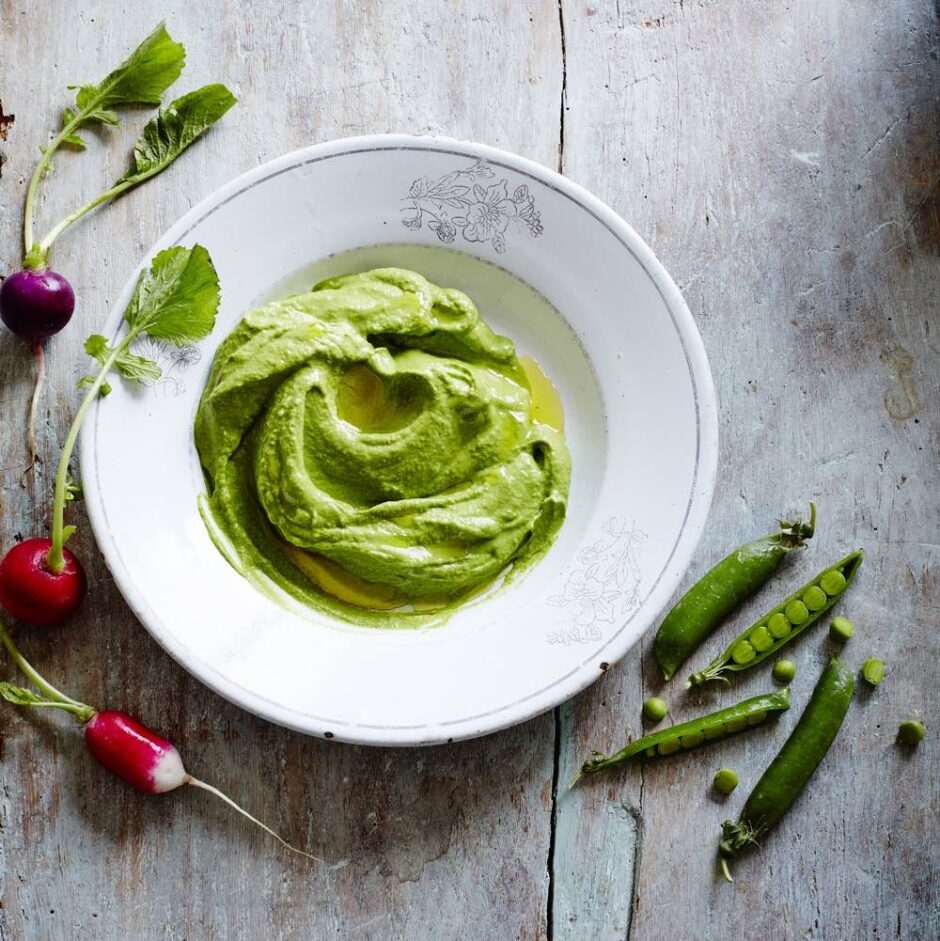
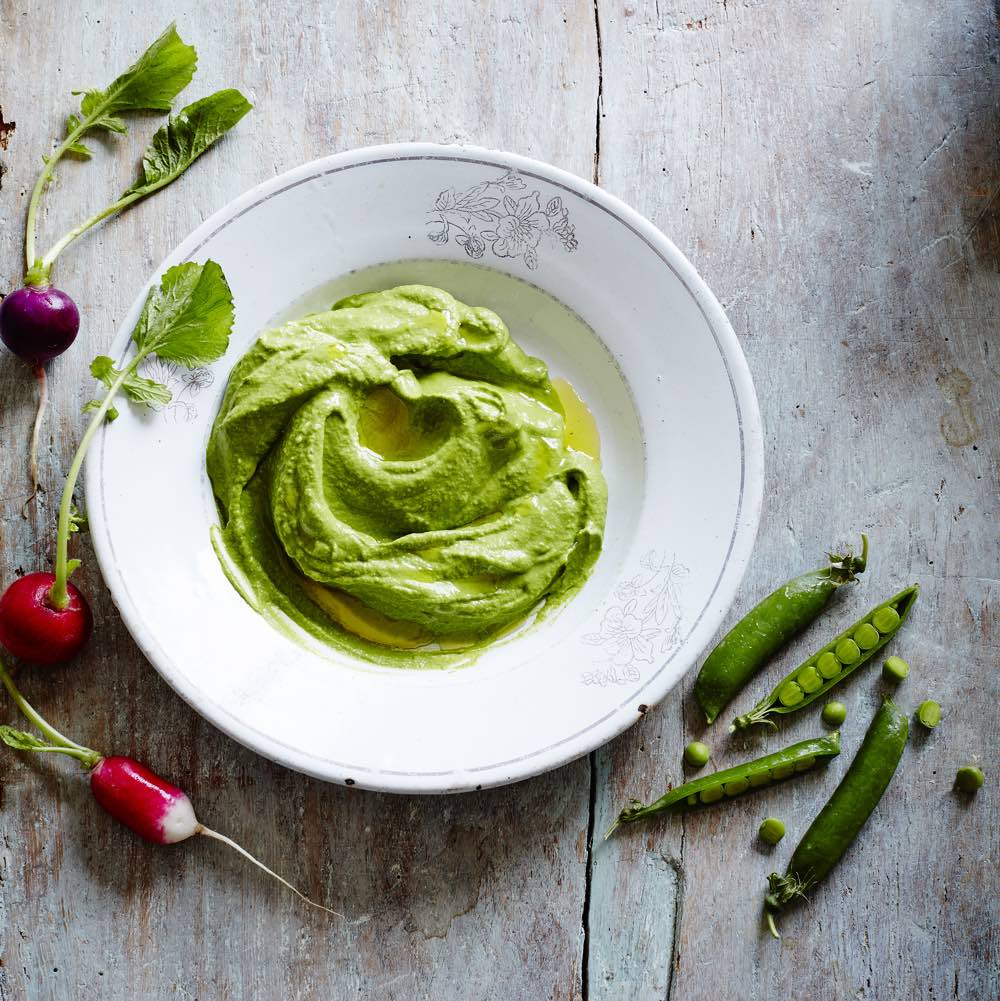
I was kindly given permission to share a recipe from the book and, after some deliberation, I’ve gone for the Pea and Basil Hummus. This recipe is just perfect for this season. It has the most beautiful texture and fresh flavour, as well as that gorgeous, vibrant green colour. The first time I made it for the family, it was devoured within seconds. Always a good sign! This is one recipe that I’ll definitely be making time and again.

Pea Basil Hummus

Recipe Card

Pea Basil Hummus

Pea and Basil Hummus

“This thick hummus-like spread made with green peas is so good! The texture always surprises me, since peas might seem light and watery, however, the finished dip has an amazing smooth texture, strong flavour and punchy colour. A simple recipe, but delicious and very lunch-worthy!”
Summary and Recipe from 'Hummus Where the Heart Is' by Dunja Gulin. Reproduced by arrangement with Ryland Peters & Small
Hands on time 10 minutes
Total Time 15 minutes
Course Lunch
Servings 3

Ingredients
 

  • 720 ml / 3 cups water
  • 260 g / 2 cups fresh or frozen peas
  • 10 g / ½ cup basil plus a few leaves to garnish*
  • 1 tablespoon olive oil plus extra for drizzling
  • 2 garlic cloves**
  • 2 tablespoon sunflower seed butter***
  • ½ teaspoon cumin seeds dry-roasted and crushed (optional)
  • ½ teaspoon salt or to taste

Instructions
 

  • Bring the water to the boil, add the peas and cook, covered, until soft but still green (about 8–10 minutes). Drain, saving the cooking water. Blend in a food processor or blender with all the other ingredients until thick and creamy, adding about 60 ml / 1⁄4 cup of the cooking liquid as necessary. Drizzle with extra olive oil to serve, if you like.

Notes

Notes on my adaptations:
* I used frozen basil
** I used 1 tsp of garlic and ginger paste instead of raw garlic (as I’m not a fan).
The flavours worked perfectly for this recipe.
*** Instead of sunflower butter, I used 1 TBSP tahini
Keyword Dairy-Free, Egg-Free, Gluten-Free, Hummus, Vegan Dips, Vegan Sandwiches
Tried this recipe?Let us know how it was!

It’s unusual for me to find more than a couple of recipes in a cookbook that I’m eager to try, but that’s not the case with this one. I’m planning on working my way through the entire book and next on my list are these four beauties…

  • Spicy Red Lentil Hummus
  • Greek-style Hummus
  • Carob Hummus Mousse
  • Fudge Cookies

And my verdict on Hummus Where The Heart Is? Well if you’re a hummus lover like me, then this book will be perfect for you. I’m really enjoying experimenting with new flavour combinations, as well as trying different pulses and vegetables in my hummus. I’ve also discovered that chickpeas can be blended to make delicious desserts. Who would have thought? This book would also make a lovely gift for hummus-loving friends and family. It’s a beautifully-designed, quality hardcover book filled with creative recipes and stunning photography.

Big thank you to Ryland Peters & Small for supplying me with a copy of this publication and giving me permission to post the photographs and recipe.

All the images contained within the post are © Ryland Peters & Small and cannot be used without express permission. The recipe text is © Dunja Gulin.

No Bake Strawberry Tarts (Dairy-Free | Egg-Free | Vegan)

Jump to Recipe

These No Bake Strawberry Tarts are a deliciously healthy treat – light, fresh, and bursting with summer berry flavour. Featuring a quick homemade chia jam and a nutrient-rich oat and nut crust, they make the perfect no-fuss snack or dessert on warmer days.

But before we dive into the recipe, there’s a special moment I’d love to share — one I’d been quietly dreaming about for years…

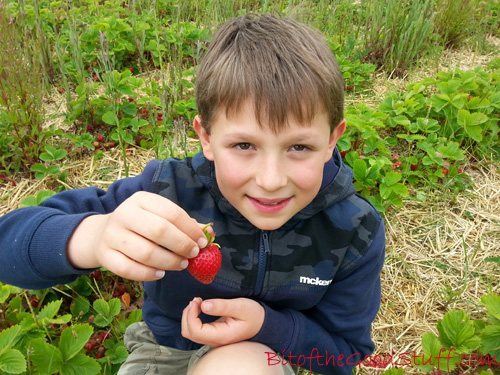
Strawberry Picking

Until fairly recently, neither for love nor money could Lil’ L be encouraged to eat strawberries. Sadly, along with all other berries, as well as oranges, plums and grapes, strawberries fell in his ‘too squishy’ camp. On the odd occasion that he did actually attempt to eat one, he’d end up gagging with tears streaming down his face. It was so torturous to watch. He did like the flavour of berries though and would happily drink them in smoothies. So as long as he was consuming berries in some shape or form, I didn’t really mind.

Still, I quietly held onto the dream of one day going berry picking with my son… though, over time, I’d started to pretty much give up on the idea.

Strawberry Picking

THEN, everything changed this Easter, during our trip to Spain. The supermarkets were overflowing with crates of the most beautiful strawberries — big, deeply red, and incredibly fragrant. We couldn’t resist picking up a crate (just €3!) and, to my surprise, Lil’ L offered to carry it. I could see him eyeing up the strawberries. They were that inviting.

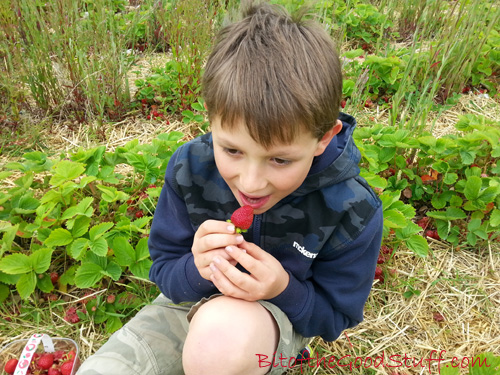
He took a tentative bite… and lo and behold — no gagging! He then proceeded to eat another five. You can imagine my joy. Finally, at the age of 11, he’d moved on from loathing to loving strawberries.

Strawberry Picking

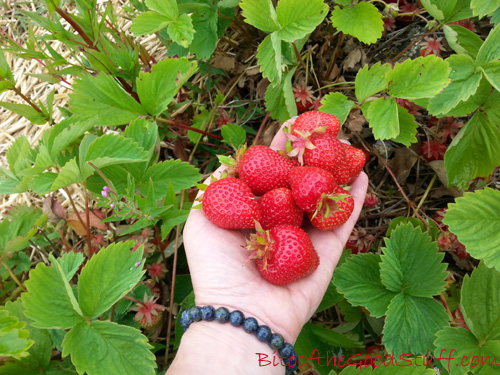
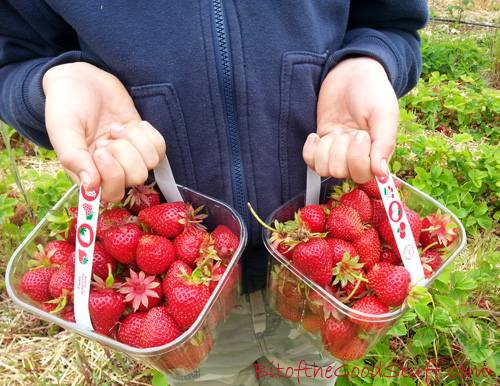
Back home, with strawberry season in full swing, we headed off to a local pick-your-own farm. Watching Lil’ L search for ‘the perfect strawberry’ with such delight was pure joy. He’s since mentioned more than once how much he loved that outing — proof that some things really are worth the wait.

The strawberries were so sweet and juicy that we ate them by the handful. To avoid waste, I also froze a bunch for ice creams and smoothies, and made a few batches of my favourite chia jam.

Strawberry Picking

If you’ve never tried chia jam before, you’re in for a treat. It’s so simple to make and tastes incredibly fresh — nothing like the overly sweet store-bought jams. I first came across the idea on Angela Liddon’s Oh She Glows blog back in 2010 and have been hooked ever since.

This strawberry chia jam takes just a few minutes to prepare, keeps for up to a week in the fridge, and is delicious spread on toast or scones, swirled into yogurt, or used as a tart filling…

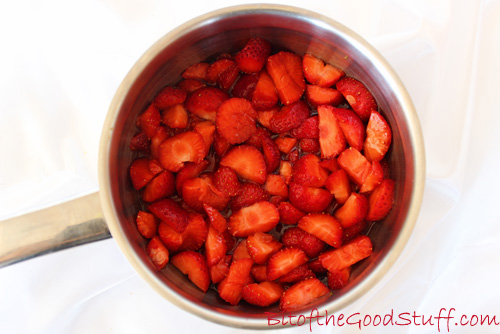
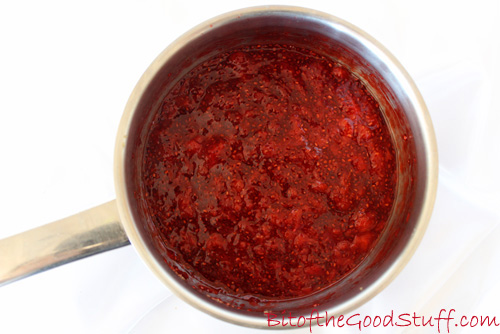
Strawberry Pan

Strawberry Pan

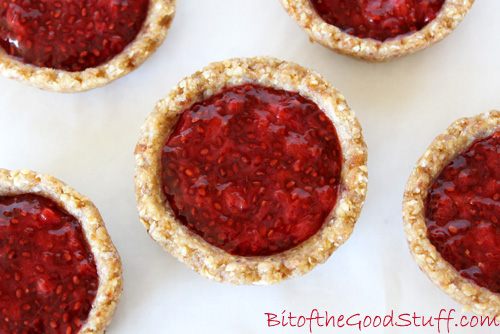
Introducing… No Bake Strawberry Tarts

These little tarts are one of our favourite ways to enjoy the jam. With last week’s mini heatwave, I was in no mood to turn on the oven, so these no bake tarts were just the ticket. They’re cool, light, and packed with feel-good ingredients.

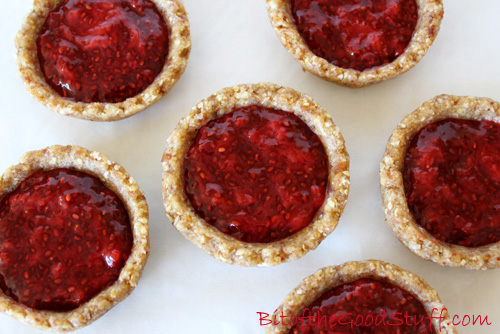
Vegan No Bake Strawberry Tarts

Lil’ L and M have been enjoying them as post-school/work snacks, while I’ve found them to be the perfect post-dinner ‘treat’ — indulgent enough to satisfy cravings, yet healthy enough to feel good about.

The oat, nut, and date base is inspired by my Pina Colada ‘Cheese’ Cake crust. It’s naturally sweet, packed with fibre and healthy fats, and gently spiced with vanilla and coconut. While it’s softer than a traditional pastry, it holds together beautifully and pairs perfectly with the jam.

Ready to make them? Let’s go!

Recipe Card

Vegan No Bake Strawberry Tarts

No Bake Strawberry Tarts (Dairy-Free | Egg-Free | Vegan)

These No Bake Strawberry Tarts are a deliciously healthy treat – light, fresh, and bursting with summer berry flavour. Featuring a quick homemade chia jam and a nutrient-rich nut and oat crust, they’re the perfect no-fuss snack or dessert for warm days.
Hands on time 25 minutes
Total Time 1 hour 25 minutes
Course Healthy Snacking, Treat
Servings 12

Ingredients
 

Strawberry Chia Jam

  • 200 g / 1½ cups fresh or frozen strawberries chopped
  • TBSP maple syrup or sweetener of choice
  • ½ TBSP freshly squeezed lemon juice
  • 1 TBSP chia seeds
  • ½ tsp vanilla extract

No Bake Tart Shells

  • 50 g / ½ cup rolled oats use certified gluten free, if needed
  • 40 g / ¼ cup raw cashews
  • 30 g / ¼ cup walnuts or pecans
  • 100 g / ½ cup soft sticky pitted dates (e.g. Medjool)
  • 1 tsp maple syrup or other liquid sweetener
  • ½ tsp vanilla extract
  • pinch of salt
  • 22 g / ¼ cup desiccated coconut

Instructions
 

  • Prepare the jam: Gently cook the strawberries, syrup and lemon juice until the berries start to break down. Stir in the chia seeds. Bring to the boil then reduce the heat and simmer for 20 minutes, until the jam has started to thicken. Give it a stir now and then with a wooden spoon and mash the berries to break them down. Remove from the heat and stir in the vanilla extract. Transfer to a glass jar, leave to cool then add a lid and place in the fridge. The jam will thicken up as it chills.
  • While the jam is simmering, prepare the tart shells. Loosely line a shallow tart/mince pie tray with cling film (plastic wrap).* Place the oats and nuts in a food processor and blitz into crumbs. Add the dates, maple syrup, vanilla extract and salt and continue processing until the mixture starts to come together. Add the desiccated coconut and whizz for a few more seconds. The mixture should easily stay together when you press it. If it’s still crumbly, keep processing until it sticks together.
  • Press the crumbs together to form a dough ball. Place between two pieces of baking paper (or use a large silicone pastry mat folded over) and roll out to a thickness of ½ cm / ⅕ inch. Press out using a 6 cm / 2½ inch pastry cutter and place in the lined tart tray. Repeat until all the dough is used up, re-rolling as needed. Chill in the fridge until the jam is ready. When the jam is completely chilled, spoon it into the tart shells and serve.
  • These tarts will keep in the fridge for up to a week.

Notes

*If you don’t have a shallow tart tray, you can shape the tart shells by hand or by moulding them round one end of a rolling pin.
Keyword Dairy-Free, Egg-Free, Gluten-Free Option, No Bake Tart, Strawberry, Vegan Treats
Tried this recipe?Let us know how it was!

If you make these No Bake Strawberry Tarts, I’d love to hear your feedback and any suggestions for adaptations. Leave a comment below or tag your photos with #bitofthegoodstuff on social media – I always love to see your creations! You can also connect with me on my social media channels here: Instagram, Facebook, Pinterest.  

With love,

Sharon xx
Apple and Almond Smoothie (Dairy-Free)

Jump to Recipe

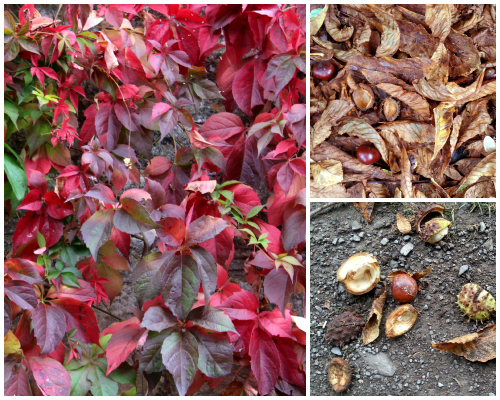
After an exceptionally warm and summer-like September and early October, Autumn has finally arrived in Bath. The Virginia creeper seems to have magically transformed overnight from lush green to vivid red, and the river and canal paths are littered with crunchy brown leaves and horse chestnuts. It most certainly is a beautiful time of year

First Signs of Autumn

And though the weather has cooled off a little, I’m still enjoying my daily smoothies. I often have them as a breakfast or lunch on the go, so I add ingredients like nut butters and chia seeds for protein, slow-release energy and to keep hunger pangs at bay. Lil’ L also enjoys smoothies as an after-school snack.

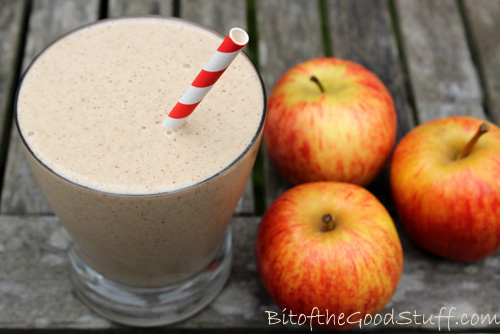
One of our current favourites is this Autumn-inspired Apple & Almond Smoothie.

Apple and Almond Smoothie (Vegan / Dairy-Free)

The nut butter, yogurt and chia seeds add a delicious creaminess to the smoothie as well as packing in lots more nutrients. The smoothie provides a good dose of protein, fibre and heart-healthy fats (including omega 3), as well as antioxidant vitamins C and E, and trace minerals such as calcium, iron and magnesium.

And another great thing about this smoothie is that you can sneak in a handful of spinach and it doesn’t affect the taste at all!

Until recently, Lil’ L hasn’t been a fan of green smoothies. He likes his smoothies to be the ‘right’ colour. In his eyes, berry smoothies should be pink or purple, while pineapple or mango smoothies should be yellow. For him, a berry smoothie that’s bright green is just wrong. However, one day it dawned on me that I might get away with adding spinach to our usual apple and almond smoothie. Apples can be green, right?

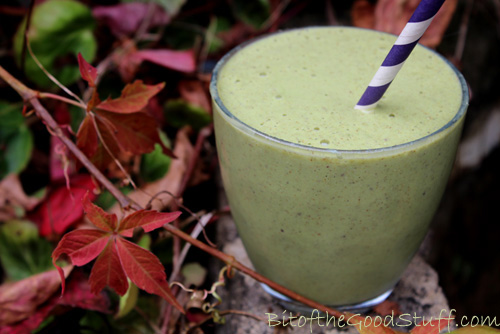
Green Apple and Almond Smoothie (Vegan / Dairy-Free)

I decided to give it a try when he arrived home from school one day. Here’s how the conversation went…
“Hi!” I call out. “I’ve made you a smoothie!”
“Great! Thanks!” he replies enthusiastically. I hand him the smoothie and there’s a pause, followed by a despondent “Oh…. it’s green”.
“Yep, it’s a green apple smoothie. Give it a try. I’m sure you’ll love it”.
With trepidation he takes a sip. “Mmm, it’s really nice!” he says with surprise. Then there’s a pause…. “So what’s making it green?”
Darn, 10 year olds are sharp. Clearly the ‘green apple’ thing won’t wash with him, so I decide to own up and tell him it’s spinach. He thinks about it for a moment then decides it doesn’t matter after all. Green or not, it tastes really good.

Hallelujah, the green smoothie hang up is finally over! In hindsight, I wish I’d introduced green smoothies when he was much younger. That way, he would have grown up thinking that green berry or tropical smoothies are normal. Never mind, he’s on board now and I’m really excited to try out lots more concoctions over the coming weeks.

So if you’ve got any green smoothie phobes in the family, I highly recommend trying this one on them. Start with a small amount of spinach so it’s a delicate light green rather than scary green and see what they think (just don’t mention the spinach until they’ve given it a thumbs up).

Recipe Card

Apple and Almond Smoothie

This smoothie is perfect for breakfast or as a post-school or exercise snack. It's sweet and flavourful, and the spinach is not detectable in the slightest (so a great way to encourage kids to enjoy their greens!) Unlike regular fruit smoothies, this one is a source of slow-release energy and will keep you feeling full up for hours.
Hands-on time 5 minutes
Total Time 5 minutes
Course Breakfast, Drinks, Snack

Ingredients
 

  • 240 ml 1 cup fortified soya milk or other non dairy milk
  • 1 small-medium organic sweet apple (e.g. Gala) cored and chopped (no need to peel if you have a high speed blender)
  • 1 small very ripe frozen peeled banana sliced into coins
  • 1 handful of fresh spinach leaves
  • 1 TBSP almond butter
  • 1 TBSP chia seeds
  • maple syrup optional

Instructions
 

  • Place all the ingredients in a high speed blender. Add a touch more milk or some maple syrup, if desired.
Keyword After School Snack, Breakfast Smoothie, Post Exercise Snack, Vegan Smoothie
Tried this recipe?Let us know how it was!

 If you make this smoothie, I’d love to hear your feedback and any suggestions for adaptations! Tag your photos with #bitofthegoodstuff on social media – I always love to see your creations! You can also connect with me on my social media channels here: Instagram, Facebook, Pinterest.   

With love,

Sharon xx