Vegan Biscoff Butter Cups

Jump to Recipe

Today I’m sharing a recipe for a delicious chocolate treat that would be perfect for sharing in the upcoming festive season.

Say hello to the Vegan Biscoff Butter Cup…
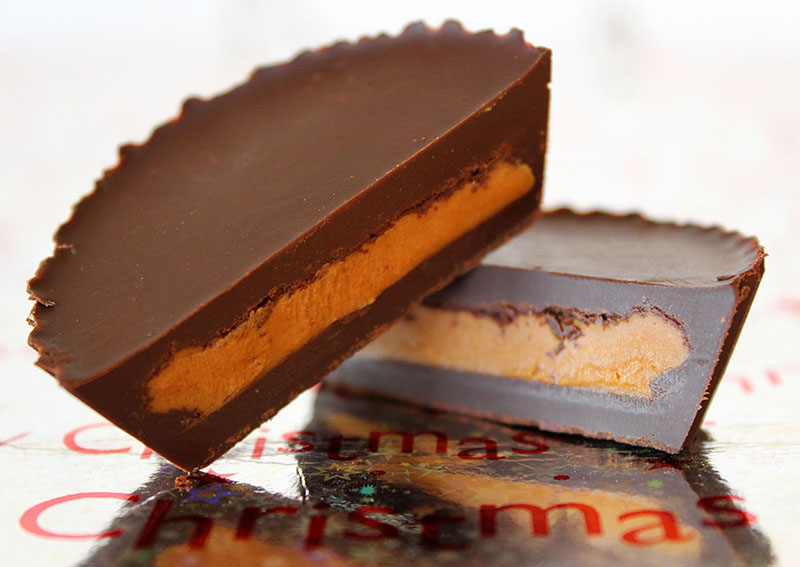
Vegan Biscoff Butter Cups

This mix of melt-in-your-mouth dark chocolate and biscoff cookies in butter form is a match made in heaven. Whether you’re vegan yourself, or looking for a chocolatey gift for a vegan/dairy-free loved one, these cups are bound to impress. And the fact that you made them yourself is sure to win you extra brownie points.

I have always loved those little Lotus Speculoos biscuits that that you get with a cup of coffee on continental Europe (known to our US friends as ‘Biscoff Cookies’). That crisp snap as you bite into it and that unique flavour are two reasons why I’m so fond of it. The fact that it happens to be vegan makes me love it even more.
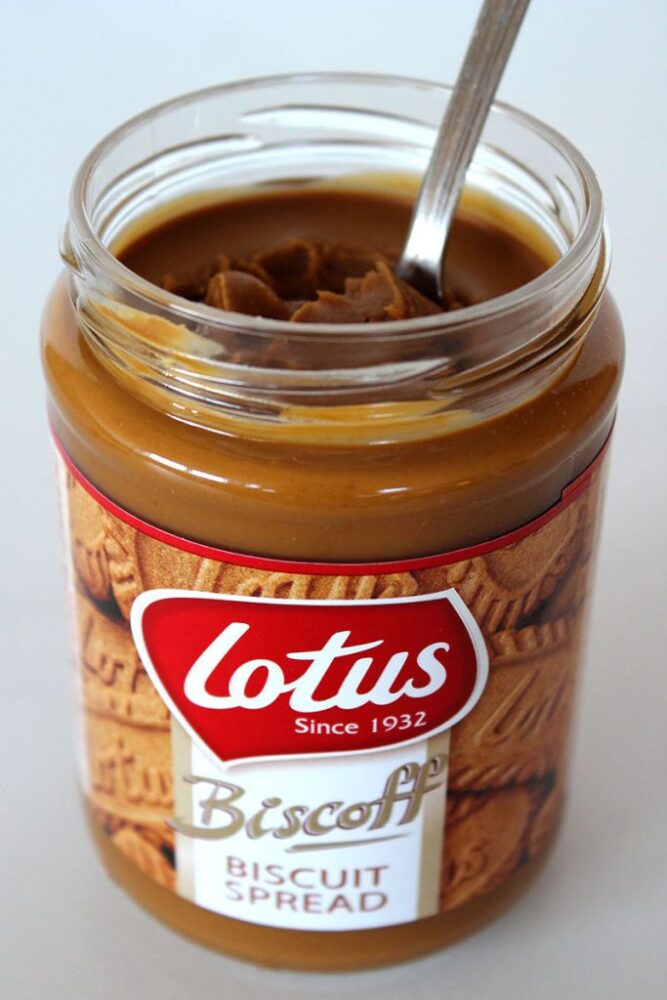
Lotus Biscoff Butter (Vegan)

So you can imagine how excited I was when I spotted Lotus Biscuit Spread (aka Biscoff Cookie Butter) in Waitrose (next to the peanut butter jars). My favourite coffee biscuit… in butter form AND it’s suitable for vegans!!!

Okay, so I know it’s not a health product, but I’m not adverse to the occasional sugary treat especially in the festive season.  And I was intrigued to see how it tastes. As soon as I got home, I stuck my spoon in to test it and, oh my word, it tastes JUST like the biscuit!!! A smooth, creamy version of the biscuit 😍
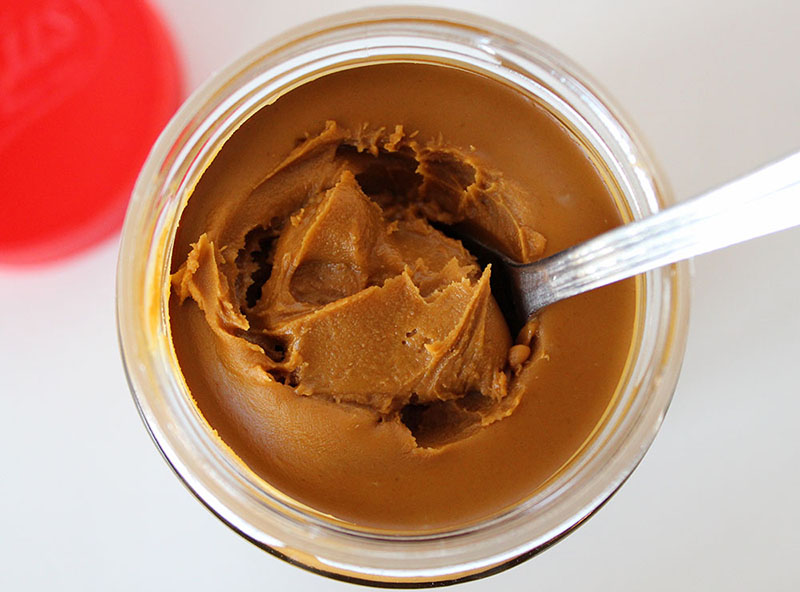
Lotus Biscoff Butter

And I knew the perfect recipe to use it in…

Vegan Biscoff Butter Cups

… a nut-free alternative to my Giant Vegan Peanut Butter Cups!

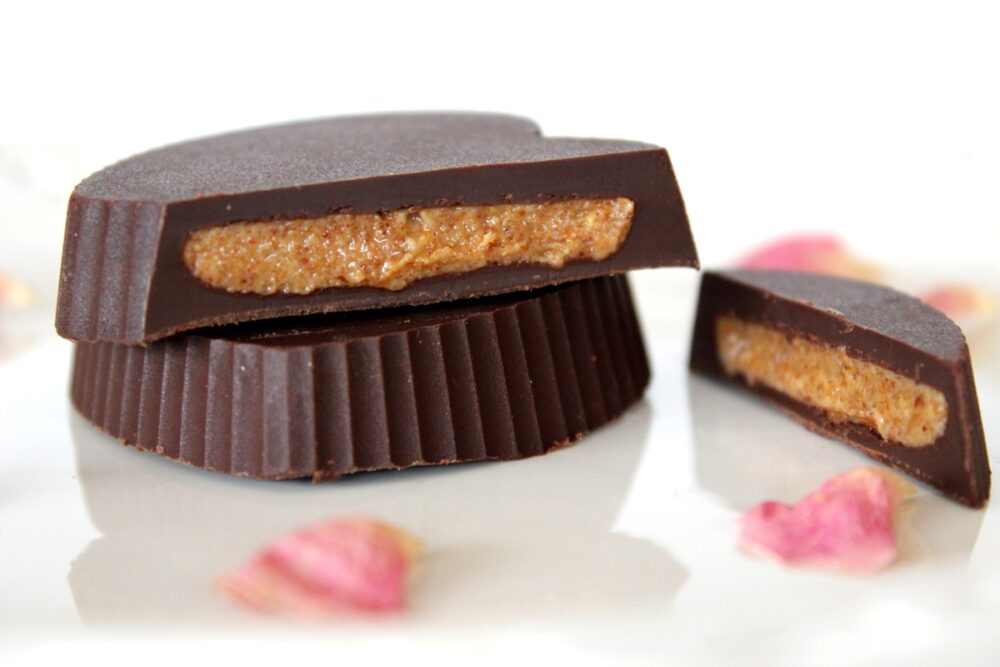
They are so easy to make! It’s simply a case of melting dark chocolate, pouring it into a silicone cupcake mould (or paper cases) and filling it with the biscoff cookie butter. The hardest bit is waiting for them to set before you can tuck in.

I’ve made two batches so far this week and they’ve been a big hit with everyone that’s tried them. These treats will definitely have wide appeal. They’d also make a great home-made Christmas gift, packaged in a chocolate box or in a festive cellophane bag.

Recipe Card
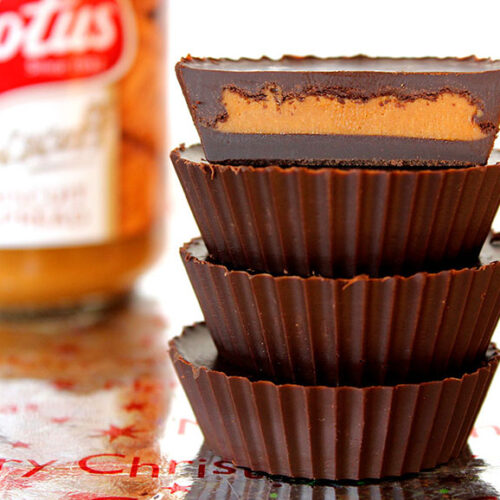
Vegan Biscoff Butter Cups

Vegan Biscoff Butter Cups

These Biscoff butter-filled chocolates are incredibly easy to make, yet look so professional that they’re bound to impress. I use silicone cupcake moulds. If you don’t have any, you can always use paper cases. Pop them in a muffin tray to help retain their shape.
Hands on time 25 minutes
Total Time 1 hour
Course Treat
Servings 8

Ingredients
 

  • 200 g / 7 oz 70% dark chocolate chopped into small pieces
  • 112 g / 12 tsp Lotus Biscoff Spread aka Lotus Biscoff Cookie Butter*

Instructions
 

  • Place half of the chocolate pieces in a heat-proof bowl set over a pan of gently simmering water (make sure the water doesn’t touch the bowl). When the chocolate has fully melted, remove from the heat.
  • Spoon about 2 tsp melted chocolate into each mould. Tilt the moulds so that the chocolate coats the sides to a height of abut 1 cm / just under ½ inch. Leave the remaining chocolate in the bowl (you will use this later).
  • Pop the moulds in the fridge until the chocolate is solid (about 8 minutes).
  • Add the remaining half of the chocolate pieces to the heat-proof bowl over the pan of water. Gently heat until the chocolate melts.
  • When the chocolate base is set, spoon a small amount of Biscoff cookie butter into the centre of each mould (I use about 1½ tsp per mould). Gently press down to level it. Run a teaspoon round the edge of the mould to create a tiny gap. Spoon melted chocolate on top and swirl to fill in the sides. Tap the mould on the worktop to release any air bubbles.
  • If you have any chocolate left over, pour it onto a piece of baking paper to create a chocolate ‘puddle’. You can keep this in the fridge for another recipe.
  • Chill the chocolates until completely solid. Stored in an airtight container, these treats will keep for weeks. If your house is warm, store them in the fridge.

Notes

* In the UK, Lotus Biscoff Spread is available in all the major supermarkets.
Keyword Dairy-Free, Nut-Free, Vegan Chocolates, Vegan Treats
Tried this recipe?Let us know how it was!

If you make these Vegan Biscoff Butter Cups, I’d love to hear your feedback and any suggestions for adaptations. Leave a comment below or tag your photos with #bitofthegoodstuff on social media – I always love to see your creations! You can also connect with me on my social media channels here: InstagramFacebookPinterest.   

With love,

Sharon xx


YOU MAY ALSO LIKE…

Giant Chocolate Peanut Butter Cups (Vegan | Dairy-Free)
Chocolate Peanut Butter Heart (Vegan | Dairy-Free)
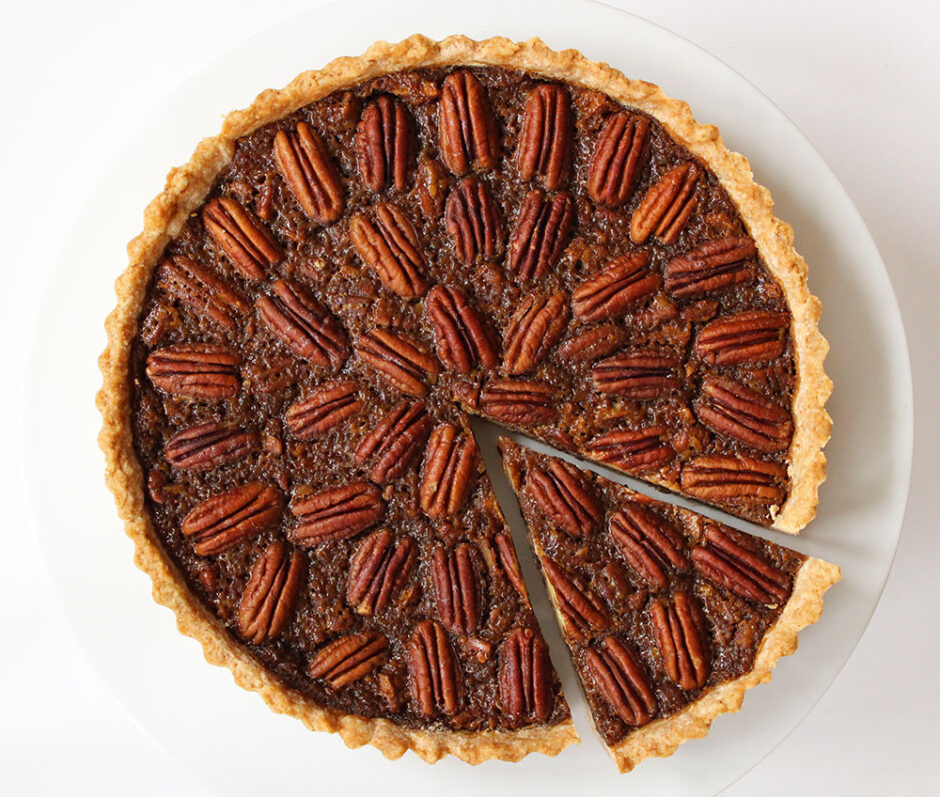
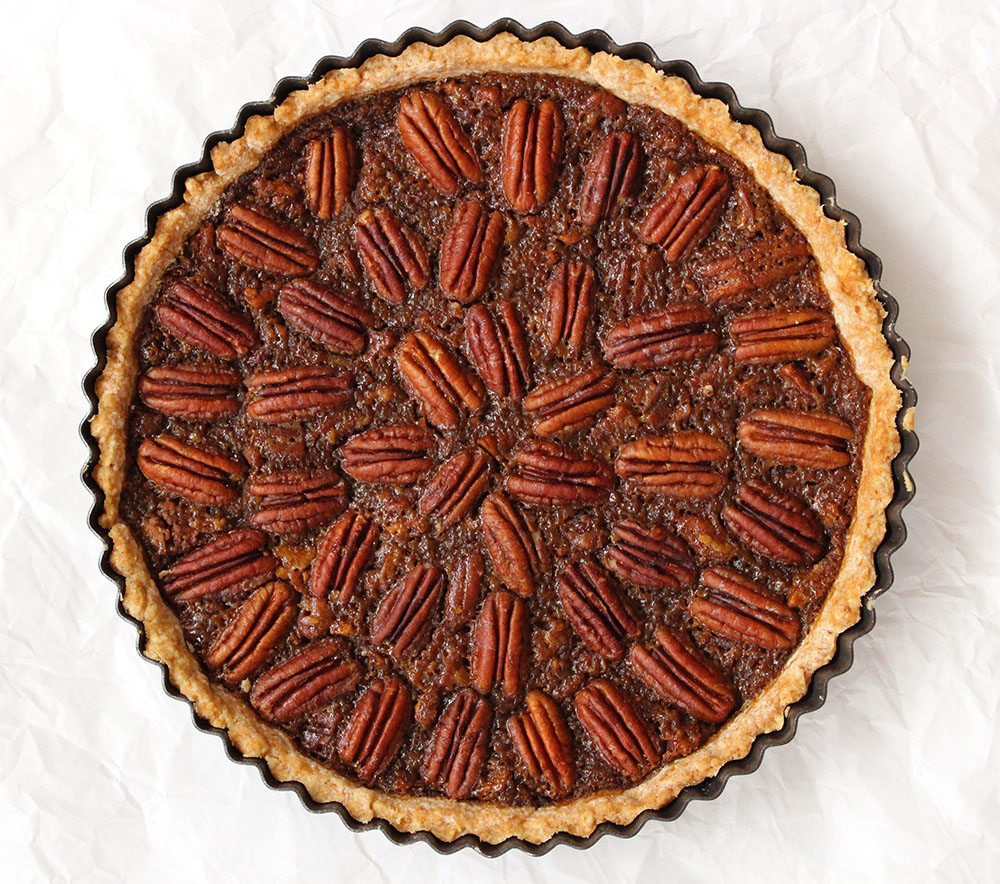
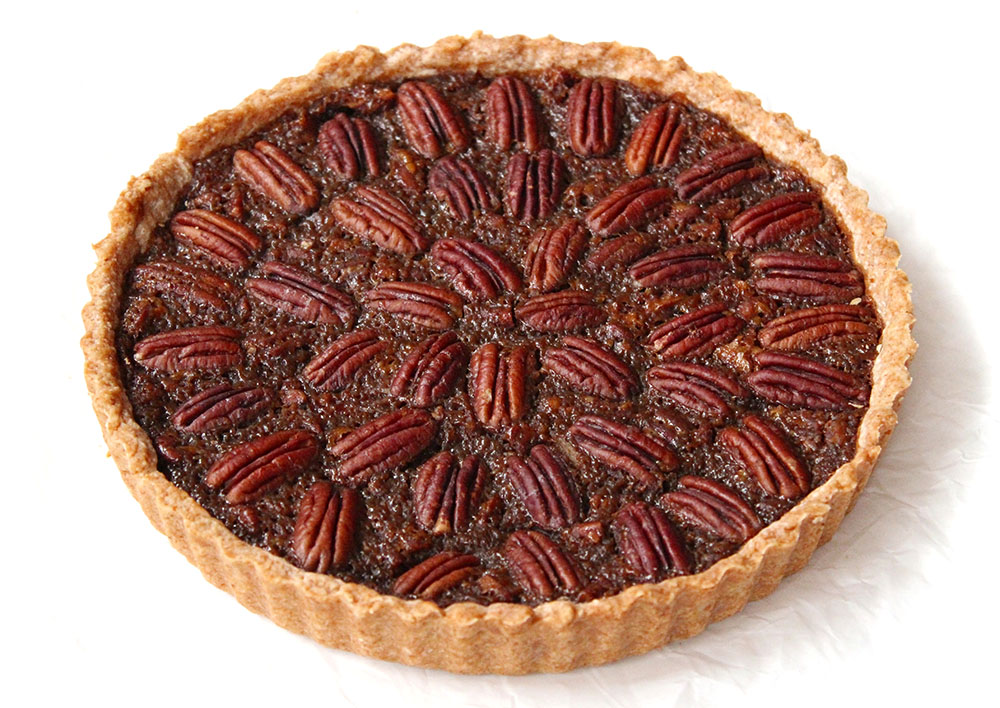
Vegan Pecan Pie

Jump to Recipe

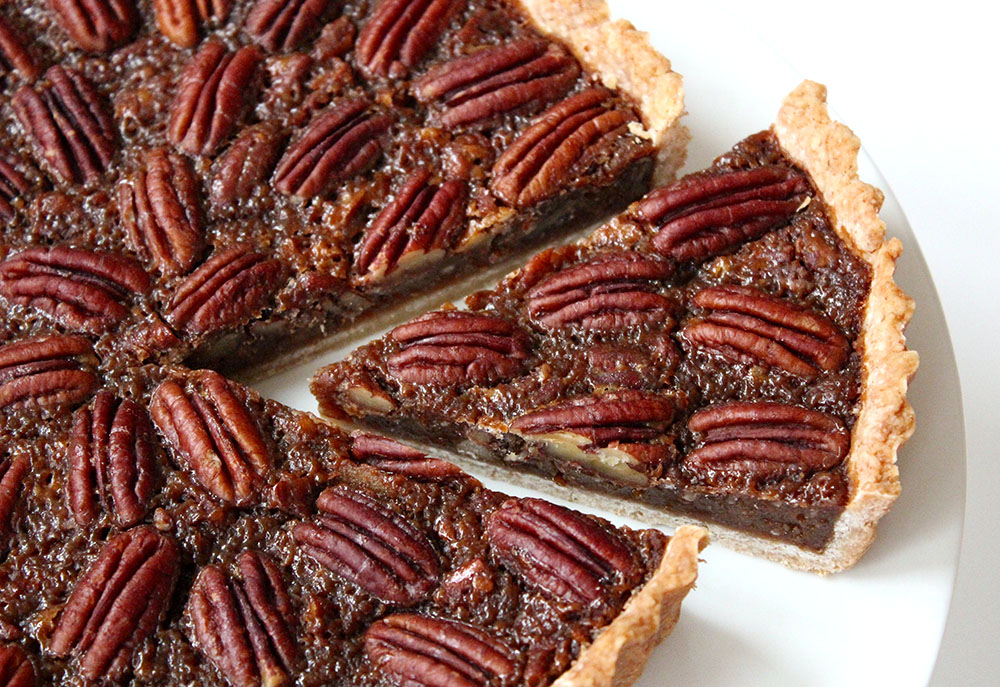
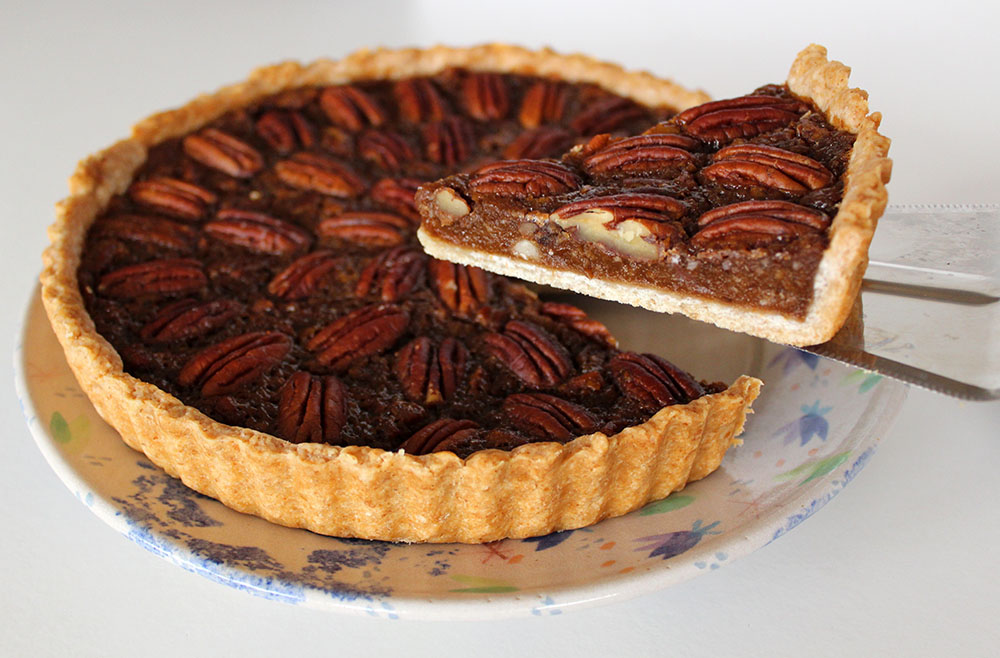
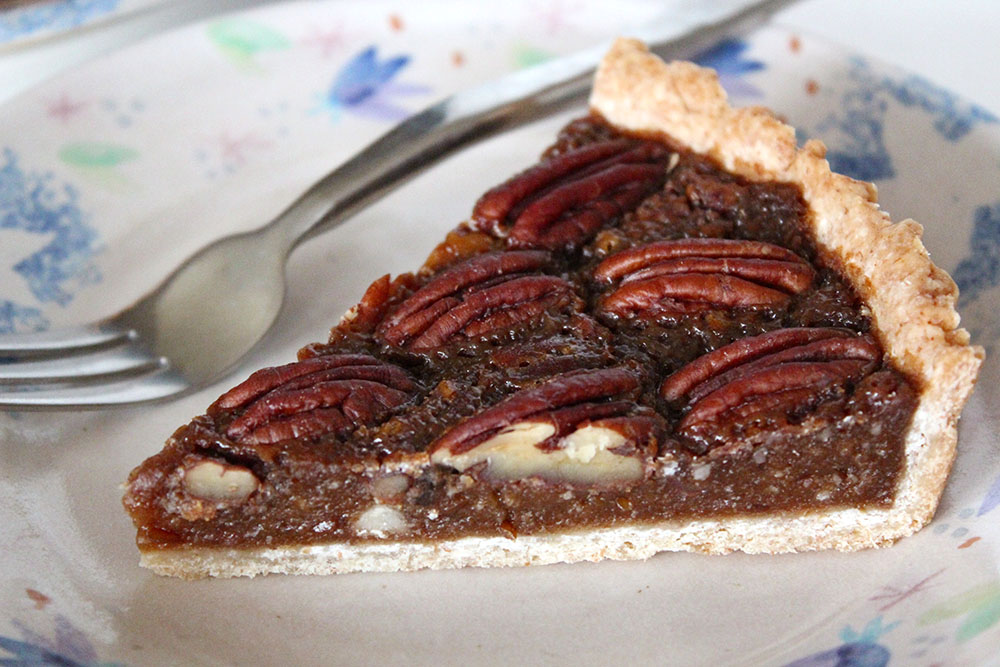
In today’s post, I’m sharing a recipe for an easy vegan pecan pie. This dish will be perfect for serving in the upcoming festive season. It looks impressive and slices beautifully.

Pecan pie hails from the southern US states. After a google search, I discovered that it’s traditionally made with eggs, butter, refined sugar and corn syrup. I decided to ditch all of these and use some of my favourite plant-based ingredients instead.

Vegan Pecan Pie

For the crust, I use my ‘go to’ sweet pastry recipe. I’ve never had a fail with this pastry and I love how crisp it turns out. Unlike many pastry recipes, it’s also palm-oil free as it uses coconut butter (the aroma-free/culinary kind) instead of dairy-free spread/vegan butter.

Vegan Pecan Pie

For the binder I replaced the chicken eggs with a couple of ‘flax eggs’ (a mix of ground linseed and warm water) and a couple of tablespoons of corn flour.

The butter was replaced with coconut cooking butter in the pastry and extra virgin coconut oil in the filling.

Vegan Pecan Pie

For the sweetener, I used a mix of maple syrup and coconut sugar. This gave the pie a delicious, caramel-like sweetness rather than the ‘sugary’ sweetness which you get from cane sugar. It also gave the pie a gloriously rich, dark brown hue.

Most of the traditional pecan pie recipes I’ve come across contain two cups of sugar in the filling. I used half this amount and still found it to be plenty sweet enough.

Vegan Pecan Pie

The pie is incredibly easy to make! In fact, I think it’s one of the simplest baked desserts that I’ve ever made… yet it looks like it took a lot of work. (It’ll be a great one for impressing your guests!) If you wanted to make it even easier, you could buy ready-made short-crust pastry (Jus-Rol does a vegan one) but, I promise you, it’s really easy to make pastry from scratch.

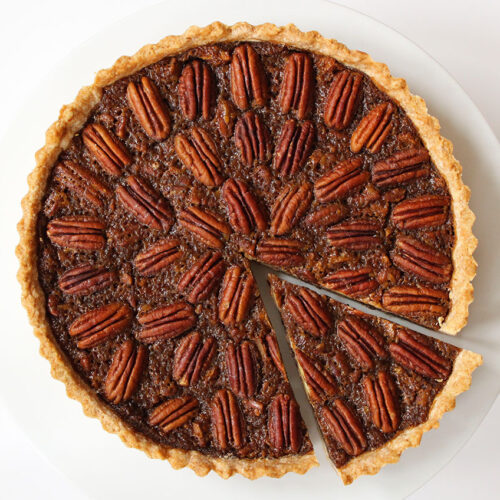
Vegan Pecan Pie

I’m sharing this recipe with the Suma Bloggers Network. Big shout out to my favourite wholefood wholesalers Suma, for supplying me with top quality ingredients. Suma products are stocked in independent healthfood shops and online.

Recipe Card

Vegan Pecan Pie

Vegan Pecan Pie

This is my plant-based version of the traditional southern US pecan pie. It’s perfect for serving in the festive season. It’s easy to make, but sure to impress your guests. You can use shop-bought pastry if you wish, but I promise you that it’s easy to make from scratch.
Hands-on time 30 minutes
Total Time 2 hours 30 minutes
Course Dessert
Cuisine American
Servings 8

Ingredients
 

Pastry

  • 90 g / ⅔ cup white spelt flour or plain (all purpose) flour
  • 90 g / ⅔ cup fine wholemeal (whole wheat pastry) flour or chapatti flour
  • 75 g / scant ½ cup aroma-free coconut cooking butter* (or substitute with dairy-free spread/vegan butter)
  • 2 TBSP golden caster (unrefined cane) sugar
  • pinch of salt
  • – 4 TBSP orange juice

Filling

  • 15 g / 2 TBSP ground linseed (flaxseed)
  • 90 ml / 6 TBSP warm water
  • 160 g / 1½ cups pecans divided
  • 100 g / ½ cup extra virgin coconut oil
  • 75 ml / ¼ cup maple syrup
  • 125 g / ¾ cup coconut sugar or golden caster (unrefined cane) sugar
  • 1 tsp vanilla extract
  • pinch of salt
  • 60 ml / 4 TBSP non-dairy milk
  • 15 g / 2 TBSP fine wholemeal (whole wheat pastry) flour or chapatti flour
  • 15 g / 2 TBSP corn flour (corn starch)

Instructions
 

  • Lightly grease an 20cm / 8 inch pie dish (or quiche tin) with oil. (I use a loose-bottomed tin for easy removal).
  • Prepare the pastry: Place the flour, coconut cooking butter (or dairy-free spread), sugar and salt in a food processor. Whiz until combined. While the machine is running, add orange juice a little at a time until the mixture starts to come together (I find I need about 3½-4 TBSP when using coconut butter and 2½ TBSP when using dairy-free spread). Scoop the mixture into a ball. Wrap in cling film (plastic wrap) and chill for 15-20 minutes.
  • Once the pastry has rested, place it on a lightly floured pastry mat and lay the cling film (plastic wrap) on top. Roll out the pastry into a circle large enough to fill the tin and the sides. Place the pastry in the tin and press it into the edges and up the sides. Slice off any excess pastry. If you have any holes in the pastry, you can patch it up using the scraps.
  • While the pastry is resting, prepare the filling. First, make the flax ‘egg’. Place the ground linseed in a small bowl with 90ml / 6 TBSP warm water. Whisk together with a fork then set aside for 10 minutes to gel up.
  • Set aside half of the pecan halves for decorating the top of the pie. Roughly chop the remaining pecans.
  • Preheat the oven to 190C (170C fan) / 375F.
  • Place the coconut oil, maple syrup, coconut sugar, vanilla extract and pinch of salt in a small saucepan over very low heat. As the oil melts, whisk to combine. When fully melted, remove from the heat.
  • In a small bowl, whisk together the milk, flour and corn flour until smooth. Pour it into the pan. Add the flax ‘egg’ and whisk until fully combined. Stir in the chopped pecans. Pour the mixture onto the pie crust (it will be very runny, but this is normal). Arrange the pecan halves on top.
  • Carefully place the pie on a baking sheet in the centre of the oven. Bake for 20 minutes at 190C (170C fan) / 375F. Reduce the heat to 130C (130C fan also) / 275F and bake for a further 40 minutes. Remove from the oven and leave to cool completely. (It will firm up as it cools).

Notes

* I used Tiana Organic Pure Coconut Cooking Butter
Storage Instructions: Stored in an airtight container in the refrigerator, the pie will keep for five days. I’m pretty confident this pie will freeze well but I haven’t tried it yet. As soon as I do, I’ll report back.
Keyword Dairy-Free, Egg-Free, Vegan Baking, Vegan Pecan Pie
Tried this recipe?Let us know how it was!

If you make this recipe, I’d love to hear about it! Leave me a comment below or tag your social media posts #BitoftheGoodStuff.  You’ll find me on Facebook and Pinterest and, as of this week… Instagram! I’m very late joining the Instagram party so if you’re already an Instagrammer, do pop by and say hi. I’d love to connect with you!

With love,

Sharon xx

Vegan Chocolate Cupcakes (Dairy Free | Egg Free)

Jump to Recipe

Today I’m sharing my “go-to” recipe for chocolate cupcakes. This recipe has never left me down. My oven can be really temperamental when it comes to cake baking, but these cupcakes always turn out perfectly. They’re light, fluffy and deliciously moist.

I’ve made them numerous times for fundraisers and they always sell in a flash. None of the children at our local school are vegan, but they choose these cupcakes simply because they love them. It also makes me happy to know that the children with dairy allergies are able to join in.  I often spot their mums making a beeline for me as I step through the school gate with my cake tin.

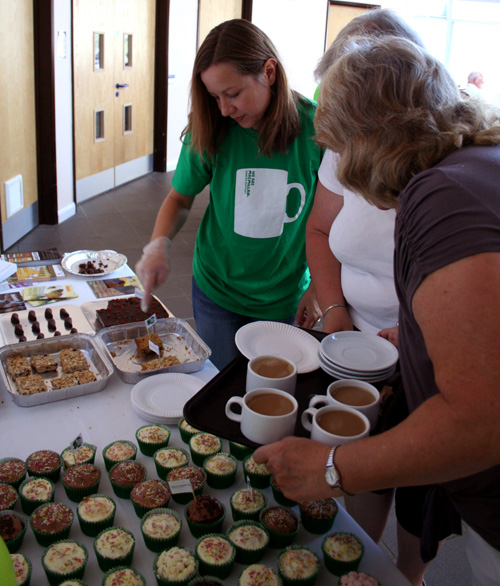
Macmillan Coffee Morning 2015

Next Friday is the annual Macmillan coffee morning here in the UK, which has now gained the status of the World’s Biggest Coffee Morning. Last year, the event raised a wopping £25 million for people affected by cancer.

s many of you already know, this is a charity very close to my heart and I’m always delighted to join in the coffee mornings and help raise money for the Macmillan nurses (or ‘Angels’ as I like to call them). Some years I’ve baked literally hundreds of cakes, like at this event in Dorset, which was organised by my sister.

Macmillan Coffee Morning 2015

Other years, I’ve joined in coffee mornings with friends or in my local community. It’s a great event to be involved in so, UK friends, do check out what’s happening in your local area.

And why not take along a batch of these tasty chocolate cupcakes? Most people don’t realise that cakes can be made free from animal products, so it’s always fun to see the look of shock on their faces when I tell them these cupcakes are 100% dairy and egg free.

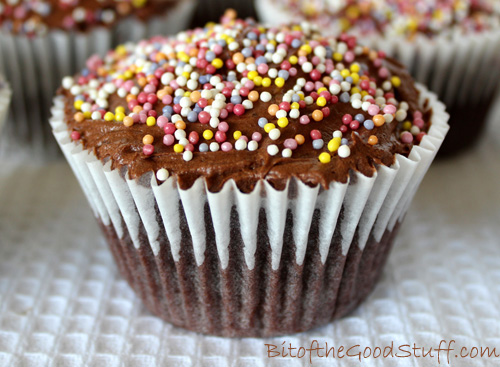
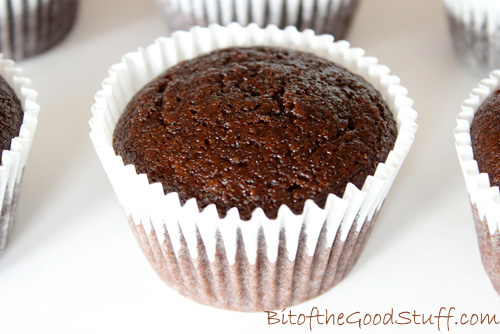
Vegan Chocolate Cupcakes

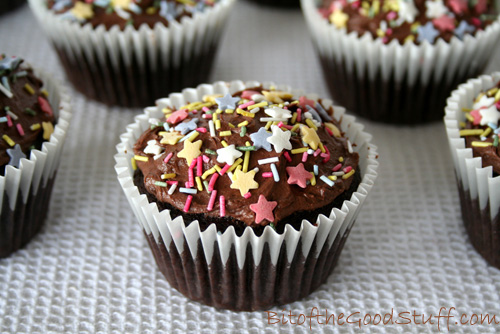
So what do they contain? Well, there are no fancy or weird substitute ingredients; just simple ingredients that you’re likely to have as pantry staples, like oil, vinegar, sugar and cocoa powder. The recipe I use is lightly adapted from the Basic Chocolate Cupcake recipe in Isa Chandra Moskowitz & Terry Hope Romero’s fab little cupcake book Vegan Cupcakes Take Over the World. I then add a simple dairy-free chocolate frosting and sprinkles.

Vegan Chocolate Cupcake

To be honest, these cakes don’t really need frosting as they taste amazing just as they are. If you add orange extract to the mix it takes them to a whole new level of deliciousness. Chocolate Orange has got to be one of the best flavour combos ever.

However, for fundraisers, these babies would look a little naked so we need to dress them up. I don’t go overboard with frosting as I find that piles of frosting is not only sickly, but also detracts from the delicious flavour of the cupcake itself. I tend to just smear some on with a palette knife and add a few sprinkles to finish it off.

If you’re vegan, you need to watch out for animal ingredients in sprinkles, including beeswax, shellac, gelatine and the red food colouring cochineal (aka E120, carmine) which is made from crushed beetles. In the UK, some of the supermarket branded sprinkles are vegan-friendly (usually the star sprinkles or other non-shiny ones). Vegan-friendly sprinkles can be also be ordered from online stores.

Recipe Card

Vegan Chocolate Cupcake

Vegan Chocolate Cupcakes

This is my go-to recipe for chocolate cupcakes. They’re light, fluffy, and deliciously moist — everything a chocolate cupcake should be! The quantities below make 10–12 cupcakes, and the frosting recipe provides plenty for spreading with a palette knife. If you’d like to pipe the frosting, I recommend doubling the batch to make sure you have enough to work with.
Hands on time 20 minutes
Total Time 40 minutes
Course Afternoon Tea, Treat
Servings 10

Ingredients
 

  • 240 ml / 1 cup soya milk
  • 1 tsp apple cider vinegar
  • 160 g / ¾ cup golden caster (unrefined) sugar
  • 70 ml / ⅓ cup organic rapeseed (canola) oil or other neutral-flavoured oil
  • 1 tsp vanilla extract or use 1 tsp orange extract for chocolate orange cupcakes
  • 70 g / ½ cup plain (all-purpose) flour
  • 70 g / ½ cup fine wholemeal (whole wheat) or chapatti flour or substitute with more plain (all purpose) flour
  • 37 g / ⅓ cup cocoa powder
  • ¾ tsp bicarbonate of soda (baking soda)
  • ½ tsp baking powder
  • ¼ tsp salt

Dairy-Free Chocolate Frosting

  • 150 g / 1 cup icing sugar (powdered sugar)
  • 4 TBSP cocoa powder
  • 50 g / 4 TBSP dairy-free spread or vegan butter
  • 2 TBSP plant milk (I use soya)

Vegan-friendly sprinkles

Instructions
 

  • Preheat oven to 180C (160C fan) / 350F. Line a muffin tray with paper liners.
  • Using a hand (balloon) whisk, whisk together the milk and vinegar in a large bowl and set aside for a few minutes to curdle. In a separate bowl, combine the flour, cocoa powder, bicarbonate of soda, baking powder and salt.
  • Add the sugar, oil and vanilla extract to the wet ingredient bowl and whisk until fully incorporated and the sugar has dissolved. Sift in half the dry ingredients and whisk to combine. Repeat with the remaining dry ingredients.
  • Fill the liners three quarters full. Bake for 18-20 minutes, or until a toothpick inserted through the middle comes out clean. (I bake mine for 20 minutes in a fan oven at 160C. My oven has a tendency to bake cakes unevenly so after 15 minutes I turn the trays round 180 degrees and bake for a further 5 minutes).
  • When ready, leave to cool for a couple of minutes then transfer to a wire rack and leave until completely cooled before frosting.

Prepare the Dairy-Free Chocolate Frosting:

  • Sieve the icing sugar and cocoa powder into a large bowl. Add the dairy-free spread and milk. Gently stir with a silicone spatula until incorporated (this will stop the sugar and cocoa flying round the kitchen as you beat it). Beat either by hand or, for a light and fluffy frosting, beat with an electric whisk. If the frosting looks a little dry, add another 1 tsp of milk.
  • Frost the cakes and decorate with sprinkles just before serving.

Notes

Recipe lightly adapted from Isa Chandra Moskowitz & Terry Hope Romero’s Basic Chocolate Cupcake in ‘Vegan Cupcakes Take Over the World’
Keyword Dairy-Free, Egg-Free, Vegan Cake, Vegan Treats
Tried this recipe?Let us know how it was!

 Are you planning to join in the Macmillan Coffee Morning? If you’re baking, I’d love to hear what you’ve got planned!

With love,

Sharon xx

SaveSave

SaveSave

Vegan Raspberry Muffins with Streusel Topping ( Dairy Free | Egg Free)

Jump to Recipe

I love this time of year when the British hedgerows and allotments are laden with berries. Whenever I’m out on a run along the river and canal paths, I can never resist pausing to grab a handful of blackberries. If you see someone running round Bath with purple stained hands, that’ll be me!

In today’ post, I’m sharing a recipe that showcases another glorious summer fruit – the raspberry

Raspberries
Continue reading “Vegan Raspberry Muffins with Streusel Topping ( Dairy Free | Egg Free)”

No Bake Strawberry Tarts (Dairy-Free | Egg-Free | Vegan)

Jump to Recipe

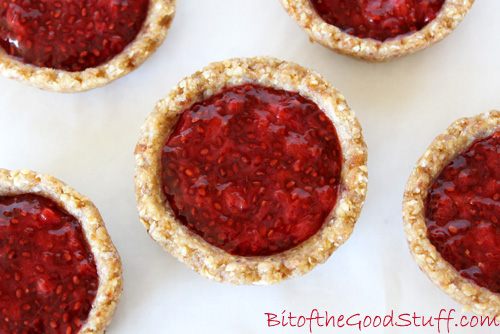
These No Bake Strawberry Tarts are a deliciously healthy treat – light, fresh, and bursting with summer berry flavour. Featuring a quick homemade chia jam and a nutrient-rich oat and nut crust, they make the perfect no-fuss snack or dessert on warmer days.

But before we dive into the recipe, there’s a special moment I’d love to share — one I’d been quietly dreaming about for years…

Strawberry Picking

Until fairly recently, neither for love nor money could Lil’ L be encouraged to eat strawberries. Sadly, along with all other berries, as well as oranges, plums and grapes, strawberries fell in his ‘too squishy’ camp. On the odd occasion that he did actually attempt to eat one, he’d end up gagging with tears streaming down his face. It was so torturous to watch. He did like the flavour of berries though and would happily drink them in smoothies. So as long as he was consuming berries in some shape or form, I didn’t really mind.

Still, I quietly held onto the dream of one day going berry picking with my son… though, over time, I’d started to pretty much give up on the idea.

Strawberry Picking

THEN, everything changed this Easter, during our trip to Spain. The supermarkets were overflowing with crates of the most beautiful strawberries — big, deeply red, and incredibly fragrant. We couldn’t resist picking up a crate (just €3!) and, to my surprise, Lil’ L offered to carry it. I could see him eyeing up the strawberries. They were that inviting.

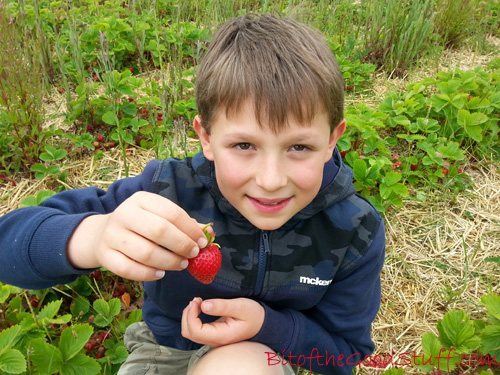
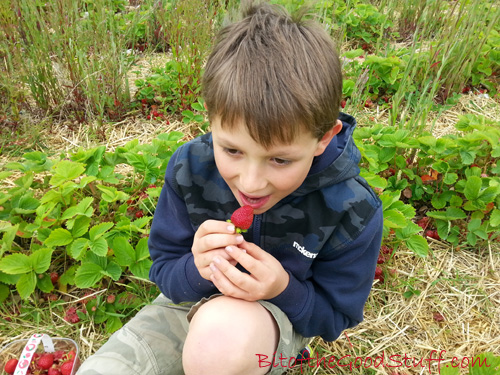
He took a tentative bite… and lo and behold — no gagging! He then proceeded to eat another five. You can imagine my joy. Finally, at the age of 11, he’d moved on from loathing to loving strawberries.

Strawberry Picking

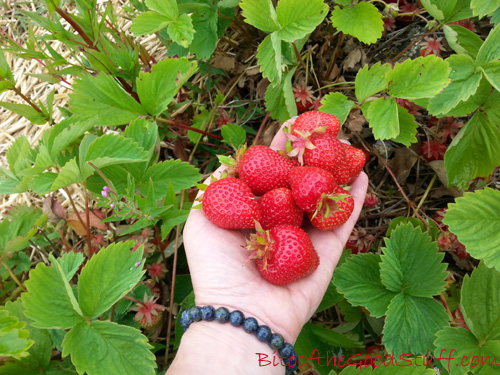
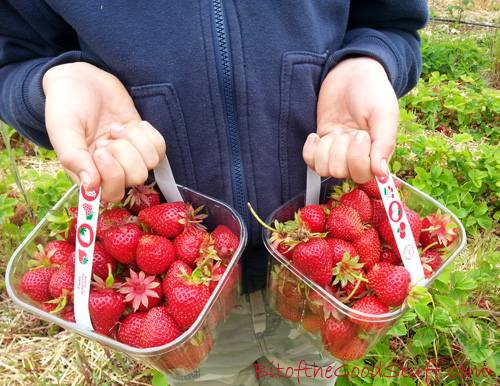
Back home, with strawberry season in full swing, we headed off to a local pick-your-own farm. Watching Lil’ L search for ‘the perfect strawberry’ with such delight was pure joy. He’s since mentioned more than once how much he loved that outing — proof that some things really are worth the wait.

The strawberries were so sweet and juicy that we ate them by the handful. To avoid waste, I also froze a bunch for ice creams and smoothies, and made a few batches of my favourite chia jam.

Strawberry Picking

If you’ve never tried chia jam before, you’re in for a treat. It’s so simple to make and tastes incredibly fresh — nothing like the overly sweet store-bought jams. I first came across the idea on Angela Liddon’s Oh She Glows blog back in 2010 and have been hooked ever since.

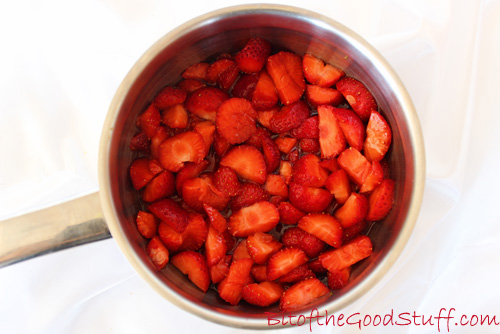
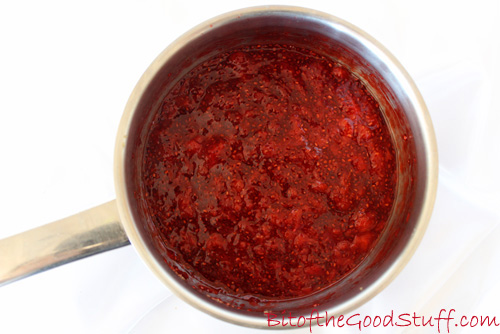
This strawberry chia jam takes just a few minutes to prepare, keeps for up to a week in the fridge, and is delicious spread on toast or scones, swirled into yogurt, or used as a tart filling…

Strawberry Pan

Strawberry Pan

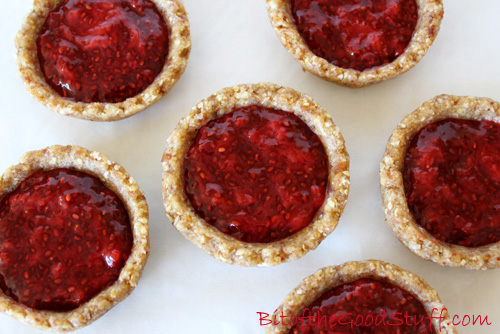
Introducing… No Bake Strawberry Tarts

These little tarts are one of our favourite ways to enjoy the jam. With last week’s mini heatwave, I was in no mood to turn on the oven, so these no bake tarts were just the ticket. They’re cool, light, and packed with feel-good ingredients.

Vegan No Bake Strawberry Tarts

Lil’ L and M have been enjoying them as post-school/work snacks, while I’ve found them to be the perfect post-dinner ‘treat’ — indulgent enough to satisfy cravings, yet healthy enough to feel good about.

The oat, nut, and date base is inspired by my Pina Colada ‘Cheese’ Cake crust. It’s naturally sweet, packed with fibre and healthy fats, and gently spiced with vanilla and coconut. While it’s softer than a traditional pastry, it holds together beautifully and pairs perfectly with the jam.

Ready to make them? Let’s go!

Recipe Card

Vegan No Bake Strawberry Tarts

No Bake Strawberry Tarts (Dairy-Free | Egg-Free | Vegan)

These No Bake Strawberry Tarts are a deliciously healthy treat – light, fresh, and bursting with summer berry flavour. Featuring a quick homemade chia jam and a nutrient-rich nut and oat crust, they’re the perfect no-fuss snack or dessert for warm days.
Hands on time 25 minutes
Total Time 1 hour 25 minutes
Course Healthy Snacking, Treat
Servings 12

Ingredients
 

Strawberry Chia Jam

  • 200 g / 1½ cups fresh or frozen strawberries chopped
  • TBSP maple syrup or sweetener of choice
  • ½ TBSP freshly squeezed lemon juice
  • 1 TBSP chia seeds
  • ½ tsp vanilla extract

No Bake Tart Shells

  • 50 g / ½ cup rolled oats use certified gluten free, if needed
  • 40 g / ¼ cup raw cashews
  • 30 g / ¼ cup walnuts or pecans
  • 100 g / ½ cup soft sticky pitted dates (e.g. Medjool)
  • 1 tsp maple syrup or other liquid sweetener
  • ½ tsp vanilla extract
  • pinch of salt
  • 22 g / ¼ cup desiccated coconut

Instructions
 

  • Prepare the jam: Gently cook the strawberries, syrup and lemon juice until the berries start to break down. Stir in the chia seeds. Bring to the boil then reduce the heat and simmer for 20 minutes, until the jam has started to thicken. Give it a stir now and then with a wooden spoon and mash the berries to break them down. Remove from the heat and stir in the vanilla extract. Transfer to a glass jar, leave to cool then add a lid and place in the fridge. The jam will thicken up as it chills.
  • While the jam is simmering, prepare the tart shells. Loosely line a shallow tart/mince pie tray with cling film (plastic wrap).* Place the oats and nuts in a food processor and blitz into crumbs. Add the dates, maple syrup, vanilla extract and salt and continue processing until the mixture starts to come together. Add the desiccated coconut and whizz for a few more seconds. The mixture should easily stay together when you press it. If it’s still crumbly, keep processing until it sticks together.
  • Press the crumbs together to form a dough ball. Place between two pieces of baking paper (or use a large silicone pastry mat folded over) and roll out to a thickness of ½ cm / ⅕ inch. Press out using a 6 cm / 2½ inch pastry cutter and place in the lined tart tray. Repeat until all the dough is used up, re-rolling as needed. Chill in the fridge until the jam is ready. When the jam is completely chilled, spoon it into the tart shells and serve.
  • These tarts will keep in the fridge for up to a week.

Notes

*If you don’t have a shallow tart tray, you can shape the tart shells by hand or by moulding them round one end of a rolling pin.
Keyword Dairy-Free, Egg-Free, Gluten-Free Option, No Bake Tart, Strawberry, Vegan Treats
Tried this recipe?Let us know how it was!

If you make these No Bake Strawberry Tarts, I’d love to hear your feedback and any suggestions for adaptations. Leave a comment below or tag your photos with #bitofthegoodstuff on social media – I always love to see your creations! You can also connect with me on my social media channels here: Instagram, Facebook, Pinterest.  

With love,

Sharon xx

Cranberry, Orange and Dark Chocolate Florentines (Dairy-free | Vegan)

Jump to Recipe

For this month’s Suma Blogger’s Network entry, I though I’d share one of my latest treat obsessions – Vegan Florentines 💜 I’d been dreaming about Florentines ever since I saw them on display in the patisserie shops of Venice and Florence a few years ago. I’d never seen anything quite like them before. They looked so dainty yet totally decadent with their dark chocolate bottoms! I was pretty sure that they’d be full of dairy and off limits to me, but I was excited about the thought of creating a vegan version one day.

This week I finally got round to a little Florentine experimentation in the kitchen.

After a quick internet search, I discovered that Florentines are typically made with cane sugar, honey, butter, candied cherries, candied citrus peel and almonds. Since I’m not a fan of the first 4 ingredients, and I know a lot of my readers aren’t keen on candied peel, I ended up subbing 5 of the 6 ingredients. The almonds stayed 😉

The cane sugar and honey was swapped for coconut sugar and maple syrup, which gave the Florentines a wonderful golden hue and caramel-like sweetness. Instead of candied cherries and citrus peel, I used dried cranberries and orange zest. This gave the Florentines a fresh, citrussy flavour which I absolutely loved. The butter was exchanged for non dairy spread or organic aroma-free coconut butter.

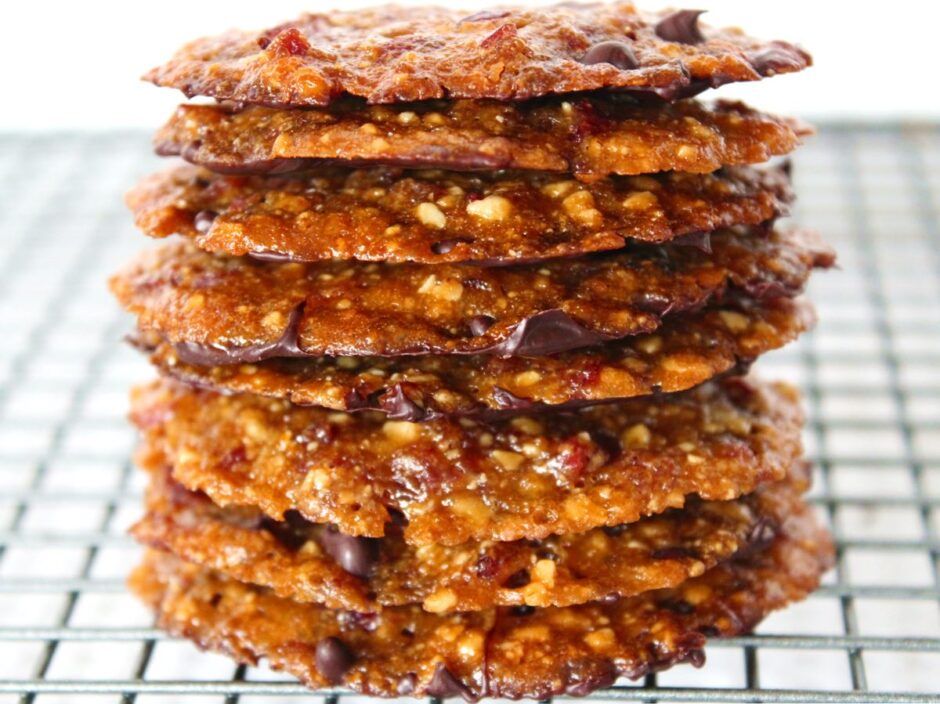
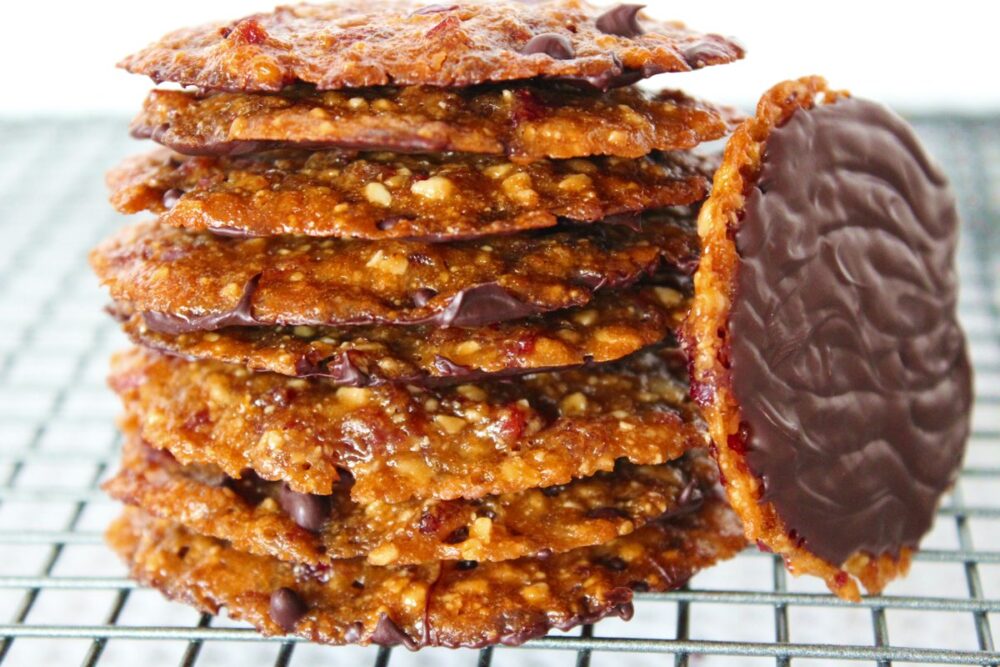
Vegan Florentines

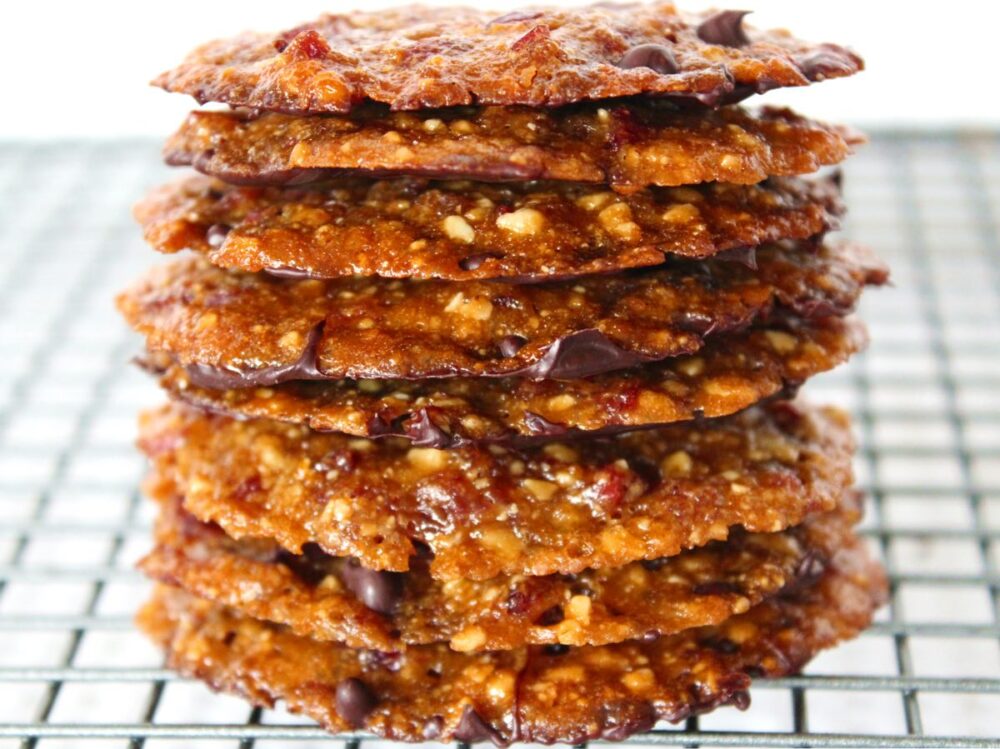
I’ve done 6 trials so far this week, playing around with different ingredient ratios and combos. All have tasted delicious, but I was striving to bake a Florentine that was super thin with the traditional ‘lacey’ texture on the underside. By the 4th trial, I’d cracked it.

Vegan Florentines

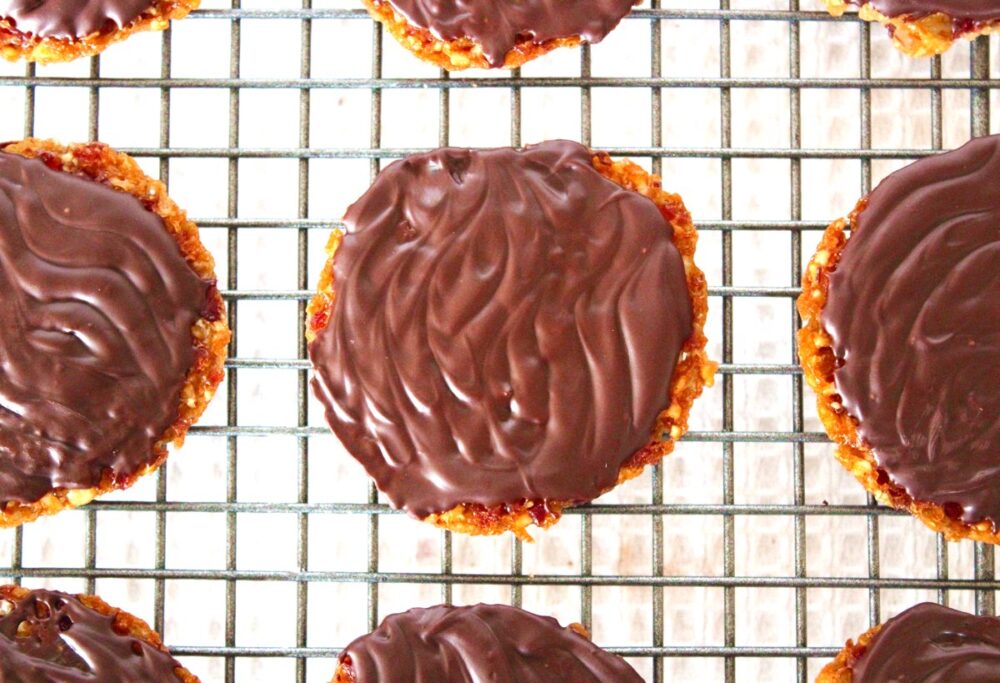
Once cooled, I then added the classic Florentine wavy chocolate bottom.

Vegan Florentines

These Florentines are my new treat obsession. I absolutely love their texture – crisp on the outside, chewy in the centre with a melt-in-your-mouth chocolate bottom. Plus the flavour combination is so lush. The citrus zest gives them a wonderful lift while the dark chocolate makes them feel decadent.

Another great thing about this biscuit is that each one only contains 1 tsp of mixture which, in my eyes, makes it totally acceptable to go back for a second or third 🙂

‘M’ and Lil’ L seem to love them as much as me. I’ve made 72 so far this week, and there are very few left in the biscuit tin! I also took along a sample to my Tuesday night study class and they were a big hit!


Vegan Florentines


Recipe Card

Cranberry, Orange and Dark Chocolate Florentines (Dairy-free | Vegan)

These Vegan Florentines are crisp on the outside, chewy in the centre, and finished with a smooth layer of dark chocolate. The zesty citrus and rich chocolate make them feel extra special.
For the best results, I recommend weighing the ingredients. The shape and signature ‘laciness’ can vary depending on the size of the fruit and nut pieces, and the type of flour or fat used – but whatever their form, they’re always delicious!
Hands-on time 20 minutes
Total Time 40 minutes
Course Afternoon Tea, Treat
Servings 12

Ingredients
 

  • 30 g / ¼ cup toasted, flaked almonds
  • 30 g 2 TBSP dairy-free spread / vegan butter or aroma-free coconut butter
  • 30 g 3 TBSP coconut sugar or golden caster (unrefined cane) sugar
  • 30 g / 2 TBSP maple syrup
  • 18 g 2 TBSP fine wholemeal (whole wheat pastry) flour, chapatti flour or gluten-free flour mix
  • 30 g / 3 TBSP dried cranberries finely chopped
  • zest of 1 unwaxed / organic orange
  • 100 g / 3½ oz dark chocolate (or substitute with dark choc chips)

Instructions
 

  • Preheat the oven to 180C (160C fan) / 350F. Line two large baking sheets with non-stick baking paper.
  • Crush the almonds between your fingers to break them up.
  • In a small pan, gently heat the dairy-free spread / butter. Once it has melted, whisk in the sugar and syrup. Remove from the heat and whisk in the flour. Stir in the almonds, cranberries and zest. You want to get the mixture as uniform as possible so that the Florentines spread evenly as they bake.
  • Drop six rounded teaspoons of mixture onto one baking sheet. Be sure to space them out to give them plenty of room to spread. Add another six teaspoons to the second baking sheet. Using damp fingers, press down on the Florentines to flatten slightly and shape into circles.
  • Place in the pre-heated oven and bake for 8 minutes, or until the edges of the Florentines have browned. Leave to cool. (They will be very soft when they come out the oven, but they firm up as they cool).
  • Place the chocolate pieces in a heat-proof bowl set over a pan of gently simmering water (make sure the water doesn’t touch the bowl). When the chocolate has melted, remove from the heat. If the chocolate is very runny, stir until it thickens slightly. Using a knife, coat the bottom of each Florentine. Before the chocolate sets, wiggle a fork across it to form a wavy pattern.
  • Chill the Florentines until fully set, then transfer to an airtight container. Stored in the refrigerator, these Florentines will keep for at least a couple of weeks. They also freeze really well.
Keyword Dairy-Free, Egg-Free, Gluten-Free Option, Vegan Baking, Vegan Florentines, Vegan Treats
Tried this recipe?Let us know how it was!

If you make these Vegan Florentines, I’d love to hear your feedback and any suggestions for adaptations! Tag your photos with #bitofthegoodstuff on social media – I always love to see your creations! You can also connect with me on my social media channels here: Instagram, Facebook, Pinterest.   

With love,

Sharon xx