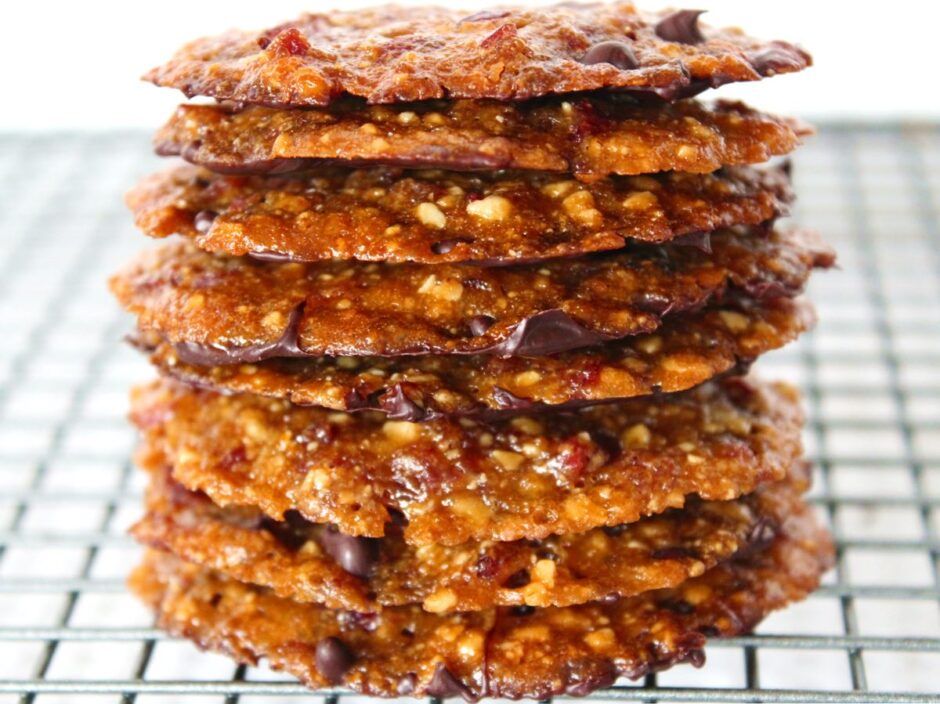
Cranberry, Orange and Dark Chocolate Florentines (Dairy-free | Vegan)

Jump to Recipe

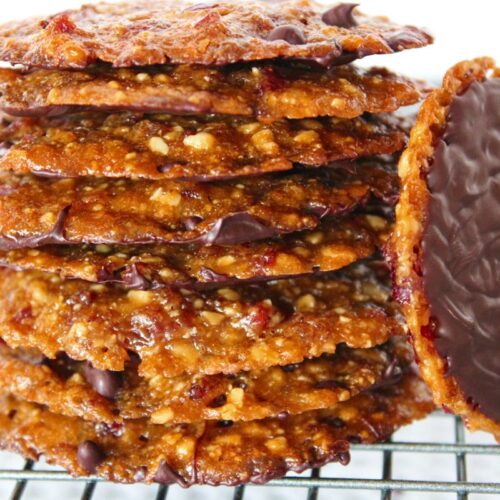
For this month’s Suma Blogger’s Network entry, I though I’d share one of my latest treat obsessions – Vegan Florentines 💜 I’d been dreaming about Florentines ever since I saw them on display in the patisserie shops of Venice and Florence a few years ago. I’d never seen anything quite like them before. They looked so dainty yet totally decadent with their dark chocolate bottoms! I was pretty sure that they’d be full of dairy and off limits to me, but I was excited about the thought of creating a vegan version one day.

This week I finally got round to a little Florentine experimentation in the kitchen.

After a quick internet search, I discovered that Florentines are typically made with cane sugar, honey, butter, candied cherries, candied citrus peel and almonds. Since I’m not a fan of the first 4 ingredients, and I know a lot of my readers aren’t keen on candied peel, I ended up subbing 5 of the 6 ingredients. The almonds stayed 😉

The cane sugar and honey was swapped for coconut sugar and maple syrup, which gave the Florentines a wonderful golden hue and caramel-like sweetness. Instead of candied cherries and citrus peel, I used dried cranberries and orange zest. This gave the Florentines a fresh, citrussy flavour which I absolutely loved. The butter was exchanged for non dairy spread or organic aroma-free coconut butter.
Vegan Florentines

I’ve done 6 trials so far this week, playing around with different ingredient ratios and combos. All have tasted delicious, but I was striving to bake a Florentine that was super thin with the traditional ‘lacey’ texture on the underside. By the 4th trial, I’d cracked it.

Vegan Florentines

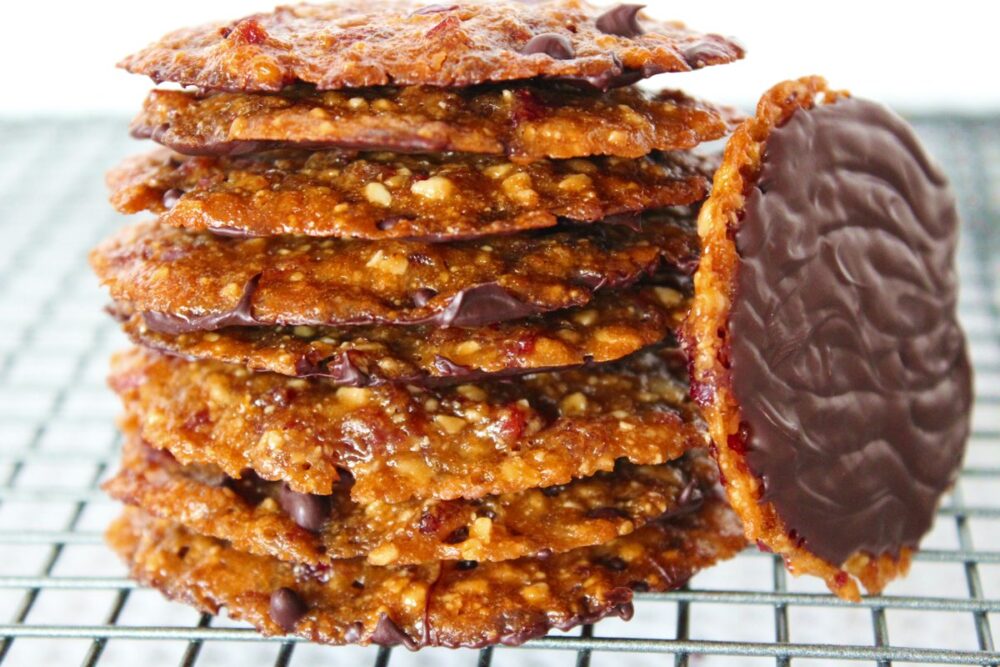
Once cooled, I then added the classic Florentine wavy chocolate bottom.

Vegan Florentines

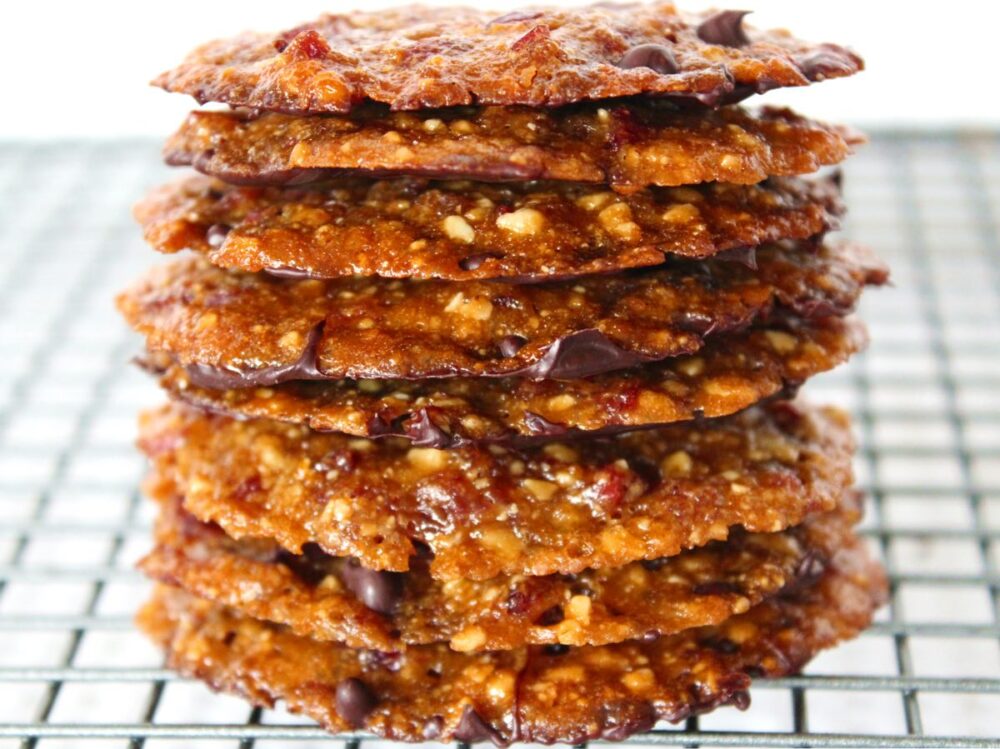
These Florentines are my new treat obsession. I absolutely love their texture – crisp on the outside, chewy in the centre with a melt-in-your-mouth chocolate bottom. Plus the flavour combination is so lush. The citrus zest gives them a wonderful lift while the dark chocolate makes them feel decadent.

Another great thing about this biscuit is that each one only contains 1 tsp of mixture which, in my eyes, makes it totally acceptable to go back for a second or third 🙂

‘M’ and Lil’ L seem to love them as much as me. I’ve made 72 so far this week, and there are very few left in the biscuit tin! I also took along a sample to my Tuesday night study class and they were a big hit!

Vegan Florentines


Recipe Card

Cranberry, Orange and Dark Chocolate Florentines (Dairy-free | Vegan)

These Vegan Florentines are crisp on the outside, chewy in the centre, and finished with a smooth layer of dark chocolate. The zesty citrus and rich chocolate make them feel extra special.
For the best results, I recommend weighing the ingredients. The shape and signature ‘laciness’ can vary depending on the size of the fruit and nut pieces, and the type of flour or fat used – but whatever their form, they’re always delicious!
Hands-on time 20 minutes
Total Time 40 minutes
Course Afternoon Tea, Treat
Servings 12

Ingredients
 

  • 30 g / ¼ cup toasted, flaked almonds
  • 30 g 2 TBSP dairy-free spread / vegan butter or aroma-free coconut butter
  • 30 g 3 TBSP coconut sugar or golden caster (unrefined cane) sugar
  • 30 g / 2 TBSP maple syrup
  • 18 g 2 TBSP fine wholemeal (whole wheat pastry) flour, chapatti flour or gluten-free flour mix
  • 30 g / 3 TBSP dried cranberries finely chopped
  • zest of 1 unwaxed / organic orange
  • 100 g / 3½ oz dark chocolate (or substitute with dark choc chips)

Instructions
 

  • Preheat the oven to 180C (160C fan) / 350F. Line two large baking sheets with non-stick baking paper.
  • Crush the almonds between your fingers to break them up.
  • In a small pan, gently heat the dairy-free spread / butter. Once it has melted, whisk in the sugar and syrup. Remove from the heat and whisk in the flour. Stir in the almonds, cranberries and zest. You want to get the mixture as uniform as possible so that the Florentines spread evenly as they bake.
  • Drop six rounded teaspoons of mixture onto one baking sheet. Be sure to space them out to give them plenty of room to spread. Add another six teaspoons to the second baking sheet. Using damp fingers, press down on the Florentines to flatten slightly and shape into circles.
  • Place in the pre-heated oven and bake for 8 minutes, or until the edges of the Florentines have browned. Leave to cool. (They will be very soft when they come out the oven, but they firm up as they cool).
  • Place the chocolate pieces in a heat-proof bowl set over a pan of gently simmering water (make sure the water doesn’t touch the bowl). When the chocolate has melted, remove from the heat. If the chocolate is very runny, stir until it thickens slightly. Using a knife, coat the bottom of each Florentine. Before the chocolate sets, wiggle a fork across it to form a wavy pattern.
  • Chill the Florentines until fully set, then transfer to an airtight container. Stored in the refrigerator, these Florentines will keep for at least a couple of weeks. They also freeze really well.
Keyword Dairy-Free, Egg-Free, Gluten-Free Option, Vegan Baking, Vegan Florentines, Vegan Treats
Tried this recipe?Let us know how it was!

If you make these Vegan Florentines, I’d love to hear your feedback and any suggestions for adaptations! Tag your photos with #bitofthegoodstuff on social media – I always love to see your creations! You can also connect with me on my social media channels here: Instagram, Facebook, Pinterest.   

With love,

Sharon xx
Chocolate Orange Chia Pudding

Jump to Recipe

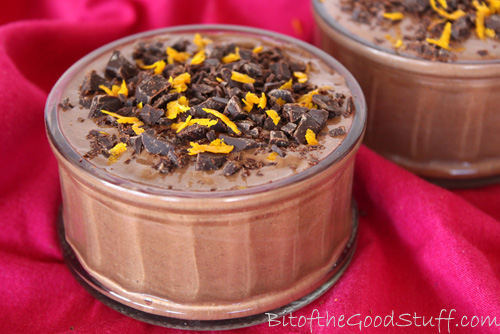
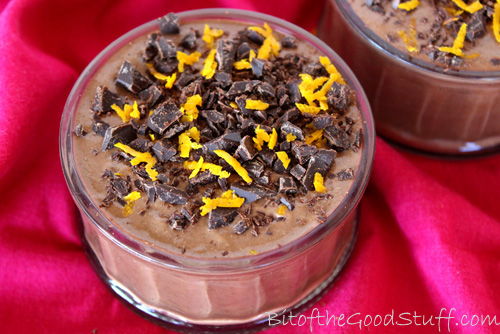
I first shared a recipe for chocolate orange chia pudding back in February 2012 and, to this day, it remains one of my family’s favourite desserts. It’s such a simple pudding to make and, since I originally posted the recipe, I’ve refined the method so that it’s even quicker. Honestly, this recipe could not be more easy! The original photo I took doesn’t do this pudding justice, so I thought it was time for a re-post with the updated recipe and some shiny new photos.

Chocolate Orange Chia Pudding

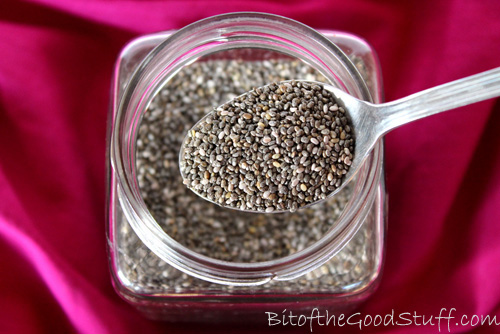
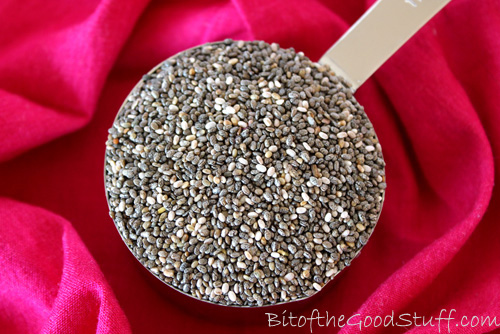
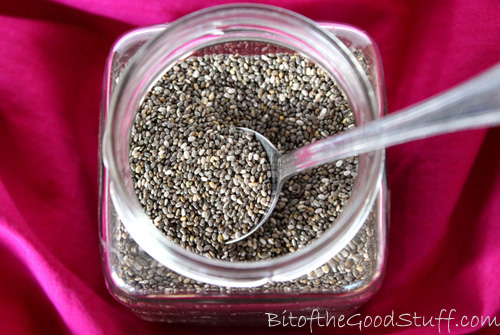
Since that original post, chia seeds have become much more popular here in the UK. You can buy them in health food shops, and even supermarkets have started stocking them. I find they can vary a lot in price, so I always shop around for the best deal. Since I use them frequently in smoothies and puddings, I’ve been buying larger bags lately, which tend to work out much better value.

Chia Seeds

So why do I love chia seeds so much?

Well, there are two main reasons. The first is their amazing nutritional profile. Chia seeds are very high in dietary fibre, a good source of ‘complete’ protein, and rich in omega 3 essential fatty acids. They’re also hydrophilic and can absorb around 10 times their weight in water, thus helping to keep us nicely hydrated. Their fibre, fat and protein content, along with these hydrophilic abilities, means that the seeds are a great source of slow release energy, they help to balance blood sugar levels, and they keep us feeling full up for hours. Adding a spoonful to smoothies is a great way to keep hunger pangs at bay.

Chia Seeds

Chia seeds contain a range of trace minerals, and are especially rich in manganese, phosphorus and calcium, which are all important for good bone health. A 28g / 1 oz serving provides 30% of the manganese RDA, 27% of phosphorus, and 18% of the calcium RDA. The seeds also contain a multitude of antioxidants, including the flavonoid quercetin, which has anti-inflammatory and antihistamine properties.

The second reason I love chia so much is that they make the most incredible chocolate puddings! Once blended with some cacao or cocoa powder and a little liquid, they transform into a delicious, silky smooth pudding that will easily rival any shop-bought chocolate dessert. And unlike the shop-bought varieties that tend to be laden with sugar and little nutritional value, these chia puddings are refined sugar free and packed with nutrition.

Chia Seeds

I used to soak the chia seeds in liquid for an hour or so until they’d transformed into a gel-like substance before blending them up, but these days I literally throw all the ingredients straight in the blender. High speed blenders are best for this job as they’ll blend the seeds smooth in a matter of seconds.

Lil’ L absolutely loves these puddings and sees them as a real treat. It’s great to be able to treat him to something that’s so nutritionally packed and full of healthy goodness.

Recipe Card

Chocolate Orange Chia Pudding

Chocolate Orange Chia Pudding

The fresh zesty flavour of the orange works in harmony with the bitter dark chocolate to make one delicious dessert! It tastes decadent yet it's super healthy and packed with feel-good nutrients. It's also very filling, so a little goes a long way. I find a ramekin or espresso cup is the perfect serving size.
Hands-on time 7 minutes
Total Time 7 minutes
Course Dessert
Servings 4

Ingredients
 

  • 80 ml / ⅓ cup orange juice
  • 300 ml / 1¼ cups plant milk (I use fortified soya milk)
  • 64 g / 6 TBSP chia seeds
  • 30 g / 4 TBSP cacao or regular cocoa powder
  • 4 soft pitted dates e.g. Medjool
  • ½ tsp orange extract
  • 1 TBSP maple syrup

Suggested garnish

  • dark chocolate finely chopped or grated
  • orange zest

Instructions
 

  • Place the orange juice and milk in a high speed, power blender, followed by the remaining ingredients. Give them a stir until they are coated in liquid. Blend on low speed until the dates are broken up, then move to high speed and continue blending until silky smooth. Stop now and then to scrape down the sides. Taste test and add a touch more orange extract or sweetener, if desired.
  • Pour into small ramekins or cups, sprinkle on the garnish and chill until ready to serve. It will keep for up to five days in the refrigerator.
Keyword Chia Pudding, Dairy-Free, Easy Vegan Desserts, Egg-Free
Tried this recipe?Let us know how it was!

Have you tried chia puddings before? If so, what’s your favourite flavour combo? If you’ve posted any recipes or pics, please do share the links below x

With love,

Sharon xxSaveSave

SaveSave

SaveSave

Crunchy Nut Apple Crumble (Vegan / Dairy-free)

Jump to Recipe

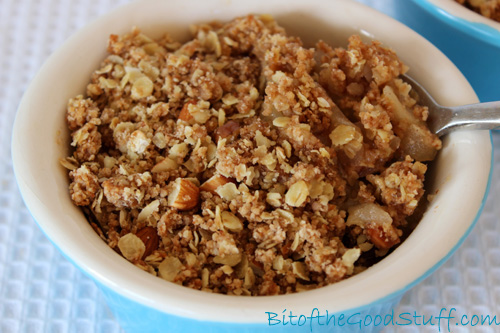
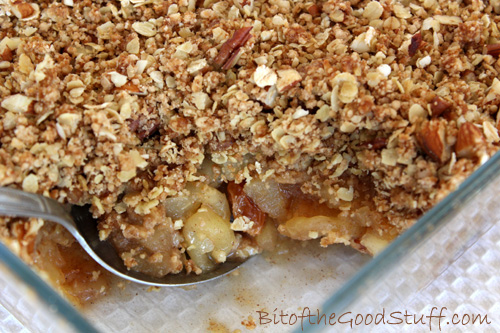
This healthy twist on the classic Apple Crumble is one of our all-time favourite autumnal desserts. With a spiced apple filling and golden, nutty topping, it’s comfort food at its best!

Apple Crumble is a quintessential British dessert. However, in contrast to the traditional version, which is typically loaded with refined sugar and white flour, I’ve created a more nourishing take using nutrient-rich ingredients. The white flour is replaced with wholegrain flour, oats, and chopped nuts, adding delicious texture, flavour, and heart-healthy goodness. And by using naturally sweet apples instead of tart Bramleys, I’ve been able to significantly reduce the sugar without sacrificing any of the flavour.

Vegan Apple Crumble

This year, our apple tree blessed us with a bumper harvest — over a hundred apples and counting! With so much fresh fruit to use, we’ve been enjoying lots of seasonal treats, and this Crunchy Nut Apple Crumble has been the standout favourite. It’s easy to make, wonderfully comforting, and loved by the whole family. We hope you enjoy it as much as we do!

Recipe Card

Vegan Apple Crumble

Crunchy Nut Apple Crumble

This healthy twist on the classic Apple Crumble is one of our all-time favourite autumnal desserts. With a deliciously spiced apple filling and a golden, crunchy topping packed with oats, nuts, and a hint of cinnamon, it’s the kind of treat we come back to again and again as the leaves begin to fall.
Hands on time 25 minutes
Total Time 45 minutes
Course Dessert
Servings 6

Ingredients
 

For the Apple Filling

  • 1 kg / 7 medium sweet apples (e.g. Gala) peeled, cored and sliced into 0.6cm / ¼-inch thick pieces
  • 60 ml / 4 tbsp water
  • 35 g / 3 tbsp coconut sugar or golden caster (unrefined cane) sugar
  • 1 tsp ground cinnamon
  • 60 g / ⅓ cup sultanas

For the Crumble Topping

  • 100 g / ¾ cup fine wholemeal (wholewheat pastry) flour or chapatti flour or gluten-free flour blend
  • 1 tsp baking powder
  • ½ tsp ground cinnamon
  • 75 g / ¾ cup rolled porridge oats (quick oats, not jumbo)
  • 50 g / 4 tbsp coconut sugar or unrefined cane sugar
  • 70 g / 4½ tbsp vegan butter or dairy-free spread
  • 30 g / ¼ cup pecans chopped
  • 40 g / ¼ cup almonds chopped
  • ½-1 TBSP Demerara (or turbinado) sugar for sprinkling

Instructions
 

  • Preheat your oven to 190°C (170°C fan) / 375°F.

Cook the apples:

  • Place the water, apples, sugar, cinnamon, and sultanas in a large saucepan. Stir, cover with a lid, and simmer over a low heat for around 15 minutes, stirring occasionally, until the apples are just tender but still hold their shape. Taste and add a little more sweetener, if needed.

Make the crumble topping:

  • In a large mixing bowl, combine the flour, baking powder, cinnamon, oats, and sugar. Add the vegan butter and rub it in with your fingertips until the mixture resembles coarse breadcrumbs. Stir in the chopped pecans and almonds.

Assemble the crumble:

  • Spoon the cooked apples into a 1.5-litre / 1½-quart ovenproof dish (approx. 22cm x 17cm x 6cm / 9” x 7” x 2½”). Level the surface and gently press down. Spoon the crumble topping evenly over the apples and sprinkle with Demerara sugar.

Bake:

  • Place in the preheated oven and bake for 20–25 minutes, until the topping is crisp and golden. Allow to rest for 5 minutes before serving.

Serving Suggestions:

  • This crumble is delicious served with dairy-free custard, cream, or yogurt
  • It can be served warm, or cold straight from the fridge (we actually love it this way as the topping becomes even crunchier!)!

Notes

Storage Tips:
Store in an airtight container for up to 5 days. It is also freezable.
Keyword Dairy-Free, Egg-Free, Gluten-Free Option, Vegan Apple Crumble, Vegan Baking
Tried this recipe?Let us know how it was!

If you make this Crunchy Nut Apple Crumble, I’d love to hear your feedback and any suggestions for adaptations! Leave a comment below or tag your photos with #bitofthegoodstuff on social media – I always love to see your creations! You can also connect with me on my social media channels here: Instagram, Facebook, Pinterest.   

With love,

Sharon xx
Apple and Almond Smoothie (Dairy-Free)

Jump to Recipe

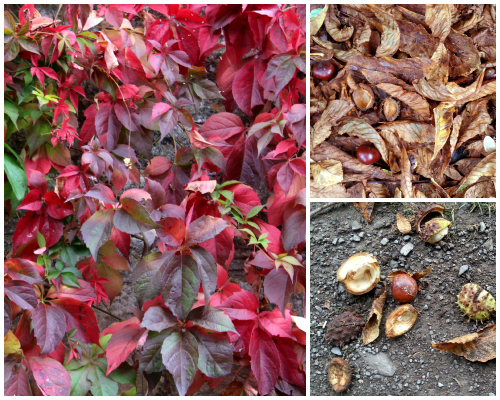
After an exceptionally warm and summer-like September and early October, Autumn has finally arrived in Bath. The Virginia creeper seems to have magically transformed overnight from lush green to vivid red, and the river and canal paths are littered with crunchy brown leaves and horse chestnuts. It most certainly is a beautiful time of year

First Signs of Autumn

And though the weather has cooled off a little, I’m still enjoying my daily smoothies. I often have them as a breakfast or lunch on the go, so I add ingredients like nut butters and chia seeds for protein, slow-release energy and to keep hunger pangs at bay. Lil’ L also enjoys smoothies as an after-school snack.

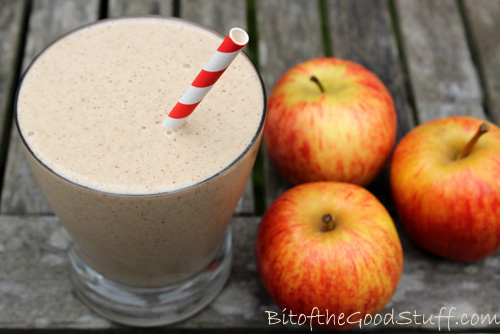
One of our current favourites is this Autumn-inspired Apple & Almond Smoothie.

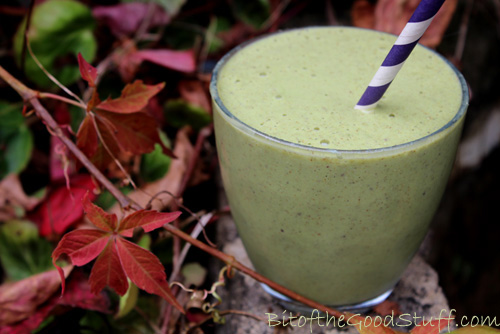
Apple and Almond Smoothie (Vegan / Dairy-Free)

The nut butter, yogurt and chia seeds add a delicious creaminess to the smoothie as well as packing in lots more nutrients. The smoothie provides a good dose of protein, fibre and heart-healthy fats (including omega 3), as well as antioxidant vitamins C and E, and trace minerals such as calcium, iron and magnesium.

And another great thing about this smoothie is that you can sneak in a handful of spinach and it doesn’t affect the taste at all!

Until recently, Lil’ L hasn’t been a fan of green smoothies. He likes his smoothies to be the ‘right’ colour. In his eyes, berry smoothies should be pink or purple, while pineapple or mango smoothies should be yellow. For him, a berry smoothie that’s bright green is just wrong. However, one day it dawned on me that I might get away with adding spinach to our usual apple and almond smoothie. Apples can be green, right?

Green Apple and Almond Smoothie (Vegan / Dairy-Free)

I decided to give it a try when he arrived home from school one day. Here’s how the conversation went…
“Hi!” I call out. “I’ve made you a smoothie!”
“Great! Thanks!” he replies enthusiastically. I hand him the smoothie and there’s a pause, followed by a despondent “Oh…. it’s green”.
“Yep, it’s a green apple smoothie. Give it a try. I’m sure you’ll love it”.
With trepidation he takes a sip. “Mmm, it’s really nice!” he says with surprise. Then there’s a pause…. “So what’s making it green?”
Darn, 10 year olds are sharp. Clearly the ‘green apple’ thing won’t wash with him, so I decide to own up and tell him it’s spinach. He thinks about it for a moment then decides it doesn’t matter after all. Green or not, it tastes really good.

Hallelujah, the green smoothie hang up is finally over! In hindsight, I wish I’d introduced green smoothies when he was much younger. That way, he would have grown up thinking that green berry or tropical smoothies are normal. Never mind, he’s on board now and I’m really excited to try out lots more concoctions over the coming weeks.

So if you’ve got any green smoothie phobes in the family, I highly recommend trying this one on them. Start with a small amount of spinach so it’s a delicate light green rather than scary green and see what they think (just don’t mention the spinach until they’ve given it a thumbs up).

Recipe Card

Apple and Almond Smoothie

This smoothie is perfect for breakfast or as a post-school or exercise snack. It's sweet and flavourful, and the spinach is not detectable in the slightest (so a great way to encourage kids to enjoy their greens!) Unlike regular fruit smoothies, this one is a source of slow-release energy and will keep you feeling full up for hours.
Hands-on time 5 minutes
Total Time 5 minutes
Course Breakfast, Drinks, Snack

Ingredients
 

  • 240 ml 1 cup fortified soya milk or other non dairy milk
  • 1 small-medium organic sweet apple (e.g. Gala) cored and chopped (no need to peel if you have a high speed blender)
  • 1 small very ripe frozen peeled banana sliced into coins
  • 1 handful of fresh spinach leaves
  • 1 TBSP almond butter
  • 1 TBSP chia seeds
  • maple syrup optional

Instructions
 

  • Place all the ingredients in a high speed blender. Add a touch more milk or some maple syrup, if desired.
Keyword After School Snack, Breakfast Smoothie, Post Exercise Snack, Vegan Smoothie
Tried this recipe?Let us know how it was!

 If you make this smoothie, I’d love to hear your feedback and any suggestions for adaptations! Tag your photos with #bitofthegoodstuff on social media – I always love to see your creations! You can also connect with me on my social media channels here: Instagram, Facebook, Pinterest.   

With love,

Sharon xx
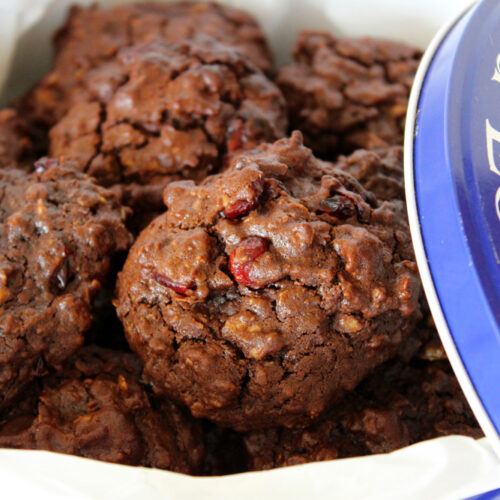
Vegan Chocolate Cranberry Oatmeal Cookies (Dairy-Free | Egg-Free)

Jump to Recipe

There’s something about Fridays that calls for chocolate… don’t you think? I had planned to share a wholesome almond breakfast smoothie today, but in the end, these indulgent yet nourishing cookies won the vote — and for good reason!

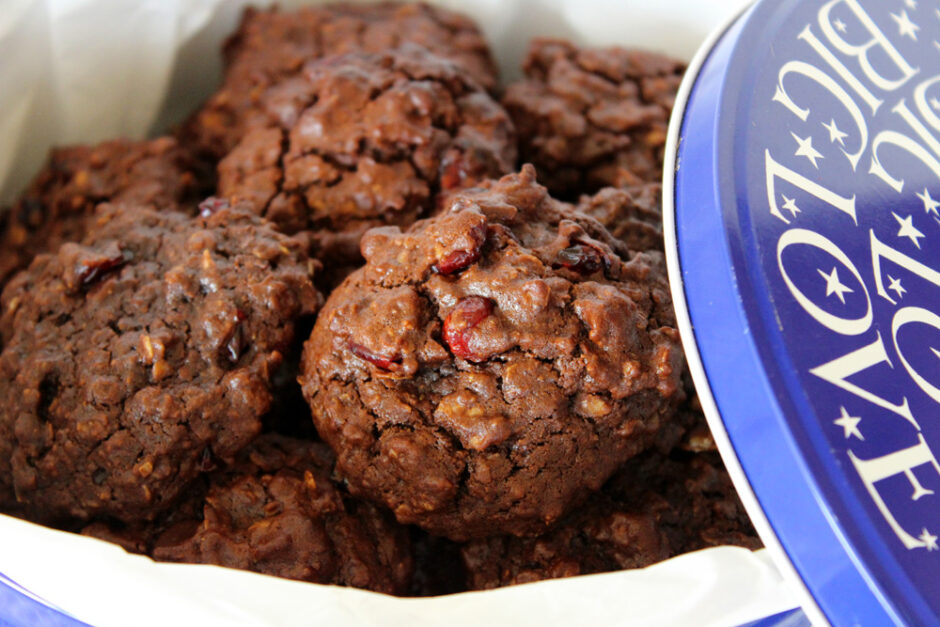
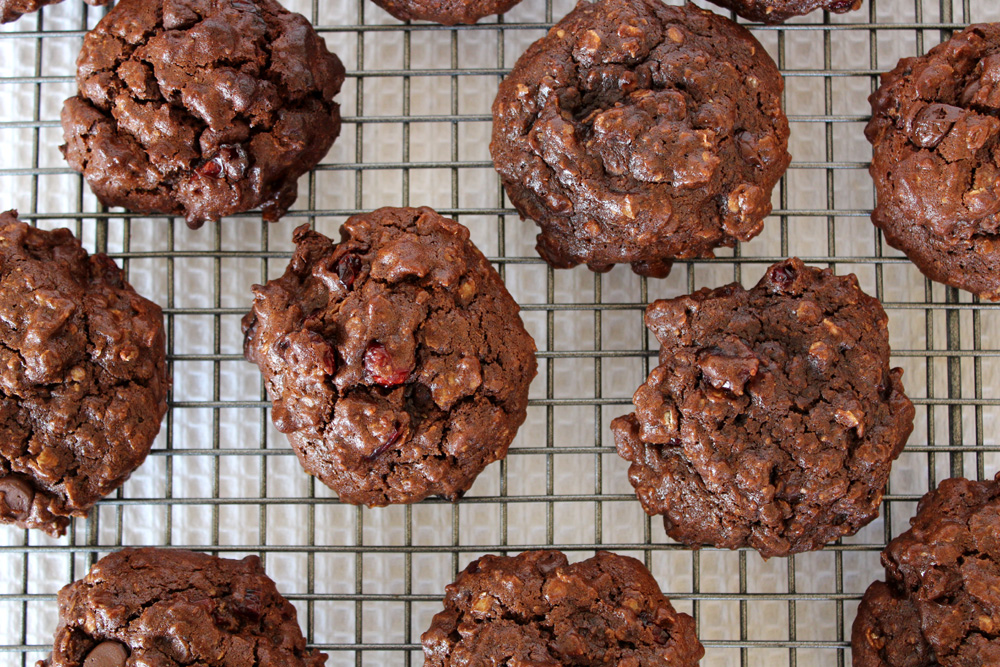
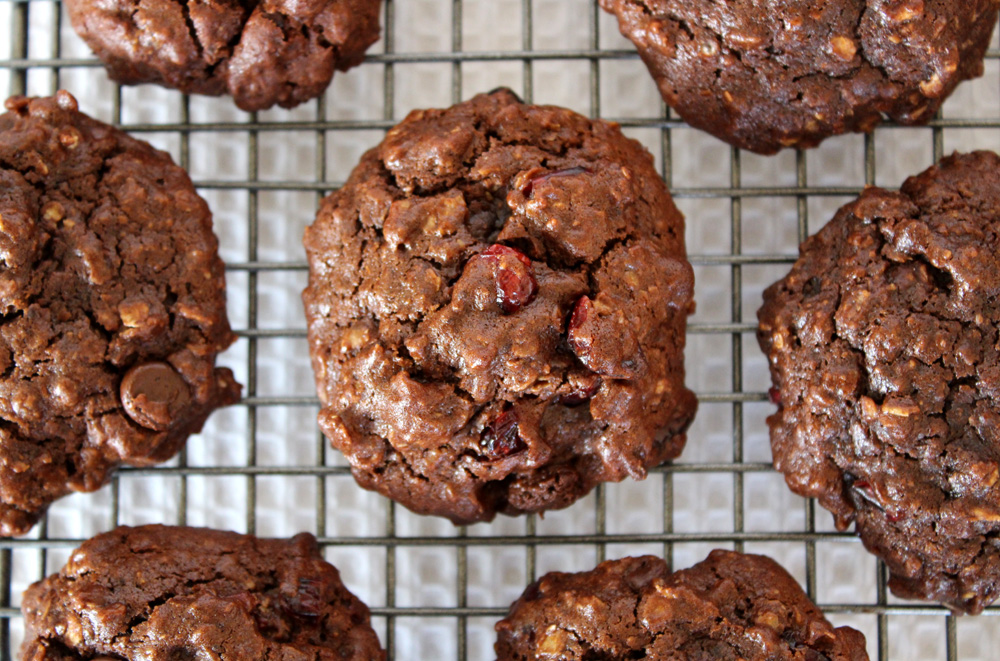
These Vegan Chocolate Cranberry Oatmeal Cookies are rich, chewy, and dotted with jewel-like cranberries that glisten against a backdrop of dark chocolate. They feel like a treat, but they’re packed with wholesome ingredients like oats and wholegrain flour, and free from dairy, eggs, and nuts — making them perfect for sharing with friends and family, including little ones with allergies.

I was thinking of a special six-year-old friend of ours as I baked these. Like me, he’s allergic to dairy, but he’s also allergic to nuts. Since I’ve been sharing lots of nutty recipes lately, this one is for him (and for anyone else who’s been missing out).

Vegan Chocolate Cranberry Oatmeal Cookies

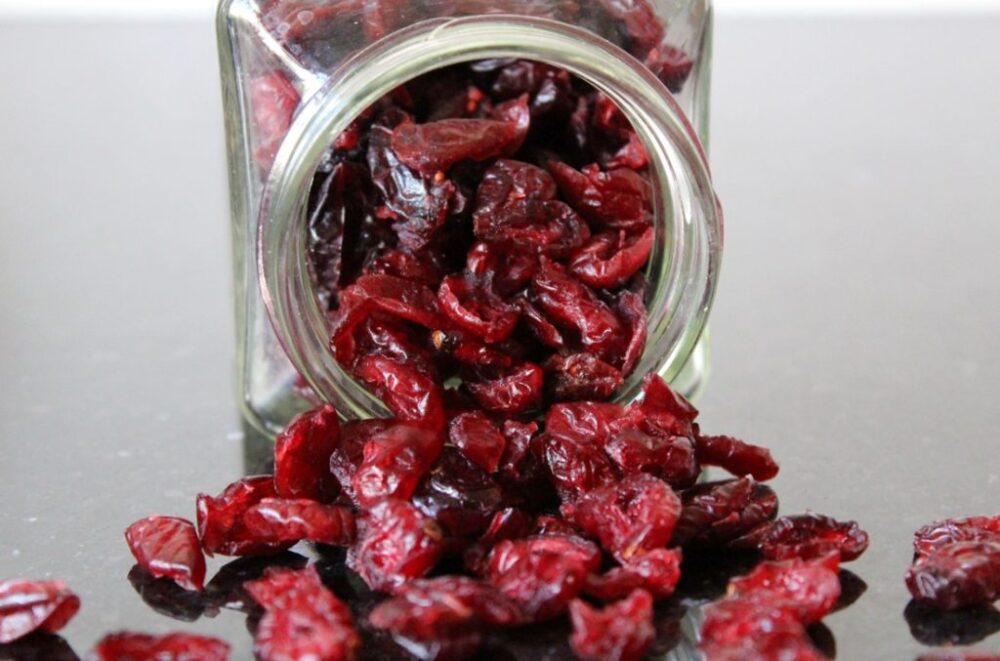
At this time of year, I love using cranberries in my baking. They add a burst of tart-sweet flavour and look like ruby gems tucked inside a cookie. I used to struggle to find cranberries that weren’t loaded with cane sugar, but thankfully, many supermarkets now stock juice-sweetened options. If you can find cranberries sweetened with pineapple juice, I highly recommend them — they’re delicious and a little more naturally balanced.

Dried Cranberries

These cookies are deceptively simple. While they taste rich and chocolatey, the ingredients list is full of nourishing staples: wholegrain flour, rolled oats, cocoa powder, and dried fruit. Fresh from the oven, they have a crisp edge and soft centre — and they continue to firm up beautifully as they cool. They’re perfect for lunchbox treats, after-school snacks, or spontaneous coffee breaks with friends.

Vegan Chocolate Cranberry Oatmeal Cookies

We’ve baked these many times and they’ve always been a big hit. I hope you enjoy them as much as we do!

Recipe Card

Vegan Chocolate Cranberry Oatmeal Cookies

Double Chocolate Cranberry Oatmeal Cookies (Vegan)

These rich, chewy cookies are packed with oats, cranberries, and chocolatey goodness — and they’re completely dairy-free, egg-free, and nut-free too. Perfect for lunchboxes, coffee breaks, or stashing in the freezer for later!
Hands on time 20 minutes
Total Time 35 minutes
Course Afternoon Tea, Elevenses, Treat
Servings 12

Ingredients
 

  • 45 ml / 3 TBSP soya milk or almond milk
  • 35 ml / 3 TBSP organic rapeseed (canola) oil or other neutral-flavoured oil
  • 1 tsp vanilla extract
  • 80 g / heaping ⅓ cup golden caster (unrefined cane) sugar
  • 70 g / ½ cup fine wholemeal (whole wheat pastry) or chapatti flour
  • 20 g / 3 TBSP cocoa powder
  • ¼ tsp baking powder
  • ¼ tsp bicarbonate of soda (baking soda)
  • ¼ tsp salt
  • 50 g / ½ cup rolled porridge oats (quick oats, not jumbo)
  • 50 g / ⅓ cup dried cranberries preferably juice-sweetened
  • 25 g / 2 TBSP dark chocolate chips

Instructions
 

  • Preheat the oven to 180°C (160°C fan) / 350°F. Line a large baking sheet with non-stick baking paper.
  • Place the milk, oil, vanilla extract and sugar in a mixing bowl and whisk with a fork until fully combined.
  • In a separate bowl, combine the flour, cocoa powder, baking powder, bicarbonate of soda, salt and oats. Add these ingredients to the wet ingredient bowl and stir to combine. Stir in the cranberries and chocolate chips.
  • Scoop slightly heaped tablespoons of dough onto the prepared baking sheet. With damp fingers, press the dough into cookie shapes (these cookies don't spread much).
  • Bake for 12 minutes, or until the cookies are dry to the touch. Leave the cookies on the tray for a few minutes (they will firm up as they cool), then loosen from the baking paper using a thin spatula/slotted turner and transfer to a wire cooling rack.
  • Once completely cooled, store in an airtight container for up to 2 weeks, or freeze in an airtight zip-loc bag for longer storage.
Keyword Dairy-Free, Egg-Free, Lunchbox Treat, Vegan Cookie, Vegan Treats
Tried this recipe?Let us know how it was!

If you make these Double Chocolate Cranberry Oatmeal Cookies, I’d love to hear your feedback and any suggestions for adaptations! Leave a comment below or tag your photos with #bitofthegoodstuff on social media – I always love to see your creations! You can also connect with me on my social media channels here: InstagramFacebookPinterest.   

Have a wonderful weekend everyone!

With love,

Sharon xx
Crispy Kale (aka Kale Chips) with Homemade Gomasio

Jump to Recipe

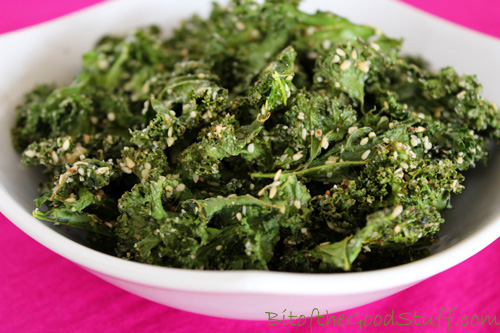
Looking for a healthy, kid-approved snack that’s packed with flavour and crunch? These crispy kale chips are oven-baked to perfection and sprinkled with homemade gomasio – a traditional Japanese seasoning made with toasted sesame seeds and salt.

They’re a long-time favourite in our house. In fact, this was one of the very first recipes I ever shared on the blog, way back in 2011, and it’s still one of my go-to snacks today.

While a lot of health food bloggers are currently enjoying raw kale salads or kale smoothies, my taste buds aren’t quite there yet. I do, however, LOVE crispy kale and will happily munch my way through handfuls of the stuff. And I’m not the only one!

Crispy kale is also one of the best ways I’ve found to encourage Lil’ L to eat kale. I often put a bowl out as a starter or as a side dish and, before I even get to sit down at the table, the whole lot will have been demolished!

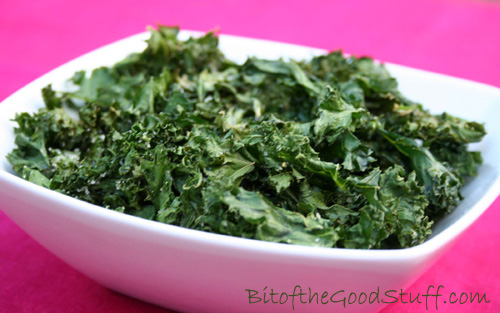
Crispy Kale

🌿 The Secret to Perfect Crispy Kale

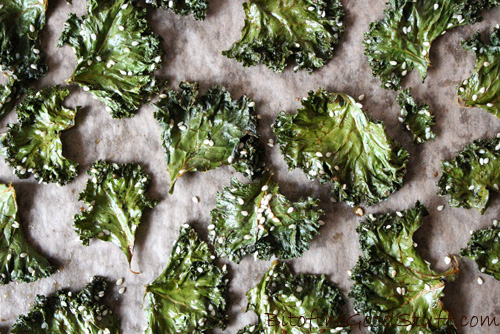
Over the past three years, I’ve been fine-tuning my method for making crispy kale, to avoid the common pitfalls of burnt or soggy kale. The trick is to roast it low and slow. I started out baking it at 180°C, but the edges would burn before the centres crisped up. I now roast it at 150°C (130°C in a fan oven), which gives beautifully even, crispy leaves with no bitterness.

Another tip: let the kale dry thoroughly before baking – a salad spinner works wonders here. And make sure the leaves aren’t overlapping on the baking tray or they’ll steam instead of crisping up.

Stored in an airtight container, the kale stays crispy for days (not that we ever have leftovers!)

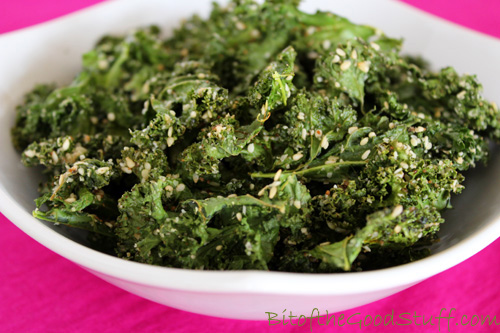
Crispy Sweet n Salty Kale

What is Gomasio?

My favourite way of serving crispy kale is with a sprinkling of gosmasio, a traditional Japanese seasoning made from toasted sesame seeds and sea salt. It adds a rich, nutty flavour and just the right amount of saltiness.

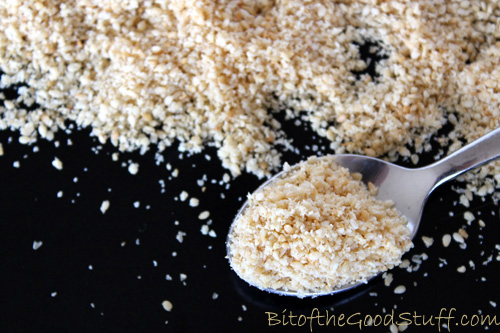
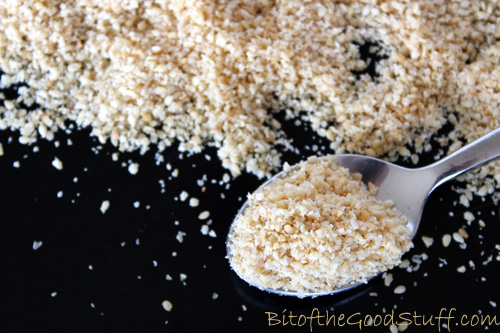
You can find gomasio in health food stores, but it’s so easy – and more affordable – to make at home. I like to grind the sesame seeds slightly, which helps them stick to the kale and also intensifies their flavour. I keep the salt content low so I can sprinkle liberally without overpowering the dish.

Gomasio

Recipe Card

Crispy Kale (aka Kale Chips)

These oven-baked kale chips are light, crispy, and seriously moreish! They make a healthy, delicious snack, appetiser, side dish, or lunchbox filler. We love to flavour them 'sweet and salty' and with a generous sprinkling of gomasio, but feel free to customise with your favourite spice blends.
Hands on time 6 minutes
Total Time 20 minutes
Course Appetizer, Healthy Snack, Lunchbox, Side Dish
Cuisine Japanese-Inspired, Vegan
Servings 3

Ingredients
 

  • 4 large handfuls curly kale (about 100g) thick stalks removed
  • ½ – 1 tbsp coconut sugar or golden caster (unrefined cane) sugar
  • ¼ tsp salt
  • ½ tbsp olive oil
  • 3 tbsp gomasio (see below for recipe) or sesame seeds

Instructions
 

  • Preheat the oven to 150°C (130°C fan) / 300°F. Line two large baking trays with non-stick baking paper.
  • Wash the kale and tear into large bite-size pieces (it will shrink as it cooks). Use a salad spinner (or kitchen paper) to dry thoroughly. Place in a large bowl and give it a final dab with kitchen paper.
  • Sprinkle over the sugar, salt, oil, and gomasio. Massage everything into the kale leaves until evenly coated.
  • Spread the kale out on the prepared trays in a single layer, ensuring the leaves don’t overlap (otherwise they will steam rather than roast). You may need to bake in two batches.
  • Bake for 14 minutes, then check for crispness. If needed, continue baking, checking every 2 minutes.
  • Crispy kale is most delicious eaten warm, straight from the oven. However, it can be stored in an airtight container where it will keep for up to a week.
Keyword baked kale chips, crispy kale, healthy vegan snack, kale chips, kid friendly vegan snack, oven baked kale
Tried this recipe?Let us know how it was!

Homemade Gomasio (Sesame Salt Seasoning)

Easy to make at home with just two ingredients, gomasio is a traditional Japanese seasoning made with toasted sesame seeds and sea salt. It adds a nutty, savoury boost to dishes like stir-fries, rice bowls, noodles, and crispy kale. Vegan, gluten-free.
Hands-on time 5 minutes
Total Time 10 minutes
Course Seasoning
Cuisine Japanese
Servings 12

Ingredients
 

  • 80 g / ¾ cup hulled sesame seeds
  • ¼ tsp salt

Instructions
 

  • Toast the sesame seeds in a dry frying pan (skillet) over medium heat, stirring continuously until golden and fragrant.
  • Transfer to a plate to cool.
  • Once cool, grind with the salt using a mortar and pestle or coffee/spice grinder. If using an electric grinder, pulse just once or twice – too much and you’ll end up with sesame paste!
  • Store in an airtight container in the fridge, where it will keep for several weeks.
Keyword homemade gomasio, sesame salt
Tried this recipe?Let us know how it was!

What’s Your Favourite Kale Chip Seasoning?

Do you make crispy kale at home? Have you tried flavouring it with Chinese, Indian, or Mexican spice blends? I’d love to hear your favourite combinations in the comments below!

With love,

Sharon xx
SaveSave

SaveSave

SaveSave