Coconut Milk Ice Cream & a Fab New Kitchen Gadget

I have always wanted to try my hand at ice cream making, but sadly my freezer drawers are way to narrow to fit an ice cream bowl, and I’m just not organised enough to hand whisk at half hourly intervals. I haven’t got a Vitamix or Blendtec either, which means I can’t use the freeze and blend technique.

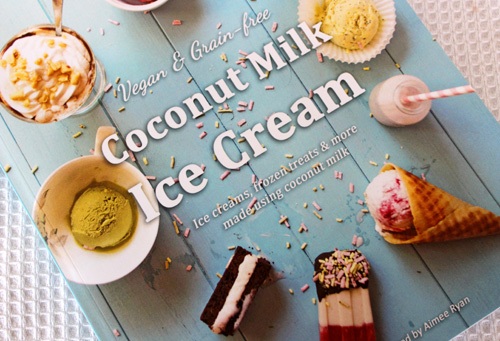
However, when my blogging friend Aimee Ryan (who writes the wonderful Wallflower Girl blog) recently launched her recipe book for coconut milk ice creams, I just couldn’t wait any longer. Those scrumptious recipes were calling to me and I needed to find a way to make them asap!

Aimee Ryan Coconut Milk Ice Cream

After trawling the Internet, I found an alternative option available to me – an ice cream maker with in-built compressor. These machines don’t require any pre-freezing of bowls. You simply pour the mixture in and 40 or so minutes later the ice cream is ready. These gadgets are pricier than traditional ice cream makers (which you can pick up for less than £20), but for people with freezer storage issues like me, these machines are perfect.

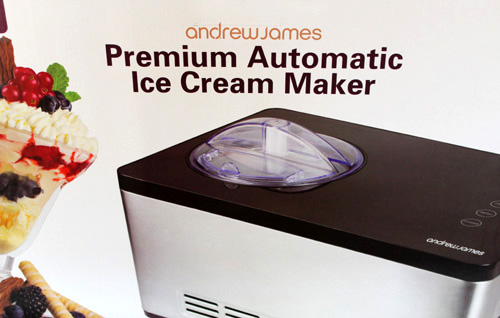
I especially liked the sound of the Andrew James New Improved 2 Litre Professional Fully Automatic Ice Cream Maker. The reviewers had given it 4.5/5 stars on Amazon and, while a pretty sizable piece of equipment (43cm wide x 28cm deep), I love its sleek style and cool blue LED display. My kitchen colours are red, black and stainless steel, so this gadget goes perfectly. Last Friday I took the plunge and ordered the machine…. and it arrived the following morning.

Andrew James Ice Cream Maker

I’d carefully read through all the reviews, so I knew what I was in for. The main negative was that it was a bit fiddly to slot the bowl, paddle and lid into place. These reviews must be referring to the older model though because the set up on the new improved machine couldn’t be easier. I didn’t even bother consulting the manual as it was obvious how to do it.

The next step was to choose an ice cream flavour. Aimee’s ice cream recipes are divided into five chapters:

Healthy Spins on Famous Flavours – Vanilla, Chocolate, Cashew Cookie Dough Chip, Chocolate Chip, Chocolate Brownie, Salted Caramel, Mint Chocolate Chip, Mocha

Fruity Flavours – Coconut, Mango & Passionfruit, Roasted Pineapple, Papaya & Lime, Roasted Plum & Cardamom, Pomegranate, Sweet Melon, Date, Strawberry, Caramelized Banana, Peaches & Cream, Orange, Apricot

Nut & Seed Flavours – Pecan Praline, Peanut Butter Chocolate Swirl, Pistachio, Chestnut Caramel, Chocolate Hazelnut, Maple Glazed Walnut, Salted Almonds, Toasted Sesame Seed

Spicy Flavours -Fresh Ginger, Mayan Chocolate, Wasabi, Chinese Five-Spice, Sweet Curry

Aimee Ryan Coconut Milk Ice Cream

Dessert Inspired Flavours – Rhubarb Almond Crumble, Lemon Poppy Seed Muffin, Pumpkin Pie, Apple Pie, Red Velvet Beetroot Cake, Coffe & Walnut Cake, Christmas Pudding
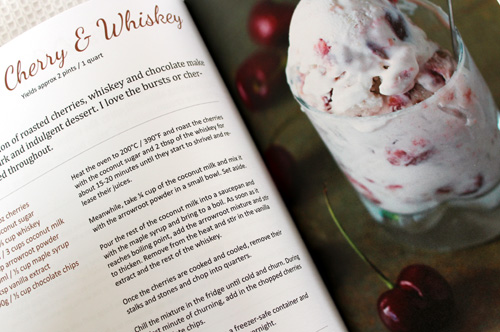
Boozy Flavours – Pina Colada, Rum & Raisin, Apple Cider, Irish Cream, Roasted Cherry & Whiskey, Mojito, White Wine
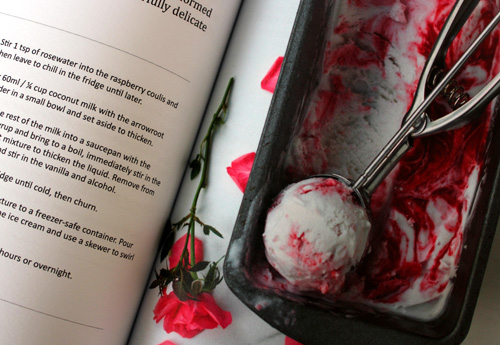
Floral Flavours -Blueberry & Lavender, Chamomile & Vanilla, Elderflower & Lemon, Orange Blossom, Rose Raspberry Ripple

Herbal & Tea Flavours – Chai Tea, Lemon Green Tea, Fresh Basil & Mint, Malted Maca Chocolate, Earl Grey

Aimee Ryan Coconut Milk Ice Cream

With all these lush flavours to choose from, we ended up practically filling the entire book with stick it notes! We’ve decided we’re going to work our way through all the recipes (adapting the boozy flavours to make them child friendly) and, to kick off our ice cream making adventure, Lil’ L chose the Chocolate and Salted Caramel flavours 🙂

Following reviewers’ recommendations, I chilled the ice cream maker for 10 minutes before pouring in the chilled ice cream mixture. I didn’t bother using the pouring hole. I just poured the mixture straight into the bucket, slotted it into the machine, screwed on the lid and pressed the button. You can choose different churning times and for our initial trials, I chose 40 minutes. This was pretty much spot on. The ice cream was soft serve consistency and the paddle started to have difficulty rotating.

Making Ice Cream

We could have served it straight away as soft serve, but we decided to freeze it so it could be scooped into cones. Aimee recommends storing the ice cream in a wide, shallow dish so I used my Pyrex lidded glass dish (which I’d previously chilled as my house is so hot at the moment). After three hours we checked on the ice cream, and it was ready for scooping.

All the ice cream recipes in Aimee’s book are dairy free, egg free, gluten free and vegan. Though, at the time of writing, Aimee wasn’t vegan herself, she simply believes that coconut milk makes the best ice cream. The healthiness of her recipes is an added bonus. For the Salted Caramel ice cream, the flavour and colour comes from delicious coconut sugar.  After three hours in the freezer, the consistency of the caramel ice cream was perfect. It was silky smooth and soft enough to scoop right away. And it had the most amazing caramel flavour. I find most commercial ice creams sickly sweet, but Aimee’s got the sweetness levels spot on. It was utterly delicious

Salted Caramel Coconut Milk Ice Cream

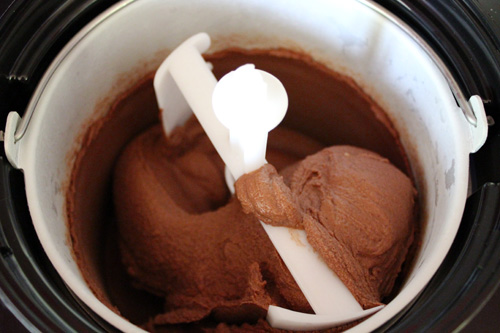
The chocolate ice cream uses maple syrup as the sweetener (as do most of Aimee’s recipes) and, in addition to cocoa powder, it has dark choc chips melted into it to add even more chocolatey goodness. As a budget-friendly alternative to pure maple syrup, I use Clark’s Original Maple Syrup, which is a blend of maple and carob syrups.

Chocolate Coconut Milk Ice Cream 500 copy

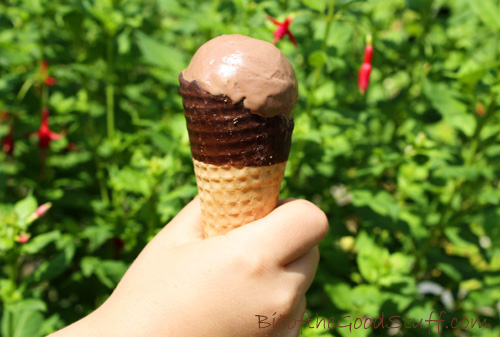
After freezing for a few hours, the chocolate ice cream was a lot firmer than the caramel one so, as Aimee recommends, we left it on the worktop for ten minutes and I heated my metal scoop in hot water. It then scooped perfectly. The flavour was incredible! It’s by far the best chocolate ice cream I’ve ever tasted, and Lil’ L said that it was easily as good as the quality ice cream he’s eaten in Italy. And I couldn’t believe it when ‘M’ enthusiastically tucked in and said how good it was. He isn’t usually an ‘ice cream person’ and tends to decline if you offer it to him. However, these coconut milk ice creams have won him over.

It’s great that Lil’ L’s on his school holidays as he makes a very handy ice cream model 😉 It was pretty hard for him to resist the temptation to lick it…

Salted Caramel Coconut Milk Ice Cream

Five seconds later he caved in 😉

Salted Caramel Coconut Milk Ice Cream

I am so pleased that I finally took the plunge and got an ice cream maker. I know it’s going to get used a lot. It will probably take me the rest of the year to work my way through Aimee’s recipe book. I’m especially looking forward to trying the Christmas Pudding flavour! I’m also looking forward to making fruity sorbets, hopefully using fresh berries from my garden.

Many thanks to Betta Living for providing the ice cream maker for these tasty new recipes Both the Andrew James Ice Cream Maker and Aimee Ryan’s Coconut Milk Ice Cream recipe book are available to purchase from Amazon UK. For our US & Canadian friends, Aimee’s book is also available from Amazon.com.

Do you have an ice cream maker? If so, what’s your favourite recipe? If you’ve posted any vegan recipes online, please do share below.

Lovely readers, I just want to let you know that I’m about to take a little break from blogging & social media. I’ll be back towards the end of August. Have a wonderful summer and I look forward to catching up with you all on my return xx


Gingerbread Cookies (Dairy-Free / Vegan)

Today, I am delighted to share my first post for the Suma Blogger’s Network  I’m sure a lot of you will have already heard of Suma or seen their products in your local health food stores. Suma are the UK’s largest independent wholefood wholesalers of vegetarian, vegan, fair trade, natural and organic produce.  Suma operates as a workers’ cooperative which means that the business is jointly owned and managed by the staff. Everyone is paid the same and they collectively do all the jobs that need doing, whatever they happen to be.

Suma-Bloggers-Network-LogoI love everything that Suma stands for, so when they invited me to become one of the first twelve bloggers in their new network, I was more than delighted to accept! Intrigued to find out who else is involved? Click on this page to check out their profiles (you’ll see I’m in good company!)

Every other month we’ll be sharing a recipe using one or more products from Suma’s product range. We’ll post the recipes on our blogs, and share them via Facebook, Twitter and a dedicated Pinterest board.

This month, I’m sharing a recipe using one of my all-time favourite ingredients and ‘super’ foods…. Blackstrap Molasses!

Meridian Blackstrap Molasses_740g

As you might know, Blackstrap is the dark, thick liquid that remains after sugar cane is processed to make refined sugar. While the end product – white sugar – has no nutritional value whatsoever, the molasses that gets left behind after extraction is literally brimming with nutrients. It’s rich in vitamin B6 and minerals, including calcium, iron, magnesium, potassium, manganese and selenium. Historically, this byproduct of sugar production has been used to feed livestock, while humans consume the empty calorie, unhealthy white sugar. Crazy eh?

Blackstrap Molasses from Wikipedia

[Source]

Flavour-wise, Blackstrap is rich and bittersweet. To me, it has a liquorice-like flavour which, I guess, is one of those flavours that you either love or hate. If you have Blackstrap lurking at the back of your cupboard, then this recipe might just tempt you to dust off the jar and give it another try. The Blackstrap adds a wonderful depth of flavour and colour to these ginger cookies, but it’s not overpowering at all.

Gingerbread Cookies | Bit of the Good Stuff #vegan

For the dry sweetener, you can use unrefined caster sugar or coconut sugar. I prefer the latter as it’s low GI (which helps to keep blood sugar levels balanced), plus it contains B vitamins and a range of minerals, including potassium, magnesium, zinc and iron. I also love its caramel-like flavour.

Feel free though to choose whatever sweetener suits your personal tastes and preferences. I prefer the coconut sugar cookies, ‘M’ prefers the cane sugar ones (which are slightly sweeter), and Lil’ L says he can’t really tell the difference and loves both!

Gingerbread Cookies | Bit of the Good Stuff #vegan

These cookies have been tried and tested many times over with my family and friends, and they’ve received a big thumbs up from everyone. I’ve been asked numerous times for the recipe and my standard reply is ‘sure, I’ll post it on the blog’. Well, it’s high time I kept my promise! Here it is…

NOTE: Recipe updated 25 March 2019 to bring it into line with the ‘Gingerbread Cookies’ recipe in the Bit of the Good Stuff Cookbook

[print_this]

Makes 12 cookies
Hands-on time: 15 minutes    Ready in: 35 minutes

Ingredients
70g / ⅓ cup unrefined cane sugar or coconut sugar
50ml / ¼ cup organic rapeseed (canola) oil (or other neutral flavoured oil)
65g / 3 TBSP black treacle (molasses) or Blackstrap molasses
22g / 1½ TBSP soya or almond milk
½ tsp vanilla extract
120g / ¾ cup & 2 TBSP fine wholemeal (whole wheat pastry) flour or chapatti flour
1 – 1½ tsp ground ginger
½ tsp ground cinnamon
pinch of ground nutmeg
¼ tsp baking powder
¼ tsp bicarbonate of soda (baking soda)
¼ tsp salt

Method
1. Preheat the oven to 200C (180C fan) / 400F. Line two baking sheets with non stick baking paper.

2. Place the sugar, oil, molasses, milk and vanilla extract in a bowl and whisk with a fork until smooth and fully combined.

3. Place the flour, spices, baking powder, bicarbonate of soda and salt in a separate bowl and stir through. Tip half the dry ingredients into the wet ingredient bowl and stir to combine. Add the remaining dry ingredients and keep stirring until the mixture comes together in a firm dough.

4. Scoop slightly rounded tablespoons of dough and arrange six on each baking sheet. With damp hands, press the dough into a thin cookie shape.

5. Bake in the centre of the oven for 9 minutes, or until dry to the touch. (The cookies will still feel soft, but they firm up as they cool).

6. Leave the cookies on the baking sheets until they are firm, then use a thin spatula/slotted turner to remove them from the baking paper and transfer to a wire rack.

7. When completely cool, store in an airtight container where they will keep for a couple of weeks. They also freeze well. Leave at room temperature for about 10 minutes before serving.

Notes
Freshly baked, the cookies should be lightly crisp on the outside with a soft, chewy centre. They go softer and chewier over time, but are just as delicious!

I did a few trials with different quantities of Blackstrap. If you add more, the flavour is still amazing but the cookies spread a lot on the baking sheet and are flatter (‘M’ calls them ‘ginger coasters’!)

If you have any black treacle (aka molasses) leftover from Christmas cakes and puddings, you can use it in these cookies instead of the Blackstrap.

All TBSP mentioned in the recipe are level tablespoons.

[/print_this]

I just need to work out how to make a gluten-free version now, so no one misses out! Any tips from the GF experts would be greatly appreciated! 😉

Gingerbread Cookies | Bit of the Good Stuff #vegan

 Enjoy! xx

Are you a fan of Blackstrap molasses? If so, what’s your favourite way to use it?

Disclaimer: I received some Suma’s products to use for recipe development but, as always, all opinions expressed are my own.

Coconut Chocolate Bark with Goji Berries and Pecans

My love affair with the little goji berry is still going strong I adore their sweet/salty flavour and vibrant colour. I eat gojis every day, sprinkled on my porridge, muesli, yoghurts and chocolate chia puddings. And, as you may have seen already, they’re my favourite ingredient to add to home-made chocolates.

Goji Berries

And did you know, goji berries are one of the most nutrient-dense foods on the planet? They are a complete protein, contain 11 essential vitamins, 22 trace minerals, and are packed with antioxidants, including flavonoids, polyphenols, carotenoids and vitamins C, E and A. They contain more vitamin C than oranges, more betacarotene than carrots and more iron than spinach. No wonder the goji berry is referred to as the ‘fruit of longevity and well-being‘!

Of course, in the East, they’ve known about the health benefits of goji berries for thousands of years. We’ve been a bit slower to catch on in the West, but we’re finally getting there 😉

Recently, nu3 invited me to take part in blogger challenge to create a recipe using their goji berries. Of course, I was more than happy to accept! I started to think of all kinds of weird and wonderful creations, but M suggested that I should keep it simple and rather than creating something new, I should share one of our family favourites.

And heeding his advice, this is what I’ve chosen to do. My entry for the Nu3 challenge is a simple home-made chocolate bark. M and Lil’ L mentioned to me the other day that this could actually be their favourite chocolate ever! Now that is a statement!

Coconut Chocolate Bark with Goji Berries and Pecans

I make this chocolate using virgin coconut oil (instead of cocoa butter), which gives it a gentle hint of coconut flavour and a glorious ‘melt-in-your-mouth’ sensation. It also features two of my favourite ingredients – goji berries and pecans – which add extra dimensions of flavour, texture and nutrients.

Pecans

This chocolate is incredibly easy to make. No expertise required! You simply melt the coconut oil, stir in the remaining ingredients, and pour them into a container. I line the container with cling film, which makes it really easy to lift out. Sometimes I toast the pecans prior to chopping them but this isn’t an essential step.

Coconut Chocolate Bar Making

The chocolate is then placed in the freezer until set and voila, you have your own scrumptious chocolate bark And you can feel very proud that you made it yourself, from scratch 😀

Coconut Chocolate Bark with Goji Berries and Pecans

It is up to you how you choose to break up the chocolate. You can either go for the rustic look and chop it into shards, or go for more uniform squares.

Store and serve the chocolates straight from the fridge and freezer, as coconut oil goes soft and melty at room temperature. In an airtight container, they will keep for weeks, but I somehow doubt they’ll last that long 😉

[print_this]Makes around 20 chocolates
Hands-on time: 20 minutes    Setting time: 1 hour  

Ingredients
70g / 2½ oz / 1/3 cup virgin coconut oil
58g / 2 oz / ½ cup cocoa powder (or cacao powder)
2½-3 TBSP Sweet Freedom fruit syrup (or agave nectar)
2½ TBSP goji berries, divided
58g / 2 oz / ½ cup pecans (raw or lightly toasted)

You will also need: medium-size saucepan, heat-proof bowl, whisk, container about 20cm x 9cm / 8” x 3½” (I use my smallest bread pan or a plastic container), cling film (plastic wrap)

Method

Preparation
Line a container with cling film, leaving sufficient hanging over the edges so you can lift out the chocolate.

Roughly chop the pecans and place 2 TBSP in a mini food processor along with 2 TBSP goji berries. Pulse until finely chopped.

Add a small amount of water to a saucepan and place a heat-proof bowl on top. Gently heat the water. Throughout the chocolate making process, you want to keep the water gently heated. On my electric hob, once the water has reached a simmer, I turn the heat down to 2. On a gas hob, I suggest turning the heat off once the coconut oil has melted and just give it an occasional blast of heat, if needed.

Ready, set, go!
Roughly chop the coconut oil and place it in the heat-proof bowl. Once melted, whisk in the cocoa powder. Next whisk in the liquid sweetener. I use about 2½ TBSP Sweet Freedom. If using agave syrup, 2 TBSP should be sufficient. Taste test, and add more sweetener, if needed.

Remove from the heat and stir in the finely chopped pecans and goji berries, along with another 2-3 TBSP of the chopped pecans. Lift the bowl and dry the bottom with a tea towel, before pouring the chocolate into the prepared container. Tap the container on the worktop to remove any air bubbles. Sprinkle the top of the chocolate with the remaining chopped pecans and whole goji berries. Lightly press them into the chocolate.

When completely cool, place the chocolate in the freezer until fully set (around 1 hour). Once set, lift the chocolate out the container and cut into pieces using a sharp, smooth edged knife.

Coconut oil becomes soft at room temperature, so serve the chocolate straight from the fridge or freezer. In an airtight container, the chocolate will keep for weeks.

[/print_this]

Products used in this recipe
nu3 goji berries
– Essential Organic Virgin Coconut Oil – I bought this from Harvest in Bath, but it’s also available in other health food shops and online stores, including Amazon
Sweet Freedom Original, available from Asda, Waitrose, Morrisons, Ocado and online stores, including Amazon
Kenwood Mini Chopper, purchased from Amazon 

[This recipe has been entered into Ricki Heller’s Wellness Weekend]

Coconut Chocolate Bark with Goji Berries and Pecans

Good luck to all the bloggers entering the nu3 challenge. I’m sure there will be many beautiful and inspiring entries

I think nu3 are planning to invite the public to vote on the entries and a prize will be awarded to the entry with the most votes. As soon as I have the details, I’ll post a link.

Have a great weekend everyone!  xx

UPDATE: Thank you so much to everyone that voted for me in the nu3 Blogger Challenge I am so thrilled to have won! 😀


Valentines Chocolate Cookie Crunch Hearts (Dairy-Free / Vegan)

Today I’d like to share one of my favourite home-made chocolate treats – Chocolate Cookie Crunch Hearts. They are so delicious, yet simple to make. They contain just THREE ingredients! ✨ They are perfect for sharing with loved ones on Valentine’s Day. Head below to see how I make them.

Continue reading “Valentines Chocolate Cookie Crunch Hearts (Dairy-Free / Vegan)”

Chocolate and Almond Biscotti (Vegan / Dairy-Free / Egg-Free)

It took me a while to pluck up the courage to trying baking biscotti. I always thought it would be a challenge to achieve the perfect, crunchy texture. However, as soon as I spotted the biscotti recipes in Isa and Terry’s Vegan Cookies Invade Your Cookie Jar, I knew it would all work out fine. This amazing little recipe book has never let me down yet.

Vegan Cookies Invade Your Cookie Jar

Baking biscotti is way easier than I ever imagined… even with the double bake aspect to it.  I love experimenting with different flavour and ingredient combinations for the biscotti.  The chocolate and almond version has especially been a hit with everyone that’s tried it 🙂

Almonds and Choc Chips

The recipe is based on Isa and Terry’s ‘Kitchen Sink Chocolate Biscotti’ recipe. The ingredient quantities are only given in cups, so I weighed them today for anyone that doesn’t use measuring cups (and that includes most of my friends and family!) Cups are readily available in the UK now so, if you do fancy trying more US/Canadian/Australian recipes, I highly recommend buying a set. You’ll find them in the larger supermarkets (like Asda-Wal-Mart and Tesco), kitchen shops, as well as Amazon.

Chocolate and Almond Biscotti (Vegan / Dairy-Free / Egg-Free) | Bit of the Good Stuff

[print_this]

Makes: about 18 biscotti

Hands on time: 15 minutes    Cooking time: 1 hour    Ready in: 2¼ hours

Ingredients
60ml / ¼ cup soya milk
2 TBSP ground linseed (flaxseed)
100ml / ½ cup rapeseed (canola) oil (preferably organic)
200g / scant 1 cup unrefined caster sugar
2 tsp pure vanilla extract
135g / 1 cup plain (all purpose) flour
70g /
½ cup fine wholemeal (wholewheat pastry) or chapatti flour
55g / ½ cup cocoa powder
1¼ tsp baking powder
¼ tsp salt
75g / ½ cup whole almonds, roughly chopped
100g / ½ cup dark choc chips

Method

Get prepared:

Preheat the oven to 180C / 350F.
Line a baking sheet with non-stick baking paper.
Grind the linseed (if not pre-ground).
Coarsely chop the almonds.

Ready, set, go!

In a large bowl, whisk together the milk and linseed with a fork. Whisk in the oil, sugar and vanilla until smooth and caramel-like.  Sift in the flours, cocoa powder, baking powder and salt. Stir to form a smooth dough, then knead in the almonds and choc chips. Push any pieces that pop out back into the dough.

Place the dough on the prepared baking sheet and form a log about 25cm / 10 inches long by 10cm / 4 inches wide. Use a silicon spatula to level it out and round the edges. Bake for 30 minutes until the log is puffed and firm. Some cracking is okay. Place the baking sheet on a wire rack, turn off the oven and allow the log to cool for at least 45 minutes.

Preheat the oven to 160C / 325F. Very carefully slide the log off the baking sheet and onto a cutting board. With a sharp, heavy knife cut the log into ½-inch thick slices, using one quick and firm motion, pressing down into the log. Discard the end pieces if they are too browned. Very gently move the slices back onto the baking sheet, standing them on their bottom edge. Bake the slices for 26-28 minutes (they should appear dry, though the choc chips will still be wet and melted). Allow the biscotti to cool 10 minutes on the baking sheet, then carefully move them to a wire rack to complete cooling (warm biscotti will be fragile).

Check each biscotti slice and gently trim off any edges that are too browned using a sharp, heavy knife. I also like to slice the biscotti pieces in half again, as this makes a good size piece to enjoy with a cuppa (plus you can always go back for ‘seconds’ 😉 )

Store the biscotti in a loosely covered container (to prevent it going rock hard), where it should last a good couple of weeks.

[/print_this]

Products used in this recipe
Aasani almonds, found on the world food aisle in Tesco
Tesco Chapatti Flour, found on the world food aisle
Tesco Organic Rapeseed Oil
Morrisons Dark Choc Chips

Chocolate and Almond Biscotti (Vegan / Dairy-free / Egg-free) | Bit of the Good Stuff

I’ve made lots of batches of biscotti this month. I don’t know why, but I always think of December as ‘biscotti month’!  I’ve really enjoyed sharing them with friends, family, my study group… and a homeless guy in Bath. His dog loved it too! (Don’t worry, it wasn’t the chocolate version 😉 )

I also made a batch today to give to Lil’ L’s teacher as a ‘thank you’ gift.

Chocolate and Almond Biscotti Holiday Gift | Bit of the Good Stuff

Do you like biscotti? If so, what’s your favourite flavour?

Have you ever tried making it at home? If you’ve got any great recipes, please do link up below x


English Scones & Vegan Cream Teas!

It’s Wimbledon season! And, for once, it looks like a Brit might actually have a shot at winning. If Murray does make it, he’ll be the first Brit to win the men’s singles title since Fred Perry in 1936!

Fred Perry

[Source]

Like many Brits, Wimbledon is the time of year when I indulge in an English scone or two and big piles of English strawberries.  This year, I decided to go one step further and have been making full-on English Cream Teas 🙂

But how can you have scones or cream tea if you don’t consume dairy, you ask?  Well, I’ve got some great tasting alternatives for you.  In fact, I would even stretch as far as saying that they taste better than the traditional recipes.  English scones are often very dry and heavy (hence why they need so much cream and jam in the middle), but these dairy-free scones are much lighter and moist in the middle. In fact, fresh out of the oven they don’t even need any filling.

Dairy Free Scone (Vegan)

As a dairy-free alternative to clotted cream, I make a thick, spreadable coconut cream, lightly sweetened and flavoured with a hint of vanilla.  For me, the flavour and texture of this coconut “clotted” cream pairs perfectly with strawberry jam.

Vegan Cream Tea

This dairy-free cream tea is far healthier than a traditional cream tea.  Since the scones don’t contain any butter, lard or cow’s milk, they contain far less fat and calories, plus they’re cholesterol-free.  Replacing clotted cream with coconut cream means that the bad fats are replaced with good, heart-healthy fats.  It is also low on sugar as we use a sugar-free strawberry spread instead of jam.

This is a cream tea that is going to fill you with goodness   I hope you enjoy it as much as we do!

[print_this]

English Scones (Dairy-free / Egg-free / Vegan)

Makes 9 large scones
Hands-on time: 20 minutes    Ready in: 35 minutes

Ingredients
300ml / 1¼ cups soya milk (or almond milk)
10ml / 2 tsp apple cider vinegar
270g / 2 cups plain (all purpose) flour
270g /
2 cups fine wholemeal (wholewheat pastry) flour or chapatti flour
20g / 4 tsp baking powder
¼ tsp salt

90g / 6 TBSP dairy-free spread/vegan butter
80g / ½ cup raisins (optional)
3 TBSP unrefined caster sugar (or coconut sugar)

Soya milk, for glaze, optional

Suggested filling
Sugar-free strawberry spread (we love St Dalfour)
Coconut “clotted” cream (recipe below)

Method
Preheat the oven to 220C (200C fan) / 425F. Line a large baking tray with non-stick baking paper.

Whisk together the milk and vinegar in a jug and set to one side.

Place the flours, baking powder and salt in a large bowl and stir through to combine. Using your finger tips, rub in the dairy-free spread/vegan butter until fully incorporated. Mix in the sugar and raisins (if using).

Make a well in the centre and pour in about three quarters of the milk and vinegar. Stir gently to combine. Add the remaining liquid, a little at a time, and use your hand to bring the mixture together into a soft, slightly sticky dough (depending on the type of flour you use, you may not need all the milk). Do not overwork the mixture, as this will result in heavy scones.

Turn out the dough onto a lightly floured surface. Sprinkle a little flour on top and gently roll out to a thickness of 2.5cm / 1 inch. Cut out the dough using a 7.5cm / 3inch metal pastry cutter.  Press down swiftly on the cutter, lift straight up and push out the dough onto the prepared tray. Do not twist the cutter as you press down otherwise you will end up with funny shaped scones. Repeat until all the dough is used up, re-rolling the scraps as needed.

Brush the tops of the scones with a little soya milk, if desired, for a golden glaze.

Bake the scones in the preheated oven for 15 minutes, until the tops are lightly browned. After 10 minutes of baking, turn the tray round 180 degrees so that they brown evenly. Leave to cool slightly before serving. They are best served fresh, but will last a couple of days in an airtight container. They also freeze well.

For a dairy-free / vegan cream tea, fill the scones with strawberry jam and coconut “clotted cream” and serve with a pot of freshly brewed tea.

[/print_this]

Vegan Cream Tea

[print_this]

Coconut “Clotted” Cream

Preparation time: 24+ hours chilling time for the coconut cream
Hands-on time: 5 minutes    Ready in: 5 minutes

Ingredients
250ml / 8½ oz can coconut cream (I use Sainsbury’s or Waitrose coconut cream)
1 TBSP icing (powdered) sugar
½ tsp pure vanilla extract

Method
Place the can of coconut cream in the fridge at least 24 hours in advance (this helps the cream to separate from the water). Without shaking the can, carefully open it and scoop the solid coconut cream into a measuring jug (you can discard the water). If your house is very warm, first chill the jug in the freezer for a few minutes.

Use a fork to break up the coconut cream then beat using an electric hand mixer until smooth.

Sieve in the powdered sugar. Add the vanilla extract and beat again to combine. Taste test and add a touch more sweetener, if desired.

Chill until ready to serve. This cream will keep up to a week in the fridge. It may firm up over time, so whisk with a fork, if needed, before serving.

[/print_this]

Vegan Scone


UPDATE

So delighted to hear that this recipe made the finals of the first-ever Great Vegan Bake-Off!

Thank you Peta