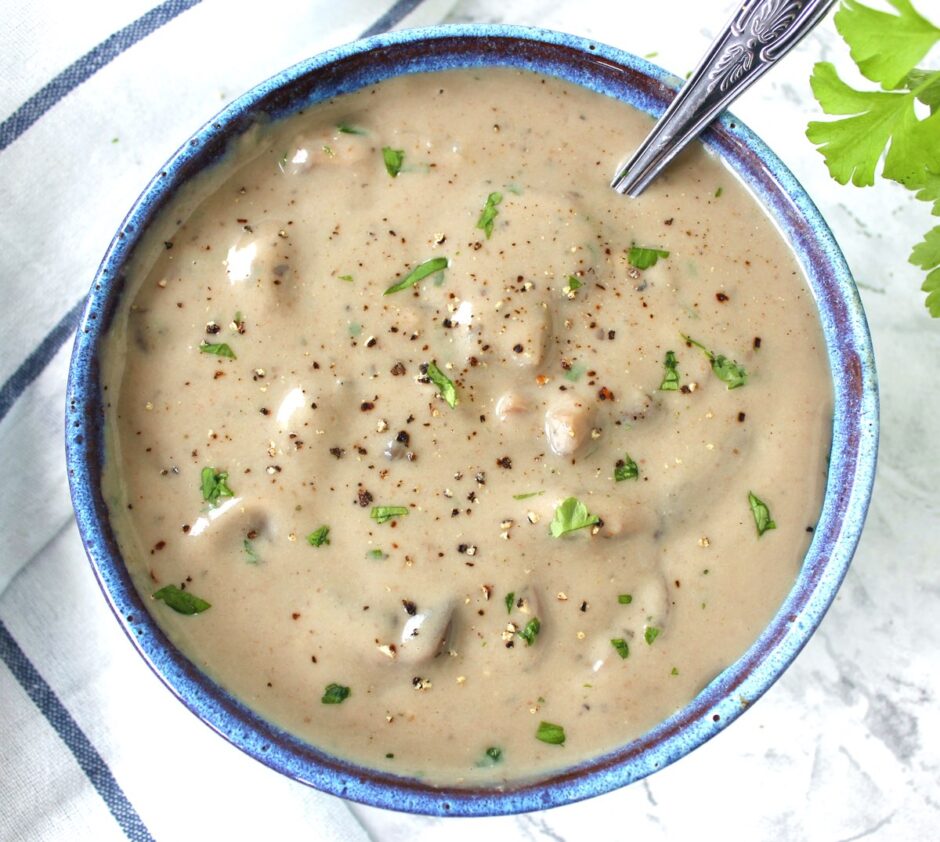
Cream of Mushroom Soup (Vegan | Dairy-Free)

Refreshed March 2026. Originally published 2021.

Jump to Recipe

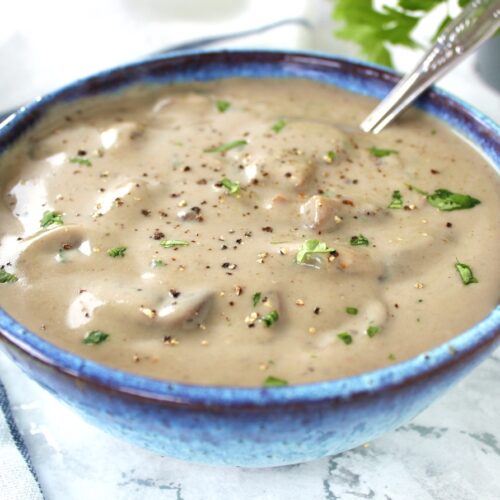
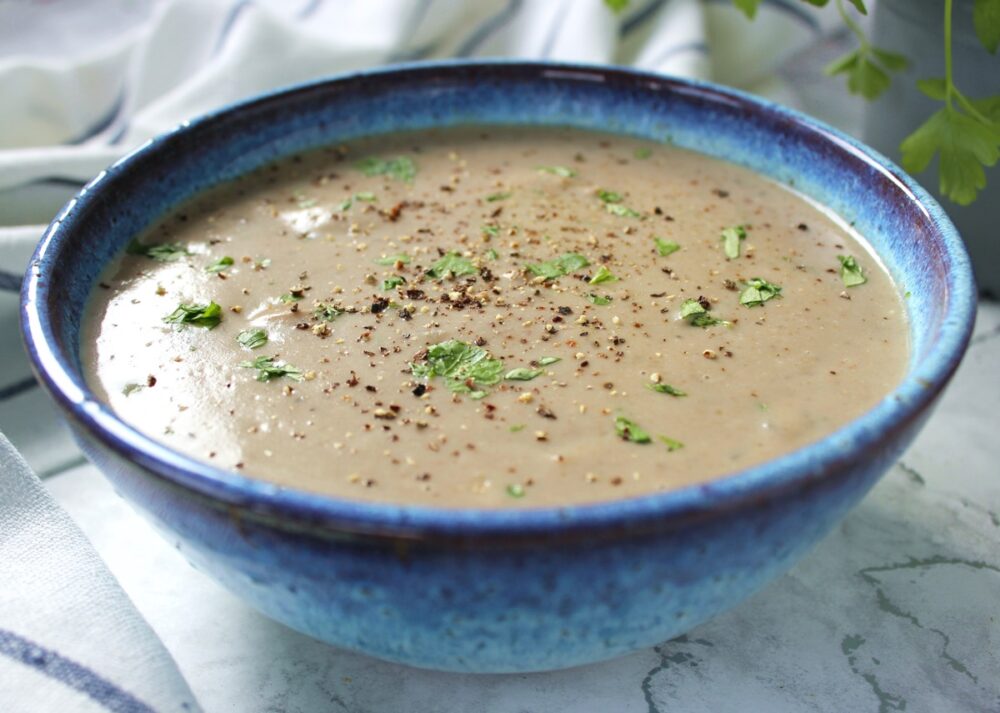
If you’re a mushroom lover (like me), you’re going to adore this Cream of Mushroom Soup. Thick, creamy, and full of flavour, it’s 100% plant-based, low in fat, and completely free of dairy or plant-based cream. Made with simple pantry ingredients, it’s budget-friendly, easy to prepare, and wonderfully comforting. We often enjoy it as an evening meal, topped with a sprinkling of golden pan-fried chickpeas and a couple of slices of fresh bread or toasted sourdough.
Cream of Mushroom Soup (Vegan | Dairy-Free)

The inspiration for today’s post came from an article in this month’s Vegan Life magazine, entitled The Magic of Mushrooms. Dietician Yvonne O’Halloran highlights the incredible health-promoting benefits of mushrooms – and there are so many!

A Few of the Many Health Benefits of Eating Mushrooms…

🍄 While naturally low in calories, mushrooms are packed full of health-boosting vitamins, minerals and antioxidants. They are especially rich in B vitamins, copper and selenium.

🍄 They contain a powerful antioxidant called ergothioneine, which helps reduce inflammation in the body. (International Journal of Molecular Sciences 2017)

🍄 Mushrooms may help protect against Parkinson’s, Alzheimer’s, hypertension, stroke and cancer. They can also lower cholesterol, support the immune system and have anti-bacterial properties. (International Journal of Microbiology, 2015)

🍄 They help protect the liver, and have anti-diabetic, anti-viral and anti-microbial effects. (International Journal of Molecular Sciences, 2017)

🍄 Mushrooms contain beta glucans, known for their antioxidant, neuroprotective and anti-cancer properties. (International Journal of Microbiology 2015)

🍄 They’re excellent for gut health, as they provide prebiotic fibres like chitin, hemicellulose, mannans, beta-glucans, and xylans – all food for our healthy gut bacteria. (Bioactive Carbohydrates & Dietary Fibre Journal)

It was wonderful to hear just how beneficial mushrooms are for human health, especially since my family loves them! We eat mushrooms almost every day – in curries, chillis, burritos, tacos, pasta, noodle and rice dishes, and on top of toast.
Cream of Mushroom Soup (Vegan | Dairy-Free)

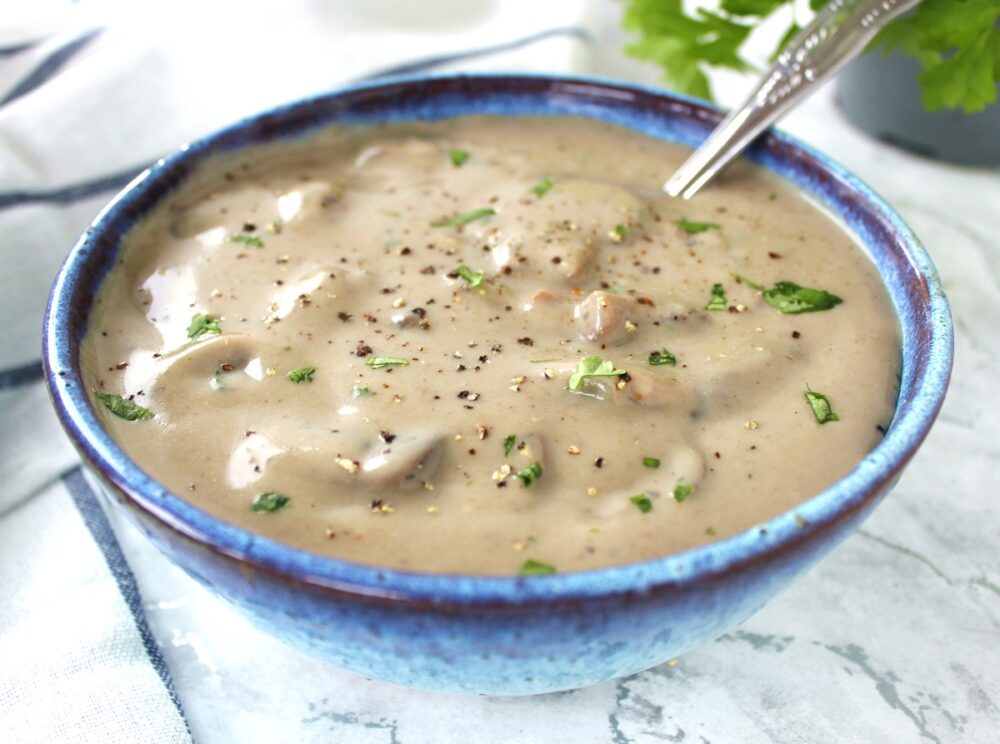
In the Vegan Life article, there was a gorgeous photo of a mushroom soup, and it reminded me just how much I used to love this soup – Campbell’s Cream of Mushroom Soup was one of my childhood favourites. The photo didn’t come with a recipe, but it inspired me to head into the kitchen and experiment with making my own vegan version of that comforting classic.

I set out to make a soup that was thick and creamy, yet low in saturated fat, using simple, budget-friendly ingredients that are easy to find. It took me three attempts to get the texture and flavour just right, but I’m thrilled with the result – and I can’t wait for you to try it too!
Cream of Mushroom Soup (Vegan | Dairy-Free)

Make It a More Filling Meal

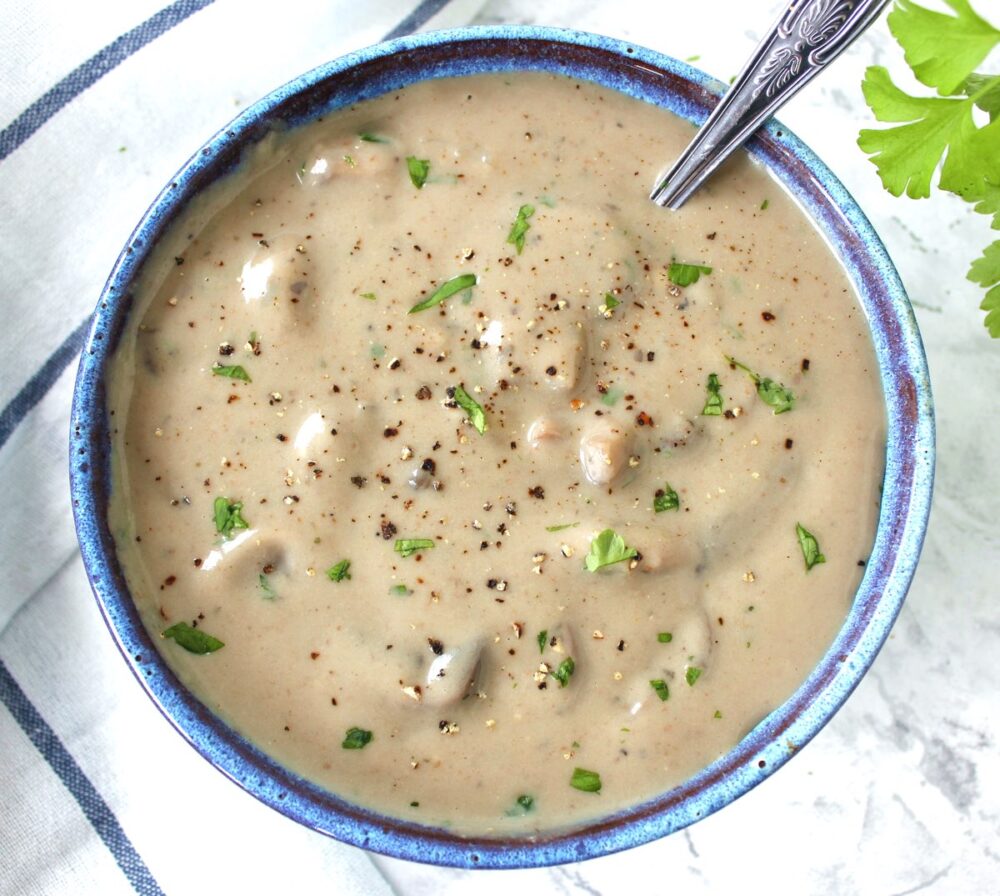
While this soup is wonderfully creamy and comforting on its own, we most often enjoy it as an evening meal, topped with a sprinkle of Golden Pan-Fried Chickpeas.

The chickpeas add a lovely contrast in texture, along with an extra boost of nourishment. A bowl of soup provides around 11g of protein, and when you add the chickpea topper and a couple of slices of bread, that rises to roughly 25g – transforming it into a truly satisfying, nourishing meal.

For me, this is pure comfort food: delicious, filling, and packed full of nutrients that support our hearts, minds, and gut health. I hope you love it as much as I do!
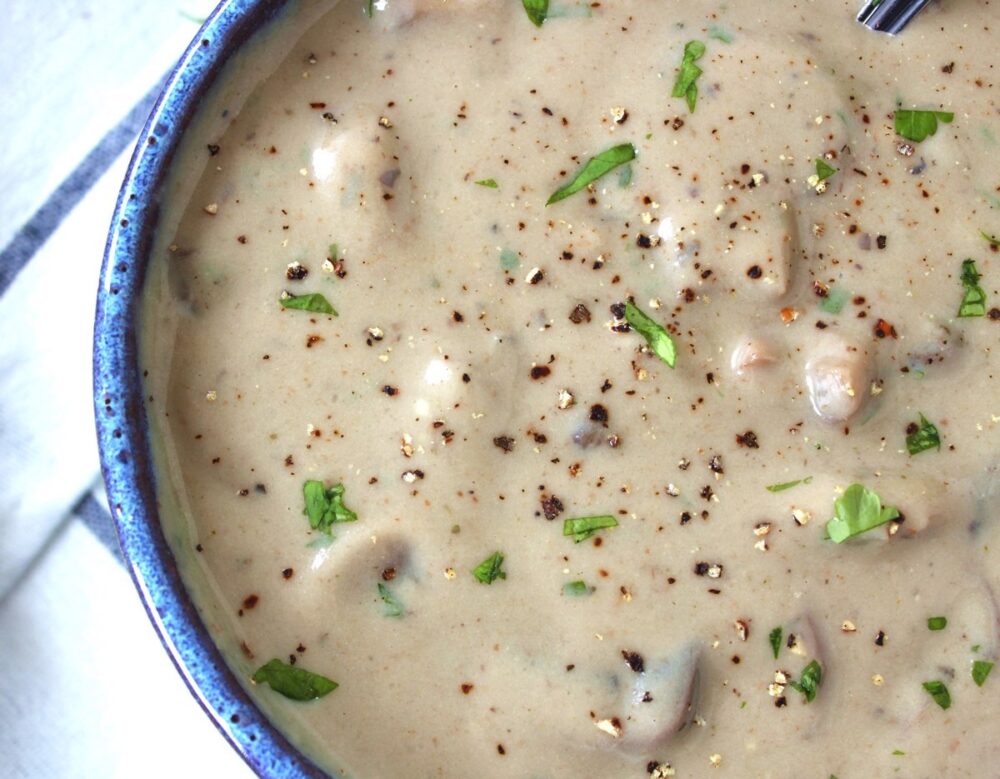
Cream of Mushroom Soup (Vegan | Dairy-Free)

Recipe Card

Cream of Mushroom Soup (Vegan | Dairy-Free)

Cream of Mushroom Soup (Vegan)

This vegan Cream of Mushroom Soup is thick, creamy and full of flavour, yet free from dairy or plant-based cream. Using simple pantry ingredients, it’s nourishing, budget-friendly and wonderfully comforting. As an evening meal, we love to serve it with a sprinkling of golden pan-fried chickpeas and a couple of slices of fresh bread or toasted sourdough.
5 from 3 votes
Hands-On Time 20 minutes
Total Time 30 minutes
Course Light Dinner, Lunch
Cuisine Plant-Based, Vegan
Servings 4

Ingredients
 

  • 2 TBSP vegan butter or dairy free spread (I use Flora Buttery or Vitalite)
  • 1 medium brown onion finely diced
  • 3 tsp minced garlic
  • 500 g / 18 oz mushrooms sliced (I use chestnut / crimini)
  • 1 tsp dried thyme
  • 1 tsp dried tarragon
  • 65 g / ½ cup whole wheat flour (or sub with plain (all purpose) flour)
  • 480 g / 2 cups fortified soya milk
  • 480 g / 2 cups freshly boiled water
  • 3 tsp vegetable bouillon powder (I use Marigold; you can sub with a crumbled stock cube)
  • ¼ tsp freshly cracked black pepper
  • 2 TBSP fresh parsley finely chopped, optional for garnish

Instructions
 

  • Melt the butter in a large saucepan over medium heat. Add the onions and garlic and cook for 4 minutes, until the onions soften.
  • Add the sliced mushrooms, thyme and tarragon. Cook for 5 minutes, stirring occasionally, until the mushrooms start to brown and release their liquid.
  • Whisk the flour and plant milk together in a jug until smooth, then pour into the pan.
  • Add the freshly boiled water, vegetable bouillon power and black pepper to the pan and stir through. Bring to the boil, stirring continuously for 1 minute. Reduce the heat to low, partially cover with a lid, and simmer gently for 10 minutes, stirring regularly with a wooden spoon to prevent the soup from sticking to the bottom of the pan.
  • Remove from the heat and let the soup cool for a couple of minutes (it will thicken slightly as it cools). Use a jug or immersion blender to blend the soup to your desired consistency.
  • Taste and adjust the seasoning as needed. Garnish with chopped parsley and a few more cracks of freshly ground black pepper, if desired, and serve.

Notes

tsp = teaspoon | TBSP = tablespoon
Storage: Store in an airtight container in the fridge for up to 3 days. Reheat gently on the stove or in a microwave before serving.
Substitutions: For best creaminess and protein, I recommend using soya milk. You can substitute with other plant-based milks such as oat or almond, but the soup may be slightly less creamy and will have a lower protein content.
Tip: For a heartier meal, try topping the soup with our Golden Pan-Fried Chickpeas. They add a lovely contrast in texture and an extra boost of plant-based protein.
Keyword Budget Vegan Meals, Dairy-Free Mushroom Soup, Easy Vegan Meals, Easy Vegan Soup, Plant-Based, Plant-based soup, Vegan Cream of Mushroom Soup, Vegan Soup
Tried this recipe?Let us know how it was!

Nutritional Breakdown

N.B. The above values are estimates and for illustration purposes only. The actual nutritional values will vary depending on the specific ingredients used. The % Reference Intake (RI) will also vary depending on your age, gender, height, BMI, level of activity and other personal variables..

Pin for later ⬇️
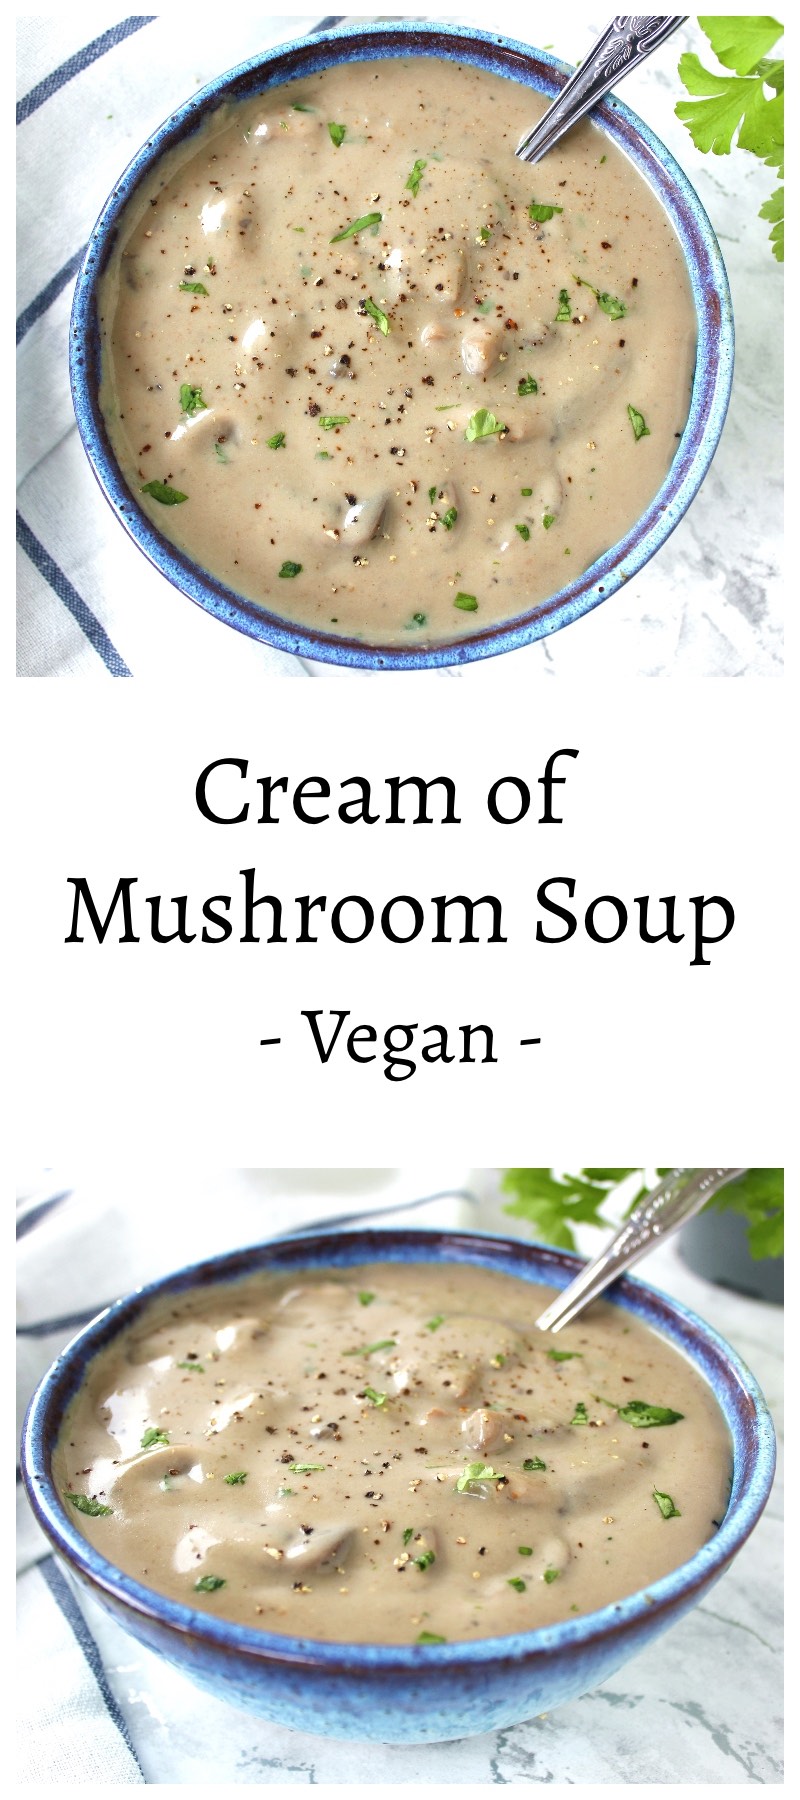
Vegan Cream of Mushroom Soup

If you make this Cream of Mushroom Soup, I’d love to hear your feedback and any suggestions for adaptations! You can drop your comments in the section below, and you can also connect with me on InstagramFacebook, Pinterest. Tag your photos with #bitofthegoodstuff on social media – I always love seeing your creations! ❤️

With love,
Sharon xx
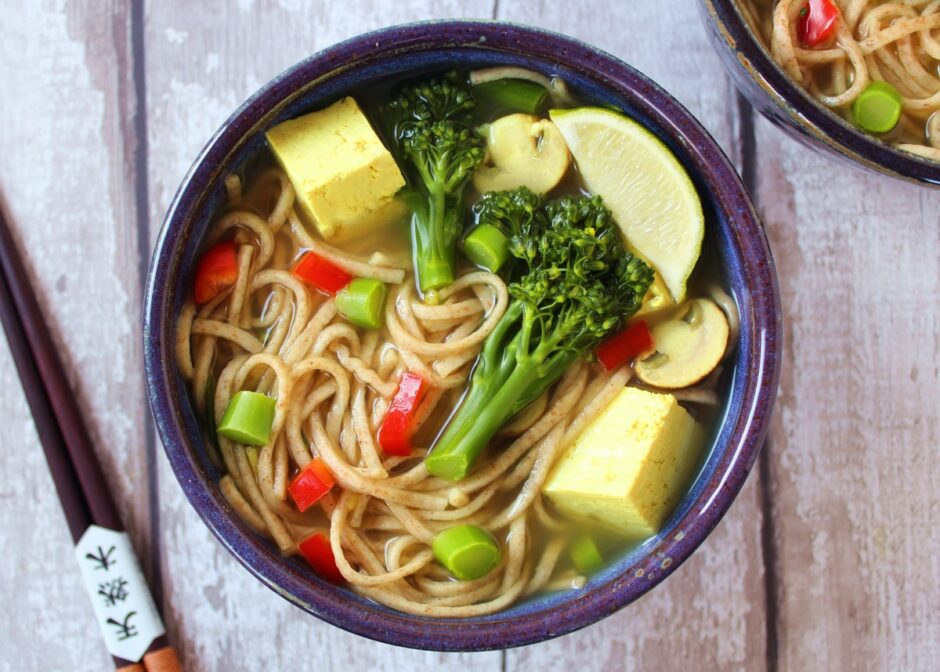
Golden Miso Soup (10 minute recipe!)

Jump to Recipe

Today I’m sharing a delicious miso soup that has quickly become my new favourite ‘working from home’ lunch. It takes just 10 minutes to prepare and is so warming and filling. It also happens to be packed full of nutritional goodness. This is one of those meals that makes me feel really energised… like I’m ‘zinging’ on the inside! It’s been a big hit with the family too. I hope you enjoy it as much as we do!

Continue reading “Golden Miso Soup (10 minute recipe!)”

Smoky Tempeh, Lettuce and Tomato Sandwich

Jump to Recipe

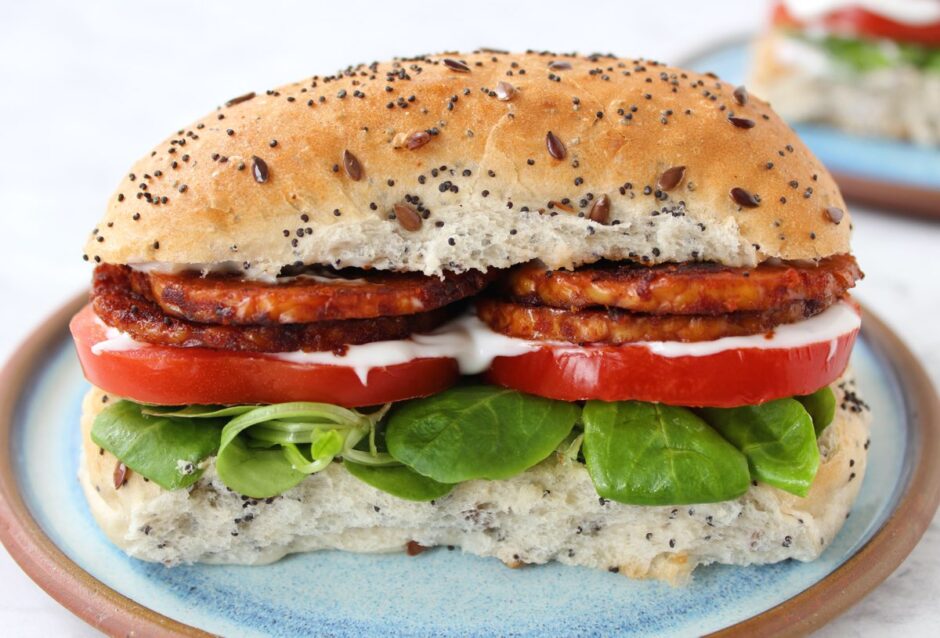
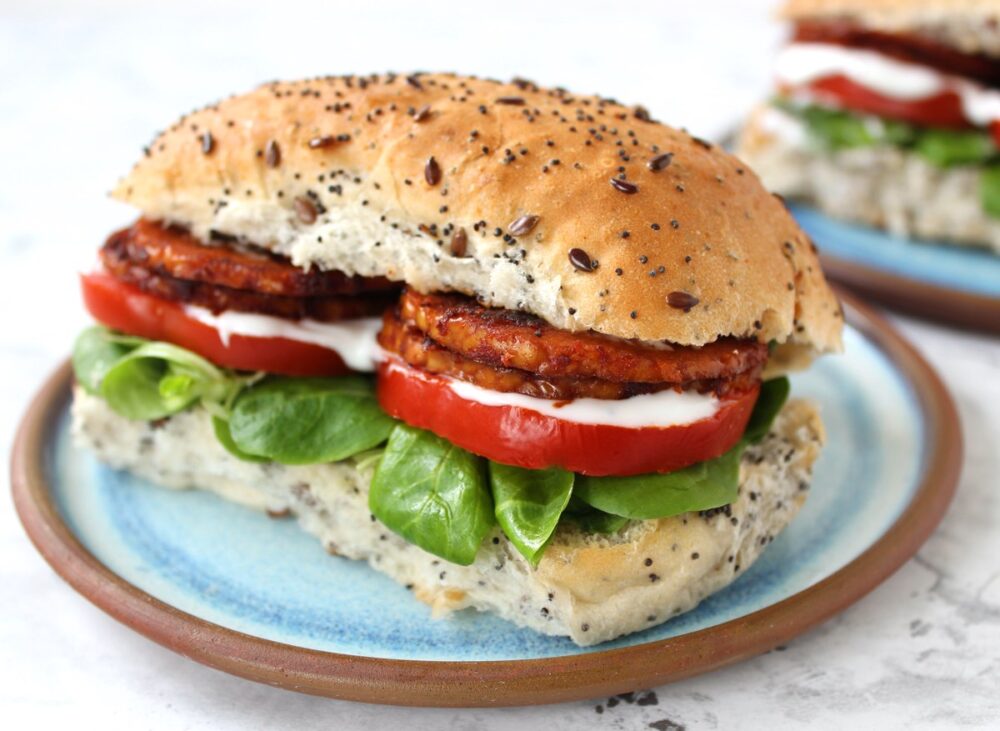
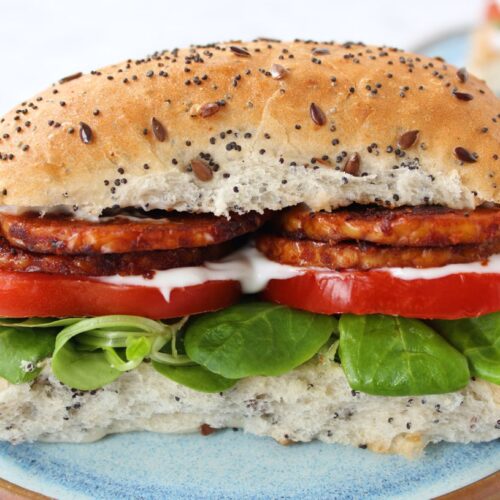
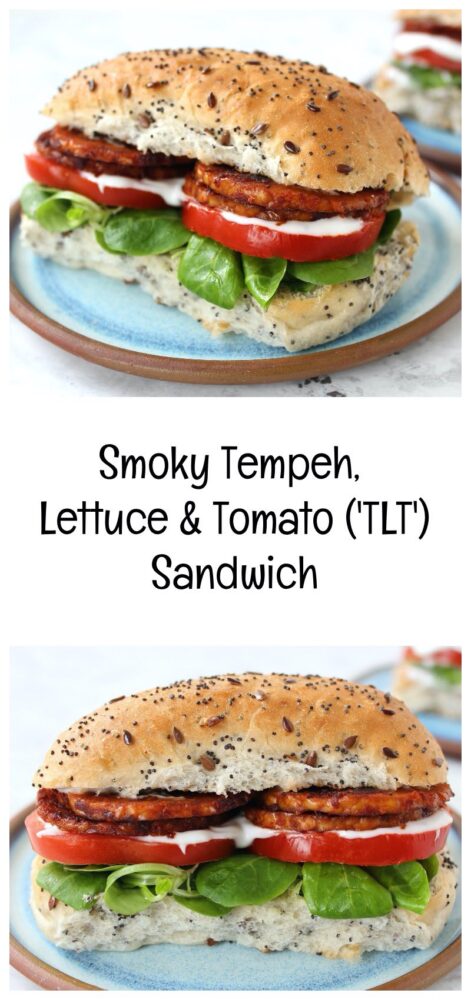
Today I’m sharing a recipe for smoky tempeh slices that are just perfect as a sandwich filling. They are super easy to make and packed full of flavour. Add some lettuce, slices of juicy tomato and a dollop of mayonnaise and you have a delicious vegan alternative to the classic BLT sandwich – the ‘TLT’ (Tempeh, Lettuce, Tomato) sandwich!

Smoky Tempeh TLT Sandwich

Tempeh originally hails from Indonesia and is made from whole soy beans which are fermented with a live culture and pressed into a block. This gives it a distinct texture and flavour (very different to tofu, which is made from soy bean curd). Tempeh is nutrient dense and contains an array of minerals, B vitamins and prebiotics (types of fibre that promote the growth of beneficial gut bacteria). It also happens to be a rich source of protein (100 grams of tempeh contains just over 20 grams of protein).

Smoky Tempeh in Pan

Here in the UK, tempeh is starting to become more widely available. I’ve been buying the Tofoo brand, which is available in my local Waitrose, Sainsbury’s and Tesco and the Plant Power Original Tempeh (from Sainsbury’s). Both can be found in the the vegetarian/vegan chilled aisle.

Tempeh Slices

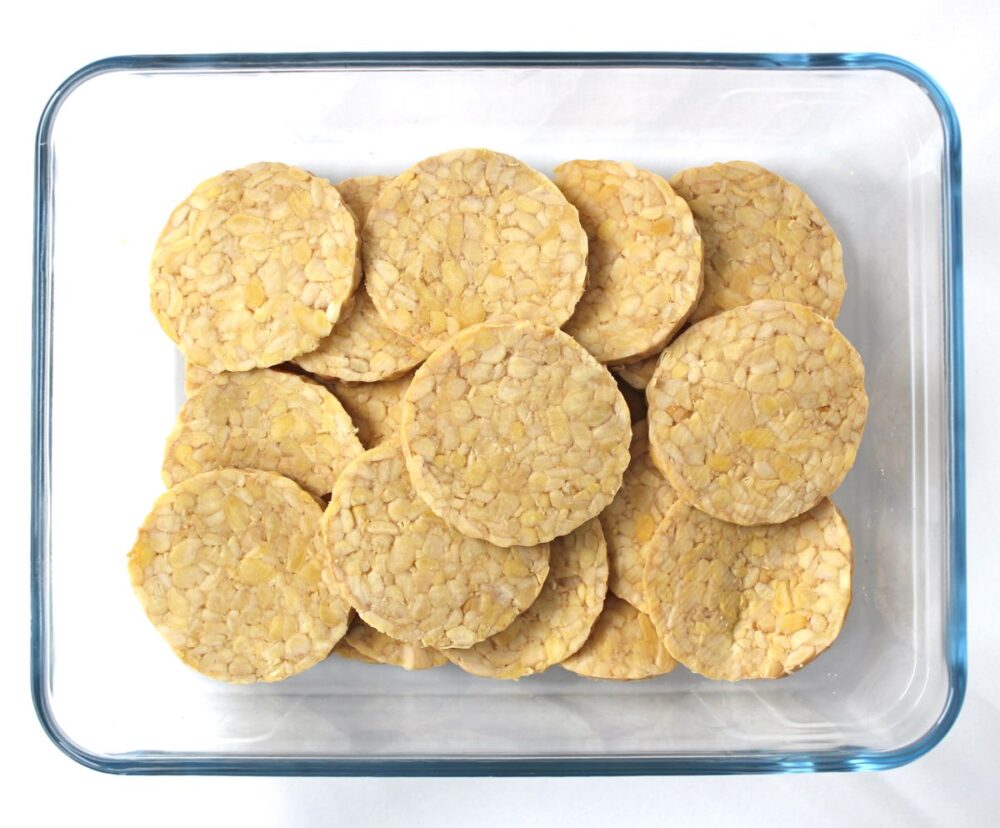
I must admit that until recently, I haven’t been a big fan of tempeh. I found its texture quite hard and the flavour bitter (even after steaming it). However, the recipe I’m sharing today has been a complete game changer for me. I’ve learnt that by slicing the tempeh very thinly and soaking it for a few minutes in a tasty marinade, completely transforms both its texture and flavour. 

Tempeh Slices Marinading

The recipe is lightly adapted from The Happy Pear’s Vegan ‘Bacon’ so a huge thank you to Steve and Dave for the inspiration, and for showing me a way to prepare tempeh that’s not only delicious but super easy too!

At the moment I can’t get enough of this smoky tempeh. It’s hard to resist eating it straight from the pan! It’s been a big hit with the rest of the family too. I hope you enjoy it as much as we do!

Recipe Card

Smoky Tempeh TLT Sandwich

Smoky Tempeh Sandwich Slices

These smoky tempeh slices are perfect for serving in sandwiches. Add some lettuce, slices of juicy tomato and a dollop of mayonnaise and you have a delicious vegan alternative to the classic BLT… the TLT!
5 from 2 votes
Hands-on Time 25 minutes
Total Time 30 minutes
Course Brunch, Lunch
Servings 3

Ingredients
 

  • 200 g / 7 oz tempeh*

Marinade

  • 1 tsp smoked paprika
  • 1 tsp minced garlic
  • 2 TBSP reduced salt soy sauce or tamari (for a GF option)
  • 1 TBSP tomato puree (paste)
  • 1 TBSP apple cider vinegar
  • TBSP extra virgin olive oil
  • 2 TBSP maple syrup
  • 1 TBSP water

Instructions
 

  • Slice the tempeh as thinly as possible and place in a wide, flat bottom dish.
  • In a small bowl, whisk together all the marinade ingredients. Pour over the tempeh and stir through, making sure both sides are coated in the marinade. Leave for five minutes (can be left longer).
  • Heat a large non-stick frying pan (skillet) on medium heat. Arrange some tempeh slices in a single layer in the pan. (You can spoon some of the extra marinade onto the slices if you wish, for an even deeper flavour). Cook the tempeh, flipping regularly until it is browned on both sides and all the liquid has evaporated (I find this takes me about six minutes in total). Transfer to a plate and repeat the process with the remaining tempeh slices.
  • The tempeh can be eaten straight away or stored in an airtight container in the fridge for 48 hours.

Notes

* I used Tofoo tempeh, currently available in the UK from Tescos, Waitrose and Sainsbury’s (in the vegetarian/vegan chiller cabinet). Tempeh is also available from independent health food shops.
The recipe is lightly adapted from The Happy Pear’s Vegan ‘Bacon’ so a huge thank you to Steve and Dave for the inspiration, and for showing me a way to prepare tempeh that’s not only delicious but super easy too!
Keyword Family Friendly, Gluten-Free, Plant-Based, Vegan Lunch, Vegan Lunchbox Ideas, Vegan Sandwiches
Tried this recipe?Let us know how it was!

Nutritional Breakdown


NB: The above values are estimates and for illustration purposes only. Actual nutritional values will vary depending on the specific ingredients used. Percentage Reference Intakes (RI) will also vary depending on individual factors such as age, gender, height, BMI and activity level.

Pin for later ⬇️

Smoky Tempeh, Lettuce and Tomato Sandwich

If you make this Smoky Tempeh, Lettuce and Tomato Sandwich sandwich, I’d love to hear your feedback and any suggestions for adaptations! Tag your photos with #bitofthegoodstuff on social media – I always love to see your creations! You can also connect with me on my social media channels here: Instagram, FacebookPinterest.   

With love,

Sharon xx

———————————-

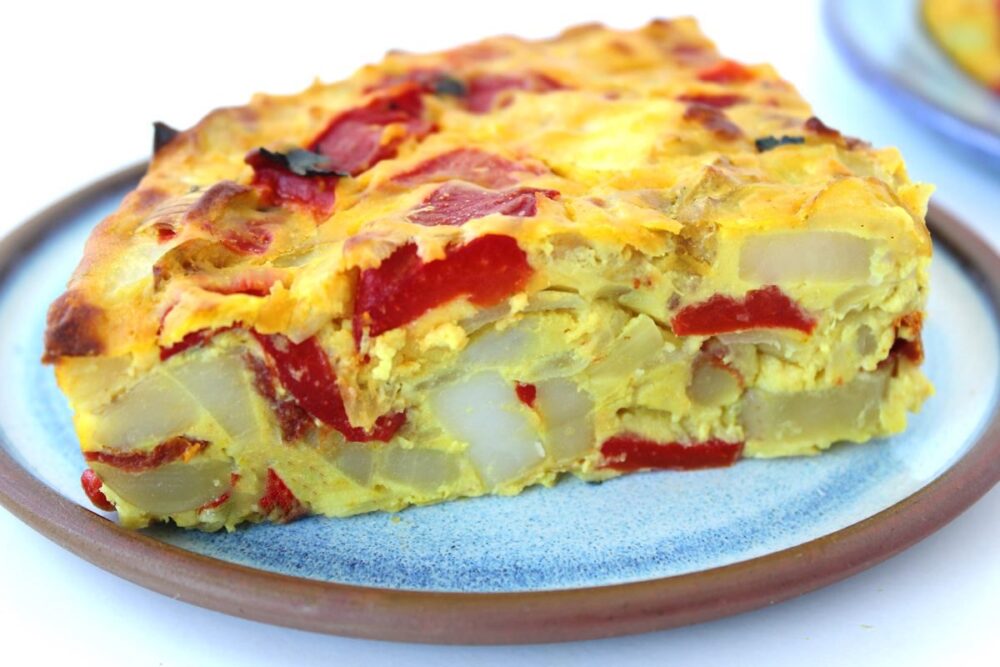
Vegan Spanish Omelette with Roasted Red Pepper and Sun-Dried Tomato

Jump to Recipe

Hey dear friends, hope you’re keeping well! 

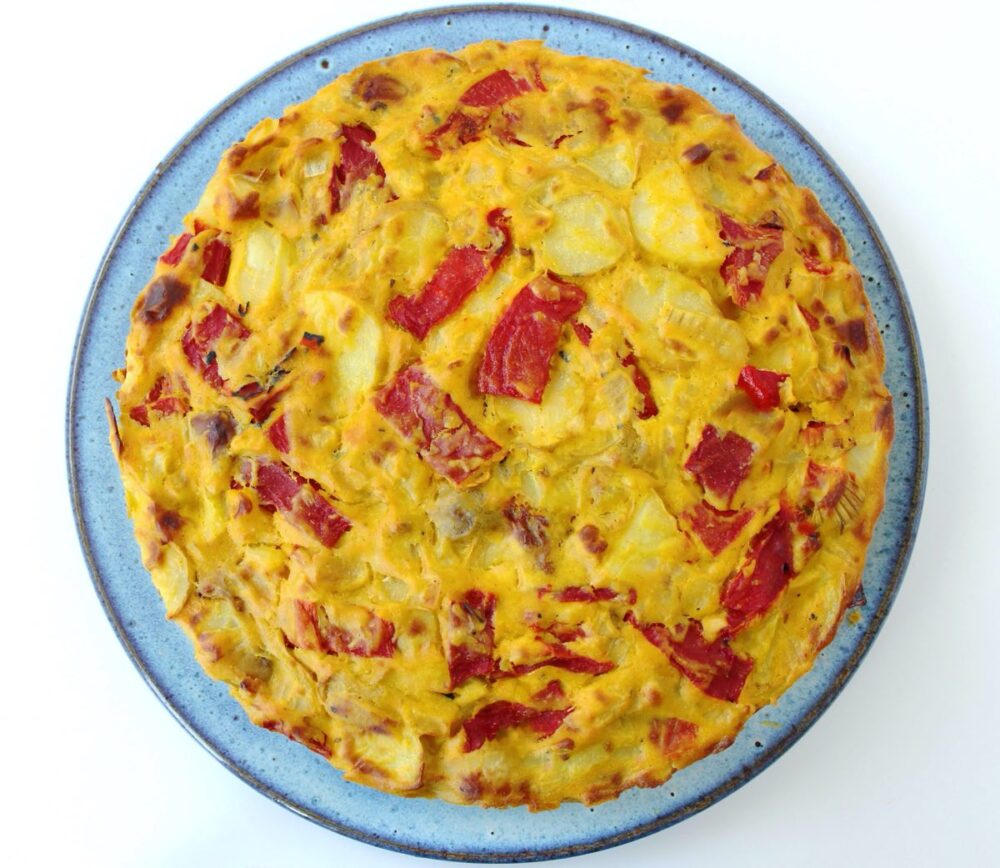
In today’s post, I’m sharing a twist on our original Vegan Spanish Potato Omelette (‘Tortilla de Patatas’). A new favourite of ours, this version features roasted red pepper and sun-dried tomato. It is so flavourful and eye catching. I love those pops of vibrant colour running through the omelette!

Vegan Spanish Omelette with Roasted Red Pepper

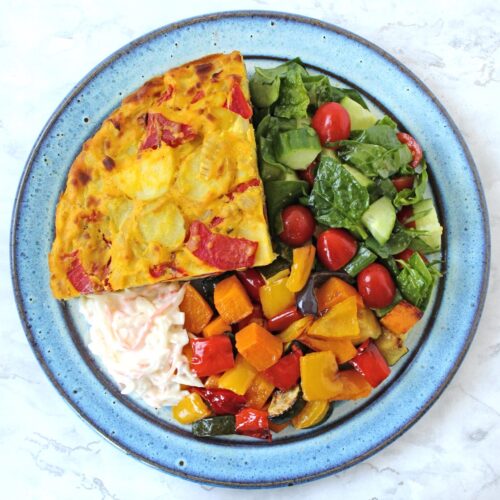
For lunch, we love to serve it with salad or use it as a sandwich filling. We were introduced to the ‘Tortilla Sandwich’ in Seville last Summer and it is unbelievably good! I highly recommend giving it a try if you haven’t had one before.

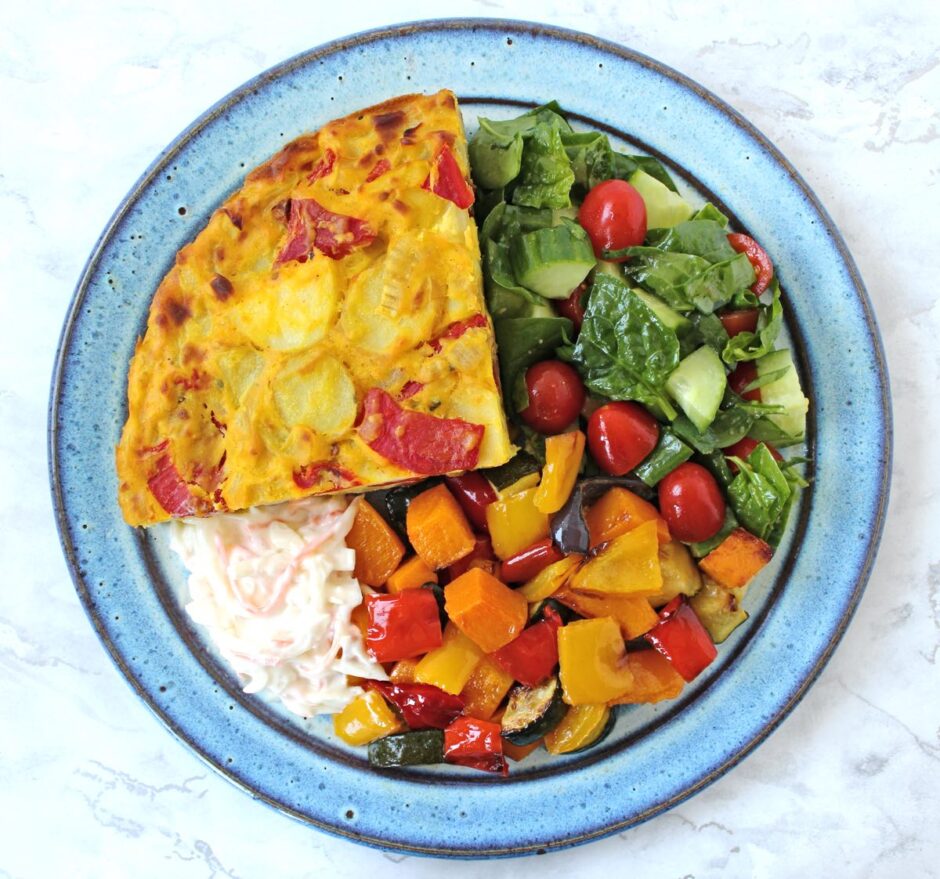
As a main meal, we’ve been enjoying it with mixed salad, roasted veggies and vegan coleslaw. Tasty and so colourful too!

And when we’re out of ‘lockdown’, this omelette is going to be perfect for summer picnics, buffets and tapas parties.

It’s equally delicious served hot and cold.

Vegan Spanish Omelette with Roasted Red Pepper

Since this omelette is vegan, of course it doesn’t contain any eggs. How do we make omelette without eggs you may ask? Well the secret ingredients are silken tofu and chickpea flour. The combination of these two, for me, makes the perfect consistency for an egg-free omelette. If you’d like to add some ‘eggy’ flavour, a pinch or two of kala namak (black salt) will do the trick.

If you haven’t made vegan Spanish omelette before, rest assured that it is easy to make. I’ve made this one even easier by giving the option of baking it in the oven rather than cooking it on the stove. Once the batter is prepared, you can simply pop it in the oven, set the timer for half an hour then walk away. 

Traditionally, Spanish Omelette is quite heavy on the oil so, to make this one a bit lighter, I first boil the potatoes until they are just soft. I then pan fry them with the onion and garlic in a little extra virgin olive oil and salt to enhance their flavour.

Since I posted the original vegan Spanish omelette recipe back in February 2019, it’s become a firm favourite with our lovely readers, and I’ve absolutely loved seeing all the photos you’ve been sharing on social media! It was these photos and your lovely feedback that inspired me to experiment with new veggie and flavour combinations. I can’t wait to see your pictures of this one!

Recipe Card

Vegan Spanish Omelette with Roasted Red Pepper

Vegan Spanish Potato Omelette with Roasted Red Pepper and Sun-Dried Tomato

This vegan Spanish omelette is easy to make and equally delicious served hot and cold. As a main meal, my family loves to serve it with colourful mixed salad and roasted veggies. For lunch, it’s great served on its own, or sliced into a sandwich. It’s also perfect for serving at picnics, buffets and tapas parties.
5 from 2 votes
Hands-on Time 25 minutes
Total Time 1 hour 5 minutes
Course Dinner, Lunch, Main Course, Tapas
Cuisine Spanish
Servings 4

Ingredients
 

  • 400 g / 14 oz waxy potatoes e.g. charlotte, maris peer or salad potatoes (no need to peel)
  • TBSP extra virgin olive oil divided
  • 1 large brown onion diced
  • 2 tsp garlic minced
  • ½ tsp salt
  • 60 ml / ¼ cup plant milk (I used soya milk)
  • 300 g / 10½ oz silken tofu drained
  • 2 tsp Dijon mustard
  • 45 g / ⅓ cup gram flour (aka chickpea flour, besan flour)
  • 2 TBSP nutritional yeast flakes
  • 2 TBSP cornflour (cornstarch)
  • ¼ tsp ground turmeric
  • ¼ tsp black salt ('kala namak') optional – adds an ‘eggy’ flavour
  • 2 roasted red peppers sliced (I used peppers from a jar, fully drained)
  • 8 sun-dried tomatoes in oil drained and sliced
  • vegetable oil for greasing the pan

Instructions
 

  • Prepare a pan of boiling water.
  • Cut the potatoes into halves or quarters, then into 0.5cm / ⅕ inch slices. Boil the potatoes for 10 minutes or until tender, then drain using a colander.
  • Meanwhile, heat ½ TBSP extra virgin olive oil in a large non-stick frying pan (skillet) on medium-low heat and cook the onion, stirring now and then.
  • Prepare the batter: place the milk, silken tofu, mustard, gram flour, nutritional yeast, cornflour, turmeric and black salt (if using) in a large mixing bowl and blend smooth using a hand blender.
  • When the potatoes are tender, tip them into the frying pan with the onion. Add 1 TBSP extra virgin olive oil, 2 tsp minced garlic and ½ tsp salt. Continue cooking for a couple of minutes on medium heat, stirring regularly until the potatoes are fully coated in the oil and salt. (They should start to turn a light yellow colour). Taste test and add a touch more salt or oil, if needed.
  • Add the contents of the frying pan, roasted red pepper and sun-dried tomato slices to the batter in the mixing bowl and stir through.

To Pan-Fry the Omelette:

  • Coat the bottom of a clean, non-stick oven-safe frying pan (skillet) with oil and heat on medium heat. (I use a rapeseed/canola oil spray as I find it less sticky than olive oil). Tip the omelette mixture into the pan and use a silicone spatula to distribute it evenly; smooth the top and neaten the edges. Cook for 15 minutes on medium-low heat, or until the edges start to firm up.
  • Towards the end of the cooking time, preheat the grill (broiler). Place the frying pan under the grill (with the handle sticking out) until the omelette is lightly browned (about 3 minutes). Keep a watch on it as it can burn quickly. Using an oven glove, remove the pan from the grill. Leave to rest for at least 10 minutes (it will firm up as it cools), then loosen with a slotted turner and transfer onto a chopping board.

To Oven-Bake the Omelette:

  • Pre-heat the oven to 200C (180C fan). Grease the sides of a 22cm / 9” loose-bottom flan tin and line the bottom with non-stick baking paper. Add the omelette mixture and press it down using a silicone spatula. Cook for 30 minutes, or until the tortilla is firm to the touch and a skewer inserted through the middle comes out clean. Leave to rest for at least ten minutes (it will firm up as it cools), then gently run a knife round the outer edge and transfer the omelette to a chopping board.

Notes

Stored in an airtight container in the fridge, the omelette will keep for up to five days. It can be eaten cold, straight from the fridge. Alternatively, to re-heat, I squirt a couple of sprays of rapeseed (canola) oil in a frying pan and cook the omelette slices on medium heat, turning regularly until warmed through.
Recipe adapted from Bit of the Good Stuff’s Vegan Spanish Potato Omelette – Tortilla de Patatas
Keyword Easy Vegan Meals, Egg-Free Omelette, Gluten-Free, Vegan Lunchbox Ideas, Vegan Omelette, Vegan Picnics, Vegan Tapas
Tried this recipe?Let us know how it was!

Nutritional Breakdown

N.B. The above values are estimates. The actual nutritional values will vary depending on the brands and ingredients used.

Products used in this recipe:
Clearspring Organic Silken Tofu
Marigold Engevita Nutritional Yeast Flakes with Added B12
Top-Op Kala Namak (Black Salt)
KTC Gram Flour

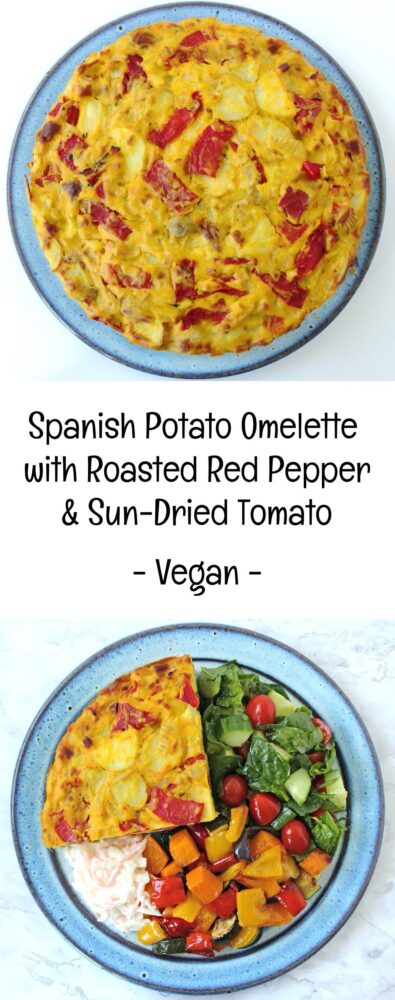
Pin for later ⬇️

Vegan Spanish Potato Omelette with Roasted Red Pepper and Sun-Dried Tomato

If you make this Vegan Spanish Potato Omelette, I’d love to hear your feedback and any suggestions for adaptations! Tag your photos with #bitofthegoodstuff on social media – I always love to see your creations! You can also connect with me on my social media channels here: Instagram, Facebook, Pinterest.   

With love,

Sunny Sri Lankan Curry (Vegan)

Jump to Recipe

Today I’m sharing the recipe for a delicious plant-based curry that is filled with sunshine colour. The stars of this dish are butternut squash and red pepper, which are roasted in warming spices to bring a richness and depth of flavour. The sauce is coconut based, adding the touch of sweetness and creaminess that we associate with Sri Lankan curries. I’ve kept the recipe mild enough to suit all family members, but feel free to crank up the heat by adding some fresh chilli.

Vegan Sri Lankan Curry

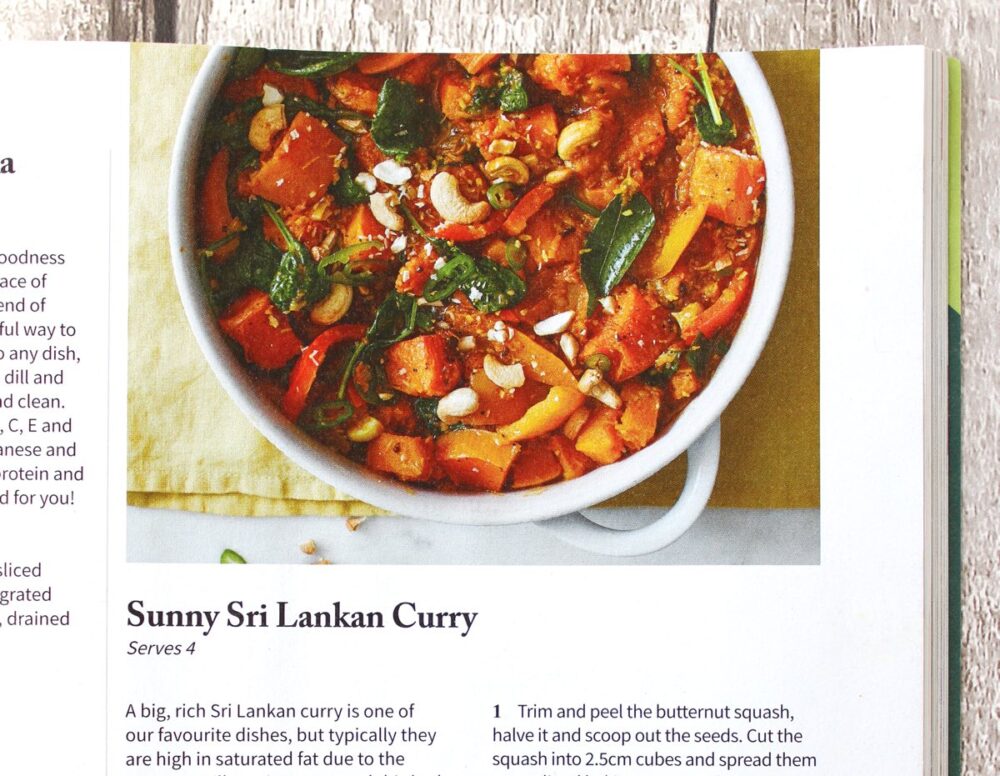
The inspiration for today’s post was a recipe that I spotted in February’s Vegan Life Magazine. With its vivid oranges and reds, this curry looked so appealing! It also reminded me of Deliciously Ella’s Sri Lankan Curry, which has been on my ‘to try’ list for ages now. Rather than buying new ingredients that I wouldn’t normally purchase, I decided to use the recipes from Ella and Vegan Life magazine as inspiration to create my own version of this delicious-looking curry.

Vegan Sri Lankan Curry


* Disclaimer: Vegan Life kindly sent me a complimentary copy of this magazine

And I was so happy with how it turned out! The colours and flavours of this curry are beautiful!! I used a mix of spices that I always have on hand (turmeric, chilli, cinnamon, curry powder and mustard seeds) which gave the dish the warm, sweet and spicy flavour that I associate with Sri Lankan-style curries. I also chose to add some marinated tofu to increase the protein content. The texture and flavour of the tofu worked really well in this curry, so I will definitely use it again in the future!

Since I first made this curry last month, I’ve gone on to make it twice more already! It’s been a big hit with family and friends, so I know I’ll be making it many more times in the future. This recipe is a keeper! I hope you enjoy it as much as we do! 

Recipe Card

Vegan Sri Lankan Curry

Sunny Sri Lankan Curry (Vegan)

Filled with beautiful sunshine colour and delicious flavours, this curry is sure to be a crowd pleaser! It’s easy to make and suitable for preparing in advance. I’ve kept it mild enough to serve to children, but feel free to ramp up the heat by adding some fresh chilli. We love to serve it on a bed of brown rice.
Hands-on Time 25 minutes
Total Time 45 minutes
Course Dinner
Cuisine Sri Lanka
Servings 4

Ingredients
 

  • 800 g / 5 cups butternut squash peeled and sliced into bite-size chunks (no bigger than 1 inch / 2.5cm)
  • TBSP extra virgin olive oil
  • ½ tsp ground turmeric
  • ½ tsp mild chilli powder
  • ½ tsp ground cinnamon
  • 1 tsp mild curry powder
  • 1 tsp black mustard seeds
  • 1 large red onion diced
  • 2 tsp minced garlic
  • 2 tsp minced ginger
  • 200 g / 7 oz marinated tofu or other protein source, sliced into chunks [See note *]
  • 400 ml / 14 oz can coconut milk
  • 120 ml / ½ cup vegetable stock (broth)
  • 2 red bell peppers (or use a mixture of colours) deseeded and sliced into chunks
  • 2 handfuls (about 60g) of baby spinach
  • salt to taste

Instructions
 

  • Preheat the oven to 430F / 220C (200C fan). Line a large roasting tin with non-stick baking paper.
  • Arrange the squash in the roasting tin and sprinkle the spices (turmeric, chilli powder, cinnamon and curry powder) and 1 TBSP oil on top. Give it a good stir to ensure the squash is thoroughly coated in the spices then roast for 20 minutes.
  • Meanwhile, gently heat ½ TBSP oil in a large saucepan. Add the mustard seeds and cook until they start to pop. Stir in the onion and cook for a couple of minutes until it starts to soften (add a splash of water if it starts to stick). Add the garlic and ginger (and fresh chilli, if using) to the pan, and continue cooking for one minute. Finally add the tofu chunks (or other protein source), the coconut milk and vegetable stock. Bring to the boil then reduce the heat to low, partially cover with a lid and gently simmer for about 10-15 minutes.
  • Once the squash has roasted for 20 minutes, add the bell pepper to the roasting tin and stir through. Continue cooking until for another 10 minutes or so, until both the squash and pepper are tender.
  • Tip the roasted vegetables into the saucepan and stir through to coat in the coconut milk. Simmer for a couple of minutes to allow the flavours to meld. Finally, add the spinach and stir through until it wilts.
  • Taste test and season with salt, if desired.
  • Any leftovers can be stored in the fridge for up to three days (be sure to check the storage instructions for the tofu or other protein source that you are using).
Keyword Dairy-Free, Easy Vegan Meals, Family Friendly, Gluten-Free, Plant-Based, Vegan Curry
Tried this recipe?Let us know how it was!

Pin for later ⬇️

Vegan Sunny Sri Lankan Curry

If you make this Vegan Sunny Sri Lankan Curry, I’d love to hear your feedback and any suggestions for adaptations! Tag your photos with #bitofthegoodstuff on social media – I always love to see your creations! You can also connect with me on my social media channels here: InstagramFacebook, Pinterest.   

Big thank you to the Vegan Life magazine and the lovely Ella Mills for today’s recipe inspiration! ✨ 

With love,

Sharon xx
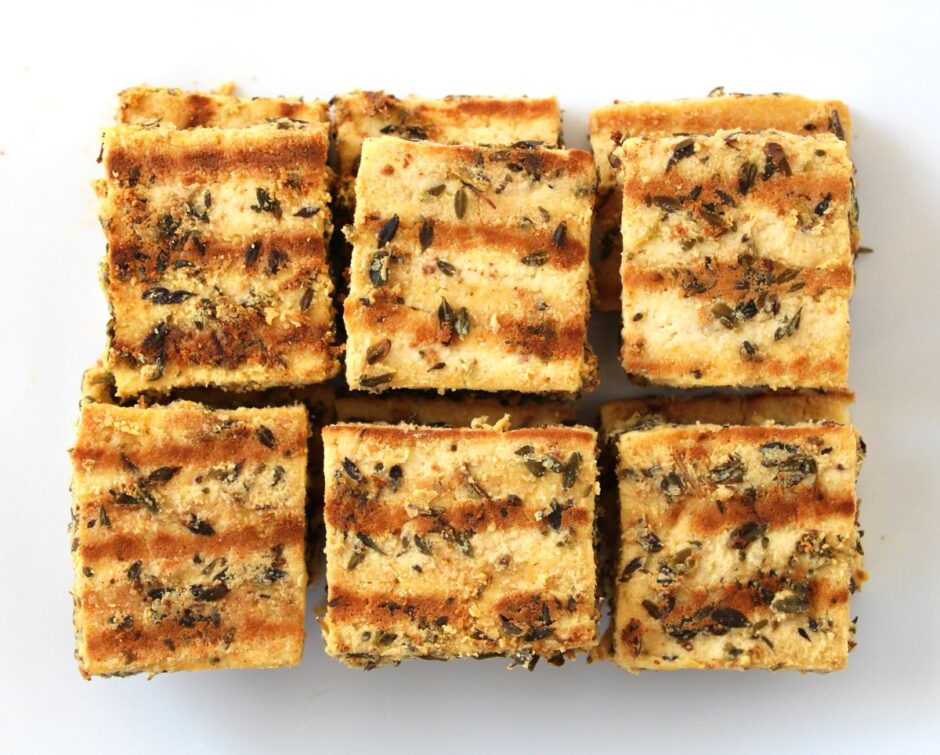

Tofu ‘Halloumi’

Jump to Recipe

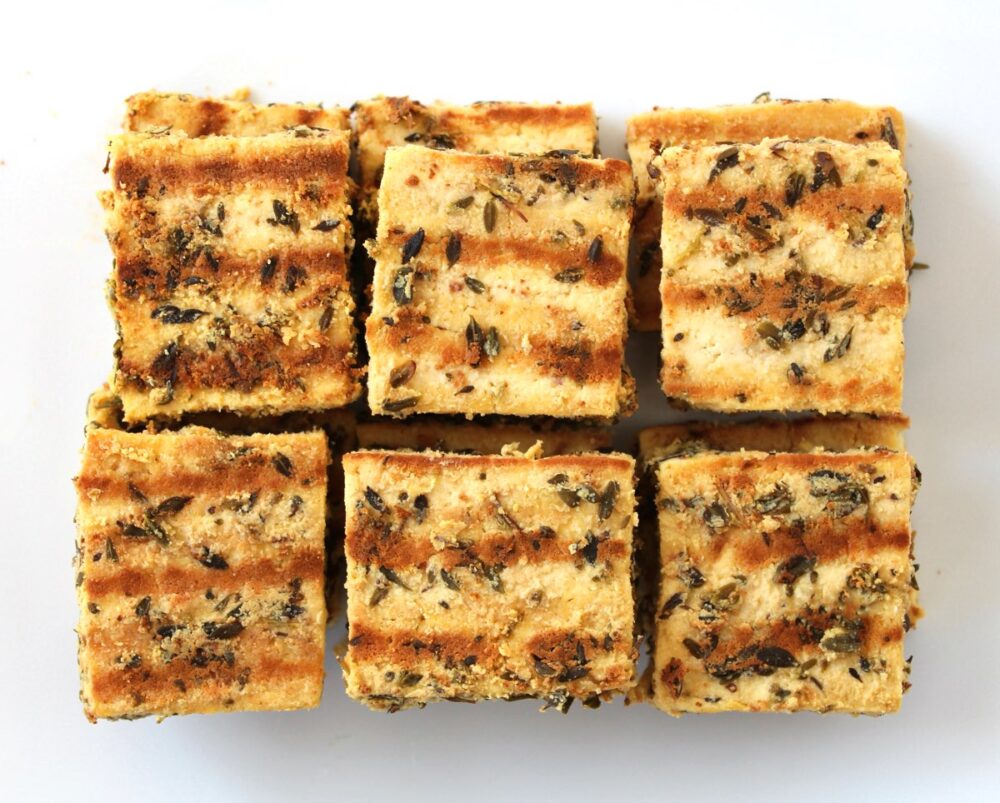
In today’s post, I’m sharing the recipe for a delicious plant-based alternative to halloumi. Simple to prepare, this Tofu ‘Halloumi’ is highly versatile. We love to add it to Greek-style salads, sandwiches, pittas, wraps and mezze platters. 

Tofu Halloumi

It was the Greek Vegan Deli guys that first introduced me to Tofu ‘Halloumi’ back in 2018 at Bristol VegFest. It was absolutely delicious!! Since then, every time I see the Greek Deli guys at a festival, I really look forward to tucking into their Tofu ‘Halloumi’, either stuffed into a pitta or as part of one of their incredible Greek platters. 

I love Greek food and halloumi used to be one of my favourite cheeses. However, once I’d tried the tofu version, I was hooked. I loved it even more than the original!

And if I’d known just how easy it is to make, I would definitely have tried making Tofu ‘Halloumi’ a long time ago!

It involves three simple steps …

  1. Pressing the tofu
  2. Marinating it for an hour
  3. Then grilling it for a few minutes.

Job done!

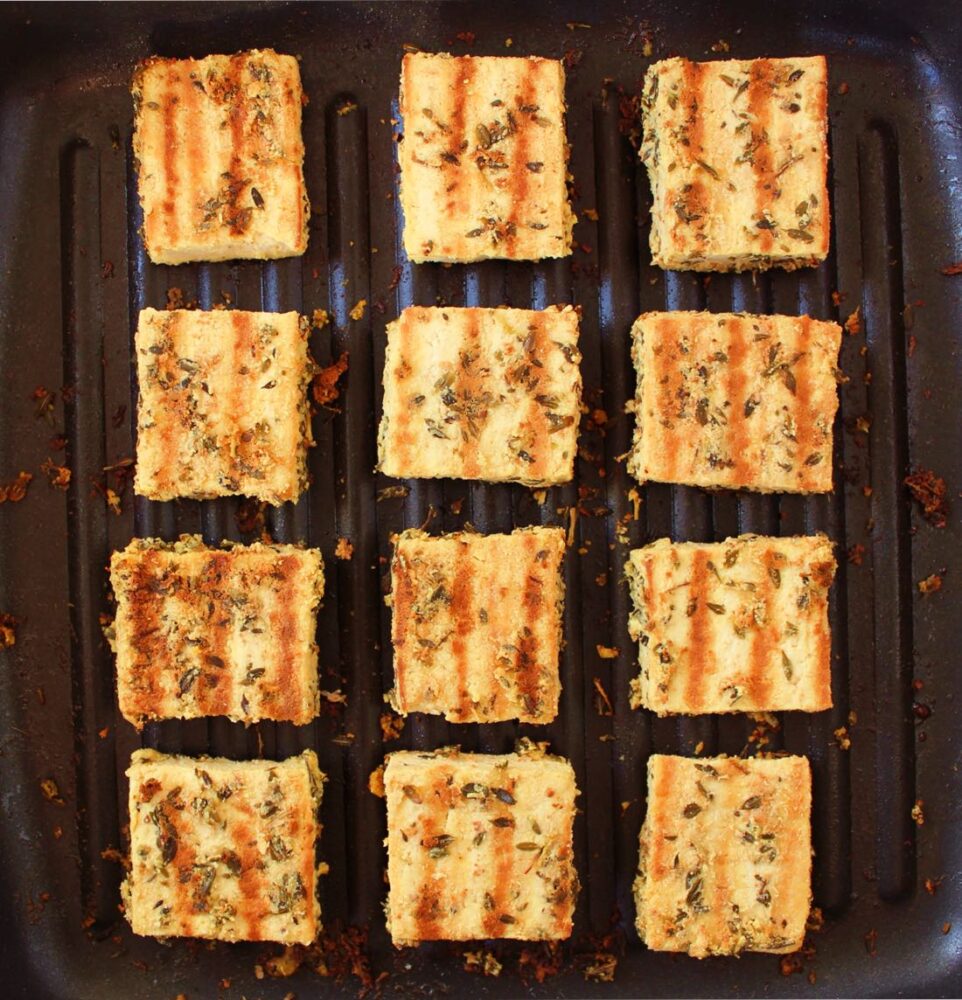
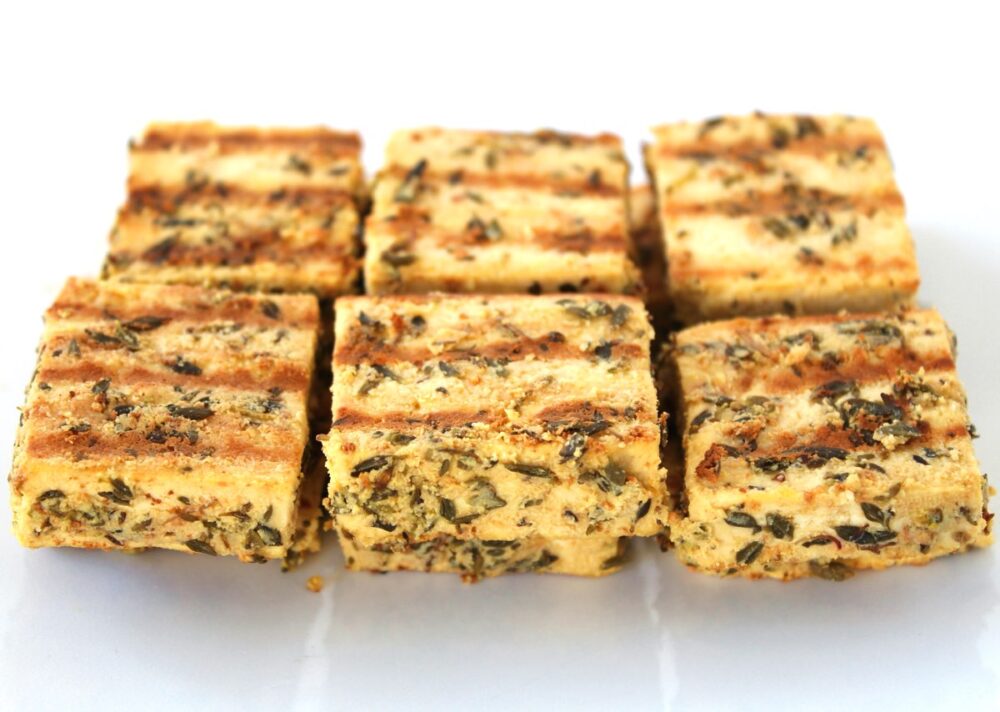
I especially love to use a griddle pan to get those beautiful grill lines.

Tofu Halloumi

For the marinade, I used five ingredients that are basic staples my kitchen – nutritional yeast flakes, lemon, oregano, extra virgin olive oil and salt. The resulting tofu was so flavourful. It was salty, tangy, cheesy and herby – all the flavours I associated with Greek halloumi (for Cypriot halloumi you could switch the oregano for mint instead).

Tofu Halloumi

Recipe Card

Tofu Halloumi

Tofu ‘Halloumi’

This tofu is a delicious alternative to halloumi. It can be served warm or cold, and is perfect for adding to Greek salads, sandwiches, pittas, wraps and mezze platters.
5 from 3 votes
Hands-on Time 18 minutes
Total Time 2 hours
Course Appetizer, Dinner, Lunch, Salad
Cuisine Mediterranean, Middle East
Servings 3

Ingredients
 

  • 1 block (about 400g / 14 oz) of super firm tofu*
  • 4 TBSP nutritional yeast flakes
  • 2 TBSP fresh lemon juice
  • 1 TBSP dried oregano
  • 1 TBSP extra virgin olive oil
  • ½ tsp salt

Instructions
 

  • Press the tofu for 30 minutes**. Slice into ½ inch (1.3 cm) thick rectangles.
  • Add the nutritional yeast flakes, lemon juice, dried oregano, oil and salt to a bowl and stir until thoroughly combined. The nutritional yeast should start to dissolve into the oil.
  • Add the tofu to a wide, shallow container and use a pastry brush or spoon to coat both sides in the marinade (it doesn’t matter if you need to stack the tofu). Cover and leave for an hour to marinate. Alternatively you can leave it overnight in the fridge.
  • When ready to cook, spray a non-stick griddle pan or frying pan (skillet) with oil and pre-heat on medium-high. Add the tofu in a single layer and press down on it with a slotted turner spatula (you should hear it sizzle). Cook for 2-3 minutes until golden brown on the underside then flip over and repeat.
  • Stored in an airtight container, the tofu will keep for a couple of days.

Notes

* I used Cauldron Extra Firm Organic Tofu (available in the chiller cabinet in most big UK supermarkets). I like this tofu as it is set in calcium sulphate so it’s an easy way to boost our calcium levels. According to their website, Cauldron Organic Tofu contains approximately 400mg of calcium per 100g (a quarter block). 
**Here’s my preferred way to press tofu (since I don’t have a tofu press): Place the tofu on a rimmed baking tray. Place a chopping board on top of the tofu, followed by a heavy object to weigh it down. The water collects in a pool round the tofu. After 30 minutes, drain off the liquid. Give the tofu a quick pat with kitchen paper to soak up any residual liquid, then it’s good to go.
Keyword Easy Vegan Meals, Gluten-Free, Plant-Based, Vegan Lunchbox Ideas, Vegan Sandwiches
Tried this recipe?Let us know how it was!

Pin for later ⬇️

Tofu Halloumi

I’m really looking forward to seeing how you would use this Tofu ‘Halloumi’. Today, I added it to a toasted sandwich with baby leaves and shredded beetroot, sun-dried tomatoes and mayo. It was so delicious! If you make it, remember to take a photo and tag it with #bitofthegoodstuff on social media – I always love to see your creations! You can also connect with me on my social media channels here: Instagram, Facebook, Pinterest.    

With love,

Sharon xx
——————————–