Mediterranean Tofu Scramble

Jump to Recipe

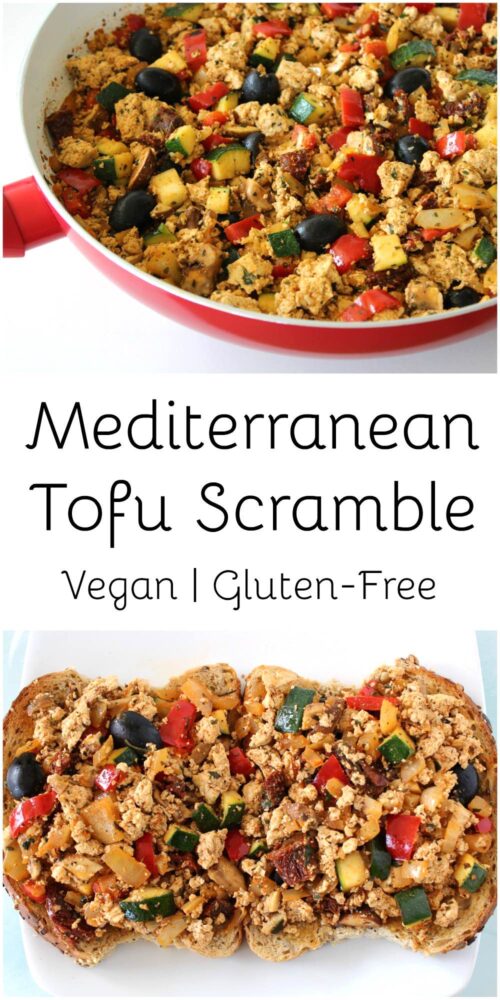
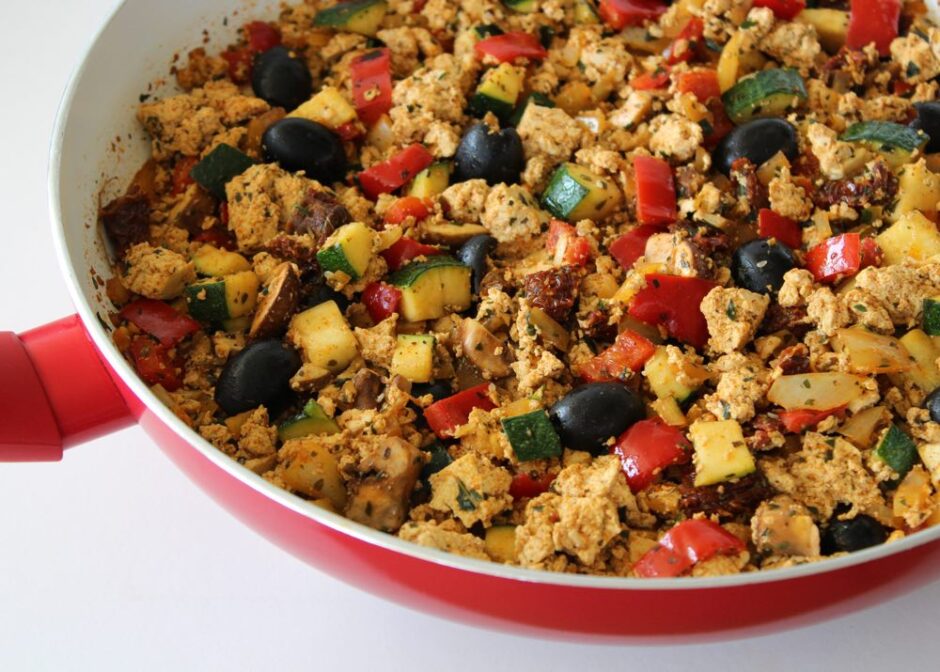
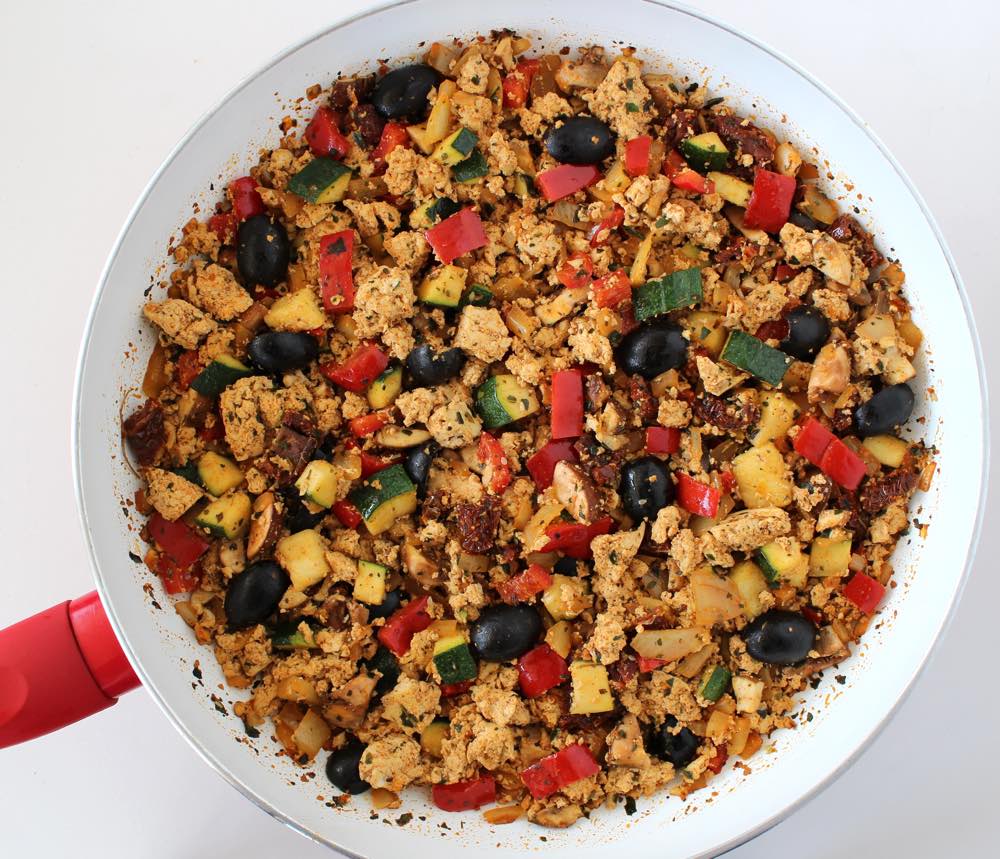
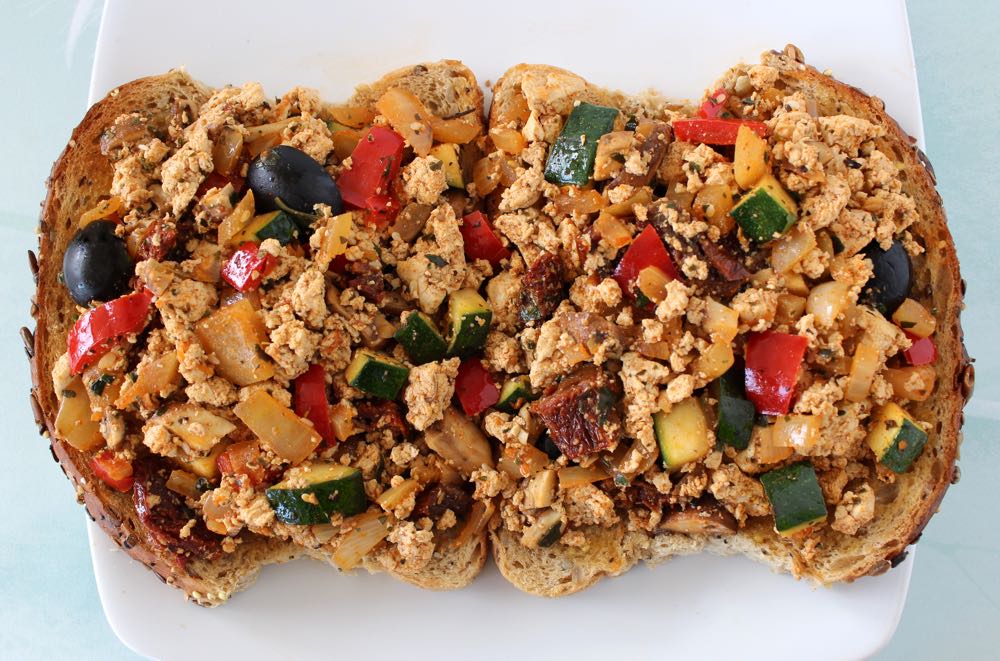
Tofu scrambles are one of my family’s favourite easy weeknight meals. They take 20 minutes or less to make, use just one pan and can be flavoured myriad ways, which means they never get boring. The scramble recipe I’m sharing in today’s post is filled with beautiful colours and flavours inspired by the Mediterranean ☀️
Mediterranean Tofu Scramble

Fresh, crisp sweet peppers and zucchini, salty black olives and rich sun-dried tomatoes make one tasty combination of flavours and textures. A splash of soy sauce and sprinkling of mushrooms adds an extra hit of ‘umami’ deliciousness.

To enhance the flavour even further, I sprinkle in a couple of my favourite herbs – fresh basil and dried oregano – and spices – smoked paprika and ground cumin. The smoked paprika turns the tofu a beautiful red colour, as well as adding a delicious smoky flavour.
I’ve always loved using dried herbs and spices in my cooking (and have a whole shelf in my pantry dedicated to them!) but I’ve only recently starting learning about their health benefits.

Do you know which food category averages the most antioxidants? Take a guess…

Nope, it’s not fruits.

Nor vegetables.

It’s herbs and spices!!

By sprinkling just a single teaspoon of dried herbs or spices on your food, you can double, triple, quadruple or more its antioxidant content. Incredible!

Here’s what Dr Michael Greger has to say in his epic “nutrition bible” How Not To Die

Antioxidants, in a Pinch

The food category that averages the most antioxidants is herbs and spices.

Let’s say you prepare a nice healthy bowl of whole-wheat pasta with marinara sauce. Together, they may achieve a score of about 80 units of antioxidant power (approximately 20 units from the pasta and 60 from the sauce). Add a handful of steamed broccoli florets, and you may end up with a delicious 150-unit meal. Not bad. Now sprinkle on a single teaspoonful of dried oregano or marjoram, oregano’s sweeter and milder twin. That alone could double your meal’s antioxidant power, up to more than 300 units.

How about a bowl of oatmeal for breakfast? By adding a teaspoon of cinnamon, you could bring the antioxidant power of your meal from 20 units to 120 units. And if you can stand the punch, adding a pinch of cloves could bring your unassuming breakfast up to an antioxidant score of 160 units.

Plant-based meals tend to be rich in antioxidants on their own, but taking a moment to spice up your life may make you meal even healthier.

p50, How Not to Die

Having read this, I’ll be sprinkling those herbs and spices even more liberally from now on!
Tofu Scramble

Recipe Card

Mediterranean Tofu Scramble

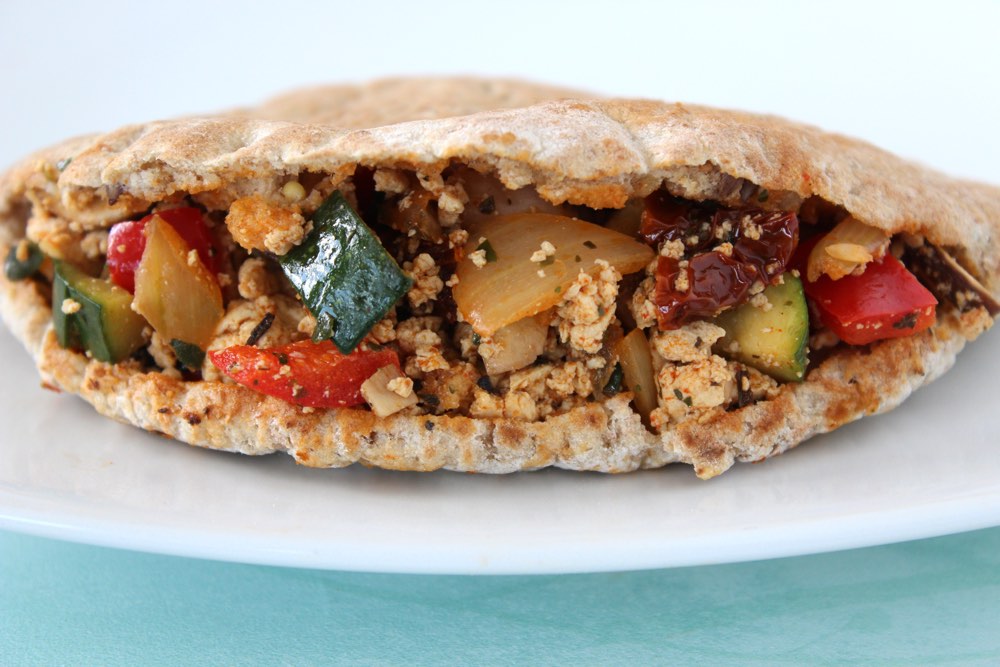
This tofu scramble makes a delicious, quick 'n' easy supper, lunch or brunch. It comes together in just 20 minutes and only uses one pan (my favourite kind of meal!) It’s protein- and calcium-rich (thanks to the tofu) and packed full of antioxidant-rich veggies, herbs and spices. We love to serve it on wholegrain toast at home and stuffed into pitta breads for school and work lunchboxes.
Hands-on time 20 minutes
Total Time 20 minutes
Course Breakfast, Brunch, Light Dinner, Lunch
Servings 4

Ingredients
 

  • 1 TBSP olive oil I use the oil from the sun-dried tomato jar
  • 1 brown onion diced
  • 2 tsp minced garlic
  • 1 sweet romano or red bell pepper deseeded and diced
  • ½ medium courgette (zucchini) (about 100g / 3½ oz) diced
  • 1 block organic firm tofu (about 400g / 14 oz)
  • 2 tsp smoked paprika
  • 1 tsp ground cumin
  • 1 TBSP tamari or reduced salt soy sauce
  • ½ TBSP dried oregano or Italian seasoning
  • 2 TBSP fresh or frozen basil finely chopped
  • 100 g / 1 cup chestnut (crimini) mushrooms, diced
  • 8 oil-packed sun-dried tomatoes drained and chopped
  • 12 black pitted olives halved

Optional extras (for a nutrient boost)

  • 2 TBSP nutritional yeast flakes
  • Sprinkling of hulled hemp seeds

Instructions
 

  • Gently heat the oil in a large frying pan (skillet). Add the onion and cook for a couple of minutes. Stir in the garlic, sweet romano/bell pepper and courgette, and continue cooking for a further 2-3 minutes.
  • Drain the tofu, then crumble it into the pan. Sprinkled the smoked paprika and cumin on top, and stir until the tofu is fully coated in the spices.
  • Add the remaining ingredients to the pan (tamari/soy sauce, oregano/Italian seasoning, basil, mushrooms, sun-dried tomatoes and olives) and stir through. Continue cooking for about 5 minutes.
  • Taste test, and adjust the seasoning to suit. Sprinkle on some nutritional yeast and hemp seeds, if desired, then serve.
  • Any leftover scramble can be stored in an airtight container for up to five days. It is also freezable.
Keyword Budget Vegan Meals, Easy Vegan Meals, Tofu Scramble, Vegan Lunchbox Ideas
Tried this recipe?Let us know how it was!

Pin for later ⬇️

Big shout out to the lovely people at Suma who supplied me with ingredients that I used to create this recipe. The following organic ingredients are available from Suma and can be purchased in the UK from independent health food shops and online:

Suma Organic Sundried Tomatoes in Olive Oil with Thyme
Clearspring Organic Tamari Soya Sauce
Suma Organic Smoked Paprika
Suma Organic Ground Oregano
Cauldron Foods Organic Firm Tofu

Do you enjoy using dried herbs and spices? If so, what are your top favourites? It’s hard for me to pick just one, so here are my current top five (in no particular order) …. 

✦ Dried Oregano
✦ Fresh Basil
✦ Smoked Paprika
✦ Ground Cumin
✦ Ground Sweet Cinnamon

If you try this Mediterranean tofu scramble recipe, please come back and leave a review. It’s so helpful to me (and other readers) to hear your experiences and ideas for variations. Thank you! ❤️

With love,

Sharon xx
Quick and Easy Vegan Mayonnaise (with Sweet Chilli option)

Jump to Recipe

In today’s post, I’m sharing a recipe for a delicious, quick & easy vegan mayonnaise that uses basic pantry ingredients, is ready in five minutes and costs as little as 34p! I never thought I’d find another mayo as tasty as Vegenaise, but this home-made version is just that. So if you’re on a budget or have difficulty finding great-tasting vegan mayos in your shops, then I definitely recommend giving this one a try.

While I’m a little late to the party (as per usual), the home-made vegan mayo craze kicked off in 2015, following a discovery by French musician Joel Roessel that the water from a can of beans (or left over from cooking beans) could be used as a plant-based alternative to egg whites. Ingenious! This discovery was then further developed by American software engineer Goose Wohlt (who named it ‘aquafaba’) and the Facebook community Aquafaba (Vegan Meringue – Hits and Misses!)

For those unfamiliar with the term ‘aquafaba’, it’s basically the Latin for ‘bean water’ (Aqua = water Faba = bean). The Latin name sure does sound more appealing, doesn’t it?

Literally within weeks of the aquafaba discovery, my Facebook newsfeed started filling up with images of meringues, pavlovas, marshmallows, mousses, macarons and mayonnaise that were being made with this liquid that we usually throw down the sink. Basically, all the foods that I loved in my pre-vegan days and never dreamed I would ever get to eat again.

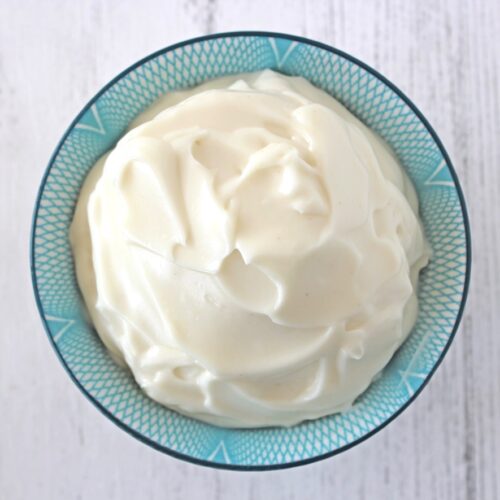
Easy Vegan Home-Made Mayonnaise

The reason I was slow to join the home-made mayo craze is because the American Follow Your Heart Vegenaise had made its way into my local health food shop. I can honestly say that Vegenaise was the best mayo I’d ever tasted (even better than the traditional egg-based mayo) so I was in no rush to find a replacement.

However, after repeatedly seeing aquafaba mayo videos popping up on social media, the intrigue got the better of me and I decided to give it a try.

And the verdict?

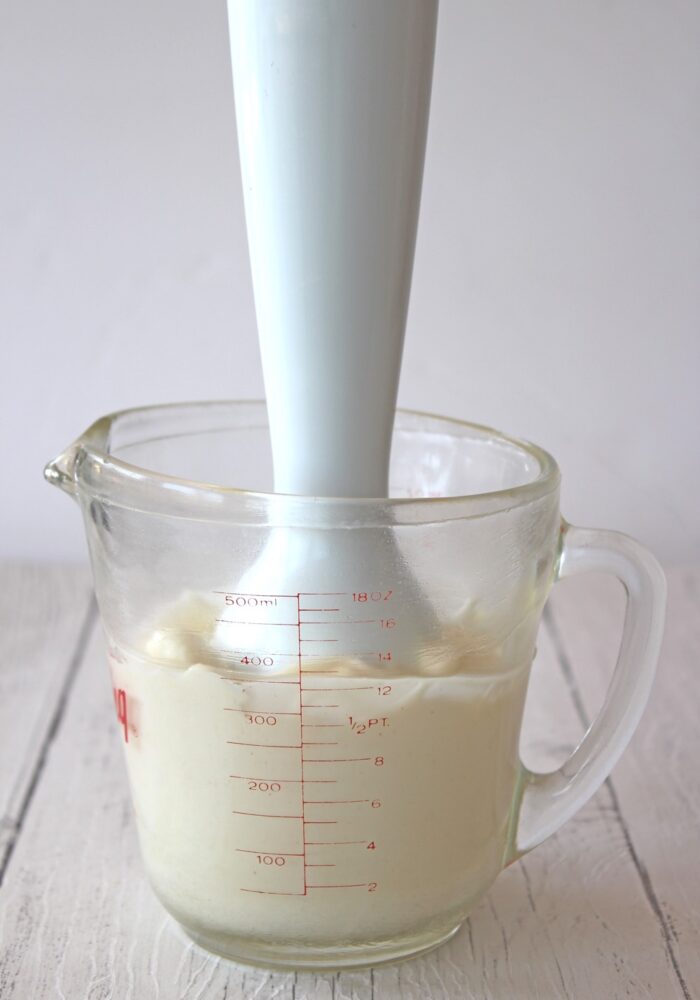
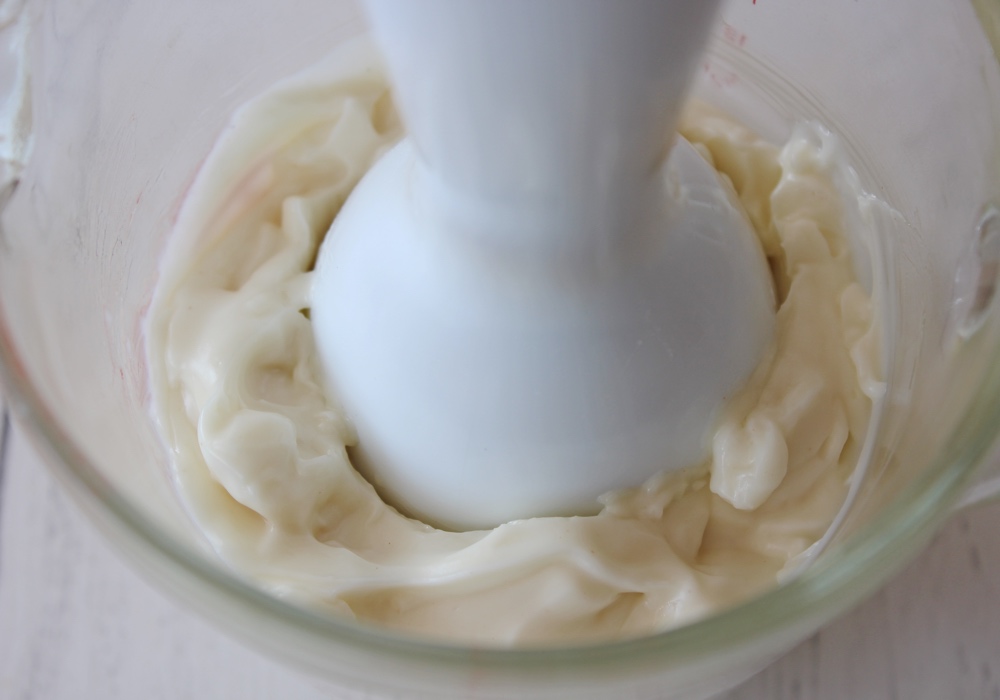
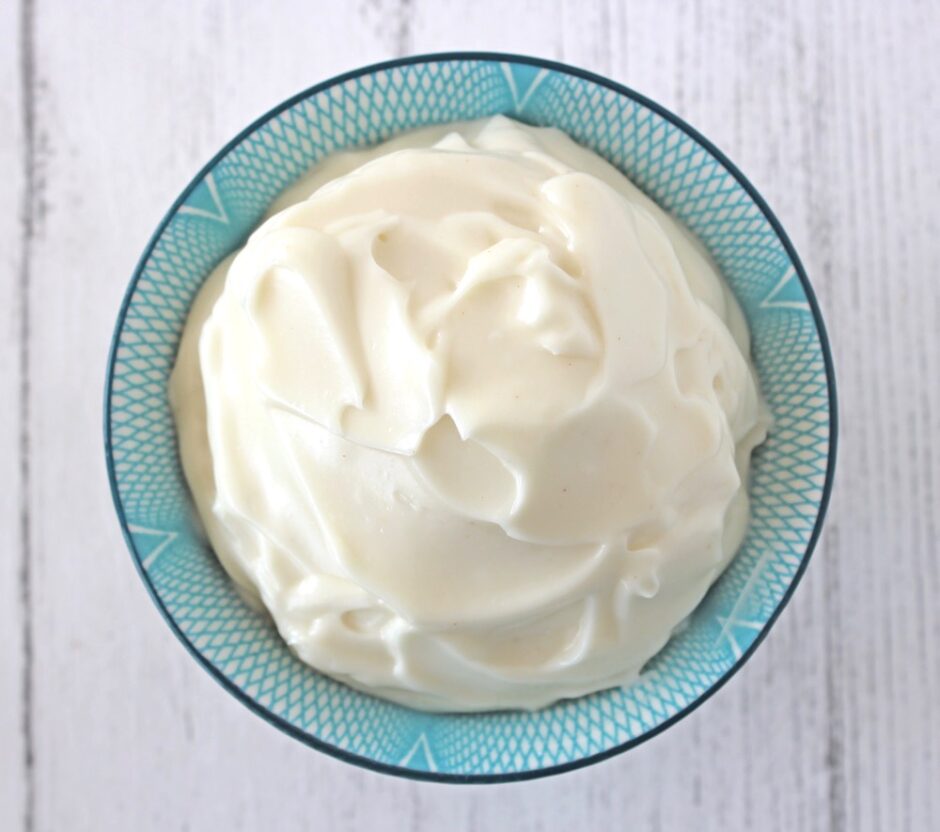
I LOVE IT! Not only does it taste gorgeous, but it’s really fun to make too! Literally within seconds of whizzing the runny ingredients together, they turn into this mass of thick, white, creamy deliciousness.

Quick and Easy Vegan Home-Made Mayonnaise

The great thing about making your own mayonnaise is that you can adjust the flavour to suit your personal preferences. A lot of mayo recipes that I’ve tried are too acidic for my taste buds, so I cut right back on the vinegar in my version.

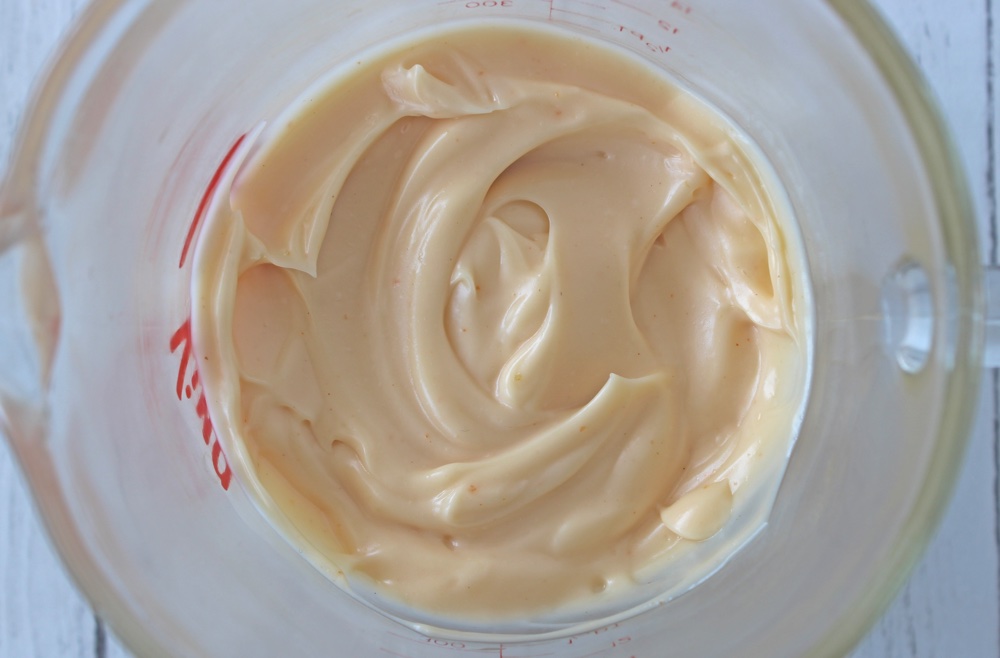
You can also switch up the flavour of the mayonnaise depending on what you’re planning to serve it with. For my vegan doner kebabs and smashed chickpea sandwich fillings, I love to add a couple of teaspoons of sweet chilli sauce to the mayonnaise for a touch of spiciness.

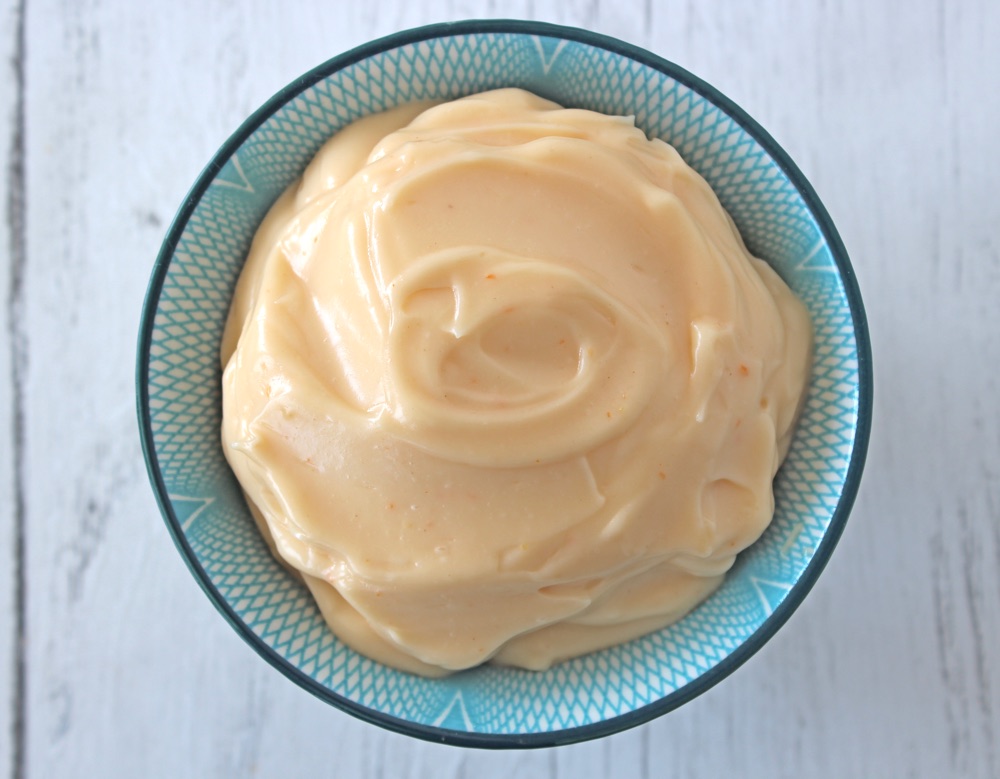
Easy Home-Made Vegan Chilli Mayonnaise

Easy Vegan Home-Made Chilli Mayonnaise

Another big advantage to making your own mayo is that it is super cheap! Using sunflower oil, it cost just 34p to make 240ml / 1 cup’s worth of mayo. (The equivalent amount of Vegenaise costs £1.77).

Using organic oil, it still only cost 70p (compared to £2.25 for the equivalent amount of organic Vegenaise).

If you’re on a budget or can’t get access to a decent vegan mayo, then home-made is definitely the way to go.

Recipe Card

Easy Vegan Home-Made Mayonnaise (Dairy-Free | Egg-Free)

Quick & Easy Vegan Mayonnaise

This delicious, quick & easy vegan mayonnaise uses basic pantry ingredients, is ready in five minutes and costs as little as 34p! In the Notes section below, you'll also find a Sweet Chilli Mayo option.
5 from 7 votes
Hands-on Time 5 minutes
Total Time 5 minutes
Course Salad
Servings 16

Ingredients
 

  • 3 TBSP aquafaba I use the water from a can of unsalted chickpeas
  • 1 tsp apple cider vinegar
  • 1 tsp maple syrup or agave nectar
  • 1 tsp Dijon mustard
  • ½ tsp salt
  • 200 g / 1 cup neutral-tasting oil e.g. organic rapeseed (canola) oil, sunflower oil, grapeseed oil
  • Sweet chilli option [See Note below]

Instructions
 

  • Place the aquafaba, vinegar, syrup, mustard and salt in a jug. Using a stick (immersion) blender, whizz the ingredients until fully combined.
  • Add 2 TBSP oil and pulse the blender until the oil is just combined (this only takes a few seconds). Add another 2 TBSP oil and pulse for a few seconds again until combined. Repeat this process, adding just 2 TBSP oil at a time, until all the oil is incorporated and the mayonnaise has become thick and creamy. (It is important to add the oil slowly so it has a chance to emulsify).
  • Taste test and add a touch more vinegar, mustard, sweetener or salt, if desired.
  • Transfer the mayonnaise to a clean glass jar and refrigerate. The mayonnaise should keep for up to 2 weeks.

Notes

For me, the ratio of ingredients in this recipe produces a mayonnaise that is very close in taste to my favourite store-bought mayo (Vegenaise). However, feel free to adapt the quantities of vinegar, sweetener, mustard and salt to suit your own taste buds.
Sweet Chilli Option: Add 2 tsp sweet chilli sauce into the mayonnaise and whizz to combine (I use Lingham’s Chilli Sauce). Taste test and add more sweet chilli, if desired.
Thanks to Hippy Chick for inspiring this recipe!
Keyword Egg-free Mayonnaise, Gluten-Free, Vegan Mayonnaise
Tried this recipe?Let us know how it was!

Pin for later ⬇️

Easy Vegan Home-Made Mayonnaise

If you make this Quick and Easy Vegan Mayonnaise, I’d love to hear your feedback and any suggestions for adaptations! Tag your photos with #bitofthegoodstuff on social media – I always love to see your creations! You can also connect with me on my social media channels here: InstagramFacebook, Pinterest.   

With love,

Sharon xx
SaveSave

SaveSave

SaveSave

Lemon Berry Crumble Slice (Dairy-free / Egg-free / Vegan)

Jump to Recipe

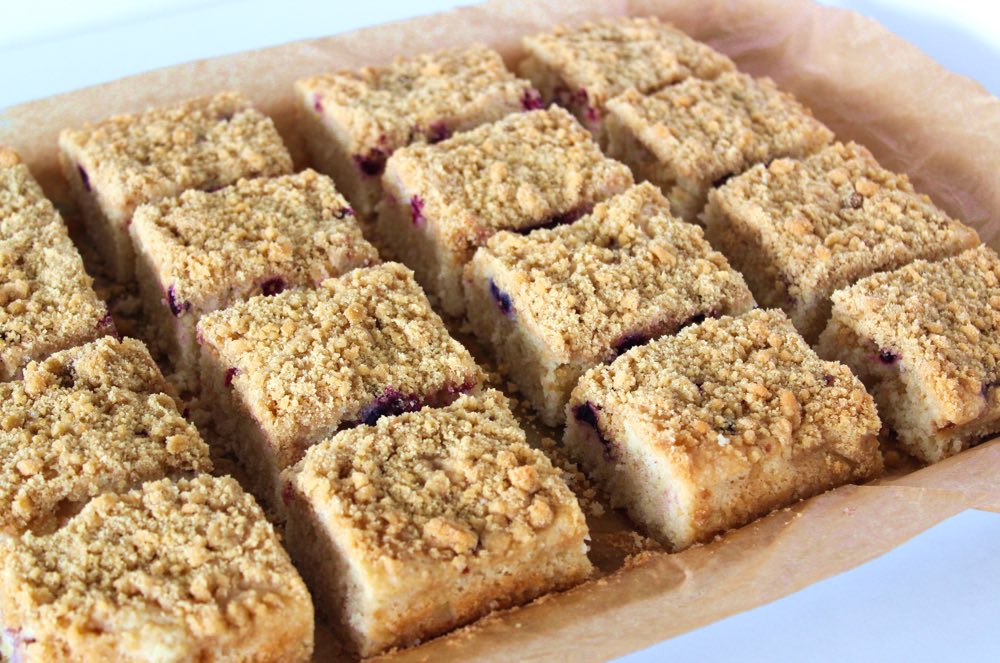
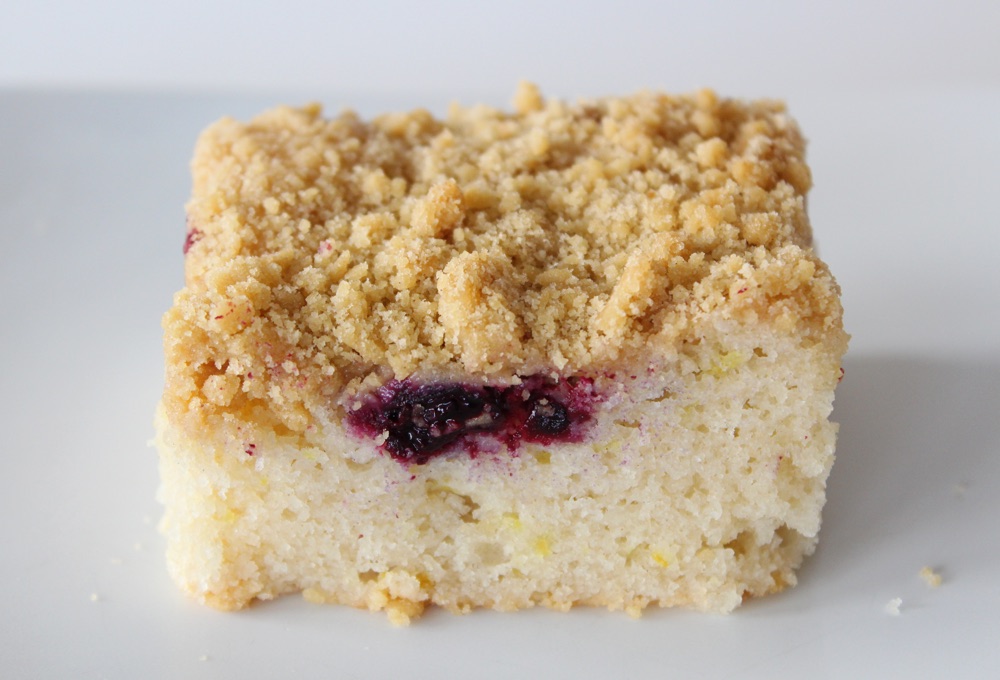
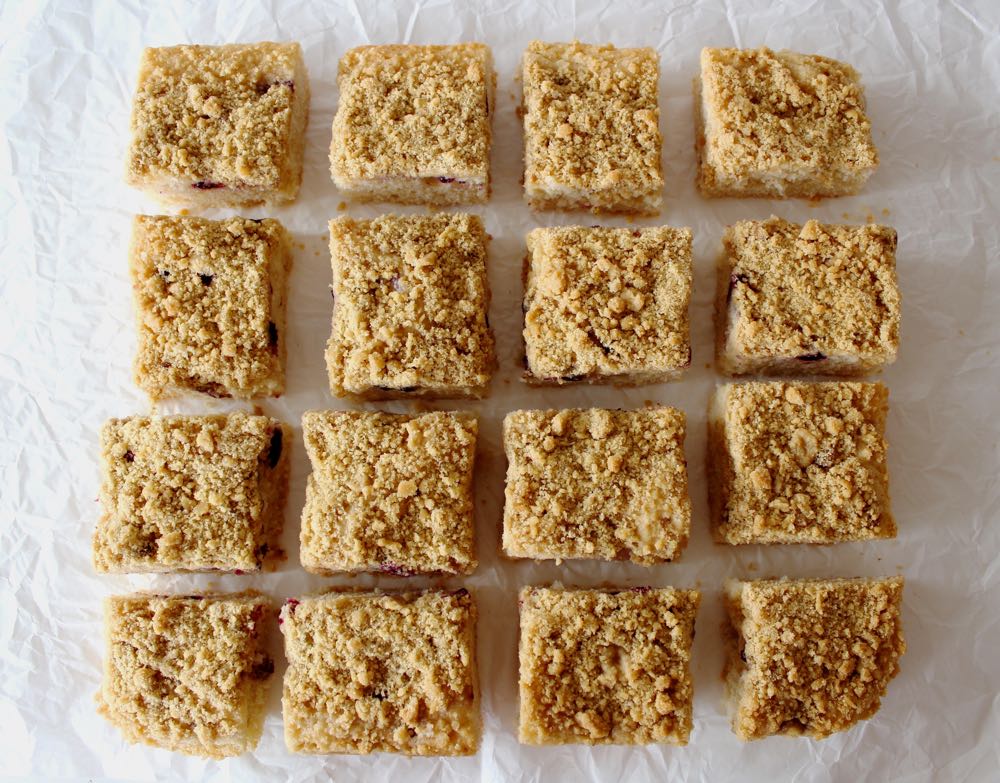
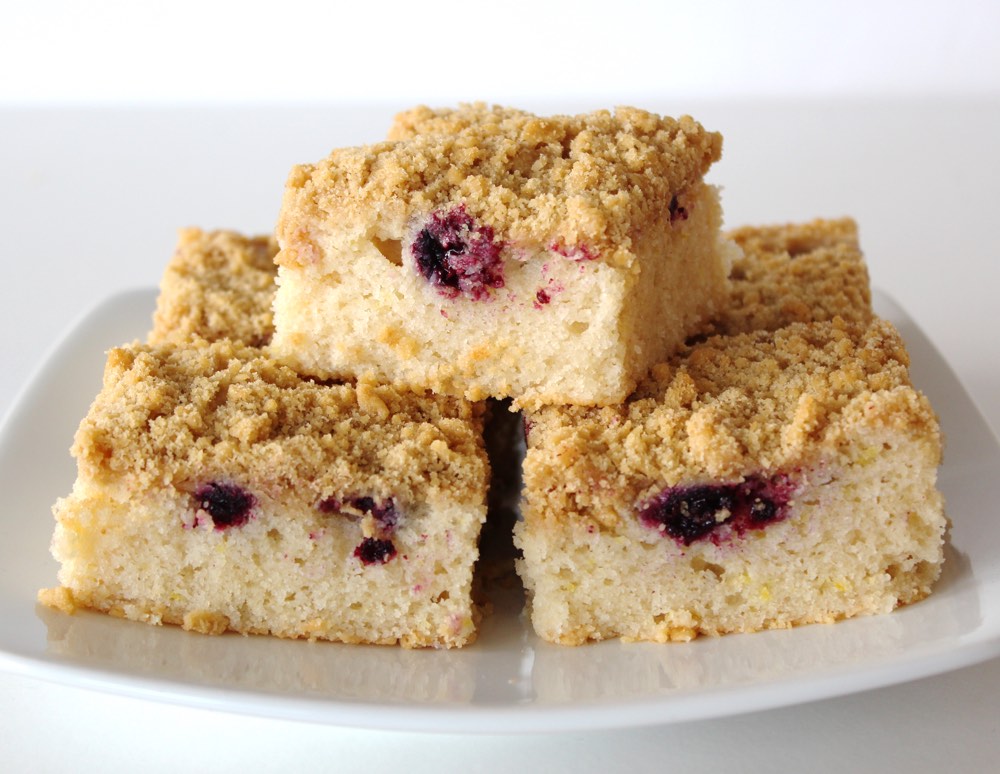
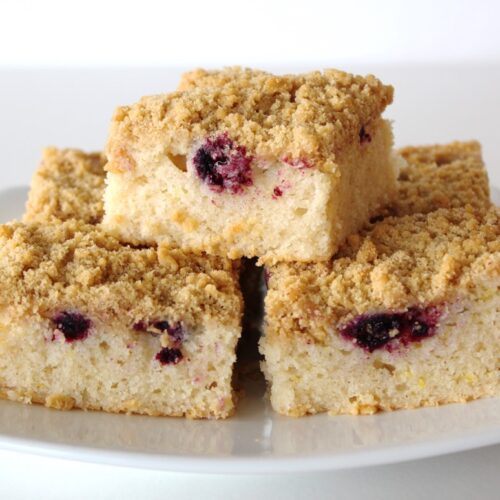
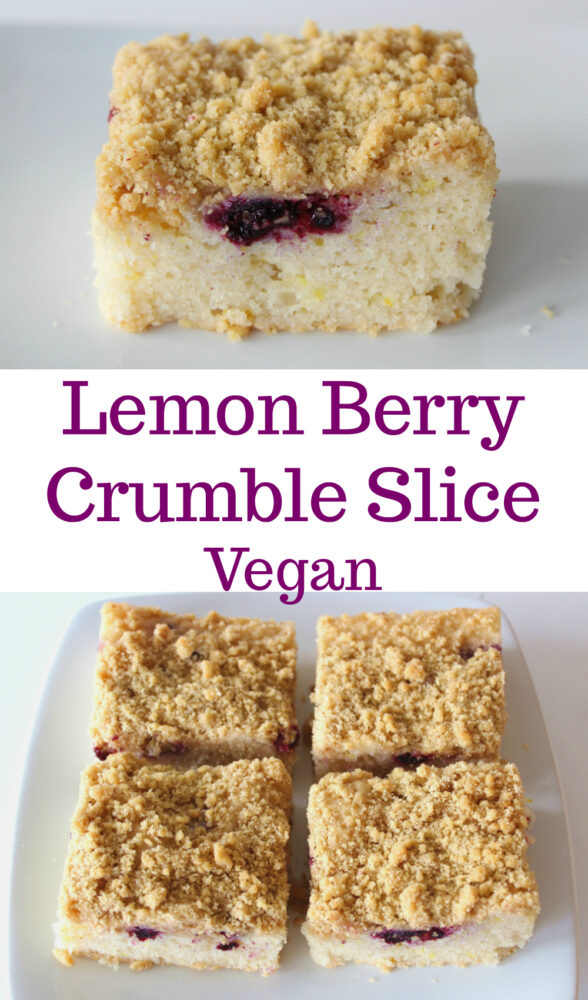
In today’s post, I’m sharing a recipe for a delicious baked treat – Lemon Berry Crumble Slices. These slices consist of a fluffy lemon sponge, studded with juicy berries and topped with crumble. They use basic pantry ingredients and are simple to make, yet they’re bound to impress your family and friends!

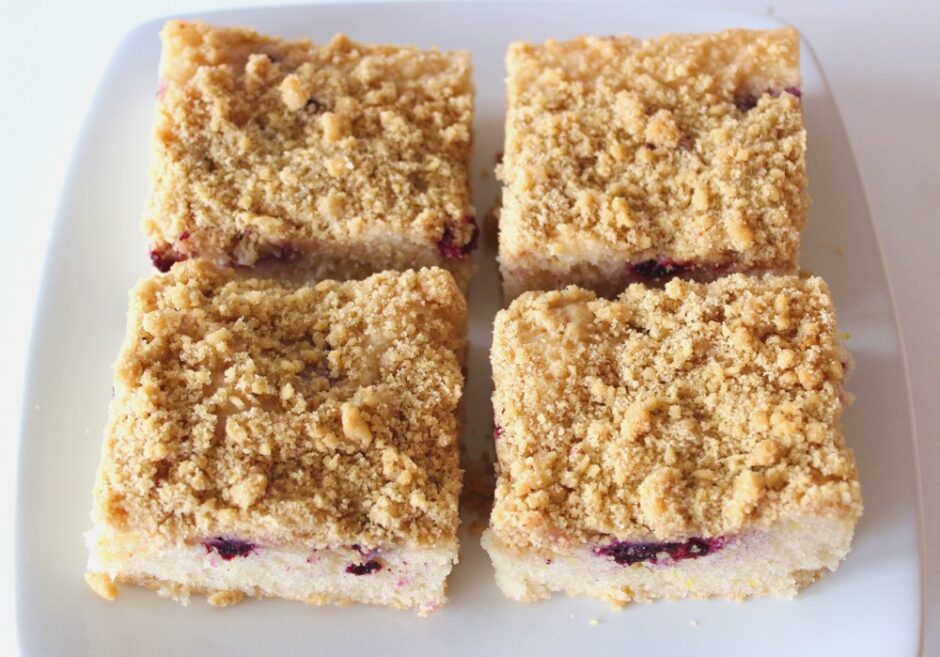
Vegan Lemon Berry Crumble Bar

Vegan Lemon Berry Crumble Bar

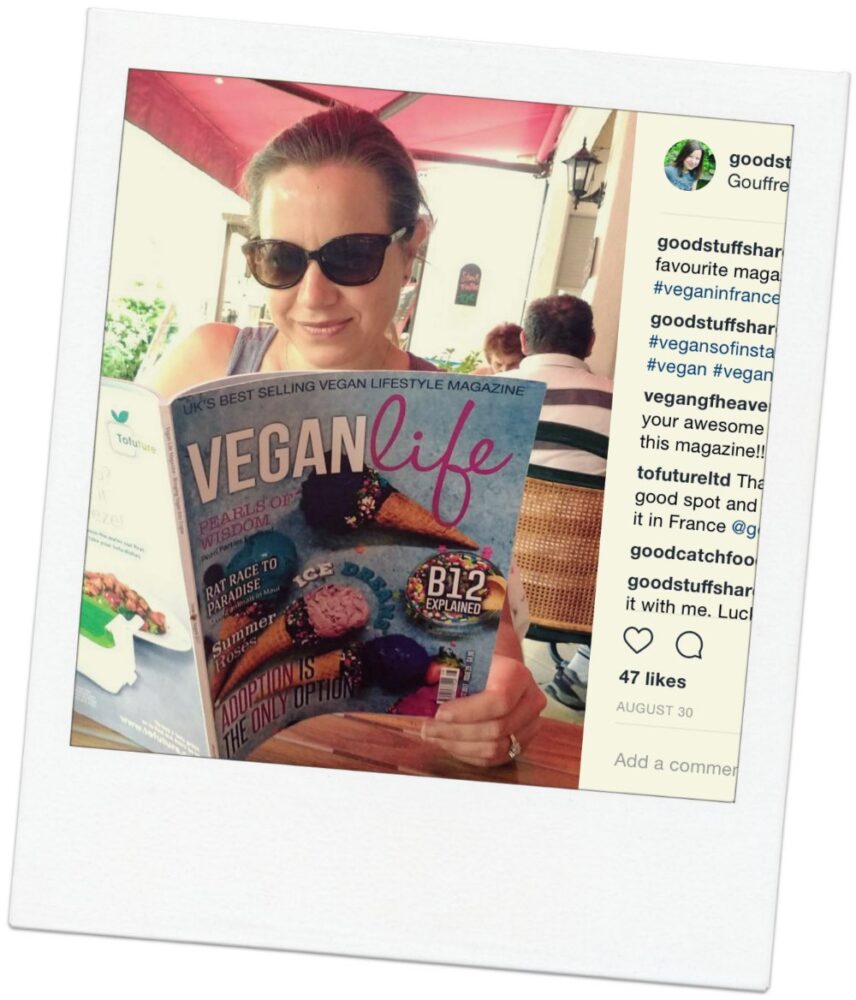
The August edition of the Vegan Life magazine landed on my doorstep just before we set off on our family summer vacation, so I tucked it into my luggage and looked forward to reading it when we arrived in the Dordogne.

Vegan Life magazine

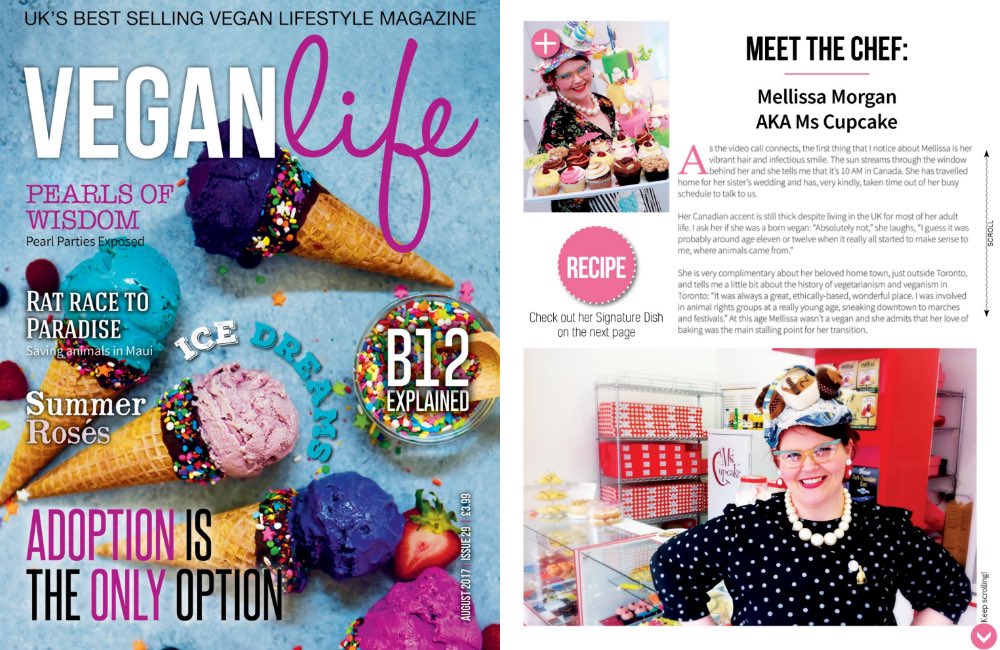
One of the first articles that caught my eye was an interview with Mellissa Morgan (aka Ms Cupcake). Canadian born, Mellissa now lives in London and runs the infamous Ms Cupcake bakery in Brixton. I love Mellissa’s kooky, fun style and vivacious character. Whenever I see photos of her (especially in those wacky cupcake hats!), they always bring a smile to my face.

Vegan Life Issue 29

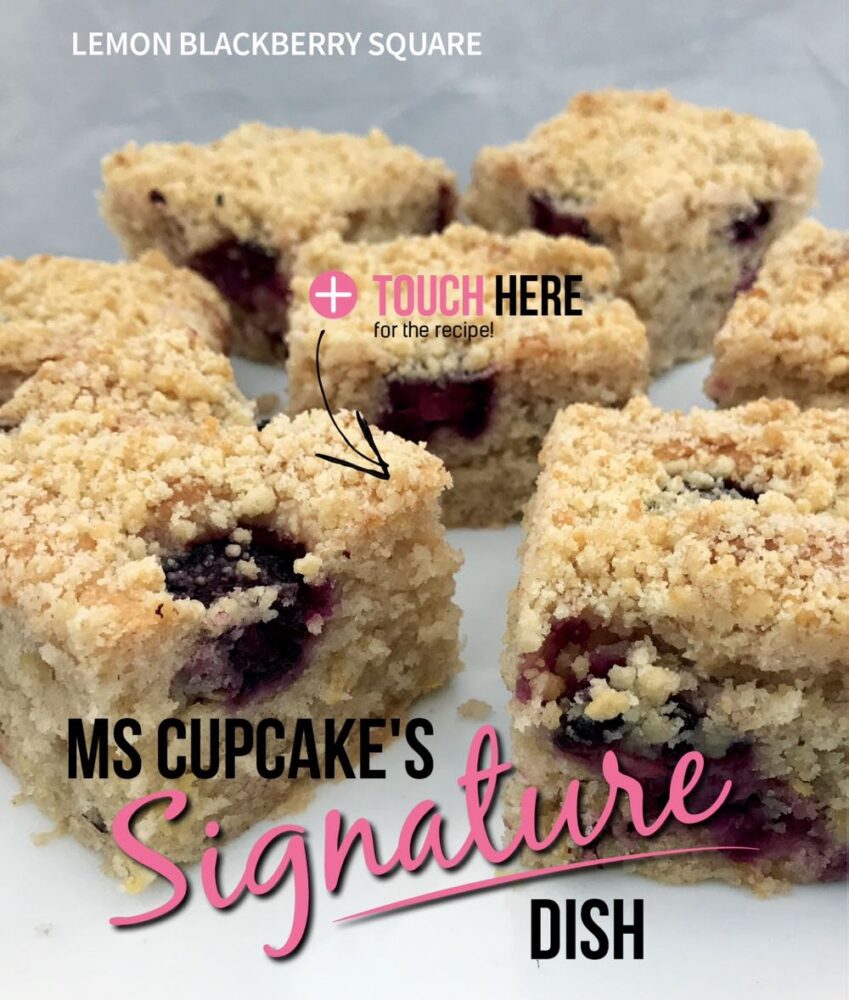
Along with the interview, Mellissa also shares her Signature Dish… the Lemon Blackberry Square. It sounded delicious and, since I’d never tried a crumble-topped sponge before,  I was intrigued to find out how it would taste. I bookmarked the page and when we arrived back in England, I headed into the kitchen and got baking.

Vegan Life Ms Cupcake Signature Dish

This cake is baked in a large rectangular pan; what we would call a ‘Traybake’ here in the UK. (I’m not sure if they’re called the same elsewhere).  I love traybakes as they’re a convenient way to bake a large amount of cake in one go, so perfect for parties, buffets, cake sales, or when you want to stock the freezer with cake ready for friend and family visits.

Vegan Lemon Berry Crumble Bars

I’ve made this traybake twice already this month, and it’s been a huge hit with everyone that’s tried it. The sponge layer is light and fluffy, with a beautiful, zesty lemon flavour. I would never have thought of putting crumble on top of sponge, but it works really well, especially with that layer of juicy berries in-between. The first time I made the cake, I didn’t feel that there was quite enough berries so second time round, I increased the quantities. Also, on Mellissa’s suggestion, I doubled the quantity of crumble. Like her, I’m a crumble-lover, and this was definitely a good move! Below, I share Mellissa’s recipe with my light adaptations.

Vegan Lemon Berry Crumble Bar

Recipe Card

Lemon Berry Crumble Slice (Dairy-free / Egg-free / Vegan)

This recipe has been lightly adapted from Ms Cupcake’s Signature Dish published in Vegan Life magazine Issue 29. It’s a delicious treat, consisting of a zesty lemon sponge studded with juicy summer fruits (berries, cherries, blackcurrants) and topped with crumble. It yields a large quantity of cake, so perfect for parties, buffets, cake sales or when you want to stock your freezer with cake ready for friend and family visits.
Hands on time 20 minutes
Total Time 2 hours 30 minutes
Course Afternoon Tea, Treat
Servings 20

Ingredients
 

Crumble mix

  • 200 g / 1½ cups plain (all-purpose) or self-raising flour
  • 100 g / ½ cup brown or demerara sugar
  • 100 g / ½ cup dairy-free spread / vegan butter

Cake mix

  • 450 g / 3¼ cups self-raising flour
  • 200 g / 1 cup unrefined sugar (I used golden caster sugar)
  • zest of 2 unwaxed/organic lemons
  • tsp bicarbonate of soda (baking soda)
  • 1 tsp vanilla extract
  • 300 ml / 1¼ cups soya milk
  • 200 ml / 1 cup sunflower oil or other flavourless oil
  • 80 ml / ⅓ cup freshly squeezed lemon juice
  • 145 g / 1 cup fresh or frozen blackberries, blackcurrants and/or cherries. (I used Sainsbury’s Frozen Black Forest Fruits)

Instructions
 

  • Line a 33cm x 23cm (13” x 9”) baking pan with non-stick baking paper. Preheat the oven to 180C (160C fan) / 350F.
  • Make the crumble: In a bowl, mix together the flour and sugar. Rub in the dairy-free spread/vegan butter using your finger tips. Set to one side.
  • In a separate bowl, add the flour, sugar, lemon zest and bicarbonate of soda, and stir through to combine.
  • Add the vanilla extract, soya milk, oil and lemon juice to the dry ingredients and stir until thoroughly combined (but do not over mix). Spoon the mixture into the prepared tin.
  • Slice any large berries into halves or quarters. Distribute the fruit evenly in the pan and lightly press them into the cake batter.
  • Sprinkle the crumble evenly on top.
  • Bake for 30 minutes, or until a skewer inserted through the middle comes out clean.
  • Leave the cake in the tin until completely cool, then slice. I divide mine into 20 slices, measuring 7cm x 6cm.
  • Stored in the refrigerator, the cake will keep for up to 5 days. It also freezes well.
Keyword Dairy-Free, Egg-Free, Vegan Baking, Vegan Cake
Tried this recipe?Let us know how it was!

Pin for later ⬇️

Vegan Lemon Berry Crumble Bar

 Big thank you to Ms Cupcake and Vegan Life for sharing this lovely recipe 💜

Happy baking everyone!

With love,

Sharon xx
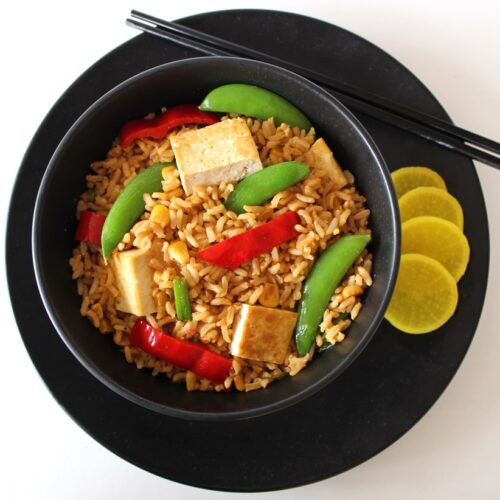
Wagamama-Inspired Yasai Cha Han Donburi (Brown Rice Bowl with Stir-Fried Veggies and Tofu)

Jump to Recipe

In early Summer, my family were eagerly anticipating a trip to Wagamamas. On the way there, we psyched each other up, talking about how much we were looking forward to tucking into our favourite Wagamama dish – the Yasai Cha Han Donburi. Upon arrival, the waiter showed us to our seats and handed us the menu. Our eyes immediately moved to the spot where the dish is usually listed, but it wasn’t there. We scanned both sides of the menu but it was nowhere to be seen. We called over the waiter and he explained that they had a new summer menu. Sadly, the Yasai Cha Han Donburi hadn’t made the cut.

Has that ever happened to you? Where you’re looking forward to tucking into your favourite dish at a restaurant, or you specifically go to that restaurant because you’re craving a dish… only to find that it’s been taken off the menu. It’s happened to my family a few times and it’s always such a bummer.

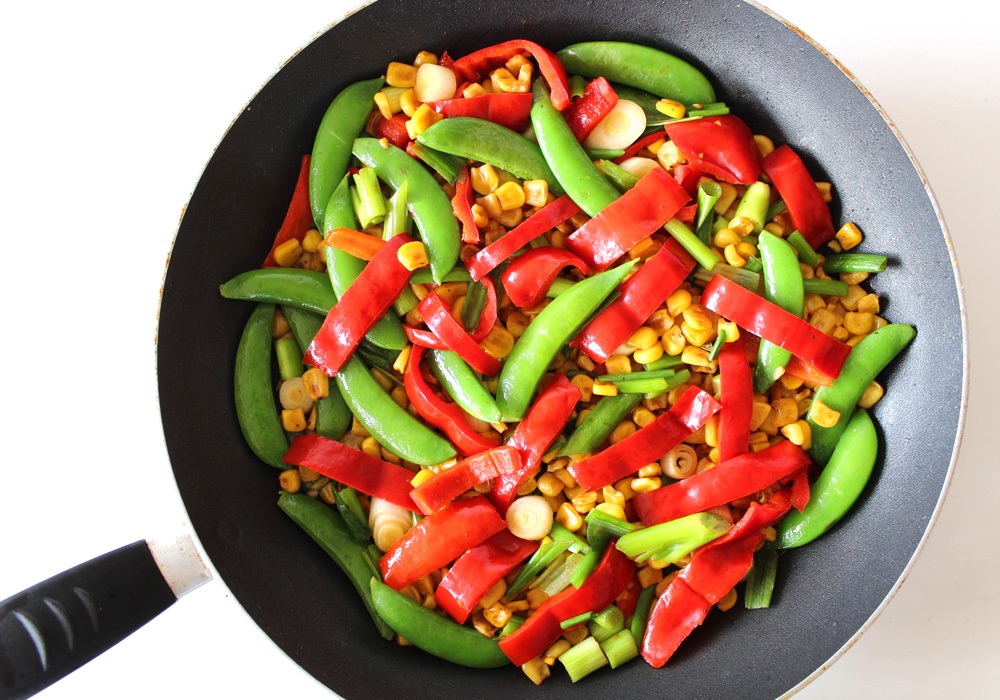
Stir Fry Veg

Well this time, I decided to look on the bright side. I’d been meaning to try my hand at making the Yasai Cha Han Donburi at home for a while, and now was the perfect opportunity. I could still remember what the bowl tasted like and its main components, so I set to work re-creating it.

One of my favourite parts of the bowl is the flavouring added to the rice, so I really wanted to nail this part. I chose to use two of my favourite pantry staples as the basis of the dressing – Clearspring Organic Tamari Sauce and Meridian Organic Toasted Sesame Oil. The tamari provides the ‘umami’ flavour, while the toasted sesame oil add a touch of smokiness. I then added a tablespoon each of maple syrup and rice vinegar for some ‘sweet ’n’ sour’ flavour, and finished it off with a sprinkling of garlic granules. I was extremely happy with the way the dressing turned out. For me, it’s the perfect compliment to a Japanese-inspired rice bowl.

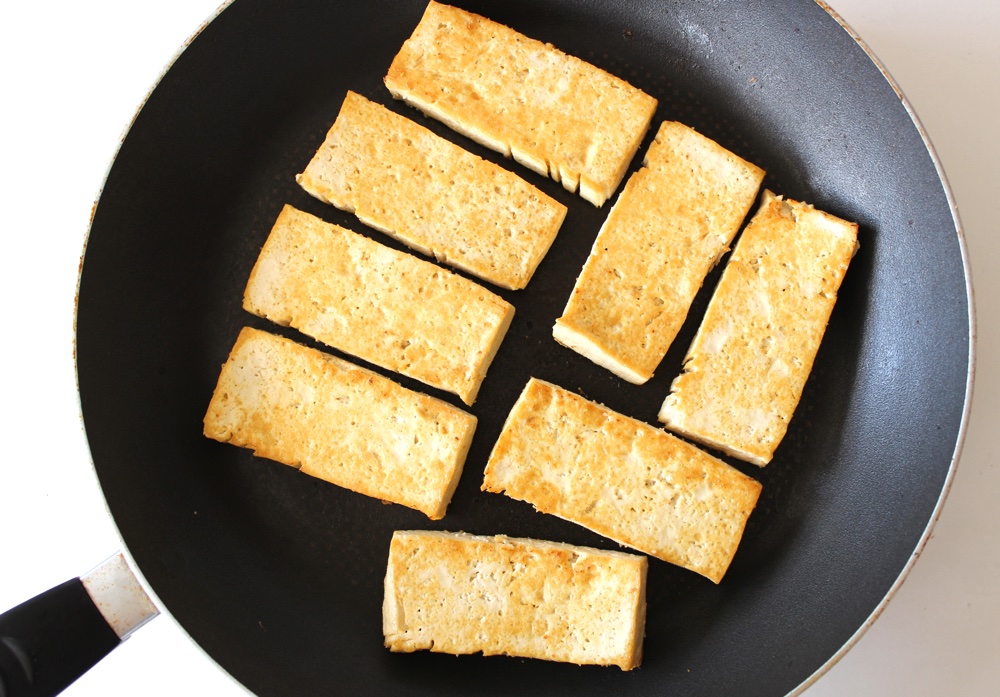
For this dish, I prefer to use original tofu, which I press for 30 minutes then pan-fry. If you’ve not cooked tofu from scratch before, rest assured that it’s not difficult at all. I’ve given some tips in the recipe below of how I do it.

Pan Fried Tofu

I absolutely adore this rice bowl, and it’s been a huge hit with the rest of the family too. I’ve made it multiple times these past couple of months and we never tire of it. The flavour is as good (if not better, in my humble opinion hehe) than the Wagamama version. It’s far cheaper too!

Recipe Card

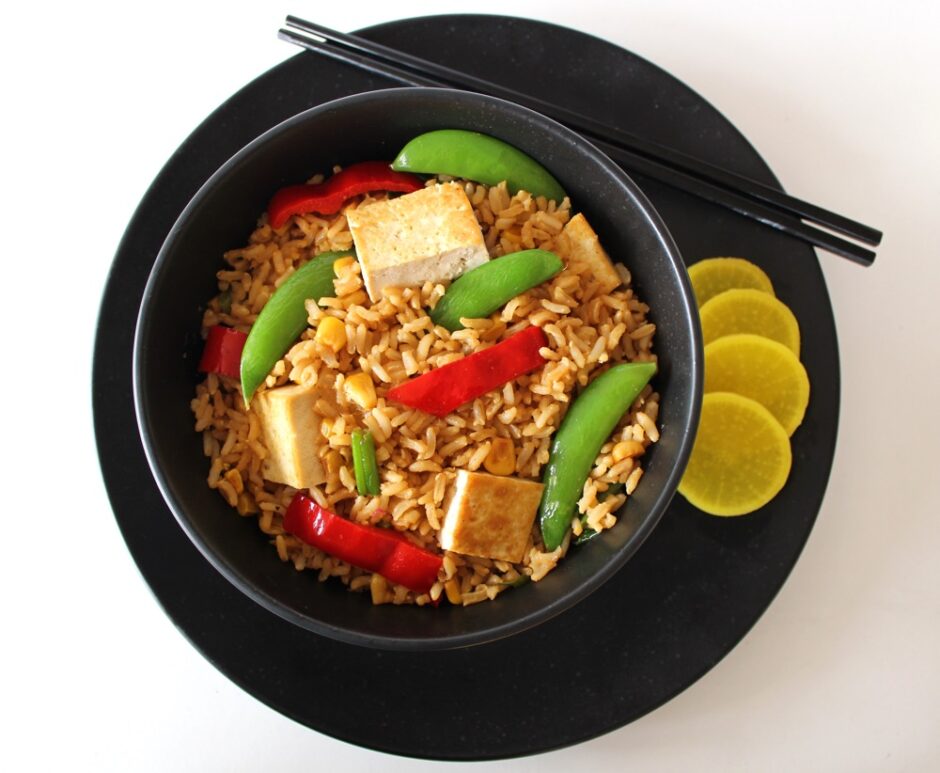
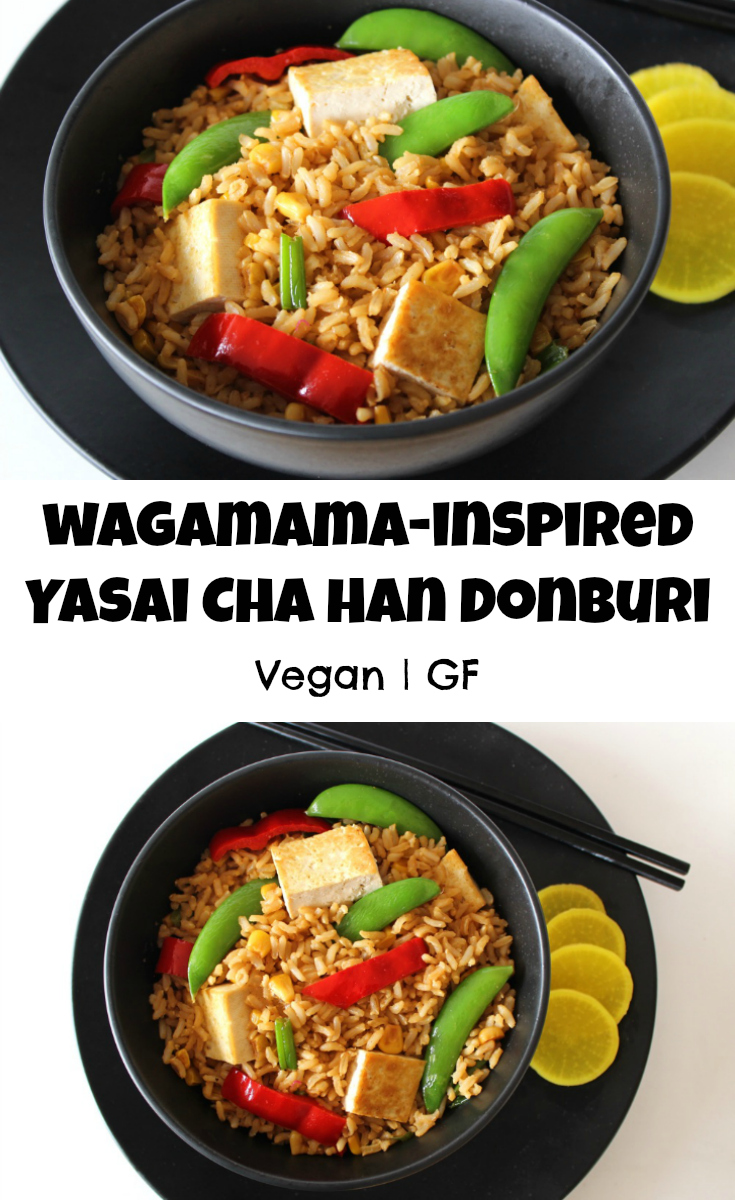
Yasai Cha Han

Wagamama-Inspired Yasai Cha Han Donburi (Brown Rice Bowl with Stir-Fried Veggies and Tofu)

This recipe was inspired by Wagamama’s Yasai Cha Han Donburi which, at the time of writing, has sadly been taken off their menu. No matter though, as this version is just as delicious and a fraction of the cost.
Hands on time 30 minutes
Total Time 1 hour 10 minutes
Course Dinner
Cuisine Japanese
Servings 3

Ingredients
 

  • 1 block firm tofu (about 400g / 14 oz)
  • 300 g / 1½ cups brown rice rinsed and drained
  • 750 ml / 3 cups water
  • ½-1 TBSP toasted sesame oil
  • ¼ tsp garlic granules or garlic powder
  • pinch of salt
  • 1 medium onion sliced
  • 175 g / 1 cup sweetcorn (I use canned)
  • 1 sweet romano pepper or red bell pepper
  • handful of sugar snap peas

Dressing

  • 3 TBSP tamari or reduced-salt soy sauce
  • 1 TBSP toasted sesame oil
  • 1 TBSP rice vinegar or substitute with another white vinegar
  • 1 TBSP maple syrup
  • ½ tsp garlic granules or powder
  • Slices of pickled radish for garnish (optional)

Instructions
 

  • Press the tofu for 30 minutes (See Note 1).
  • Cook the rice (see Note 2).
  • Prepare the dressing: Place all the dressing ingredients in a small bowl and whisk together with a fork.
  • Once pressed, slice the tofu into eight long rectangles. (I find it far easier and quicker to pan-fry and flip eight pieces of tofu rather than a panful of tofu cubes).
  • Heat ½ TBSP sesame oil in a large non-stick frying pan (skillet) on medium-high heat. Once the oil is hot, place the tofu in the pan (be careful as the oil may spit). Flip the tofu over, so that both sides are coated in oil. Sprinkle the garlic granules and a pinch of salt over the tofu. Leave to cook until golden brown on the underside, then flip over and cook until browned on the second side. Transfer to a plate and slice into bite-size pieces. Place in a warm oven while you prepare the veggies.
  • Add a splash more oil to the pan, if needed. Add the onion and stir fry on medium heat for 2 minutes. Add the sweetcorn and continue stir frying until it just starts to brown. Finally, add the sweet romano (or bell) pepper and sugar snap peas to the pan and stir fry until warmed through. Stir in 1 TBSP of the dressing and set aside.
  • Once the rice is ready, tip into a large bowl. Drizzle in the remaining dressing and stir through until thoroughly coated. Add the veggies and tofu and stir through. Divide between four bowls. Garnish with picked radish (if desired) and serve.
  • Any leftovers can be stored in the fridge for 24 hours. As with any rice dish, make sure the leftover rice is cooled quickly and refrigerated within an hour.

Notes

Note 1: Pressing tofu: Here’s my preferred way to do it (since I don’t have a tofu press): Slice the block of tofu through the middle into two equal halves. Place the tofu on a rimmed baking tray. Place a chopping board on top of the tofu, followed by a heavy object to weigh it down. The water collects in a pool round the tofu. After 30 minutes, drain off the liquid. Give the tofu a quick pat with kitchen paper to soak up any residual liquid, then it’s good to go.
Note 2: Cooking brown rice: My preferred way to do this is using the absorption method. Here’s how I do it: Place the rinsed rice in a large, heavy-bottomed saucepan along with the water. Bring to the boil, then reduce the heat and simmer uncovered for 10 minutes. Reduce the heat to very low, cover with a tight-fitting lid and cook for a further 20 minutes. When air pockets have appeared in the rice, it’s ready. Remove from the heat and leave to rest for 5 minutes, covered with the lid.
Keyword Dairy-Free, Easy Vegan Meals, Rice, Tofu, Vegan Dinners
Tried this recipe?Let us know how it was!

Pin for later ⬇️

Yasai Cha Han Donburi

Big thank you to Suma for supplying me with the gorgeous ingredients for this bowl. It’s hugely appreciated!

Much love,

Sharon xx

SaveSave

SaveSave

SaveSave

SaveSave

Vegan Pear and Yogurt Cake (Dairy-Free / Egg-Free)

Jump to Recipe

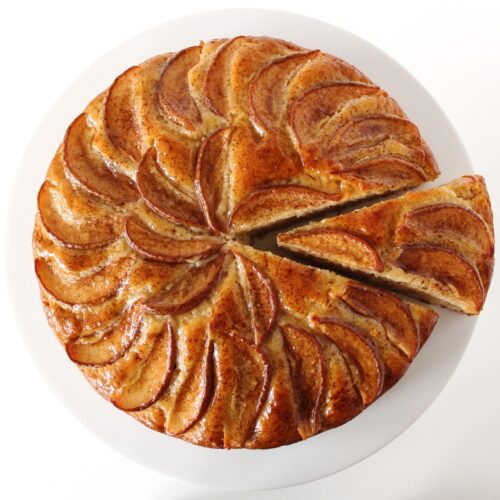
In today’s post, I’m sharing a recipe for a delicious Pear and Yogurt Cake. While simple to make, this cake looks pretty impressive with its glistening pear and cinnamon-speckled top. The cake itself has a beautifully moist, light and fluffy texture and is flavoured with hints of vanilla and almonds.

I know some people with gluten sensitivities are able to tolerate spelt flour and this cake works just perfectly with white spelt flour. Otherwise regular plain (all-purpose) flour or even a combination of half white/plain flour and half wholemeal or chapatti flour works great.

Vegan Pear and Yoghurt Cake

The inspiration for this cake was a visit during May half-term break to one of my favourite cafes in Bristol – Roll for the Soul. This community-run cafe also houses a cycle workshop and event space. It has a great atmosphere and lovely food and coffee, so I highly recommend a visit if you’re in the area [UPDATE: Sadly Roll for the Soul closed down in September 2017 ]

Roll for the Soul is in one of my favourite districts of Bristol. We often head over there to check out the street art. One of my favourite street artists is Silent Hobo and I actually bumped into him a few weeks ago at Montpelier Railway station where he was putting the finishing touches to this mural. Isn’t it beautiful?

Silet Hobo Mural Montpelier Bristol

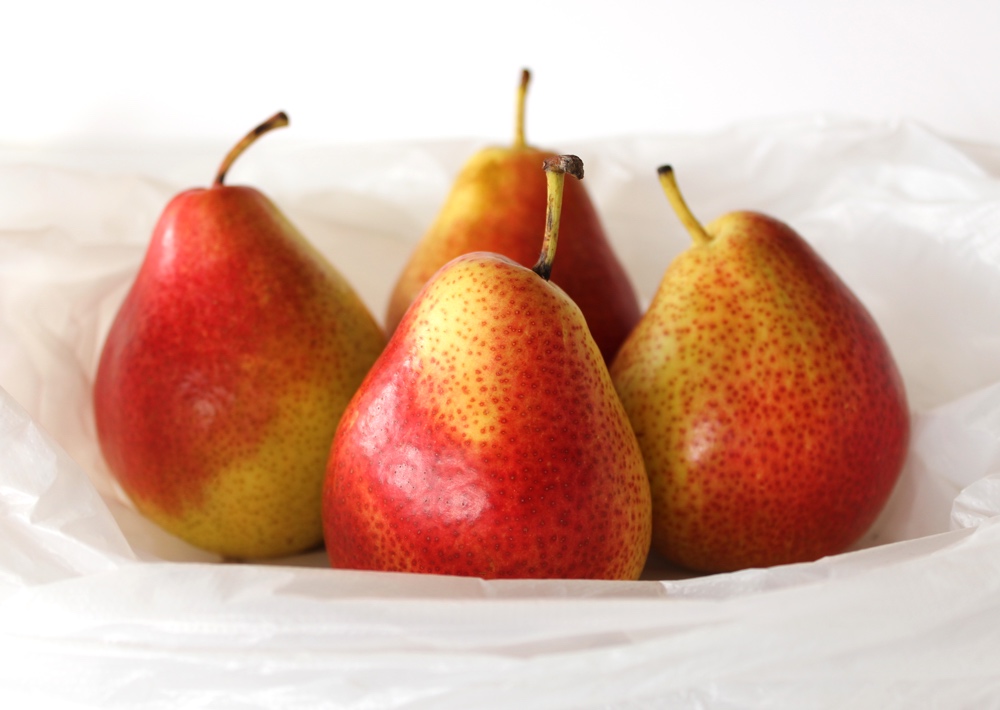
Last week, at Roll for the Soul, I had my first-ever slice of Pear Cake and it was so delicious that I couldn’t wait to try re-creating it at home. Back in Bath, I headed to the fruit & veg market stall in Kingsmead Square where I spotted these beauties which would be just perfect for topping a cake.

Pears

I’m pretty sure the Pear Cake I had at Roll for the Soul had a hint of almonds, so I decided to use my Orange & Almond Cake recipe (a reader favourite!) as the basis for creating my Pear Cake. I switched the milk for yogurt, reduced the amount of ground almonds to give it a more ‘spongy’ texture and tweaked the wet/dry ingredient ratio. The resulting cake turned out beautifully!

It slices well too. It can be picked up but, for me, this is the kind of cake that’s best eaten with a fork. Far more elegant that way!

Vegan Pear and Yoghurt Cake

Just in case it was a fluke or ‘beginner’s luck’, I made two more cakes to check the recipe. Again, both cakes came out perfect so I’m now happy to release the recipe into the world. I hope you have as much success with it as I have.

Recipe Card

Pear and Yogurt Cake (Dairy-Free / Egg-Free / Vegan)

This cake is simple to make, but looks pretty impressive with its glistening pear and cinnamon-speckled top. I’m sure it will wow your friends and family! It would be a great cake to take along to a dinner party or for afternoon tea.
Hands-on time 20 minutes
Total Time 2 hours
Course Afternoon Tea, Treat
Servings 10

Ingredients
 

Wet ingredients

  • 250 ml / 1 cup natural/plain soya yogurt (I use Alpro)
  • 2 tsp apple cider vinegar
  • 100 g / ½ cup golden caster (unrefined cane) sugar
  • 80 ml / ¼ cup maple syrup or maple blend. (I often use Clarks Original).
  • 100 ml / ½ cup organic rapeseed, canola oil or other neutral-tasting oil
  • 1 tsp almond extract
  • 1 tsp vanilla extract

Dry ingredients

  • 280 g / 2 cups white spelt flour (or substitute with plain (all-purpose) flour or half plain flour and half wholemeal (wholewheat) flour)
  • tsp baking powder
  • ½ tsp bicarbonate of soda (baking soda)
  • ½ tsp salt
  • 50 g / ½ cup ground almonds (almond meal)

Topping

  • 1-2 ripe pears
  • generous pinch of ground cinnamon

Glaze

  • 2 TBSP unrefined sugar
  • 4 TBSP water
  • ¼ tsp vanilla extract
  • 1 tsp cornflour (corn starch)

Instructions
 

  • Preheat the oven to 180C (160C fan) / 350F. Grease a 23cm / 9 inch cake tin and line the bottom with non-stick baking paper.
  • In a large mixing bowl, whisk together all the wet ingredients. Taste test and add a touch more almond extract, if desired.
  • In a separate bowl, mix together all the dry ingredients except the ground almonds.
  • Slice the pears ready for the topping. To do this, I slice the pears into halves, then quarters. Using a sharp knife, scoop out the core. Place the pears cut side down on a chopping board, and slice into even-sized thin slices.
  • Sift the dry ingredients into the wet ingredient bowl and stir through to combine (but do not overmix). Add the ground almonds and stir through.
  • Tip the batter into the prepared tin and use a silicone spatula to distribute it evenly. Arrange the pear slices on top, then add a light sprinkle of ground cinnamon.
  • Place on the centre rack in the oven and bake for 50-55 minutes, or until a skewer inserted through the middle comes out clean.
  • While the cake is cooling, prepare the glaze. In a small bowl, mix 1 TBSP water with the cornflour until dissolved. Add the remaining water, sugar and vanilla extract to a small pan over medium heat. Once the sugar has dissolved, whisk in the cornflour paste. Gently bring to the boil, whisking continuously. When the mixture has thickened slightly remove from the heat.
  • Use a silicone pastry brush to lightly coat the top in the glaze (you won’t need to use all the glaze). Leave the cake in the tin until it has completely cooled (it will firm up as it cools), then transfer to an airtight container. The cake will keep for 5 days in the refrigerator. It also freezes well.
Keyword Dairy-Free, Egg-Free, Vegan Baking, Vegan Cake
Tried this recipe?Let us know how it was!


Pin for later ⬇️

Vegan Pear and Yogurt Cake

I’m sharing this recipe with the Suma Blogger’s Network. Big thank you to the lovely people at Suma for supporting Bit of the Good Stuff and for supplying ingredients for my kitchen experiments.

If you bake this Pear and Yogurt cake, I’d love to hear your feedback and any suggestions for adaptations. Tag your photos with #bitofthegoodstuff on social media – I always love to see your creations! You can also connect with me on my social media channels here:  Instagram,  Facebook,  Pinterest.   

With love,

Sharon xx
SaveSave

Sultana Banana Mini Pancakes (Vegan)

Jump to Recipe

Today I’m sharing a recipe for Sultana Banana Mini Pancakes ❤️ They are quick, easy to make and use basic pantry ingredients. They’re perfect for serving as a weekend breakfast or for ‘elevenses’. Me and Lil’ L have made them three times so far and they have proven to be a big hit with the family.

Have you tried adding sultanas to pancake batter before? They work beautifully in these American-style fluffy pancakes. In fact, I loved them so much that I ended up adding more than the original recipe called for.

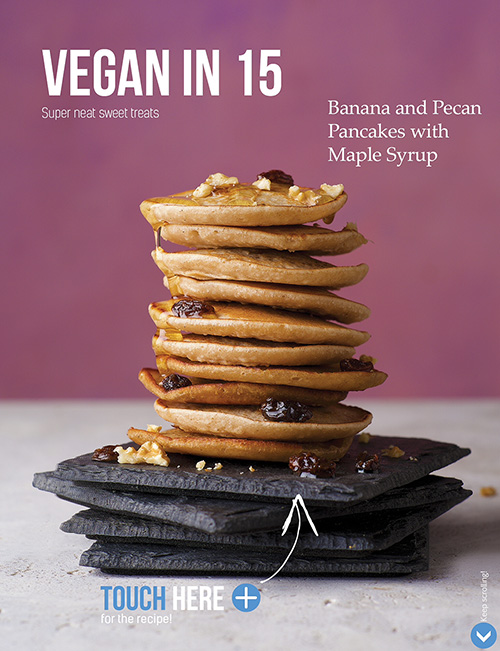
The original recipe is from Kate Ford’s new cookbook ‘Vegan in 15’ and was published in this month’s Vegan Life magazine.

Check out that cute pancake stack!

Vegan Life Issue 24 Pancakes

* Disclaimer: Vegan Life kindly sent me a complimentary copy of this magazine

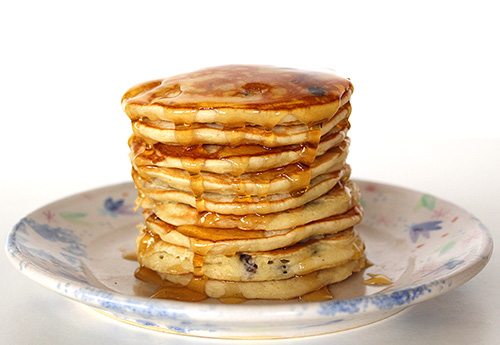
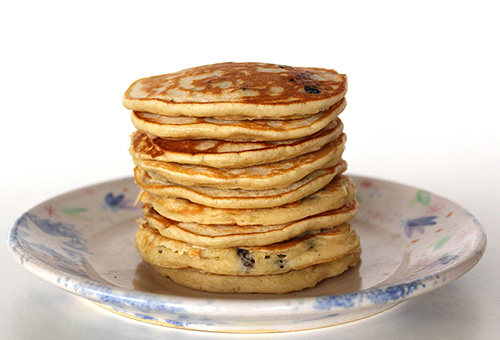
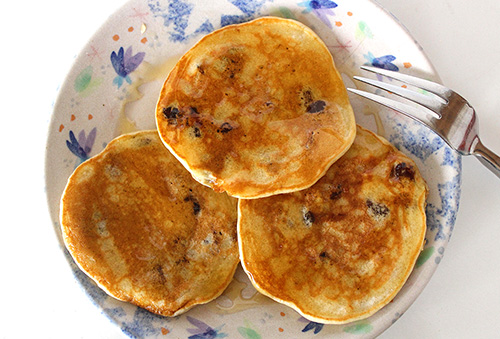
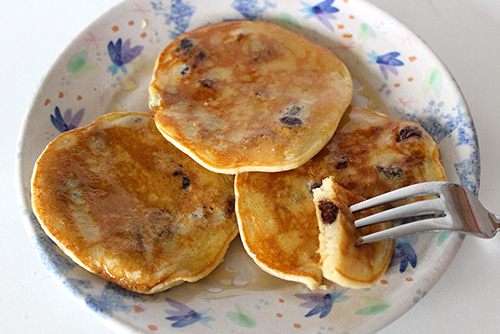
And below is my little pancake stack, before the obligatory drizzle of maple syrup. As you can see, I still haven’t learnt the art of food styling 😊 I still just plonk the food on a plate or in a bowl and click the shoot button on the camera.

Well at least you know how they will turn out when you make them, and the pancakes themselves look pretty similar to the ones above, don’t you think? I just need to work on the presentation.

Sultana Banana Pancakes

I did tweak Kate’s pancake recipe ever so slightly, increasing the quantity of sultanas (as we were enjoying them so much!) and omitting the nuts from the batter (so we could keep them as an option for sprinkling on top instead). I found that the flour conversion from grams into cups in the Vegan Life magazine was slightly off (according to my scales and cups anyhow!) so I’ve taken this into account in the recipe I share below.

Vegan 
Sultana Banana Pancakes

I usually get nine pancakes out of the batter, which means three pancakes each for me and the boys.

As soon as the photoshoot was over, you can guess where these three ended up.

Sultana Banana Pancakes

Recipe Card

Vegan Sultana Banana Pancakes

Sultana Banana Mini Pancakes (Vegan)

These mini pancakes are perfect for serving as a weekend breakfast or for ‘elevenses’. The recipe is lightly adapted from the Banana and Pecan Pancakes recipe in Kate Ford’s Vegan in 15. We love these pancakes with sultanas in the batter and chopped nuts as an optional topping, but feel free to add 2 TBSP chopped pecans into the batter as per the original recipe.
Hands-on time 20 minutes
Total Time 20 minutes
Course Breakfast, Elevenses, Snack
Servings 8 mini pancakes

Ingredients
 

  • 1 ripe banana chopped into chunks
  • 150 ml / ⅔ cup soya, nut or oat milk (I use fortified soya milk)
  • 120 g / 1 scant cup self-raising flour
  • 1 tsp maple syrup plus extra for drizzling
  • pinch of salt
  • 4 TBSP sultanas
  • neutral-flavoured oil for frying I use organic rapeseed (canola oil or sunflower oil)

Optional topping

  • chopped walnuts or pecans

Instructions
 

  • In a blender or food processor, blitz the banana, milk, flour, syrup and salt into a smooth batter. Pour into a jug and stir in the sultanas.
  • If possible, use two frying pans (skillets) to halve the cooking time. Brush the bottom of the pan with oil and heat on medium heat. To check the pan is hot enough, flick a few drops of water into the pan. If they sizzle, the pan’s ready.
  • Pour the batter into three separate circles to create mini pancakes (I use my ice cream scoop – one scoop per pancake). Cook for a minute or so until the underneath is golden brown, then flip over and cook for a further minute. Pop them in a warm oven while you prepare the remaining pancakes.
  • Drizzle with syrup, sprinkle on some chopped nuts (if desired) and serve.
  • These pancakes will keep for 3 days in the refrigerator. Gently heat through before serving.
Keyword Dairy-Free, Egg-Free, Vegan Pancakes
Tried this recipe?Let us know how it was!

Have a great weekend everyone!

With love,

Sharon xx