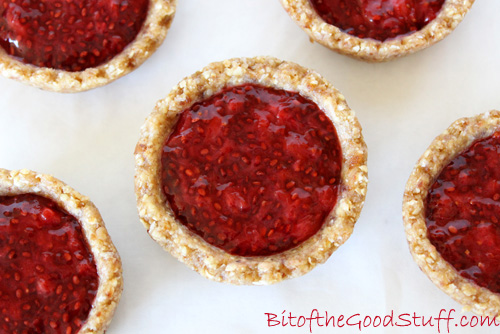
These No Bake Strawberry Tarts are a deliciously healthy treat – light, fresh, and bursting with summer berry flavour. Featuring a quick homemade chia jam and a nutrient-rich oat and nut crust, they make the perfect no-fuss snack or dessert on warmer days.
But before we dive into the recipe, there’s a special moment I’d love to share — one I’d been quietly dreaming about for years…
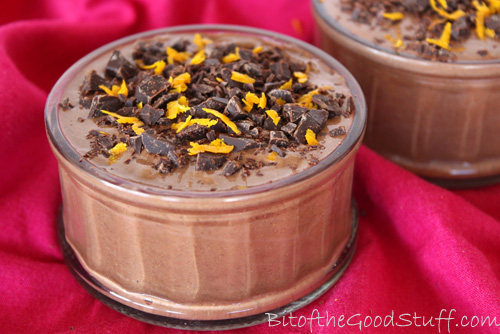
I first shared a recipe for chocolate orange chia pudding back in February 2012 and, to this day, it remains one of my family’s favourite desserts. It’s such a simple pudding to make and, since I originally posted the recipe, I’ve refined the method so that it’s even quicker. Honestly, this recipe could not be more easy! The original photo I took doesn’t do this pudding justice, so I thought it was time for a re-post with the updated recipe and some shiny new photos.
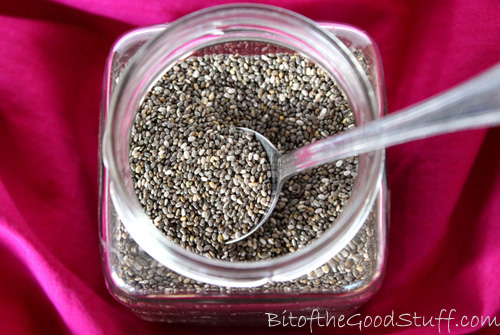
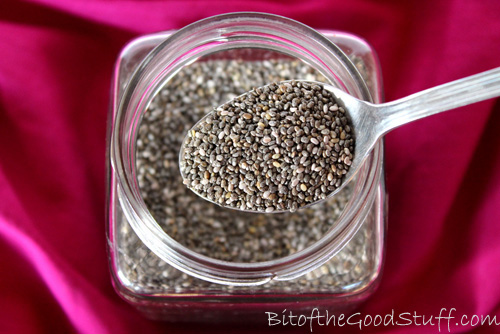
Since that original post, chia seeds have become much more popular here in the UK. You can buy them in health food shops, and even supermarkets have started stocking them. I find they can vary a lot in price, so I always shop around for the best deal. Since I use them frequently in smoothies and puddings, I’ve been buying larger bags lately, which tend to work out much better value.
So why do I love chia seeds so much?
Well, there are two main reasons. The first is their amazing nutritional profile. Chia seeds are very high in dietary fibre, a good source of ‘complete’ protein, and rich in omega 3 essential fatty acids. They’re also hydrophilic and can absorb around 10 times their weight in water, thus helping to keep us nicely hydrated. Their fibre, fat and protein content, along with these hydrophilic abilities, means that the seeds are a great source of slow release energy, they help to balance blood sugar levels, and they keep us feeling full up for hours. Adding a spoonful to smoothies is a great way to keep hunger pangs at bay.
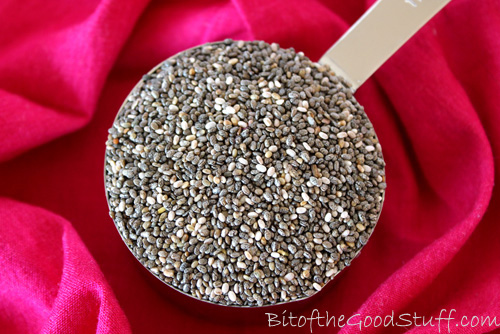
Chia seeds contain a range of trace minerals, and are especially rich in manganese, phosphorus and calcium, which are all important for good bone health. A 28g / 1 oz serving provides 30% of the manganese RDA, 27% of phosphorus, and 18% of the calcium RDA. The seeds also contain a multitude of antioxidants, including the flavonoid quercetin, which has anti-inflammatory and antihistamine properties.
The second reason I love chia so much is that they make the most incredible chocolate puddings! Once blended with some cacao or cocoa powder and a little liquid, they transform into a delicious, silky smooth pudding that will easily rival any shop-bought chocolate dessert. And unlike the shop-bought varieties that tend to be laden with sugar and little nutritional value, these chia puddings are refined sugar free and packed with nutrition.
I used to soak the chia seeds in liquid for an hour or so until they’d transformed into a gel-like substance before blending them up, but these days I literally throw all the ingredients straight in the blender. High speed blenders are best for this job as they’ll blend the seeds smooth in a matter of seconds. Since I’ve had the Froothie power blender, making chia puddings has been a breeze.
Lil’ L absolutely loves these puddings and sees them as a real treat. It’s great to be able to treat him to something that’s so nutritionally packed and full of healthy goodness.
Recipe Card
Chocolate Orange Chia Pudding
The fresh zesty flavour of the orange works in harmony with the bitter dark chocolate to make one delicious dessert! It tastes decadent yet it's super healthy and packed with feel-good nutrients. It's also very filling, so a little goes a long way. I find a ramekin or espresso cup is the perfect serving size.
300ml/ 1¼ cups plant milk (I use fortified soya milk)
64g/ 6 TBSP chia seeds
30g/ 4 TBSP cacao or regular cocoa powder
4soft pitted datese.g. Medjool
½tsporange extract
1TBSPmaple syrup
Suggested garnish
dark chocolatefinely chopped or grated
orange zest
Instructions
Place the orange juice and milk in a high speed, power blender, followed by the remaining ingredients. Give them a stir until they are coated in liquid. Blend on low speed until the dates are broken up, then move to high speed and continue blending until silky smooth. Stop now and then to scrape down the sides. Taste test and add a touch more orange extract or sweetener, if desired.
Pour into small ramekins or cups, sprinkle on the garnish and chill until ready to serve. It will keep for up to five days in the refrigerator.
Have you tried chia puddings before? If so, what’s your favourite flavour combo? If you’ve posted any recipes or pics, please do share the links below x
There’s something about Fridays that calls for chocolate… don’t you think? I had planned to share a wholesome almond breakfast smoothie today, but in the end, these indulgent yet nourishing cookies won the vote — and for good reason!
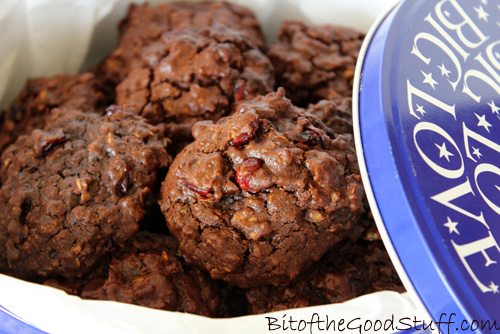
These Vegan Chocolate Cranberry Oatmeal Cookies are rich, chewy, and dotted with jewel-like cranberries that glisten against a backdrop of dark chocolate. They feel like a treat, but they’re packed with wholesome ingredients like oats and wholegrain flour, and free from dairy, eggs, and nuts — making them perfect for sharing with friends and family, including little ones with allergies.
I was thinking of a special six-year-old friend of ours as I baked these. Like me, he’s allergic to dairy, but he’s also allergic to nuts. Since I’ve been sharing lots of nutty recipes lately, this one is for him (and for anyone else who’s been missing out).
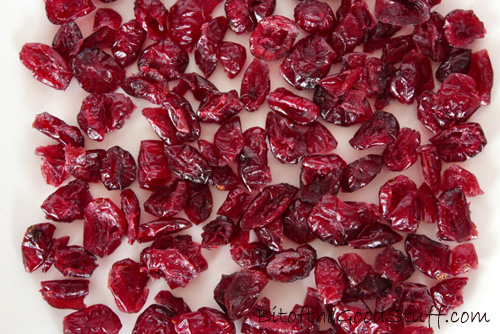
At this time of year, I love using cranberries in my baking. They add a burst of tart-sweet flavour and look like ruby gems tucked inside a cookie. I used to struggle to find cranberries that weren’t loaded with cane sugar, but thankfully, many supermarkets now stock juice-sweetened options. If you can find cranberries sweetened with pineapple juice, I highly recommend them — they’re delicious and a little more naturally balanced.
These cookies are deceptively simple. While they taste rich and chocolatey, the ingredients list is full of nourishing staples: wholegrain flour, rolled oats, cocoa powder, and dried fruit. Fresh from the oven, they have a crisp edge and soft centre — and they continue to firm up beautifully as they cool. They’re perfect for lunchbox treats, after-school snacks, or spontaneous coffee breaks with friends.
We’ve baked these many times and they’ve always been a big hit. I hope you enjoy them as much as we do!
Double Chocolate Cranberry Oatmeal Cookies (Vegan)
These rich, chewy cookies are packed with oats, cranberries, and chocolatey goodness — and they’re completely dairy-free, egg-free, and nut-free too. Perfect for lunchboxes, coffee breaks, or stashing in the freezer for later!
35ml/ 3 TBSP organic rapeseed (canola) oilor other neutral-flavoured oil
1tspvanilla extract
80g/ heaping ⅓ cup golden caster (unrefined cane) sugar
70g/ ½ cup fine wholemeal (whole wheat pastry) or chapatti flour
20g/ 3 TBSP cocoa powder
¼tspbaking powder
¼tspbicarbonate of soda (baking soda)
¼tspsalt
50g/ ½ cup rolled porridge oats (quick oats, not jumbo)
50g/ ⅓ cup dried cranberriespreferably juice-sweetened
25g/ 2 TBSP dark chocolate chips
Instructions
Preheat the oven to 180°C (160°C fan) / 350°F. Line a large baking sheet with non-stick baking paper.
Place the milk, oil, vanilla extract and sugar in a mixing bowl and whisk with a fork until fully combined.
In a separate bowl, combine the flour, cocoa powder, baking powder, bicarbonate of soda, salt and oats. Add these ingredients to the wet ingredient bowl and stir to combine. Stir in the cranberries and chocolate chips.
Scoop slightly heaped tablespoons of dough onto the prepared baking sheet. With damp fingers, press the dough into cookie shapes (these cookies don't spread much).
Bake for 12 minutes, or until the cookies are dry to the touch. Leave the cookies on the tray for a few minutes (they will firm up as they cool), then loosen from the baking paper using a thin spatula/slotted turner and transfer to a wire cooling rack.
Once completely cooled, store in an airtight container for up to 2 weeks, or freeze in an airtight zip-loc bag for longer storage.
If you make these Double Chocolate Cranberry Oatmeal Cookies, I’d love to hear your feedback and any suggestions for adaptations! Leave a comment below or tag your photos with #bitofthegoodstuff on social media – I always love to see your creations! You can also connect with me on my social media channels here:Instagram, Facebook, Pinterest.
Today I’m delighted to share one of my family’s all-time favourite baked treats – Vegan Gingerbread Cookies! These spiced beauties are naturally dairy-free and egg-free, and they make the perfect treat for cosy afternoons, holiday gatherings, or anytime you fancy a wholesome sweet bite.
I’m thrilled to be sharing this recipe with the Suma Bloggers’ Network. You might already be familiar with Suma Wholefoods — the UK’s largest independent vegetarian and vegan wholesaler. They’re a workers’ cooperative, which means the business is owned and managed jointly by the staff. Everyone is paid equally and shares responsibility for the day-to-day running of the business. I love what they stand for, so I was over the moon when they invited me to become one of the founding bloggers in their new Network!
Every couple of months, we’ll be sharing plant-based recipes featuring ingredients from the Suma range. You’ll find our creations on our blogs, social media, and a shared Pinterest board.
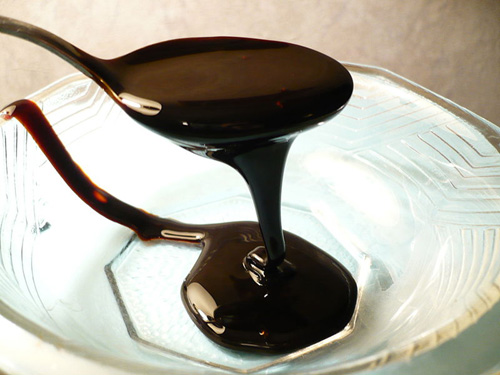
For my first recipe, I’m spotlighting one of my all-time favourite ingredients and unsung superfoods… blackstrap molasses!
Why Bake with Blackstrap Molasses?
Molasses is the rich, dark syrup that remains after sugar cane is processed to make refined sugar. While white sugar has no nutritional value, blackstrap molasses is brimming with nutrients — including vitamin B6, calcium, iron, magnesium, potassium, and selenium. It adds a beautiful depth of flavour and colour to baked goods, especially these spiced gingerbread cookies.
If you’ve got a jar lurking in your cupboard, this recipe is the perfect excuse to dust it off!
These vegan gingerbread cookies are crisp on the outside with a soft, chewy centre. The blackstrap molasses gives them a subtle liquorice-like flavour without being overpowering. You can use coconut sugar or an unrefined cane sugar for the dry sweetener. Coconut sugar is my favourite as it’s lower GI and has a lovely caramel note; my husband prefers the cane sugar ones (which are slightly sweeter), and Lil’ L says he can’t really tell the difference and loves both!
These cookies have been tried (and loved!) many times over with my family and friends, and I’ve been asked numerous times for the recipe. My standard reply is ‘sure, I’ll post it on the blog’. Well, it’s high time I kept my promise so here it is…
Recipe Card
Vegan Gingerbread Cookies
These gingerbread cookies are infused with warming spices and rich blackstrap molasses. They’re dairy-free, egg-free, and simple to prepare. Perfect for festive treats, holiday baking, or as a cosy everyday snack!
70g/ ⅓ cup golden caster (unrefined cane) sugar or coconut sugar
50ml/ ¼ cup organic rapeseed (canola) oil or other neutral-flavoured oil
65g/ 3 TBSP Blackstrap molasses or black treacle (molasses)
22g/ 1½ TBSP soya or almond milk
½tspvanilla extract
120g/ ¾ cup + 2 TBSP fine wholemeal (whole wheat pastry) flour or chapatti flour
1– 1½ tsp ground gingerto taste
½tspground cinnamon
pinchof ground nutmeg
¼tspbaking powder
¼tspbicarbonate of soda (baking soda)
¼tspsalt
Instructions
Preheat the oven to 200°C (180°C fan) / 400°F. Line two baking sheets with non-stick baking paper.
In a mixing bowl, whisk together the sugar, oil, molasses, plant milk, and vanilla extract until smooth.
In a separate bowl, combine the flour, spices, baking powder, bicarbonate of soda, and salt.
Add half the dry ingredients to the wet mixture and stir to combine. Add the remaining dry ingredients and stir until a dough forms.
Scoop slightly rounded tablespoons of dough and space six on each baking sheet. With damp hands, press each dough ball into a thin cookie shape.
Bake in the centre of the oven for 9 minutes, or until the tops are dry to the touch. (The cookies will still feel soft but will firm up as they cool).
Leave to cool on the baking sheets, then carefully transfer to a wire rack using a thin spatula.
Once fully cool, store in an airtight container. They’ll keep for up to two weeks. They can also be frozen in an airtight freezer bag.
Notes
Freshly baked, the cookies are crisp on the outside and chewy inside. Over time, they become softer but remain just as tasty.Using black treacle or a milder molasses will create a gentler flavour; blackstrap adds a richer, more mineral taste.All TBSP in the recipe are level.These cookies freeze beautifully — just leave them at room temperature for 10 minutes before serving.
Keyword dairy-free cookies, holiday baking, vegan gingerbread cookies
If you make these Vegan Gingerbread Cookies, I’d love to hear your feedback and any suggestions for adaptations! Leave a comment below or tag your photos with #bitofthegoodstuff on social media – I always love to see your creations! You can also connect with me on my social media channels here:Instagram, Facebook, Pinterest.
Wishing you a joyful day and happy baking!
With love,
Disclaimer: I received some Suma’s products to use for recipe development but, as always, all opinions expressed are my own.
Today I’d like to share one of my favourite home-made chocolate treats – Chocolate Cookie Crunch Hearts. They are so delicious, yet simple to make. They contain just THREE ingredients! ✨ They are perfect for sharing with loved ones on Valentine’s Day. Head below to see how I make them.
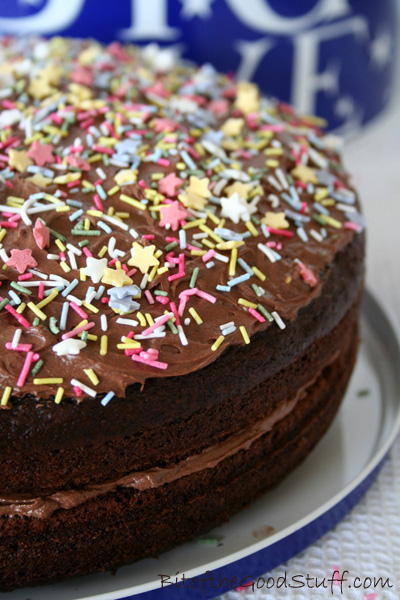
This easy vegan chocolate cake is light, moist, and made with simple pantry ingredients — perfect for birthdays, parties, and special occasions. A longtime family favourite, it’s loved by kids and adults alike!
There are some recipes that become part of your family story — passed from celebration to celebration, baked with love, and enjoyed by everyone. This chocolate cake is one of ours.
It’s the cake that my son, Lil’ L requests for every birthday. It’s also the one I’ve baked for my parents’ birthdays, family gatherings, and countless vegan festivals over the years. Without fail, it receives great reviews — even from people who say they’re “not cake people”! ☺️
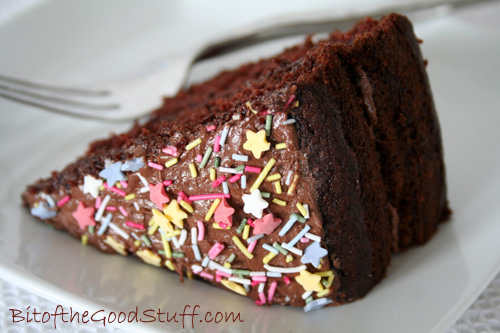
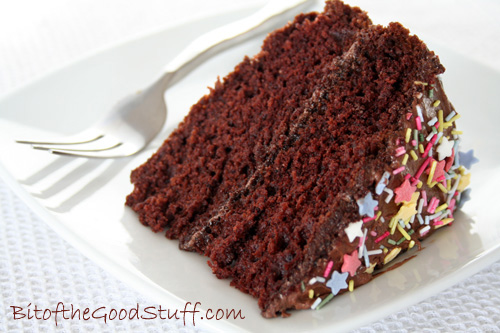
What makes this cake so special? It’s light, moist, and perfectly chocolatey — without being too rich or overly sweet. It’s made with simple pantry staples (no fancy ingredients required!) and it’s incredibly easy to whip up. It also holds together beautifully when sliced and keeps well for days, which makes it perfect for parties and prep-ahead occasions.
And let’s not forget the decorating fun. For birthdays, we love to frost and top it with colourful vegan-friendly sprinkles. For a more classic presentation, a layer of raspberry fruit spread and a dusting of icing sugar is beautifully elegant.
However you choose to dress it, this cake is a real crowd-pleaser. I hope you enjoy it as much as we do!
Recipe Card
Vegan Chocolate Celebration Cake
This easy vegan chocolate cake is light, moist, and made with simple pantry ingredients — perfect for birthdays, parties, and special occasions. A longtime family favourite, it’s loved by kids and adults alike!
200g/ 1½ cups fine wholemeal (wholewheat pastry) flour or chapatti flour
60g/ ½ cup cocoa powder
1tspbaking powder
1tspbicarbonate of soda (baking soda)
½tspsalt
140ml/ ⅔ cup rapeseed (canola) oil or other neutral oil
330g/ 1⅔ cups unrefined cane sugar (e.g. golden caster sugar)
2tspvanilla extract
Decorating options:
Chocolate frosting (see recipe below) and vegan-friendly sprinkles (see Notes)
OR raspberry jam/fruit spread for filling and a dusting of icing (powdered sugar) on top
Instructions
Preheat the oven to 180°C (160°C fan) / 350°F. Lightly oil two 23cm (9-inch) springform or loose-bottomed cake tins and line the bases with non-stick baking paper.
In a large bowl, whisk together the milk and vinegar. Set aside for a couple of minutes.
In a separate large bowl, stir together the flours, cocoa powder, bicarbonate of soda, baking powder and salt.
To the milk mixture, add the oil, sugar, and vanilla extract. Whisk with a hand (balloon) whisk until fully combined. Sieve in the dry ingredients in three batches, whisking gently each time. Avoid over-mixing.
Divide the batter evenly between the tins and place them on oven racks as close to the centre of the oven as possible. Bake for 40–50 minutes, or until a skewer inserted in the centre comes out clean and the tops spring back when lightly pressed. (In my oven, the top rack cake is ready after 40 minutes; the lower one often needs 5-10 minutes more.) If both cakes are domed, decide which one will be the bottom tier, cover with a clean tea towel and gently press down to level.
Leave the cakes in their tins for at least an hour to cool (they’ll firm up as they cool), then transfer to a wire rack to cool completely.
Once cooled, sandwich with fruit spread or frosting and top with your chosen decoration. Chill before serving for clean slices.
Notes
Storage Tips:The cake keeps beautifully in an airtight container in the fridge for up to a week. In fact, we find the flavour and texture improve after a day or two!It also freezes well — simply wrap slices or the whole (undecorated) cake tightly and freeze for up to 3 months.Baking Tips:When it comes to vegan baking, I highly recommend weighing the ingredients rather than using cups (the results will be far more consistent). Electronic scales make baking a breeze. Tesco chapatti flour is my go-to for fine wholemeal baking — inexpensive and works beautifully.Vegan-Friendly Sprinkles: Try Waitrose Rainbow Stars and Confetti, Sainsbury’s Sugar Stars, Morrisons Cosmic Stars, Asda Rainbow Star Sprinkles, or Dr Oetker Unicorn Confetti (all were vegan-friendly at the time of writing). Vegan sprinkles can also be purchased online.
The recipe below is sufficient to frost the centre and top of a 23cm (9-inch) cake using a palette knife. If piping the frosting, I recommend at least doubling the quantities.
50g/ 4 TBSP dairy-free spread or vegan buttere.g. Vitalite, Flora, Pure
1– 1½ TBSP water
Instructions
Sieve the icing sugar and cocoa into a large bowl. Add the dairy-free spread/butter and 1 TBSP water. Stir with a metal spoon until it starts to combine, then beat with electric beaters until light and fluffy. If the frosting looks a little stiff, add another ½ TBSP water and keep beating.
This frosting will keep for a week in the fridge. It is also freezable.
For those of you that dislike the traditional Christmas fruit cake, I think this would make a great alternative. You could even add some festive sprinkles!