Chestnut and Mushroom Bourguignon Pie (Vegan with Gluten Free Option)

Jump to Recipe

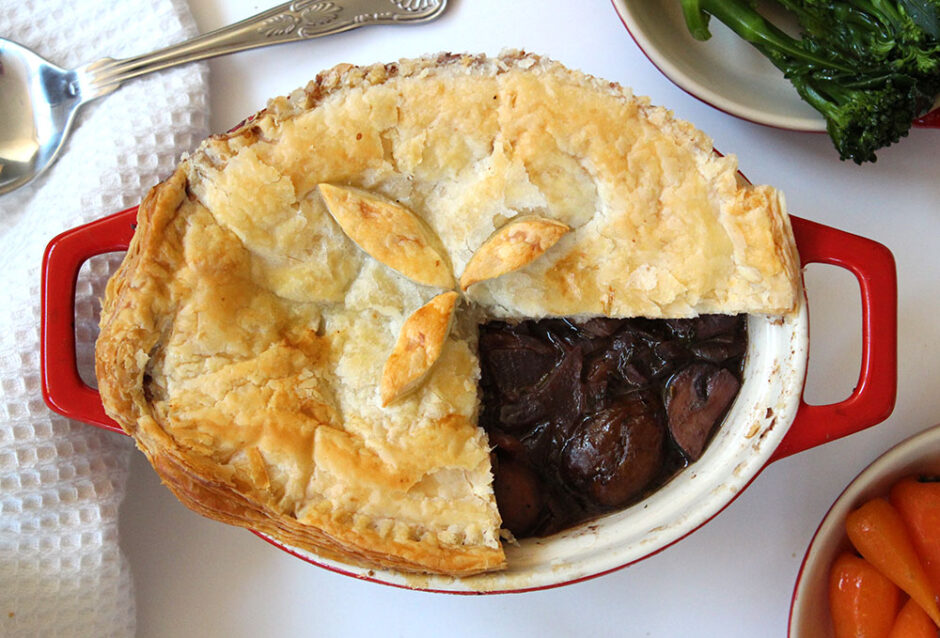
In today’s post I’m sharing a recipe for a delicious pie that’s just perfect for serving in the cold weather months. It’s an adaptation of a recipe published by the Vegetarian Society back in 1995. We first tried this pie last month and it was a big hit with the family. Since then, we’ve already eaten it a couple more times as special weekend dinners. While it looks pretty impressive, it’s really easy to make and requires less than 30 minutes hands on time.

The original recipe states that it serves 4-6 people but we must be greedy guzzlers as we devoured the whole pie between the three of us. When I made it again, I increased the filling quantities just to make sure there was enough for 4.
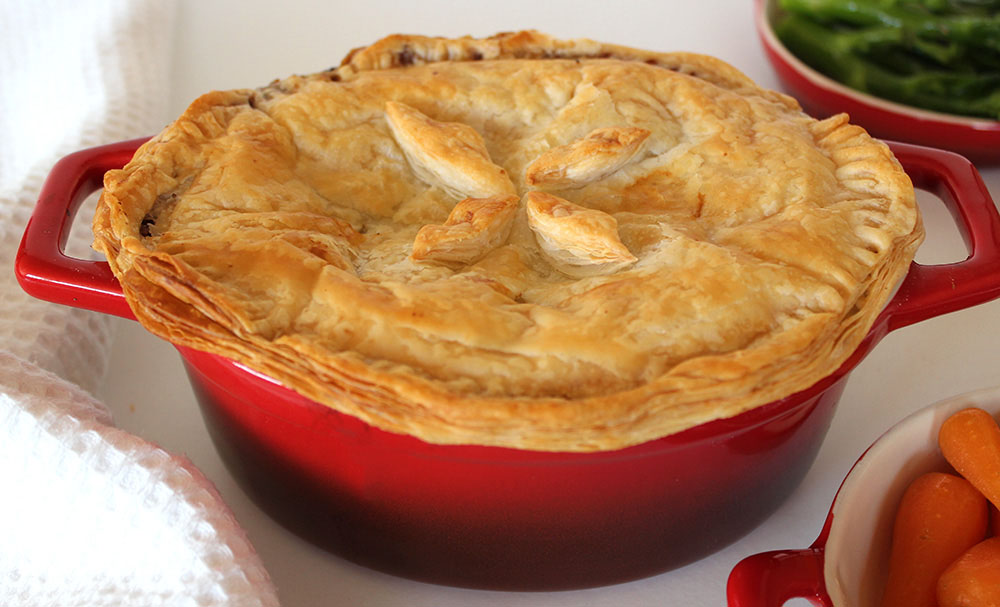
Vegan Chestnut Bourguignonne Pie

The base of the filling is a rich gravy, flavoured with red wine, stock, herbs, mustard and soy sauce. Since I don’t drink wine, I buy one of these cute 500ml bottles.
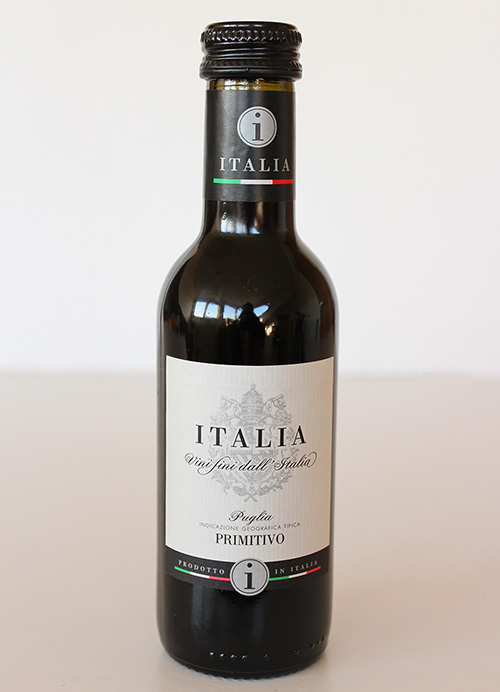
Red Wine

As you may already know, not all wines are vegan, or even vegetarian. When filtering wine (or beer) some companies use products such as isinglass (from fish bladders), gelatin, egg whites or sea shells as filtering agents. Companies can also add products such as dairy and honey into the final recipe. Fortunately there are plenty of vegan wines and beers available in our shops.

UK supermarkets are getting better at labelling their wines vegetarian or vegan. At the present time, the Waitrose, Sainsbury’s and Ocado websites are the easiest to use, as they state if a wine is suitable for vegetarians and/or vegans in their lifestyle/dietary choice tabs. There is also Barnivore, an online directory which lists all vegan beers, wines and spirits.
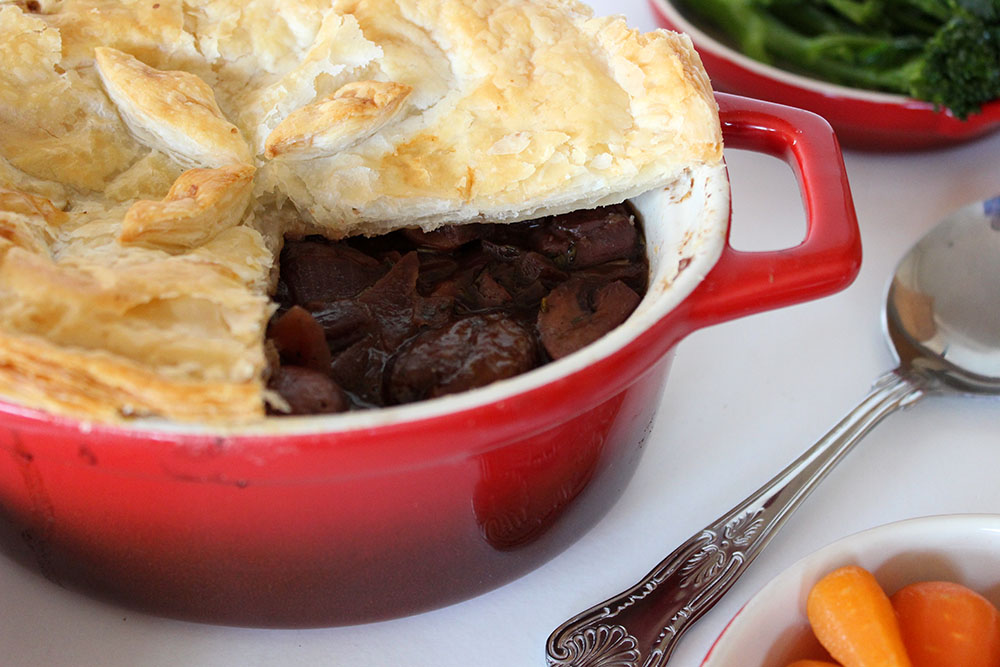
Vegan Chestnut Bourguignonne Pie

The original VegSoc recipe calls for 250g chestnuts, however the most common brand of cooked chestnuts in the UK (Merchant Gourmet) comes in a 187g pack. Since chestnuts are quite expensive, rather than buying a second pack and only using a portion of it, I reduced the quantity of chestnuts and bumped up the volume of chestnut mushrooms instead. I also added some thinly sliced carrot for an extra dimension of texture and flavour.

If you’re gluten-free, Jus-Rol are now selling a GF Vegan puff pastry sheet. I spotted it for sale in Tesco and Ocado. I haven’t tried it myself yet but, if you have, I’d love to hear what you think of it.

Recipe Card
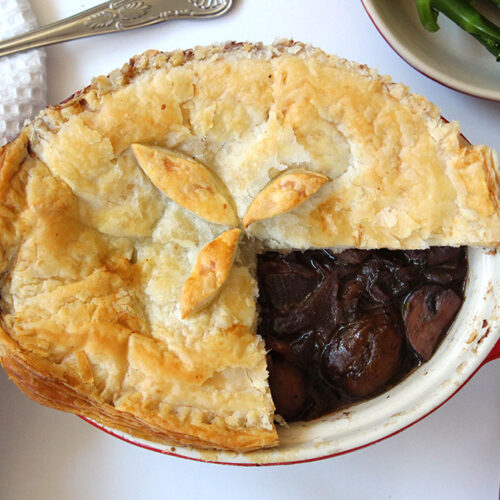
Vegan Chestnut Bourguignonne Pie

Chestnut and Mushroom Bourguignon Pie (Vegan with Gluten Free Option)

This pie is perfect for serving in the cold weather months. It makes a lovely special weekend dinner. It’s easy to make but sure to impress your dinner guests.
Hands-on time 25 minutes
Total Time 1 hour 10 minutes
Course Dinner
Servings 4

Ingredients
 

  • 25 g / 1½ TBSP dairy-free spread/vegan butter
  • 3 small red onions (about 250g) thinly sliced
  • 250 g / 3 cups chestnut (or crimini) mushrooms quartered or halved (depending on size)
  • 180 g / 1 heaping cup pre-cooked chestnuts halved
  • 187 ml / ¾ cup vegan red wine
  • 300 ml vegetable stock (broth)
  • 2 bay leaves
  • 1 tsp dried sage
  • 1 tsp dried thyme
  • ½ tsp dried parsley
  • 2 tsp Dijon mustard
  • 1 TBSP tamari or reduced-salt soy sauce
  • freshly ground black pepper to taste
  • 1 puff pastry sheet (about 300g / 10½ oz) thawed if frozen (use GF puff pastry, if needed)
  • soya milk for glazing

Instructions
 

  • Pre-heat the oven to 220C (200C fan) / 425 F.
  • Melt the dairy-free spread/butter in a large frying pan (skillet) and cook the onions on low/medium heat until lightly browned.
  • Add the mushrooms and cook for a further 4 minutes.
  • Add the chestnuts, red wine, stock (broth), bay leaves, dried herbs, mustard and tamari/soy sauce.
  • Bring to the boil, then reduce the heat and simmer for 20 minutes, or until the liquid has reduced somewhat.
  • Remove the bay leaves. Add black pepper to taste.
  • Spoon the mixture into a large pie dish or four individual/mini pie dishes.
  • Place the pastry on top. Leave a good margin hanging over the sides as the pastry will shrink as it cooks. Use a fork to press the pastry onto the rim of the dish to seal it. Use any leftover pastry to cut out some leaf shapes and arrange on top of the pie. Brush the pastry with soya milk. Pierce a couple of holes in the pastry to allow the steam to escape.
  • Bake for about 20 minutes or until golden.
  • If baked in a large pie dish, I recommend removing the pastry top, placing on a chopping board and slicing into four equal pieces. Spoon the filling onto plates and arrange the pastry on top. This way, you can cut the pastry neatly without it pushing down into the filling and becoming soggy.
  • Serve the pie with one or two veggie side dishes. We love to serve it with steamed baby carrots and steamed tenderstem broccoli tossed in a little soy sauce, or some sweet potato wedges. I also think potato mash or butter bean puree could work well with it.

Notes

The pie filling can easily be made in advance. Half an hour before you plan to serve, simply warm through, add the pastry topping and bake for 20 minutes.
The pie can also be re-heated. I’ve found the quickest way to do this is to remove the pastry lid and bake this on a tray in the oven for 15-20 minutes (that way it crisps up again). Meanwhile, gently heat through the filling in a saucepan covered with a lid.
The pie will keep for a couple of days in the refrigerator.
Recipe adapted from this Vegetarian Society recipe 
Keyword Dairy-Free, Egg-Free, Gluten-Free Option, Vegan Dinners, Vegan Pie
Tried this recipe?Let us know how it was!

If you make this Vegan Chestnut and Mushroom Bourguignon Pie, I’d love to hear your feedback and any suggestions for adaptations! Tag your photos with #bitofthegoodstuff on social media – I always love to see your creations! You can also connect with me on my social media channels here: Instagram, Facebook, Pinterest.   

With love,

Sharon xx
No Bake Strawberry Tarts (Dairy-Free | Egg-Free | Vegan)

Jump to Recipe

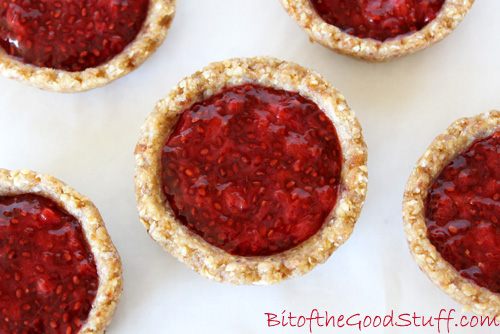
These No Bake Strawberry Tarts are a deliciously healthy treat – light, fresh, and bursting with summer berry flavour. Featuring a quick homemade chia jam and a nutrient-rich oat and nut crust, they make the perfect no-fuss snack or dessert on warmer days.

But before we dive into the recipe, there’s a special moment I’d love to share — one I’d been quietly dreaming about for years…

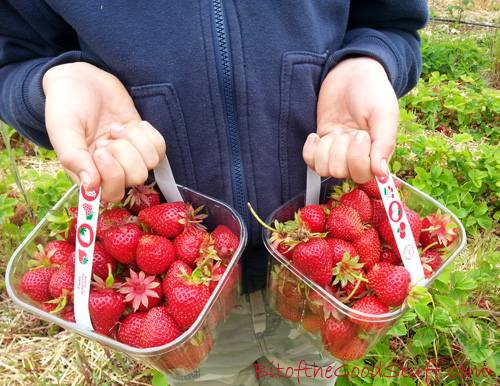
Strawberry Picking

Until fairly recently, neither for love nor money could Lil’ L be encouraged to eat strawberries. Sadly, along with all other berries, as well as oranges, plums and grapes, strawberries fell in his ‘too squishy’ camp. On the odd occasion that he did actually attempt to eat one, he’d end up gagging with tears streaming down his face. It was so torturous to watch. He did like the flavour of berries though and would happily drink them in smoothies. So as long as he was consuming berries in some shape or form, I didn’t really mind.

Still, I quietly held onto the dream of one day going berry picking with my son… though, over time, I’d started to pretty much give up on the idea.

Strawberry Picking

THEN, everything changed this Easter, during our trip to Spain. The supermarkets were overflowing with crates of the most beautiful strawberries — big, deeply red, and incredibly fragrant. We couldn’t resist picking up a crate (just €3!) and, to my surprise, Lil’ L offered to carry it. I could see him eyeing up the strawberries. They were that inviting.

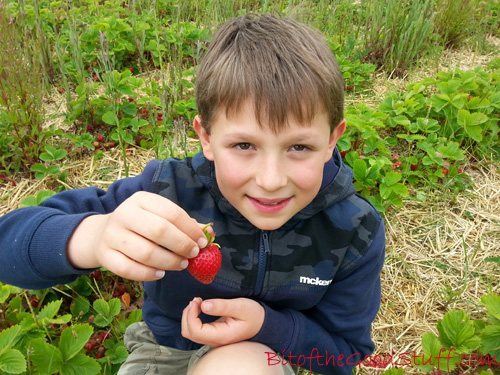
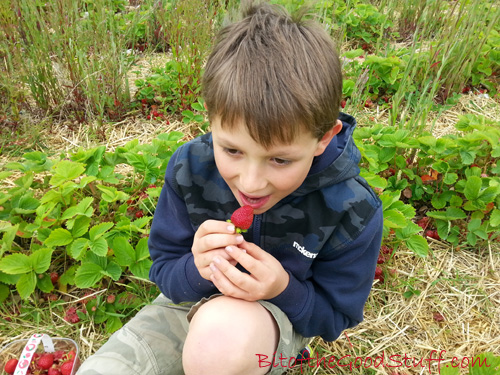
He took a tentative bite… and lo and behold — no gagging! He then proceeded to eat another five. You can imagine my joy. Finally, at the age of 11, he’d moved on from loathing to loving strawberries.

Strawberry Picking

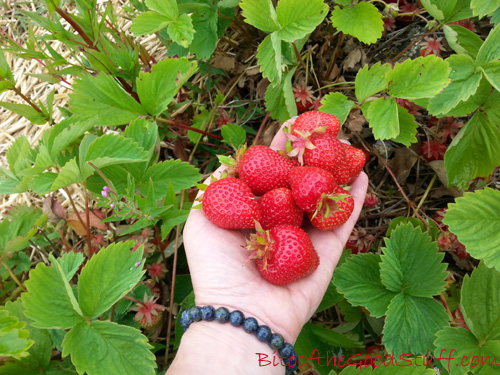
Back home, with strawberry season in full swing, we headed off to a local pick-your-own farm. Watching Lil’ L search for ‘the perfect strawberry’ with such delight was pure joy. He’s since mentioned more than once how much he loved that outing — proof that some things really are worth the wait.

The strawberries were so sweet and juicy that we ate them by the handful. To avoid waste, I also froze a bunch for ice creams and smoothies, and made a few batches of my favourite chia jam.

Strawberry Picking

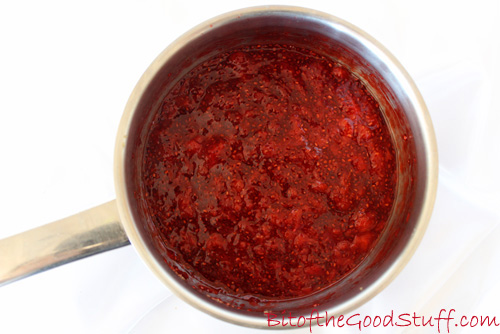
If you’ve never tried chia jam before, you’re in for a treat. It’s so simple to make and tastes incredibly fresh — nothing like the overly sweet store-bought jams. I first came across the idea on Angela Liddon’s Oh She Glows blog back in 2010 and have been hooked ever since.

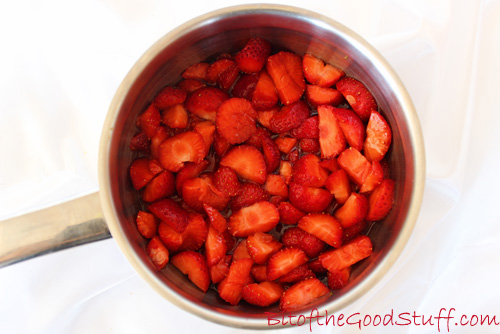
This strawberry chia jam takes just a few minutes to prepare, keeps for up to a week in the fridge, and is delicious spread on toast or scones, swirled into yogurt, or used as a tart filling…

Strawberry Pan

Strawberry Pan

Introducing… No Bake Strawberry Tarts

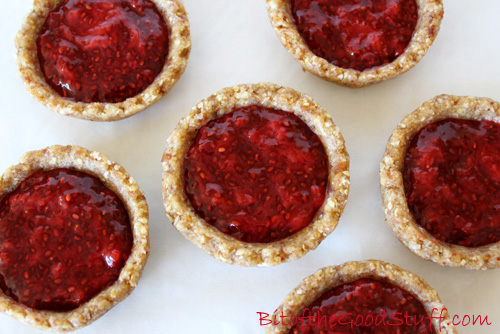
These little tarts are one of our favourite ways to enjoy the jam. With last week’s mini heatwave, I was in no mood to turn on the oven, so these no bake tarts were just the ticket. They’re cool, light, and packed with feel-good ingredients.

Vegan No Bake Strawberry Tarts

Lil’ L and M have been enjoying them as post-school/work snacks, while I’ve found them to be the perfect post-dinner ‘treat’ — indulgent enough to satisfy cravings, yet healthy enough to feel good about.

The oat, nut, and date base is inspired by my Pina Colada ‘Cheese’ Cake crust. It’s naturally sweet, packed with fibre and healthy fats, and gently spiced with vanilla and coconut. While it’s softer than a traditional pastry, it holds together beautifully and pairs perfectly with the jam.

Ready to make them? Let’s go!

Recipe Card

Vegan No Bake Strawberry Tarts

No Bake Strawberry Tarts (Dairy-Free | Egg-Free | Vegan)

These No Bake Strawberry Tarts are a deliciously healthy treat – light, fresh, and bursting with summer berry flavour. Featuring a quick homemade chia jam and a nutrient-rich nut and oat crust, they’re the perfect no-fuss snack or dessert for warm days.
Hands on time 25 minutes
Total Time 1 hour 25 minutes
Course Healthy Snacking, Treat
Servings 12

Ingredients
 

Strawberry Chia Jam

  • 200 g / 1½ cups fresh or frozen strawberries chopped
  • TBSP maple syrup or sweetener of choice
  • ½ TBSP freshly squeezed lemon juice
  • 1 TBSP chia seeds
  • ½ tsp vanilla extract

No Bake Tart Shells

  • 50 g / ½ cup rolled oats use certified gluten free, if needed
  • 40 g / ¼ cup raw cashews
  • 30 g / ¼ cup walnuts or pecans
  • 100 g / ½ cup soft sticky pitted dates (e.g. Medjool)
  • 1 tsp maple syrup or other liquid sweetener
  • ½ tsp vanilla extract
  • pinch of salt
  • 22 g / ¼ cup desiccated coconut

Instructions
 

  • Prepare the jam: Gently cook the strawberries, syrup and lemon juice until the berries start to break down. Stir in the chia seeds. Bring to the boil then reduce the heat and simmer for 20 minutes, until the jam has started to thicken. Give it a stir now and then with a wooden spoon and mash the berries to break them down. Remove from the heat and stir in the vanilla extract. Transfer to a glass jar, leave to cool then add a lid and place in the fridge. The jam will thicken up as it chills.
  • While the jam is simmering, prepare the tart shells. Loosely line a shallow tart/mince pie tray with cling film (plastic wrap).* Place the oats and nuts in a food processor and blitz into crumbs. Add the dates, maple syrup, vanilla extract and salt and continue processing until the mixture starts to come together. Add the desiccated coconut and whizz for a few more seconds. The mixture should easily stay together when you press it. If it’s still crumbly, keep processing until it sticks together.
  • Press the crumbs together to form a dough ball. Place between two pieces of baking paper (or use a large silicone pastry mat folded over) and roll out to a thickness of ½ cm / ⅕ inch. Press out using a 6 cm / 2½ inch pastry cutter and place in the lined tart tray. Repeat until all the dough is used up, re-rolling as needed. Chill in the fridge until the jam is ready. When the jam is completely chilled, spoon it into the tart shells and serve.
  • These tarts will keep in the fridge for up to a week.

Notes

*If you don’t have a shallow tart tray, you can shape the tart shells by hand or by moulding them round one end of a rolling pin.
Keyword Dairy-Free, Egg-Free, Gluten-Free Option, No Bake Tart, Strawberry, Vegan Treats
Tried this recipe?Let us know how it was!

If you make these No Bake Strawberry Tarts, I’d love to hear your feedback and any suggestions for adaptations. Leave a comment below or tag your photos with #bitofthegoodstuff on social media – I always love to see your creations! You can also connect with me on my social media channels here: Instagram, Facebook, Pinterest.  

With love,

Sharon xx
Cranberry, Orange and Dark Chocolate Florentines (Dairy-free | Vegan)

Jump to Recipe

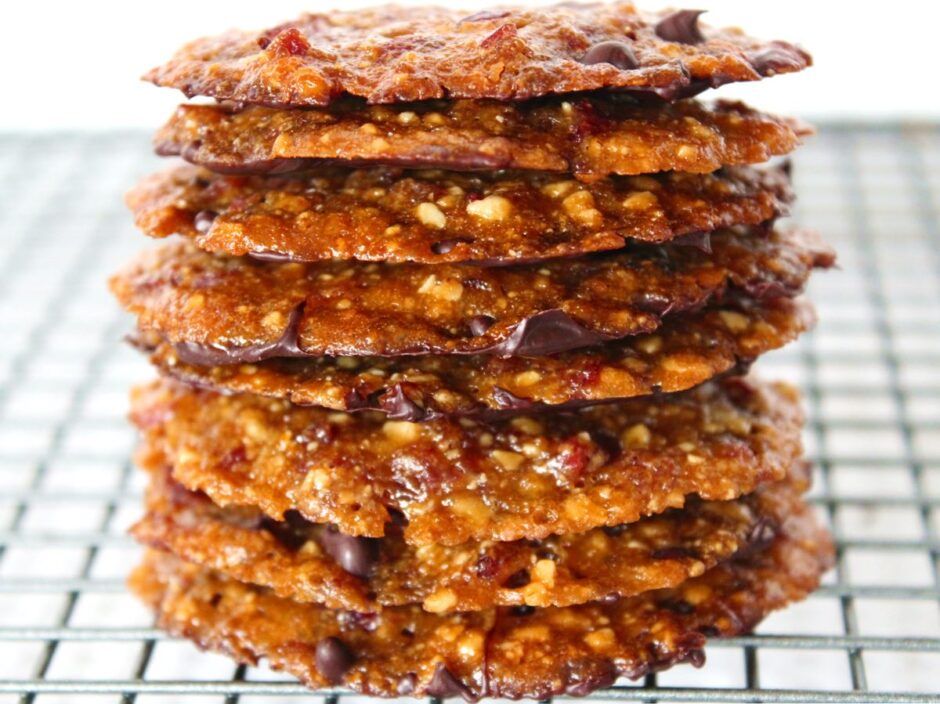
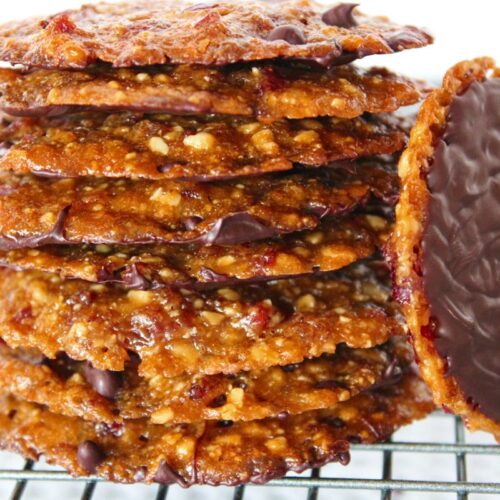
For this month’s Suma Blogger’s Network entry, I though I’d share one of my latest treat obsessions – Vegan Florentines 💜 I’d been dreaming about Florentines ever since I saw them on display in the patisserie shops of Venice and Florence a few years ago. I’d never seen anything quite like them before. They looked so dainty yet totally decadent with their dark chocolate bottoms! I was pretty sure that they’d be full of dairy and off limits to me, but I was excited about the thought of creating a vegan version one day.

This week I finally got round to a little Florentine experimentation in the kitchen.

After a quick internet search, I discovered that Florentines are typically made with cane sugar, honey, butter, candied cherries, candied citrus peel and almonds. Since I’m not a fan of the first 4 ingredients, and I know a lot of my readers aren’t keen on candied peel, I ended up subbing 5 of the 6 ingredients. The almonds stayed 😉

The cane sugar and honey was swapped for coconut sugar and maple syrup, which gave the Florentines a wonderful golden hue and caramel-like sweetness. Instead of candied cherries and citrus peel, I used dried cranberries and orange zest. This gave the Florentines a fresh, citrussy flavour which I absolutely loved. The butter was exchanged for non dairy spread or organic aroma-free coconut butter.

Vegan Florentines

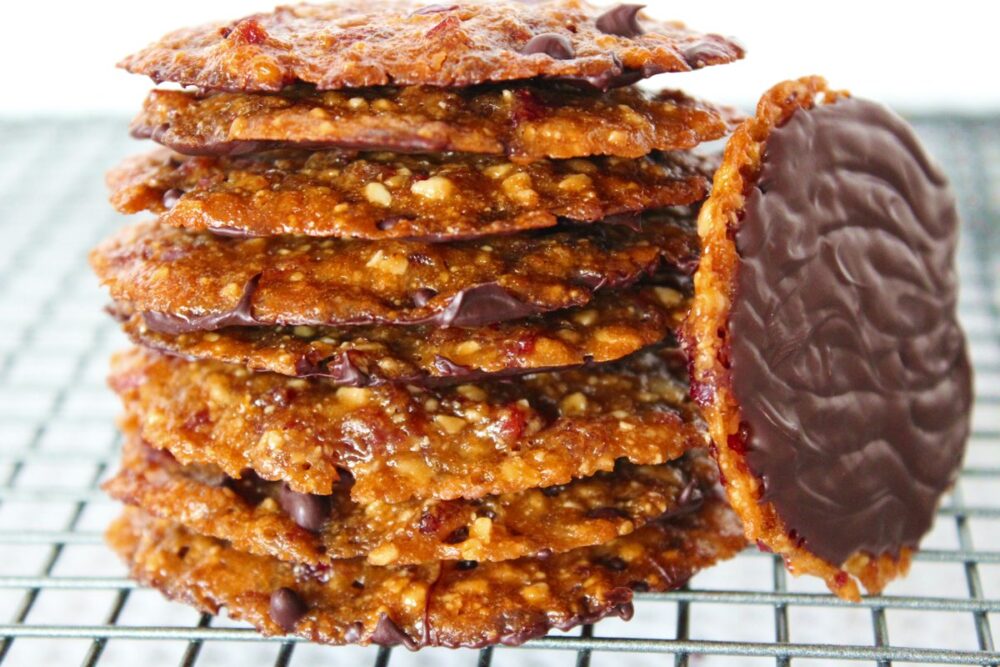
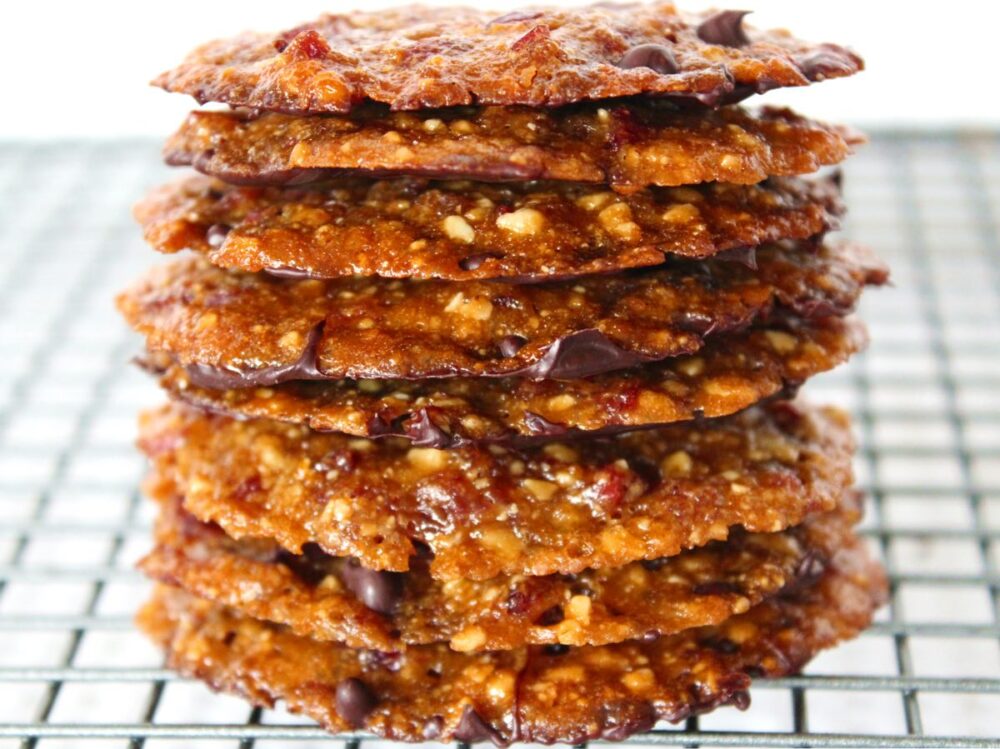
I’ve done 6 trials so far this week, playing around with different ingredient ratios and combos. All have tasted delicious, but I was striving to bake a Florentine that was super thin with the traditional ‘lacey’ texture on the underside. By the 4th trial, I’d cracked it.

Vegan Florentines

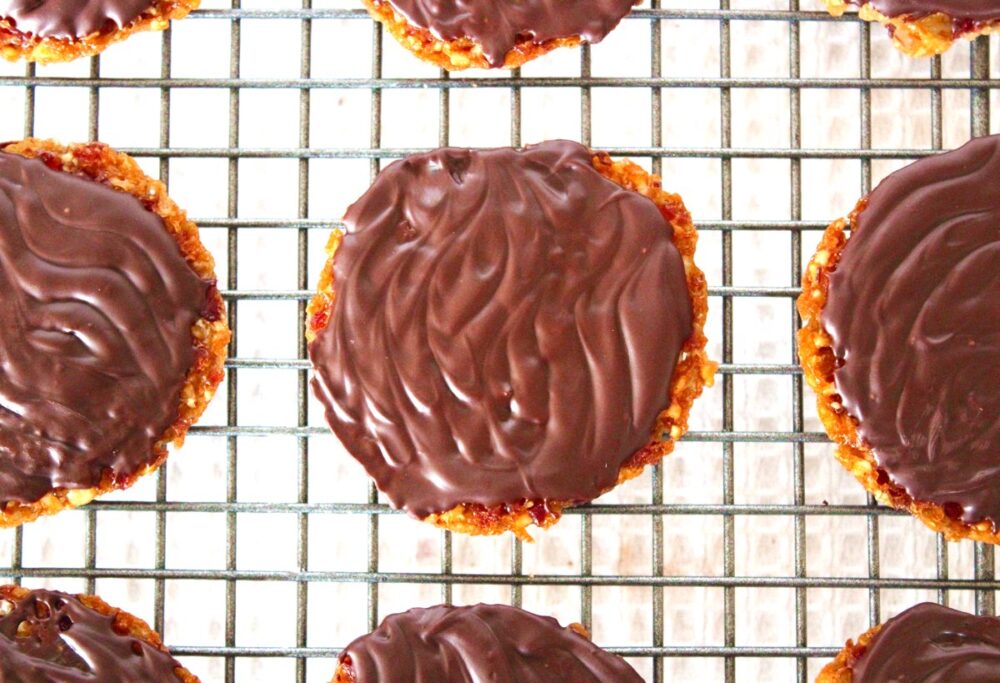
Once cooled, I then added the classic Florentine wavy chocolate bottom.

Vegan Florentines

These Florentines are my new treat obsession. I absolutely love their texture – crisp on the outside, chewy in the centre with a melt-in-your-mouth chocolate bottom. Plus the flavour combination is so lush. The citrus zest gives them a wonderful lift while the dark chocolate makes them feel decadent.

Another great thing about this biscuit is that each one only contains 1 tsp of mixture which, in my eyes, makes it totally acceptable to go back for a second or third 🙂

‘M’ and Lil’ L seem to love them as much as me. I’ve made 72 so far this week, and there are very few left in the biscuit tin! I also took along a sample to my Tuesday night study class and they were a big hit!


Vegan Florentines


Recipe Card

Cranberry, Orange and Dark Chocolate Florentines (Dairy-free | Vegan)

These Vegan Florentines are crisp on the outside, chewy in the centre, and finished with a smooth layer of dark chocolate. The zesty citrus and rich chocolate make them feel extra special.
For the best results, I recommend weighing the ingredients. The shape and signature ‘laciness’ can vary depending on the size of the fruit and nut pieces, and the type of flour or fat used – but whatever their form, they’re always delicious!
Hands-on time 20 minutes
Total Time 40 minutes
Course Afternoon Tea, Treat
Servings 12

Ingredients
 

  • 30 g / ¼ cup toasted, flaked almonds
  • 30 g 2 TBSP dairy-free spread / vegan butter or aroma-free coconut butter
  • 30 g 3 TBSP coconut sugar or golden caster (unrefined cane) sugar
  • 30 g / 2 TBSP maple syrup
  • 18 g 2 TBSP fine wholemeal (whole wheat pastry) flour, chapatti flour or gluten-free flour mix
  • 30 g / 3 TBSP dried cranberries finely chopped
  • zest of 1 unwaxed / organic orange
  • 100 g / 3½ oz dark chocolate (or substitute with dark choc chips)

Instructions
 

  • Preheat the oven to 180C (160C fan) / 350F. Line two large baking sheets with non-stick baking paper.
  • Crush the almonds between your fingers to break them up.
  • In a small pan, gently heat the dairy-free spread / butter. Once it has melted, whisk in the sugar and syrup. Remove from the heat and whisk in the flour. Stir in the almonds, cranberries and zest. You want to get the mixture as uniform as possible so that the Florentines spread evenly as they bake.
  • Drop six rounded teaspoons of mixture onto one baking sheet. Be sure to space them out to give them plenty of room to spread. Add another six teaspoons to the second baking sheet. Using damp fingers, press down on the Florentines to flatten slightly and shape into circles.
  • Place in the pre-heated oven and bake for 8 minutes, or until the edges of the Florentines have browned. Leave to cool. (They will be very soft when they come out the oven, but they firm up as they cool).
  • Place the chocolate pieces in a heat-proof bowl set over a pan of gently simmering water (make sure the water doesn’t touch the bowl). When the chocolate has melted, remove from the heat. If the chocolate is very runny, stir until it thickens slightly. Using a knife, coat the bottom of each Florentine. Before the chocolate sets, wiggle a fork across it to form a wavy pattern.
  • Chill the Florentines until fully set, then transfer to an airtight container. Stored in the refrigerator, these Florentines will keep for at least a couple of weeks. They also freeze really well.
Keyword Dairy-Free, Egg-Free, Gluten-Free Option, Vegan Baking, Vegan Florentines, Vegan Treats
Tried this recipe?Let us know how it was!

If you make these Vegan Florentines, I’d love to hear your feedback and any suggestions for adaptations! Tag your photos with #bitofthegoodstuff on social media – I always love to see your creations! You can also connect with me on my social media channels here: Instagram, Facebook, Pinterest.   

With love,

Sharon xx
Crunchy Nut Apple Crumble (Vegan / Dairy-free)

Jump to Recipe

This healthy twist on the classic Apple Crumble is one of our all-time favourite autumnal desserts. With a spiced apple filling and golden, nutty topping, it’s comfort food at its best!

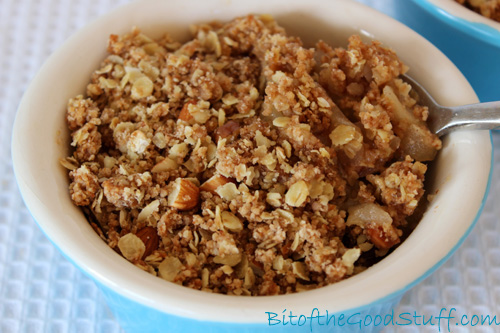
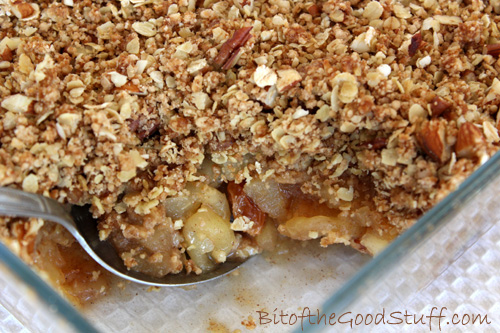
Apple Crumble is a quintessential British dessert. However, in contrast to the traditional version, which is typically loaded with refined sugar and white flour, I’ve created a more nourishing take using nutrient-rich ingredients. The white flour is replaced with wholegrain flour, oats, and chopped nuts, adding delicious texture, flavour, and heart-healthy goodness. And by using naturally sweet apples instead of tart Bramleys, I’ve been able to significantly reduce the sugar without sacrificing any of the flavour.

Vegan Apple Crumble

This year, our apple tree blessed us with a bumper harvest — over a hundred apples and counting! With so much fresh fruit to use, we’ve been enjoying lots of seasonal treats, and this Crunchy Nut Apple Crumble has been the standout favourite. It’s easy to make, wonderfully comforting, and loved by the whole family. We hope you enjoy it as much as we do!

Recipe Card

Vegan Apple Crumble

Crunchy Nut Apple Crumble

This healthy twist on the classic Apple Crumble is one of our all-time favourite autumnal desserts. With a deliciously spiced apple filling and a golden, crunchy topping packed with oats, nuts, and a hint of cinnamon, it’s the kind of treat we come back to again and again as the leaves begin to fall.
Hands on time 25 minutes
Total Time 45 minutes
Course Dessert
Servings 6

Ingredients
 

For the Apple Filling

  • 1 kg / 7 medium sweet apples (e.g. Gala) peeled, cored and sliced into 0.6cm / ¼-inch thick pieces
  • 60 ml / 4 tbsp water
  • 35 g / 3 tbsp coconut sugar or golden caster (unrefined cane) sugar
  • 1 tsp ground cinnamon
  • 60 g / ⅓ cup sultanas

For the Crumble Topping

  • 100 g / ¾ cup fine wholemeal (wholewheat pastry) flour or chapatti flour or gluten-free flour blend
  • 1 tsp baking powder
  • ½ tsp ground cinnamon
  • 75 g / ¾ cup rolled porridge oats (quick oats, not jumbo)
  • 50 g / 4 tbsp coconut sugar or unrefined cane sugar
  • 70 g / 4½ tbsp vegan butter or dairy-free spread
  • 30 g / ¼ cup pecans chopped
  • 40 g / ¼ cup almonds chopped
  • ½-1 TBSP Demerara (or turbinado) sugar for sprinkling

Instructions
 

  • Preheat your oven to 190°C (170°C fan) / 375°F.

Cook the apples:

  • Place the water, apples, sugar, cinnamon, and sultanas in a large saucepan. Stir, cover with a lid, and simmer over a low heat for around 15 minutes, stirring occasionally, until the apples are just tender but still hold their shape. Taste and add a little more sweetener, if needed.

Make the crumble topping:

  • In a large mixing bowl, combine the flour, baking powder, cinnamon, oats, and sugar. Add the vegan butter and rub it in with your fingertips until the mixture resembles coarse breadcrumbs. Stir in the chopped pecans and almonds.

Assemble the crumble:

  • Spoon the cooked apples into a 1.5-litre / 1½-quart ovenproof dish (approx. 22cm x 17cm x 6cm / 9” x 7” x 2½”). Level the surface and gently press down. Spoon the crumble topping evenly over the apples and sprinkle with Demerara sugar.

Bake:

  • Place in the preheated oven and bake for 20–25 minutes, until the topping is crisp and golden. Allow to rest for 5 minutes before serving.

Serving Suggestions:

  • This crumble is delicious served with dairy-free custard, cream, or yogurt
  • It can be served warm, or cold straight from the fridge (we actually love it this way as the topping becomes even crunchier!)!

Notes

Storage Tips:
Store in an airtight container for up to 5 days. It is also freezable.
Keyword Dairy-Free, Egg-Free, Gluten-Free Option, Vegan Apple Crumble, Vegan Baking
Tried this recipe?Let us know how it was!

If you make this Crunchy Nut Apple Crumble, I’d love to hear your feedback and any suggestions for adaptations! Leave a comment below or tag your photos with #bitofthegoodstuff on social media – I always love to see your creations! You can also connect with me on my social media channels here: Instagram, Facebook, Pinterest.   

With love,

Sharon xx
Valentines Chocolate Cookie Crunch Hearts (Dairy-Free / Vegan)

Jump to Recipe

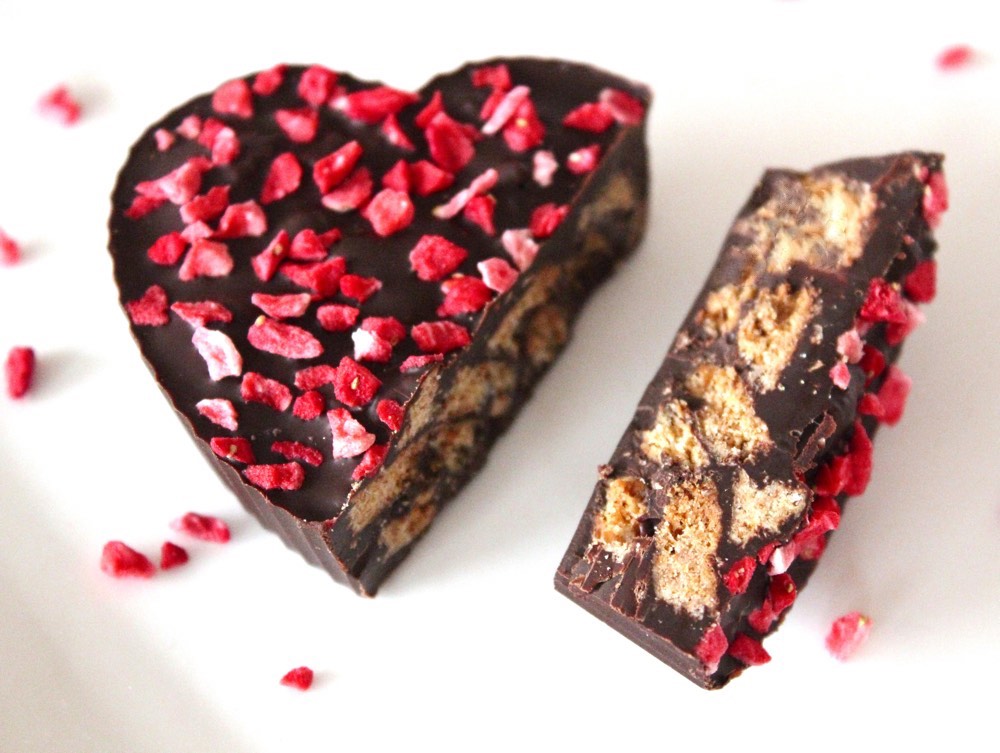
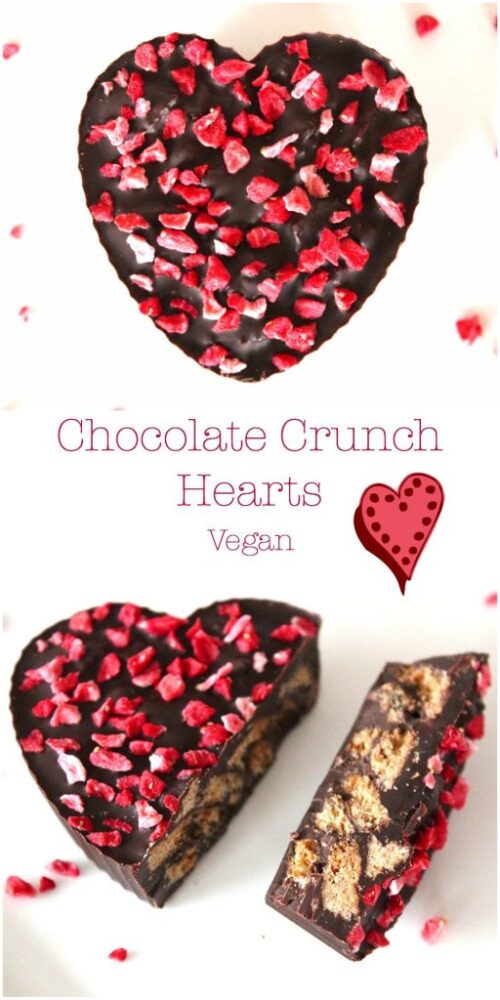
Today I’d like to share one of my favourite home-made chocolate treats – Chocolate Cookie Crunch Hearts. They are so delicious, yet simple to make. They contain just THREE ingredients! ✨ They are perfect for sharing with loved ones on Valentine’s Day. Head below to see how I make them.

Vegan Chocolate Cookie Crunch Heart

Mark and I haven’t got a great track record when it comes to Valentine’s Day. Normally our days run pretty smoothly (and I’m very thankful for that!) but we seems to trip and stumble our way through Valentines. It’s very strange indeed!

Vegan Chocolate Cookie Crunch Heart

One year we’d arranged to go out for a special Valentine’s meal, but Mark decided to first unblock the kitchen sink. He put on safety goggles (‘cos that’s the kind of guy he is), poured a heavy duty drain cleaner down the plughole and pushed the plunger. A second later, the drain cleaner shot out the overflow, through a gap in the side of his safety goggles and straight into his eye!!!

Since I’m not very confident at driving, he chose to drive himself to the hospital. In a hurry (and with only one eye vision!) he accidentally cut up a guy at a roundabout. The guy got so mad that he overtook us, slammed on his brakes in front of our car, got out his car and started making his way towards us. We quickly swerved round him and continued on our way. It was scary at the time (and one of the least romantic nights of my life), but seems totally farcical now!

Vegan Chocolate Cookie Crunch Heart

Decades later, things haven’t improved much. Last year, we decided to celebrate Valentines Day with a take-away from our favourite Thai restaurant. We rang through the order using the numbers on the menu (as you do). When the food arrived, we gleefully ripped open the containers…. to discover that the dishes were full of meat 🙁 It turns out that our menu was out of date and the dish numbers had changed!

I dread to think what might happen this year. To be safe, I’m going to lie low!

Whatever happens, the Valentines treats should be okay, as I’m making them in advance. The chocolates were made yesterday, and I made sure I had a few extra so that Lil’ L could test them for me. I’m delighted to say that he gave them a huge thumbs up.

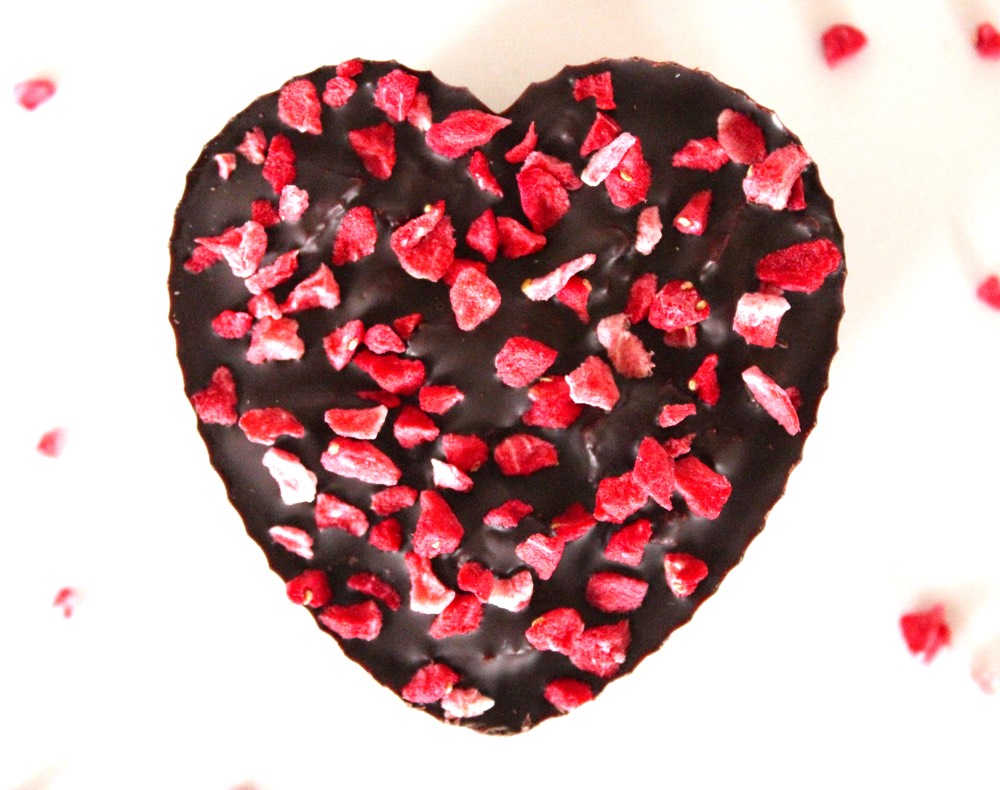
These treats remind me of Tiffin and Rocky Road, yet they are neither as they don’t contain butter, syrup, marshmallow or dried fruits. They are simply a scrumptious mix of dark chocolate and crunchy biscuits (cookies), topped with a sprinkling of colourful berries.

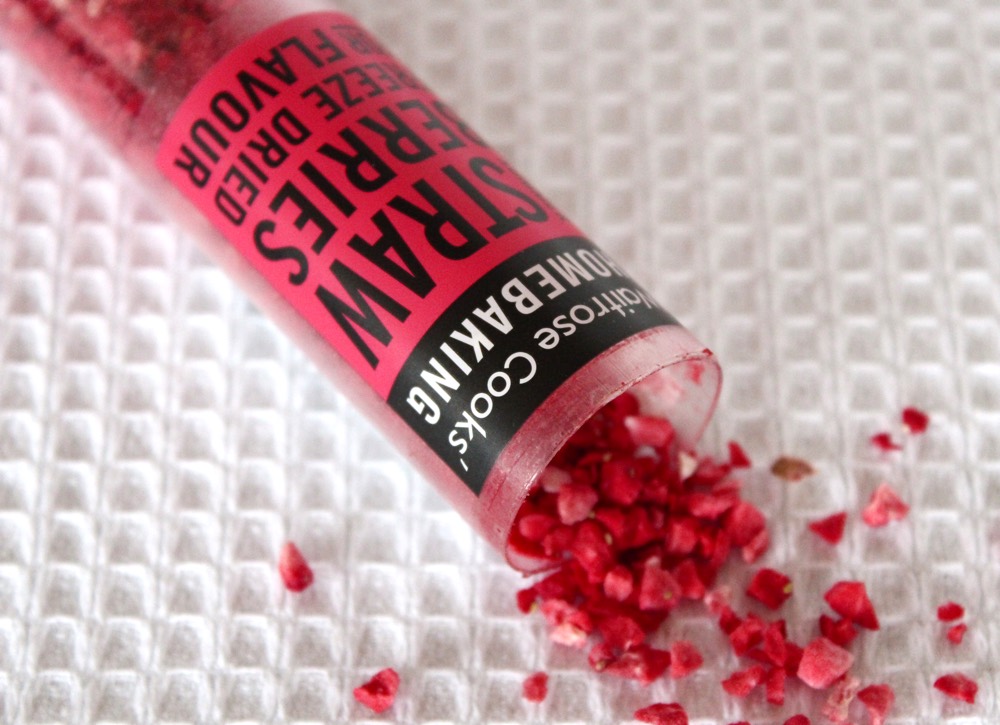
I used freeze-dried strawberries, but raspberries would work well too.  In one batch, I added some strawberries into the centre, but Lil’ L and I agreed that we preferred the batch where the strawberries were sprinkled on top only.

Freeze Dried Strawberries

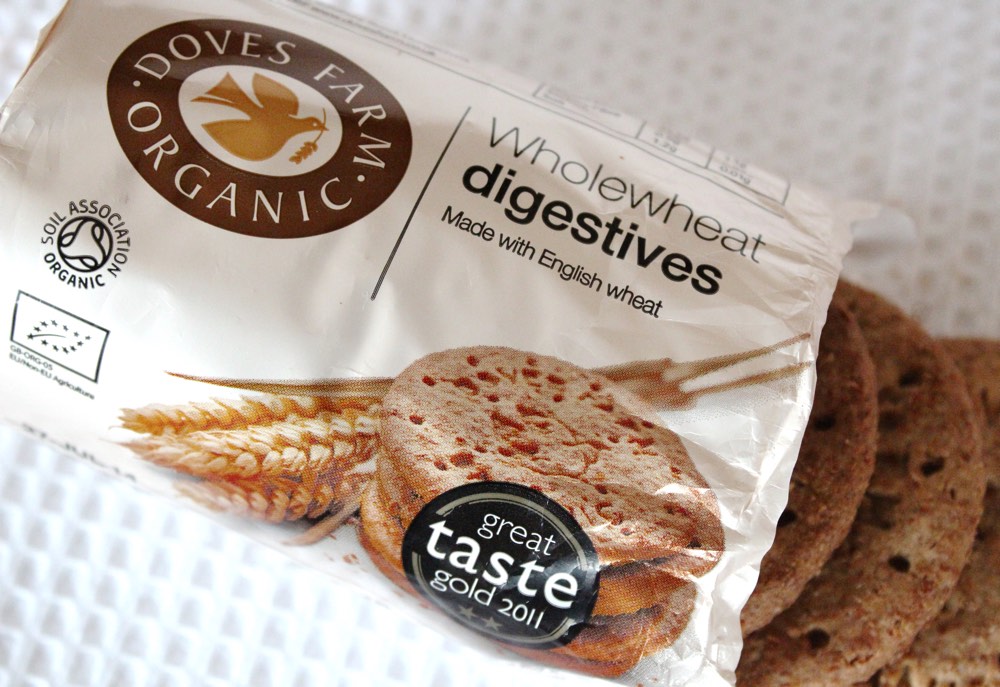
For the crunchy centre, I used some Doves wholewheat digestive biscuits, which have great flavour and are dairy-free.

Doves Digestive Biscuits

These chocolate treats are super simple to make, yet look really impressive! I set them in cupcake moulds, so they’re pretty substantial and great for sharing.

Vegan Chocolate Cookie Crunch Heart

You could make a single chocolate for your loved one, or a ‘His n Her’ pair. Wrap them in cellophane with a hand-made card, and your loved one is bound to be impressed by the thought and effort you’ve put in.

Recipe Card

Vegan Chocolate Cookie Crunch Heart

Vegan Chocolate Cookie Crunch Hearts

These treats are so delicious, yet simple to make! They are just perfect for sharing with loved ones on Valentines Day. The quantities below make 2 cup-cake size chocolates (my silicone heart moulds are 7cm / 2¾” in diameter)
Hands-on Time 15 minutes
Total Time 2 hours 10 minutes
Course Treat
Servings 2

Ingredients
 

  • 85 g / 3 oz 70% dark chocolate broken into chunks
  • 4 TBSP digestive biscuits or shortbread / sugar cookies broken into small pieces*
  • Freeze-dried strawberries or raspberries for sprinkling

Instructions
 

  • Add a small amount of water to a saucepan and place a heat-proof bowl on top. Add the chocolate to the bowl and gently heat, stirring occasionally until the chocolate has fully melted.
  • In a small bowl, stir together the biscuit pieces and 2 TBSP melted chocolate, until fully incorporated.
  • Coat the bottom of a silicone mould with 1 tsp melted chocolate (this will give the chocolate a nice, smooth bottom). Add 2 TBSP of the crunchy mixture and press to level as much as possible. Add 1 TBSP melted chocolate and tap the mould on the work surface to remove air bubbles and level the top. Sprinkle with freeze dried berries and place in the fridge until solid (about 2 hours). Repeat the above steps for the second chocolate.
  • When set, the chocolates should easily peel out of their moulds.
  • Store in an airtight container, the chocolates will keep for weeks in the fridge. They are also freezable.

Notes

* For a gluten free option, use gluten-free digestive biscuits/sugar cookies (found in the ‘Free From’ section in UK supermarkets)
Keyword Valentines Chocolate Treat, Vegan Treats, Vegan Valentines
Tried this recipe?Let us know how it was!

Pin for later ⬇️

Vegan Chocolate Cookie Crunch Hearts Collage

What would your ideal Valentines gift be? Do you like grand gestures, roses, romantic meals… or do you prefer the smaller, low key but thoughtful gestures like hand-made cards and treats?

SaveSave

SaveSave

SaveSave

SaveSave

SaveSave

SaveSave

SaveSave

Crunchy Maple Pecan Granola Clusters (Vegan | Dairy-Free)

Jump to Recipe

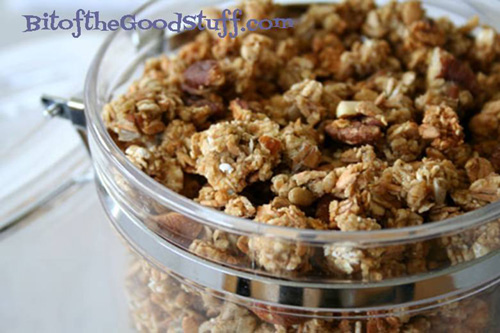
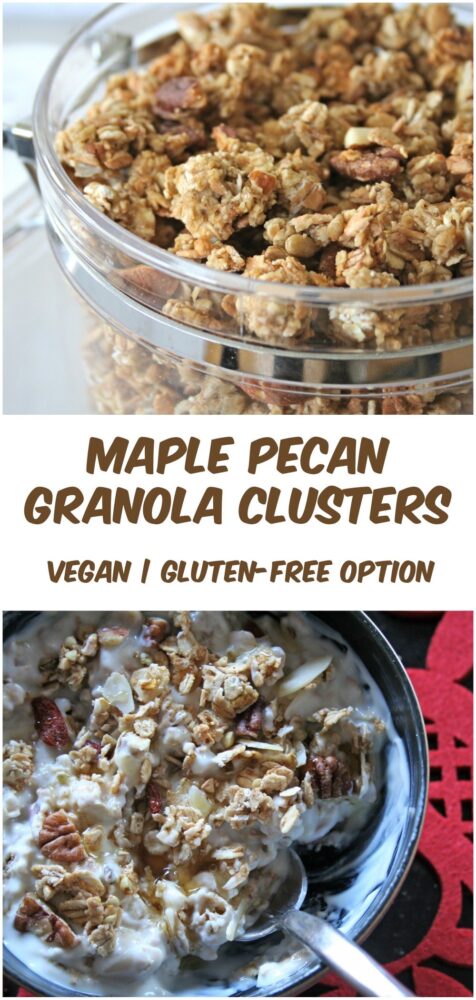
With crunchy clusters of oats, toasted pecans, and a hint of warm spice, this Maple Pecan Granola is one of my family’s all-time favourite breakfasts. Naturally vegan and dairy-free, it’s lightly sweetened with maple syrup and made with wholesome, nourishing ingredients. Best of all, it’s incredibly easy to make—just a few minutes of prep, then the oven does the rest. It’s so simple that even the kids can make their own!

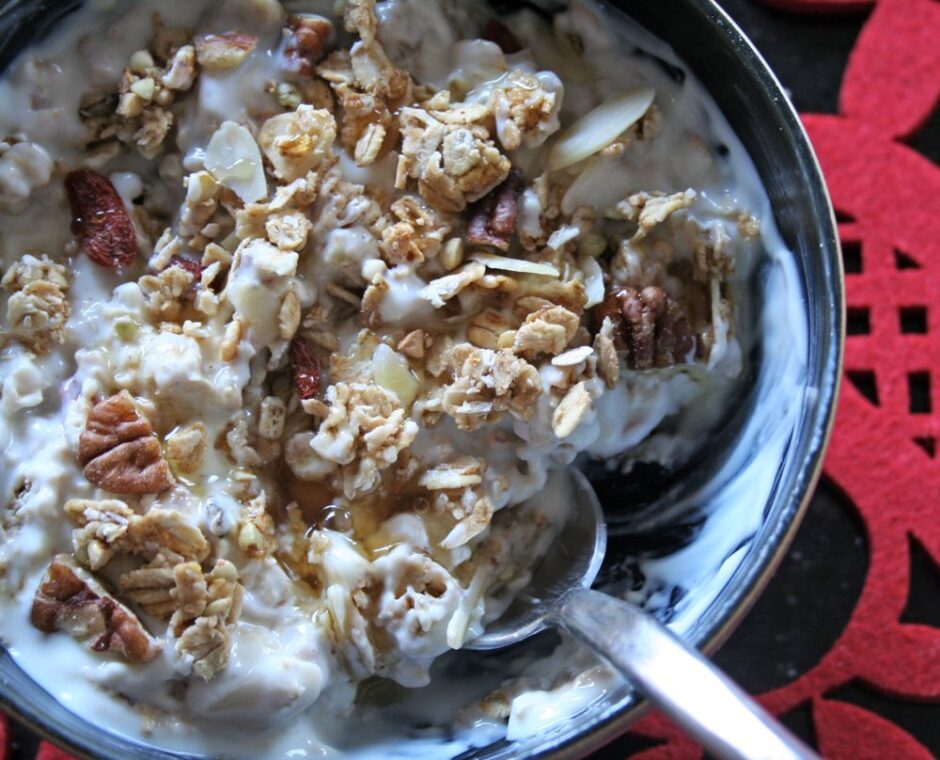
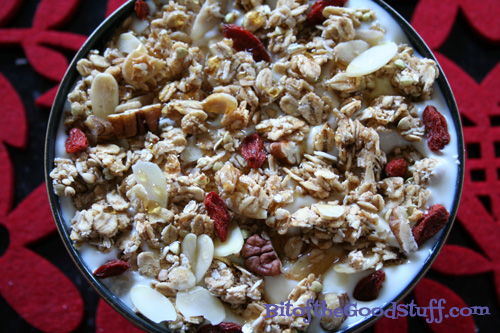
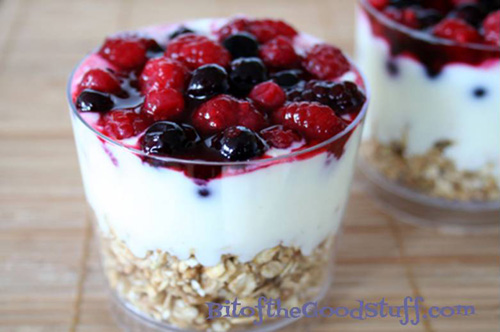
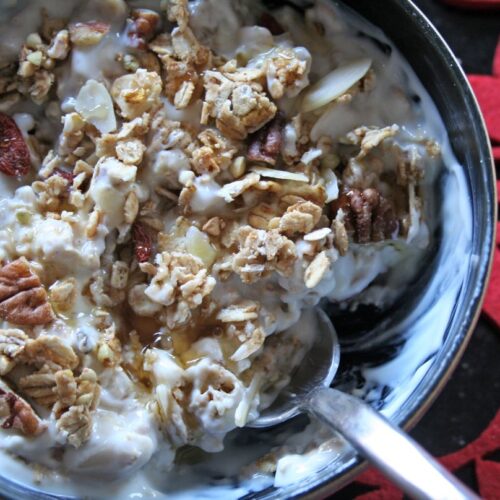
We love serving this granola with plant-based milk or yoghurt for breakfast, layering it into a vibrant berry parfait, or simply snacking on it straight from the jar!

Crunchy Maple Pecan Granola Clusters

I started making homemade granola about five years ago in response to Lil’ L’s dislike for the dried fruits found in shop-bought varieties. After a week of picking out the raisins before serving, I realised life was far too short for that kind of effort—and decided to try making our own instead!

This way, we could tailor it to suit all our tastes—nutty clusters for Lil’ L, a mix of nuts and dried fruits for me, and anything goes for Mark.

Making our own granola also meant we could skip the refined sugars and oils often found in shop-bought versions and opt for healthier, natural alternatives instead. The result? A crunchy, flavourful breakfast packed with ingredients we feel good about.

Maple Crunch Granola

We love serving this granola with non-dairy milk or yoghurt for a nourishing breakfast. It also makes a beautiful addition to a granola parfait, layered with plant-based yoghurt and berries. We often use frozen berries, which slowly thaw and swirl their juices into the yoghurt, creating a gorgeous colour and a naturally sweet flavour. These parfaits make a wonderful breakfast, dessert, or even a post-school snack.

Berry Granola Parfait

Recipe Card

Maple Pecan Crunch Granola

Maple Pecan Granola Clusters

Crunchy, chunky granola clusters loaded with oats, pecans, and warm spices, sweetened with pure maple syrup. This vegan, dairy-free recipe is easy to make, and perfect for breakfasts, parfaits, or snacks.
Hands-on time 10 minutes
Total Time 1 hour
Course Breakfast, Healthy Snack
Cuisine Vegan
Servings 10

Ingredients
 

  • 300 g / 3 cups rolled oats use gluten-free oats if needed
  • 100 g / ½ cup buckwheat groats* washed and drained
  • 40 g / 4 tbsp fine wholemeal (whole wheat pastry) flour, chapatti flour or gluten-free flour
  • 30 g / ⅓ cup desiccated coconut
  • 60 g / ½ cup pecans roughly chopped
  • 30 g / ¼ cup flaked almonds
  • 30 g / 3 tbsp coconut sugar or unrefined cane sugar (e.g. golden caster sugar)
  • ½ –1 tsp ground cinnamon to taste
  • pinch of ground nutmeg
  • ¼ tsp sea salt
  • 150 ml / ⅔ cup maple syrup or another natural liquid sweetener
  • 3 tbsp virgin coconut oil melted

Instructions
 

  • Preheat the oven to 150 °C (130 °C fan) / 300 °F. Line a large baking tray (approx. 38 × 26 cm / 15 × 10 inches) with non-stick baking paper. If your coconut oil is solid, place it in a heat-proof bowl in the oven for a minute or two to melt. (Be careful when removing—it will be very hot!)
  • In a large mixing bowl, stir together the rolled oats, buckwheat groats, desiccated coconut, pecans, flaked almonds, coconut sugar, cinnamon, nutmeg, and sea salt.
  • Pour in the maple syrup and stir to combine. Drizzle in the melted coconut oil and mix well until everything is evenly coated.
  • Transfer the granola mixture to the prepared tray. Press down firmly with the back of a spoon, a spatula (or even your hands!) so it forms a compact, even layer—like a thin granola bar. (This step helps create those lovely chunky clusters.)
  • Bake in the preheated oven for 40 minutes, or until the granola is lightly golden. Once out of the oven, allow the granola to cool completely on the tray—it will crisp up as it cools.
  • Once cooled, break into clusters with your hands. Some pieces, especially from the centre, may feel a little soft at first, but they tend to firm up over time.
  • Store in an airtight container in a cool, dry place. It will keep well for weeks.

Notes

* Buckwheat adds protein and a lovely crunchy texture. (I buy mine from Tesco). If you can’t find it, simply substitute an extra ½ cup of oats or another grain of your choice.
Serving Suggestions:
Serve with your favourite plant-based milk or yoghurt. For added nutrition, sprinkle with chopped walnuts, ground flaxseed, or goji berries. It’s also delicious layered into a berry parfait or enjoyed as a snack straight from the jar.
Keyword dairy-free granola, healthy breakfast, homemade granola, maple pecan granola, Vegan Breakfast, vegan granola
Tried this recipe?Let us know how it was!

Pin for later ⬇️

Maple Pecan Granola Clusters Collage

Do you make your own granola? What’s your favourite flavour combination? I’d love to hear your ideas!

Have a great weekend everyone!

With love,

Sharon xx