Crunchy Nut Apple Crumble (Vegan / Dairy-free) for Suma Blogger’s Network

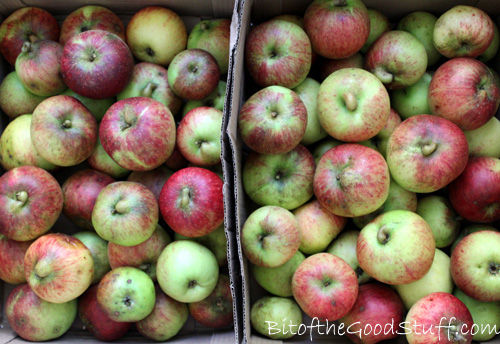
This year we had a bumper crop of fruit on our apple tree. Thanks to the late September sunshine, within the space of two weeks the apples transformed from green and small to red and huge! We must have picked at least a hundred apples so far. And with this amazing bounty, we’ve been able to indulge in lots of delicious apple treats.

Orchard Apples

For this month’s Suma entry, I thought I’d share one of our all-time favourite Autumnal desserts – Apple Crumble I’ve lost count of the number of crumbles I’ve made this past month, but it could be getting on for ten!

Crunchy Nut Apple Crumble

As well as oats and wholegrain flour, I love to add some pecans and almonds into the crumble, which gives it a delicious crunch. Traditionally, this dessert has a fair amount of cane sugar and dairy butter in it. However, instead of cane sugar, I prefer to use coconut sugar and maple syrup as they add a delicious, caramel-like sweetness and beautiful golden hue to the crumble.

Crunchy Nut Apple Crumble

Instead of dairy butter, I use coconut butter (the aroma-free kind) or a non dairy spread. Through Suma, I discovered the Tiana Organic Coconut Cooking Butter and I’m loving it! It’s really versatile and you can use it for all kinds of cooking and baking. I made some scrumptious pasties with it last week. Unfortunately they were devoured before I could take any pics, so I’ll re-create them soon and post the recipe.

Crunchy Nut Apple Crumble

BTW, those lidded Pyrex glass dishes are really handy for cooking, storing and transporting the crumbles. I took a couple with me to Essex recently to share with our relatives. Stored in a thermal bag, six hours after I’d baked them they were still warm!

Crunchy Nut Apple Crumble

[print_this]

This healthy twist on the classic Apple Crumble is packed with delicious flavours and crunchy texture. We love to serve it in colourful ramekins, either on its own or with a drizzle of non dairy cream, yogurt or custard. It’s delicious eaten warm or cold. Lil’ L and I actually prefer it cold as the topping firms up in the fridge for extra crunchiness!

Serves 6
Hands on time: 25 minutes   Cooking time: 35 minutes
Ready in: 45 minutes

Ingredients
1 kg / 35 oz cooking apples (e.g. Bramleys), peeled, cored and sliced (about 7 medium apples)
1 tsp ground cinnamon
60g / 2 oz / 1/3 cup sultanas
3 TBSP fruit juice (or water)
3 TBSP maple syrup (or agave syrup)

Crumble Topping:
100g / 3½ oz / ¾ cup fine wholemeal (whole wheat) or chapatti flour (use a GF flour mix, if needed)
1 tsp baking powder
½ tsp ground cinnamon
60g / 2 oz / 4 TBSP aroma-free coconut butter (e.g. Tiana) or non dairy spread (e.g. Pure)
75g / 2½ oz / ¾ cup rolled oats (use certified GF oats, if needed)
4 TBSP coconut sugar (or unrefined caster sugar)
2 TBSP maple syrup (or agave syrup)
30g / 1 oz / ¼ cup pecans, chopped
40g / 1½ oz / ¼ cup almonds, chopped

Method
Preheat the oven to 180C (160C fan) / 350F / Gas 4.

Place the sliced apples, cinnamon, sultanas, juice and syrup in a large saucepan. Partially cover with a lid and simmer for 15 minutes until the apples are soft and fluffy. Taste test and add more sweetener, if needed.

Meanwhile, prepare the topping: Place the flour, baking powder, cinnamon and coconut butter in a food processor and pulse until the butter is fully incorporated. Tip into a bowl and stir in the oats, sugar, syrup and nuts.
Spoon the apples into a 1.5 litre / 1½ quart ovenproof dish. Sprinkle the crumble on top. Bake for 20 minutes or so, until the topping is golden.

Stored in an airtight container, it will last up to a week in the fridge, or for weeks in the freezer.

[/print_this]

Products used in this recipe (UK stockists)
Pyrex Rectangular Lidded Dish, available from Amazon (currently discounted to £3.50)
Magimix Food Processor
Tiana Coconut Cooking Butter, available from Suma, health food shops and online
Biona Organic Coconut Sugar, available from Suma, health food shops and online
Suma Organic Sultanas, available direct from Suma, via Amazon, and independent health food shops (love that they come in recyclable packaging!)
Clarks Original Maple Syrup, available from Tesco, Asda, Sainsbury’s, Morrisons

Apple Crumble & Oatly Cream

What’s your favourite fruit crumble? For me, it’s a close call between apple and plum 🙂

Have you made any crumbles this Autumn/Fall? If you’ve posted any recipes, please do share below xx

Rocky Road (Vegan Style!)

Sorry I haven’t been around much these past few weeks, but I’ve been hanging out with Lil’ L. He’s growing up fast, and since this could be the last summer that he actually wants to hang out with me, I’ve been savouring every moment. We’ve had so much fun! This week’s highlights (so far) have been hiking, biking, playing tennis, picnicking in the park, a trip to the cinema (How To Train Your Dragon 2) and playing in the kitchen 🙂

Last weekend we got back from our vacation and there was a postal delivery card waiting for us. First thing Monday morning, we hopped on our bikes and pedalled down to the post office. I jumped with glee when I saw that the mystery parcel was the latest The Vegan Kind Subscription Box. I couldn’t wait to do the big ‘reveal’!

The Vegan Kind #TVK10

As usual, the box was filled with interesting brands and products that I’m excited to try out. Lil’ L’s eyes especially lit up when he saw these….

Freedom Mallows

While regular marshmallows are made with gelatine (a slaughterhouse byproduct), Freedom Mallows are gelatine free, dairy free, egg free, gluten free and nut free, and thus suitable for vegetarians and vegans, as well as people with gluten, dairy and nut allergies/intolerances.

And it’s incredible how similar they are to regular marshmallows, both in taste and texture. My mum loves marshmallows and even she can’t tell the difference.

Over the winter, Lil’ L enjoyed slicing and sprinkling vanilla mallows onto his hot chocolates. This time round, we thought it would be fun to make some Rocky Road. While I stood by, Lil’ L set to work melting chocolate and coconut oil…

Rocky Road Making

…bashing biscuits

Rocky Road Making

…then adding mallows and mixing it altogether. Since our mallows were strawberry flavoured, we thought it would be nice to finish off our Rocky Road with a sprinkling of freeze-dried strawberries (which we had left over from these Chocolate Crunch Hearts).

After a couple of hours in the freezer, the Rocky Road was ready to slice and sample. It got a huge thumbs up from Lil’ L!

Rocky Road (Vegan Style)

So far this week, he’s enjoyed it as a treat snack at the cinema and the tennis courts. While it’s a little too sweet for me, Lil’ L reckons it’ll be a hit with kids or anyone with a sweet tooth. It would be great for sharing at children’s tea parties or selling at charity or school fundraisers. It would also make a lovely home-made gift for sweet-loving veggie friends, wrapped in a special box or tin

[print_this]

Rocky Road… Vegan Style!
Got a sweet tooth? Then this treat is for you! It’s easy and fun to prepare. It makes a great rainy day activity for veggie kids, young and old alike!

Makes about 12 pieces
Hands-on time: 15 minutes Ready in: 2 hrs 15 minutes

Ingredients
200g / 7oz dark chocolate (70% cocoa solids)
2 TBSP virgin coconut oil, plus extra for greasing
200g / 7 oz Digestive biscuits (or Rich Tea, Oreos or gluten free cookies)
75g / 2½ oz veggie marshmallows (e.g. Freedom Mallows)
Icing sugar, for dusting

Method
Grease and line a freezer-safe container about 12cm x 22cm (5 inches x 8½ inches) with baking paper. (I used a large loaf pan, but you could use a plastic, silicone or foil container).

Add a small amount of water to a saucepan and place a heat-proof bowl on top. Break the chocolate into chunks, place it in the bowl along with the coconut oil and gently heat, stirring occasionally until the chocolate has fully melted.

Meanwhile, place the biscuits (cookies) in a freezer bag. Press out the air and tie the bag shut. Bash with a rolling pin until you have a mixture of crumbs and small pieces.

If your mallows are large, slice them into halves or thirds.

When the chocolate has melted, remove from the heat and stir in the biscuits and mallows. Tip into the prepared pan and press down hard with the back of a spoon to remove air pockets.

Place in the freezer for about 2 hours, until solid. Using a sharp knife, slice into rectangles about 4 cm (1½ inches) in size. Add a light dusting of icing sugar for decoration.

Store in an airtight container in the fridge or freezer, where it will keep for weeks.

[/print_this]

In the UK, Freedom Mallows are available from Holland & Barrett, independent health food shops (including Harvest in Bath) and online.

Have a wonderful weekend everyone! xx

Something for the Weekend – Pineapple Sunshine Deepcrust Pizza

When the sun’s shining, June has got to be the most glorious month of the year in England, don’t you think? The countryside is lush and green, the roses are out in full force, and gardens are a hive of activity.

Roses in June - By the K&A Canal

And after all those months of rain, it’s so refreshing to go out running without an umbrella (yes, I did actually resort to that, much to the amusement of others!) and head out on my beloved bike.

Countryside around Bath

It feels so liberating to travel around on the bike. No queuing in traffic, no waiting for a bus or driving around looking for a parking slot, no expense. Just lots of fresh air, exercise and a chance to take in the beautiful views along the way

Kennet and Avon Canal with Swans - June

Swans and cygnets - K&A Canal - June

I much prefer to take the scenic route into the city centre rather than along the main roads. It only takes a couple of minutes extra, but it’s so worth it. I get to see lots of gorgeous creatures along the way, like these beauties.

Cows and Calves - Bath Countryside

I always give them a wave and often stop to say ‘hi’. They’re very patient with me and this one in particular politely feigns interest in my incessant chatter 😉

Cows in Bathampton

Along with my exercise and travel routines, this time of year, my appetite changes too, and I’m craving lots of fresh salads, fruit smoothies and frappuccinos.

Though my appetite for pizza is year-round, the toppings change to suit the season. To celebrate the arrival of summer, for me, nothing beats our ‘Pineapple Sunshine Deepcrust Pizza’.

PineappleSunshine Deepcrust Pizza (Vegan Style)

This is my vegan take on the classic Hawaiian pizza. The ham’s been removed, and replaced with an array of tasty, sunshine-filled veggies. If you wish, you could sprinkle on some vegan cheese, but these days me and the boys prefer to leave our pizzas cheeseless and let the veggies take centre stage.

Vegan Pineapple Sunshine Deepcrust Pizza

If you’re a subscriber to The Vegan Kind Monthly Subscription Box (TVK), you’ll have spotted this pizza on the June recipe card. It was tucked in with a whole bunch of fab vegan and eco-friendly goodies, including a jar of Mr Organic Italian Sun-dried Tomato Pesto. It was the first time I’d ever tried this brand of pesto and I seriously loved it! It has the most amazing flavour and it works beautifully on the pineapple pizza.

TVK8 Collage

For those of you that don’t receive the TVK box, I thought I’d share our pizza recipe here. I’ve also added some notes about gluten free and speedy options, as well as my vegan cheese recommendations (just in case you still love your pizzas cheesy 😉 )

[print_this]

Makes: 1 large deep crust pizza, serving 2-3 people
Hands on time: 20 minutes    Resting time: 60+ minutes
Cooking time: 20 minutes    Ready in: 1 hr 40 minutes

Ingredients
Pizza dough:
210g / 7½ oz / 1½ cups  fine wholemeal (wholewheat) or chapatti flour (I use the latter)
90g / 3 oz / ½ cup fine semolina
½ tsp fast action yeast
1 tsp salt
1 tsp sugar
1 TBSP extra virgin olive oil
170ml / 5¾ oz / scant ¾ cup lukewarm water

Base: 3-4 TBSP sun-dried tomato paste or pesto

Toppings:
1 small red onion, finely sliced
½ small red pepper, sliced
½ small yellow or orange pepper, sliced
2-3 TBSP canned sweet corn
100g / 3½ oz / 2/3 cup fresh pineapple, sliced into thin pieces
2 mushrooms, thinly sliced
1½ TBSP pine nuts
1 tsp dried oregano
Light sprinkling of cashew ‘parmesan’*, optional
Garlic, chilli or herb infused olive oil, for drizzling

Method
Place the flour, semolina, yeast, salt and sugar in a bowl. Pour in the oil and water and stir with a fork until it starts to come together, then work into a dough with your hands. Turn out onto a lightly floured surface and knead for 5-10 minutes until the dough is smooth and springy. Place in a clean, lightly oiled bowl, cover with a damp tea towel and leave to rise in a warm place for 1-2 hours.

Preheat the oven to 220C (200C fan) / 425F.

Tip the dough onto a surface dusted with flour and semolina. Knock out the air, then roll into a circle about 25cm / 10” in diameter. Transfer to a lightly oiled pizza tray or non-stick baking sheet.

Spread the tomato paste or pesto over the crust and add the veggies. (Be sure to add plenty as they shrink on cooking). Blot the pineapple with kitchen paper to remove excess juice before adding to the pizza. Sprinkle on the pine nuts, oregano, cashew ‘parmesan’ and a light drizzle of oil. Place in the pre-heated oven and bake for 20 minutes, or until the centre of the pizza is cooked through.

This pizza is best served straight from the oven, however it can be served cold and any leftovers make a tasty addition to lunch boxes. The pizza will keep for up to 3 days in the fridge.

*Cashew ‘parmesan’: Grind together ¼ cup cashews and 3 TBSP nutritional yeast. Store in an airtight container in the fridge or freezer. [/print_this]


Notes
GF option – I haven’t made a GF pizza myself yet, but ready-made bases/crusts are available to purchase in stores and online. In the UK, the Venice Bakery gluten free pizza bases come highly recommended (I’m looking forward to trying them myself!)

If you wish to add some vegan cheese, I can recommend the Violife brand. It tastes incredibly similar to dairy cheese, yet it’s made with coconut oil! In the UK, you’ll find it in independent health food shops and online.

For a super speedy dinner, we love to make French bread pizzas using a large multigrain baguette or ‘Grand Paysan’ loaf. Roast the veggies for about 15 minutes in a little olive oil. Slice the bread in half and lightly toast on both sides. Spread on the pesto, then pile on the veggies and serve.

What are your favourite things about June?
What kinds of foods are you enjoying right now?

‘Rise and Shine’ Oaty Pineapple Breakfast Smoothie (Dairy-free)

The British winter was more like a monsoon this year. For over two months it rained pretty much continuously, and often accompanied by gail force winds. It’s been yet another crazy weather season, with January recorded as the wettest winter month since 1767! Thousands of homes experienced terrible flooding, especially on the Somerset levels. While our garden has been completely submerged under water three times since Christmas Eve, fortunately our house is elevated and out of harm’s way.

We’re now coming to the end of March and we’re STILL experiencing rain pretty much every day here in the South West. However, there are breaks and when the sun comes out and the clouds disappear, it’s absolutely glorious! I’d forgotten how wonderful it is to feel the warmth of the sun on your skin!

Japonica March 2014

As the sunny spells are so fleeting, I’m grabbing every opportunity to get out there and make the most of them. The garden is starting to come to life and it’s been a joy to see the Spring flowers popping up. Every where I look, there’s a hive of activity in the garden. The bees, butterflies, ladybirds and toads are all out of hibernation, and the birds are busy pairing up and make nests. This truly is a wonderful time of year! Now if the rain could just go away for a while so I can go jogging without getting wet or having to run with an umbrella, then that really would be the icing on the cake 😉

Primroses March 2014

For today’s recipe, I’d love to share one of Lil’ L and I’s favourite ‘power boosting’ breakfast smoothies. This one contains fresh pineapple, which has powerful antioxidant, anti-inflammatory and immune-boosting properties. For slow-release energy, a protein boost and delicious creaminess, we add oats and chia seeds. The chia seeds also give the smoothie an omega-3 boost and have this amazing satiating effect, leaving you feeling full up for hours.

'Rise and Shine' Pinapple Oat Breakfast Smoothie | Bit of the Good Stuff

To ramp up the nutritional factor even more, we add a spoonful of baobab powder. This natural fruit powder boasts some amazing nutritional stats, including 3 times more calcium than milk and 6 times more antioxidants than blueberries!

When the sun peeked out the other day, I grabbed the opportunity to drink my smoothie in the garden. Five minutes of bliss!

[print_this]

This smoothie makes a refreshing change from breakfast cereals. It’s packed with goodies that will help to sustain energy levels and leave you feeling full up all morning. It also makes a great after school or work ‘pick me up’. For a lighter, post dinner ‘dessert’ smoothie, simply omit the oats.

Makes 1 tall drink
Hands-on time: 5 minutes

Ingredients
¾ cup sweet, fresh pineapple, diced
1 cup non dairy milk (almond, soya or rice, preferably fortified)
1 TBSP chia seeds
1 TBSP baobab powder, optional (for a nutritional boost)
4 TBSP rolled (porridge) oats (use certified GF oats, if needed)
Maple syrup (or other natural sweetener), optional to taste

Method
Place all the ingredients, except the sweetener, in a high-speed blender and blend until completely smooth. Stop now and then to scrape down the sides. Taste test, and add a little maple syrup, or other natural sweetener, if needed.

As with any acidic fruit drink, allow at least thirty minutes after drinking before brushing your teeth.

[/print_this]

Products used in this recipe
So far, I’ve made this smoothie with Alpro Almond milk & Soya milk and Rice Dream Rice Milk
Chia Seeds, available from health food stores and online, including Amazon

Baobab Fruit Powder from the Eden Project (gifted to me)
Mornflake Superfast Oats

'Rise and Shine' Pineapple Oat Breakfast Smoothie


 I hope you’re having a wonderful weekend everyone! xx

Valentines Chocolate Cookie Crunch Hearts (Dairy-Free / Vegan)

Today I’d like to share one of my favourite home-made chocolate treats – Chocolate Cookie Crunch Hearts. They are so delicious, yet simple to make. They contain just THREE ingredients! ✨ They are perfect for sharing with loved ones on Valentine’s Day. Head below to see how I make them.

Continue reading “Valentines Chocolate Cookie Crunch Hearts (Dairy-Free / Vegan)”

Maple Pecan Granola Clusters

Today, I’d like to share one of Lil’ L’s all-time favourite breakfasts.

I started making home-made granola about five years ago in response to Lil’ L’s dislike for the dried fruits that appear in shop-bought granolas.  After a week of picking out the raisins from a granola before serving it to him, I decided that life was far too short to waste time picking out dried fruit and that I would have a try at making my own granola instead!  By making it myself, I would be able to tailor the granola to suit all our tastes.  Lil’ L loves nutty granola, I love a mix of nuts and dried fruits, while Mark will eat anything.

Maple Pecan Granola

By making our own, we could also omit the refined sugars and oils that are found in shop-bought granolas and replace them with healthy, natural alternatives.

Maple Pecan Granola Ingredients

For breakfast, we love serving this granola with non dairy milk or yoghurt.

Maple Pecan Granola

It is also delicious layered with yoghurt and berries in a parfait (we use frozen berries as they turn the yogurt a beautiful colour as they thaw!)  These can be served as breakfast, dessert or even a post-school snack.

Berry Granola Parfait

Please note that the recipe below has been updated in 2018 to bring it into line with the recipe that appears in the Bit of the Good Stuff cookbook.

[print_this]

It’s so simple to make your own granola. In fact, with very little assistance, the kids could easily make their own! Lil’ L prefers his granola to be “chunky cluster” and we’ve found a simple method of doing this which we’ve set out below.  

Makes approximately 5 cups (10 servings)
Hands on time: 10 minutes    Ready in: 60 minutes

Ingredients

300g / 3 cups rolled oats (use GF oats, if needed)

100 g / ½ cup buckwheat groats* (washed and drained)
40g / 4 TBSP fine wholemeal (whole wheat pastry) flour, chapatti flour or gluten-free flour
30g / ⅓ cup dessicated coconut

60g / ½ cup pecans, roughly chopped

30g / ¼ cup flaked almonds

30g / 3 TBSP coconut sugar or unrefined caster sugar

½-1 tsp ground cinnamon

pinch of ground nutmeg

¼ tsp sea salt

150ml / ½ cup maple syrup (or other natural liquid sweetener. I use Clarks Original Maple Syrup which is a carob and maple blend)

3 TBSP virgin coconut oil, melted

*I add buckwheat to my granolas as it’s a great source of protein and adds another dimension of texture. In the UK, it’s available in the wholefoods section of Tesco and from health food stores.  If you can’t get hold of buckwheat, you can substitute with another ½ cup of oats or other grain.

 Method

1.  Preheat the oven to 150C (130C fan) / 300F. Line a large baking tray (38 x 26cm / 15 x 10 inches) with non-stick baking paper. If your coconut oil is solid, place it in a heat-proof howl in the oven for a couple of minutes to melt it (be careful when you remove it as the container will be very hot!)

2.  In a large bowl, mix together the oats, buckwheat, dessicated coconut, nuts, sugar, cinnamon, nutmeg and salt. Stir in the maple syrup. Pour in the coconut oil and stir until the grains are thoroughly coated.

3.  Spread the granola out evenly on the prepared baking tray and press down hard so that the mixture sticks together as if you were making a thin granola bar. Bake for 40 minutes, until the granola has lightly browned. Remove from the oven and allow to completely cool (it will firm up as it cools).

4. Break up the granola into clusters. (Don’t worry if the pieces from the centre of the tray feel a little soft as I find they firm up over time). Stored in an airtight container in a cool place, the granola will keep for weeks.

5.This granola is delicious served with non-dairy milk or yoghurt, and a sprinkling of your favourite dried fruits, nuts and seeds. I often add a sprinkling of chopped walnuts and ground linseed for an omega-3 boost and goji berries for vitamin C.

[/print_this]

Pin for later ⬇️

Last Christmas, I thought I’d treat Lil’ L to some “luxury” shop-bought granola.  I bought two different brands for him, both of which included a selection of his favourite nuts and no dried fruits.  It turns out he didn’t like either of them as they were “way too sugary”!  Instead, he asked whether he could have some of our home-made granola.  Since we’d run out, he was even prepared to postpone his Christmas Day breakfast for 45 minutes until a fresh batch was baked!  I wasn’t expecting to be making granola on Christmas morning but I was happy to oblige. Thank goodness it only takes a few minutes to prepare!  We won’t be buying shop-bought granolas any more.  Home made is best by a long shot!

And if you like chocolate, how about trying our chocolate clusters? Totally scrumptious and perfect for breakfasts, snacks and desserts 🙂

Have a great weekend everyone xx

Do you make your own granolas?  If so, what is your favourite flavour combination? If you have any published recipes, please do link up below.