Purple Haze Salad with Blackcurrant, Hemp and Mustard Vinaigrette

Salads have been noticeably absent from my blog and that’s because I only share recipes that are ‘Lil’ L approved’. Until recently, salad was definitely not on his love list. Last summer in Provence, I started to put tiny amounts of lettuce on his lunch plate and he would eat it… providing it was slathered in hummus or salad dressing. We slowly increased the portion size and, since Christmas, he’s actually been tucking in with enthusiasm. Finally, he’s feeling the love for salad leaves and he’s even enjoying taking them to school in his lunch box 🙂

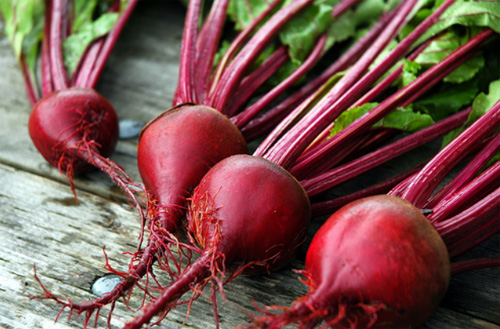
Unlike Lil’ L, I’ve always been a fan of salad. As a kid, I would munch my way through my Dad’s homegrown salad patch – tomatoes, radishes, lettuces, beetroot, celery, cucumber – I loved it all! However, just like Lil’ L, I much prefer my salads well dressed. Tangy vinaigrettes or creamy mayonnaise can really help to bring a bowl of salad to life and definitely make it more appealing to kids!

When I was invited to take part in a Maison Maille Culinary Challenge, I thought it would be the perfect opportunity to devise a new, family-approved salad recipe. We were invited to select two products from their range, and I opted for the Dijon Mustard Originale and Red Wine Vinegar with Dijon Blackcurrant Liqueur. Unfortunately, the vinegar never arrived, however it did provide the inspiration for my recipe.

Blackcurrant, Hemp and Mustard Vinaigrette

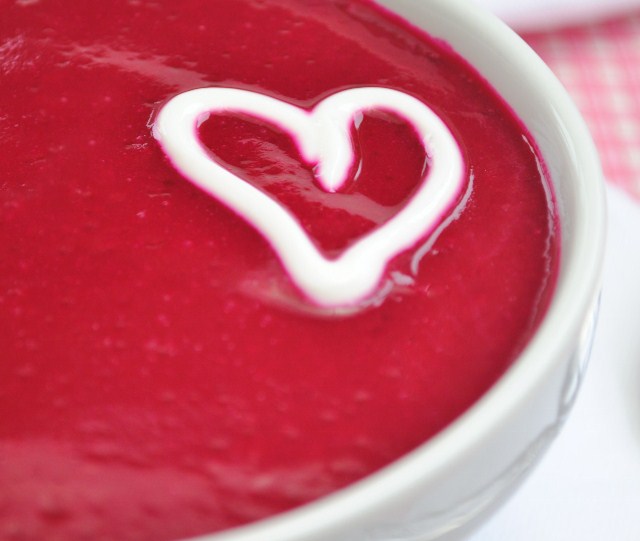
While shop-bought salad dressings tend to be high in empty calories with little or no nutritional value, I try to make my home-made dressing the exact opposite. I love to pack them with nutrient-rich ingredients so I can drizzle on the dressing to my heart’s content, in full knowledge that it’s actually good for me and isn’t going to pile on the pounds. The dressing I’m sharing today is actually oil free. And check out that amazing colour!

I absolutely love the flavour of this dressing, and it’s been a huge hit with the rest of the family too (including Lil’ L!) It’s tangy, with a touch of sweetness and beautiful hint of blackcurrant. I’ve used real blackcurrants in the dressing which are loaded with antioxidants. To add a touch of creaminess, I blended in some hemp seeds, which also happen to be a great source of omega 3.

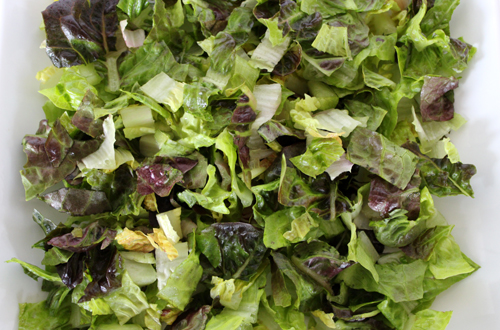
To complement this beautifully vibrant dressing, I’ve compiled a colourful, crunchy, protein-rich salad. I love the contrasting colours of the Ruby Gem lettuce. Like most lettuces, it’s packed with phytonutrients to keep us healthy.

Gem Lettuce 500

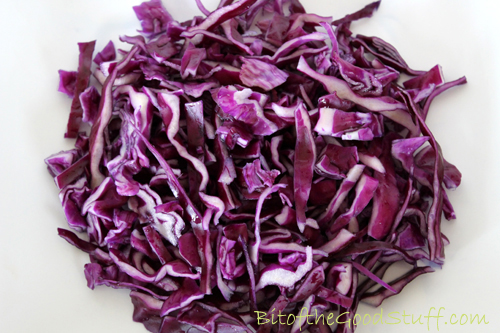
And surely nothing can beat red cabbage for vibrancy? As well as adding flavour, crunch and colour, red cabbage is packed with antioxidants, including vitamin C. Just one cup of shredded cabbage contains 85% of the recommended daily amount of vitamin C!

Red Cabbage copy

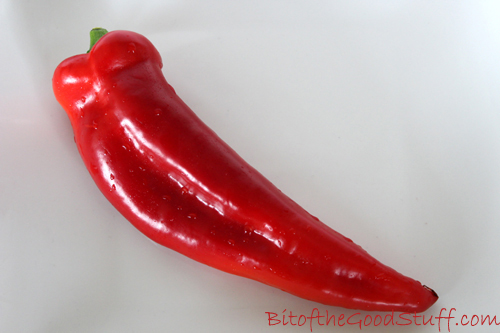
And here’s another antioxidant-rich, immune-boosting, tasty addition to my salad bowl – red pepper. I opted to use a sweet romano pepper, but bell pepper would work fine too.

Sweet Romano Pepper copy

For protein, I added some edamame (soya) beans. I love their fresh flavour and colour. I tend to undercook mine slightly so they’re nice and firm for salads or snacks. Soya beans have great health benefits but have received some bad press lately. If you want to find out more, check out this report from Viva!

Edamame Soya Beans

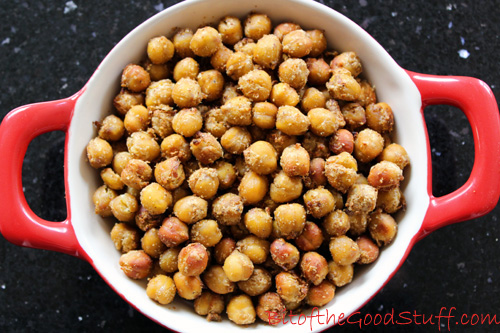
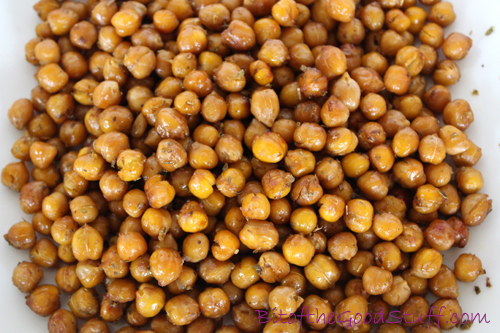
For an extra boost of protein and slow release energy, I added some chickpeas. This time, I opted for maple soy roasted chickpeas, but my Dukkah spiced chickpeas would also work well in this salad. Chickpeas are a nutrient powerhouse packed with protein, dietary fibre, antioxidants, B vitamins and minerals including iron.

Roasted Chickpeas copy

While not featured in today’s pics, I also highly recommend adding avocado to this salad bowl. It adds another great dimension of flavour and texture, as well as heart-healthy monounsaturated fats and vitamin E. Lil’ L is a huge avocado fan and always loves to add a few slices to his salad plates.

[print_this]

Purple Haze Salad with Blackcurrant, Hemp and Mustard Vinaigrette

The Dressing (oil free)
Yield: approx. 120g / ½ cup
Hands-on time: less than 5 minutes

Ingredients
18g / 2 TBSP shelled hemp seeds
2 tsp balsamic vinegar
2 tsp maple syrup
2 tsp Dijon Mustard
35g/ ¼ cup fresh or frozen blackcurrants
60ml / ¼ cup water
pinch of salt

Method
Place all the ingredients in a small bowl and whizz with a hand blender until smooth (alternatively use a jug blender). Taste test and add more mustard or sweetener, if desired.

The Salad
Serves 2 as a main (or 4 as a side salad)
Hands-on time: 10 minutes

Ingredients
60g / ⅓ cup frozen soya (edamame) beans
140g / 2 cups ruby gem (or romaine) lettuce, shredded
100g / 1 cup red cabbage, thinly shredded
1 red romano (or bell) pepper, finely chopped
1 batch of roasted chickpeas (recipe below)
1 medium ripe avocado, sliced (optional, but highly recommended)

Method
Boil the soya beans for 3 minutes, then run under the cold water tap and drain. How you arrange the salad is entirely your choice! You could keep all the ingredients separate or mix it all up. Either way, it will look beautiful
Sprinkle with the roasted chickpeas and dressing just before serving.

Soy Maple Roasted Chickpeas

Serves 2-4
Hands-on time: 5 minutes    Cooking time: 25-30 minutes

Ingredients
1 x 400g / 14 oz can chickpeas
2 tsp tamari soy sauce (or low-sodium soy sauce)
1 tsp extra virgin olive oil
1 tsp maple syrup
1 tsp dried oregano
Pinch of salt

Method

1. Preheat the oven to 200C (180C fan) / 400F. Line a large baking sheet with non-stick baking paper.

2. Thoroughly drain the chickpeas and place in a bowl. Add the soy sauce, oil, syrup, oregano and salt. Stir to coat, then tip the chickpeas onto the prepared baking sheet and arrange in a single layer. Scrape any remaining marinade from the bowl and spread it onto the chickpeas. Roast for 25-30 minutes, stirring half way through the cooking time. After 25 minutes roasting time, I find that the chickpeas have a slightly softer, chewier texture (which I personally prefer), while after 30 minutes they become harder and crunchier.

[/print_this]

After snapping the photos, I couldn’t wait to tuck in!

Lord Love a Dukkah! Olives Et Al Review & Recipe for Dukkah Roasted Chickpeas

In 1992, Annie  and Giles Henschel, founders of the Dorset-based business Olives Et Al, set out on a year-long journey through the Mediterranean Middle East and North Africa. They fell in love with the regional food flavours and, upon their return, began a process to capture and recreate the authentic flavours of the Mediterranean and bring them to the UK.

olives et al

On their website you’ll see the vast array of food items they currently sell including olives, marinades, sauces, oils, nuts and snacks, as well as hampers and gift boxes.

Recently, I was lucky enough to receive a complementary Lord Love a Dukkah Hat Box. Inside this super stylish box, I was delighted to find the following:
Moroccan Inspired Tapenade Marocaine with Preserved Lemons
– Sunshine Rosemary & Garlic Olives
Very Deli Herbed and Pitted Olives
Extra Virgin Olive Oil
Egyptian Style Spiced Dukkah

Retailing at £25, this stylish quality box would make a fantastic gift for ‘foodie’ friends. This is the type of gift that I love to receive – a treat that I can share with others

Dukkah Gift Box

Mezze has got to be my favourite dining style, so this box couldn’t have been more perfect for me! For get-togethers with friends and family, I love to whip up some houmous, baba ganoush, roasted almonds and chickpeas, lay out some dishes of olives, tapenade, oils, and salad leaves, and serve it all with a big pile of warm flat bread. While the conversation’s flowing, everyone enthusiastically tucks in. Mezze is incredibly tasty, and very moreish!

Dukkah Gift Box

Though Olives Et Al didn’t know this, Dukkah is actually one of my all-time favourite spice mixes! I would describe its flavour as “warmly aromatic”. Though the ingredients vary depending upon brand, I’ve always found Dukkah to be mild rather than hot. This makes it perfect for people (like me!) that can’t handle much heat. The ingredients in the Olives Et Al Dukkah spice mix are: sesame seeds, coriander, cumin, almonds, hazelnuts, salt, garlic, thyme and black pepper.

Olives et al Spiced Dukkah

Traditionally, Dukkah is served as a starter with bread and oil, but I also use it to flavour home-made breads and houmous. One of my current obsessions is Dukkah spiced roasted chickpeas. They’re so simple to make and really versatile! They make a great addition to pasta, rice and salad dishes, can be mashed and used as a sandwich or wrap filling, or simply eaten straight up. They make a great snack too! I really should start making bigger batches as I can easily eat a can’s worth of chickpeas in one sitting!

Dukkah Roasted Chickpeas

I absolutely love the nutty taste and texture of chickpeas. They’re also super good for you! They provide slow release energy, help to control blood sugar levels and lower bad cholesterol levels. They’re packed full of protein, dietary fibre, phytonutrients, B vitamins and minerals. Just one cup of cooked chickpeas provides 84% of the recommended daily amount of manganese, and 26% of iron!

The Dukkah spices also have great health benefits. Sesame, cumin and coriander seeds are packed with antioxidant and anti-inflammatory compounds, and rich in minerals including calcium and iron. Just one tablespoon of cumin seeds provides 22% of the recommended daily amount of iron!

[print_this]

Dukkah Roasted Chickpeas

Hands on time: 5 minutes    Cooking time: 25-30 minutes
Ready in: 35 minutes

Ingredients
400g / 14 oz can chickpeas (or 1½ cups cooked chickpeas)
1 tsp extra virgin olive oil
1 tsp maple syrup
1 TBSP Dukkah spice mix

Method

Get prepared:
Preheat the oven to 190C / 375F.
Line a large baking sheet with non stick baking paper.
Grind the Dukkah spice mix into a powder using a mortar and pestle or grinder.

Ready, set go!
Thoroughly drain the chickpeas and place in a bowl. Add the oil, syrup and spice mix. Stir to coat then spread them out on the prepared baking sheet. Using a silicon spatula, scrape out any remaining spice mix from the bowl and spread it onto the chickpeas. Roast for 25-30 minutes, stirring half way through the cooking time. After 25 minutes roasting time, I find that the chickpeas have a slightly softer, chewier texture (which I personally prefer), while after 30 minutes they become harder and crunchier.

Leave to cool and store in an airtight container in the refrigerator, where they will last up to five days. Over time, I find the chickpea texture changes and becomes chewier (it’s different but still nice!)

Notes
Roasted chickpeas are great in pasta and rice dishes, or roughly mashed for a sandwich or wrap filling, served with salad and avocado. They can also be eaten straight up as a snack.
I highly recommend making a double or triple batch as they go quick!

[/print_this]

Products used in this recipe
Tesco Organic Chickpeas (they’re packaged in a tetra pak)
Olives Et Al Extra Virgin Olive Oil
Clarks Original Maple Syrup
Olives Et Al Spiced Dukkah

Have you heard of Dukkah or used it yourself? If so, what’s your favourite way to serve it? If you’ve published any recipes, please do link up below x

Vegan Cornbread – Great Accompaniment to Mexican Chillis & Soups (Dairy free / Egg free)

What glorious weather we’ve had this week in the UK!  The blue sky and sunshine has been very welcome indeed.  I doubt that it will last but I’m determined to make the most of it while it’s here 🙂

Since it’s been so warm, we’ve had some lighter dinners this week.  On Tuesday, we had one of my all-time favourite soups – Mexican Black Bean Soup – which we served with some toasted tortilla segments and a side dish of cornbread.

Mexican Black Bean Soup

I’ve tried many cornbread recipes over the years, but they’ve never suited my family’s tastes.  The American recipes tend to be too sweet, while Hugh Fearnley-Whittingstall’s recipe (which only uses cornmeal rather than a mix with wheat flour) was too overpowering for us.  It was also really dry (or maybe that was down to me).  M didn’t even think the ducks would like it, so we ended up throwing it in the compost!

Anyway, I’m relieved to say that my third attempt of the week turned out really well.  I revisited my old cornbread recipe and tweaked it slightly, adding more liquid and some apple cider vinegar so that it was lighter and less dry.  I really liked the texture of this latest batch – it had a lightly crisped exterior and fluffy, moist interior.  It was perfect for dipping into the soup and didn’t need any margarine or oil on it.  The quantities made 9 large slices, so I’ve frozen the remaining slices for future Mexican dishes.

Vegan Cornbread

This cornbread recipe may not be authentic, but it’s got great texture and flavour (plus it’s 100% plant-powered!)  It’s very simple to make, requires little hands-on time and will be ready in 30 minutes.  Prepare the bread first and it can be baking while you cook your Mexican dish.

Here’s the recipe:

[print_this]

Serves 4-6
Hands-on time: 15 minutes    Ready in: 60 minutes

Ingredients

480 ml / 2 cups soya milk
2 tsp apple cider vinegar
140g / 
1 cup fine yellow cornmeal
140g /1 cup fine wholemeal (whole wheat) flour or chapatti flour
1½ tsp baking powder
½ tsp bicarbonate of soda (baking soda)
1 tsp salt
50ml / ¼ cup organic rapeseed (canola) oil or other neutral-flavoured oil
1 TBSP maple syrup

Method

1. Pre-heat the oven to 180C (160C fan) / 350F. Grease a 20cm / 8 inch baking pan and line the bottom with non-stick baking paper.

2. Whisk together the milk and vinegar in a large mixing bowl and set to one side for a couple of minutes.

3. Place the cornmeal, flour, baking powder, bicarbonate of soda and salt in another bowl and stir to combine.

4. Whisk the oil and syrup into the milk and vinegar.

5. Sieve the dry ingredients into the wet ingredient bowl roughly in thirds, whisking each time until smooth before adding the next third. Stir in any remaining wheatgerm from the sieve.

6. Pour the mixture into the prepared pan and bake for 30 minutes, or until a skewer inserted into the middle comes out clean.

7. Leave to cool for 15 minutes. Run a knife round the edge to loosen the bread, then invert onto a chopping board so you can peel off the baking paper. 

8. Stored in an airtight container, this bread will keep for up to five days in the fridge or for weeks in the freezer. Warm through before serving. 

[/print_this]


Have a great weekend everyone! xx

Have you tried corn bread before?  If so, do you prefer it sweet or savoury?

SaveSave

SaveSave

SaveSave

SaveSave

SaveSave

Sweet Beet “Love” Soup

With its sweet, earthy flavour and deep purple colour, I have always been strongly attracted to beets.  In my childhood, my favourite salad ingredient was my Dad’s home grown beetroot, freshly pulled from the garden.

beetroot-uprooted copy

 [Source]

But little did I know as a child how good they were for my health.  I only recently discovered that beets are actually a super food.  Well I never!  Here’s what I’ve learned…

1. Beets are packed with vitamins and minerals
They contain a huge array of nutrients, including potassium, magnesium, iron, phosphorus, vitamins A, B & C, beta-carotene, beta-cyanine and folic acid.

2. Beets are rich in antioxidants which help to protect against disease
Beets are a very good source of antioxidants vitamin C and manganese.  They also contain a powerful group of antioxidants called betalains, which can help in the prevention of cancer, heart disease, diabetes and inflammation. (It’s the betalains that give beets their deep red colour).  The nitrates contained in beets can also help to lower blood pressure.

3. Beets cleanse the body
Beets are a great detoxifier, tonic for the liver and blood purifier.

4. Beets help your mental health
Beets, like chocolate, contain trytophan, a substance which is known to relax the mind and create a sense of well-being.  The betalains contained in beets have also been used in certain treatments of depression.

5. Beets boost our brain power
Beetroot contains high concentrations of nitrates, which are converted in the body into nitric oxide.  This helps open blood vessels in the body, increasing blood flow and oxygen.  Nitrites also increase blood flow to the brain, which may help to prevent dementia.

6. Beets are energy boosters
Beets are a great source of complex carbs and slow-release energy.  The natural nitrates found in beets also help to increase our oxygen intake and energy levels.

7. Beets enhance our physical performance
Studies have shown that the nitrates in beets can enhance physical endurance.  In one study, cyclists who drank 500 ml of beetroot juice were able to ride up to 20% longer.

8. Beets are great for weight management
Beets are high in complex carbs and fibre, but low in calories, which makes them the perfect food for weight management.

And finally, did you know that…

9. Beets are Nature’s Viagra!
The Romans used beets medicinally as an aphrodisiac, and science has proven that beets are indeed a natural Viagra.  Their nitrate content increases blood flow in all areas of the body.  Beets also contain high amounts of boron, which is directly related to the production of human sex hormones.

If you wish to know more, there’s a clip of Dr Oz talking about the health benefits of beets (including number 9!) here.

Getting in the Mood for Love with …

Sweet Beet Soup!

With its deep red colour and wonderful mood enhancing properties, I reckon beetroot would make a wonderful addition to any romantic meal that you might have planned for your loved ones this evening 😉

On tonight’s menu for us, is a starter of Sweet Beet Soup.  Until recently, I’d only ever eaten beetroot in salad but, inspired by Candy’s beautiful blog post called ‘Simple Pleasures’ I was inspired to try my hand at making a beet soup.

Candy kindly allowed me to share her beet soup photo. Isn’t it stunning?

Sweet Beet 'Love' Soup
 

And perfect for Valentines!

You must check out Candy’s post.  It is such a beautiful read!

For my beet soup, I chose to add sweet potato.  As well as adding sweetness and additional nutrients, I find it gives soups a wonderful, silky texture (without the need to add cream or milk).  Furthermore, with the addition of the potato, I find that a bowl of soup is filling on its own, without the need to add a side dish of bread.

For protein, additional flavour, textures and nutrients, I add a sprinkling of shelled hempseeds, lightly toasted pumpkin seeds and dried dill.

Here’s how I make it…

[print_this]

Sweet Beet Soup

Serves 4
Hands on time: 5-10 minutes    Cooking time: 30 minutes

Ingredients
1tbsp olive oil
1 onion, finely chopped
2 garlic cloves, crushed
3-4 medium beetroot, peeled and chopped (I use a potato peeler and wear kitchen gloves to avoid getting purple hands!)
1 large sweet potato, peeled and chopped
1 litre / 34fl oz / 4 cups vegetable stock
Salt and freshly ground pepper, to taste

Suggested toppings:
Shelled hempseeds
Lightly toasted pumpkin seeds (I like to lightly toast them in a frying pan with a little extra virgin olive oil)
Dried dill

Method

  1. Gently heat the oil in a large saucepan and sauté the onion until it starts to soften.  Add the garlic, beetroot and sweet potato. Cover with a lid and sweat on a low heat for 5 minutes.  Add the stock, bring to the boil, then cover and simmer for 20 minutes or so, until the beetroot is soft.  Allow to cool slightly, then blend smooth.  Add salt and pepper, if desired.
  2. Serve in warm bowls with a sprinkling of seeds and dill.

[/print_this]

[This recipe has been submitted to Ricki Heller’s #Wellness Weekend]

So I’ve got the starter and dessert sorted for tonight’s meal, just got to decide on the main course now!

Are you a fan of Beets? What’s your favourite way of serving them? 

Have a wonderful Valentine’s Day everyone xx

p.s. It’s the last day to enter my Valentine’s Raw Chocolate Giveaway (ends midnight GMT tonight).  I’ve been overwhelmed by all the beautiful comments I’ve received on this giveaway.  Thank you so much guys! You really have made my week!  Since there have been so many entries, I’ve decided to make another batch of chocolates, and I’ll select 3 winners in total.  I’ll post details of the winners on FB and Twitter tomorrow, and also email directly.
Good luck everyone xx

Mexican Black Bean Soup (Vegan / Dairy-free)

The black bean (aka ‘turtle’ bean), is a small, shiny bean that’s highly popular in Latin American cuisine. Here in the UK, though, this little bean tends to get neglected in favour of its big red brother, the kidney bean. It’s a shame because its flavour and texture is way superior to its big brother (in my opinion!) For me, the black bean has a beautiful smoky flavour and ‘meaty’ texture that makes it the perfect bean to add to our home-cooked Latin American dishes.

I think it’s high time we gave this fantastic bean the recognition it deserves!

One of my favourite ways of serving black beans is in a richly flavoured soup. For children, the soup can easily be blended to produce a smoother soup.

For lunch or a light dinner, we like to serve this soup with a couple of segments of toasted wholegrain tortilla.  For a main dinner, we love a slice or two of freshly baked cornbread.

[print_this]

Serves 4-6
Hands on time: 15 minutes    Ready in: 45 minutes

Ingredients
1 TBSP olive oil
1 medium onion, finely diced
2-3 garlic cloves, minced
1 large carrot, finely diced
1 large sweet potato, peeled and diced
1 tsp ground cumin
1 tsp smoked paprika
1 tsp dried oregano
½ tsp chilli powder (use mild chilli for children)
145g / 1 cup canned or frozen sweetcorn
400g / 14oz can chopped tomatoes
600 ml / 2½ cups vegetable stock (broth)
2 x 400g / 14oz cans black beans, rinsed and drained
salt, to taste
cayenne pepper, to taste
2 TBSP nutritional yeast flakes, optional (adds savouriness and extra nutrients)

Suggested garnish:
fresh coriander leaves (cilantro)
red pepper or chilli, finely chopped

Method

 1. Gently heat the oil in a large saucepan. Add the onion, garlic, carrot, sweet potato, cumin, paprika, oregano and chilli powder. Stir to combine, then cover with a lid and leave to sweat on a low heat for 5 minutes.

2. Add the sweetcorn, tomatoes and stock to the pan. Bring to the boil then reduce the heat, partially cover with a lid, and simmer for 20 minutes. When the vegetables are tender, stir in the beans.

3. Remove half of the soup from the pan. Allow to cool slightly, then blend smooth in a jug blender. Return it to the pan and gently heat through.  (Note: small children may prefer their soup completely smooth. In this case, simply add more soup to the blender).

4. Season the soup with salt, to taste.  If you’d like to give the soup a spicy kick, first remove any children’s portions then add a pinch of cayenne pepper.

5. Allow to cool slightly, then stir in the nutritional yeast (this helps to preserve its nutrients).

6. This soup is delicious served with a side serving of toasted tortilla segments and/or corn bread. Any leftovers can be stored in the fridge for 3 days. The soup may thicken over time, so simply add a touch more water or vegetable stock. It also freezes well.

[/print_this]


Enjoy!


Do you cook with black beans? If so, what’s your favourite recipes? If you’ve published any recipes online, do post the links below x

SaveSave

SaveSave

Living Rich on Less! A Yummy Budget-Friendly Recipe for the Weekend – Creamy Chana Dal with Cauliflower & Peas

Cutting Back on Personal Spending

In recent years, I’ve been making a conscious effort to cut my personal spending.  Since making the decision to leave the day job, I need to do this more than ever!

Here’s a few ways that I’ve cut back on spending so far…

Sold my car saving £100s each year (I now walk/bike/bus)

– Stopped my gym membership saving £360 per year (I now exercise outside)

– Negotiated a new deal on my phone, reducing my monthly payments from £30 to £13.50, saving £198 per year. I’ve now got a much better deal for less money!

– Stopped buying so many clothes which is saving me £100s per year. I hardly ever buy clothes these days and, if I do, it’s usually to replace worn out items. I still love quality brands, like Kuyichi, but I’ll buy last season T Shirts etc for half price or less. I also buy from charity shops.

– Stopped buying books & magazines saving about £100 per year. Instead I’ve got an Amazon wishlist for birthdays & Christmas 🙂

These cutbacks have reduced my personal spending by well over £1,000 per year.  And the funny thing is, I’m actually happier as a result of making these cutbacks. My life is simpler, less cluttered and I’m less dependent on money. However, there are two areas where I haven’t cut back, and that’s giving to charity and present-giving. These are too important to me!

Cutting Back on Family Overheads

I’ve also been sorting out the family’s finances in an attempt to cut our overheads. Here’s how I’ve got on so far…

– Switched our water from rates to a meter. We now pay £35 per month, compared to £61, saving £313 per year

– Switched our gas & electricity to a new supplier and reduced our consumption. We currently pay £79 per month, compared to £148, saving £828 per year. I check the gas & electricity deals each year now and switch if I find a better deal.

– Renegotiated our house insurance. For the same cover, we now pay £149 compared to £275, saving £126 per year. My advice is to never automatically renew your house insurance each year. You seem to get penalised for loyalty! I use comparison sites to check rates then ring my existing supplier to see if they can match it (they always do!)

– Renegotiated the mortgage. We’re now on a ‘tracker for life’ deal and currently paying 2.49%, the lowest rate we’ve ever paid on a mortgage.

– Cut our grocery bill from around £80 to £70 per week (this includes all household products, food & toiletries), saving £520 per year.

To date, I’ve managed to cut our bills by nearly £2,000 per year, which isn’t too bad considering the cost of living has increased these past few years.  It didn’t take a lot of effort either. There are some great online comparison sites available now, which save time & effort. Some of my favourite sites are: www.uswitch.comwww.moneysavingexpert.com, www.gocompare.com and www.mySupermarket.com.

The one area that I still need to work on is landline telephone & broadband. We’re currently paying £109 each quarter which is way too high.  I’m currently looking at Sky and Plusnet so, if anyone has experience of either of these two, I’d love to hear what you think of them 🙂

A Budget-Friendly Recipe for the Weekend

On Wednesday, I promised that I’d give the recipe for one of our favourite lentil dishes which uses Chana Dal (also known as Yellow Split Gram and Gram Dal). This lentil is a relative of the chick pea and has a lovely nutty flavour.

This dish is super duper cheap to make! In Tesco, a 2kg bag of Indus Chana Dal costs just £2.99 (and this size bag will last you ages).

The dish is mildly spiced, so perfect for all the family, though feel free to crank up the heat if you like spice! It’s also deliciously creamy. I use Alpro Soya Cream in this dish, which makes it dairy free and low in fat. I hope you enjoy it as much as we do!

[print_this]

Creamy Chana Dal with Cauliflower & Peas

Serves 6
Hands on time: 10 minutes (& half hour soaking time)
Cooking time: 50 minutes

Ingredients
225g / 8oz / 1 cup chana dal (aka split yellow gram, gram dal)
695 ml / 24½ fl oz / 3 cups water
½ tsp ground turmeric
1 small head of cauliflower, cut into small florets
130g / 4½ oz / 1 cup frozen peas
1 tbsp olive oil
1 thumb-size piece of fresh or frozen ginger, finely grated
1 tsp garam masala
1 tsp ground cumin
½ – 1 tsp chilli powder
1 red chilli, seeded and finely chopped (omit for children)
2 large fresh tomatoes, skinned and finely chopped
130 ml / 4½ fl oz / ½ cup non dairy cream (I use Alpro Soya Chilled Single Cream)
¼ tsp saffron strands, infused in 2 tbsp hot water (optional)
2 tbsp fresh coriander (cilantro) chopped
1 tsp sea salt, or to taste
1 tsp sugar or natural sweetener (I use agave syrup)
Toasted almonds, sesame seeds and/or finely chopped red chilli for garnish

Serve with: brown rice and/or chapattis

Method

  1. Place the lentils in a sieve and sort through, discarding any hardened kernels or grit. Thoroughly wash the lentils. Place in a container, cover with water and leave to soak for at least 30 minutes. Rinse the lentils, drain well, and put them in a large saucepan with 3 cups of water. Stir in the turmeric. Boil uncovered for 10 minutes (skim off any froth that appears on the surface). Reduce the heat, cover with a lid and simmer for 30 minutes, stirring occasionally. Add the cauliflower and peas and continue cooking for a further 8 minutes.
  2. Meanwhile, heat the oil in a frying pan (skillet) and gently cook the grated ginger, dry spices and chilli (if using) for one minute. Add the chopped tomatoes and continue to cook for two minutes.
  3. Fold the tomato and spices into the lentils, along with the cream, saffron, coriander, salt and sweetener. Cook on a low heat (don’t allow it to boil) for 2-3 minutes.
  4. Delicious served in warm bowls with a garnish of toasted almonds, sesame seeds and/or red chilli, and side dishes of brown rice and chapattis.

[/print_this]

[This recipe has been submitted to Ricki Heller’s Wellness Weekend, November 15-19 2012]

Lentils are so versatile. As well as using them in Indian dishes, we make lentil burgers, lentil loaves and add them to soups. This week I made a large batch of tomato and red lentil soup and it was lush! Lil’ L took it to school, M took it to work, and we had enough left over for dinner one evening too. You can check out the recipe here.

Do you cook with lentils? If so, I’d love to hear about your favourite lentil dish. Add a link to your recipe if possible.

Also, do you keep an eye on your finances and look for ways to cut bills? If so, I’d love to hear your tips!

Right, it’s Friday night and the weekend has officially begun 🙂 Time for me to sign off!

Have a great weekend everyone! xx