My Top Vegan 7 for British Sandwich Week

This week we’re celebrating British Sandwich Week. Do you know how the sandwich got its name? I remember as a kid thinking it was a strange name for a food. It clearly didn’t contain sand. Maybe it was what witches ate? Incredibly, I only learnt the meaning of the name this month (thanks to the May issue of Vegan Life magazine).

John Montagu, the 4th Earl of Sandwich, was fond of ordering meat tucked between two slices of bread, avoiding both the inconvenience of a fork and messy meat-covered hands, so he could easily eat while playing cards. His fellow gamblers saw the appeal and started ordering “the same as Sandwich”. The 18th century aristocrat’s clean and convenient way of eating is why we came to call any variation of filling between bread ‘a sandwich’
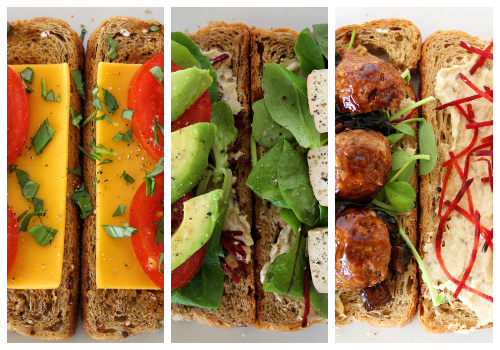
Sadly, here in the UK, the availability of ready-prepared vegan sandwiches is extremely limited. The supermarket aisles are filled with row upon row of chicken, cheese, ham, egg mayo and tuna. If you’re lucky, you might find a falafel sandwich, but then you’re likely to find they’ve added milk or egg into the dressing. I’m sure that one day the sandwich shops will catch up with the growing plant-based trend but, until then, we’ll just have to whip up some of our own.
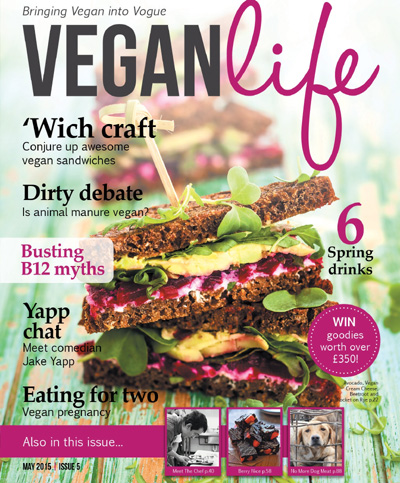
Vegan Life Issue 5

This month’s Vegan Life magazine has a fantastic selection of sandwich recipes, including the Reuben, Buffalo Tofu Hoagie, Triple BLT, Spicy Wiener and The Peter Pan. There was also a fun Sandwich Roulette on their digital magazine app.
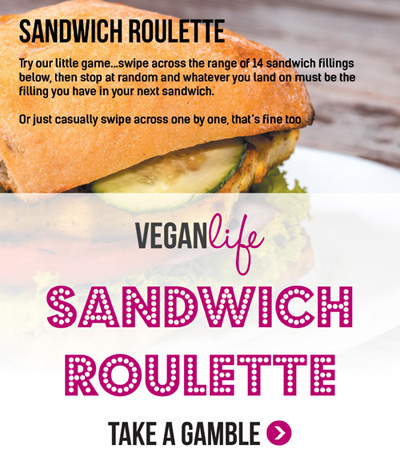
Vegan Life Issue 5 Sandwich Roulette

You spin the scroll bar and whatever recipe you land on has to be your next sandwich creation. I landed on Coronation Chickpea which is perfect for me as I love chickpea spreads (as you’ll see below).
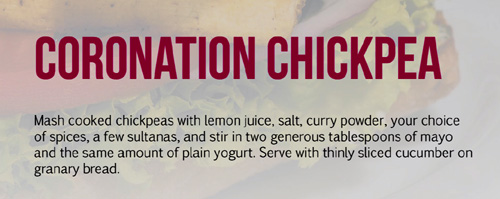
Vegan Life Issue 5 Sandwich Roulette 2 500

In honour of British Sandwich Week, I thought I’d share a selection of my family’s current favourite creations. All of them are 100% plant-based and come together in a matter of minutes. I don’t know about you but, if I need a sandwich, I need it pretty instantly. I’m usually making sandwiches first thing in the morning for lunchboxes or I need to grab a quick bite at lunchtime between jobs, so I can’t be spending ages cooking or prepping the filling.

So, in no particular order, here are our current 7 top picks. Between us, we’ve eaten all of these already this week and we’re only on day 3 of British Sandwich Week!

1. Falafel, Caramelised Onion Hummus, Beetroot Salad and Sweet Pickle.
I always keep a stash of falafel in the fridge for quick sandwich making. At home, I love this filling in freshly baked or lightly toasted granary bread. For lunchboxes, we stuff it into wholemeal pitta breads so, no matter how much the school bag gets shaken, the filling stays neatly inside.
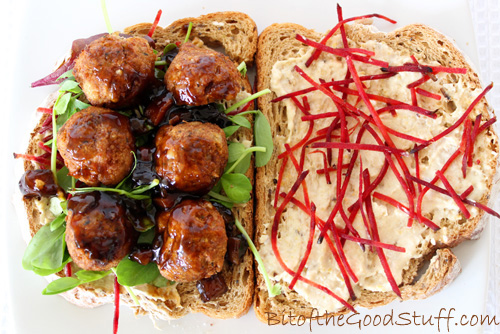
Falafel Sandwich

2. Cheese, Tomato and Basil.
This is a pretty classic combination, except that we use vegan ‘cheese’. In our dairy-eating days, none of us actually liked cheese slices, but we really like the Violife version. They’re made with coconut oil instead of cow’s milk and are surprisingly tasty.  The slices come in a range of flavours. Cheddar, olive oil, herbs, pizza and smoked are our favourites. In the UK, Violife is currently available in health food shops, Tesco and Asda.
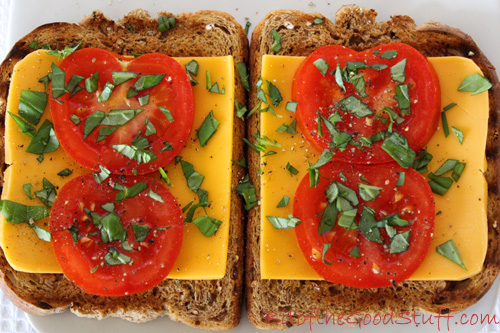
Cheese and Tomato Sandwich

3. Sweet Chilli Chickpea Smash
Chickpea smashes are really versatile. You can flavour them in different ways and change the texture, making them coarse or creamy. One of my all-time favourite smashes is Sweet Chilli Chickpea, made with a can of drained chickpeas, glug of sweet chilli sauce, splash of fresh lime juice and salt whizzed in a blender or food processor until coarse. In this sandwich, I’ve served it with organic sprouts and freshly ground black pepper.
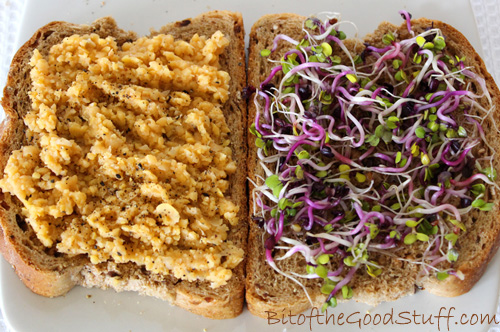
Chilli Chickpea Smash Sandwich

4. Mediterranean Veggie Ciabatta
This is one of our favourite ‘easy’ Saturday night teas. It’s also one of Lil’ L’s favourite school lunches (though we use pittas to keep the veggies intact). A selection of colourful veggies (red onion, courgette/zucchini, bell pepper, mushrooms) and seeds (sunflower & pumpkin) are pan-fried, then served on crispy, warm ciabatta slathered in sun-dried tomato paste. The veggies are either fried in a drizzle of olive oil with plenty of seasoning or a splash of tamari.
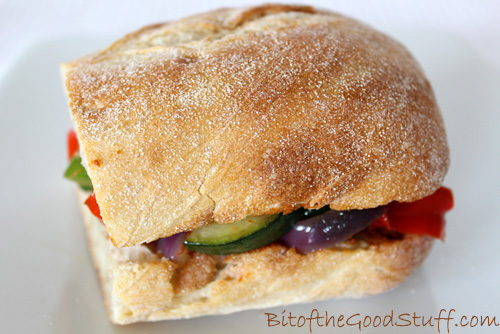
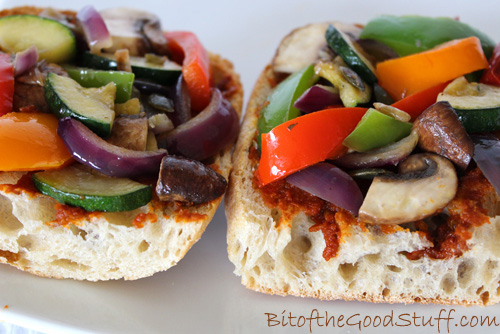
Mediterranean Veggie Ciabatta

Mediterranean Veggie Ciabatta

5. Smoked Tofu, Avocado, Tomato Salad
I was so pleased to find smoked tofu in the Spanish Hipercor so we could make one of our favourite sandwiches whilst in Marbella last month – organic smoked tofu, sliced tomato and avocado, baby leaf salad and hummus, topped with a sprinkling of salt and freshly ground black pepper. For our return flight, we stuffed this filling into seeded wholewheat mini baguettes. It tasted so good and far, far better than any option available on the plane.
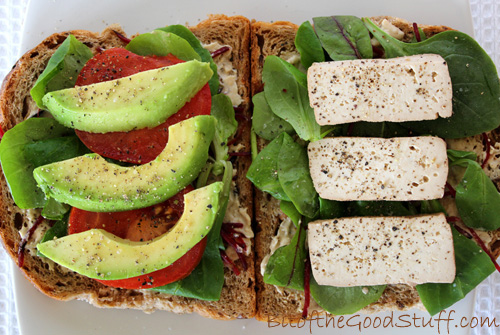
Smoked Tofu Sandwich

6. The Sunday Dinner Sandwich
We used to call this The Boxing Day Sandwich as it was filled with our Christmas Dinner leftovers. However, I love this sandwich so much that I couldn’t relegate it to a ‘once a year’ thing. Now we use the leftovers from the Sunday roast dinner, or I even just make this sandwich instead of a Sunday roast, hence why Lil’ L calls it the ‘Sunday Dinner sandwich’. My favourite components for this sandwich are red lentil & cashew nut loaf or sage & chestnut stuffing, balsamic red onion and brussel sprout hash, served on soft granary bread slathered in cranberry sauce. Tastes. So. Good.
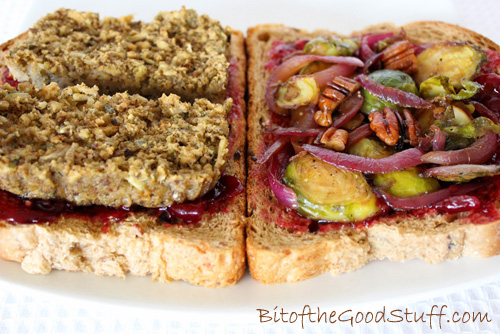
Sunday Dinner Sandwich

7. Home-made ‘Nutella’ and Banana Panini
And here’s one of our favourite ‘Elevenses’ or mid-afternoon snacks, perfect for when a sweet craving strikes. Slather one side of toasted panini in home-made ‘nutella’ (hazelnut butter, maple syrup, cocoa powder, a little coconut oil and pinch of salt whizzed together) and the other side in mashed ripe banana and a sprinkling of ground cinnamon, then slam together and devour.
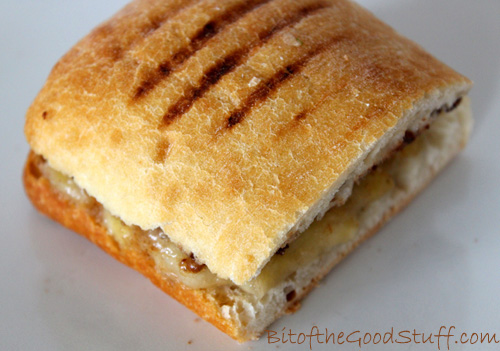
Nutella Banana Panini

Happy Sandwiching everyone! xx

What’s your current favourite sandwich creation?

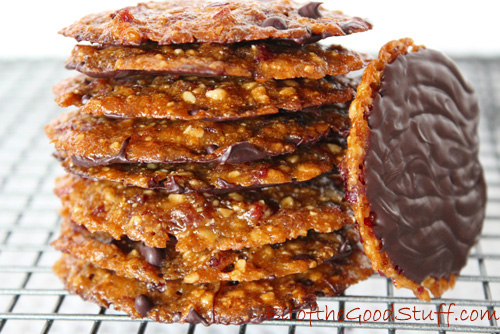
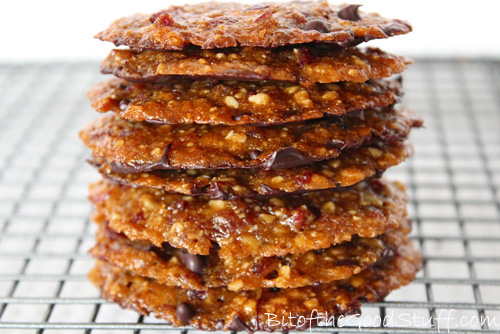
Cranberry, Orange and Dark Chocolate Florentines. Dairy-free. Vegan

For this month’s Suma Blogger’s Network entry, I though I’d share one of my latest treat obsessions – Vegan Florentines

Vegan Florentines

I’ve been dreaming about Florentines ever since I saw them on display in the patisserie shops of Venice and Florence a few years ago. I’d never seen anything quite like them before. They looked so dainty yet totally decadent with their dark chocolate bottoms! I was pretty sure that they’d be full of dairy and off limits to me, but I was excited about the thought of creating a vegan version one day.

This week I finally got round to a little Florentine experimentation in the kitchen.

After a quick internet search, I discovered that Florentines are typically made with cane sugar, honey, butter, candied cherries, candied citrus peel and almonds. Since I’m not a fan of the first 4 ingredients, and I know a lot of my readers aren’t keen on candied peel, I ended up subbing 5 of the 6 ingredients. The almonds stayed 😉

The cane sugar and honey was swapped for coconut sugar and maple syrup, which gave the Florentines a wonderful golden hue and caramel-like sweetness. Instead of candied cherries and citrus peel, I used dried cranberries and orange zest. This gave the Florentines a fresh, citrussy flavour which I absolutely loved. The butter was exchanged for non dairy spread or organic aroma-free coconut butter.

Vegan Florentines

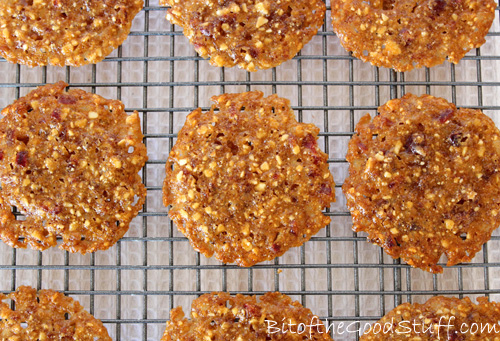
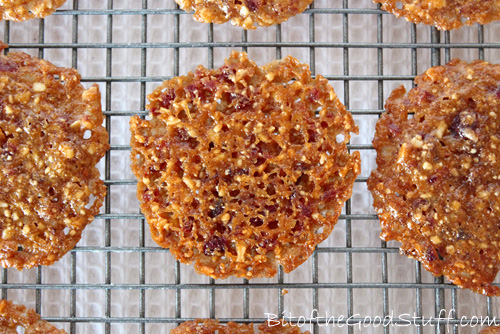
I’ve done 6 trials so far this week, playing around with different ingredient ratios and combos. All have tasted delicious, but I was striving to bake a Florentine that was super thin with the traditional ‘lacey’ texture on the underside. By the 4th trial, I’d cracked it.

Vegan Florentines

Once cooled, I then added the classic Florentine wavy chocolate bottom.

Vegan Florentines

These Florentines are my new treat obsession. I absolutely love their texture – crisp on the outside, chewy in the centre with a melt-in-your-mouth chocolate bottom. Plus the flavour combination is so lush. The citrus zest gives them a wonderful lift while the dark chocolate makes them feel decadent.

Another great thing about this biscuit is that each one only contains 1 tsp of mixture which, in my eyes, makes it totally acceptable to go back for a second or third 🙂

‘M’ and Lil’ L seem to love them as much as me. I’ve made 72 so far this week, and there are very few left in the biscuit tin! I also took along a sample to my Tuesday night study class and they were a big hit!

Vegan Florentines

[print_this]

If possible, I recommend weighing the ingredients rather than using tablespoons as it’s more precise. I find that the shape and ‘lacieness’ of the Florentines varies depending on the size of the fruit and nut pieces, and the type of flour or fat used. Regardless of their shape, all are totally delicious!

Makes 12
Hands-on time: 20 minutes    Cooking time: 8 minutes
Ready in: 40 minutes

Ingredients
27g / 1 oz / 3 rounded TBSP flaked almonds
27g / 1 oz / 3 TBSP dried cranberries
Zest of ½ unwaxed / organic orange
27g / 1 oz / 2 TBSP dairy-free spread or organic aroma-free coconut butter
27g / 1 oz / 3 TBSP coconut sugar
27g / 1 oz / 1½ TBSP maple syrup
18g / ⅔ oz / 2 TBSP fine wholemeal (whole wheat), chapatti or gluten-free flour mix
80g / 3 oz dark chocolate or ½ cup dark choc chips

Method
Preheat the oven to 180C (160C fan) / 350F. Line two large baking sheets with non stick baking paper.

Place the almonds in a frying pan (skillet) and dry fry for a few minutes, stirring regularly. As soon as they start to brown and become fragrant, tip them onto a plate and leave to cool. Once cool, finely chop the nuts or scrunch them in your hands to break them up.

Finely chop the cranberries. Zest the orange.

In a small pan, gently heat the non dairy spread / coconut butter. Once it has melted, whisk in the sugar and syrup. Remove from the heat and whisk in the flour until fully incorporated. Stir in the nuts and fruits. You want to get the mixture as uniform as possible so that the Florentines spread evenly as they bake.

Drop six rounded teaspoons of mixture onto one baking sheet. Be sure to space them out well to give them room to spread. Add another six teaspoons to the second baking sheet. Using damp fingers, press down on the Florentines to flatten slightly and shape into circles.

Place in the pre-heated oven and bake for 8 minutes, or until the edges of the Florentines have browned. Leave to cool. (They will be very soft when they come out the oven, but they firm up as they cool).

Once the Florentines are completely cool, prepare the chocolate coating. Place the chocolate pieces in a heat proof bowl set over a pan with an inch or so of water (make sure the water doesn’t touch the base of the bowl). Gently heat the water and stir the chocolate until it has fully melted. Remove from the heat. If the chocolate is very runny, keep stirring it until it has thickened slightly. Using a knife, coat the bottom of each Florentine with chocolate, then wiggle a fork along the chocolate to form a wavy pattern. Leave the chocolate to set.

The Florentines will keep for a week or so in an airtight container. In warm houses, it’s best to store them in the fridge. They also freeze really well so it’s worth making a double batch and freezing some. That way, you’ll have a stash ready for coffee mornings, surprise visitors or whenever a sweet craving strikes.

[/print_this]

Unwaxed Citrus Fruits
Unwaxed lemons are widely available, but unwaxed oranges are a little harder to come by. In the UK, they are currently available in Sainsbury’s, Waitrose and Tesco. If you’re only able to find waxed oranges, you’ll find tips online on how to remove the wax. The wax on citrus fruits often contains shellac (from the lac beetle) or beeswax, making them unsuitable for vegans. Organic citrus fruits are unwaxed, which makes them vegan friendly 🙂

You’ll find Suma products available to purchase in UK independent health food shops. You can also bulk buy many of their products from Amazon.

Gingerbread Men (Dairy-free / Vegan)

The recipes I most often share are firm family favourites that I’ve been refining over a number of years. So when I get inspired to create a new recipe that I want to blog now rather than in 5 years time, I end up obsessively testing it again and again over the course of a week or so to play catch up with the tweaks and refinements.

This week, the obsession has been these little guys…

Gingerbread Men

When Amy mentioned gingerbread under my waffles post, it reminded me that I hadn’t made gingerbread men in years. I decided it was high time I dusted off my old recipe notes and gave them another whirl.

So far this week, I’ve made 72 gingerbread men! Family and friends have kindly been helping me out with the testing. Lil’ L’s taken them to school, Mark’s taken them to work, and I’ve shared them with friends over coffee (not the classiest of cookies but hey it made them smile).

Making Gingerbread

All the batches got great feedback, but Mark thought they could be a bit ‘gingerier’ so the next batch had an extra ½ tsp of ginger. I’ve tested different thicknesses (the thicker men were the winners), different sugars and different oils/butters. All worked fine, so I’m guessing the recipe is pretty adaptable. I also tested different cooking times and I personally preferred the longer time as it made them firmer and crunchier round the edges.

Readers have also had great success using gluten-free flour to make these gingerbread men. Check out the Comments section below to see their feedback.

Gingerbread Men

Even though I’ve eaten a ridiculous amount of gingerbread men this week, I’m still totally in love them and will be happily munching my way through more this weekend. Fortunately, as cookies go, these are pretty healthy as they’re wholegrain, plus they’ve got an extra boost of iron from the molasses. As well as coffee, they’re delicious with a cup of ginger tea. This has got to be the ultimate winter warmer. I can literally feel myself warming up from the inside out as I sip a cup

Gingerbread Men

[print_this]

Makes about 18 cookies (depending on cutter size)

Hands on time: 20 minutes   Chilling time: 1 hour (can be left up to 2 days)
Cooking time: 10-12 minutes    Ready in: 1 hour 35 minutes

Ingredients
100g / ½ cup organic rapeseed (canola) oil, dairy-free spread or aroma-free coconut butter
85g / ½ cup soft brown sugar or coconut sugar
4 TBSP molasses (black treacle or blackstrap)
2 TBSP non dairy milk
280g / 2 cups fine wholemeal (whole wheat pastry) or chapatti flour (see Comments section below for reader feedback on gluten-free options)
½ tsp bicarbonate of soda (baking soda)
½ tsp salt
1½ – 2 tsp ground ginger
1 tsp ground cinnamon
Pinch of ground nutmeg

Method
Place the oil/spread/butter in a pan with the sugar, molasses and milk. Gently heat over a low heat. As it warms, whisk to combine.

Sift the flour, bicarbonate of soda, salt, ginger, cinnamon and nutmeg into a large bowl. Give it a mix to make sure it is combined. Pour in the contents of the pan and stir until it comes together to form a dough. This will take some elbow grease as it’s a stiff dough. (If you’re using coconut butter, you may need to add 1-2 TBSP more milk to form a smooth non crumbly dough).

Shape the dough into a ball, wrap in clingfilm (plastic wrap) and chill for 1 hour. The dough can be chilled for up to 2 days but, if left for more than 1 hour, remove from the refrigerator 10 minutes before rolling.

When ready to bake, preheat the oven to 180C (160C fan) / 350 F. Line 2 large baking sheets with non-stick baking paper.

Place the dough on a silicone mat or lightly floured work surface. Place a sheet of non stick baking paper on top and roll to a thickness of ½ cm (just under ¼ inch). Press out the dough using a metal cookie cutter and transfer to the prepared baking sheet. Combine the dough scraps into a ball and roll out again. Repeat until all the dough is used.

Place in the oven and bake for 10-14 minutes. (I check mine after 10 minutes and then bake for another 2-4 minutes as I like mine firmer and crunchier). Leave to cool and firm up for a few minutes, then transfer to a wire rack to completely cool. The cookies will last about a week in an airtight container, or for weeks in the freezer. If freezing, place in a single layer in a freezer bag. Press out all the air before tying or zip locking.

Freshly baked, these gingerbread men are crispy round the edges with a soft centre. Over time, they become softer and chewier, but delicious nonetheless.

[/print_this]

If you try the recipe and make any adjustments, do let me know. I always love to hear your feedback!

love

Chocolate Orange Chia Pudding

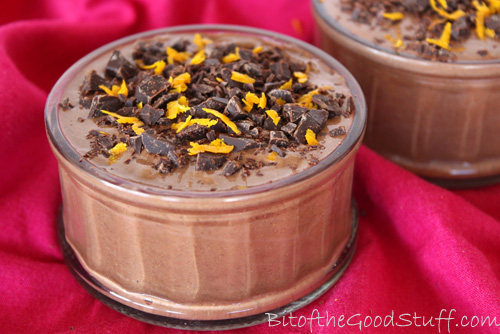
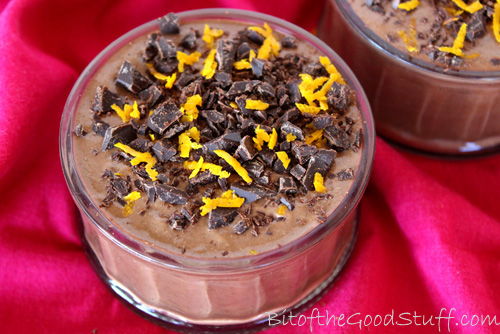
I first shared a recipe for chocolate orange chia pudding back in February 2012 and, to this day, it remains one of my family’s favourite desserts. It’s such a simple pudding to make and, since I originally posted the recipe, I’ve refined the method so that it’s even quicker. Honestly, this recipe could not be more easy! The original photo I took doesn’t do this pudding justice, so I thought it was time for a re-post with the updated recipe and some shiny new photos.

Chocolate Orange Chia Pudding

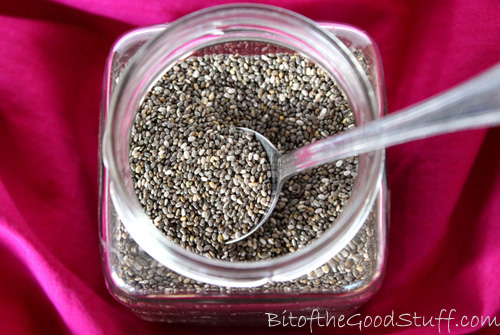
Since that original post, chia seeds have become much more popular here in the UK. You can buy them in health food shops, and even supermarkets have started stocking them. I find they can vary a lot in price, so I always shop around for the best deal. Since I use them frequently in smoothies and puddings, I’ve been buying larger bags lately, which tend to work out much better value.

Chia Seeds

So why do I love chia seeds so much?

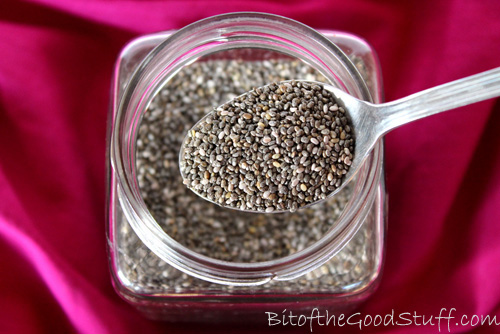
Well, there are two main reasons. The first is their amazing nutritional profile. Chia seeds are very high in dietary fibre, a good source of ‘complete’ protein, and rich in omega 3 essential fatty acids. They’re also hydrophilic and can absorb around 10 times their weight in water, thus helping to keep us nicely hydrated. Their fibre, fat and protein content, along with these hydrophilic abilities, means that the seeds are a great source of slow release energy, they help to balance blood sugar levels, and they keep us feeling full up for hours. Adding a spoonful to smoothies is a great way to keep hunger pangs at bay.

Chia Seeds

Chia seeds contain a range of trace minerals, and are especially rich in manganese, phosphorus and calcium, which are all important for good bone health. A 28g / 1 oz serving provides 30% of the manganese RDA, 27% of phosphorus, and 18% of the calcium RDA. The seeds also contain a multitude of antioxidants, including the flavonoid quercetin, which has anti-inflammatory and antihistamine properties.

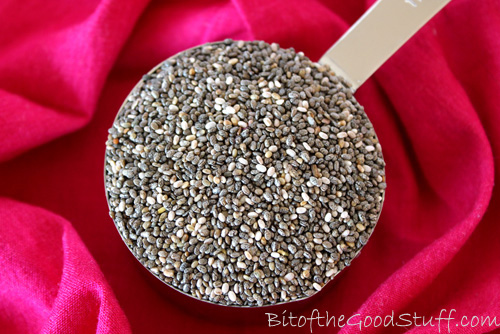
The second reason I love chia so much is that they make the most incredible chocolate puddings! Once blended with some cacao or cocoa powder and a little liquid, they transform into a delicious, silky smooth pudding that will easily rival any shop-bought chocolate dessert. And unlike the shop-bought varieties that tend to be laden with sugar and little nutritional value, these chia puddings are refined sugar free and packed with nutrition.

Chia Seeds

I used to soak the chia seeds in liquid for an hour or so until they’d transformed into a gel-like substance before blending them up, but these days I literally throw all the ingredients straight in the blender. High speed blenders are best for this job as they’ll blend the seeds smooth in a matter of seconds. Since I’ve had the Froothie power blender, making chia puddings has been a breeze.

Lil’ L absolutely loves these puddings and sees them as a real treat. It’s great to be able to treat him to something that’s so nutritionally packed and full of healthy goodness.

[print_this]

Serves 4
Hands-on time: 10 minutes   Ready in: 10 minutes

Ingredients
80ml / ⅓ cup freshly squeezed orange juice (1-2 juicy oranges)
300ml / 1¼ cups non dairy milk
64g / 6 TBSP chia seeds
30g / 4 TBSP cacao powder (or regular cocoa powder)
4 soft pitted dates (e.g. Medjool)
½ tsp orange extract
Maple syrup (or agave syrup), to taste

Suggested garnish
Dark chocolate, finely chopped or grated
Orange zest

Method
Place the orange juice and milk in a high speed power blender, followed by the remaining ingredients. Give them a stir until they are coated in liquid, then blend until silky smooth. Stop now and then to scrape down the sides. Taste test and add a touch more orange extract or sweetener, if desired.

Pour into small ramekins or cups, sprinkle on the garnish and chill until ready to serve. It will keep for up to five days in the refrigerator.

[/print_this]

Chocolate Orange Chia Pudding

Have you tried chia puddings before? If so, what’s your favourite flavour combo? If you’ve posted any recipes or pics, please do share the links below x

With love,SaveSave

N.B. This post contains affiliate links. Any funds we receive via these links will fund the upkeep of Bit of the Good Stuff. Thank you for your support!SaveSave

SaveSave

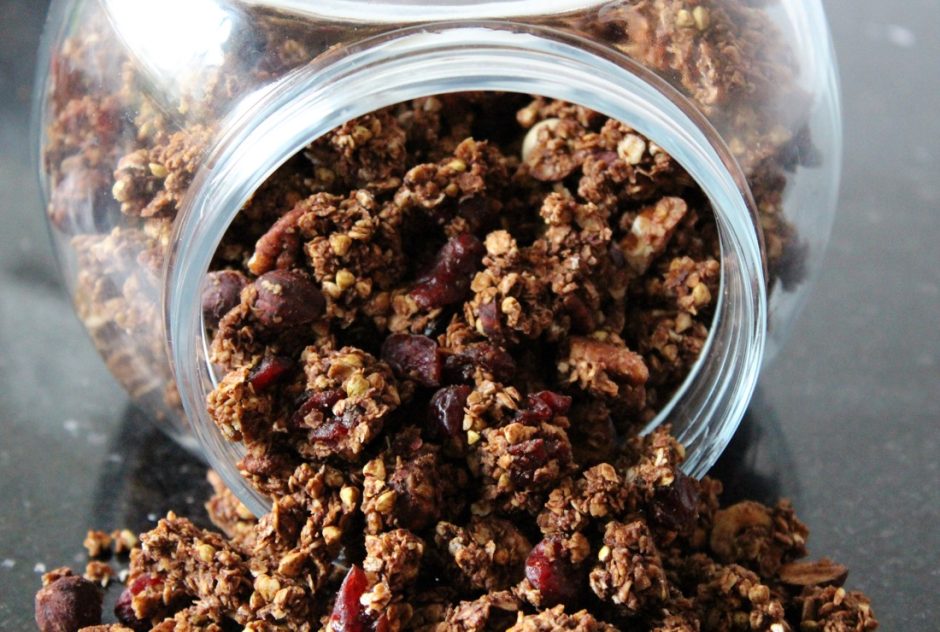
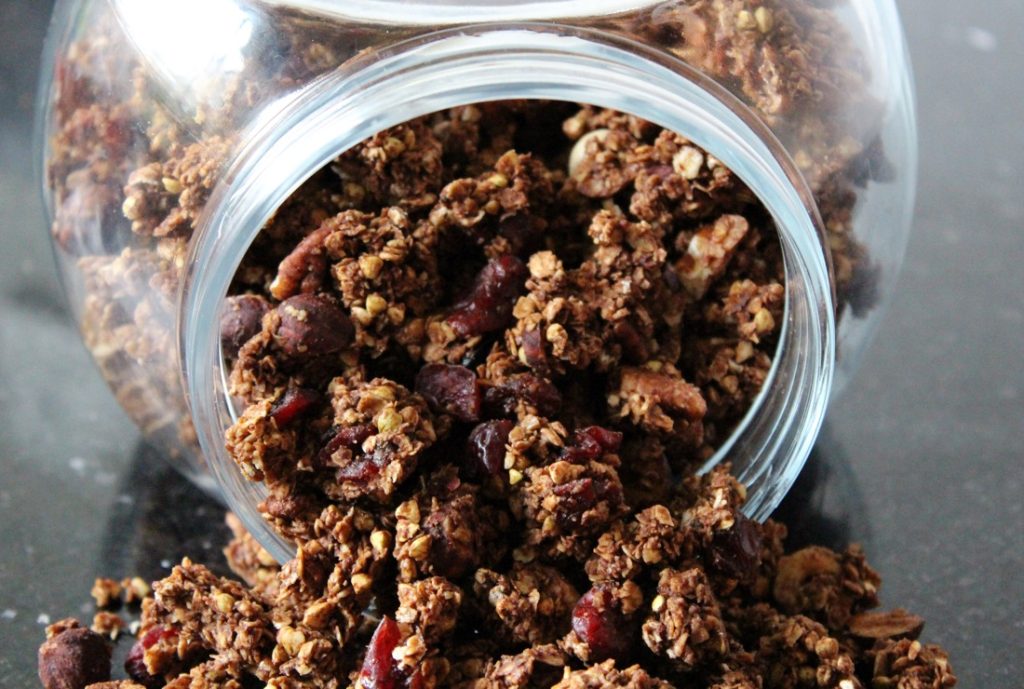
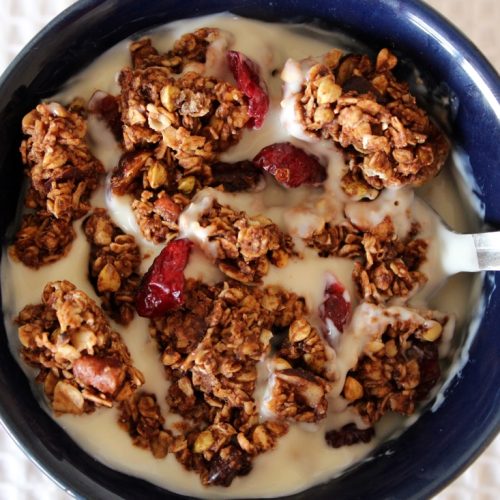
Chocolate Granola Clusters with Hazelnuts, Pecans and Cranberries

Today, I’d like to share another of my family’s favourite granola recipes. Filled with hazelnuts, pecans, cranberries and chocolatey goodness, this granola is perfect for this season.

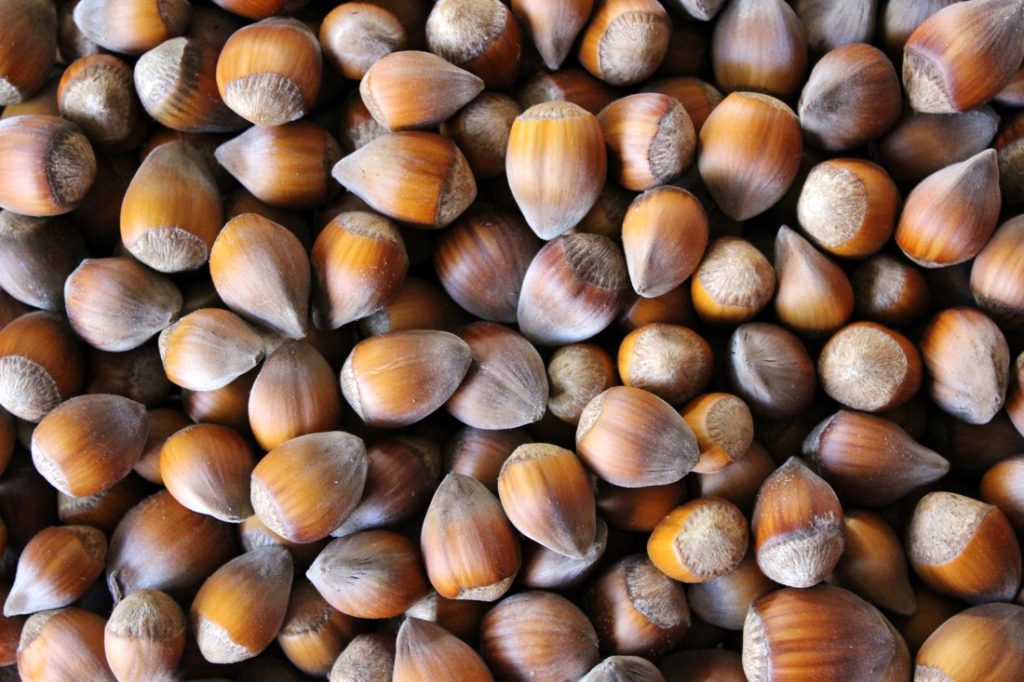
My garden is bordered by cob nut trees, and this year they produced the most amazing crop. I made a deal with the squirrels whereby I would collect nuts from the low hanging branches, and they could have the rest. They then got to work, burying nuts all over my lawn and flower beds, and in my plant pots. Invariably they forget where they’ve buried them and we end up with nut trees growing literally everywhere!

Once they’ve matured, cob nuts are very similar in taste and texture to hazelnuts, so I put them to good use in recipes, like this granola!

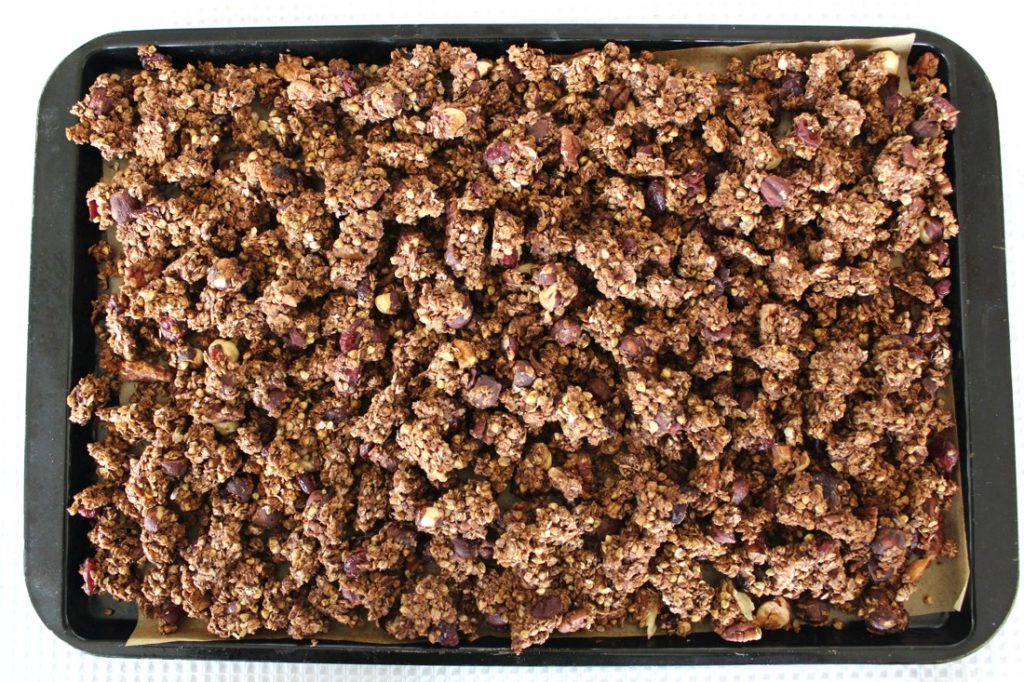
As I’ve mentioned in previous posts, Lil’ L loves home-made granola, especially when it’s formed into clusters. It’s so easy to make. You simple press down the mixture as if you’re making a thin granola bar then, once completely cooled, you break it into clusters.

As well as oats, I Iove to add buckwheat into the granola which adds some lovely crunch as well as more great nutrients. The name ‘buckwheat’ is pretty misleading as it’s actually a fruit seed and doesn’t contain any wheat at all! It is a good source of protein, dietary fibre, antioxidant phytonutrients, B vitamins and minerals. In the UK, buckwheat is currently available in some of the larger supermarkets (Tesco, Waitrose, Ocado), health food stores and online.

Our favourite sweetener for granola is maple syrup. This adds a delicious caramel-like sweetness, rather than a ‘sugary’ flavour. I use Clarks Original Maple Syrup, which is a blend of maple and carob syrups. It’s widely available in the UK, and a fair bit cheaper than pure maple syrup. I really like its flavour and consistency, which is slightly thicker than the pure grade syrup.

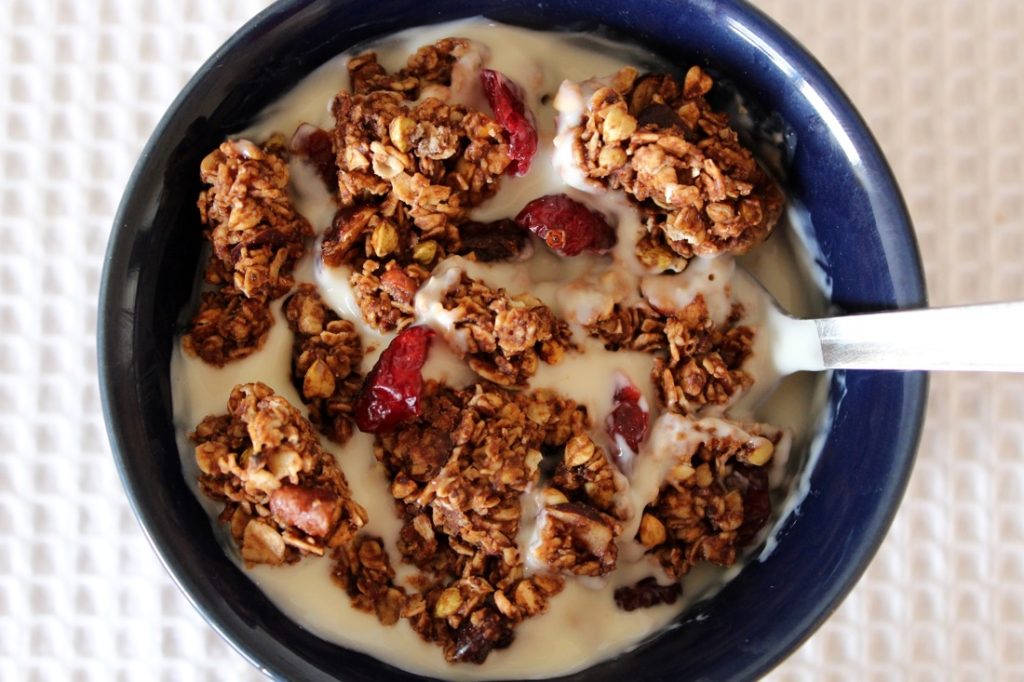
These granola clusters make wonderful breakfasts, snacks and desserts. For breakfast, we like to serve them with plant milk or non-dairy yogurt. For an omega-3 boost, I often add a light sprinkling of ground linseed and finely chopped walnuts before serving. I also sprinkle in a few extra cranberries to brighten up the bowl.

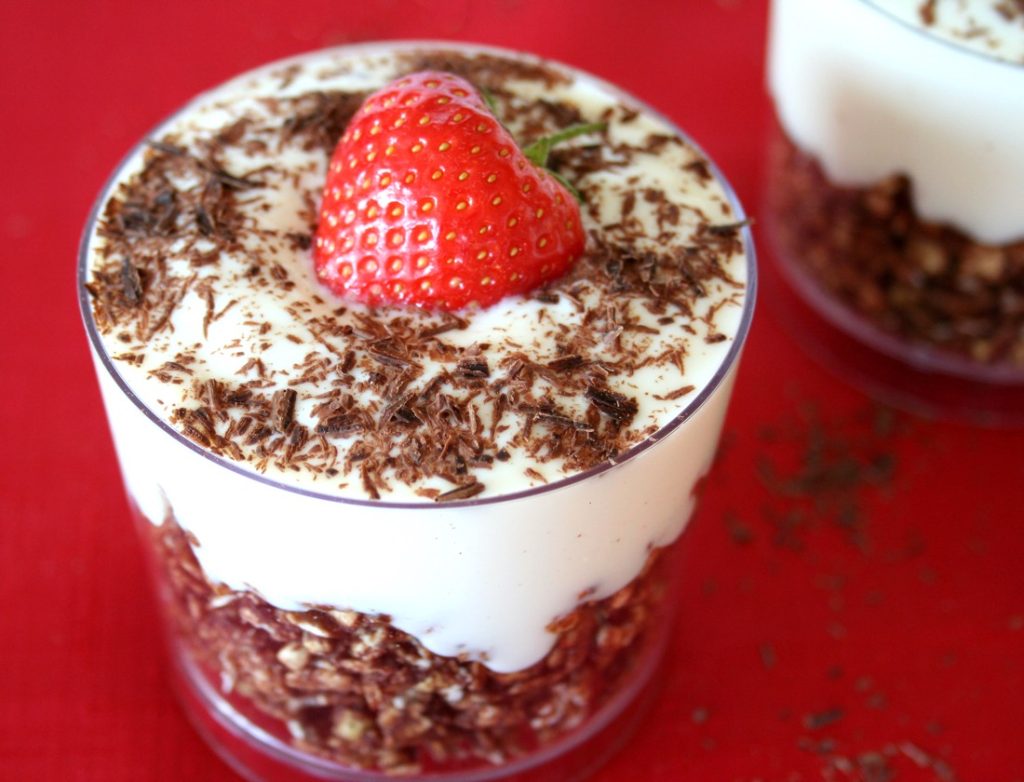
Layered with yogurt and fresh or frozen fruits, the clusters also make a delicious dessert or after-school snack. They look really fancy yet take literally seconds to throw together!

Chocolate Granola Clusters with Hazelnuts, Pecans and Dried Cranberries

These granola clusters make a wonderful breakfast, snack or dessert. For a fancy treat, layer up the granola with yogurt and fruits to make a parfait. Despite taking only seconds to prepare, it looks really beautiful and is bound to impress family and friends!
Hands on time: 10 minutes
Total Time 1 hour
Course Breakfast, Dessert, Snack
Servings 10

Ingredients
  

  • 300 g / 3 cups rolled oats
  • 100 g / ½ cup raw buckwheat (or you can substitute with more oats)
  • 30 g / 4 TBSP cocoa powder
  • 30 g / 3 TBSP coconut sugar or unrefined caster sugar
  • ¼ tsp salt
  • 75 g / ½ cup hazelnuts roughly chopped
  • 65 g / ½ cup pecans roughly chopped
  • 70 g / ½ cup dried cranberries (preferably sweetened with fruit juice)
  • 150 ml / ½ cup maple syrup*
  • 2 tsp vanilla extract
  • 45 g / 3 TBSP virgin coconut oil melted

Instructions
 

  • Preheat the oven to 150C (130C fan) / 300F. Line a large baking tray (38 x 26cm / 15 x 10 inches) with non-stick baking paper. If your coconut oil is solid, place in the oven in a heat-proof bowl for a couple of minutes until it has liquefied. Be careful when removing the bowl as it will be very hot!
  • In a large mixing bowl, stir together the oats, buckwheat, cocoa powder, sugar and salt. Stir in the nuts. You can also stir in the cranberries at this stage or, if you'd like to preserve their vibrant colour, add them to the granola once it's baked.
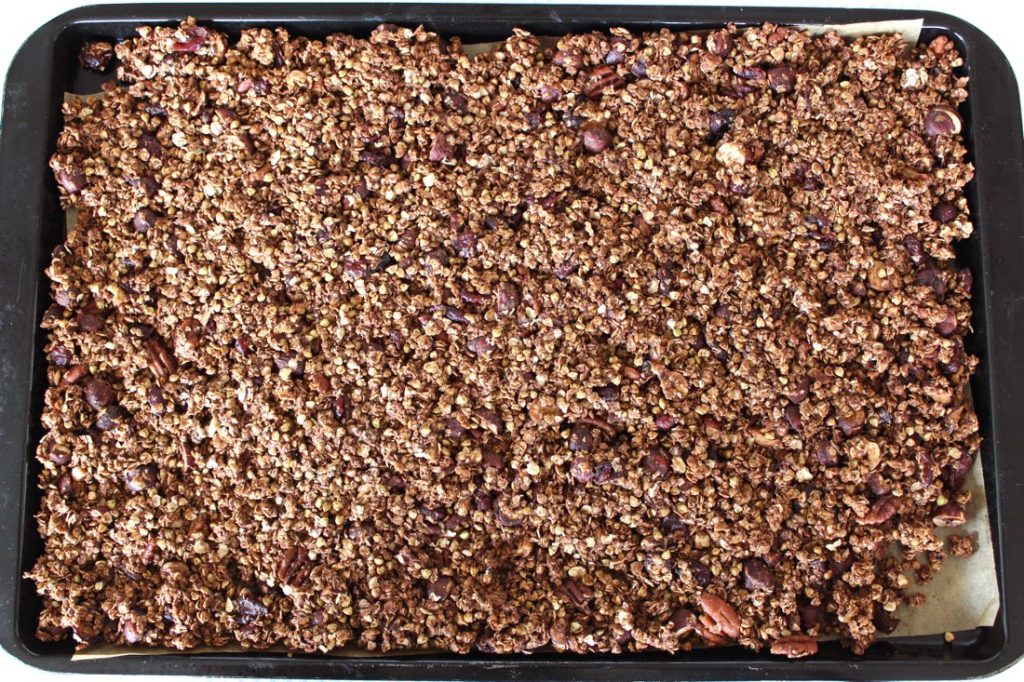
  • Pour in the maple syrup and vanilla extract, and stir until all the grains become coated and shiny. Add the coconut oil and stir until thoroughly combined. Spread the granola out evenly on the prepared baking tray. Press down firmly with a silicone spatula so that the mixture sticks together as if you were making a thin granola bar.
  • Bake for 40 minutes. Remove from the oven and leave to cool. (The granola will firm up as it cools). Once completely cooled, break up the granola. The clusters from the centre of the tray may still feel a little soft when fresh baked but I find they firm up and become crunchy over time. Stored in an airtight container in a cool place, the granola will last for weeks.

Notes

*I use Clark’s Original Maple Syrup which is blended with carob fruit syrup. It’s much cheaper than pure maple syrup and I really like its flavour!
Keyword Easy Vegan Desserts, Home-made Granola, Vegan Breakfast, Vegan Snacks

If you make this granola, I’d love to hear your feedback and any suggestions for adaptations! Tag your photos with #bitofthegoodstuff on social media and they will find their way to me. You can also connect with me on my social media channels here: InstagramFacebookPinterest.   

With love

Autumn-Inspired Apple and Almond Breakfast Smoothie

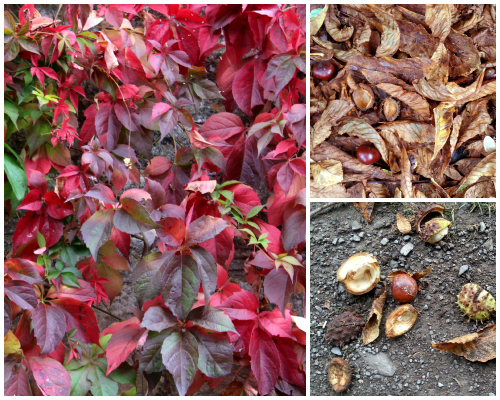
After an exceptionally warm and summer-like September and early October, Autumn has finally arrived in Bath. The Virginia creeper seems to have magically transformed overnight from lush green to vivid red, and the river and canal paths are littered with crunchy brown leaves and horse chestnuts. It most certainly is a beautiful time of year

First Signs of Autumn 4

And though the weather has cooled off a little, I’m still enjoying my daily smoothies. I often have them as a breakfast or lunch on the go, so I add ingredients like nut butters and chia seeds for protein, slow-release energy and to keep hunger pangs at bay. Lil’ L also enjoys smoothies as an after-school snack.

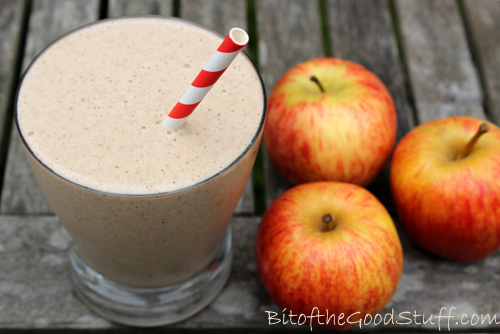
One of our current favourites is this Autumn-inspired Apple & Almond Smoothie.

Apple and Almond Smoothie

The nut butter, yogurt and chia seeds add a delicious creaminess to the smoothie as well as packing in lots more nutrients. The smoothie provides a good dose of protein, fibre and heart-healthy fats (including omega 3), as well as antioxidant vitamins C and E, and trace minerals such as calcium, iron and magnesium.

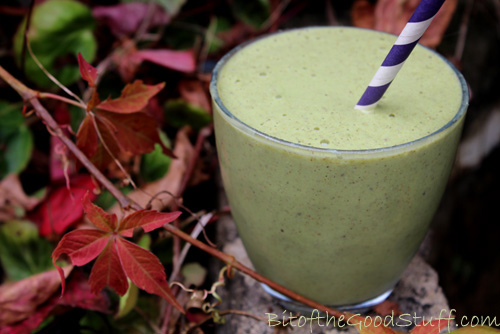
And another great thing about this smoothie is that you can sneak in a handful of spinach and it doesn’t affect the taste at all!

Until recently, Lil’ L hasn’t been a fan of green smoothies. He likes his smoothies to be the ‘right’ colour. In his eyes, berry smoothies should be pink or purple, while pineapple or mango smoothies should be yellow. For him, a berry smoothie that’s bright green is just wrong. However, one day it dawned on me that I might get away with adding spinach to our usual apple and almond smoothie. Apples can be green, right?

Green Apple and Almond Smoothie

I decided to give it a try when he arrived home from school one day. Here’s how the conversation went…
“Hi!” I call out. “I’ve made you a smoothie!”
“Great! Thanks!” he replies enthusiastically. I hand him the smoothie and there’s a pause, followed by a despondent “Oh…. it’s green”.
“Yep, it’s a green apple smoothie. Give it a try. I’m sure you’ll love it”.
With trepidation he takes a sip. “Mmm, it’s really nice!” he says with surprise. Then there’s a pause…. “So what’s making it green?”
Darn, 10 year olds are sharp. Clearly the ‘green apple’ thing won’t wash with him, so I decide to own up and tell him it’s spinach. He thinks about it for a moment then decides it doesn’t matter after all. Green or not, it tastes really good.

Hallelujah, the green smoothie hang up is finally over! In hindsight, I wish I’d introduced green smoothies when he was much younger. That way, he would have grown up thinking that green berry or tropical smoothies are normal. Never mind, he’s on board now and I’m really excited to try out lots more concoctions over the coming weeks (especially as I’ve got an awesome new blender to play with).

So if you’ve got any green smoothie phobes in the family, I highly recommend trying this one on them. Start with a small amount of spinach so it’s a delicate light green rather than scary green and see what they think (just don’t mention the spinach until they’ve given it a thumbs up 😉 ).

[print_this]

This smoothie is perfect for breakfast on the go or as a post-school or exercise snack. Unlike regular fruit smoothies, this one is a great source of slow-release energy and will keep you feeling full up for hours.

Hands-on time: 5 minutes

Serves 1 as a breakfast (or two as a snack)

1 medium organic apple, cored and chopped (no need to peel if you have a powerful, high speed blender)
1 tsp ground cinnamon
2 TBSP almond butter
1 TBSP chia seeds
handful of spinach leaves (optional)
120ml / 4 fl oz / ½ cup almond milk (or other non dairy milk)
120ml / 4 fl oz / ½ cup non dairy natural yogurt
1 tsp maple syrup, or to taste

Place all the ingredients in a blender. Pulse a few times to break up the apple, then blend on high speed until smooth. Taste test, and add more sweetener, if desired.

[/print_this]