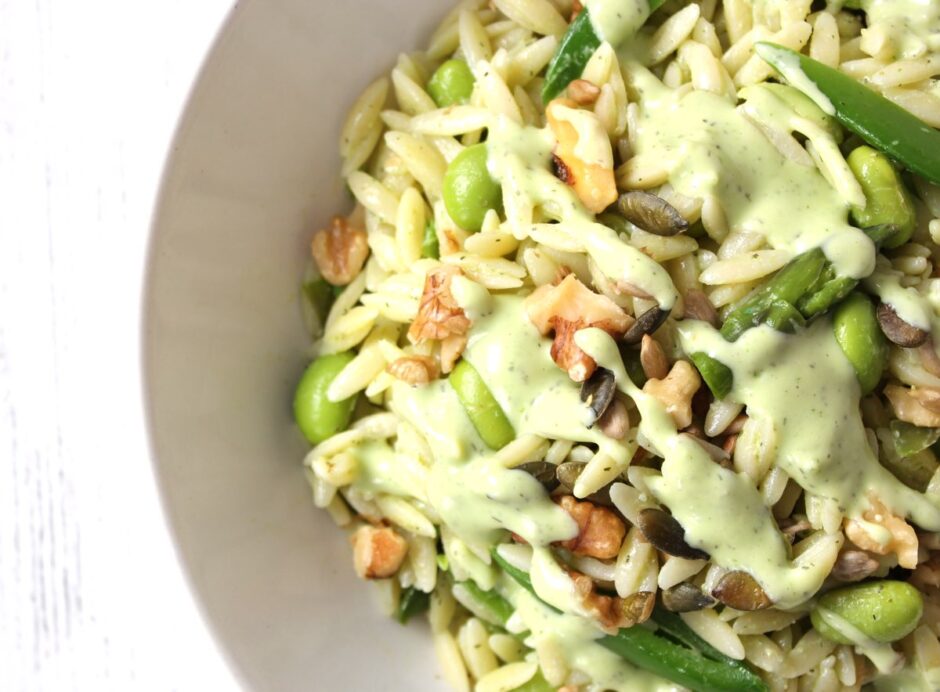
Green Orzo Pasta Salad with Creamy Herby Dressing (30 Minute Recipe)

Jump to Recipe

In today’s post, I’m sharing a delicious Green Orzo Pasta Salad that my family has been loving lately. It’s perfect for serving as a main meal on a warm summer’s evening, but would also make a great addition to work or school lunchboxes. It’s really easy to make and ready in 30 minutes or less.

Orzo is the pasta of choice for this dish. In appearance, it looks like giant grains of rice! It feels much lighter than regular pastas, making it perfect for salads.
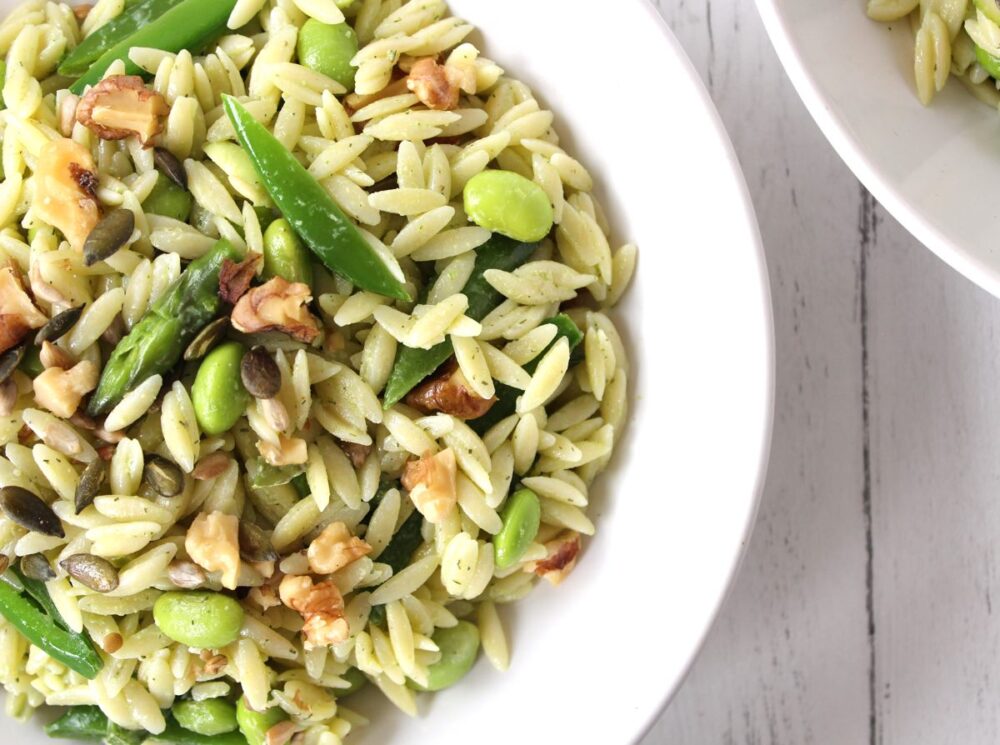
Green Orzo Pasta Salad

Asparagus spears, sugar snap peas, courgette and edamame beans give this dish a beautiful green hue and fresh taste. They are very lightly cooked or served raw, so that they retain their vibrant colours and nutrients. 
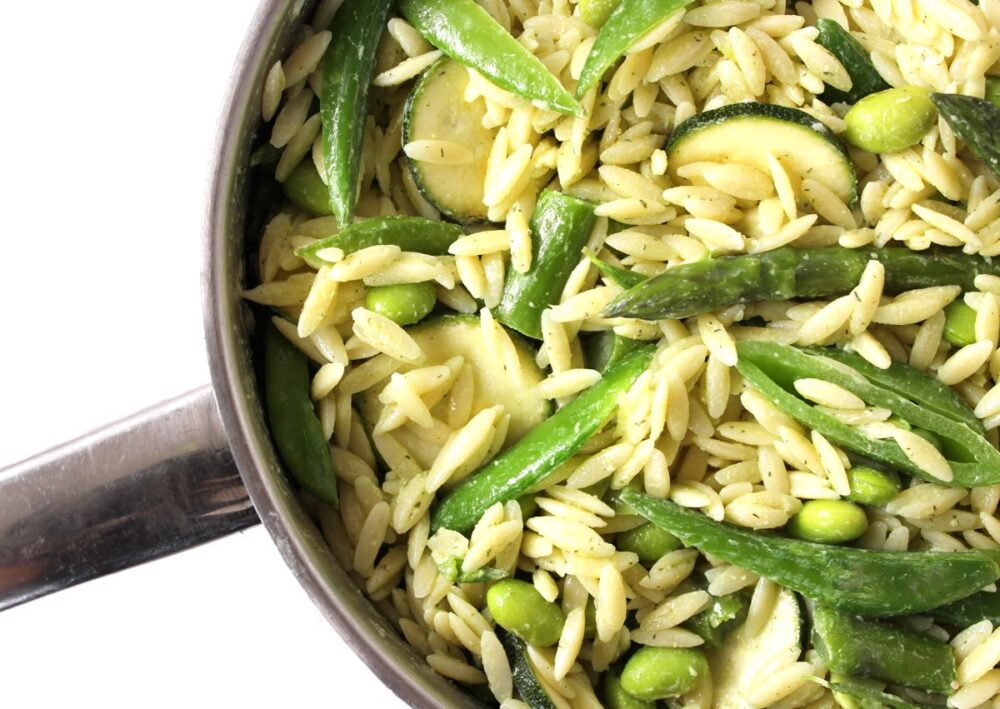
Green Orzo Pasta Salad (Vegan)

The pasta is coasted in a creamy, herby dressing that’s made with non-dairy yogurt, extra virgin olive oil and fresh green herbs. Not only does it taste amazing on pasta, but it’s also far healthier than traditional creamy salad dressings.
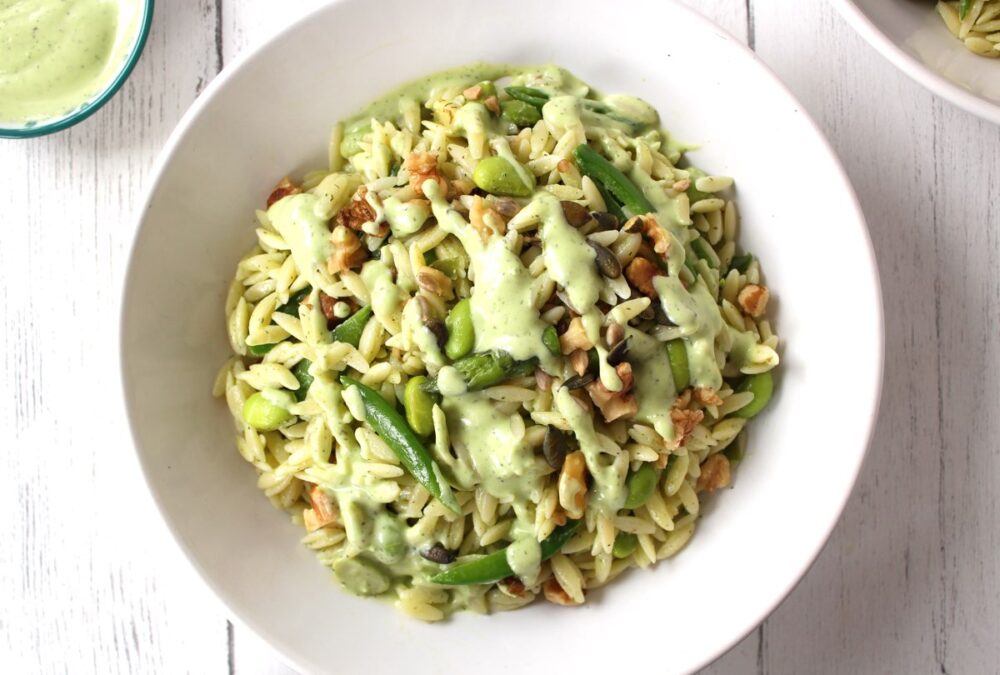
Green Orzo Pasta Salad (Vegan)

This pasta salad is packed full of nutritional goodness. It’s a rich source of protein, dietary fibre, heart healthy fats, antioxidants and a whole array of vitamins (A, B, C, E, K) and minerals (including iron, magnesium, potassium, selenium and zinc). This is a meal that’s going to leave you feeling energised and ‘zinging’ on the inside!!

Recipe Card
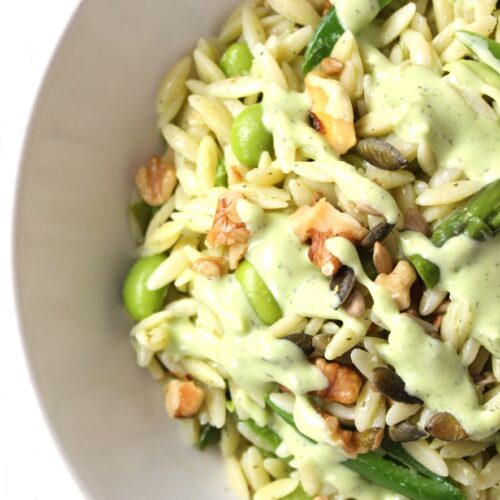
Green Orzo Pasta Salad (Vegan)

Green Orzo Pasta Salad with Creamy Herby Dressing

This delicious, creamy pasta salad is fresh, vibrant and packed full of nutritional goodness! It’s perfect for serving in the summer months as a main meal or lunchtime option. It’s really easy to make and comes together in 30 minutes or less.
Hands-on Time 30 minutes
Total Time 30 minutes
Course Lunch, Main Course, Salad
Cuisine Mediterranean
Servings 4

Ingredients
 

  • 400 g / 14 oz orzo pasta
  • 200 g / 7 oz asparagus trimmed* and chopped
  • 150 g / 1½ cups sugar snap peas trimmed
  • 160 g / 1 cup edamame beans (I use frozen)
  • 1 medium courgette (zucchini) thinly sliced

For the creamy herby dressing:

  • 250 g / 1 cup plain dairy-free yogurt (I used Alpro plain)
  • 2 tbsp extra virgin olive oil
  • 1 tsp Dijon mustard
  • small handful (about 5 g) basil leaves
  • small handful (about 5 g) flat leaf parsley leaves
  • ½ tsp dried dill
  • ½ tsp garlic granules
  • ¼ tsp salt

For garnish:

  • 50 g / ½ cup toasted walnuts
  • 2 TBSP toasted sunflower seeds
  • 2 TBSP toasted pumpkin seeds
  • freshly ground black pepper, to taste

Instructions
 

  • Prepare two pans of boiling water. In one pan, cook the pasta until al dente (about 9 minutes). Drain and rinse the pasta under cold running water, then transfer it back to the pan.
  • In the second pan, boil the asparagus, sugar snap peas and edamame beans for a maximum of two minutes (until they are just tender). Drain and rinse under cold running water to stop them cooking and to help retain their vibrant colour. If you’re feeling fancy, slice the sugar snap peas diagonally to expose the cute peas inside.
  • Place all the dressing ingredients in a blender or mini food processor and whizz until smooth. Taste test and adjust the seasoning to suit.
  • If the nuts and seeds aren’t already toasted, place them in a dry frying pan (skillet) on medium heat and cook for a couple of minutes, stirring regularly until the walnuts become fragrant and the seeds start to brown or pop.
  • Add the vegetables and beans to the pasta pan. Pour three quarters of the dressing in and stir through to coat. Transfer to bowls and drizzle on the remaining dressing. Add a sprinkling of toasted nuts and seeds, some freshly ground black pepper and serve.
  • Any leftovers will keep in the fridge for three days. They make a great lunchbox option!

Notes

* To trim the asparagus, simply take the end of the asparagus between your thumb and forefinger and bend until it breaks. The asparagus will automatically break where the woody part ends and the fresh, juicy asparagus begins.
Recipe lightly adapted from the Green Orzo Pasta Salad in Vegan Life magazine, Issue 54
Keyword Lunchbox Ideas, Pasta salad, Plant-Based, Vegan Dinners, Vegan Lunch
Tried this recipe?Let us know how it was!

Nutritional Breakdown

N.B. The above values are estimates. The actual nutritional values will vary depending on the brands and ingredients used.

Pin for later ⬇️
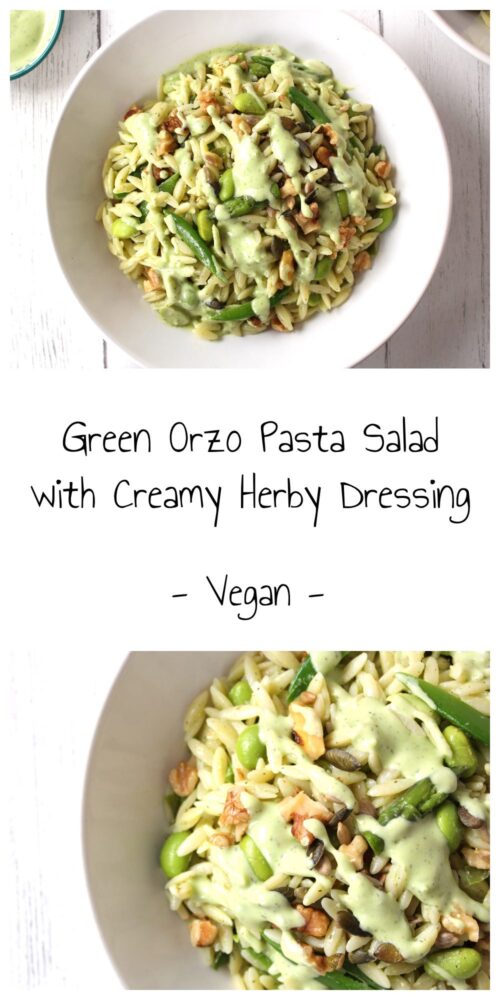
Green Orzo Pasta Salad (Vegan)

If you make this Green Orzo Pasta Salad, I’d love to hear your feedback and any suggestions for adaptations! Tag your photos with #bitofthegoodstuff on social media – I always love to see your creations! You can also connect with me on my social media channels here: InstagramFacebook, Pinterest.   

With love,

Sharon xx

———————————-
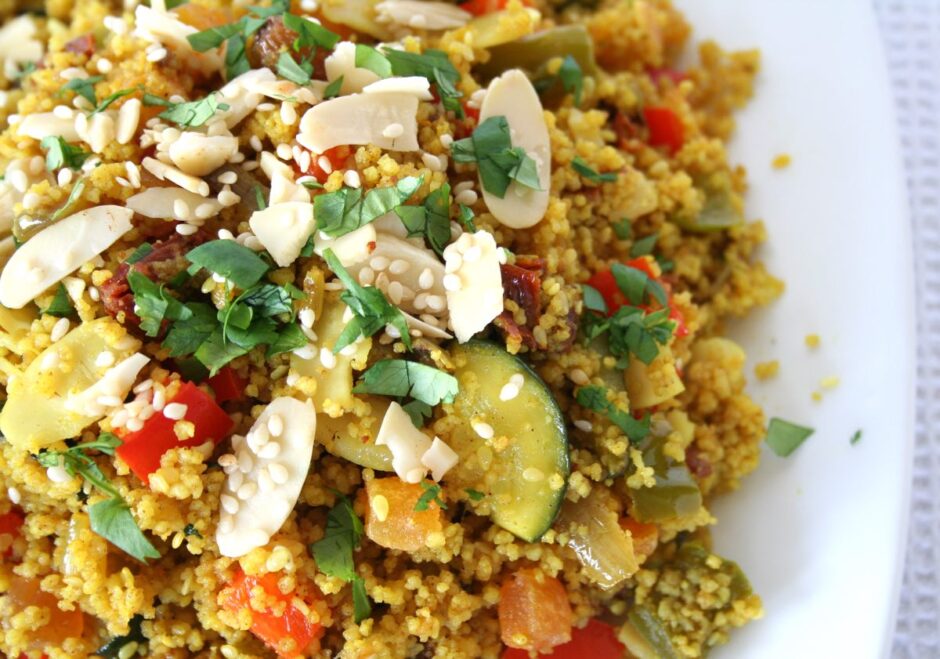
Moroccan Fruity Couscous

Jump to Recipe

* This post was originally published in July 2013. The page was updated in August 2019.

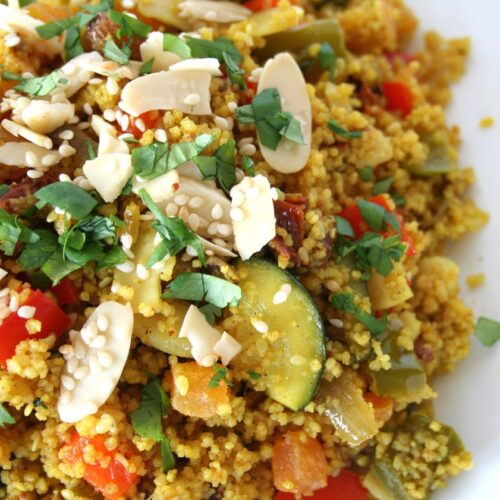
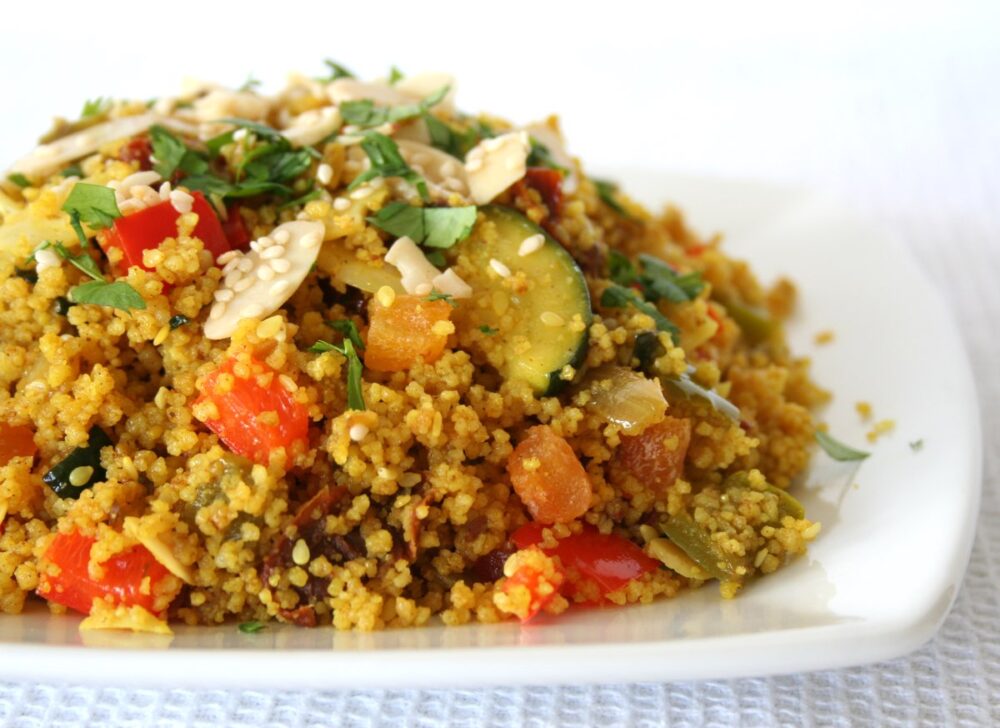
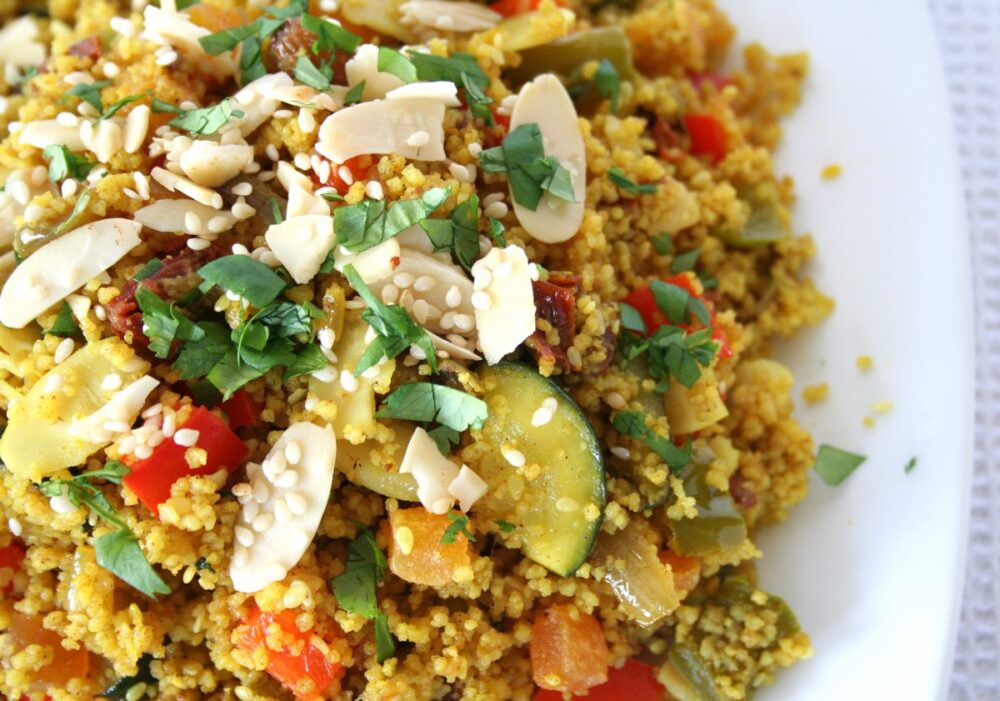
Today I’d like to share another one of my family’s current favourite dishes – Moroccan Fruity Couscous. This is such a pretty dish, full of flavour and ready in just 20 minutes!

Moroccan Fruity Couscous

It makes a lovely summer weekend lunch or speedy weeknight supper. It’s equally delicious served hot or cold, making it perfect for al fresco dining, picnics and buffets. As a main meal, we love to serve it with strips of warm pitta or garlic bread, some baby salad leaves and a large dollop of hummus. Moroccan-spiced or roasted red pepper hummus is especially good!

Moroccan Fruity Couscous

July 30 2013 – I made this dish for dinner last night, and was intending to blog it in the evening and join in Meatless Monday. However, after a day of thunder, lightening and heavy rain, the weather had finally cleared by 7pm and the three of us were itching to get outside and make the most of the ‘best part of the day’. Our short stroll turned into a 6 mile circular walk along the Kennet & Avon Canal & across Bath City centre. It was such a beautiful evening! Everything smelt so fresh after the rainfall, and the late sun was making everything sparkle.

Kennet and Avon Canal by Sydney Gardens in Bath

So here’s the recipe, a day late but I’m sure you’ll forgive me 😉

Recipe Card

Moroccan Fruity Couscous

Moroccan Fruity Couscous

Sharon
This gently spiced, fruity couscous makes a lovely summer weekend lunch or speedy weeknight supper. As a main meal, we like to serve it with strips of warm pitted bread or garlic bread, baby salad leaves and a large dollop of hummus. I've kept it mild enough for children, but feel free to spice it up with some chilli.
Hands-on time 20 minutes
Total Time 20 minutes
Course Lunch, Main Course, Supper
Cuisine Moroccan
Servings 4

Ingredients
 

  • 245 g / 1⅓ cups couscous, preferably whole wheat
  • 8 sun-dried tomatoes in olive oil drained and sliced
  • 8 dried apricots chopped
  • 30 g / 3 TBSP dried cranberries or sultanas
  • 480 ml / 2 cups boiling hot vegetable stock (broth)
  • 1 TBSP olive oil divided
  • 1 medium onion (140g) finely chopped
  • 2-3 garlic cloves minced
  • 1 bell pepper (190g) deseeded and diced (or use a mix of different coloured pepper pieces to make it extra vibrant!)
  • 1 medium courgette (zucchini) (240g) quartered lengthwise and sliced
  • 1 tsp ground cumin
  • ½ – 1 tsp sweet paprika
  • ½ tsp ground cinnamon
  • ¼ tsp ground ginger
  • ¼ tsp ground turmeric
  • small handful of fresh coriander leaves (cilantro)or parsley roughly chopped
  • salt to taste

Garnish

  • 4 TBSP toasted flaked almonds
  • 2 TBSP toasted sesame seeds

Instructions
 

  • Place the couscous, sun-dried tomatoes, dried apricots and cranberries/sultanas in a heat-proof bowl. Pour the boiling hot stock on top, cover with a plate and leave for 7 minutes. Drizzle on ½ TBSP olive oil (or oil from the jar of sun-dried tomatoes) and fluff up with a fork.
  • Meanwhile, heat ½ TBSP oil in a large frying pan (skillet) on medium heat and cook the onion, garlic, bell pepper and courgette for a couple of minutes. Stir in the dried spices, reduce the heat to medium-low and continue cooking for 5 minutes. If the vegetables start to stick, add a splash of water to the pan.
  • Once ready, tip the couscous into the pan along with the fresh herbs. Gently stir through to combine. Season with salt, to taste.
  • Divide between four bowls. Sprinkles on the nuts and seeds and serve.
  • Any leftovers can be stored in the fridge for three days. They’re great for packing into lunchboxes as an alternative to sandwiches. Be sure to add a dollop of hummus to the bowl. It helps the couscous stick together!

Notes

Super Speedy Version
To save on chopping time, substitute the fresh vegetables with a bag of frozen grilled Mediterranean vegetables.
Keyword Buffets, Couscous, Lunchbox Ideas, Plant-Based, Vegan Dinners, Vegan Lunch, Vegan Picnics, Vegan Supper
Tried this recipe?Let us know how it was!

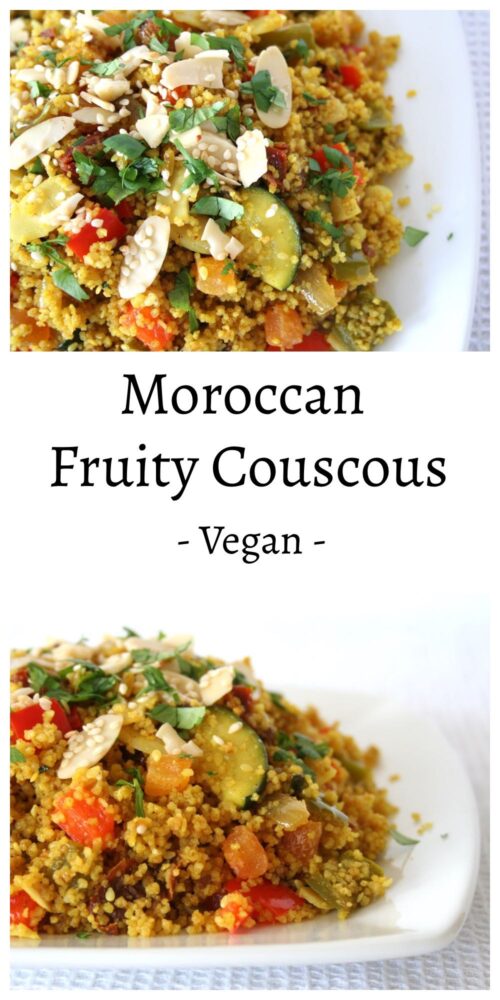
Pin for later ⬇️

Moroccan Fruity Couscous

If you make this Moroccan Fruity Couscous (or any other recipes on my blog), I’d love to hear your feedback and any suggestions for adaptations! Tag your photos with #bitofthegoodstuff on social media – I always love to see your creations! You can also connect with me on my social media channels here:
InstagramFacebookPinterest.   

With love,

Sharon xx

———————————-
YOU MAY ALSO LIKE…

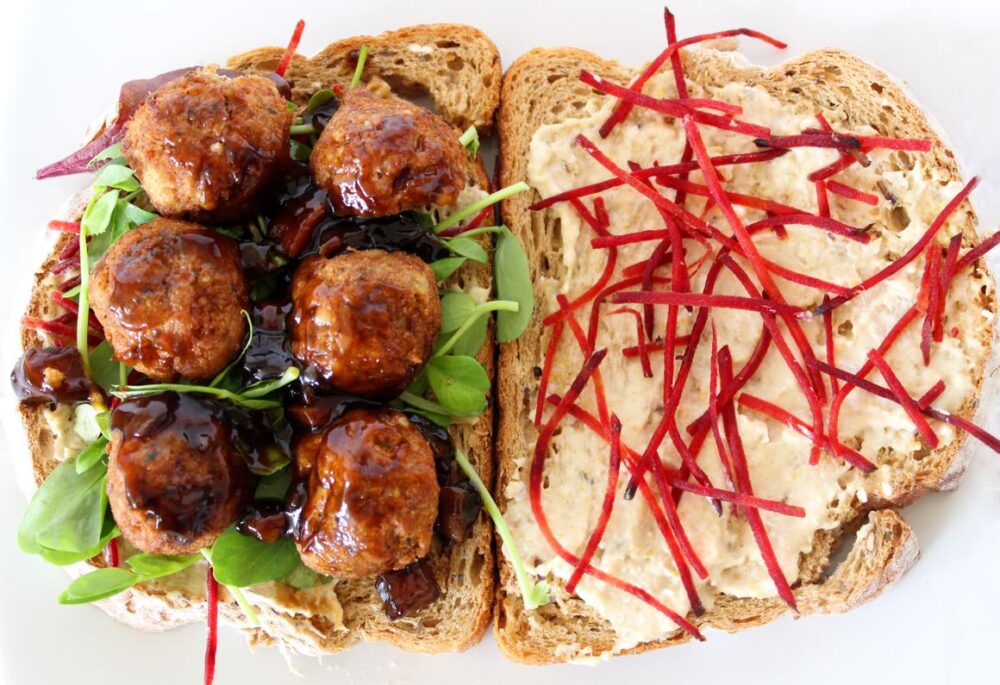
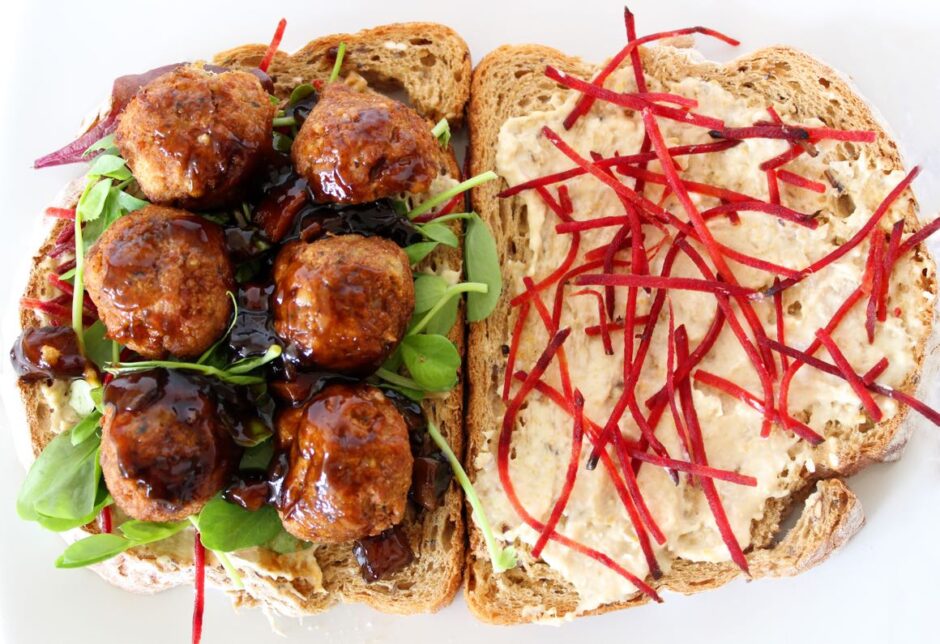
Moroccan-Spiced Falafel

Falafel Sandwich

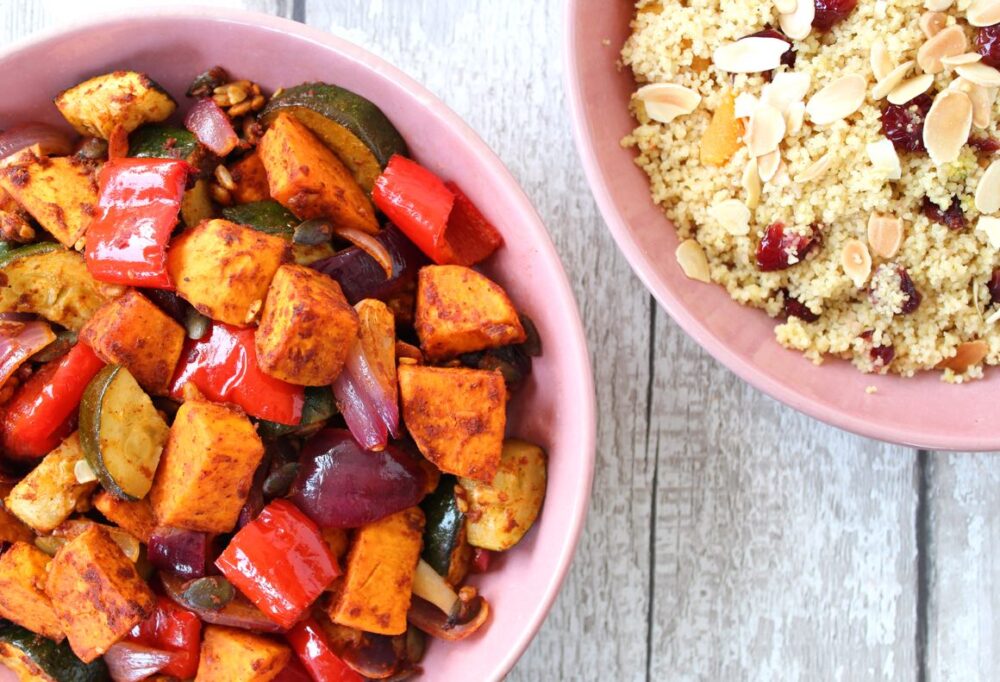
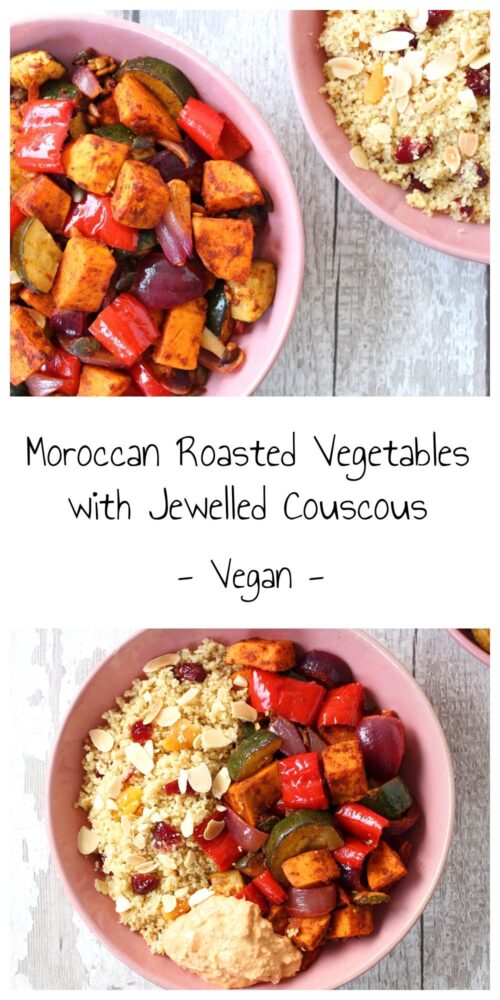
Moroccan Roasted Vegetables with Jewelled Couscous

Jump to Recipe

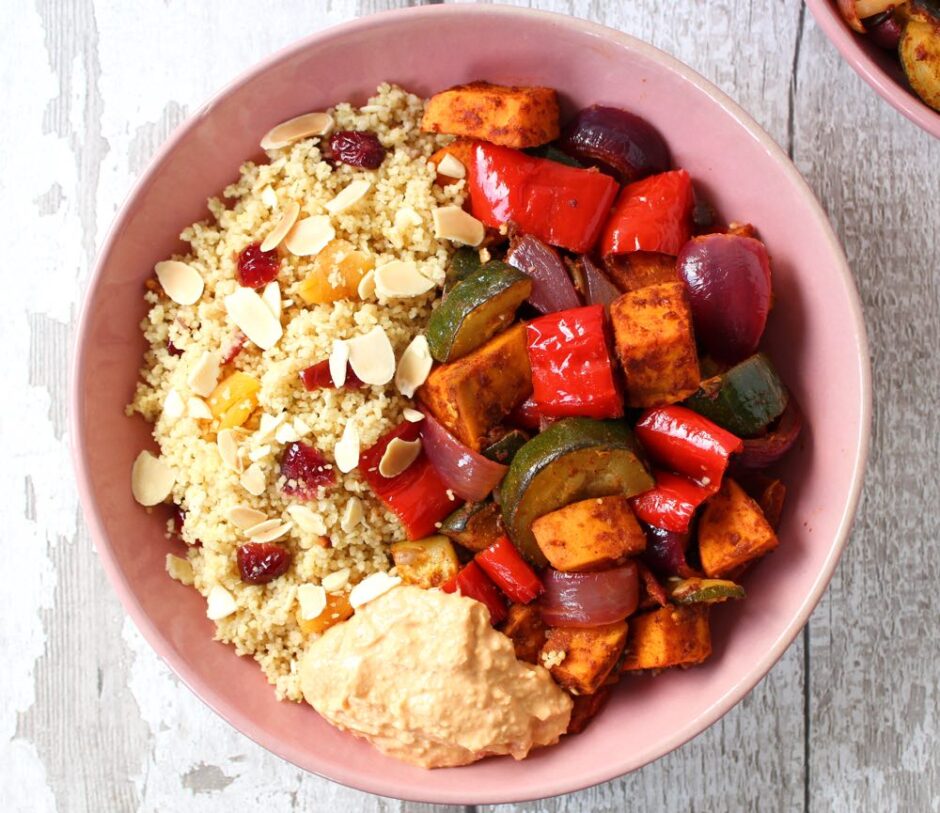
In today’s post, I’m sharing a Moroccan-inspired dinner that my family has been loving lately. It’s super easy to make, highly adaptable and a great make-ahead option. These past couple of weeks have been scorching hot in the UK, so we’ve really enjoyed this dish at room temperature. It’s equally delicious served hot or cold.

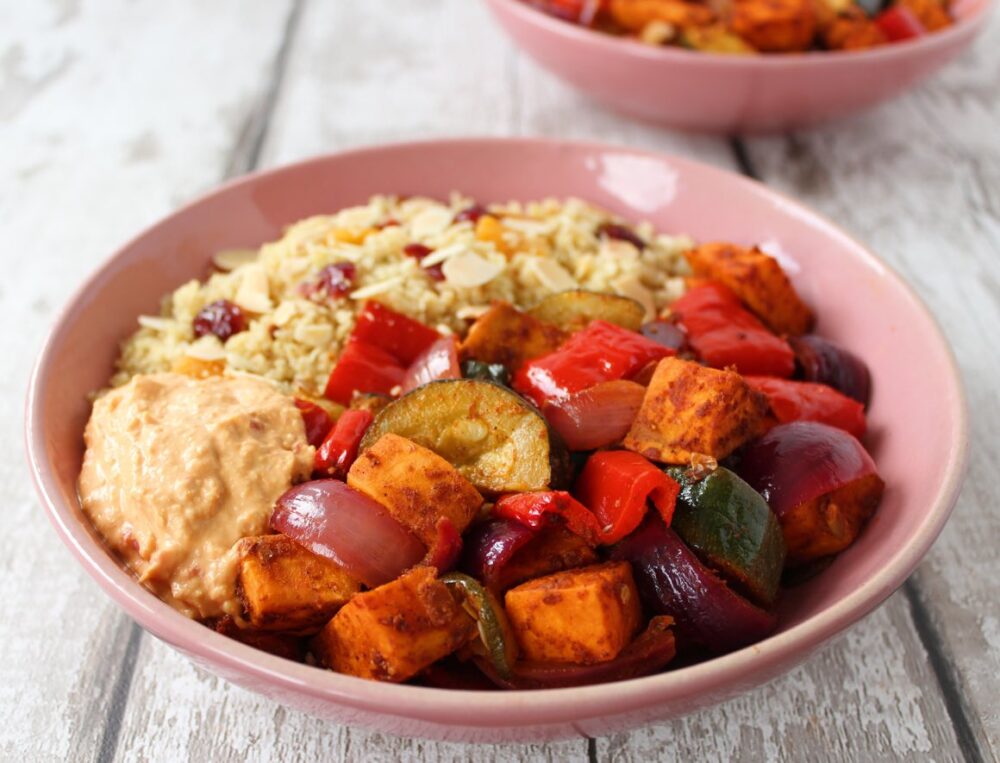
Moroccan Roasted Vegetables with Jewelled Couscous

Check out all those beautiful colours!!

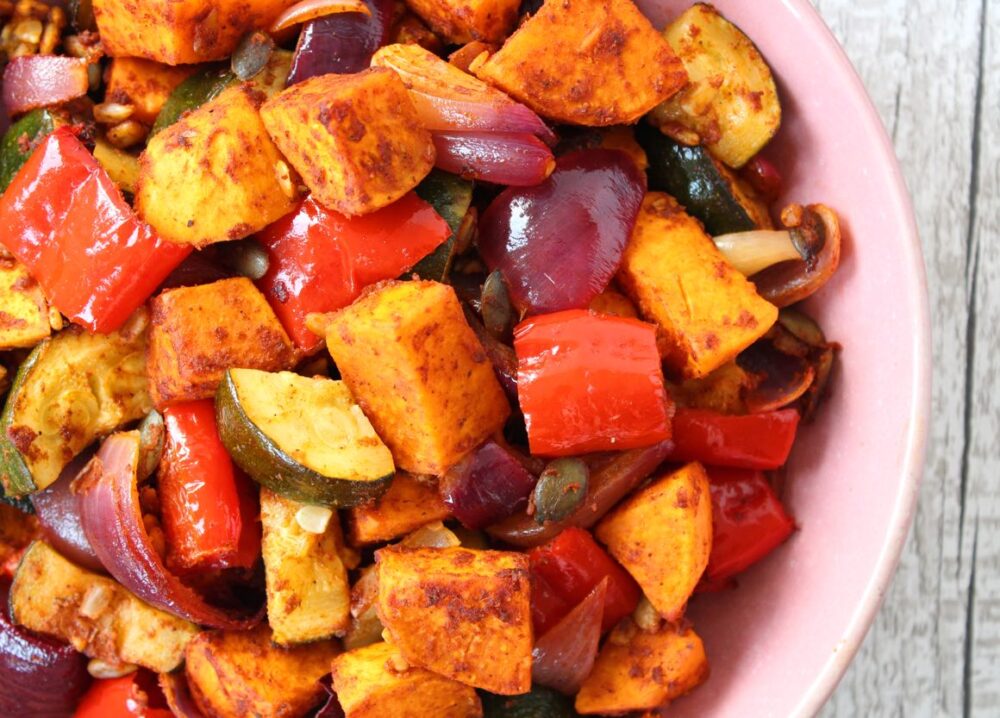
And those vibrant colours are an indication of all the wonderful health-boosting antioxidants and phytonutrients in this dish. It is especially rich in carotenoids (which give the sweet potato and bell pepper their vivid orange and red hue), vitamin C and vitamin E.

This is one of those meals that leaves me feeling incredibly energised and fantastic on the inside!

Moroccan Roasted Vegetables

The inspiration for this dinner was a recipe that featured in this month’s Vegan Life magazine for ‘Jewelled Cous Cous with Harissa Roasted Vegetables’. I’ve tried Harissa paste a few times in the past, but I personally find it way too spicy… I can literally feel my lips and throat burning even with the tiniest amount.

Since I’m a complete wimp when it comes to handling chilli heat, instead of using Harissa, I created my own spice blend mix which has the aromatic flavours that I associate with Moroccan cuisine, but is mild enough for me (and, by default, children!)

Moroccan Roasted Vegetables with Jewelled Couscous

Recipe Card

Moroccan Roasted Vegetables with Jewelled Couscous

Moroccan Roasted Vegetables with Jewelled Couscous

Sharon
This Moroccan-inspired dinner is packed full of colour and flavour. I’ve made it mild enough to serve to all family members, but feel free to add some Harissa paste if you like heat. It is equally delicious served hot or cold, and is a great make-ahead option. Be sure to add a dollop of hummus to your bowls before serving. It’s the perfect complement to the dish and is great for holding the couscous together on your fork!
5 from 1 vote
Hands-on time 20 minutes
Total Time 40 minutes
Course Lunch, Main Course
Cuisine Moroccan
Servings 4

Ingredients
 

Spice blend for the roasted vegetables

  • 2 TBSP tomato puree (paste)
  • TBSP olive oil
  • juice of 1 lime
  • 2 tsp minced garlic
  • 2 tsp ground cumin
  • 1 tsp Ras el hanout
  • 1 tsp ground cinnamon

Roasted Vegetables

  • 2 sweet potatoes (450g) peeled and cut into 2 cm / ¾ inch cubes
  • 2 courgettes (zucchini) (400g) sliced lengthwise then into 1.5 cm / ½ inch half moons
  • 2 sweet romano or red bell peppers (200g) deseeded and sliced
  • 2 red onions (200g) sliced into wedges
  • ¼ tsp salt
  • oil for spraying the roasting tins
  • 2 TBSP pumpkin seeds
  • 2 TBSP sunflower seeds

Jewelled Couscous

  • 250 g / 1⅓ cups couscous (preferably whole wheat)
  • 8 dried apricots (44g) diced
  • 4 TBSP dried cranberries (38g) (preferably sweetened with fruit juice)
  • 480 ml / 2 cups boiling vegetable stock (broth) (I use water and 2 tsp vegetable bouillon powder)
  • ½ TBSP extra virgin olive oil

Garnish

  • 4 TBSP toasted flaked almonds
  • 8 TBSP hummus

Instructions
 

  • Preheat the oven to 200C (180C fan) / 400F.
  • In a mixing bowl, combine all the spice blend ingredients. Add the chopped vegetables and stir through to coat.
  • Lightly spray two roasting tins with oil and arrange the veggies in a single layer. Lightly sprinkle with salt. Roast for 25-30 minutes, or until the sweet potato is cooked through. Give them a stir half way through the cooking time. At this point, sprinkle in the pumpkin and sunflower seeds.
  • Ten minutes before the veggies are ready, place the couscous, apricots and cranberries in a heat-proof bowl. Pour the boiling hot stock on top, cover with a plate and leave for 7 minutes. Drizzle on ½ TBSP olive oil and fluff up with a fork.
  • Divide the couscous and roasted veggies between four bowls. Add a large dollop of hummus to each bowl, sprinkle some flaked almonds on top for garnish and serve.
  • Any leftovers can be stored in the fridge for three days. They’re delicious eaten hot or cold, and make a great lunchbox option! The roasted veggies are also freezable.

Notes

Recipe adapted from ‘Jewelled Cous Cous with Harissa Roasted Vegetables’ in Issue 52 of Vegan Life magazine.
Keyword Couscous, Family Friendly, Lunchbox Ideas, Plant-Based, Roasted Vegetables, Vegan Dinners, Vegan Lunch
Tried this recipe?Let us know how it was!

Nutritional Breakdown

N.B. The above values are estimates. The actual nutritional values will vary depending on the brands and ingredients used.

Pin for later ⬇️

Moroccan Roasted Vegetables with Jewelled Couscous

If you make this Moroccan Roasted Vegetables with Jewelled Couscous (or any other recipes on my blog), I’d love to hear your feedback and any suggestions for adaptations! Tag your photos with #bitofthegoodstuff on social media – I always love to see your creations! You can also connect with me on my social media channels here: InstagramFacebookPinterest.   

With love,

Sharon xx

———————————-
YOU MAY ALSO LIKE…

Moroccan-Spiced Falafel

Falafel Sandwich


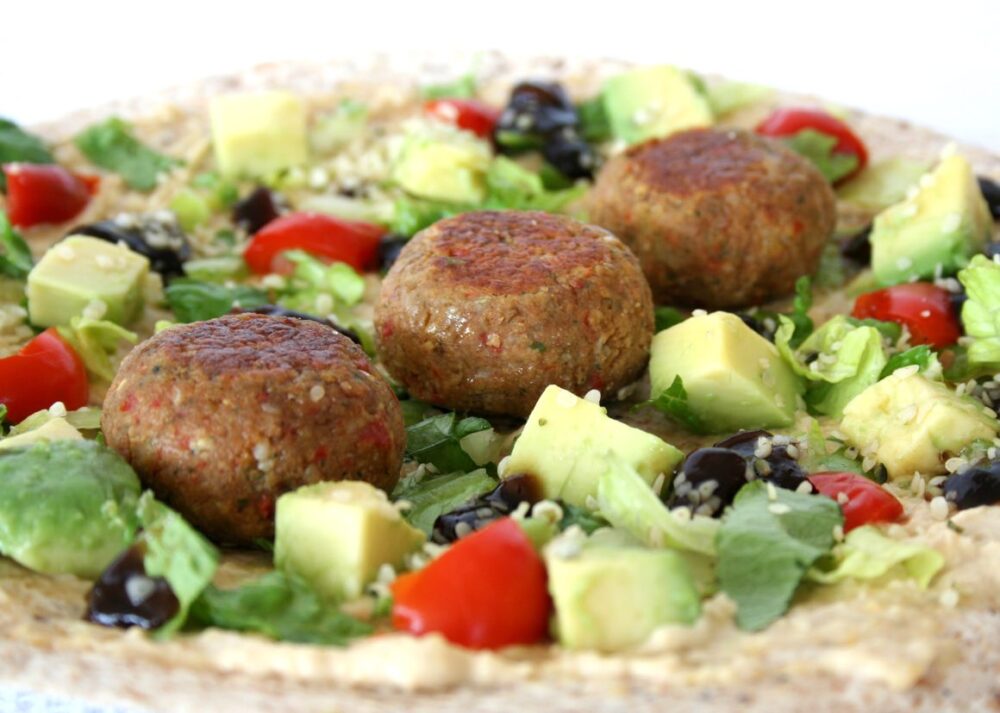
Moroccan-Spiced Falafel

Jump to Recipe

* This blog post was originally posted on October 18, 2013. The page was refreshed July 2019

This week, one of my lovely readers emailed and asked whether I could share our recipe for falafel. I was more than happy to oblige! I know I’ve posted numerous pics of our falafel in the past, so this recipe share is way overdue.

My family are huge fans of home-made falafel. They’re so versatile! You can flavour them to suit your tastes, and they’re delicious eaten hot or cold.

Falafel Wrap
Continue reading “Moroccan-Spiced Falafel”

Easy Vegan ‘Camembert Cheese’

Jump to Recipe

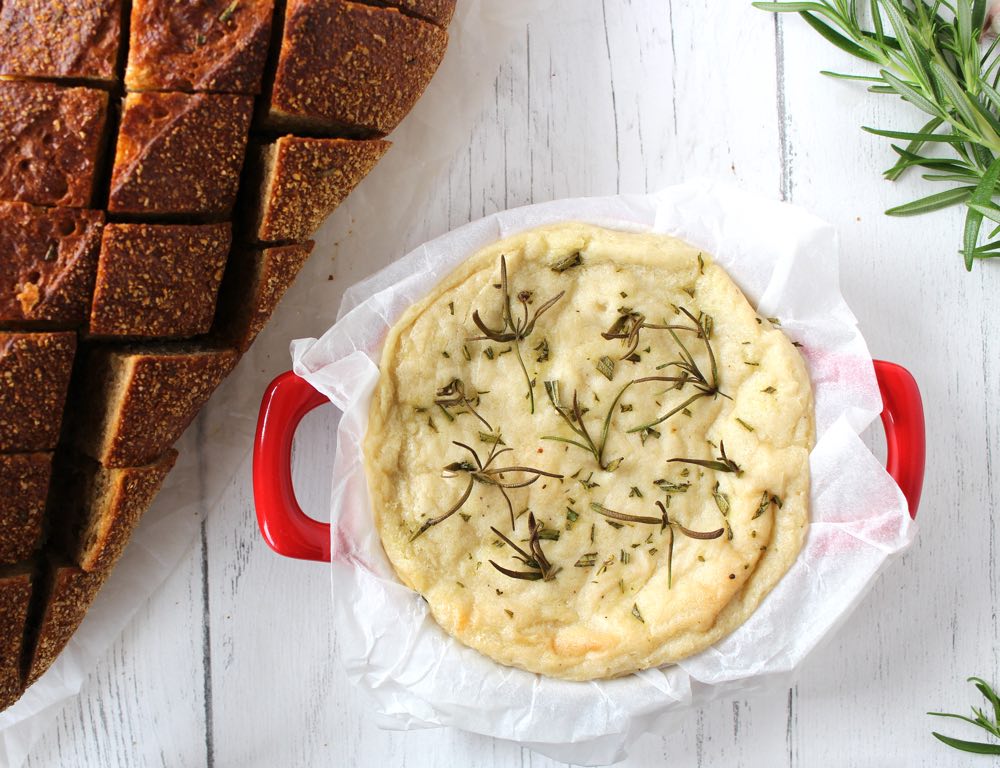
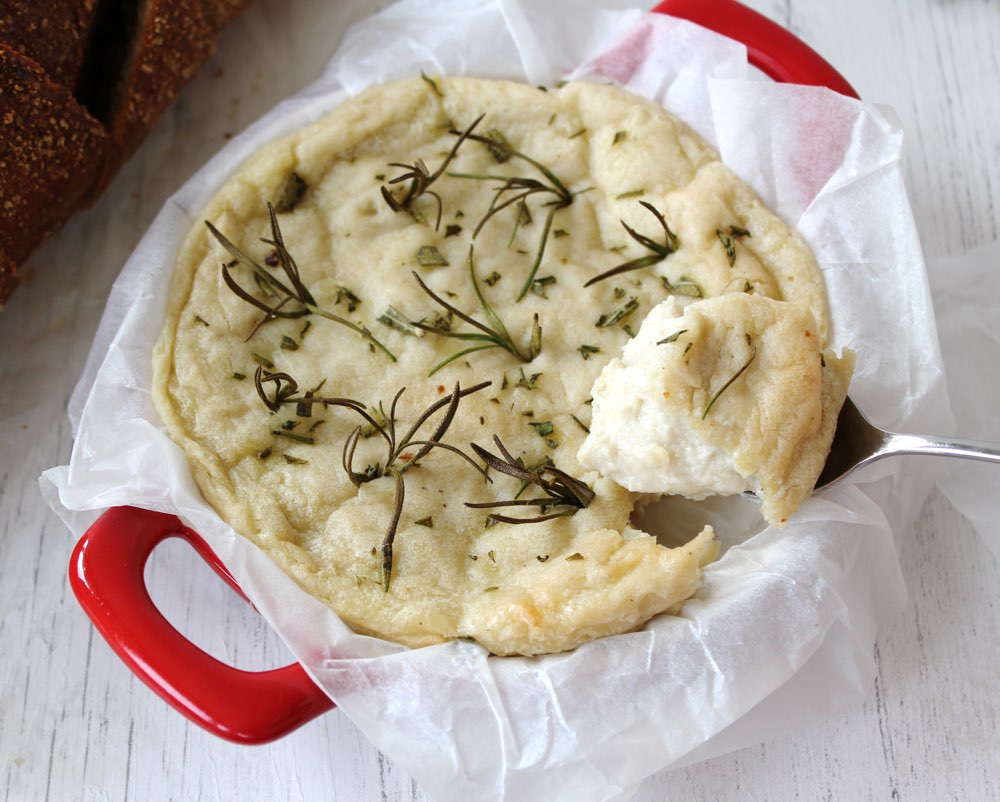
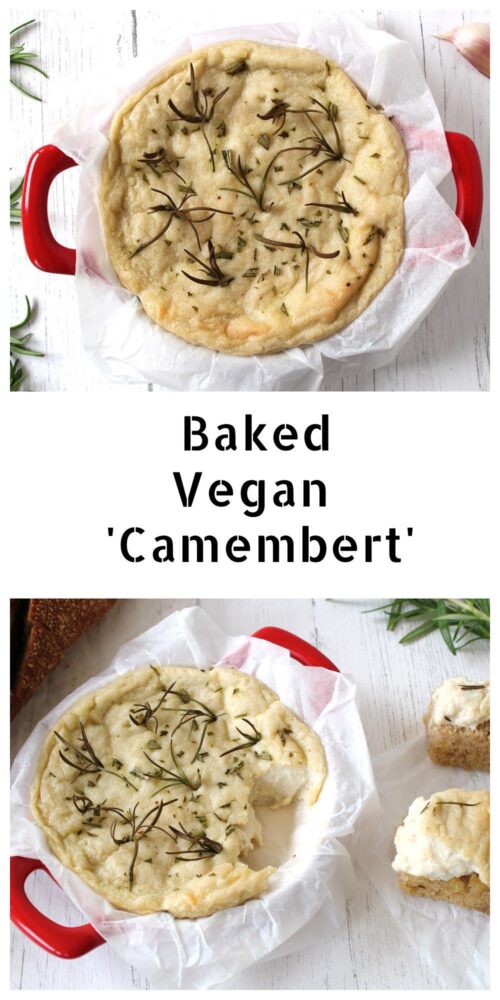
Today, I’m delighted to be sharing a recipe for a delicious vegan camembert-style cheese. When I started food blogging back in 2011, I would never have dreamed that I would be sharing such a recipe but here we are, in 2019, where it’s pretty much possible to veganise anything!! Whether you avoid dairy for ethical, dietary or environmental reasons, this creamy, cashew-based cheese is more than a worthy substitute for traditional camembert. Not only does it taste amazing, but it also has a beautiful texture. As it bakes, it forms a skin on the outside, yet remains soft and gooey in the middle.

Unlike a lot of hand-made cheeses, this one is incredibly quick and easy to make. It takes just 10 minutes hands-on time and is ready to serve in half an hour. It’s also super cheap. I calculated that this cheese cost me just 65p to make, which is way cheaper than any vegan cheeses you’ll find in the shops. 

And while it feels like an indulgent treat, it’s actually good for you! It’s rich in heart-healthy monounsaturated fats, B vitamins and a whole host of minerals, including zinc, manganese, magnesium and iron. Unlike its dairy counterpart, this plant-based camembert contains zero cholesterol as well as significantly less saturated fat. Oh, and most importantly, it’s cruelty-free… no cows were harmed in the making of this cheese 🐮❤️ It’s a winner all round!

Vegan Camembert

The inspiration for today’s recipe was the infamous ‘Camembosh’ which was featured in this month’s Vegan Life magazine (the one with the lovely Henry and Ian from BOSH! on the front cover). I’d been meaning to try this cheese ever since I’d first heard the rave reviews about it on social media, and seeing it in Vegan Life prompted me to dive into the kitchen and get stuck in.

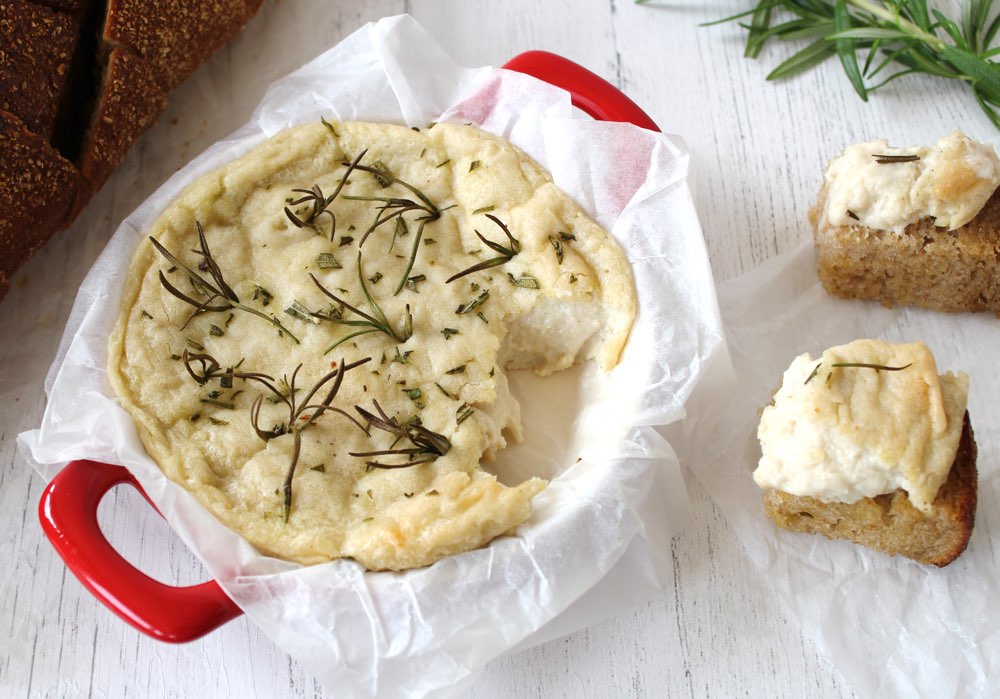
The recipe is actually very similar to the one I use for cashew ‘mozzarella’ which I make for our pizza nights. It is so easy to make! It’s simply a case of blending the ingredients, then heating them in a saucepan and stirring until they become thick and gooey. For the camembert cheese, the mixture gets transferred to a shallow dish and baked in the oven for 20 minutes until it forms a skin. And that’s it! It’s now ready to serve. If you wish, you can warm some bread in the oven at the same time, ready for dipping into the camembert.

Vegan Camembert

The recipe I’m sharing in this post is an adaptation of the Camembosh. The main tweak I’ve made is to reduce the salt. The BOSH! recipe calls for 1½ tsp salt, plus extra for seasoning. A friend who had already tried the cheese recommended reducing the salt quantity as she’d found it very salty. Heeding her advice, we initially reduced the amount to 1 tsp, but we still found it too salty, so in the second batch, we reduced it to ½ tsp. This amount proved to be perfect for us. In the recipe below, I recommend using ½ tsp salt initially, then taste test while the cheese is on the stove. You can always add extra salt at this point, if needed.

I also reduced the amount of garlic compared to the original recipe as I wanted the ‘cheesy’ aspect of the camembert to shine through. Feel free though to add more garlic if you’d prefer a more garlic-flavoured camembert.

Vegan Camembert

Recipe Card

Vegan Camembert

Easy Vegan ‘Camembert Cheese’

This creamy cashew ‘camembert’ is delicious served with warm crusty bread as a weekend treat or when you’re having friends over for ‘drinks and nibbles’. It’s also perfect for picnics, buffets and parties. Any leftovers make a great sandwich filling. We especially love it with slices of sun-dried tomato and chutney.
4.84 from 6 votes
Cook Time 20 minutes
Hands-on Time 10 minutes
Total Time 30 minutes
Course Appetizer, Lunch, Treat
Cuisine French
Servings 2

Ingredients
 

  • 75 g / ½ cup cashews (If you don’t have a power blender, first soften the cashews by soaking them in freshly boiled water for 30 minutes, then drain)
  • 150 ml / ⅔ cup water
  • 2 TBSP tapioca flour (tapioca starch)
  • 1 garlic clove peeled
  • 1 tsp apple cider vinegar
  • 1 TBSP nutritional yeast flakes with B12
  • ½ tsp salt

For Garnish

  • 1 sprig fresh rosemary (highly recommended as it imparts a wonderful flavour to the cheese)
  • freshly ground black pepper (omit if serving to children)

Instructions
 

  • Preheat the oven to 180C / 350F. Line a small shallow dish with baking paper (the dish I use measures approx 11cm x 3cm).
  • Add all the ingredients (except the rosemary and pepper) to a blender and whizz on high speed until smooth.
  • Transfer to a saucepan and cook on medium heat, stirring continuously until it is smooth and has started to thicken (about 2 minutes). Initially, as it warms up, it will go lumpy but don’t worry this is normal. Keep stirring and it will soon smoothen out. Taste test and add a touch more salt, if needed.
  • Pour into the prepared dish and smooth the top. Garnish with rosemary needles (I push some of the needles in whole and finely chop a few to sprinkle). Add some freshly ground black pepper, if desired.
  • Bake for 20 minutes, or until the cheese has formed a skin and is lightly browned round the edges. (You can also warm some bread in the oven at the same time, if you wish).
  • Serve immediately or leave to cool before transferring to an airtight container. It will keep for up to five days in the fridge. Bring to room temperature or re-heat in the oven for a few minutes before serving.

Notes

This recipe has been adapted from the BOSH! Camembosh in BISH BASH BOSH! by Henry Firth and Ian Theasby, featured in Vegan Life magazine Issue 50 (The BOSH! guys credit Ellie from Kinda Co. for the original recipe).
Keyword Dairy-Free, Gluten-Free, Lunchbox Ideas, Oil-Free, Plant-Based, Sandwiches, Vegan Buffets, Vegan Cheese, Vegan Picnics, Vegan Sandwiches
Tried this recipe?Let us know how it was!

Nutritional Breakdown

N.B. The above values are estimates. The actual nutritional values will vary depending on the brands and ingredients used.

Pin for later ⬇️

Baked Vegan Camembert

If you make this Cashew ‘Camembert’, I’d love to hear your feedback and any suggestions for adaptations! Tag your photos with #bitofthegoodstuff on social media – I always love to see your creations! You can also connect with me on my social media channels here: Instagram, Facebook, Pinterest.   

With love,

Sharon xx


——————————–

Easy Home-Made Seitan ‘Chicken’

Jump to Recipe

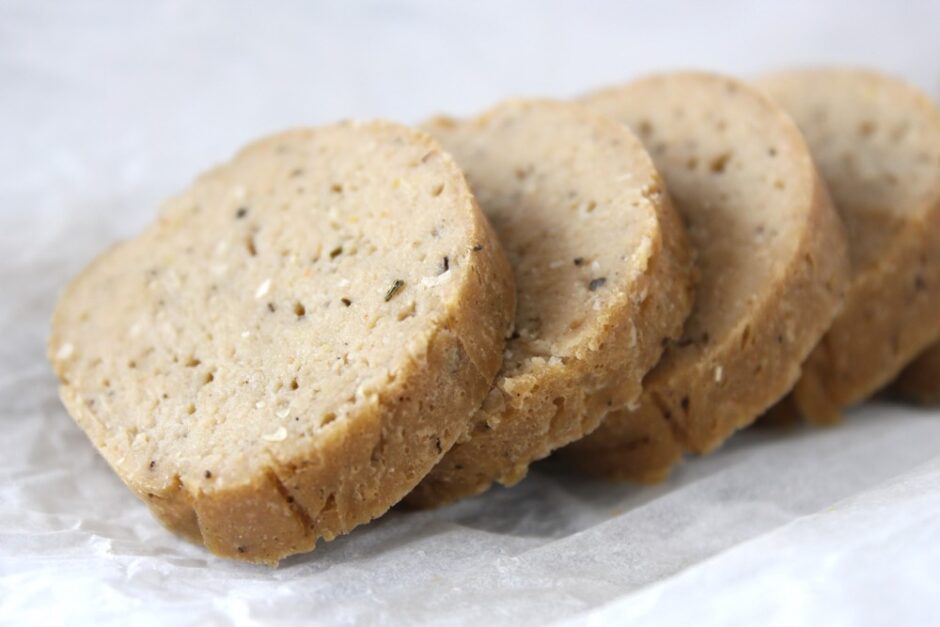
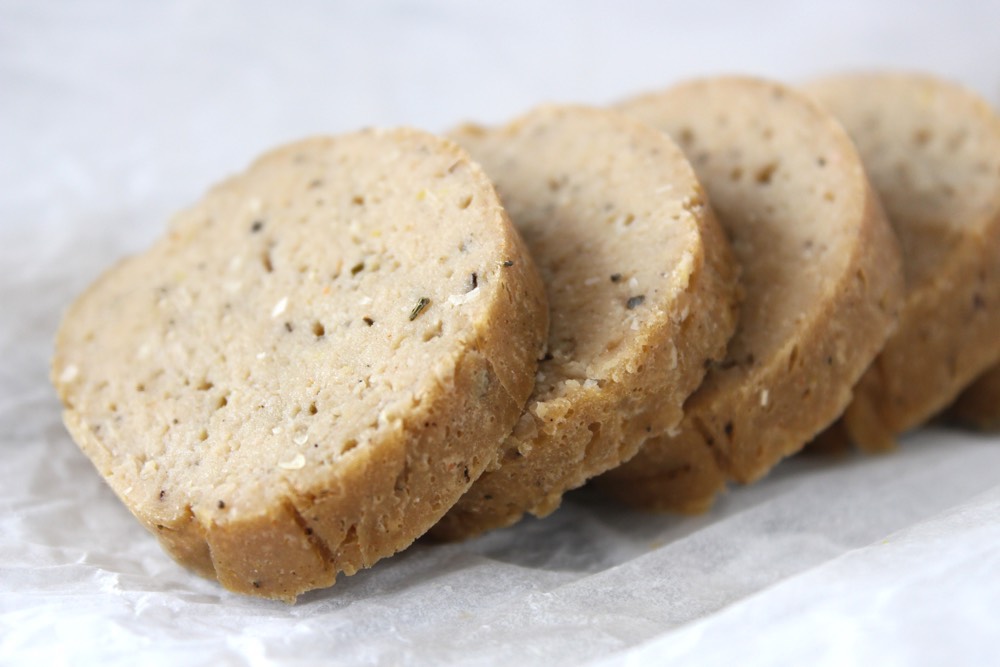
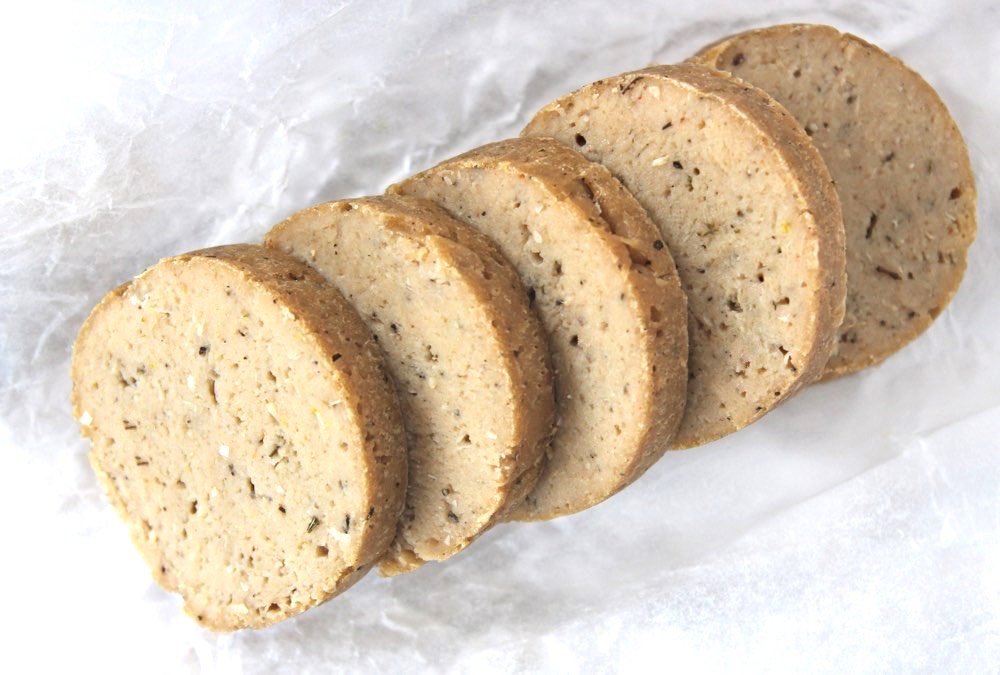
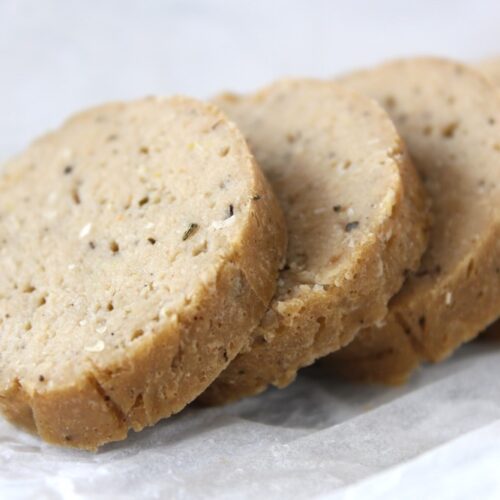
Today’s recipe for Seitan ‘Chicken’ is a new favourite of mine. It’s easy to make, has a succulent, chewy texture and tastes great. It can be torn into chunks and used as a meat substitute in dishes that traditionally use chicken, or it can be sliced and used for sandwiches. I especially love to slice it into discs and pan-fry it in a little olive oil for a warm sandwich filling.

Home-Made Seitan 'Chicken'

Seitan has a super high protein content. Today’s recipe contains a wopping 52% of the protein RDA per 100g. It’s also high in B vitamins and a range of minerals, especially iron, selenium and zinc. It’s low fat and contains zero cholesterol so, providing you’re not gluten intolerant, this recipe makes a tasty, healthy, cruelty-free alternative to chicken.  

Seitan 'Chicken'

As an added bonus, home-made seitan tends to work out much cheaper than the store-bought meat alternatives. Today’s recipe makes 457g / 16 oz of seitan (which serves four as a main meal), and cost me just £1.77 to make. 

If you’re new to making seitan, rest assured it’s easy to do… especially this recipe! It has three key steps – combining the ingredients, kneading for seven minutes, then steaming for thirty minutes. Job done!

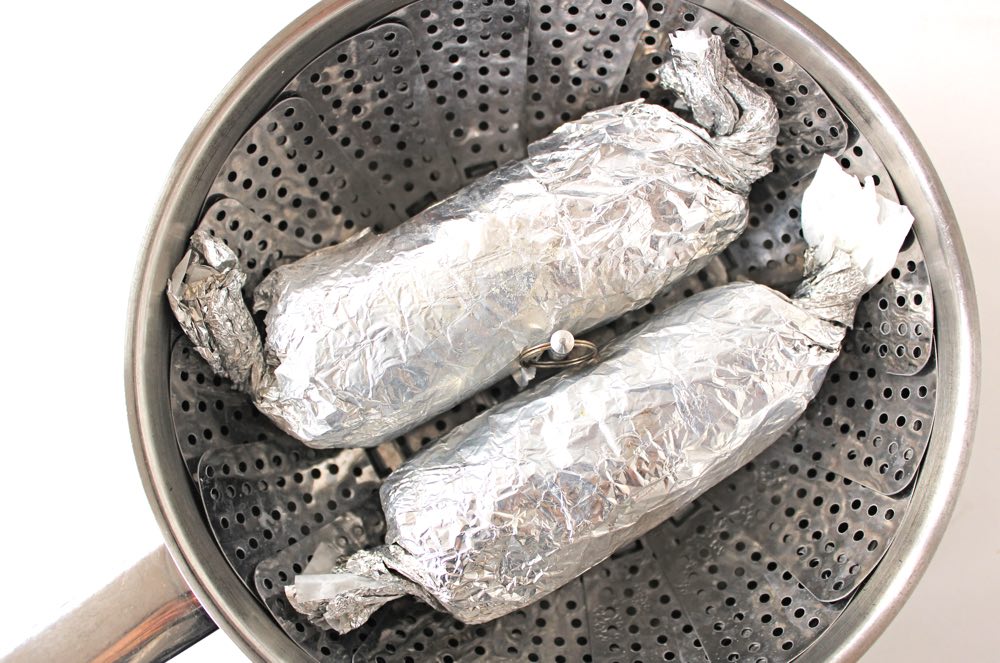
Seitan Chicken Steaming

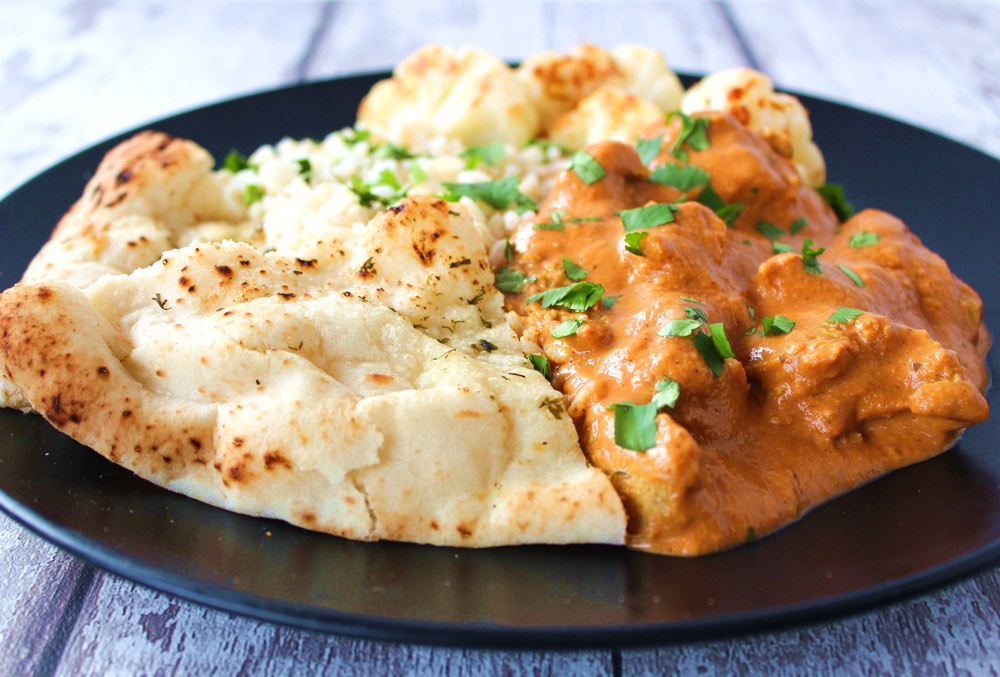
The inspiration for today’s post was a recipe I spotted in March’s Vegan Life magazine for ‘Butter Chicken’. The dish looked so appetising and I was totally intrigued as to how a vegan version of Butter Chicken would taste, considering it contains no butter or chicken!! The creator of the recipe – Sasha Gill – is an absolute genius as this veganised ‘Butter Chicken‘ is utterly delicious! It makes a wonderful alternative to the original dish, and I’m confident it will appeal to vegans and meat eaters alike!

Vegan Butter 'Chicken'

I’m really excited to try this seitan ‘chicken’ in other traditional chicken dishes. I’ll keep you posted on how it goes!

Recipe Card

Home-Made Seitan 'Chicken'

Easy Home-Made Seitan ‘Chicken’

This seitan ‘chicken’ is new favourite of mine. It’s easy to make, tastes great and has a succulent, chewy texture. It can be torn into chunks and used as a meat substitute in traditional dishes that call for chicken (such as 'Butter Chicken'), or it can be sliced and used for sandwiches. I especially love to slice it into discs and pan-fry it in a little olive oil for a warm sandwich filling. It's so delicious! 
 
Recipe lightly adapted from Sasha Gill’s Butter ‘Chicken’ from her debut cookbook Jackfruit & Blue Ginger: Asian Favourites, Made Vegan, featured in Vegan Life magazine, Issue 48
5 from 4 votes
Hands-on time 20 minutes
Total Time 1 hour 20 minutes
Course Main Course
Cuisine Chinese

Ingredients
 

  • 180ml / ¾ cup vegetable stock (broth) (I use water and 1 tsp vegetable bouillon powder)
  • 95g / ½ cup cooked butter beans (or chick peas)
  • 4 TBSP nutritional yeast
  • 2 tsp garlic paste
  • 2 tsp chicken-style seasoning (I use 1 tsp dried sage, ½ tsp smoked paprika, ½ tsp dried oregano)
  • 1 tsp onion powder
  • 1 TBSP light tahini
  • ¼ tsp ground cumin
  • ½ tsp salt
  • 135g / 1 cup vital wheat gluten*

Instructions
 

  • In a blender or food processor, whizz all the ingredients except the vital wheat gluten, until smooth.
  • Pour the mixture into a large bowl. Add the vital wheat gluten and stir with a wooden spoon until it forms a wet dough.
  • Knead for about 7 minutes. It is ready once the dough appears drier, has defined strands, and bounces back when stretched.
  • Set a steamer basket over a pan of simmering water.
  • Divide the dough in half and shape into logs. Roll each log tightly, first in non-stick baking paper, followed by foil. Twist the ends to seal it tight, like a sweet wrapper.
  • Steam the seitan for 30 minutes, then remove from the steamer and leave to cool for 30 minutes (I find it firms up as it cools). Tear into chunks and add to any dish that traditionally uses chicken (like ‘Butter Chicken’). Alternatively, cool completely and store in an airtight container in the fridge for up to five days.

Notes

* The key ingredient in seitan is a type of flour called ‘vital wheat gluten’. It’s this flour which provides seitan with its characteristic firm, chewy consistency. In the UK, vital wheat gluten is currently available from independent health food shops, as well as online.
Keyword Meat Alternative, Seitan, Vegan
Tried this recipe?Let us know how it was!

Nutritional Breakdown

N.B. The above values are estimates. The actual nutritional values will vary depending on the brands and ingredients used.

Products used in this recipe:
– Suma Vital Wheat Gluten (available in the UK from independent health food shops and online)
– Marigold Swiss Vegetable Vegan Bouillon Powder
– Suma Organic Light Tahini, available from independent health food shops. (Tahini is also widely available in UK supermarkets)
– Onion powder – available in the UK from independent health foods shops and online
– Marigold Engevita Nutritional Yeast Flakes with B12, available from health food shops, some supermarkets (I found it in my local Waitrose and Aldi recently!) and online 

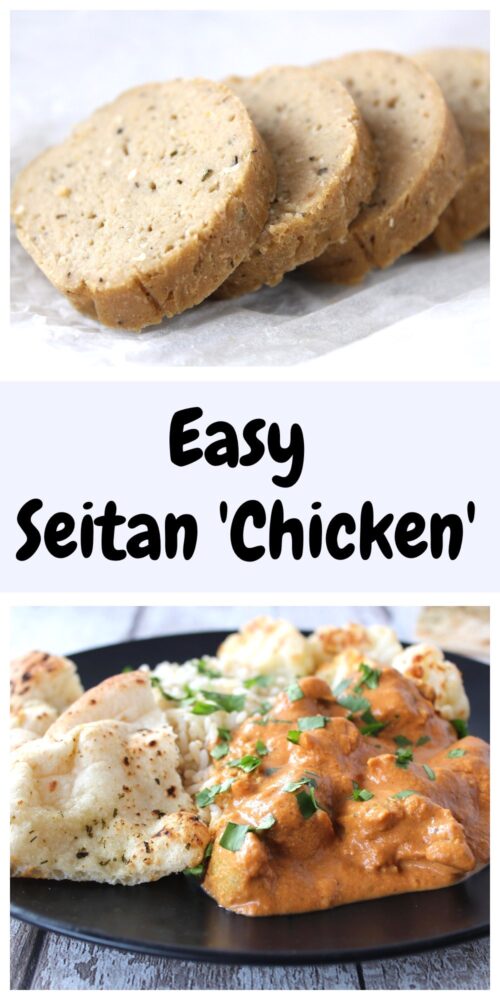
Pin for later ⬇️

Vegan Butter 'Chicken'

Big thank you to Sasha Gill and Vegan Life magazine for the inspo!

If you make this Seitan ‘Chicken’ (or any other recipes on my blog), I’d love to hear your feedback and any suggestions for adaptations! Tag your photos with #bitofthegoodstuff on social media – I always love to see your creations! You can also connect with me on my social media channels here: Instagram, FacebookPinterest.   

With love,

Sharon xx