Gingerbread Men (Dairy-free / Vegan)

The recipes I most often share are firm family favourites that I’ve been refining over a number of years. So when I get inspired to create a new recipe that I want to blog now rather than in 5 years time, I end up obsessively testing it again and again over the course of a week or so to play catch up with the tweaks and refinements.

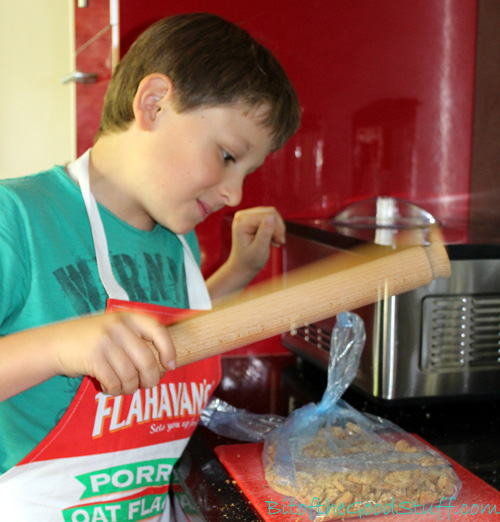
This week, the obsession has been these little guys…

Gingerbread Men

When Amy mentioned gingerbread under my waffles post, it reminded me that I hadn’t made gingerbread men in years. I decided it was high time I dusted off my old recipe notes and gave them another whirl.

So far this week, I’ve made 72 gingerbread men! Family and friends have kindly been helping me out with the testing. Lil’ L’s taken them to school, Mark’s taken them to work, and I’ve shared them with friends over coffee (not the classiest of cookies but hey it made them smile).

Making Gingerbread

All the batches got great feedback, but Mark thought they could be a bit ‘gingerier’ so the next batch had an extra ½ tsp of ginger. I’ve tested different thicknesses (the thicker men were the winners), different sugars and different oils/butters. All worked fine, so I’m guessing the recipe is pretty adaptable. I also tested different cooking times and I personally preferred the longer time as it made them firmer and crunchier round the edges.

Readers have also had great success using gluten-free flour to make these gingerbread men. Check out the Comments section below to see their feedback.

Gingerbread Men

Even though I’ve eaten a ridiculous amount of gingerbread men this week, I’m still totally in love them and will be happily munching my way through more this weekend. Fortunately, as cookies go, these are pretty healthy as they’re wholegrain, plus they’ve got an extra boost of iron from the molasses. As well as coffee, they’re delicious with a cup of ginger tea. This has got to be the ultimate winter warmer. I can literally feel myself warming up from the inside out as I sip a cup

Gingerbread Men

[print_this]

Makes about 18 cookies (depending on cutter size)

Hands on time: 20 minutes   Chilling time: 1 hour (can be left up to 2 days)
Cooking time: 10-12 minutes    Ready in: 1 hour 35 minutes

Ingredients
100g / ½ cup organic rapeseed (canola) oil, dairy-free spread or aroma-free coconut butter
85g / ½ cup soft brown sugar or coconut sugar
4 TBSP molasses (black treacle or blackstrap)
2 TBSP non dairy milk
280g / 2 cups fine wholemeal (whole wheat pastry) or chapatti flour (see Comments section below for reader feedback on gluten-free options)
½ tsp bicarbonate of soda (baking soda)
½ tsp salt
1½ – 2 tsp ground ginger
1 tsp ground cinnamon
Pinch of ground nutmeg

Method
Place the oil/spread/butter in a pan with the sugar, molasses and milk. Gently heat over a low heat. As it warms, whisk to combine.

Sift the flour, bicarbonate of soda, salt, ginger, cinnamon and nutmeg into a large bowl. Give it a mix to make sure it is combined. Pour in the contents of the pan and stir until it comes together to form a dough. This will take some elbow grease as it’s a stiff dough. (If you’re using coconut butter, you may need to add 1-2 TBSP more milk to form a smooth non crumbly dough).

Shape the dough into a ball, wrap in clingfilm (plastic wrap) and chill for 1 hour. The dough can be chilled for up to 2 days but, if left for more than 1 hour, remove from the refrigerator 10 minutes before rolling.

When ready to bake, preheat the oven to 180C (160C fan) / 350 F. Line 2 large baking sheets with non-stick baking paper.

Place the dough on a silicone mat or lightly floured work surface. Place a sheet of non stick baking paper on top and roll to a thickness of ½ cm (just under ¼ inch). Press out the dough using a metal cookie cutter and transfer to the prepared baking sheet. Combine the dough scraps into a ball and roll out again. Repeat until all the dough is used.

Place in the oven and bake for 10-14 minutes. (I check mine after 10 minutes and then bake for another 2-4 minutes as I like mine firmer and crunchier). Leave to cool and firm up for a few minutes, then transfer to a wire rack to completely cool. The cookies will last about a week in an airtight container, or for weeks in the freezer. If freezing, place in a single layer in a freezer bag. Press out all the air before tying or zip locking.

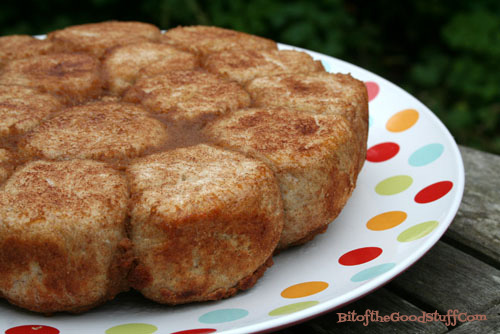
Freshly baked, these gingerbread men are crispy round the edges with a soft centre. Over time, they become softer and chewier, but delicious nonetheless.

[/print_this]

If you try the recipe and make any adjustments, do let me know. I always love to hear your feedback!

love

Autumn-Inspired Apple and Almond Breakfast Smoothie

After an exceptionally warm and summer-like September and early October, Autumn has finally arrived in Bath. The Virginia creeper seems to have magically transformed overnight from lush green to vivid red, and the river and canal paths are littered with crunchy brown leaves and horse chestnuts. It most certainly is a beautiful time of year

First Signs of Autumn 4

And though the weather has cooled off a little, I’m still enjoying my daily smoothies. I often have them as a breakfast or lunch on the go, so I add ingredients like nut butters and chia seeds for protein, slow-release energy and to keep hunger pangs at bay. Lil’ L also enjoys smoothies as an after-school snack.

One of our current favourites is this Autumn-inspired Apple & Almond Smoothie.

Apple and Almond Smoothie

The nut butter, yogurt and chia seeds add a delicious creaminess to the smoothie as well as packing in lots more nutrients. The smoothie provides a good dose of protein, fibre and heart-healthy fats (including omega 3), as well as antioxidant vitamins C and E, and trace minerals such as calcium, iron and magnesium.

And another great thing about this smoothie is that you can sneak in a handful of spinach and it doesn’t affect the taste at all!

Until recently, Lil’ L hasn’t been a fan of green smoothies. He likes his smoothies to be the ‘right’ colour. In his eyes, berry smoothies should be pink or purple, while pineapple or mango smoothies should be yellow. For him, a berry smoothie that’s bright green is just wrong. However, one day it dawned on me that I might get away with adding spinach to our usual apple and almond smoothie. Apples can be green, right?

Green Apple and Almond Smoothie

I decided to give it a try when he arrived home from school one day. Here’s how the conversation went…
“Hi!” I call out. “I’ve made you a smoothie!”
“Great! Thanks!” he replies enthusiastically. I hand him the smoothie and there’s a pause, followed by a despondent “Oh…. it’s green”.
“Yep, it’s a green apple smoothie. Give it a try. I’m sure you’ll love it”.
With trepidation he takes a sip. “Mmm, it’s really nice!” he says with surprise. Then there’s a pause…. “So what’s making it green?”
Darn, 10 year olds are sharp. Clearly the ‘green apple’ thing won’t wash with him, so I decide to own up and tell him it’s spinach. He thinks about it for a moment then decides it doesn’t matter after all. Green or not, it tastes really good.

Hallelujah, the green smoothie hang up is finally over! In hindsight, I wish I’d introduced green smoothies when he was much younger. That way, he would have grown up thinking that green berry or tropical smoothies are normal. Never mind, he’s on board now and I’m really excited to try out lots more concoctions over the coming weeks (especially as I’ve got an awesome new blender to play with).

So if you’ve got any green smoothie phobes in the family, I highly recommend trying this one on them. Start with a small amount of spinach so it’s a delicate light green rather than scary green and see what they think (just don’t mention the spinach until they’ve given it a thumbs up 😉 ).

[print_this]

This smoothie is perfect for breakfast on the go or as a post-school or exercise snack. Unlike regular fruit smoothies, this one is a great source of slow-release energy and will keep you feeling full up for hours.

Hands-on time: 5 minutes

Serves 1 as a breakfast (or two as a snack)

1 medium organic apple, cored and chopped (no need to peel if you have a powerful, high speed blender)
1 tsp ground cinnamon
2 TBSP almond butter
1 TBSP chia seeds
handful of spinach leaves (optional)
120ml / 4 fl oz / ½ cup almond milk (or other non dairy milk)
120ml / 4 fl oz / ½ cup non dairy natural yogurt
1 tsp maple syrup, or to taste

Place all the ingredients in a blender. Pulse a few times to break up the apple, then blend on high speed until smooth. Taste test, and add more sweetener, if desired.

[/print_this]

Rocky Road (Vegan Style!)

Sorry I haven’t been around much these past few weeks, but I’ve been hanging out with Lil’ L. He’s growing up fast, and since this could be the last summer that he actually wants to hang out with me, I’ve been savouring every moment. We’ve had so much fun! This week’s highlights (so far) have been hiking, biking, playing tennis, picnicking in the park, a trip to the cinema (How To Train Your Dragon 2) and playing in the kitchen 🙂

Last weekend we got back from our vacation and there was a postal delivery card waiting for us. First thing Monday morning, we hopped on our bikes and pedalled down to the post office. I jumped with glee when I saw that the mystery parcel was the latest The Vegan Kind Subscription Box. I couldn’t wait to do the big ‘reveal’!

The Vegan Kind #TVK10

As usual, the box was filled with interesting brands and products that I’m excited to try out. Lil’ L’s eyes especially lit up when he saw these….

Freedom Mallows

While regular marshmallows are made with gelatine (a slaughterhouse byproduct), Freedom Mallows are gelatine free, dairy free, egg free, gluten free and nut free, and thus suitable for vegetarians and vegans, as well as people with gluten, dairy and nut allergies/intolerances.

And it’s incredible how similar they are to regular marshmallows, both in taste and texture. My mum loves marshmallows and even she can’t tell the difference.

Over the winter, Lil’ L enjoyed slicing and sprinkling vanilla mallows onto his hot chocolates. This time round, we thought it would be fun to make some Rocky Road. While I stood by, Lil’ L set to work melting chocolate and coconut oil…

Rocky Road Making

…bashing biscuits

Rocky Road Making

…then adding mallows and mixing it altogether. Since our mallows were strawberry flavoured, we thought it would be nice to finish off our Rocky Road with a sprinkling of freeze-dried strawberries (which we had left over from these Chocolate Crunch Hearts).

After a couple of hours in the freezer, the Rocky Road was ready to slice and sample. It got a huge thumbs up from Lil’ L!

Rocky Road (Vegan Style)

So far this week, he’s enjoyed it as a treat snack at the cinema and the tennis courts. While it’s a little too sweet for me, Lil’ L reckons it’ll be a hit with kids or anyone with a sweet tooth. It would be great for sharing at children’s tea parties or selling at charity or school fundraisers. It would also make a lovely home-made gift for sweet-loving veggie friends, wrapped in a special box or tin

[print_this]

Rocky Road… Vegan Style!
Got a sweet tooth? Then this treat is for you! It’s easy and fun to prepare. It makes a great rainy day activity for veggie kids, young and old alike!

Makes about 12 pieces
Hands-on time: 15 minutes Ready in: 2 hrs 15 minutes

Ingredients
200g / 7oz dark chocolate (70% cocoa solids)
2 TBSP virgin coconut oil, plus extra for greasing
200g / 7 oz Digestive biscuits (or Rich Tea, Oreos or gluten free cookies)
75g / 2½ oz veggie marshmallows (e.g. Freedom Mallows)
Icing sugar, for dusting

Method
Grease and line a freezer-safe container about 12cm x 22cm (5 inches x 8½ inches) with baking paper. (I used a large loaf pan, but you could use a plastic, silicone or foil container).

Add a small amount of water to a saucepan and place a heat-proof bowl on top. Break the chocolate into chunks, place it in the bowl along with the coconut oil and gently heat, stirring occasionally until the chocolate has fully melted.

Meanwhile, place the biscuits (cookies) in a freezer bag. Press out the air and tie the bag shut. Bash with a rolling pin until you have a mixture of crumbs and small pieces.

If your mallows are large, slice them into halves or thirds.

When the chocolate has melted, remove from the heat and stir in the biscuits and mallows. Tip into the prepared pan and press down hard with the back of a spoon to remove air pockets.

Place in the freezer for about 2 hours, until solid. Using a sharp knife, slice into rectangles about 4 cm (1½ inches) in size. Add a light dusting of icing sugar for decoration.

Store in an airtight container in the fridge or freezer, where it will keep for weeks.

[/print_this]

In the UK, Freedom Mallows are available from Holland & Barrett, independent health food shops (including Harvest in Bath) and online.

Have a wonderful weekend everyone! xx

Maple Glazed Nuts

Today I have a delicious treat for you that takes only five minutes to prepare…

Maple Glazed Nuts

Mapled Glazed Almonds, Pecans & Walnuts

These taste SO good! And they’re packed with lots of nutty goodness.

I’ve just made a fresh batch as a treat for Lil’ L and his friend when they get home from school.  I’m also going to bag some up for Mark to take out on his mountain bike rides this weekend.

As well as making a great post-school and exercise snack, they’re also the perfect snack to munch on at work to keep your energy levels up.

Be warned though, they are addictive and they will test your will power!  If (like me) you’re tempted to devour the whole lot in one go, I suggest bagging it up into individual size portions and hiding them.

Here’s how I make them..

Hands-on time: 5 minutes    Cooking time: 5 minutes
Ready in: 8 minutes

Ingredients

  • 2 cups of nuts (I use a mix of raw walnut halves, pecans and whole roasted almonds*)
  • 4 tbsp maple syrup (I use Clark’s Original Maple Syrup, which is a mix of maple and carob syrup. It tastes great but is much cheaper than pure maple syrup)
    sea salt, optional

* You will often find that nuts such as almonds, cashews and peanuts are cheaper in Asian grocery stores or in the World aisles of large supermarkets.  Currently, a 750g bag of Aasani Almonds costs £5 in Tesco.

Method

1.  Preheat a dry frying pan (skillet) on a medium-high heat.

2. Add the nuts and dry fry for 2 minutes, stirring continuously.  Add the maple syrup and continue stirring for about 3 minutes, until the nuts are fully coated and the syrup has caramelised and become very sticky.

3. Space out the nuts on a piece of non stick baking paper.  If you like the sweet and salty combo, lightly sprinkle the nuts with salt as soon as they have left the pan.  As they cool, the nuts will firm up, become shiny, and not sticky at all.  Store in an airtight container in a cool, dry place.

Mapled Glazed Nuts

Have a wonderful weekend everyone 🙂  xx

Apple & Cinnamon Dough Balls (Healthy ‘Monkey Bread’)

When I first started blogging, I recall there was a wave of health food bloggers posting recipes for ‘Healthier’ Monkey bread.  I had absolutely no idea what ‘Monkey bread’ was or why it had such a funny name!

Wikipedia soon filled me in…

Monkey bread, also called monkey puzzle bread, sticky bread, African coffee cake, golden crown, pinch-me cake, bubbleloaf and monkey brains is a sweet, sticky, gooey pastry served in the United States for breakfast.  The bread is made with pieces of sweet yeast dough which are baked in a cake pan after first being covered in melted butter, cinnamon and sugar. It is traditionally served hot so that the baked segments can be easily torn away with the fingers and eaten by hand.

Sounds yummy doesn’t it?  However, traditional Monkey Bread isn’t particularly healthy.  It contains A LOT of fat and sugar.  In contrast, the ‘healthified’ versions often use bread or pizza dough as their base, and are glazed with healthier alternatives to butter and refined cane sugar.

One Sunday, I decided to have a go at making some Apple and Cinnamon-Spiced Healthy Monkey Bread as a ‘special breakfast’.  It was a huge hit with Lil’ L and M and,  I must admit, I’m rather partial to it too.

The ‘authentic’ way to serve Monkey Bread is to invert it onto a plate…

Apple and Cinnamon Healthy Monkey Bread

However, we prefer to eat it straight from the pan.  Hands get less messy, and you can use the balls to mop up any syrup left in the pan.

Healthy Apple & Cinnamon Monkey Bread

If you’re lucky enough to have a breadmaker, then this recipe requires very little effort at all.  You simply throw all the dough ingredients in the machine and press a button.   I’ve had my breadmaker for a couple of years now and it’s been fantastic!  I reckon it’s easily paid for itself in terms of the amount of times we’ve chosen to stay in rather than going to Pizza Express!

Today, I made some Monkey Bread as an after-school treat for Lil’ L and his friend, and I made it by hand to see how it compared to the bread-maker version.  To be honest, making dough by hand doesn’t require THAT much effort.  It takes less than 15 minutes, which isn’t too bad at all.  Plus kneading dough is great exercise for the arms.

Below I’ve given instructions for making the Monkey Bread by hand and in a breadmaker.  If you’re planning to eat it for breakfast, you can easily prepare the dough the night before and chill it in the fridge.  In the morning, simply remove the dough from the fridge about 20 minutes before you need to use it.

[print_this]

Makes 18-20 dough balls (serves 3-4)
Hands-on time: 10-30 minutes (depending on whether you make the dough in a breadmaker or by hand)
Dough resting time: 1 hour
Cooking time: 25-30 minutes

Dough
½ tsp fast action/easy blend yeast
300g / 11oz / 2¼ cups wholemeal (wholewheat) bread flour or chapatti flour (I use the latter)
½ tsp sea salt
170ml / 5¾ fl oz / ¾ cup lukewarm water
1 tbsp olive oil

Cinnamon Sugar
1 tbsp coconut sugar (or use granulated sugar)
1 tsp ground cinnamon

Apple Cinnamon Syrup
1 organic apple, cored and chopped (I keep the skin on)
2 tbsp virgin coconut oil (or you could use non dairy margarine, like Pure)
2 tbsp maple or agave syrup (I often use Clark’s Original Maple Syrup)
1 tbsp coconut sugar (or brown sugar)
1 tsp ground cinnamon

Method

  1. Prepare the dough.
    – In a breadmaker: Throw all the ingredients in the pan and select ‘pizza dough’.  The programme should take around 45 minutes.  When it signals that it’s ready, leave the dough in the machine for a further 20 minutes or so to rise.
    – By hand: Place the yeast, flour and salt in a large bowl.  Add the warm water and oil.  Mix well with a spoon, then bring it together with your hands until you have a sticky dough.  Knead for 5-10 minutes, until the dough is smooth.  Place the dough in a lightly oiled bowl, cover with a damp tea cloth or oiled cling film (plastic wrap), and leave in a warm place for about an hour until it has doubled in size.  If your house is cool (like ours) then cover with oiled foil and leave in the oven at 40C / 100F for an hour.  When the dough is ready, remove from the oven, knead for a couple more minutes then set aside.
  2. Preheat the oven to 200C / 400F / Gas 6.  Brush or spray a 23 cm / 9″ loose bottom pan with oil.
  3. Prepare the cinnamon sugar: In a small bowl, combine the sugar and cinnamon.
  4. Prepare the apple cinnamon syrup: First blend the apple into a smooth puree.  I find the easiest way to do this is to place the apple pieces in a bowl and use a hand blender (stick / immersion blender).  Place the apple puree, coconut oil, syrup, sugar and cinnamon in a small pan and gently heat until the oil has melted.
  5. Pull off small amounts of dough and roll them into balls about 2½ cm / 1″ in diameter.  Roll them in the cinnamon sugar and place in the oiled pan.  Repeat until all the dough has been used.  Evenly space out the balls in the pan (they will expand when baking).  If you have any cinnamon sugar left over, add it to the syrup pan.
  6. Spoon the apple cinnamon syrup evenly over the top and in between the dough balls.  Place in the preheated oven and cook for 25-30 minutes.
  7. Serve warm, either inverted onto a plate or straight from the pan.

[/print_this]

Lil L & Monkey Bread

Good Hemp Seed Giveaway Results!
Before I go, I’d like to announce the winners of the Good Hemp Seed Giveaway.  The eligible entries were placed in chronological order and 3 winners were randomly selected using Random.org.

I’m delighted to announce that the winners are…

1. Emma
2. Samantha
3. Penniless Veggie

Please email your postal addresses and I’ll arrange for the gifts to be sent to you asap.

Have a great weekend everyone!

With love,

—————–