Crunchy Maple Pecan Granola Clusters (Vegan | Dairy-Free)

Jump to Recipe

With crunchy clusters of oats, toasted pecans, and a hint of warm spice, this Maple Pecan Granola is one of my family’s all-time favourite breakfasts. Naturally vegan and dairy-free, it’s lightly sweetened with maple syrup and made with wholesome, nourishing ingredients. Best of all, it’s incredibly easy to make—just a few minutes of prep, then the oven does the rest. It’s so simple that even the kids can make their own!

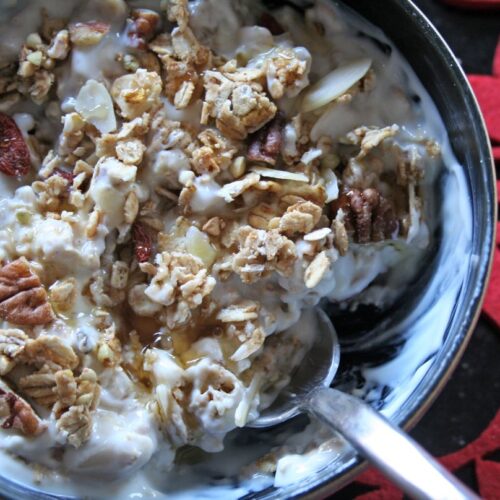
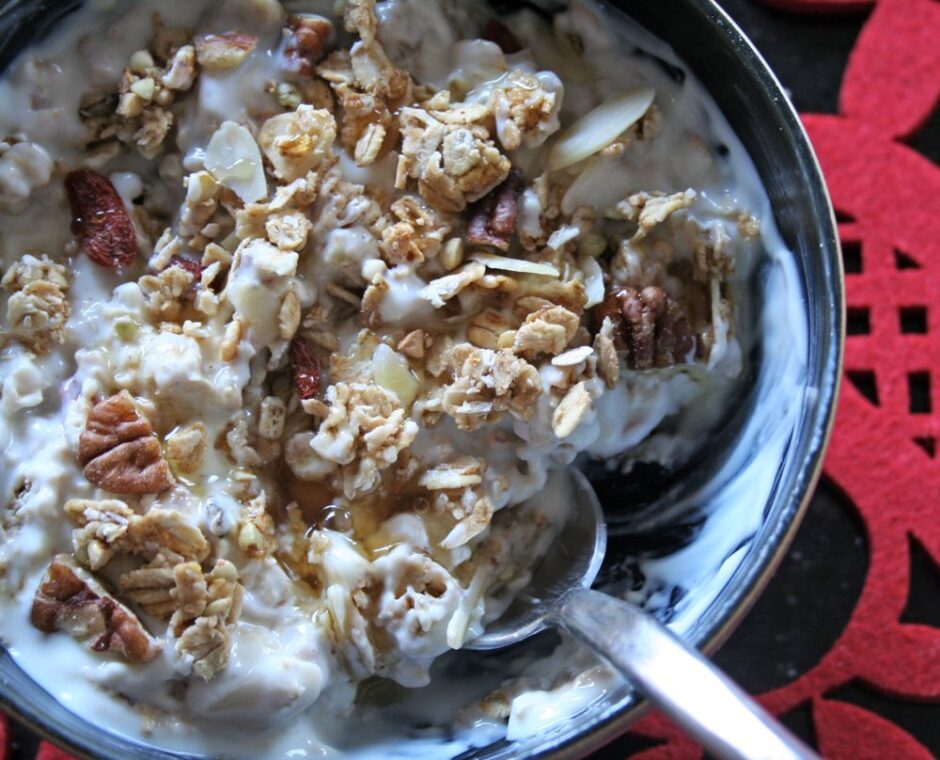
We love serving this granola with plant-based milk or yoghurt for breakfast, layering it into a vibrant berry parfait, or simply snacking on it straight from the jar!
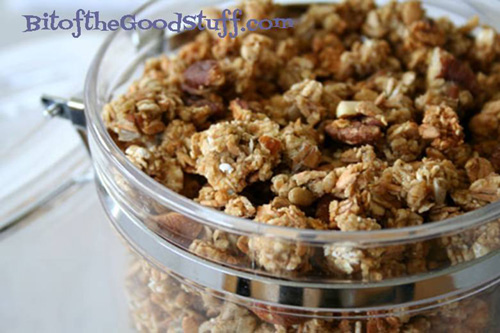
Crunchy Maple Pecan Granola Clusters

I started making homemade granola about five years ago in response to Lil’ L’s dislike for the dried fruits found in shop-bought varieties. After a week of picking out the raisins before serving, I realised life was far too short for that kind of effort—and decided to try making our own instead!

This way, we could tailor it to suit all our tastes—nutty clusters for Lil’ L, a mix of nuts and dried fruits for me, and anything goes for Mark.

Making our own granola also meant we could skip the refined sugars and oils often found in shop-bought versions and opt for healthier, natural alternatives instead. The result? A crunchy, flavourful breakfast packed with ingredients we feel good about.
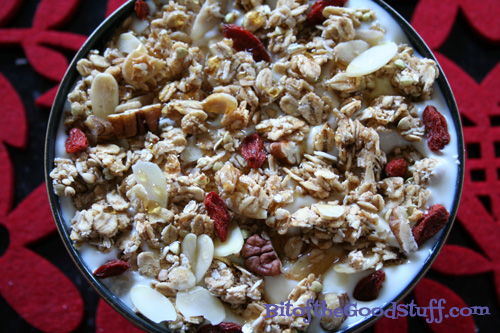
Maple Crunch Granola

We love serving this granola with non-dairy milk or yoghurt for a nourishing breakfast. It also makes a beautiful addition to a granola parfait, layered with plant-based yoghurt and berries. We often use frozen berries, which slowly thaw and swirl their juices into the yoghurt, creating a gorgeous colour and a naturally sweet flavour. These parfaits make a wonderful breakfast, dessert, or even a post-school snack.
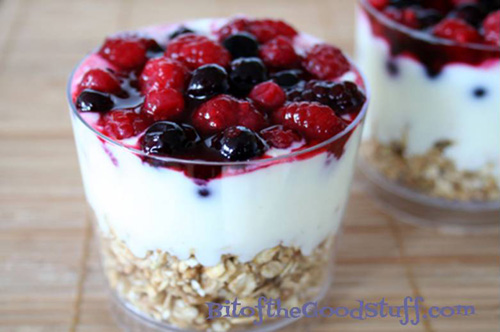
Berry Granola Parfait

Recipe Card

Maple Pecan Crunch Granola

Maple Pecan Granola Clusters

Crunchy, chunky granola clusters loaded with oats, pecans, and warm spices, sweetened with pure maple syrup. This vegan, dairy-free recipe is easy to make, and perfect for breakfasts, parfaits, or snacks.
Hands-on time 10 minutes
Total Time 1 hour
Course Breakfast, Healthy Snack
Cuisine Vegan
Servings 10

Ingredients
 

  • 300 g / 3 cups rolled oats use gluten-free oats if needed
  • 100 g / ½ cup buckwheat groats* washed and drained
  • 40 g / 4 tbsp fine wholemeal (whole wheat pastry) flour, chapatti flour or gluten-free flour
  • 30 g / ⅓ cup desiccated coconut
  • 60 g / ½ cup pecans roughly chopped
  • 30 g / ¼ cup flaked almonds
  • 30 g / 3 tbsp coconut sugar or unrefined cane sugar (e.g. golden caster sugar)
  • ½ –1 tsp ground cinnamon to taste
  • pinch of ground nutmeg
  • ¼ tsp sea salt
  • 150 ml / ⅔ cup maple syrup or another natural liquid sweetener
  • 3 tbsp virgin coconut oil melted

Instructions
 

  • Preheat the oven to 150 °C (130 °C fan) / 300 °F. Line a large baking tray (approx. 38 × 26 cm / 15 × 10 inches) with non-stick baking paper. If your coconut oil is solid, place it in a heat-proof bowl in the oven for a minute or two to melt. (Be careful when removing—it will be very hot!)
  • In a large mixing bowl, stir together the rolled oats, buckwheat groats, desiccated coconut, pecans, flaked almonds, coconut sugar, cinnamon, nutmeg, and sea salt.
  • Pour in the maple syrup and stir to combine. Drizzle in the melted coconut oil and mix well until everything is evenly coated.
  • Transfer the granola mixture to the prepared tray. Press down firmly with the back of a spoon, a spatula (or even your hands!) so it forms a compact, even layer—like a thin granola bar. (This step helps create those lovely chunky clusters.)
  • Bake in the preheated oven for 40 minutes, or until the granola is lightly golden. Once out of the oven, allow the granola to cool completely on the tray—it will crisp up as it cools.
  • Once cooled, break into clusters with your hands. Some pieces, especially from the centre, may feel a little soft at first, but they tend to firm up over time.
  • Store in an airtight container in a cool, dry place. It will keep well for weeks.

Notes

* Buckwheat adds protein and a lovely crunchy texture. (I buy mine from Tesco). If you can’t find it, simply substitute an extra ½ cup of oats or another grain of your choice.
Serving Suggestions:
Serve with your favourite plant-based milk or yoghurt. For added nutrition, sprinkle with chopped walnuts, ground flaxseed, or goji berries. It’s also delicious layered into a berry parfait or enjoyed as a snack straight from the jar.
Keyword dairy-free granola, healthy breakfast, homemade granola, maple pecan granola, Vegan Breakfast, vegan granola
Tried this recipe?Let us know how it was!

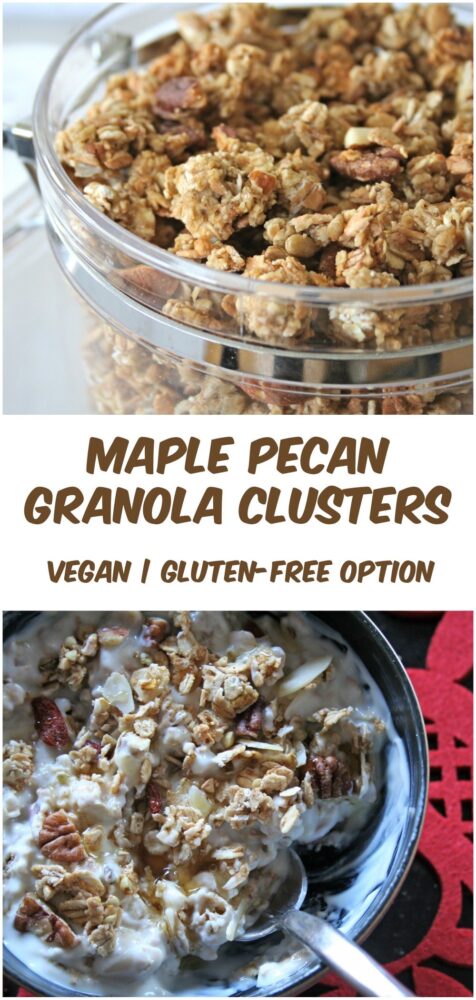
Pin for later ⬇️

Maple Pecan Granola Clusters Collage

Do you make your own granola? What’s your favourite flavour combination? I’d love to hear your ideas!

Have a great weekend everyone!

With love,

Sharon xx

Maple Glazed Nuts (Easy, 8 Minute Recipe)

Jump to Recipe

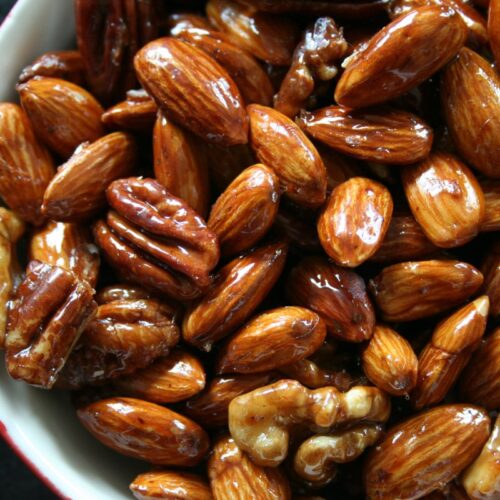
Sweet, crunchy, and incredibly moreish, these Maple Glazed Nuts are one of the easiest treats you can make! With just a handful of ingredients and eight minutes of your time, you can whip up a batch of these delicious nuts that are perfect for snacking or gifting. No oven required – just a pan, some maple syrup, and a little stirring. It’s that simple!

Maple Glazed Nuts

I often make these as a post-school snack for Lil’ L and his friends (they go down a treat!). Mark loves to take little snack bags of them on his mountain bike rides too. They’re great for an energy boost at work, school, or while you’re out adventuring

That said, I must warn you – they’re seriously moreish! If you’re anything like me and tempted to eat the whole batch in one sitting, I highly recommend dividing them into little snack-sized bags and hiding them in the fridge or freezer. You’ve been warned 😉

Recipe Card

Maple Glazed Nuts

Maple Glazed Nuts

Sweet, crunchy, and incredibly moreish, these Maple Glazed Nuts are one of the easiest treats you can make! With just a handful of ingredients and eight minutes of your time, you can whip up a batch of these delicious nuts, perfect for snacking or gifting.
5 from 1 vote
Hands-on time 8 minutes
Total Time 8 minutes
Course Snack, Treat
Cuisine American, Vegan
Servings 8

Ingredients
 

  • 110g / 1 cup pecans
  • 160g / 1 cup roasted or blanched almonds
  • 80ml / 4 TBSP maple syrup (pure maple or a blended syrup*)
  • pinch of sea salt optional

Instructions
 

  • Preheat a large dry frying pan (skillet) over medium-high heat.
  • Add the nuts and dry fry for 2 minutes, stirring continuously.
  • Pour in the maple syrup and stir for about 3 minutes, until the syrup thickens and becomes very sticky.
  • Using a spatula, transfer the nuts to a sheet of non-stick baking paper and spread them out in a single layer. If you enjoy a sweet-salty combo, sprinkle over a pinch of sea salt while they’re still hot.
  • Allow to cool completely. The nuts will firm up and become glossy and crisp as they cool.
  • Store in an airtight container in the fridge, or the freezer for longer freshness.

Notes

* I often use Clark’s Original, which is a blend of maple and carob syrup. It works perfectly for this recipe and is more affordable than pure maple syrup.
Tips & Variations:
  • Add a little spice – a pinch of cinnamon or smoked paprika adds a lovely twist
  • Try different nut combos – walnuts, cashews, hazelnuts, or peanuts work well too
  • Gift idea – package in a glass jar with a ribbon for a homemade holiday or hostess gift
Keyword Candied Nuts, Edible Gifts, Maple Almonds, Maple Glazed Nuts, Maple Pecans, Quick Sweet Snack, Stovetop Candied Nuts, Vegan Snacks
Tried this recipe?Let us know how it was!

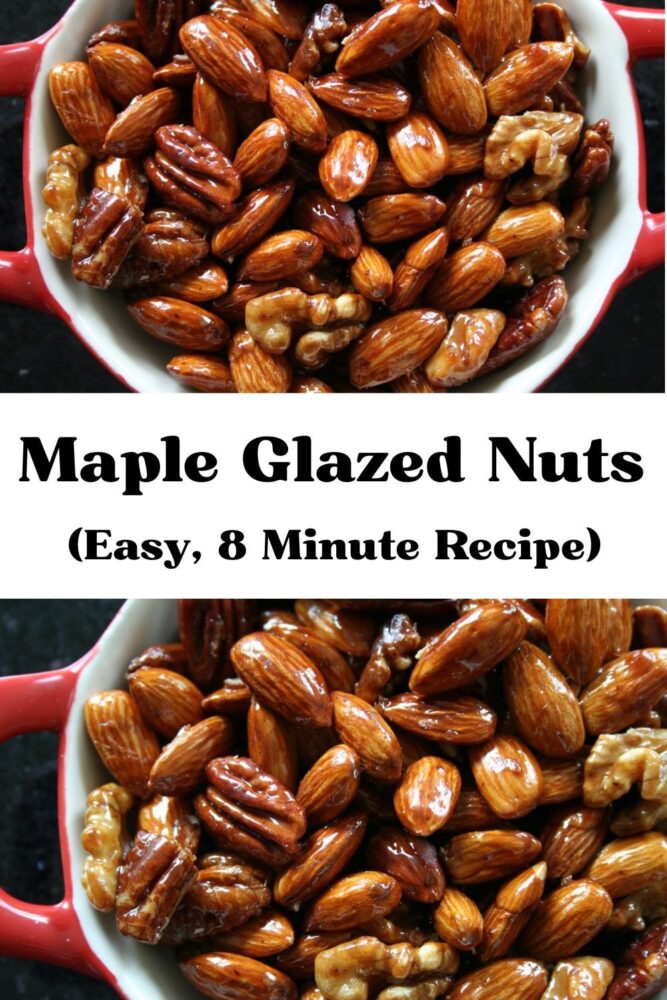
Pin for Later ⬇️

Maple Glazed Nuts

Have you tried making your own maple glazed nuts? If so, I’d love to hear your favourite combinations! Let me know in the comments or tag me on social media #bitofthegoodstuff if you share a pic. I always love to see your creations! You can also connect with me on my social media channels here: Instagram, FacebookPinterest.   

Wishing you a beautiful week!

With love,

Sharon xx

Vegan Lemon Drizzle Cake (Dairy-free | Egg-free)

Jump to Recipe

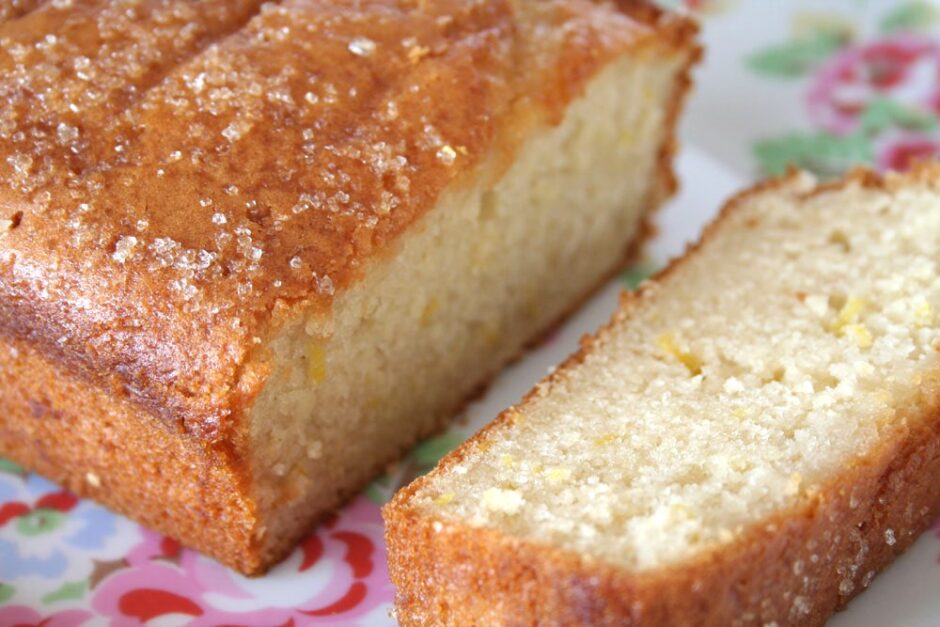
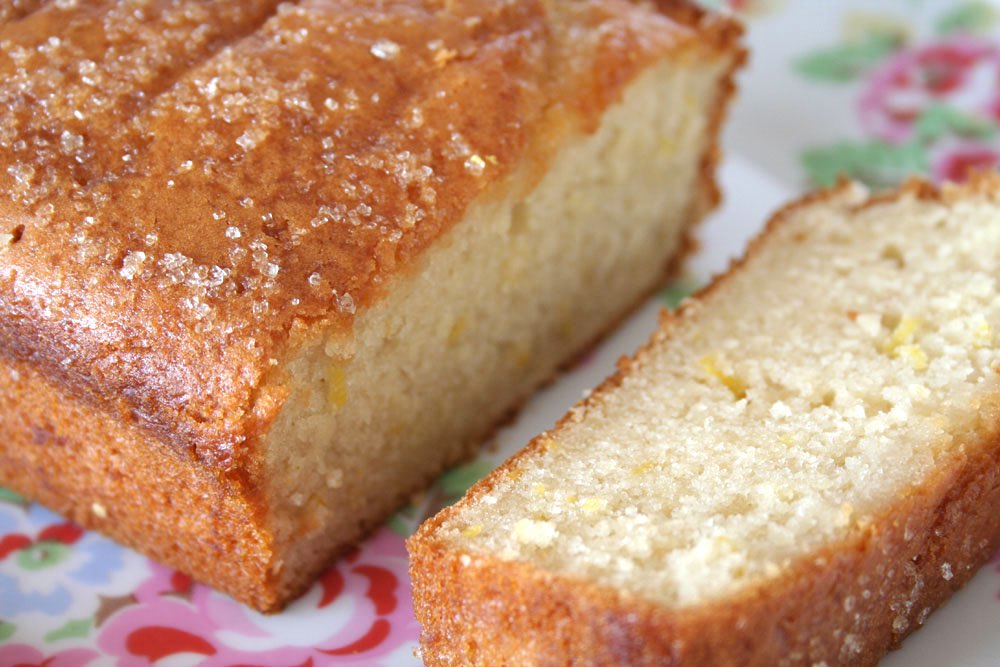
Light, fluffy, and bursting with citrus flavour, this Vegan Lemon Drizzle Cake has long been a reader favourite—and for good reason! It’s everything you want in a lemon cake: zingy, moist, and topped with that irresistible crunchy lemon-sugar drizzle.

I first made this cake for my mum as a Mother’s Day treat. Yellow is her favourite colour (and to me, the colour of spring!), so this cake—with its golden hue and bright lemon zest—felt like the perfect gift. It’s been loved by friends, family, and readers ever since. It even made its way into The Independent newspaper and onto the pages of my cookbook!

Though it’s dairy- and egg-free, it doesn’t compromise on flavour or texture. It’s light, fluffy, and sweet—but not overly so—and makes a gorgeous centrepiece for spring gatherings, afternoon teas, or a special treat for someone you love.

Vegan Lemon Drizzle Cake

Recipe Card

Vegan Lemon Drizzle Cake

Vegan Lemon Drizzle Cake (Dairy-Free | Egg-Free)

Light, fluffy and full of citrus zing, this Vegan Lemon Drizzle Cake is one of our all-time favourite bakes. It’s perfect for spring celebrations, Mother’s Day, or any time you’re craving a slice of sunshine.
Hands-on time 15 minutes
Total Time 2 hours
Course Afternoon Tea, Treat
Cuisine Plant-Based, Vegan
Servings 8

Ingredients
 

Ingredients

  • 200 g / ¾ cup + 3 TBSP unrefined cane sugar (e.g. golden caster sugar)
  • 40 ml / 2 TBSP maple syrup or maple blend
  • 70 ml / ⅓ cup organic rapeseed (canola) oil or other neutral-flavoured oil
  • 240 ml / 1 cup soya milk
  • 2 tsp apple cider vinegar
  • 30 ml / 2 TBSP freshly squeezed lemon juice
  • zest of 2 organic/unwaxed lemons
  • 250 g / 1¾ cups plain (all-purpose) flour
  • 2 tsp baking powder
  • ¼ tsp salt

Drizzle Topping:

  • 2 TBSP freshly squeezed lemon juice
  • 2 TBSP demerara or turbinado sugar

Instructions
 

  • Preheat oven to 200°C (180°C fan) / 400°F. Grease and line a 2lb loaf tin with non-stick baking paper or use a loaf liner.
  • In a large mixing bowl, whisk together the sugar, maple syrup, oil, milk, vinegar, and lemon juice using a hand/balloon whisk. Stir in the lemon zest.
  • Sift in the flour, baking powder, and salt in three stages, whisking gently after each addition until just combined.
  • Pour the batter into the prepared loaf tin and bake for 45 minutes, or until a skewer inserted into the middle comes out clean.
  • While the cake is baking, mix the drizzle ingredients in a small bowl.
  • Once baked, pierce the cake all over with a toothpick and spoon over the drizzle while the cake is still hot. Let it cool in the tin for at least an hour before removing (it will firm up as it cools).
  • Once completely cooled, slice and serve, or store in an airtight container. The cake keeps well in the fridge for up to a week and also freezes beautifully.
Keyword dairy-free cake, easy vegan baking, easy vegan cake, egg-free cake, lemon cake, loaf cake, Mother’s Day recipes, Spring baking
Tried this recipe?Let us know how it was!

Have you tried this Vegan Lemon Drizzle Cake? I’d love to hear how it turned out for you! Feel free to leave a comment below or tag me on social media using #bitofthegoodstuff if you share a photo — I always love seeing your creations! 💛 You can also connect with me on my social media channels here: InstagramFacebookPinterest.   

With love,

Sharon xx


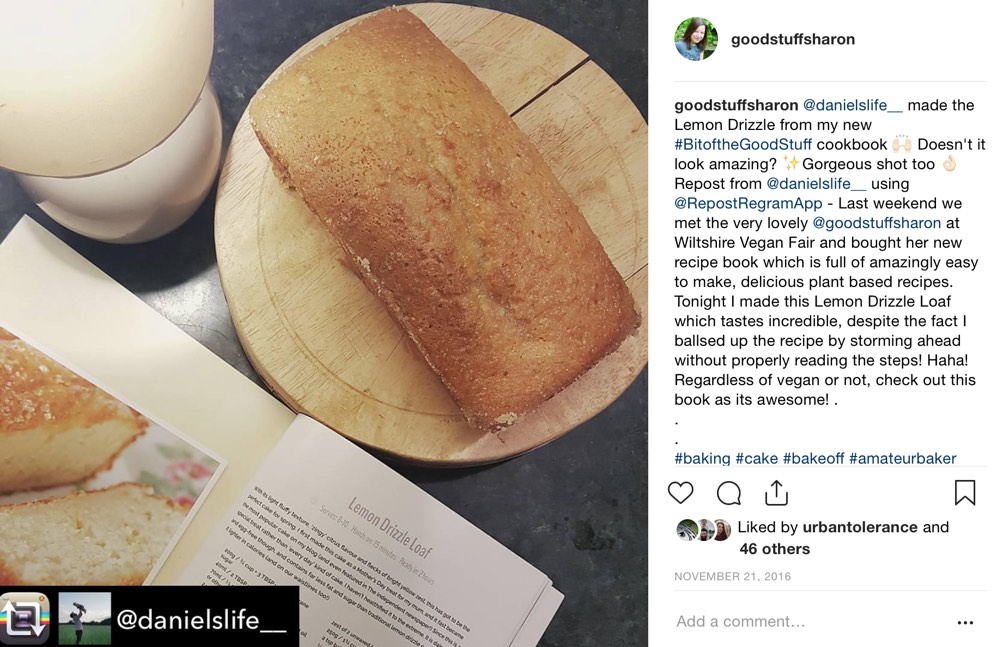
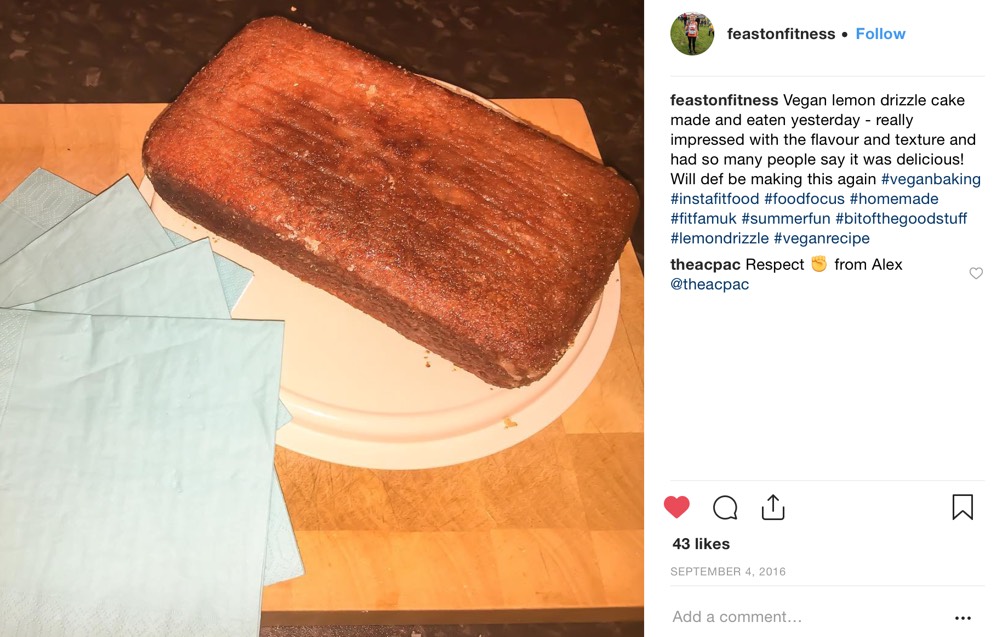
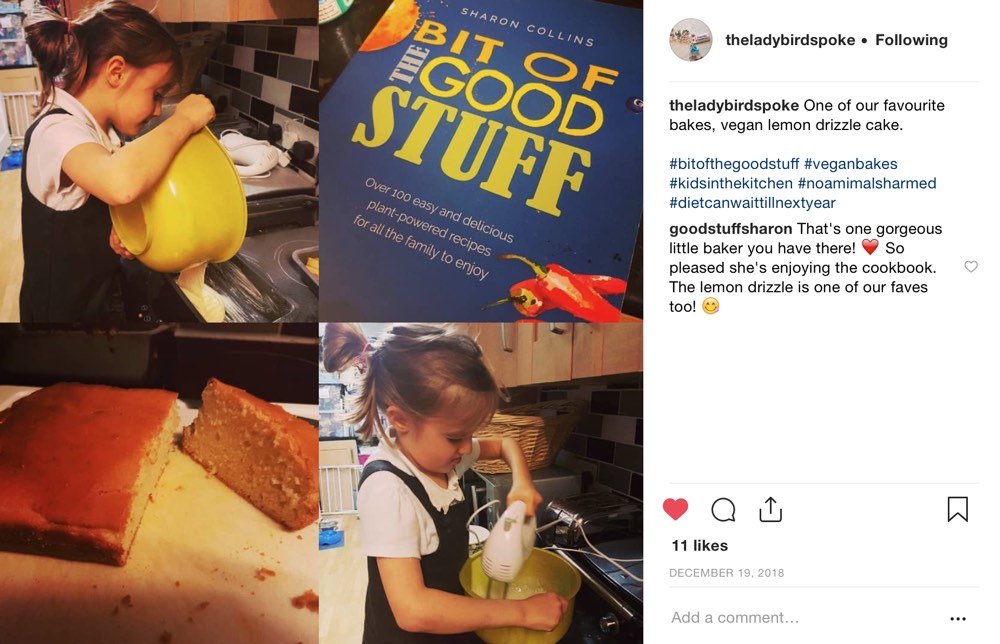
READER REMAKES ❤️

Vegan Lemon Drizzle Cake

Vegan Lemon Drizzle Cake

Vegan Lemon Drizzle Cake

————————————————-

SaveSave

Apple & Cinnamon Dough Balls (Healthy ‘Monkey Bread’)

Jump to Recipe

When I first started blogging, I recall there was a wave of health food bloggers posting recipes for ‘Healthier’ Monkey bread.  I had absolutely no idea what ‘Monkey bread’ was or why it had such a funny name!

Wikipedia soon filled me in…

Monkey bread, also called monkey puzzle bread, sticky bread, African coffee cake, golden crown, pinch-me cake, bubbleloaf and monkey brains is a sweet, sticky, gooey pastry served in the United States for breakfast.  The bread is made with pieces of sweet yeast dough which are baked in a cake pan after first being covered in melted butter, cinnamon and sugar. It is traditionally served hot so that the baked segments can be easily torn away with the fingers and eaten by hand.

Sounds yummy doesn’t it?  However, traditional Monkey Bread isn’t particularly healthy.  It contains A LOT of fat and sugar.  In contrast, the ‘healthified’ versions often use bread or pizza dough as their base, and are glazed with healthier alternatives to butter and refined cane sugar.

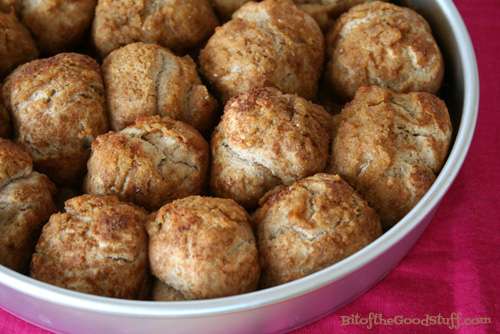
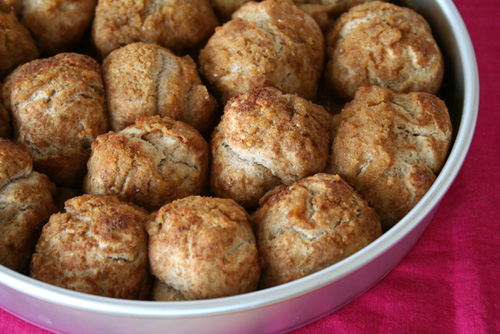
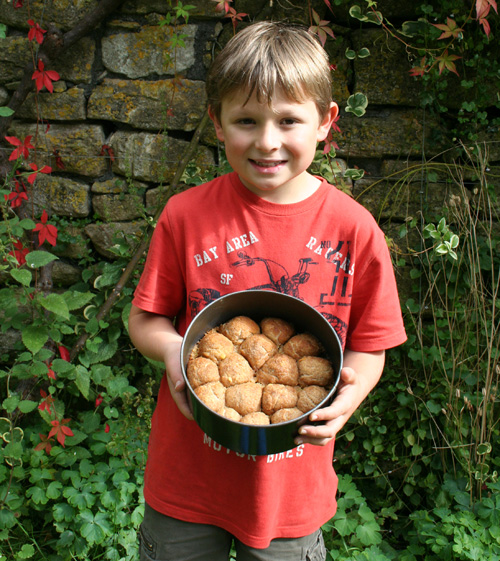
One Sunday, I decided to have a go at making some Apple and Cinnamon-Spiced Healthy Monkey Bread as a ‘special breakfast’.  It was a huge hit with Lil’ L and M and,  I must admit, I’m rather partial to it too.

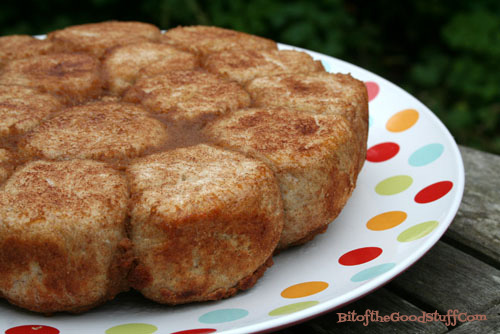
The ‘authentic’ way to serve Monkey Bread is to invert it onto a plate…

Apple and Cinnamon Monkey Bread (Vegan / Dairy-Free)

However, we prefer to eat it straight from the pan.  Hands get less messy, and you can use the balls to mop up any syrup left in the pan.

Healthy Apple & Cinnamon Monkey Bread

If you’re lucky enough to have a breadmaker, then this recipe requires very little effort at all.  You simply throw all the dough ingredients in the machine and press a button. I’ve had my breadmaker for a couple of years now and it’s been fantastic!  I reckon it’s easily paid for itself in terms of the amount of times we’ve chosen to stay in rather than going to Pizza Express!

Today, I made some Monkey Bread as an after-school treat for Lil’ L and his friend, and I made it by hand to see how it compared to the bread-maker version.  To be honest, making dough by hand doesn’t require THAT much effort.  It takes less than 15 minutes, which isn’t too bad at all.  Plus kneading dough is great exercise for the arms.

Below I’ve given instructions for making the Monkey Bread by hand and in a breadmaker.  If you’re planning to eat it for breakfast, you can easily prepare the dough the night before and chill it in the fridge.  In the morning, simply remove the dough from the fridge about 20 minutes before you need to use it.

Recipe Card

Apple Cinnamon Monkey Bread

These warm sweet dough balls make the most delicious weekend breakfast or 'elevenses'.
Below I’ve given instructions for making the Monkey Bread by hand and in a breadmaker. If you’re planning to eat it for breakfast, you can easily prepare the dough the night before and chill it in the fridge. In the morning, simply remove the dough from the fridge about 20 minutes before you need to use it.
Hands-on time 30 minutes
Total Time 2 hours
Course Breakfast, Elevenses
Servings 3

Ingredients
 

Dough

  • 165 g / 1¼ cups fine wholemeal (whole wheat pastry) flour or chapatti flour
  • 140 g / 1 cup plain (all purpose) flour
  • ½ tsp fast action yeast
  • ½ tsp salt
  • 1 TBSP coconut sugar or golden caster (unrefined cane) sugar
  • 170 ml / ¾ cup lukewarm water
  • 1 TBSP extra virgin olive oil

Apple Cinnamon Syrup

  • 2 small sweet organic apples (about 220g) or 190g / ¾ cup apple sauce
  • 30 g / 2 TBSP virgin coconut oil
  • 40 g / 2 TBSP maple syrup
  • 1 TBSP coconut sugar or golden caster (unrefined cane) sugar
  • 1 tsp ground sweet cinnamon

Cinnamon Sugar

  • 1 TBSP coconut sugar or golden caster (unrefined cane) sugar
  • 1 tsp ground sweet cinnamon

Instructions
 

  • Prepare the dough:
    – In a breadmaker: Tip all the ingredients in the pan and select ‘pizza dough’. The programme should take around 45 minutes. When it signals that it’s ready, leave the dough in the machine for a further 15 minutes or so.
    – Or by hand: Place the flours, yeast, salt and sugar in a large bowl. Stir in the warm water and oil using a spoon, then bring it together with your hands to form a sticky dough. Knead for 10 minutes, until the dough is smooth. Place in a lightly oiled bowl, cover with a damp tea cloth and leave in a warm place for an hour to prove.
  • Once the dough is ready, prepare the apple cinnamon syrup. Core the apples and chop into pieces. Place them in a bowl and blitz into a puree using a hand blender. Place the apple puree, coconut oil, syrup, sugar and cinnamon in a pan and gently heat until the oil has melted. Stir through, then remove from the heat.
  • To make the cinnamon sugar, simply combine the sugar and cinnamon in a small bowl.
  • Preheat the oven to 200C (180C fan) / 400F. Grease a 23cm / 9″ baking pan with oil.
  • Prepare the dough balls: Pull off a small amount of dough and roll into a ball about 2.5 cm / 1″ in diameter. Place the ball in the prepared pan. Repeat until all the dough has been used. Space out the balls in the pan (they will expand as they cook). Spoon the apple cinnamon syrup between the balls and round the edges of the pan. Sprinkle the cinnamon sugar on top.
  • Bake in the preheated oven for 25 minutes, or until the dough balls are crusty on top. Leave the pan to cool slightly, then place it in the centre of the table and invite everyone to tuck in.
  • Should there be any leftovers, store in the refrigerator for up to three days and gently warm through in the oven before serving.
Keyword Dairy-Free, Healthy Monkey Bread, Vegan Baking, Vegan Breakfast, Vegan Monkey Bread
Tried this recipe?Let us know how it was!


Monkey Bread (Vegan / Dairy-Free)

Good Hemp Seed Giveaway Results!
Before I go, I’d like to announce the winners of the Good Hemp Seed Giveaway.  The eligible entries were placed in chronological order and 3 winners were randomly selected using Random.org.

I’m delighted to announce that the winners are…

1. Emma
2. Samantha
3. Penniless Veggie

Please email your postal addresses and I’ll arrange for the gifts to be sent to you asap.

Have a great weekend everyone!

With love,

Sharon xx

Veggie Paella (Easy, One-Pot, Vegan)

Jump to Recipe

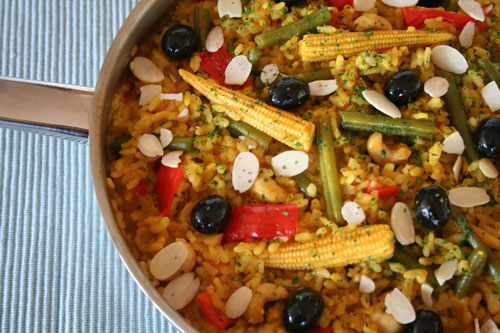
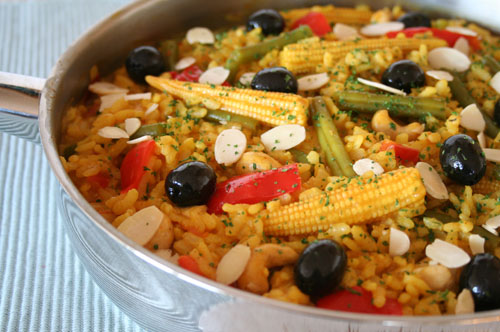
Looking for a nourishing one-pot meal that’s bursting with colour? This Spanish Veggie Paella is one of our absolute favourites! Packed with fresh vegetables, warming spices, and protein-rich nuts, it’s wholesome, satisfying, and incredibly simple to make. No need for multiple pots or fancy ingredients—just a single pan and a few pantry staples. Easy prep, easy clean-up!

When Lil’ L was four years old, we took a trip to the beautiful island of Majorca. It was there that he had his first encounter with paella—the enormous pans filled with mussels and crab claws left quite the impression! Thankfully, the restaurant also offered a veggie version, which was just as vibrant and flavourful, minus the seafood. Back home, I couldn’t wait to recreate the dish, and I was thrilled to discover how quick and easy it was to make. This version has become a firm family favourite!

Spanish Veggie Paella

Recipe Card

Spanish Veggie Paella

Spanish Veggie Paella

This Spanish-inspired vegan paella is bursting with colourful veggies, fragrant spices, and crunchy nuts. Easy to make in one pot, it’s perfect for a fuss-free midweek dinner.
Hands-on time 15 minutes
Total Time 30 minutes
Course Dinner
Cuisine Mediterranean, Plant-Based, Spanish, Vegan
Servings 4

Ingredients
 

  • 1 TBSP olive oil
  • 1 large brown onion (160g) finely diced
  • 2 tsp minced garlic
  • 1 red bell pepper (200g) deseeded and diced
  • 1 tsp ground cumin
  • 1 tsp sweet paprika
  • 300 g / 1⅓ cups Spanish paella rice
  • pinch of saffron* or substitute with ¼ tsp ground turmeric
  • 1 medium tomato (100g) diced
  • 1 litre / 4 cups hot vegetable stock (broth)
  • handful of fine green beans (about 100g) trimmed and halved
  • 6 –8 baby corn
  • 80 g / ½ cup cashews
  • salt to taste
  • ground black or cayenne pepper to taste
  • 16 black pitted olives
  • sprinkling of green nori flakes or dried parsley
  • 35 g / ⅓ cup toasted flaked almonds

Instructions
 

  • Infuse the saffron in a little hot water and prepare the vegetable stock.
  • In a large, deep-sided frying pan (skillet), gently heat the oil. Add the onion and cook until soft. Meanwhile, chop the remaining vegetables.
  • Add the garlic, bell pepper, cumin, and paprika. Cook for a minute, adding a splash of water if needed to prevent sticking.
  • Stir in the rice and saffron (or turmeric), followed by the tomato and hot stock. Bring to the boil, then reduce heat and simmer uncovered for 10 minutes.
  • Add the green beans, baby corn, and cashews. Simmer for another 10 minutes. Stir regularly towards the end of the cooking time. Add a little more stock or water, if needed.
  • While the rice is cooking, prepare any side dishes. (My family loves to serve this paella with some Crispy Garlic Bread, Toasted Tortilla Chips, or a large bowl of Crispy Kale).
  • Once the rice is tender but still has a slight bite, remove from the heat. Season to taste with salt and pepper.
  • Serve on warm plates with a scattering of olives, nori flakes or parsley, and toasted flaked almonds.

Notes

* Saffron gives paella its classic golden hue and nutty aroma, but it can be pricey. For a budget-friendly alternative, substitute with ½ tsp ground turmeric.
Storage Instructions:
Store leftovers in the fridge and eat within 24 hours. As with all rice dishes, make sure the rice is cooled quickly and refrigerated within an hour.
Keyword easy one-pot meal, easy vegan dinner, one pot vegan dinner, plant-based dinner, Spanish rice dish, vegan paella, veggie paella
Tried this recipe?Let us know how it was!

If you try this recipe, I’d love to hear how it went! Share your thoughts in the comments or tag me on social media using #bitofthegoodstuff or @goodstuffsharon. I always love seeing your creations! 💛 You can also connect with me on my social media channels here: Instagram, Facebook, Pinterest.   

Wishing you a joyful week!

With love,

Sharon xx
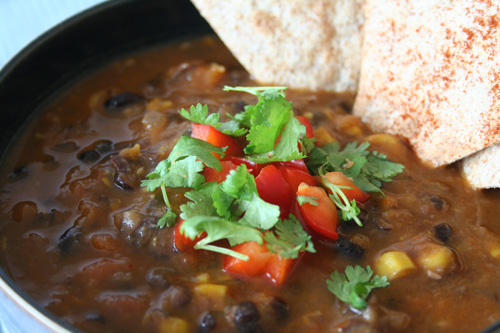
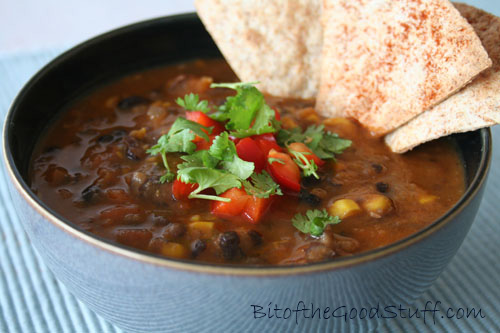
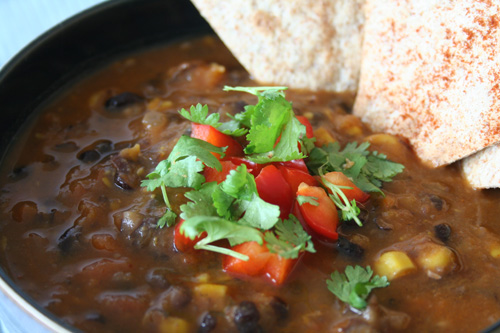
Mexican Black Bean Soup (Vegan | Dairy-free | Easy One Pot)

Jump to Recipe

Looking for a hearty, flavour-packed soup that’s easy to prepare and guaranteed to warm you up? This Mexican Black Bean Soup is just the ticket! Brimming with wholesome veggies, protein-rich black beans, and warming spices, this soup is as nourishing as it is delicious.

Here in the UK, black beans (aka ‘turtle beans’) don’t tend to get the love they deserve. Their smoky flavour makes them a fantastic addition to Latin American-style dishes, especially soups. Once you try this one, we think you’ll be a convert too!

This soup is perfect for lunch or a light dinner, especially when served with toasted wholegrain tortilla chips (see recipe below). For a heartier meal, we love to pair it with freshly baked vegan cornbread. It’s family-friendly too — simply blend the soup smooth for little ones or those who prefer a silky texture.

Recipe Card

Mexican Black Bean Soup (Vegan | Dairy-free | Easy One Pot)

Mexican Black Bean Soup

This richly spiced Mexican-style black bean soup is hearty, satisfying, and easy to prepare. Packed with vegetables and flavourful black beans, it’s perfect for a cosy lunch or dinner.
Hands-on time 15 minutes
Total Time 45 minutes
Course Dinner, Lunch
Cuisine Mexican, Vegan
Servings 6

Ingredients
 

  • 1 TBSP olive oil
  • 1 medium onion (130g) finely diced
  • 2 tsp minced garlic
  • 1 large carrot (140g) finely diced
  • 1 large sweet potato (370g) peeled and diced
  • 1 tsp ground cumin
  • 1 tsp sweet or smoked paprika
  • 1 tsp dried oregano
  • ½ tsp chilli powder (I use mild)
  • 145 g / 1 cup canned or frozen sweetcorn
  • 400 g / 14 oz can Italian vine-ripened chopped tomatoes
  • 600 ml / 2½ cups vegetable stock (broth)
  • 2 x 400g / 14 oz cans black beans rinsed and drained
  • salt to taste
  • cayenne pepper to taste
  • 2 TBSP nutritional yeast flakes optional – adds savouriness and nutrients

Suggested Garnish

  • fresh coriander (cilantro) leaves
  • finely chopped red pepper or red chilli

Instructions
 

  • Gently heat the oil in a large saucepan. Add the onion, garlic, carrot, sweet potato, cumin, paprika, oregano, and chilli powder. Stir to combine, then cover with a lid and cook on low for 5 minutes, allowing the veggies to sweat.
  • Add the sweetcorn, chopped tomatoes, and vegetable stock. Bring to the boil, then reduce the heat, partially cover with a lid, and gently boil for 20 minutes until the vegetables are tender.
  • Stir in the black beans. Remove half the soup and blend smooth using a jug blender. Return it to the pan and stir well. (For a smoother soup, blend more as needed).
  • Season to taste with salt. If desired, add a pinch of cayenne for a spicy kick (after setting aside any children's portions). Let it cool slightly, then stir in nutritional yeast, if using.
  • Serve hot with toasted tortilla chips or slices of cornbread. Garnish with fresh coriander and a sprinkle of red chilli or pepper, if desired.

Notes

Storage Instructions:
Leftovers can be stored in the fridge for up to 3 days. The soup may thicken over time—just add a splash of water or vegetable stock to loosen. It also freezes well.
Family-Friendly Tip:
For younger children, blend the soup completely for a smoother texture and use mild chilli powder.
Keyword black beans, Budget Vegan Meals, Dairy-Free, easy dinner, healthy soup, Mexican soup, one-pot recipe, Plant-Based, sweet potato soup, Vegan Soup
Tried this recipe?Let us know how it was!
Mexican Black Bean Soup (Vegan | Dairy-free | Easy One Pot)

Toasted Tortilla Chips (Baked or Grilled)

These crispy toasted tortilla chips are so simple to make! You can enjoy them plain or add a sprinkle of paprika, cumin or chilli for a flavourful kick. They're perfect for dipping into soups, guacamole, salsa, or hummus — or top with mashed avocado and salsa for a quick wholesome snack!
Hands-on time 5 minutes
Total Time 10 minutes
Course Healthy Snacking, Side Dish
Cuisine Mexican-Inspired, Vegan
Servings 4

Ingredients
 

  • 2 large or 4 small whole grain soft tortillas
  • Optional: ground cumin, paprika, or chilli powder for sprinkling

Instructions
 

Baking Method:

  • Preheat the oven to 190°C (170°C fan) / 375°F.
  • Slice the tortillas into segments and place them in a single layer on two baking sheets.
  • Sprinkle with spices if desired.
  • Bake for 8–10 minutes, or until lightly browned. TIP: Watch closely towards the end of the baking time as they can burn quickly!
  • Remove and let cool — they’ll crisp up as they cool.
  • Store in an airtight container. They’ll stay crispy for up to 2 weeks.

Grill Method:

  • Place the whole tortillas under a medium grill (broiler).
  • Keep a watch on them and, as soon as they start to brown, flip them over.
  • Once lightly browned on both sides, remove from the grill and immediately slice into segments.
  • Leave to cool and crisp up.
Keyword Healthy Snacking, homemade tortilla chips, soup accompaniment, toasted chips, tortilla chips
Tried this recipe?Let us know how it was!

If you try this soup, I’d love to hear how it went! Leave a comment below or tag me on social media using #bitofthegoodstuff — I always love seeing your creations! 💛 You can also connect with me on my social media channels here: InstagramFacebookPinterest.   

With love,

Sharon xx