Vegan Chocolate Celebration Cake (Dairy-Free / Egg-Free)

At the start of the Autumn half term school holidays, Lil’ L moved into double digits. I’m still dumbfounded as to how my boy grew up so fast. Seriously, where did all those years go?

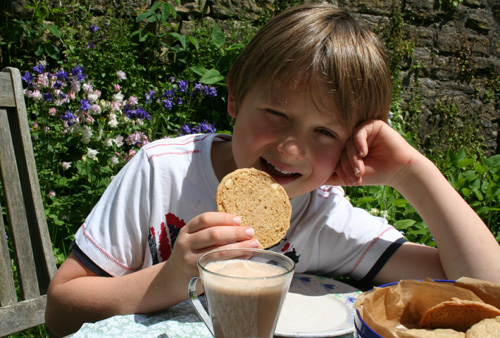
His day kicked off with present & card opening. I love watching his facial expressions as he opens presents!Lil L 10th Bday Morning 2013

Another sign that he’s growing up is the lack of toys on his birthday wish list. Instead, he wanted new wheels for his scooter, a skater helmet and books (so glad he still enjoys reading!)

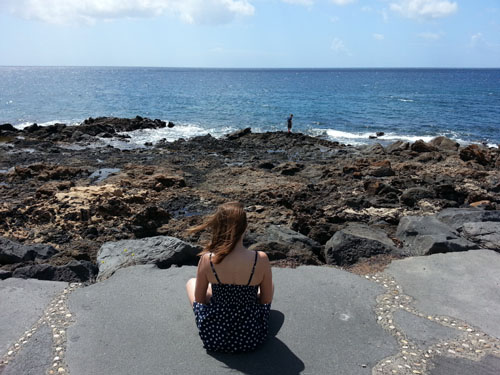
The birthday celebrations continued for the next few days (one of the perks of having a birthday in the school hols!) and included a Laser Quest party; a trip to Dorset to visit his Nan; walks in the forest; and bike rides with his Dad and cousin. What a lucky boy he is!

Lil L 10th Bday Activities 2013

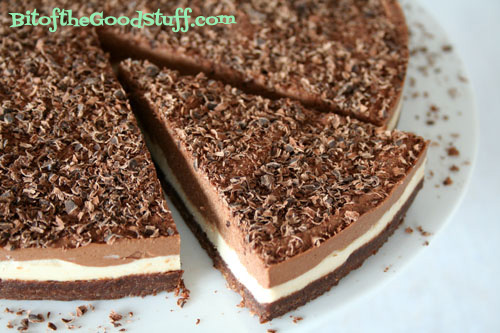
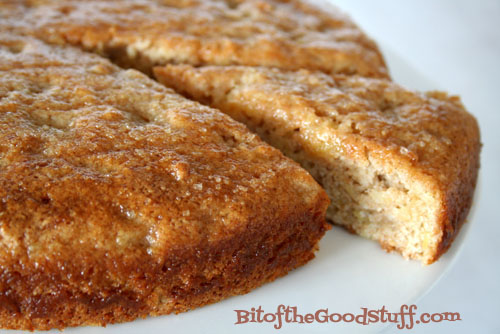
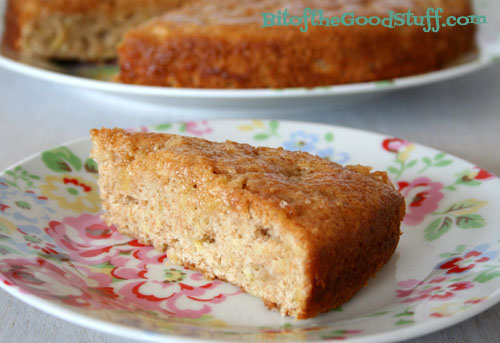
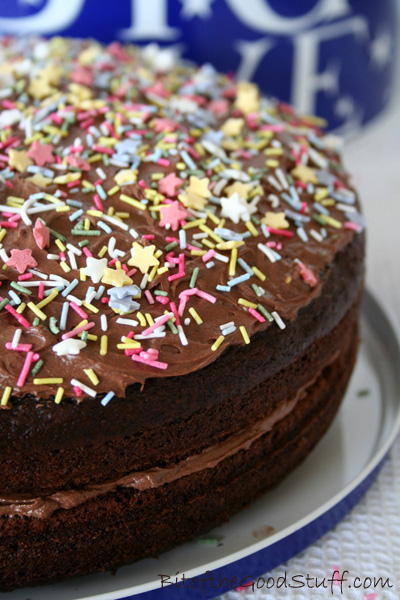
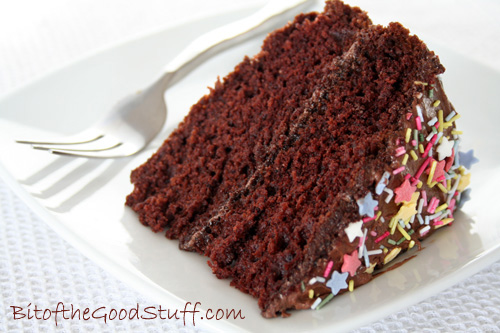
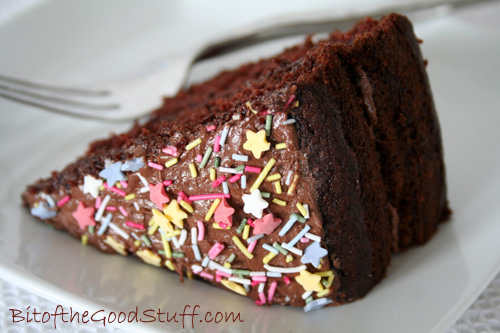
As usual, he requested a vegan chocolate cake for his birthday. This year, I made a very simple chocolate victoria sponge sandwich cake, which worked out surprisingly well. It was moist, held together well when sliced, and wasn’t too rich or sickly sweet.

I was all set to use cashew cream frosting (which I prefer a million times over to regular frosting) … but then had a change of heart. This cake wasn’t for me, it was for Lil’ L and his friends. Rather than impose my preferences on them, I ditched the cashews and dug out an old box of icing sugar from the back of the cupboard. I even went to the shops and bought some sugar sprinkles.

Vegan Chocolate Victoria Sponge Sandwich Cake 400 copy

The cake got great feedback from the family (including my mum!) as well as Lil’ L’s friends. I was particularly surprised when Lil’ L’s best friend came up to me after the party to tell me how much he’d enjoyed the cake. This meant a lot as he isn’t normally a ‘cake person’ (you’re much more likely to seeing him diving into a fruit bowl or tucking into roasted nuts and seeds!)

Vegan Chocolate Cake 2 copy

The cake was super easy to make. Here’s how I did it:

[print_this]

Makes 1 x 9 inch sandwich cake    Serves: 12-16
Hands on time: 20 minutes    Ready in: 2 hours

Ingredients
480ml / 2 cups soya milk
2 tsp apple cider vinegar
200g / 1½ cups plain (all purpose) flour
200g / 1½ cups fine wholemeal (wholewheat) or chapatti flour (I use the latter)
60g / ½ cup cocoa powder
1
tsp bicarbonate of soda (baking soda)
1 tsp baking powder
½ tsp salt
140ml / ⅔ cup rapeseed (canola) oil (or other neutral-flavoured oil)
330g / 1⅔ cups unrefined cane sugar (e.g. golden caster sugar)
2 tsp vanilla extract

Decorating options:
– chocolate frosting (recipe below) and vegan-friendly sprinkles (e.g. Sainsbury’s or Morrisons Sugar Star sprinkles, Dr Oetker Sugar Stars and Sugar Strands)
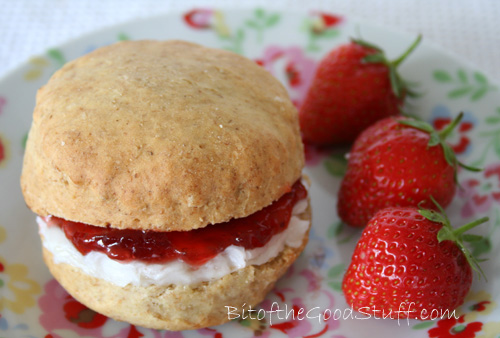
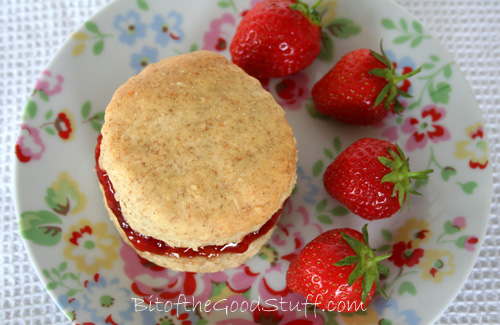
– raspberry jam or fruit spread (e.g. St Dalfour) for filling and a dusting of icing (powdered) sugar on top

Method
Preheat the oven to 180C (160C fan) / 350F. Lightly oil 2 x 9 inch spring-form or loose-bottomed cake tins and line the bottoms with non-stick baking paper.

In a large mixing bowl, whisk together the milk and vinegar, then set to one side.

In a separate large bowl, add the dry ingredients (flours, cocoa powder, bicarbonate of soda, baking powder and salt) and stir through to combine.  

Add the oil, sugar and vanilla extract to the milk and vinegar, and whisk until fully combined. Sieve in a third of the dry ingredients and whisk to combine. Add another third and whisk to combine. Add the last third along with any remaining wheatgerm. Stir through to combine (but do not over stir).

Divide the batter equally between the prepared tins. Place on racks as close to the centre of the oven as possible. Bake for 40-50 minutes, until a skewer inserted through the middle comes out clean and the cakes are springy when lightly pressed. (In my oven, I find the cake on the higher rack is ready after 40 minutes, and the cake on the lower rack needs an extra 10 minutes). If both cakes are domed, decide which one will be the bottom tier, cover with a clean tea cloth and gently press down to level. 

Leave the cakes in their tins for at least an hour (they will firm up as they cool), then transfer to a wire rack. Once completely cooled, decorate and assemble the cake. Chill before serving.

Stored in an airtight container, this cake will keep for up to a week in the fridge. (I find the flavour and texture of the cake actually improves in the next day or two after baking). It also freezes well.

Chocolate Frosting
The quantities below are sufficient for frosting the centre and top of a 23cm/9 inch cake (as shown in the picture). 

Ingredients
150g / 1 cup icing sugar
35g / ¼ cup 4
cocoa powder
50g / 4 TBSP dairy-free spread/vegan butter (e.g. Vitalite, Flora Dairy Free, Pure)
1 – 1½ TBSP water

Method
Sieve the icing sugar and cocoa powder into a large bowl. Add the dairy-free spread/butter and 1 TBSP water. Stir with a metal spoon until it starts to combine, then beat with an electric whisk until light and fluffy. If the frosting looks a little dry, add another ½ TBSP water and keep beating. This frosting will keep for a week in the fridge. 

[/print_this]

Products used in this recipe
Morrisons 23cm Non-Stick Springform Cake Tins – These are made in the UK, cost only £4 each and have a 5-year guarantee!
Salter Aquatronic Electronic Kitchen Scale – These scales are great as you can weigh everything directly into the same bowl. As an added bonus, they come with a 15 year guarantee!
Tesco Chapatti Flour – I use this flour in all my baked goods. It’s a very fine wholemeal flour and super cheap too!
– Dr Oetker Sugar Stars and Sugar Strands – Purchased from The Co-Op; also available from Tesco

Vegan Chocolate Cake 3 copy

For those of you that dislike the traditional Christmas fruit cake, I think this would make a great alternative. You could even add some festive sprinkles!


SaveSave

SaveSave

SaveSave

SaveSave

SaveSave

SaveSave

SaveSave

SaveSave

SaveSave

SaveSave

SaveSave

SaveSave

English Scones & Vegan Cream Teas!

It’s Wimbledon season! And, for once, it looks like a Brit might actually have a shot at winning. If Murray does make it, he’ll be the first Brit to win the men’s singles title since Fred Perry in 1936!

Fred Perry

[Source]

Like many Brits, Wimbledon is the time of year when I indulge in an English scone or two and big piles of English strawberries.  This year, I decided to go one step further and have been making full-on English Cream Teas 🙂

But how can you have scones or cream tea if you don’t consume dairy, you ask?  Well, I’ve got some great tasting alternatives for you.  In fact, I would even stretch as far as saying that they taste better than the traditional recipes.  English scones are often very dry and heavy (hence why they need so much cream and jam in the middle), but these dairy-free scones are much lighter and moist in the middle. In fact, fresh out of the oven they don’t even need any filling.

Dairy Free Scone (Vegan)

As a dairy-free alternative to clotted cream, I make a thick, spreadable coconut cream, lightly sweetened and flavoured with a hint of vanilla.  For me, the flavour and texture of this coconut “clotted” cream pairs perfectly with strawberry jam.

Vegan Cream Tea

This dairy-free cream tea is far healthier than a traditional cream tea.  Since the scones don’t contain any butter, lard or cow’s milk, they contain far less fat and calories, plus they’re cholesterol-free.  Replacing clotted cream with coconut cream means that the bad fats are replaced with good, heart-healthy fats.  It is also low on sugar as we use a sugar-free strawberry spread instead of jam.

This is a cream tea that is going to fill you with goodness   I hope you enjoy it as much as we do!

[print_this]

English Scones (Dairy-free / Egg-free / Vegan)

Makes 9 large scones
Hands-on time: 20 minutes    Ready in: 35 minutes

Ingredients
300ml / 1¼ cups soya milk (or almond milk)
10ml / 2 tsp apple cider vinegar
270g / 2 cups plain (all purpose) flour
270g /
2 cups fine wholemeal (wholewheat pastry) flour or chapatti flour
20g / 4 tsp baking powder
¼ tsp salt

90g / 6 TBSP dairy-free spread/vegan butter
80g / ½ cup raisins (optional)
3 TBSP unrefined caster sugar (or coconut sugar)

Soya milk, for glaze, optional

Suggested filling
Sugar-free strawberry spread (we love St Dalfour)
Coconut “clotted” cream (recipe below)

Method
Preheat the oven to 220C (200C fan) / 425F. Line a large baking tray with non-stick baking paper.

Whisk together the milk and vinegar in a jug and set to one side.

Place the flours, baking powder and salt in a large bowl and stir through to combine. Using your finger tips, rub in the dairy-free spread/vegan butter until fully incorporated. Mix in the sugar and raisins (if using).

Make a well in the centre and pour in about three quarters of the milk and vinegar. Stir gently to combine. Add the remaining liquid, a little at a time, and use your hand to bring the mixture together into a soft, slightly sticky dough (depending on the type of flour you use, you may not need all the milk). Do not overwork the mixture, as this will result in heavy scones.

Turn out the dough onto a lightly floured surface. Sprinkle a little flour on top and gently roll out to a thickness of 2.5cm / 1 inch. Cut out the dough using a 7.5cm / 3inch metal pastry cutter.  Press down swiftly on the cutter, lift straight up and push out the dough onto the prepared tray. Do not twist the cutter as you press down otherwise you will end up with funny shaped scones. Repeat until all the dough is used up, re-rolling the scraps as needed.

Brush the tops of the scones with a little soya milk, if desired, for a golden glaze.

Bake the scones in the preheated oven for 15 minutes, until the tops are lightly browned. After 10 minutes of baking, turn the tray round 180 degrees so that they brown evenly. Leave to cool slightly before serving. They are best served fresh, but will last a couple of days in an airtight container. They also freeze well.

For a dairy-free / vegan cream tea, fill the scones with strawberry jam and coconut “clotted cream” and serve with a pot of freshly brewed tea.

[/print_this]

Vegan Cream Tea

[print_this]

Coconut “Clotted” Cream

Preparation time: 24+ hours chilling time for the coconut cream
Hands-on time: 5 minutes    Ready in: 5 minutes

Ingredients
250ml / 8½ oz can coconut cream (I use Sainsbury’s or Waitrose coconut cream)
1 TBSP icing (powdered) sugar
½ tsp pure vanilla extract

Method
Place the can of coconut cream in the fridge at least 24 hours in advance (this helps the cream to separate from the water). Without shaking the can, carefully open it and scoop the solid coconut cream into a measuring jug (you can discard the water). If your house is very warm, first chill the jug in the freezer for a few minutes.

Use a fork to break up the coconut cream then beat using an electric hand mixer until smooth.

Sieve in the powdered sugar. Add the vanilla extract and beat again to combine. Taste test and add a touch more sweetener, if desired.

Chill until ready to serve. This cream will keep up to a week in the fridge. It may firm up over time, so whisk with a fork, if needed, before serving.

[/print_this]

Vegan Scone


UPDATE

So delighted to hear that this recipe made the finals of the first-ever Great Vegan Bake-Off!

Thank you Peta


Birthday Celebrations & a Chocolate and Lime Vegan “Cheesecake”

This week it was my birthday.  I never imagined that birthdays would be as much fun at the ripe old age I am now, but how wrong I was.  I actually think this was my best birthday yet! I had a fantastic day, made all the better by the fact that M was able to take the day off work 😀

During the day, we managed to fit in lots of my favourite activities (as you’ll see, eating crops up a lot 😉 )  We started off with one of my favourite bike rides, along the Kennet & Avon Canal to Limpley Stoke where we stopped at the Angel Fish Cafe for a toasted tea bun and cup of coffee.  We then continued through Monkton Coombe, the Two Tunnels, Bear Flat, Widcome and into the centre of Bath.

Me on my Birthday 2013

Along the way, we saw lots of wildlife, including this very cute baby rabbit

Baby Rabbit

For lunch, we went to one of my favourite restaurants in Bath – Thai Basil on Walcot Street – where I had a Thai red vegetable curry.  It was creamy and full of delicious fragrant flavours.  This has got to be one of my favourite curries ever!

Thai Basil - Thai Red Curry

After school, we went to the cinema with Lil’ L to see Epic.  On the way, we stopped off at Hotel Chocolat to buy some vegan chocolate (I can highly recommend the Gianduja Bombe Selector – it’s totally lush!)

Epic the Movie 2013

[Source]

For dinner, we went to another one of my favourite restaurants, the Nepalese Yak Yeti Yak, where we had the delicious Dal Bhat Tarkari (vegetarian/vegan set menu).

Yak Yeti Yak - Vegetarian Platter

Even though I was full up, I couldn’t leave without having the Kir dessert.  This is one of my favourite desserts ever.  It’s a creamed coconut rice pudding lightly spiced with cardamom. I’m going to have to try at make this at home one day. It’s so yummy!

For my birthday cake, I chose to make one of my all-time favourites – Chocolate and Lime Vegan “Cheesecake”.  I much prefer these ‘no bake’ cheese cakes to any kind of baked cake, plus they’re almost impossible to fail at.  You simply throw the ingredients in the food processor, whizz it together then freeze!

Raw / No Bake Chocolate and Lime Cashew "Cheese" Cake

Here’s how I made it…

[print_this]

Chocolate & Lime Vegan “Cheesecake”

Serves: 12
Hands on time: 20 minutes
Freezing time: 2 hours

Ingredients

Crust
150g / 5¼ oz / 1 cup raw unsalted almonds (or use a mix of almonds and pecans)
180g / 6¼ oz / 1 packed cup soft, pitted dates*
5 tbsp raw cacao powder (or regular cocoa powder)
1 tbsp maple syrup (or other liquid sweetener such as agave syrup. I used Clarks Original Maple Syrup)
1 tsp vanilla extract
pinch of salt

* If your dates aren’t soft, soak them in hot water for 2-3 minutes, then drain

Lime Layer
150g / 5¼ oz / 1 cup unsalted cashews
80ml / 2¾ fl oz / ¼ cup maple syrup (or agave syrup)
60ml / 2 fl oz / ¼ cup freshly squeezed lime juice (approximately 2 limes)
½ tsp vanilla extract
53ml / 2 fl oz / ¼ cup virgin coconut oil, liquefied

Chocolate Layer
150g / 5¼ oz / 1 cup unsalted cashews
80ml / 2¾ fl oz / ¼ cup maple syrup (or agave syrup)
37g / 1¼ oz / 1/3 cup raw cacao powder (or regular cocoa powder)
60ml / 2 fl oz / ¼ cup water
½ tsp vanilla extract
53ml / 2 fl oz / ¼ cup virgin coconut oil, liquefied

Grated dark chocolate or cacao nibs, for sprinkling

Method

Preparation

1.   Soften the cashews for the chocolate and lime layers by pre-soaking them for 4-6 hours, or boiling them in a pan of water for 15 minutes.  Drain and set to one side.

2.    Grease a shallow, loose bottom 20 cm (8 inch) or 23 cm (9 inch) tin and line the bottom with non-stick baking paper.

 Crust:

3.    Place the almonds in a food processor and process until they are crumbs.  Add the remaining ingredients and pulse until combined. You want the crumbs to be slightly moist and sticky.  Test them by pressing a small amount between your thumb and finger. If they stick together, they’re ready. If not, continue to pulse for a little longer.

4.    Tip the crumbs into the prepared tin. Use the back of a greased metal spoon to firmly press down the crumbs to form a crust.

Lime Layer

5.    Divide the cashews in two, and place half of them in a food processor or powerful high speed blender along with the liquid sweetener, lime juice and vanilla extract. Process until the cashews are completely grinded into a creamy mixture, stopping now and then to scrape down the bowl. Add the liquefied coconut oil and continue blending until the mixture is completely smooth.

6.    Tip the mixture on top of the crust and smooth with a knife. Place in the freezer whilst you prepare the next layer.

Chocolate Layer

7.    Place the remaining cashews in the food processor or blender along with the cacao/cocoa powder, liquid sweetener, water and vanilla extract. Process until the cashews are creamy, stopping now and then to scrape down the bowl. Add the liquefied coconut oil and continue blending until the mixture is completely smooth.  Taste test and add more cacao/cocoa powder or sweetener, to taste.

8.    Tip the mixture on top of the lime layer and freeze for about two hours, or until firm. Cut the cake into 12 slices and serve with a sprinkling of grated chocolate or cacao nibs on top.  This dessert will last up to a week in the fridge, or weeks in the freezer.  If you’re not planning on eating the dessert in one go, simply remove the required slices and store the remainder in the freezer.

[/print_this]

Note: Almonds and cashews tend to be much cheaper in Asian supermarkets or in the World Aisle of large supermarkets.  For this dessert, I used Aasani almonds and cashews, which are available from the larger UK Tesco stores.


We finally got round to eating a slice of birthday cake yesterday and it was absolutely gorgeous!  All three of us loved it and, even though Lil’ L went back for seconds, there’s still plenty in the freezer to share with friends and family (if they’re lucky 😉 )

Have a wonderful weekend everyone! xx

What would be your ultimate birthday cake?

Do you still enjoy your birthdays as much as when you were a kid? (or even enjoy them more, like me!)


Almond Cookies (Dairy Free, Egg Free, Vegan)

After one of the coldest Springs on record, the weather is finally starting to warm up.  Like us, the garden is loving it!  The Aquilegias (‘Granny’s Bonnet’) are out in full force…

Aquilegia - June 2013

and the peonies have started to bloom.

Peony May-June 2013

We had zero fruit on the apple and plum trees last year due to the poor weather conditions, but things are looking better this year.  Even the tiny apple tree growing in our rockery is covered in blossom.

Apple Tree & Peony - May-June 2013

Hopefully we’ll have lots of homegrown apples come September 🙂

Apple Blossom - May-June 2013

The weather is still very patchy at the moment though.  One day we have glorious sunshine and it’s warm, while the next day it can be cold and dark, with non stop rain.  I don’t know when (or if) the weather is going to settle down this year, so we’re just going to have to make the most of the sunshine when it appears.

This morning, before heading out on our bikes, Lil’ L and I decided to bake some Cinnamon Fruit Loaf and Almond Cookies.  As soon as the cookies were baked, we headed out into the garden to enjoy them along with a cup of raw hot chocolate.

Lil L, Almond Cookies & Hot Choc in the Garden 1

In fact, it was so sunny this morning that we needed to wear sun glasses!

Lil L, Almond Cookies & Hot Choc in the Garden 2

The almond cookies were really yummy!  Straight from the oven, they were crunchy on the outside with a softer centre.  We used chapatti flour which is so fine that you wouldn’t even guess that these cookies were wholegrain!  To boost the almond flavour, we added a little almond extract which gave them a hint of marzipan.  Next time round, we’re going to toast the almonds first to see if we can boost the almond flavour even more.

Vegan Almond Cookies

Here’s how we made them:

[print_this]

Makes: about 18 cookies

Ingredients
140ml / 4¾ fl oz / 2/3 cup rapeseed (canola) oil
155g / 5½ oz /¾ cup unrefined caster sugar
60ml / 2
fl oz / ¼ cup soya milk (or use almond milk)
1 teaspoon almond extract
1 teaspoon vanilla extract
200g / 7 oz / 1½ cups fine wholemeal (wholewheat) flour (I use chapatti flour)
1 tablespoon semolina
½ teaspoon bicarbonate of soda (baking soda)
½ teaspoon salt

100g / 3½ oz / 1 cup flaked almonds

Method

  1. Preheat the oven to 180C / 350F / Gas 4.  Line 2 large baking trays with non stick baking paper.
  2. Place the sugar, oil and milk in a large bowl and use a fork to whisk the mixture until it is smooth and caramel-like (about 2 minutes).  Mix in the almond and vanilla extracts.  Sift the flour, semolina, bicarbonate of soda and salt into the bowl and stir until fully combined.  (If your wheat flakes are too big to be sifted, simply whizz them in a grinder, food processor or mini chopper until they are fine).  Mix in the flaked almonds.
  3. Scoop a rounded tablespoon of dough and place on the prepared baking tray.  Press down to flatten the dough slightly.  Repeat with the remaining dough, placing the cookies about 5cm / 2 inches apart on the tray (they will spread as they cook).  Place in the middle of the oven and bake for 10-15 minutes, until lightly browned round the edges.  Remove from the oven and leave for a few minutes before transferring to a cooling rack.  When completely cooled, store the cookies in an airtight container.

[/print_this]

Fuelled up from our ‘elevenses’, we headed out on our second bike ride of the weekend, this time along the beautiful Kennet & Avon Canal…

Riding along the Kennet & Avon Canal Towpath

passing through the lush green countryside and wildflower meadows round Monkton Coombe, followed by a ride through the Bath Two Tunnels (it was so cool in there!)

Two Tunnels

then onto Bath city centre for cappuccinos & smoothies.    It was absolutely glorious!

I hope you had a lovely weekend too and I wish you all the best for the week ahead 🙂

What was the highlight of your weekend?

Vegan Lemon Poppy Seed Muffins & Our 2nd Mother’s Day Treat

I hope all the international mothers had a wonderful day of rest, relaxation and pampering last Sunday 🙂  Unlike the rest of the world, here in the UK we celebrate Mother’s Day in March rather than in May but, despite this, last Sunday did feel like Mother’s Day as we had lovely day out with my parents’ in law at Wisley Gardens.  We even had some Mother’s Day gifts for my mother-in-law as we didn’t get to her on the UK Mother’s Day.

Rhododendrons at Wisley in May

www.rhs.org.uk/Gardens/Wisley/

Funnily enough, M thought it was Mother’s Day last Sunday as the date was printed on his works calendar.  Shame I didn’t keep my mouth shut otherwise I could have been in for another treat 😉  He said he was going to remind Lil’ L to make me a card.   I didn’t need another card though as the one I received on our first Mother’s Day was perfect.  In fact, I still haven’t put it away as it makes me smile every time I re-read it.  Here’s what he wrote:

My Mothers Day Card 2013

How sweet is that?

He sure knows how to encourage me to keep baking him treats 😉

Since he loves lemon cake so much, I thought I’d treat him (and M) to some lemon poppy seed muffins this week.  I’m happy to report that they turned out really well and received great feedback from the family 🙂  Even though they’re made with wholegrain flour, they’re light, fluffy and moist.

Vegan Lemon Poppy Seed Muffin

This is what they look like inside:

Vegan Lemon Poppy Seed Muffin

They’re very easy to make.  Here’s how I did it:

[print_this]

Lemon Poppy Seed Muffins (Dairy free, Egg free, Vegan)

Makes: 12 muffins
Hands-on time: 10 minutes    Cooking time: 20-25 minutes

Ingredients
280g / 10 oz / 2 cups fine wholemeal (wholewheat pastry) or chapatti flour (I use the latter)
2 tsp baking powder
1 tsp bicarbonate of soda (baking soda)
¼ tsp sea salt
1½ tbsp poppy seeds
100 ml / 3½ fl oz / ½ cup rapeseed (canola) oil
120g / 4¼ oz / ½ packed cup & 1 TBSP unrefined caster sugar (add up to 4 TBSP more sugar if you prefer sweeter muffins)
3 tbsp agave syrup (or maple syrup)
65 ml / 2¼ fl oz / ¼ cup freshly squeezed lemon juice (roughly 2 lemons)
zest of 2 lemons, finely chopped
185 ml / 6½ fl oz / ¾ cup fortified sweetened soya milk (or other non dairy milk)
1 tsp vanilla extract
2 tsp apple cider vinegar
1½ tbsp unrefined demerara (turbinado) sugar

To make gluten-free muffins, use a gluten-free flour blend, like the ones produced by Doves Farm. You may need to add a little more liquid (see instructions on the packet)

Method

  1. Preheat the oven to 180C / 355 F / Gas 4.  Line a muffin tray with paper liners (or use  silicon moulds)
  2. Sift the flour, baking powder, bicarbonate of soda and salt into a large bowl.  (If the wheat flakes are too large to be sieved, grind them finer using a coffee grinder or mini chopper).  Stir in the poppy seeds.
  3. In a separate bowl, whisk together the oil, sugar, syrup, lemon juice, lemon zest, milk, vanilla extract and vinegar until completely combined.
  4. Fold the wet ingredients into the dry ingredients, until just combined (do not over stir).
  5. Spoon the mixture into the muffin cups, filling each about 3/4 full.  Sprinkle a little demerera sugar on top of each muffin.
  6. Place in the pre-heated oven and bake for 20-25 minutes, until a toothpick inserted into the middle of a muffin comes out clean.  Leave to rest for a few minutes, then transfer to a cooling rack.  Once completely cool, store in an airtight container.  These muffins will last a week in the refrigerator and several weeks in the freezer.

[/print_this]


Here’s another of our favourite muffin recipes: Mama Pea’s Blueberry Streusel Muffin

Mama Pea Blueberry Streusel Muffin

And if you like lemon cakes, how about a slice of Vegan Lemon Drizzle Cake?

Lemon Drizzle Cake

I don’t know about you, but I find that muffins are a bit too big for me to eat in one go.  I often slice them and save half in the fridge for another day.  It’s my birthday next month and on my wish list is one of these mini muffin trays.  They look so cute and this muffin size would be perfect for me.  They’ll also be great for lunchboxes (and waistlines) too!

What’s your favourite muffin flavour?  The next two flavours I’d like to try baking are raspberry & coconut, and maple syrup with maple glazed walnuts.  I just need to wait until I have a bit of space in the freezer then I can get recipe testing 🙂


Please note: This post contains an Amazon Affiliate link – if you click on the link and purchase something I will receive a small percentage from Amazon which will goes towards the development of Bit of the Good Stuff. Thanks in advance!


Lanzarote 2013 & Three Ingredient Pineapple Cake

Hi everyone!

I’m back at long last!  Sorry I’ve been away so much longer than expected.  I hope you all had a wonderful Spring break.  While I’ve really valued my ‘unplugged’ time, I’ve been looking forward to my return to blogging world.  I’ve missed you guys!

So what have I been up to?  Well, over Easter, M, Lil’ L and I were very fortunate to escape the freezing cold weather in the UK and head to the Canary Island of Lanzarote.  It was wonderful to spend some quality time with my boys, without all the distractions and ‘busyness’ of life back home.

We enjoyed chilling out on the beach and at cafes, chatting, reading, playing card games and sketching (cartoon drawing was particularly popular this holiday!)

We’re huge fans of Cesar Manrique, and we loved spending time at the sites he designed, including Los Jameos del Agua, Jardin de Cactus and his own house (now a charitable foundation) which is situated in a lava field!

Lanzarote - Jardin de Cactus
Jardin de Cactus, Lanzarote

During the holiday, we also got to spend some quality time by ourselves.  M really enjoyed biking in the volcanic national park…

Biking in Lanzarote - 500

while I loved my daily runs along the coast path and meditation by the sea.

Meditating in Lanzarote 1 - 500

Lil’ L loved playing on the beach, rock climbing…

Playing on the Rocks in Lanzarote - 500

Lil' L at Los Jameos del Agua Lanzarote 2 - 500

and leaping!

Lil L at Los Jameos del Agua 2 Lanzarote - 500

However, in contrast to all this boisterous activity, sometimes you’d walk round the corner and find him meditating!

Lil' L Meditating in Lanzarote - 500

He also spent a lot of time reading.  He got through about seven books! (‘Big Nate’ was a popular read this holiday).

Beach Reading in Lanzarote - 500

We did some great walks along the coast and in the volcanic national park.  Away from the resorts and towns, you could easily start to feel like you were on another planet!

Lanzarote Volcanic National Park 2 - 500

To be honest, when I saw the newspaper headlines about the freezing temperatures and chilling winds in the UK, I wasn’t particularly looking forward to our return.  However, we seem to have brought the good weather back with us.  Perhaps Spring has finally arrived for sure (fingers crossed!)  I’m loving the lighter mornings and evenings too

Inspired by the sunshine and warm weather, I chose to make a pineapple cake for my study class this week.  It was no ordinary cake though… it was fat free, dairy free and egg free!  A friend gave me the recipe a few years ago.  She’d spotted it in a newspaper, but I believe it was originally published by Kim and Rachael of the 4 Ingredients phenomenon.

Fat Free Pineapple Cake - 500 copy

Since it has no fat, its texture is different to other cakes, but it’s delicious none the less.  It’s one of my all-time favourite cakes and I’m happy to report that it got the thumbs up from my study group friends too 😀

Here’s how to make it…

[print_this]

Three Ingredient Pineapple Cake

Serves: 12

Ingredients
250g / 9 oz / 1¾ cups self raising flour*
200g / 7 oz / 1 cup unrefined caster sugar
1 x 432g / 15 oz tin of crushed pineapple

* alternatively use plain (all purpose) or wholemeal (wholewheat) flour and 2 tsp baking powder.  I use chapatti atta flour, which is a very fine wholemeal flour, available in the UK from the world food aisles of Tesco and Asda.

Optional glaze
1-2 tbsp pineapple or tropical juice
2 tbsp granulated sugar

Method

  1. Grease a 22cm / 8½ inch cake tin and line the bottom with non stick baking paper.  Preheat the oven to 180c / 350F.
  2. Sift the flour (and baking powder) into a mixing bowl.  Stir in the sugar.  Add the pineapple (entire contents of the tin, including the juice).  Mix until just combined.  Bake in the pre-heated oven for 40 minutes.
  3. Optional glaze:  As soon as the cake comes out of the oven, prick it all over with a cocktail stick. Brush with juice and sprinkle on some granulated sugar.
  4. Allow the cake to cool completely before removing it from the tin.  Transfer to an airtight container and store in the fridge (or slice and freeze).

[/print_this]

Fat Free Pineapple Cake 2 - 500 copy

I wonder if this cake will work with crushed mangoes too? I’m definitely going to have to give it a try 😉

Have a wonderful weekend everyone.  I hope the sun is shining wherever you are xx

Link of the day: Orange and Almond Cake

Orange & Almond Cake 2

SaveSave