Easy Home-Made Seitan ‘Chicken’

Jump to Recipe

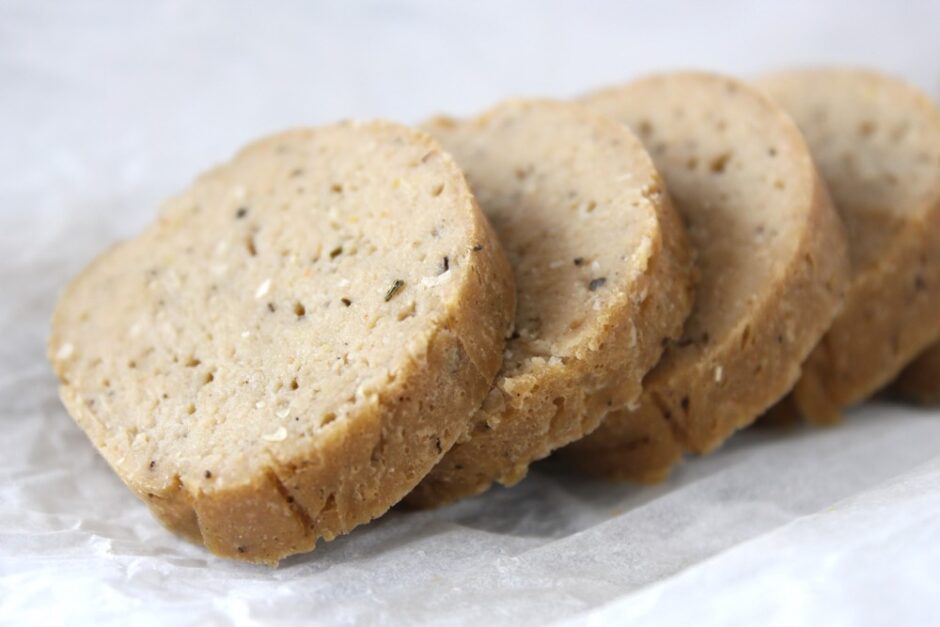
Today’s recipe for Seitan ‘Chicken’ is a new favourite of mine. It’s easy to make, has a succulent, chewy texture and tastes great. It can be torn into chunks and used as a meat substitute in dishes that traditionally use chicken, or it can be sliced and used for sandwiches. I especially love to slice it into discs and pan-fry it in a little olive oil for a warm sandwich filling.
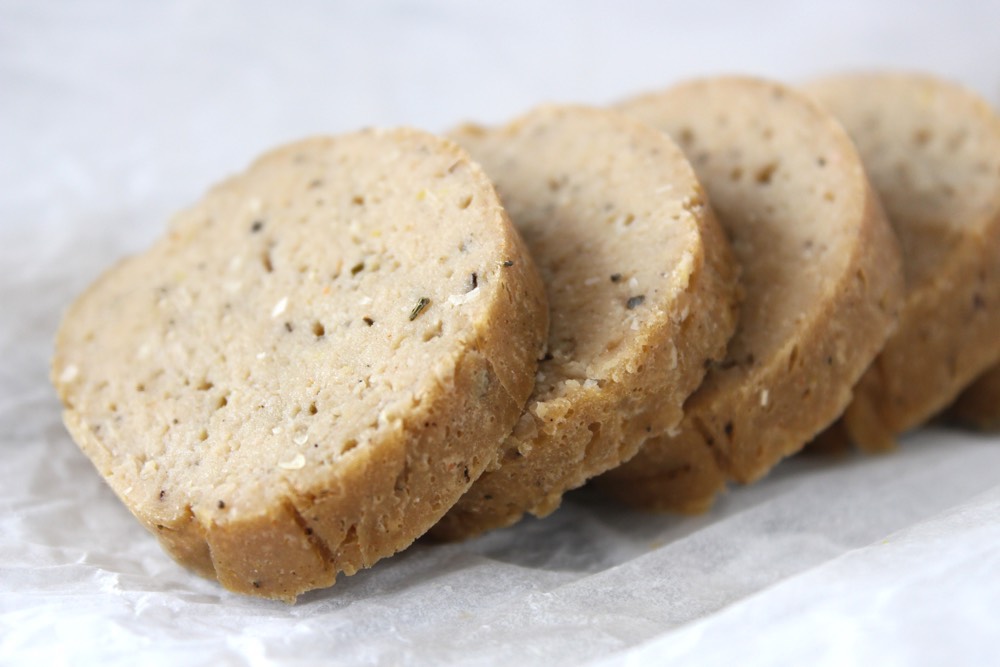
Home-Made Seitan 'Chicken'

Seitan has a super high protein content. Today’s recipe contains a wopping 52% of the protein RDA per 100g. It’s also high in B vitamins and a range of minerals, especially iron, selenium and zinc. It’s low fat and contains zero cholesterol so, providing you’re not gluten intolerant, this recipe makes a tasty, healthy, cruelty-free alternative to chicken.  
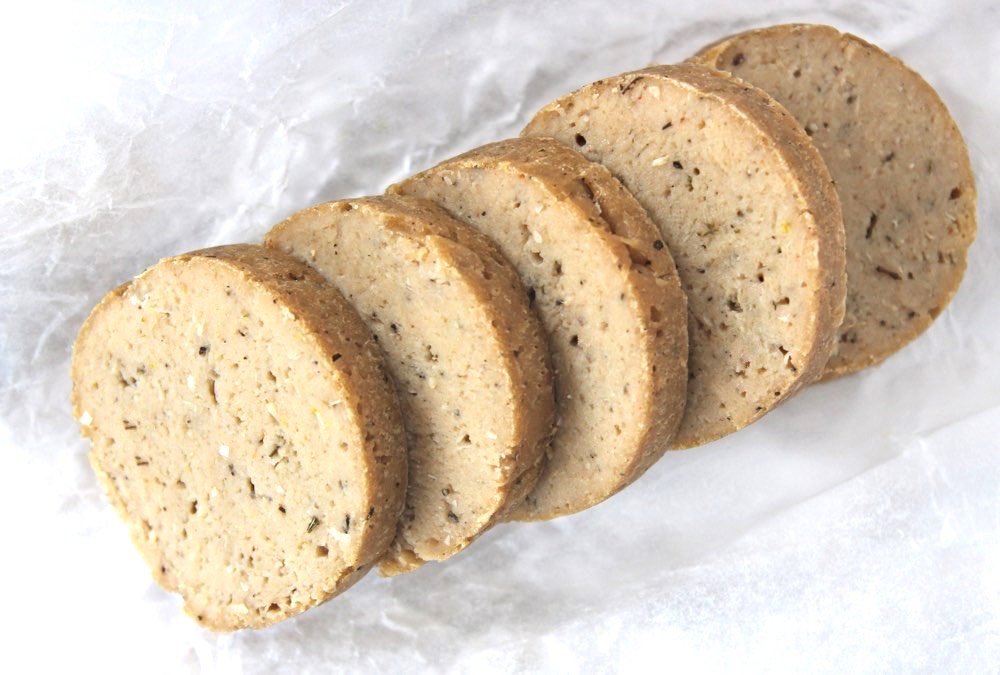
Seitan 'Chicken'

As an added bonus, home-made seitan tends to work out much cheaper than the store-bought meat alternatives. Today’s recipe makes 457g / 16 oz of seitan (which serves four as a main meal), and cost me just £1.77 to make. 

If you’re new to making seitan, rest assured it’s easy to do… especially this recipe! It has three key steps – combining the ingredients, kneading for seven minutes, then steaming for thirty minutes. Job done!
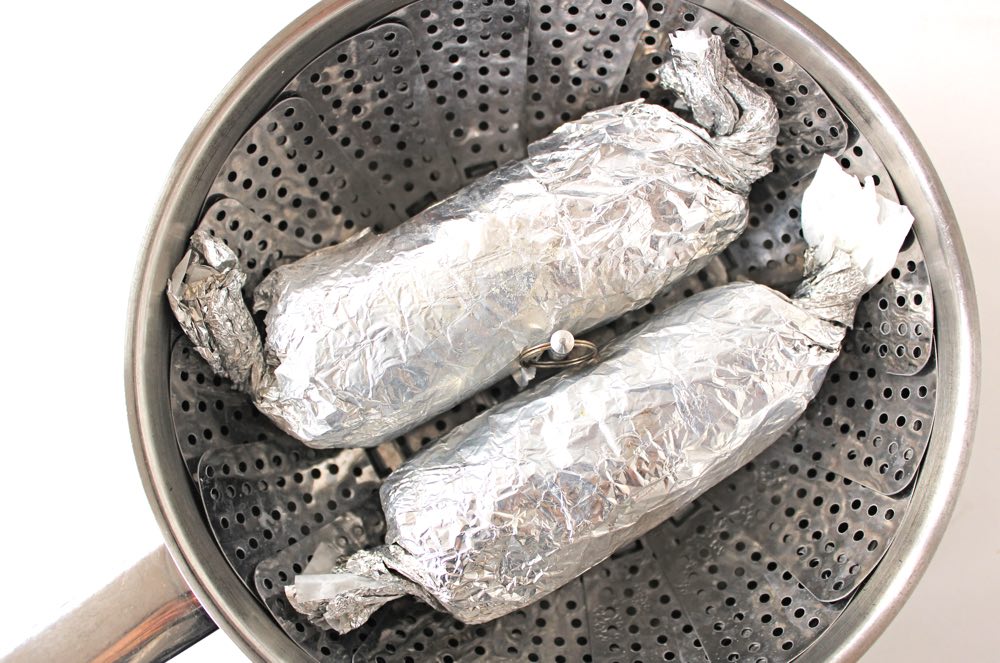
Seitan Chicken Steaming

The inspiration for today’s post was a recipe I spotted in March’s Vegan Life magazine for ‘Butter Chicken’. The dish looked so appetising and I was totally intrigued as to how a vegan version of Butter Chicken would taste, considering it contains no butter or chicken!! The creator of the recipe – Sasha Gill – is an absolute genius as this veganised ‘Butter Chicken‘ is utterly delicious! It makes a wonderful alternative to the original dish, and I’m confident it will appeal to vegans and meat eaters alike!
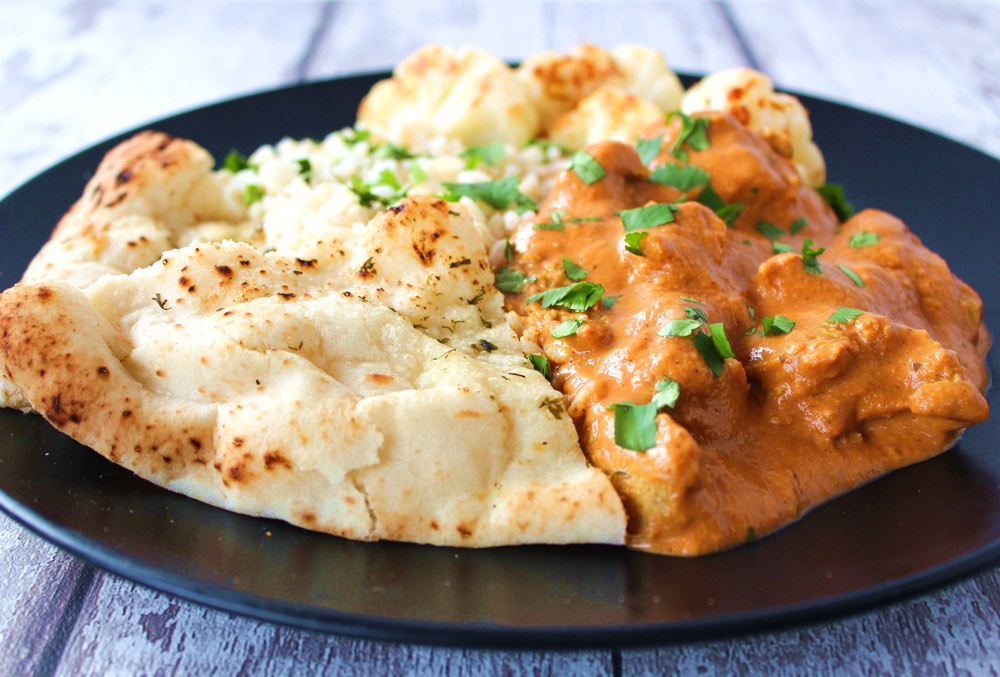
Vegan Butter 'Chicken'

I’m really excited to try this seitan ‘chicken’ in other traditional chicken dishes. I’ll keep you posted on how it goes!

Recipe Card
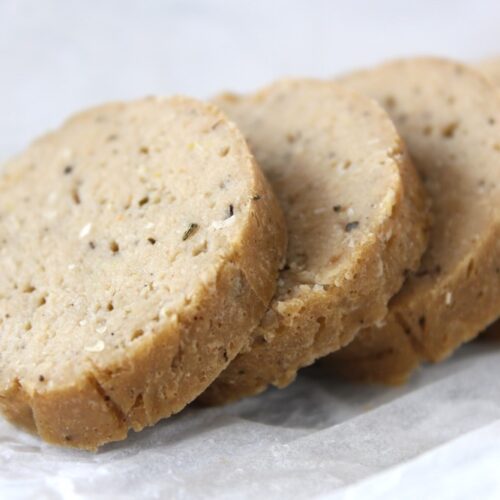
Home-Made Seitan 'Chicken'

Easy Home-Made Seitan ‘Chicken’

This seitan ‘chicken’ is new favourite of mine. It’s easy to make, tastes great and has a succulent, chewy texture. It can be torn into chunks and used as a meat substitute in traditional dishes that call for chicken (such as 'Butter Chicken'), or it can be sliced and used for sandwiches. I especially love to slice it into discs and pan-fry it in a little olive oil for a warm sandwich filling. It's so delicious! 
 
Recipe lightly adapted from Sasha Gill’s Butter ‘Chicken’ from her debut cookbook Jackfruit & Blue Ginger: Asian Favourites, Made Vegan, featured in Vegan Life magazine, Issue 48
5 from 4 votes
Hands-on time 20 minutes
Total Time 1 hour 20 minutes
Course Main Course
Cuisine Chinese

Ingredients
 

  • 180ml / ¾ cup vegetable stock (broth) (I use water and 1 tsp vegetable bouillon powder)
  • 95g / ½ cup cooked butter beans (or chick peas)
  • 4 TBSP nutritional yeast
  • 2 tsp garlic paste
  • 2 tsp chicken-style seasoning (I use 1 tsp dried sage, ½ tsp smoked paprika, ½ tsp dried oregano)
  • 1 tsp onion powder
  • 1 TBSP light tahini
  • ¼ tsp ground cumin
  • ½ tsp salt
  • 135g / 1 cup vital wheat gluten*

Instructions
 

  • In a blender or food processor, whizz all the ingredients except the vital wheat gluten, until smooth.
  • Pour the mixture into a large bowl. Add the vital wheat gluten and stir with a wooden spoon until it forms a wet dough.
  • Knead for about 7 minutes. It is ready once the dough appears drier, has defined strands, and bounces back when stretched.
  • Set a steamer basket over a pan of simmering water.
  • Divide the dough in half and shape into logs. Roll each log tightly, first in non-stick baking paper, followed by foil. Twist the ends to seal it tight, like a sweet wrapper.
  • Steam the seitan for 30 minutes, then remove from the steamer and leave to cool for 30 minutes (I find it firms up as it cools). Tear into chunks and add to any dish that traditionally uses chicken (like ‘Butter Chicken’). Alternatively, cool completely and store in an airtight container in the fridge for up to five days.

Notes

* The key ingredient in seitan is a type of flour called ‘vital wheat gluten’. It’s this flour which provides seitan with its characteristic firm, chewy consistency. In the UK, vital wheat gluten is currently available from independent health food shops, as well as online.
Keyword Meat Alternative, Seitan, Vegan
Tried this recipe?Let us know how it was!

Nutritional Breakdown

N.B. The above values are estimates. The actual nutritional values will vary depending on the brands and ingredients used.

Products used in this recipe:
– Suma Vital Wheat Gluten (available in the UK from independent health food shops and online)
– Marigold Swiss Vegetable Vegan Bouillon Powder
– Suma Organic Light Tahini, available from independent health food shops. (Tahini is also widely available in UK supermarkets)
– Onion powder – available in the UK from independent health foods shops and online
– Marigold Engevita Nutritional Yeast Flakes with B12, available from health food shops, some supermarkets (I found it in my local Waitrose and Aldi recently!) and online 

Pin for later ⬇️
Vegan Butter 'Chicken'

Big thank you to Sasha Gill and Vegan Life magazine for the inspo!

If you make this Seitan ‘Chicken’ (or any other recipes on my blog), I’d love to hear your feedback and any suggestions for adaptations! Tag your photos with #bitofthegoodstuff on social media – I always love to see your creations! You can also connect with me on my social media channels here: Instagram, FacebookPinterest.   

With love,

Sharon xx

Chinese Egg-Fried Rice … Vegan Style!

Jump to Recipe

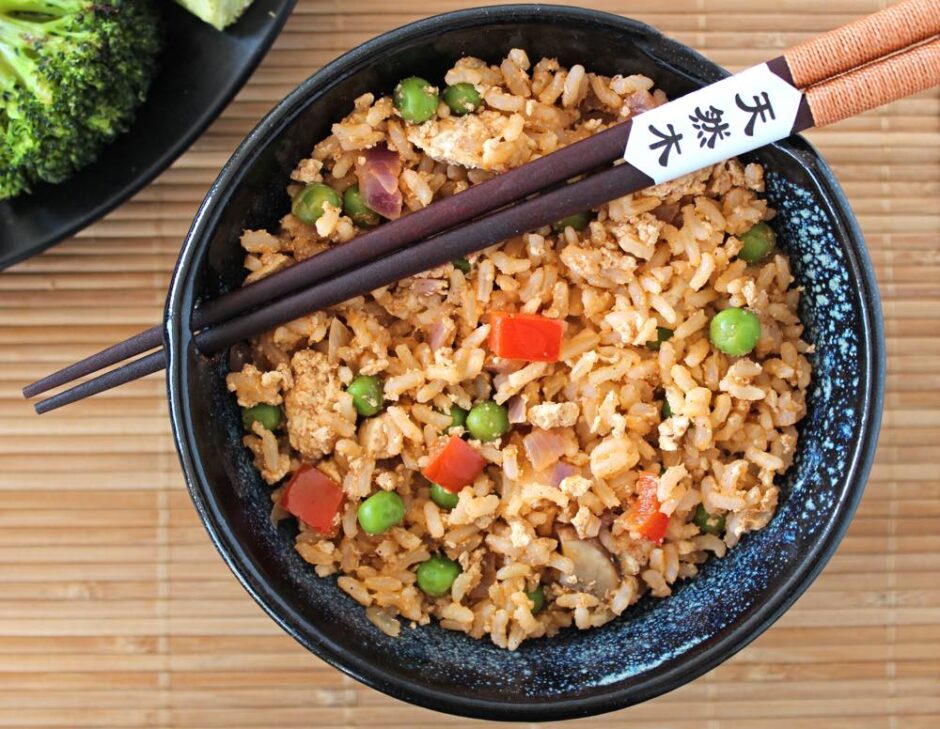
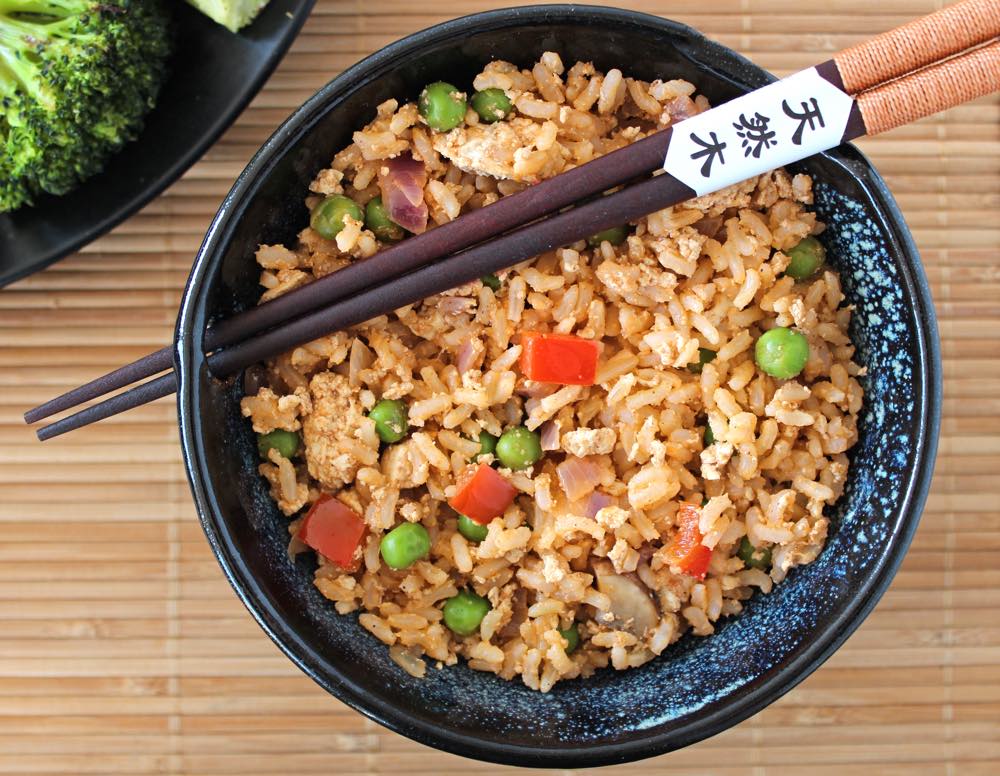
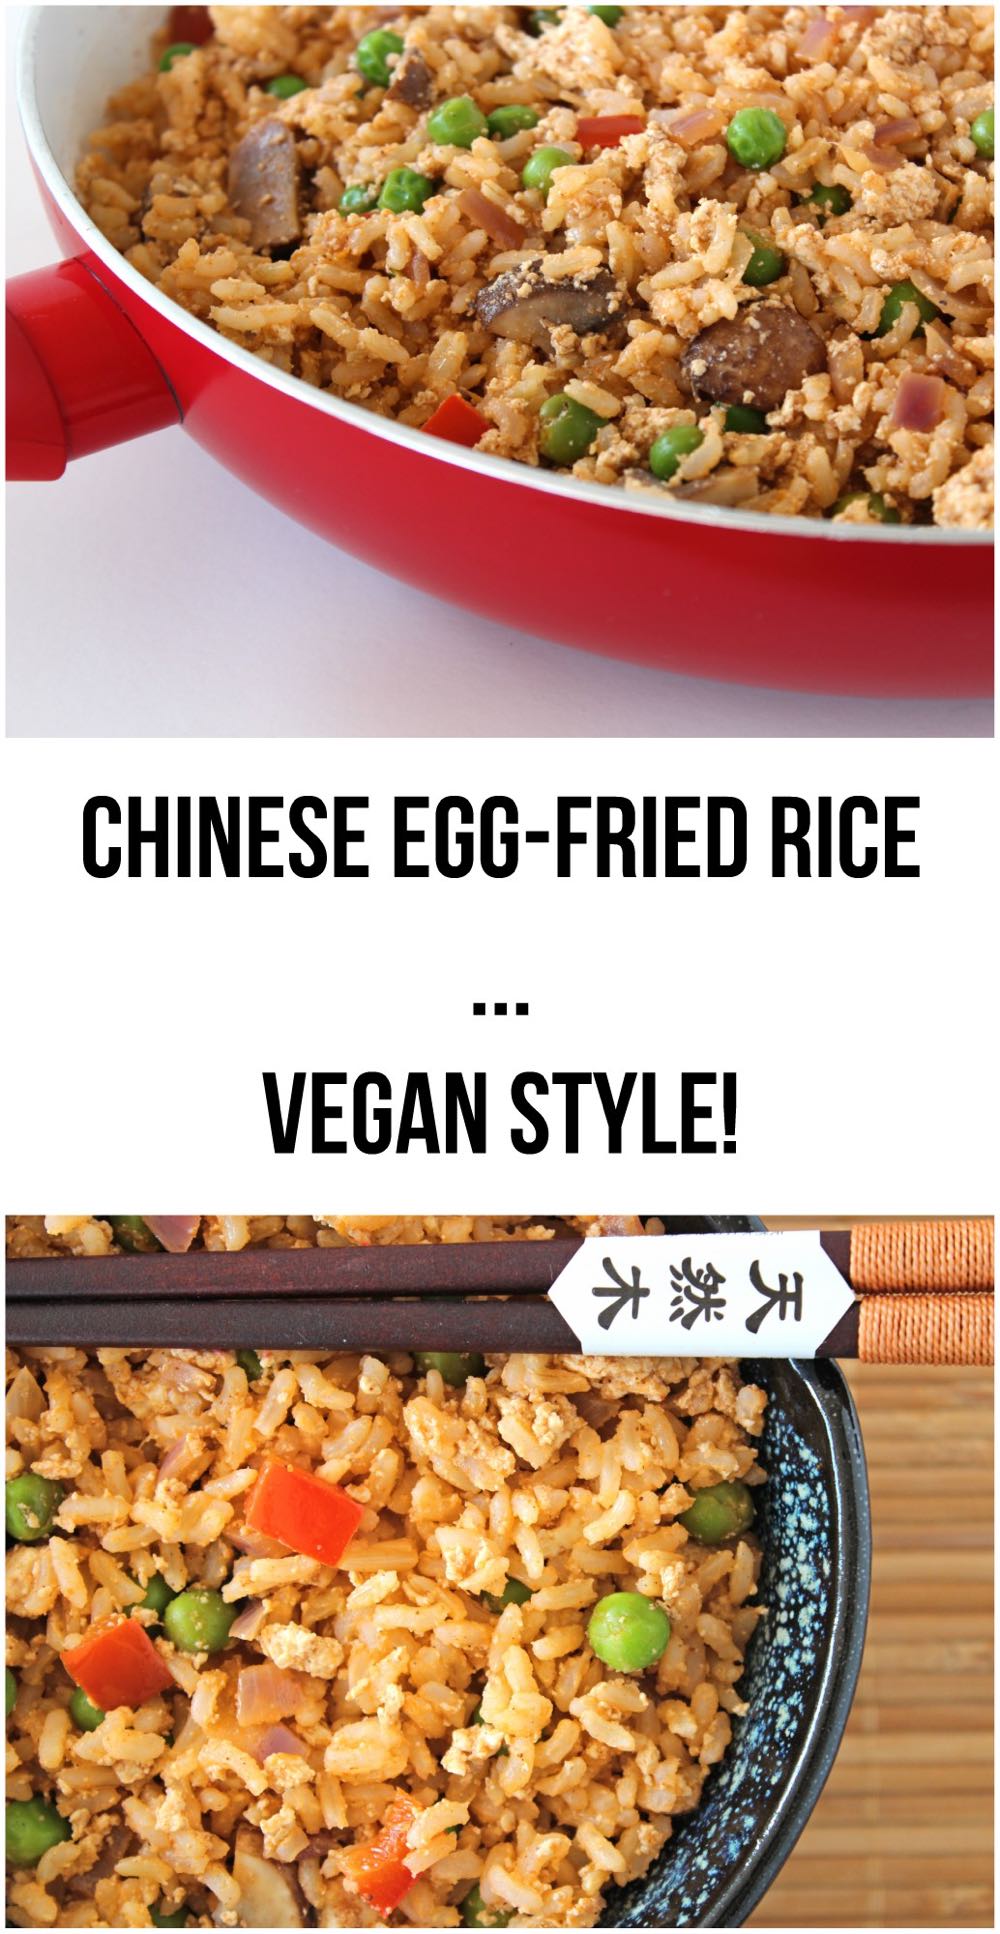
In today’s post, I’m sharing a recipe for a Chinese “Egg-Fried” Rice that’s perfect for serving any night when you need a quick and easy meal on the table. Not only is it tasty, but it’s also packed full of nutritional goodness. It’s especially rich in protein, vitamins A, B and C, and an array of minerals. It’s also much lower in fat than traditional Chinese egg-fried rice and contains zero cholesterol.

And, most importantly, it’s cruelty free! No hens or chicks were harmed in the making of this meal!

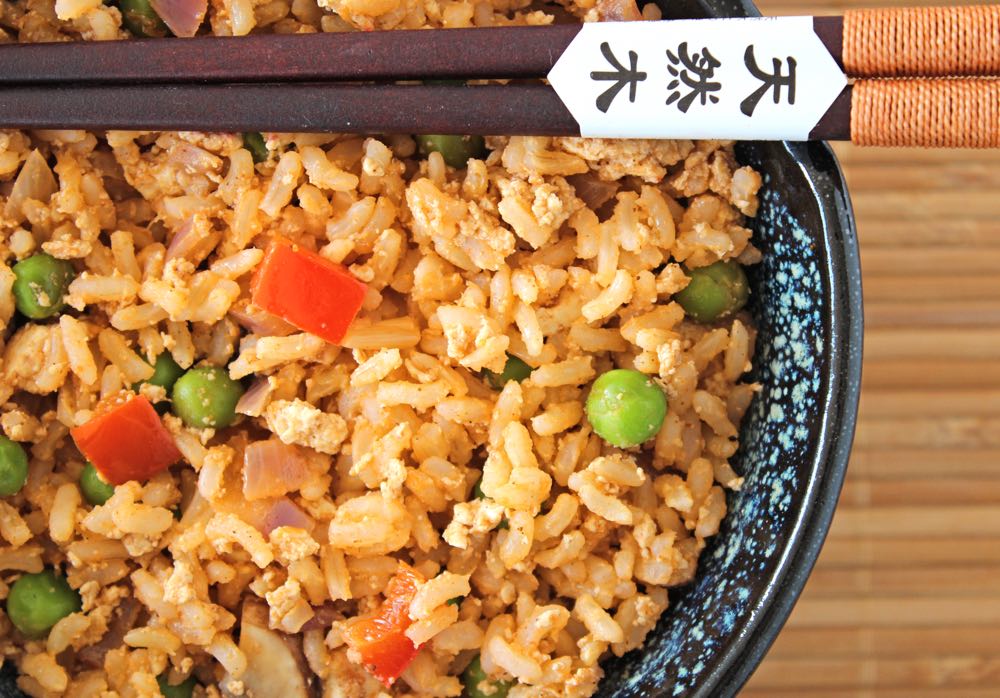
Chinese Egg-Fried Rice - Vegan Style

A few years ago, I discovered that tofu makes a fantastic egg replacer for Chinese egg-fried dishes. Crumbled, seasoned and stirred through rice or noodles, its texture and appearance have an uncanny resemblance to egg, which is pretty weird when you consider that tofu is made from beans!

I like to use calcium-set tofu as it’s a quick way to boost the family’s calcium levels. Here in the UK, the one brand of tofu that I’ve found to be calcium-set is Cauldron Foods Organic Tofu. (And fortunately, this is the one that’s widely available in our supermarkets right now!) According to the FAQ page on the Cauldron Foods website, a 100g serving (¼ pack) of their tofu provides around 40% of the recommended daily amount of calcium.

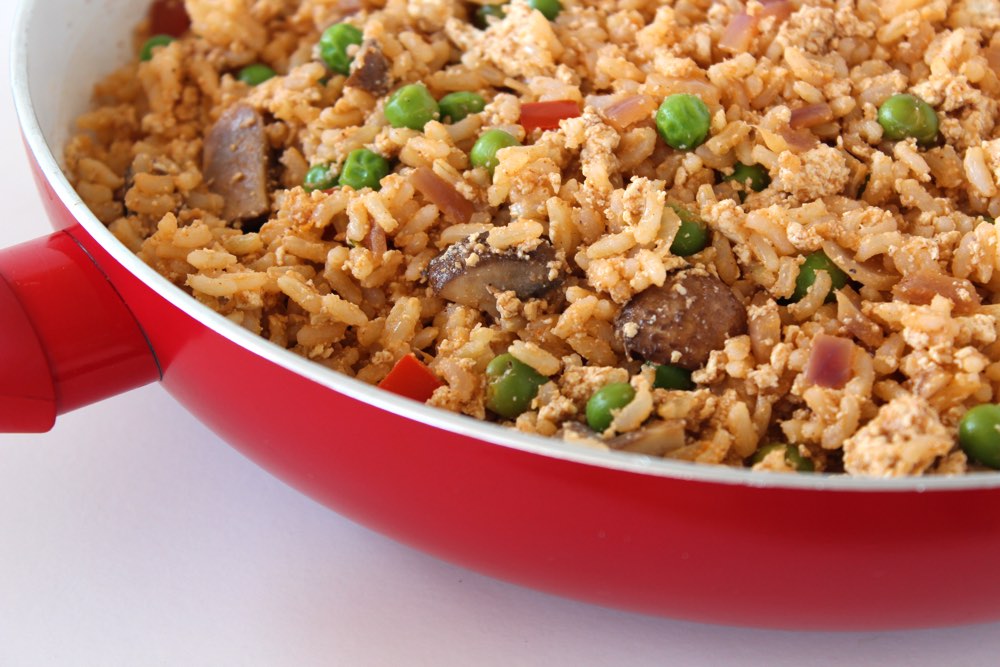
Chinese Egg-Fried Rice - Vegan Style

Back in 2014, I shared a recipe for Vegan Egg-Fried Noodles, but my family’s favourite Chinese Egg-Fried Rice still hadn’t made its way onto the blog. It was high time for me to put that right! Since Thursday is typically ‘Rice Night’ in our house, I made sure to photograph our dinner last night before we devoured it. That way, I would have some pictures to share alongside the recipe today.

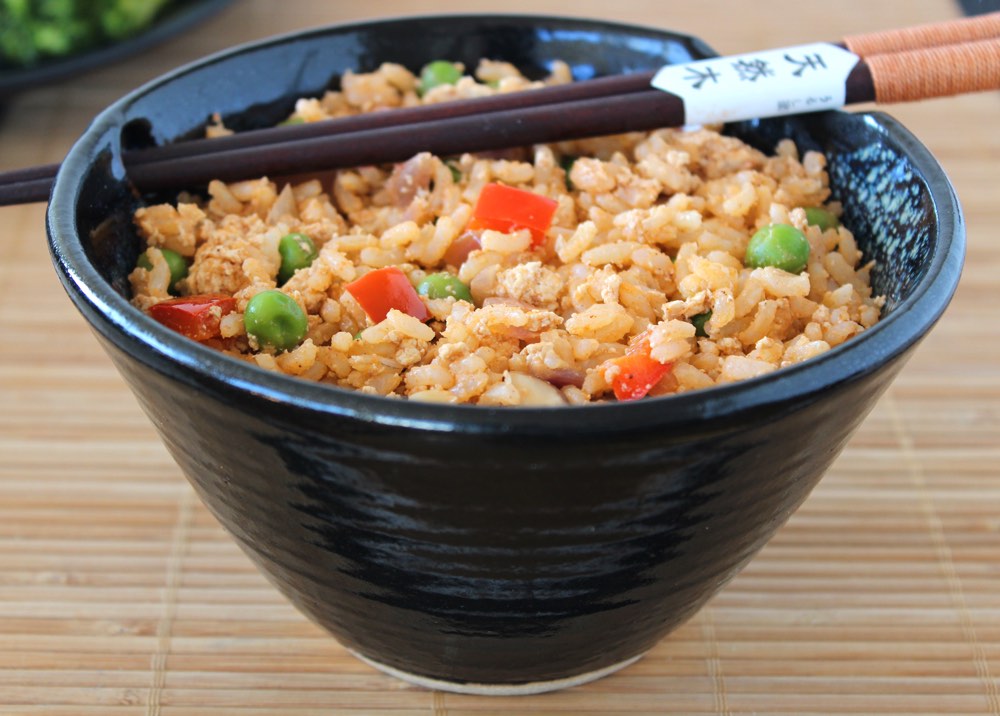
Chinese Egg-Fried Rice - Vegan Style

The dish is really simple to make. While the rice is cooking, pan fry some veggies and crumbled tofu, then whisk together the marinade and pour it into the pan. When the rice is cooked, stir it through the veggies then it’s ready to serve.

The choice of veggies to include in the fried rice is entirely yours. I add red pepper and green peas as they’re so colourful. Mushrooms are great for savouriness and some chewy texture. If you wish, you could even add in some vegan meat alternatives like Iceland’s “No Chick” strips or Oumph’s “The Chunk” to make a vegan style “Chicken” Fried Rice.

Recipe Card

Chinese Egg-Fried Rice - Vegan Style

Chinese Egg-Fried Rice… Vegan Style!

This vegan version of Chinese egg-fried rice is packed with plant-based goodness. It makes a great weeknight meal, either served on its own or with a side-dish of green veggies (we love roasted broccoli!)
Hands-on time 20 minutes
Total Time 35 minutes
Course Dinner
Cuisine Chinese
Servings 4

Ingredients
 

  • 290 g / 1½ cups brown rice
  • 1 TBSP toasted sesame oil divided
  • 1 large onion diced
  • 2 tsp minced garlic
  • 1 small red bell pepper deseeded and diced
  • 125 g / 1½ cups mushrooms chopped
  • 400 g / 14 oz firm tofu
  • tsp Chinese Five Spice
  • 190 g / 1½ cups frozen peas*

Marinade

  • 1 TBSP toasted sesame oil
  • 1 TBSP reduced-salt soy sauce use tamari for a GF option
  • 1 TBSP white miso or substitute with another 1 TBSP soy sauce
  • 2 TBSP tomato puree (paste)
  • ½ TBSP maple syrup or to taste
  • ¼ tsp Chinese Five Spice

Instructions
 

  • Cook the brown rice.**
  • When the rice has been cooking for about 10 minutes, gently heat ½ TBSP oil in a large, deep-sided frying pan (skillet). Add the onion and cook on medium heat for a couple of minutes.
  • Add the garlic, bell pepper and mushrooms and continue cooking for a further 2-3 minutes.
  • Drain the tofu and crumble it into the pan. Sprinkle the Chinese Five Spice on top, and stir through.
  • Add all the marinade ingredients to a small bowl and whisk with a fork until fully combined. Set aside about 1 TBSP of the marinade and pour the remainder into the pan. Stir through until the tofu is thoroughly coated.
  • Add the frozen peas and continue cooking for 5-6 minutes, stirring occasionally, until the peas are heated through.
  • When the rice is ready, drizzle in ½ TBSP toasted sesame oil and stir through. Add the 1 TBSP marinade that you set aside and continue stirring until the rice is fully coated.
  • Add the rice to the frying pan, a couple of a scoops at a time, stirring each time to combine.
  • Arrange the rice in warm bowls and serve. Any leftovers can be stored in the fridge for 24 hours. As with any rice dish, make sure that the rice is chilled within an hour of cooking.

Notes

* If you’re planning to re-heat this dish, it’s is best to omit the frozen peas as the instructions on the packet state ‘do not reheat’.
** Here’s how I cook brown rice using the absorption method: First, rinse the rice in a fine mesh sieve under running cold water, agitating the grains with your hand until the water runs clear. Place the rice in a large heavy-bottomed saucepan along with double the volume of water (e.g. 1½ cups rice & 3 cups water). Bring to the boil, then reduce the heat and simmer uncovered for 10 minutes. Reduce the heat to very low, cover with a tight-fitting lid and cook for a further 20 minutes. When air pockets have appeared in the rice, it’s ready.
Keyword Dairy-Free, Easy Vegan Meals, Egg-Free, Plant-Based, Rice, Tofu
Tried this recipe?Let us know how it was!

Nutritional Breakdown

N.B. The above values are estimates. The actual nutritional values will vary depending on the brands and ingredients used.

Products I used in this recipe…
Cauldron Foods Organic Tofu
Meridian Organic Toasted Sesame Oil
Kikkoman Less Salt Soy Sauce
Clarks Original Maple Syrup
Clearspring Sweet White Miso
Suma Chinese Five Spice

Pin for later ⬇️

Chinese Egg-Fried Rice... Vegan Style

If you make this Chinese Fried Rice, I’d love to hear your feedback and any suggestions for adaptations! Tag your photos with #bitofthegoodstuff on social media – I always love to see your creations! You can also connect with me on my social media channels here: Instagram, Facebook, Pinterest.   

With love,

Sharon xx
Creamy Vegan Mushroom Carbonara (20 Minute Recipe)

Jump to Recipe

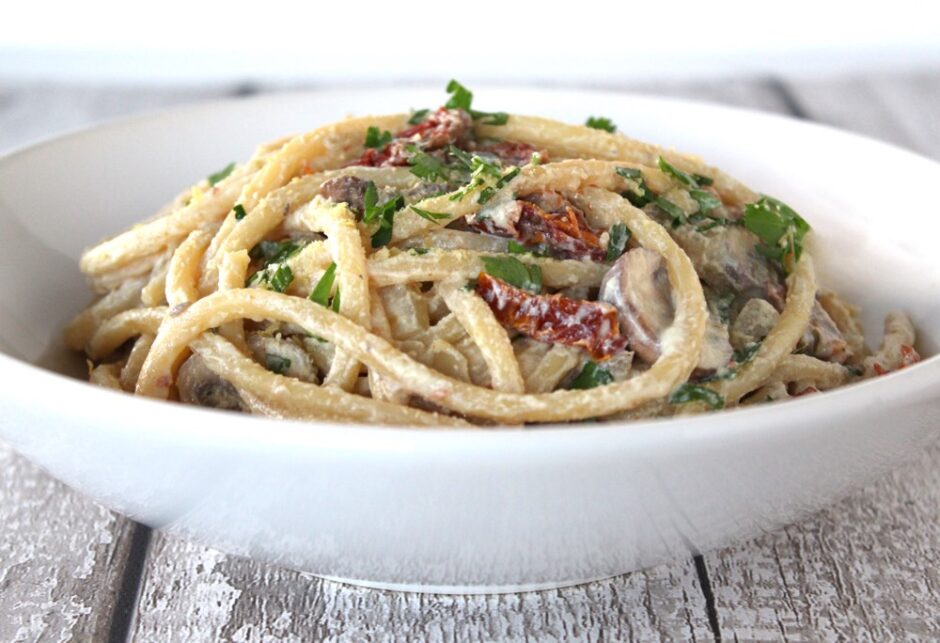
Hi everyone! Today, I’m sharing a delicious vegan twist on the traditional pasta dish ‘Carbonara’. It’s really easy to make and takes just 20 minutes from start to finish, making it perfect for any night when you need a quick meal on the table.

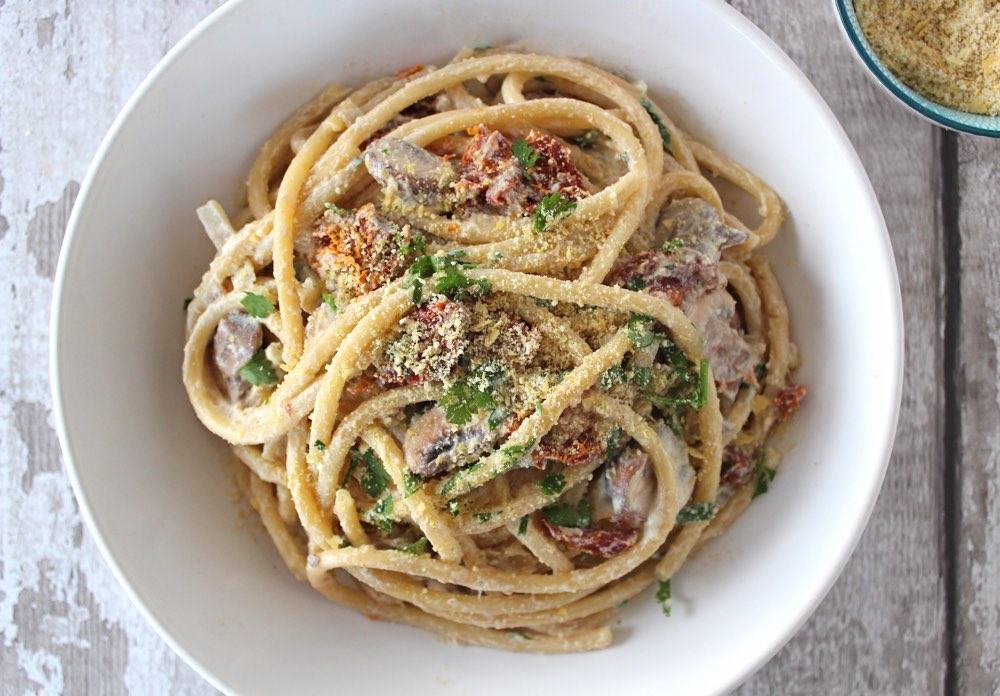
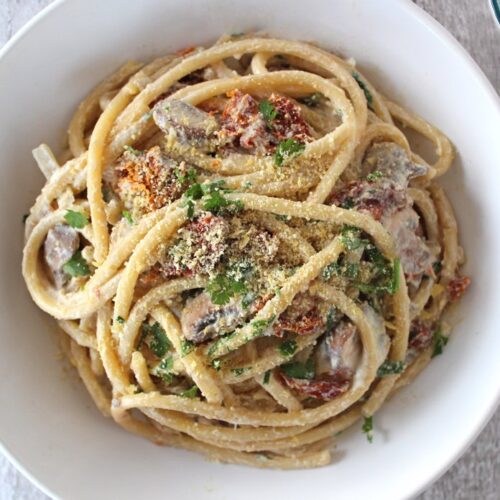
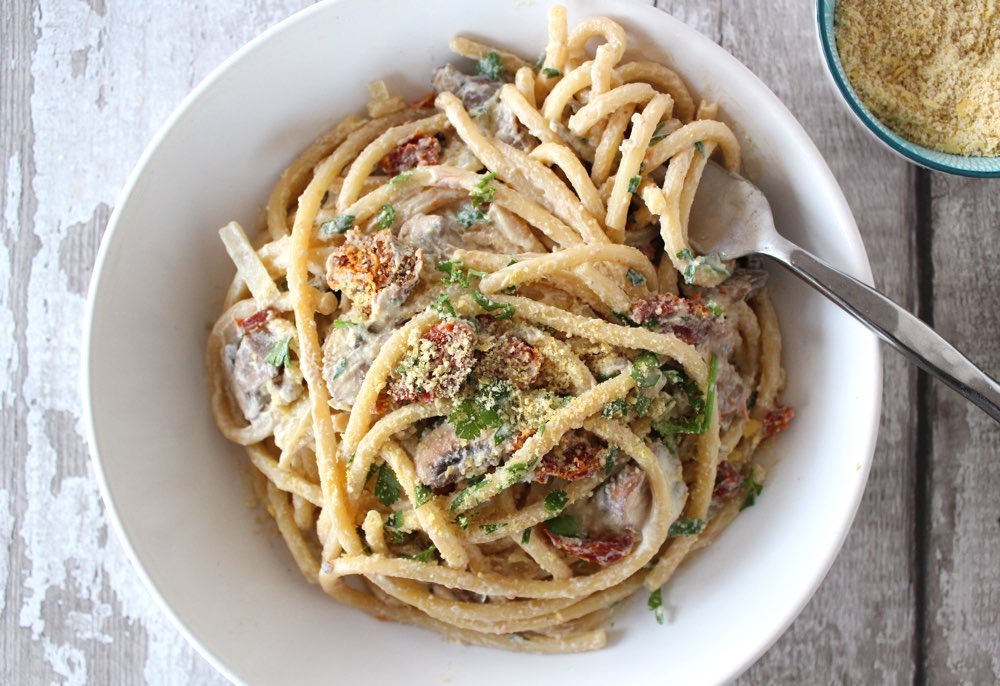
Creamy Vegan Carbonara


Carbonara is traditionally made with cheese, pork and eggs (or cream), so not vegan-friendly at all. These ingredients also make it high in saturated fat and cholesterol (so not great for heart health or waistlines either!)

In contrast, this creamy, plant-based version that I’m sharing today is actually good for you! Not only is it low in saturated fat and with zero cholesterol, but it also contains a whole host of vitamins, minerals and other plant compounds that promote good health. It is also high in protein, with each serving providing 26 grams!

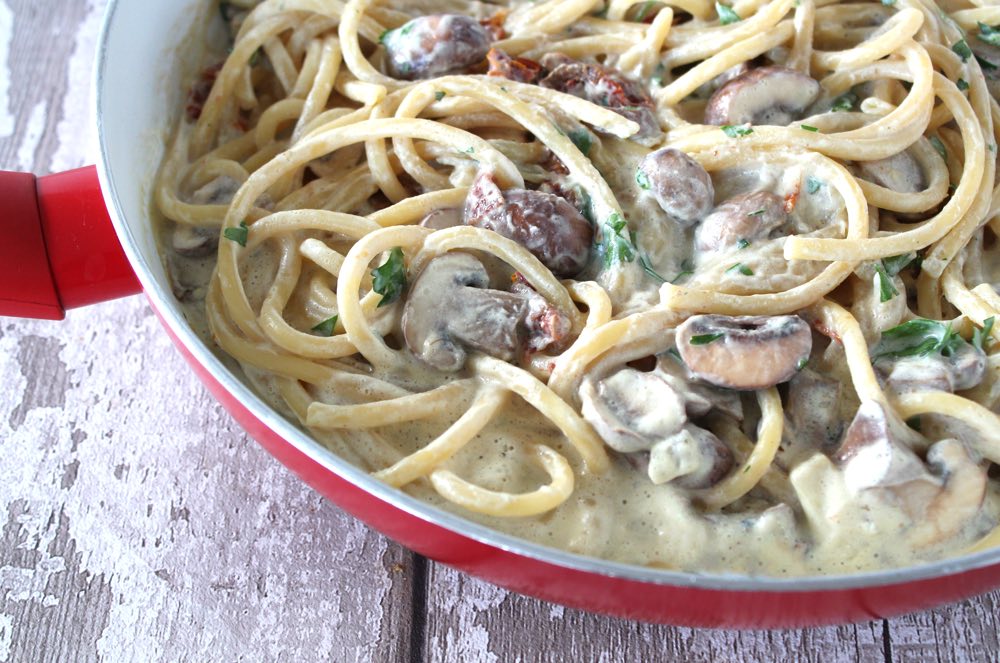
Check out how creamy this sauce is…

Creamy Vegan Carbonara

… and it doesn’t contain any cream, cheese or eggs. Amazing!!

So how do we make a carbonara sauce using plant-based ingredients? There are a number of ways to achieve this, such as blending cashews or by making a roux using flour and dairy-free vegetable spread. However, the secret ingredient we used for this carbonara was silken tofu.

Silken tofu is much softer and creamier than regular tofu, making it ideal for blending into creamy sauces, dips and desserts. It also makes a great egg replacer for egg-centric dishes like Frittata and Spanish Omelette.

Here in the UK, silken tofu can be found in the world food section of major supermarkets (usually with the Japanese foods), as well as Asian supermarkets and health food shops.

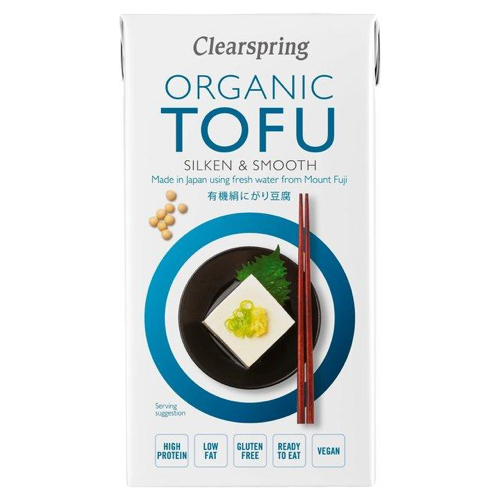
Clearspring Silken Tofu

Traditional carbonara also includes pancetta (cured pork belly) or guanciale (cured pork cheeks). Incredibly, there are vegan pork alternatives, including vegan bacon lardons now available in UK supermarkets. If you’re into meaty flavours and textures, this kind of option would definitely be worth trying as a healthier, cruelty-free alternative to pork. My family opted to use slices of sun-dried tomato instead. This worked well, adding bites of rich, savoury flavour and chewy texture.

Mushrooms also work really well in this pasta dish, adding extra savouriness and chewy texture, so don’t hold back if you’re a mushroom fan. I used baby chestnut mushrooms sliced but I imagine that shiitake mushrooms would work great too.

Creamy Vegan Carbonara

While spaghetti is the most common pasta used for carbonara, you can basically use any kind of long pasta. I used bucatini, which is like spaghetti but a bit fatter and hollow. It’s great for soaking up sauces plus you can whistle through the long tubes which is a bit of a novelty.

Recipe Card

Creamy Vegan Carbonara

Creamy Vegan Mushroom Carbonara

This vegan twist on the traditional dish ‘Spaghetti Carbonara’ is perfect for any night when you need a quick, easy meal on the table. Not only will it rival its traditional counterpart when it comes to creamy deliciousness, but it beats it hands down when it comes to nutritional goodness. It’s been a big hit with our family and we hope you love it too!
5 from 1 vote
Hands-on time 20 minutes
Total Time 20 minutes
Course Main Course
Cuisine Italian
Servings 4

Ingredients
 

  • 400 g / 14 oz spaghetti, bucatini or other long pasta (use GF pasta, if needed)
  • ½ TBSP olive oil
  • 1 white onion diced
  • 1 tsp minced garlic
  • 250 g / 3½ cups mushrooms sliced
  • 300 g / 10½ oz silken tofu
  • 240 ml / 1 cup fortified soya milk or other plant milk
  • 1 tsp vegetable bouillon powder or crumbled stock cube
  • 3 TBSP nutritional yeast flakes
  • ½ TBSP white miso optional, but highly recommended as it adds a delicious umami flavour
  • 8-10 sun-dried tomatoes in oil drained and sliced
  • salt and freshly ground black pepper, to taste

Garnish

  • 4 TBSP vegan parmesan (I used home-made cashew parmesan, recipe below)
  • 2 TBSP flat leaf parsley optional

Instructions
 

  • Heat a large pan of water and cook the pasta as per the instructions on the packet.
  • Gently heat the oil in a large, deep-sided frying pan (skillet) and add the onions and garlic. Slice the mushrooms and add them to the pan. Stir through.
  • Place the silken tofu, milk, vegetable bouillon powder, nutritional yeast flakes and white miso in a blender and whizz smooth (alternatively use a bowl and stick blender). Pour the sauce into the pan with the onions and mushrooms and stir through. Continue cooking at a gentle simmer.
  • When the pasta is ready, drain and add it to the frying pan. Add the sun-dried tomatoes and stir through. Season with salt and pepper, to taste.
  • Serve in warm bowls with a sprinkling of chopped parsley and vegan parmesan. We also love to add some roasted broccoli on the side for extra goodness.
  • If you have used a wheat pasta, any leftover carbonara can be stored in the fridge for 24 hours. Re-heat in a large frying pan (skillet). Add a generous splash of plant milk to refresh the sauce. Stir regularly until heated through evenly. Alternatively, you can store the sauce separately in the fridge for 3-5 days and cook the pasta fresh.
Keyword Dairy-Free, Family Friendly, Gluten-Free Option, Plant-Based, Vegan Dinners, Vegan Pasta Dish
Tried this recipe?Let us know how it was!

Cashew ‘Parmesan’

This dairy-free ‘parmesan’ uses just two nutrient-rich ingredients which are ground together to make a cheesy, savoury condiment that’s perfect for sprinkling on pasta dishes.
5 from 1 vote
Hands-on time 5 minutes
Total Time 5 minutes

Ingredients
 

  • 40 g / ¼ cup cashews
  • 18 g / ¼ cup nutritional yeast flakes
  • pinch of salt optional

Instructions
 

  • Place the ingredients in a mini food processor or chopper and pulse into fine crumbs. Store in an airtight jar in the fridge, where it will keep for weeks.
Tried this recipe?Let us know how it was!

Nutritional Breakdown

N.B. The above values are estimates. The actual nutritional values will vary depending on the brands and ingredients used.

Products used in this recipe
Clearspring Organic Tofu – Silky and Smooth (bought from Waitrose)
Waitrose 1 Bucatini pasta
Marigold Organic Vegan Swiss Vegetable Bouillon Powder
Marigold Engevita Nutritional Yeast Flakes with B12
Miso Tasty Organic White Miso
Optimum Nutri Force Extractor Compact Blender

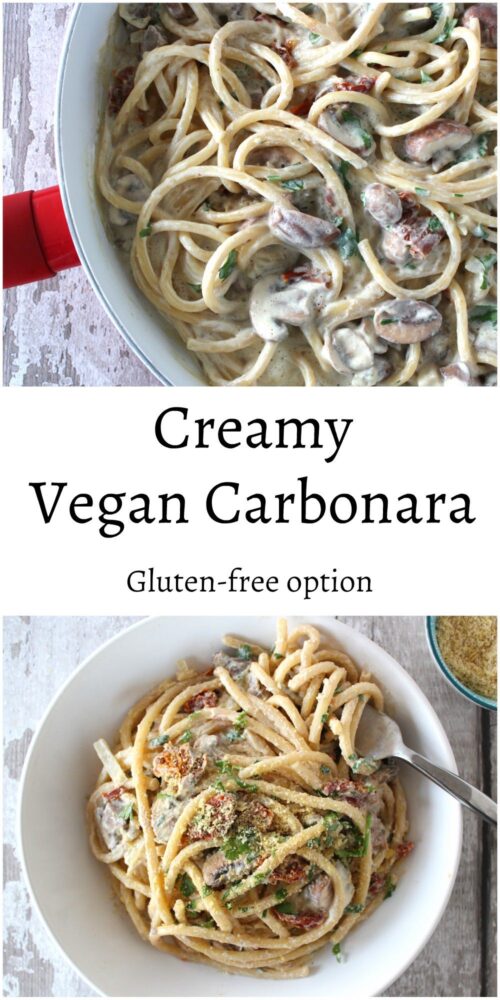
Pin for later ⬇️

Creamy Vegan Carbonara

I hope you’ve had a great start to 2019 everyone! And if you make this Creamy Vegan Carbonara, I’d love to hear your feedback and any suggestions for adaptations! Tag your photos with #bitofthegoodstuff on social media – I always love to see your creations! You can also connect with me on my social media channels here: InstagramFacebookPinterest.   

With love,

Sharon xx

READER REMAKES 💚

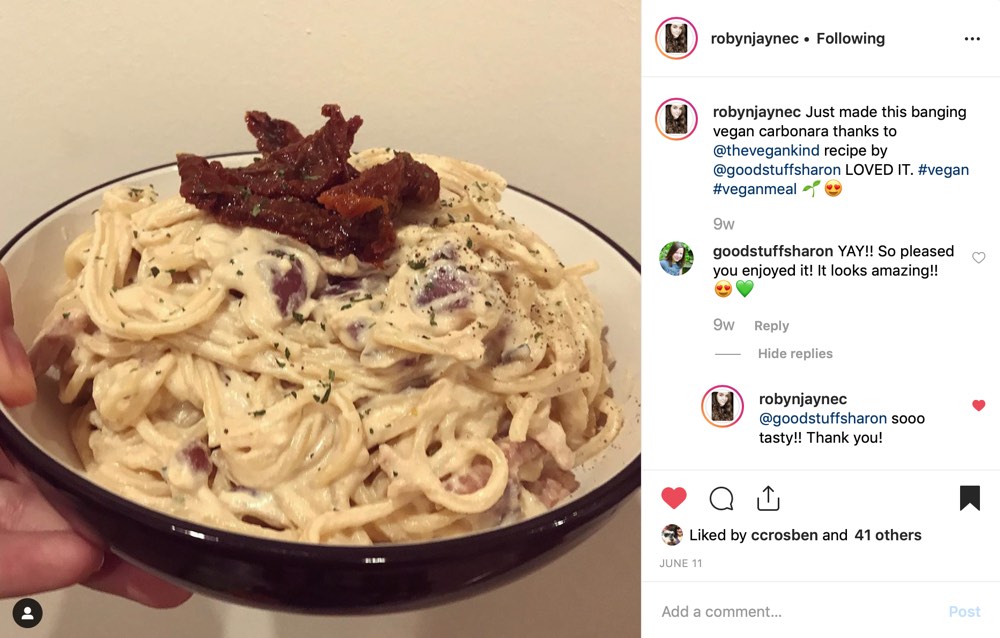
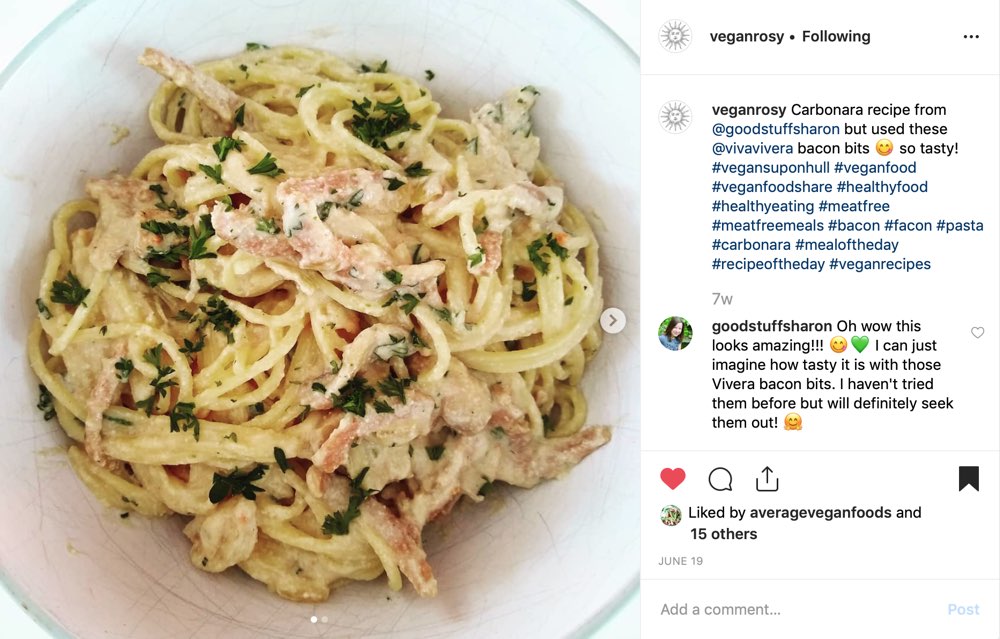
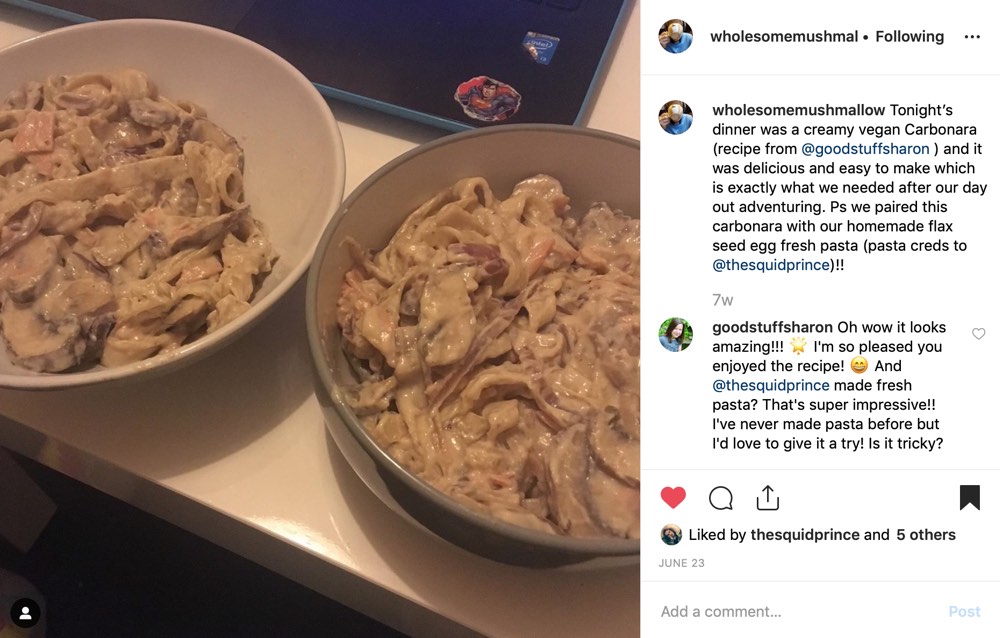
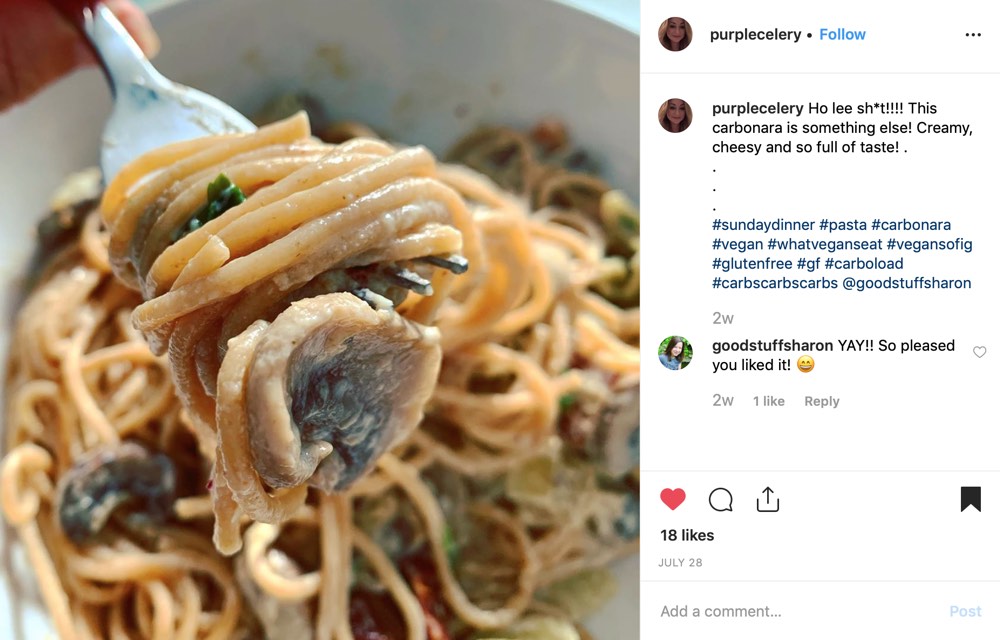
Been loving all your carbonara remakes! Here’s a selection from Instagram…

Creamy Vegan Carbonara
@robynjanynec
Creamy Vegan Carbonara
@veganrosy
Creamy Vegan Carbonara
@wholesomemushmallow
Creamy Vegan Carbonara
@purplecelery

Vegan Carrot Cake with Cream Cheese Frosting

Jump to Recipe

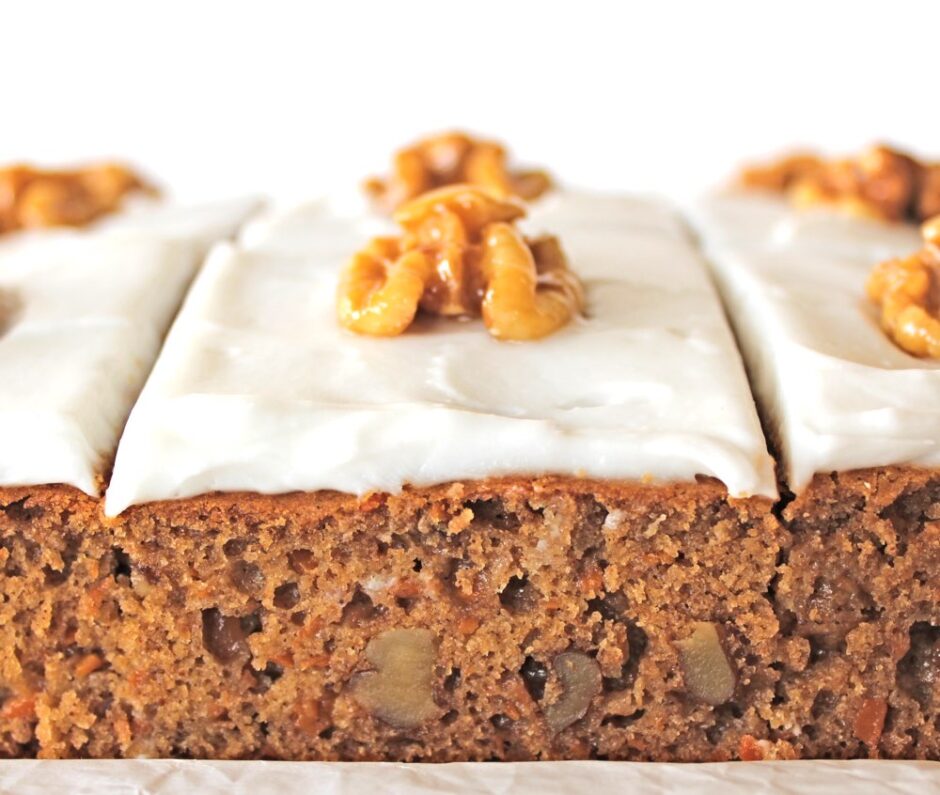
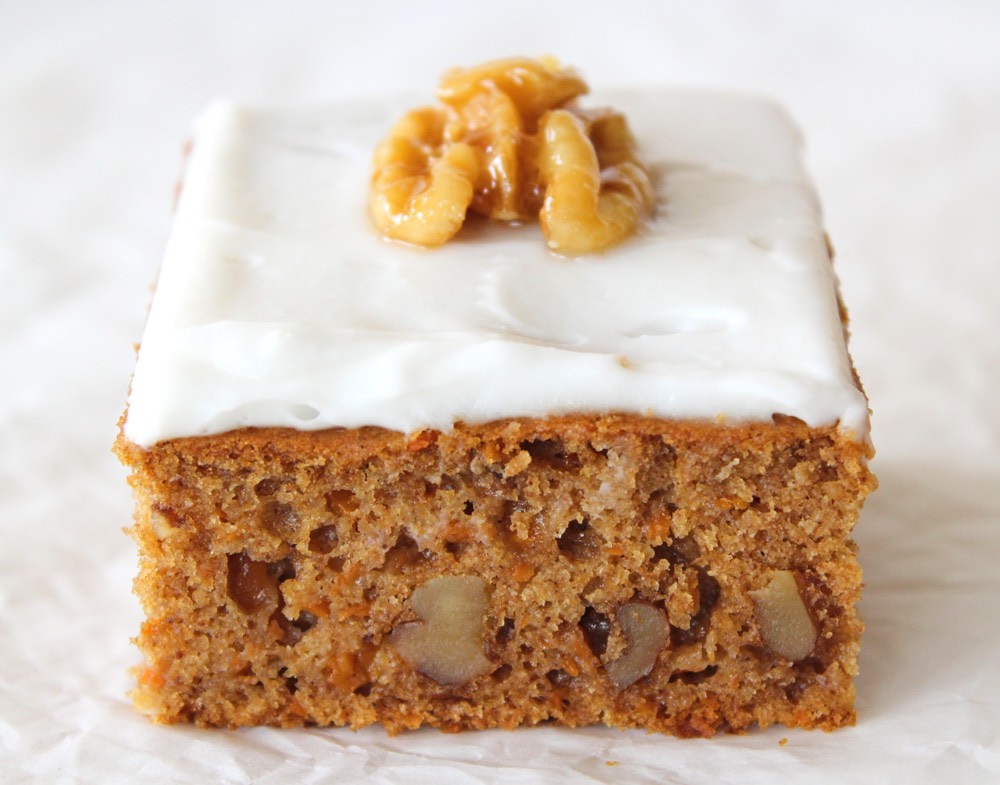
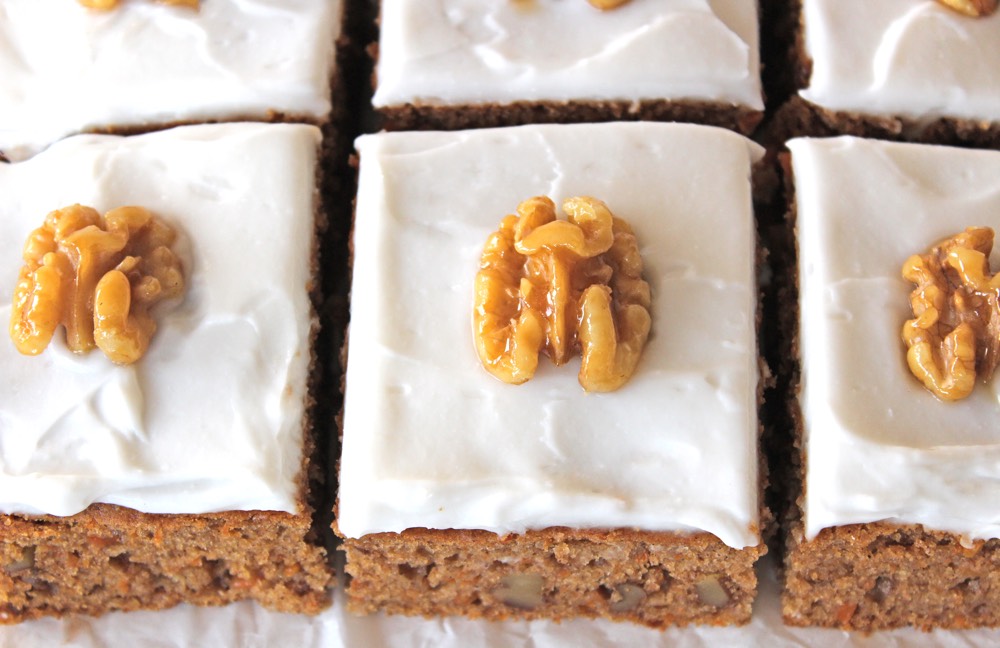
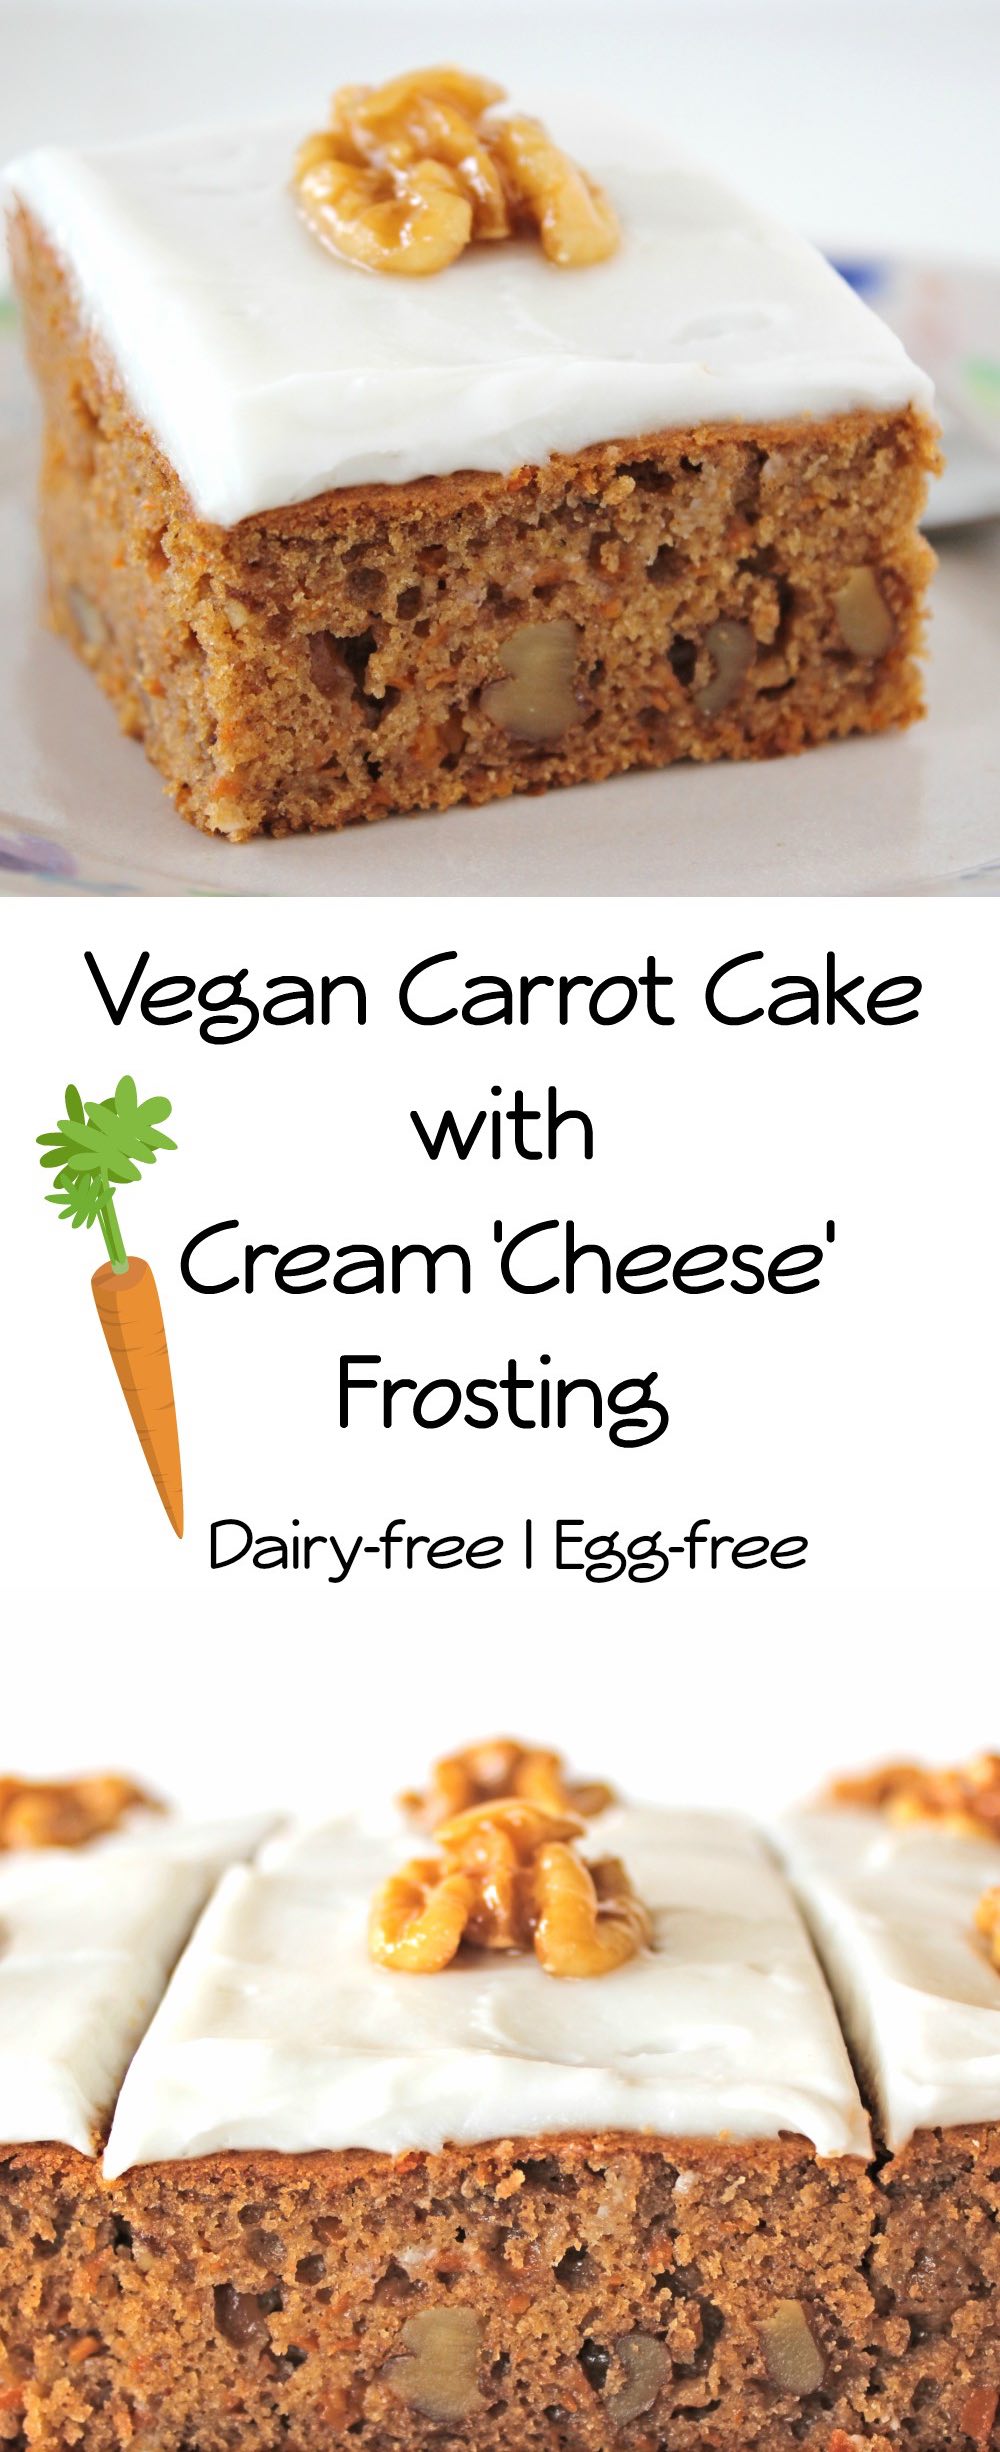
Today, I’m finally publishing my recipe for vegan carrot cake. It contains no dairy or eggs, yet tastes just as good (if not better!) than its traditional counterpart. This was the cake that I chose to bake for my mum’s and father-in-law’s birthdays this year and I’m pleased to say, it went down a treat!

Vegan Carrot Cake

I must admit, this recipe has been a long time coming (the culmination of about two years’ worth of experimenting!) Carrot cake is one of my all-time favourites so I was determined to keep experimenting until I’d created a vegan version that replicated the one of my childhood memories. I had set the bar high!

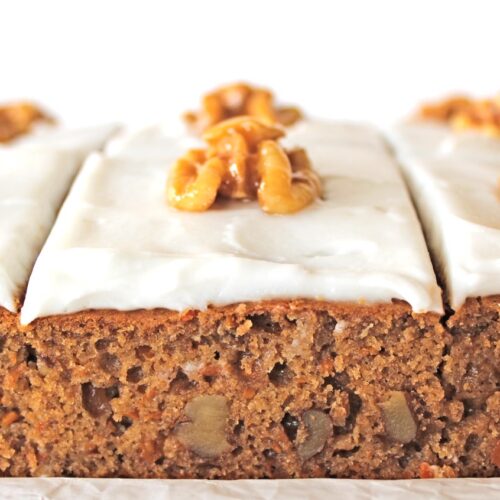
My family were very willing cake testers and gave positive feedback on all the various versions I created but, for me, they were never quite right. The main issue that I needed to nail was the texture. If you’re a carrot cake connoisseur, you’ll know that it has a very specific texture. It isn’t like a traditional ‘light and fluffy’ sponge cake. It’s a lot more dense and moist; almost fudge-like.

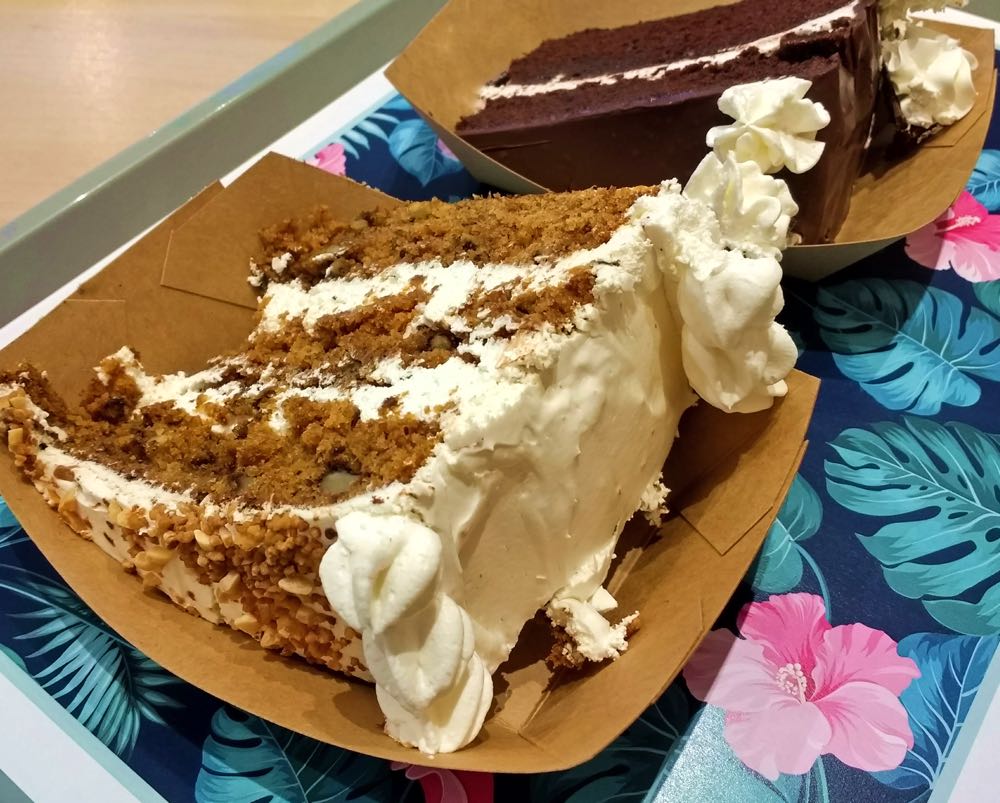
It had been at least 20 years since I’d eaten a traditional carrot cake so my reference point was pretty old (and with questionable reliability!) but this Easter I finally got to indulge in carrot cake once more; and at the most unexpected of places… the vegan fast food joint ‘Vurger’ in Valencia, Spain.

Vegan Carrot Cake

After we’d ordered our burgers and were making our way to the seating area, I caught sight of a glass cabinet filled with the most incredible-looking cakes. Each one was at least three layers tall and covered in the most beautiful frosting. There were a selection of flavours on offer, including double chocolate, chocolate cherry, and carrot cake. Much to our delight, we discovered that another vegan fast food joint called ‘Aloha’ also stocked these beautiful cakes. My family ended up going to Vurger and Aloha three times, just so we could try out all the cakes!

Vegan Carrot Cake

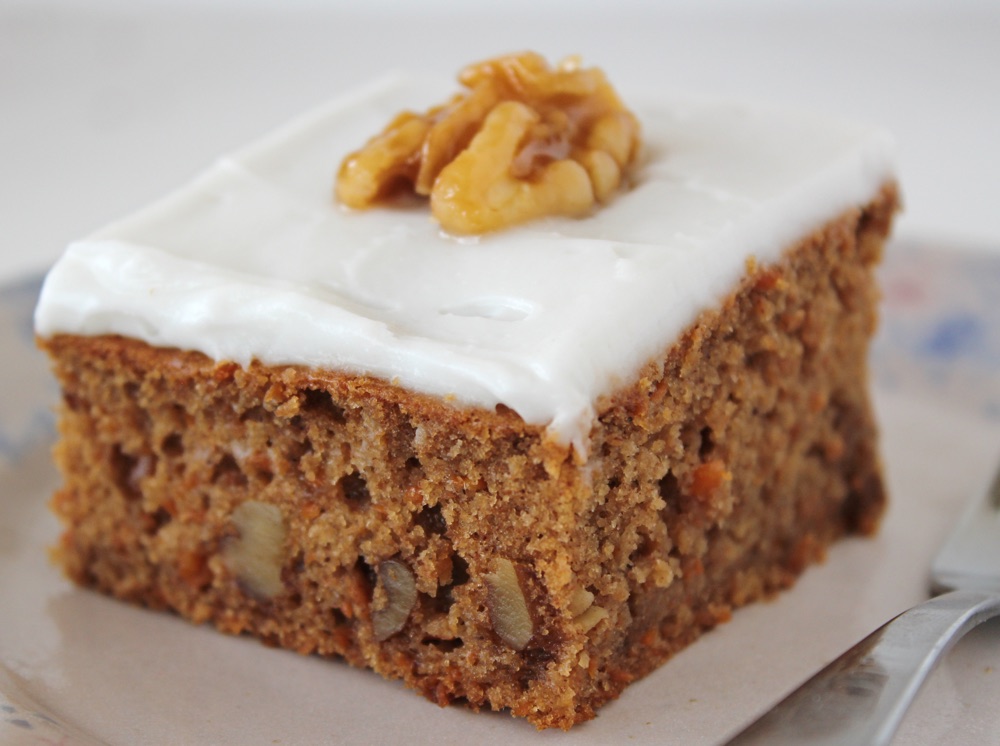
Filled with fresh memories of how carrot cake should taste, as soon as I returned home I dusted off my scribbled experiments and enthusiastically set to work on ‘perfecting’ my recipe. I experimented with different ratios of wet/dry ingredients, varying ratios of carrots and nuts, different shape tins and baking times, and finally came up with a recipe that I’m 100% happy with. It might not be to everyone’s taste but, for me, this cake is just spot on flavour and texture-wise. It’s dense and moist, with plenty of carrot and walnuts for added layers of texture. It’s not sugary sweet, but instead flavoured with beautiful, warming spices.

Vegan Carrot Cake

Cream cheese frosting is the perfect topping for this cake. A few years ago, it was difficult to find vegan cream cheese here in the UK (let alone a great-tasting one!); however lately there’s been an explosion of dairy-free ‘cheeses’ entering our shops. When it comes to vegan cheese, everyone’s tastes differ so it’s worth trying a few and seeing which one most appeals to your taste buds. Two of my personal favourites are Violife Creamy Original  and Tofutti Creamy Smooth Original. These have a very subtle cheese flavour, with a lovely creamy texture, making it perfect for cake frosting. I’ve also used Sheese Creamy Original and Tesco Free From Soft Cheese for topping carrot cake. These two have a stronger cheese flavour so need a touch more icing sugar to balance the flavours.

Recipe Card

Vegan Carrot Cake

Vegan Carrot Cake with Cream Cheese Frosting

For me, this recipe epitomises everything that I love about carrot cake. It’s dense and moist, with a generous amount of carrots and walnuts. It's not sugary-sweet, but beautifully flavoured with warming spices. It’s had great feedback from my friends and family. I hope you enjoy it too!
Hands-on time 30 minutes
Total Time 2 hours
Course Afternoon Tea, Elevenses, Treat
Cuisine English
Servings 9

Ingredients
 

  • 240 ml / 1 cup soya milk
  • 2 tsp apple cider vinegar
  • 100 g / ½ cup soft brown sugar or coconut sugar
  • 80 ml / ¼ cup syrup of choice (I use maple syrup or coconut blossom syrup)
  • 100 ml / ½ cup neutral-flavoured oil (I use rapeseed (canola) oil, grapeseed oil or sunflower oil
  • 240 g / 2 cups carrot grated
  • 140 g / 1 cup plain (all purpose) flour
  • 140 g / 1 cup fine wholemeal (whole wheat) flour or chapatti flour
  • tsp baking powder
  • ½ tsp bicarbonate of soda (baking soda)
  • ½ tsp salt
  • 2 tsp mixed spice or pumpkin spice
  • 1 tsp ground cinnamon
  • 50 g / ½ cup walnuts chopped

Vegan Cream Cheese Frosting

  • 1 tub vegan cream cheese (around 200g / 7 oz)
  • 2½ – 5 TBSP icing (confectioners) sugar

Maple-Glazed Walnuts

  • 9 walnut halves
  • 1 TBSP maple syrup

Instructions
 

  • Grease a 21 cm x 21 cm / 8” x 8” square baking pan and line with non-stick baking paper. Preheat the oven to 180C (160C fan) / 350F.
  • Grate the carrots either using a box grater or mini chopper. Roughly chop the walnuts.
  • Whisk together the soya milk and vinegar in a large mixing bowl using a hand whisk or fork. Add the sugar, syrup and oil. Continue whisking until fully combined.
  • In a separate bowl, add the flours, baking powder, bicarbonate of soda, salt, mixed spice and cinnamon. Stir through to combine.
  • Fold the dry ingredients into the wet ingredients. Add the grated carrot and chopped walnuts and stir through until evenly distributed.
  • Transfer the mixture to the prepared tin. Using a spatula, distribute the mixture evenly in the tin and smooth the top. Place in the centre of the oven and bake for 45 minutes, or until a skewer inserted through the middle comes out clean and the top of the cake is springy to the touch.
  • Leave the cake in the tin for at least an hour, or until completely cool (it will continue to firm up as it cools), then peel off the baking paper and transfer to a chopping board. Using a bread knife, trim the four edges of the cake to neaten them up.
  • Meanwhile, place the cream cheese in a bowl. Sieve in the icing sugar, then beat using electric beaters until just combined (do not over-beat, otherwise the cheese may become runny). Taste test and add more sieved sugar, if desired. Beat once more to combine. Store the cream cheese in the fridge until needed.
  • Preheat a frying pan (skillet) on a medium-high heat. Add the walnuts and dry fry for 2 minutes, stirring continuously. Add the maple syrup and continue stirring for about 3 minutes, until the nuts are fully coated and the syrup has caramelised and become very sticky. Space out the nuts on a piece of non-stick baking paper. As they cool, the nuts will firm up and become shiny. Store in an airtight container in the fridge until ready to use.
  • Once the cake is completely cooled, distribute the cream cheese over the top of the cake using a knife. Slice the cake into squares, add the maple-glazed walnuts, then chill the cake in the fridge until ready to serve.
  • This cake will keep for up to five days in the fridge. It is also freezable (without the frosting). The cream cheese frosting is best added on the day that it is to be served as the lighter coloured cheeses (like Violife, Tofutti) can discolour over time.
Keyword Dairy-Free, Egg-Free, Plant-Based, Vegan Cake, Vegan Treats
Tried this recipe?Let us know how it was!

Pin for later ⬇️

Vegan Carrot Cake

This recipe is being submitted to the Suma Blogger’s Network. Big shout out to the lovely people at Suma who supplied the ingredients I used to create this recipe.

Ingredients from Suma (available from independent health food shops in the UK):

Aspall Organic Cyder Vinegar
Suma Organic Coconut Palm Sugar
Suma Organic Coconut Blossom Syrup
Suma Grapeseed Oil
Suma Mixed Spice
Suma Ground Cinnamon
Doves Farm Organic Fine Plain English Wholemeal Flour
Doves Farm Organic Plain White Flour
Doves Farm Baking Powder
Doves Farm Bicarbonate of Soda
Violife Creamy Original
Tofutti Creamy Smooth Original

If you make this Carrot Cake, I’d love to hear your feedback and any suggestions for adaptations! Tag your photos with #bitofthegoodstuff on social media – I always love to see your creations! You can also connect with me on my social media channels here: InstagramFacebookPinterest.   

Happy baking!

Veggie Paella (Easy, One-Pot, Vegan)

Jump to Recipe

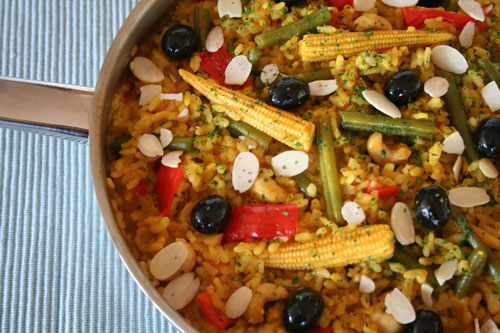
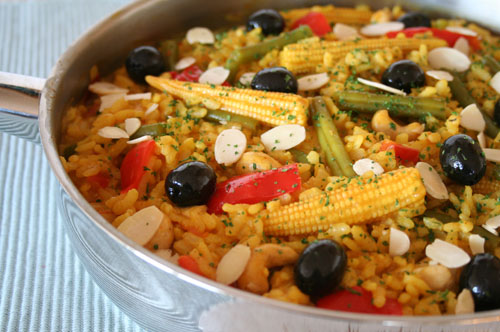
Looking for a nourishing one-pot meal that’s bursting with colour? This Spanish Veggie Paella is one of our absolute favourites! Packed with fresh vegetables, warming spices, and protein-rich nuts, it’s wholesome, satisfying, and incredibly simple to make. No need for multiple pots or fancy ingredients—just a single pan and a few pantry staples. Easy prep, easy clean-up!

When Lil’ L was four years old, we took a trip to the beautiful island of Majorca. It was there that he had his first encounter with paella—the enormous pans filled with mussels and crab claws left quite the impression! Thankfully, the restaurant also offered a veggie version, which was just as vibrant and flavourful, minus the seafood. Back home, I couldn’t wait to recreate the dish, and I was thrilled to discover how quick and easy it was to make. This version has become a firm family favourite!

Spanish Veggie Paella

Recipe Card

Spanish Veggie Paella

Spanish Veggie Paella

This Spanish-inspired vegan paella is bursting with colourful veggies, fragrant spices, and crunchy nuts. Easy to make in one pot, it’s perfect for a fuss-free midweek dinner.
Hands-on time 15 minutes
Total Time 30 minutes
Course Dinner
Cuisine Mediterranean, Plant-Based, Spanish, Vegan
Servings 4

Ingredients
 

  • 1 TBSP olive oil
  • 1 large brown onion (160g) finely diced
  • 2 tsp minced garlic
  • 1 red bell pepper (200g) deseeded and diced
  • 1 tsp ground cumin
  • 1 tsp sweet paprika
  • 300 g / 1⅓ cups Spanish paella rice
  • pinch of saffron* or substitute with ¼ tsp ground turmeric
  • 1 medium tomato (100g) diced
  • 1 litre / 4 cups hot vegetable stock (broth)
  • handful of fine green beans (about 100g) trimmed and halved
  • 6 –8 baby corn
  • 80 g / ½ cup cashews
  • salt to taste
  • ground black or cayenne pepper to taste
  • 16 black pitted olives
  • sprinkling of green nori flakes or dried parsley
  • 35 g / ⅓ cup toasted flaked almonds

Instructions
 

  • Infuse the saffron in a little hot water and prepare the vegetable stock.
  • In a large, deep-sided frying pan (skillet), gently heat the oil. Add the onion and cook until soft. Meanwhile, chop the remaining vegetables.
  • Add the garlic, bell pepper, cumin, and paprika. Cook for a minute, adding a splash of water if needed to prevent sticking.
  • Stir in the rice and saffron (or turmeric), followed by the tomato and hot stock. Bring to the boil, then reduce heat and simmer uncovered for 10 minutes.
  • Add the green beans, baby corn, and cashews. Simmer for another 10 minutes. Stir regularly towards the end of the cooking time. Add a little more stock or water, if needed.
  • While the rice is cooking, prepare any side dishes. (My family loves to serve this paella with some Crispy Garlic Bread, Toasted Tortilla Chips, or a large bowl of Crispy Kale).
  • Once the rice is tender but still has a slight bite, remove from the heat. Season to taste with salt and pepper.
  • Serve on warm plates with a scattering of olives, nori flakes or parsley, and toasted flaked almonds.

Notes

* Saffron gives paella its classic golden hue and nutty aroma, but it can be pricey. For a budget-friendly alternative, substitute with ½ tsp ground turmeric.
Storage Instructions:
Store leftovers in the fridge and eat within 24 hours. As with all rice dishes, make sure the rice is cooled quickly and refrigerated within an hour.
Keyword easy one-pot meal, easy vegan dinner, one pot vegan dinner, plant-based dinner, Spanish rice dish, vegan paella, veggie paella
Tried this recipe?Let us know how it was!

If you try this recipe, I’d love to hear how it went! Share your thoughts in the comments or tag me on social media using #bitofthegoodstuff or @goodstuffsharon. I always love seeing your creations! 💛 You can also connect with me on my social media channels here: Instagram, Facebook, Pinterest.   

Wishing you a joyful week!

With love,

Sharon xx