Sweet Potato, Red Lentil & Coconut Curry

For my second submission to the Suma Bloggers Network, I thought I’d share our Sweet Potato, Red Lentil and Coconut Curry. I’ve been making this dish since Lil’ L was a toddler and, to this day, it remains one of his favourite dinners. Every time I make it, his chatter stops and all you hear is ‘mm… mm’ as he woofs it down.

Lil’ L has never really liked white potato (he finds it bland), but he loves sweet potato. With its sweet taste and beautiful orange colour, I bet it’s a hit with a lot of kids.

And another great thing about sweet potato is its nutritional profile. It’s literally packed with antioxidants. Just one medium potato contains 438% of the vitamin A RDA and 37% of the vitamin C RDA. It’s also rich in vitamin B6, manganese, potassium, and a good source of dietary fibre. [Source]

For a protein and iron boost, I add red lentils to this curry which all but disappear into the sauce (perfect for picky kids). I also throw in a couple of handfuls of spinach. With its soft texture and neutral flavour, this has to be one of the most kid-friendly greens.

Pataks Korma Paste

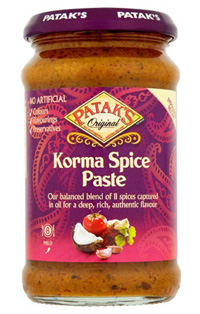
To keep this curry quick and simple to prepare, I use a ready-made curry paste. Pataks Korma Paste is my favourite as it’s mild enough for kids, and the spice blend is a perfect compliment to the sweet potato and coconut. You can also buy this paste in little ‘travel’ size pots which is really handy for self-catering vacations. (This is what we took on our road trip to France).

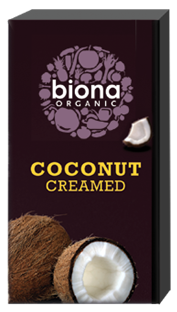
For creaminess and a beautiful hint of coconut flavour, I use creamed coconut. I really like this ingredient as it’s 100% coconut, cheap to buy and lasts ages. Here in the UK, Creamed coconut is available from large supermarkets in the UK (on the world food aisle) and health food shops. It’s also available online.

Biona Organic Creamed Coconut

[print_this]

With its sweet, mildly spiced flavour and soft, creamy texture, this curry is perfect for all the family. It’s quick and easy to prepare, so great for busy week day nights. For a full-blown Indian feast (perfect for weekends and dinner parties), serve with side dishes of rice and chappatis or naan bread, and an entrée of poppadoms, onion bhajis and fresh mango chutney.

Serves 4-5
Hands-on time: 20 minutes
Ready in: 35 minutes

Ingredients
1 TBSP oil
1 large onion, finely chopped
3 medium sweet potatoes (about 500g), scrubbed and cut into bite size chunks (peeling is optional)
2 TBSP curry paste (use mild curry or korma paste for children)
140g / ¾ cup red lentils
750ml / 3 cups hot vegetable stock
1 large tomato, finely chopped (or you can substitute with tomato puree (paste)
50g / ¼ cup creamed coconut, finely chopped
2 handfuls of spinach, roughly chopped

Suggested garnish
Handful each of flaked almonds and sesame seeds, lightly toasted

Method
Heat the oil in a large heavy-bottomed pan and cook the onion and sweet potato on a medium-low heat for about 6 minutes, stirring occasionally.

Meanwhile, place the lentils in a fine mesh sieve and rinse under cold running water, agitating with your hand until the water runs clear. Prepare the vegetable stock.

Add the curry paste to the pan and cook for a couple of minutes. Add a touch of water, if needed, to loosen the mixture. Stir in the lentils until coated in curry paste. Add the stock, tomato and creamed coconut. Bring to the boil, then reduce the heat and simmer, uncovered, for 15 minutes. When the potato and lentils are tender, stir in the spinach and continue cooking until it has wilted.

While the curry is simmering, prepare the garnish. Place the flaked almonds and sesame seeds in a dry frying pan (skillet) and cook on a medium heat, stirring continuously. As soon as they start to brown and become fragrant, remove from the heat.

Remove the curry from the heat and leave to rest for a couple of minutes. Taste test and adjust the seasoning to suit. Sprinkle on the garnish and serve.

Any leftover curry can be stored in the fridge for five days or for weeks in the freezer.

TIP
Sometimes the block of creamed coconut can have a layer of coconut oil in it. It’s easy to spot as it’s bright white in colour. In curries, use only the opaque cream-coloured section of the block. The coconut oil can be saved for other recipes.

Notes for serving to young children
For really young children, I would recommend giving their curry a quick blast with a stick (immersion) blender to make a chunky purée. For children that have an aversion to onion or spinach, whizz them in a mini food processor before adding them to the pan (the veggies, not the children!) That way, they’re so small they won’t detect them.

[/print_this]

This curry is so easy to prepare and cheap (it costs literally a few pence per portion). It’s also far healthier and less calorific than take-outs. So, next time you’re craving a curry, head into the kitchen and make your own. In less time than it takes to get a take-out, you’ll be tucking into your own delicious curry and have saved yourself a small fortune. Now that’s my idea of the perfect fast food!

With love,

SaveSave

Pina Colada ‘Cheesecake’ (Dairy-free / Gluten-free / Vegan)

We’ve had a glorious summer here in the UK

This week, there’s been a change in the air. It’s cooling off, the rain’s returned and the evenings are drawing in.

But before we officially say goodbye to summer, I’m going to enjoy one last weekend of summer dishes, rounded off with a slice or two of this sunshine-filled Pina Colada ‘Cheesecake’. Cheesecake was my favourite childhood dessert, but I love this dairy-free version even more!

Pina Colada Dairy Free Cheese Cake #Vegan #Glutenfree

In this version, the dairy’s been replaced with delicious pineapple and coconut-flavoured cashew cream, gently sweetened with maple syrup. Instead of a biscuit base, we use crushed almonds and pecans for crunch, and dates for sweetness. The cake is then dressed with a layer of crushed pineapple and finished with a sprinkling of coconut flakes.

Pina Colada 'Cheese' Cake #Dairyfree #Glutenfree #Vegan

While cheesecakes aren’t usually considered to be a healthy option, this version is packed with goodness, including lots of minerals, vitamins, antioxidants and heart-healthy fats. Like regular cheesecake, it is pretty calorie-intensive, but you’ll find that even the thinnest of slices will leave you feel satiated. Once the cake has firmed up, I slice it then pop it back in the freezer. That way, we can pull out a slice whenever we fancy one.

Pina Colada 'Cheese' Cake #Dairyfree #Glutenfree #Vegan

This recipe first appeared in Issue 3 of the fab e-magazine Fresh Vegan. One of my lovely readers has already made the cheesecake and I was thrilled to hear how much her family enjoyed it. It’s one of my family’s all-time favourite desserts and I hope you enjoy it as much as we do

Note: Recipe updated 9th July 2017 – this is the new and improved version that features in the Bit of the Good Stuff cookbook.

[print_this]

This dessert is bursting with the colours and flavours of my two favourite summer ingredients. If I can’t be sitting on a Caribbean beach sipping Pina Coladas, then tucking into a slice of this scrumptious dessert is definitely the next best thing. It’s incredibly easy to make. You simply need to blend and freeze. No baking required!

Serves: 12
Hands on time: 30 minutes   Ready in: 3 hours

Ingredients

Crust
115g / ¾ cup almonds or pecans (or use a mix of the two)
50g / ½ cup desiccated coconut
170g / 1 cup soft, sticky dates (e.g. Medjool), pitted
1 tsp maple syrup
1 tsp vanilla extract
pinch of salt

Filling & topping
280g / 2 cups raw cashews
340g / 2 cups fresh sweet pineapple, cubed
80ml / ¼ cup maple syrup
6 drops rum essence, or to taste (or substitute with 1 tsp vanilla extract)
100g / ½ cup virgin coconut oil, melted
4-5 TBSP coconut chips

Method

1  Soften the cashews by soaking them in freshly boiled water for 30 minutes, then rinse and drain.

2  Grease the sides of a 18-20cm (7-8 inch) loose-bottomed tin with coconut oil and line the bottom with non-stick baking paper.

3  Place the almonds/pecans in a food processor and blitz into crumbs. Add the remaining crust ingredients and whiz to combine. Test the crumbs by pressing a small amount between your thumb and finger. If they stick together, they’re ready. Tip them into the prepared tin and press down firmly.

4  Pulse the pineapple in the food processor to crush it. Place in a sieve over a bowl and use the back of a spoon to press out as much juice from the pineapple as possible.

5  Place the cashews in the food processor and blitz into crumbs. Add the syrup, rum essence and 120ml / ½ cup pineapple juice from the drained pineapple. (If you don’t have sufficient juice, top it up with water). Process for a few minutes until the cashews are ground into a creamy mixture, pausing now and then to scrape down the bowl. Add the melted coconut oil and continue processing until the mixture is completely smooth. Taste test for smoothness and sweetness. Add a touch more syrup, if desired.

6  Stir half of the crushed pineapple into the creamy cashew mixture.

7  Spoon the filling onto the crust and use a knife to smooth the top. Place in the freezer for about 2 hours, until it has firmed up. When ready to serve, top with the remaining crushed pineapple and a sprinkling of coconut chips.

8  Stored in an airtight container, this dessert will keep for a couple of days in the refrigerator or for two months in the freezer. If frozen, allow 30 minutes to an hour to thaw before serving.

[/print_this]


Pina Colada 'Cheese' cake #Dairyfree #Glutenfree #Vegan

Do you have anything special planned for this last weekend of August? I’ve got lots of jobs to tackle this weekend… like my jungle of a garden & school uniform buying (as usual I’ve left the latter to the last minute!) Once the jobs are out the way, I’m looking forward to heading out on my bike in the beautiful English countryside.

Whatever you’re up to, have a great weekend everyone! xx

Rocky Road (Vegan Style!)

Sorry I haven’t been around much these past few weeks, but I’ve been hanging out with Lil’ L. He’s growing up fast, and since this could be the last summer that he actually wants to hang out with me, I’ve been savouring every moment. We’ve had so much fun! This week’s highlights (so far) have been hiking, biking, playing tennis, picnicking in the park, a trip to the cinema (How To Train Your Dragon 2) and playing in the kitchen 🙂

Last weekend we got back from our vacation and there was a postal delivery card waiting for us. First thing Monday morning, we hopped on our bikes and pedalled down to the post office. I jumped with glee when I saw that the mystery parcel was the latest The Vegan Kind Subscription Box. I couldn’t wait to do the big ‘reveal’!

The Vegan Kind #TVK10

As usual, the box was filled with interesting brands and products that I’m excited to try out. Lil’ L’s eyes especially lit up when he saw these….

Freedom Mallows

While regular marshmallows are made with gelatine (a slaughterhouse byproduct), Freedom Mallows are gelatine free, dairy free, egg free, gluten free and nut free, and thus suitable for vegetarians and vegans, as well as people with gluten, dairy and nut allergies/intolerances.

And it’s incredible how similar they are to regular marshmallows, both in taste and texture. My mum loves marshmallows and even she can’t tell the difference.

Over the winter, Lil’ L enjoyed slicing and sprinkling vanilla mallows onto his hot chocolates. This time round, we thought it would be fun to make some Rocky Road. While I stood by, Lil’ L set to work melting chocolate and coconut oil…

Rocky Road Making

…bashing biscuits

Rocky Road Making

…then adding mallows and mixing it altogether. Since our mallows were strawberry flavoured, we thought it would be nice to finish off our Rocky Road with a sprinkling of freeze-dried strawberries (which we had left over from these Chocolate Crunch Hearts).

After a couple of hours in the freezer, the Rocky Road was ready to slice and sample. It got a huge thumbs up from Lil’ L!

Rocky Road (Vegan Style)

So far this week, he’s enjoyed it as a treat snack at the cinema and the tennis courts. While it’s a little too sweet for me, Lil’ L reckons it’ll be a hit with kids or anyone with a sweet tooth. It would be great for sharing at children’s tea parties or selling at charity or school fundraisers. It would also make a lovely home-made gift for sweet-loving veggie friends, wrapped in a special box or tin

[print_this]

Rocky Road… Vegan Style!
Got a sweet tooth? Then this treat is for you! It’s easy and fun to prepare. It makes a great rainy day activity for veggie kids, young and old alike!

Makes about 12 pieces
Hands-on time: 15 minutes Ready in: 2 hrs 15 minutes

Ingredients
200g / 7oz dark chocolate (70% cocoa solids)
2 TBSP virgin coconut oil, plus extra for greasing
200g / 7 oz Digestive biscuits (or Rich Tea, Oreos or gluten free cookies)
75g / 2½ oz veggie marshmallows (e.g. Freedom Mallows)
Icing sugar, for dusting

Method
Grease and line a freezer-safe container about 12cm x 22cm (5 inches x 8½ inches) with baking paper. (I used a large loaf pan, but you could use a plastic, silicone or foil container).

Add a small amount of water to a saucepan and place a heat-proof bowl on top. Break the chocolate into chunks, place it in the bowl along with the coconut oil and gently heat, stirring occasionally until the chocolate has fully melted.

Meanwhile, place the biscuits (cookies) in a freezer bag. Press out the air and tie the bag shut. Bash with a rolling pin until you have a mixture of crumbs and small pieces.

If your mallows are large, slice them into halves or thirds.

When the chocolate has melted, remove from the heat and stir in the biscuits and mallows. Tip into the prepared pan and press down hard with the back of a spoon to remove air pockets.

Place in the freezer for about 2 hours, until solid. Using a sharp knife, slice into rectangles about 4 cm (1½ inches) in size. Add a light dusting of icing sugar for decoration.

Store in an airtight container in the fridge or freezer, where it will keep for weeks.

[/print_this]

In the UK, Freedom Mallows are available from Holland & Barrett, independent health food shops (including Harvest in Bath) and online.

Have a wonderful weekend everyone! xx

Coconut Milk Ice Cream & a Fab New Kitchen Gadget

I have always wanted to try my hand at ice cream making, but sadly my freezer drawers are way to narrow to fit an ice cream bowl, and I’m just not organised enough to hand whisk at half hourly intervals. I haven’t got a Vitamix or Blendtec either, which means I can’t use the freeze and blend technique.

However, when my blogging friend Aimee Ryan (who writes the wonderful Wallflower Girl blog) recently launched her recipe book for coconut milk ice creams, I just couldn’t wait any longer. Those scrumptious recipes were calling to me and I needed to find a way to make them asap!

Aimee Ryan Coconut Milk Ice Cream

After trawling the Internet, I found an alternative option available to me – an ice cream maker with in-built compressor. These machines don’t require any pre-freezing of bowls. You simply pour the mixture in and 40 or so minutes later the ice cream is ready. These gadgets are pricier than traditional ice cream makers (which you can pick up for less than £20), but for people with freezer storage issues like me, these machines are perfect.

I especially liked the sound of the Andrew James New Improved 2 Litre Professional Fully Automatic Ice Cream Maker. The reviewers had given it 4.5/5 stars on Amazon and, while a pretty sizable piece of equipment (43cm wide x 28cm deep), I love its sleek style and cool blue LED display. My kitchen colours are red, black and stainless steel, so this gadget goes perfectly. Last Friday I took the plunge and ordered the machine…. and it arrived the following morning.

Andrew James Ice Cream Maker

I’d carefully read through all the reviews, so I knew what I was in for. The main negative was that it was a bit fiddly to slot the bowl, paddle and lid into place. These reviews must be referring to the older model though because the set up on the new improved machine couldn’t be easier. I didn’t even bother consulting the manual as it was obvious how to do it.

The next step was to choose an ice cream flavour. Aimee’s ice cream recipes are divided into five chapters:

Healthy Spins on Famous Flavours – Vanilla, Chocolate, Cashew Cookie Dough Chip, Chocolate Chip, Chocolate Brownie, Salted Caramel, Mint Chocolate Chip, Mocha

Fruity Flavours – Coconut, Mango & Passionfruit, Roasted Pineapple, Papaya & Lime, Roasted Plum & Cardamom, Pomegranate, Sweet Melon, Date, Strawberry, Caramelized Banana, Peaches & Cream, Orange, Apricot

Nut & Seed Flavours – Pecan Praline, Peanut Butter Chocolate Swirl, Pistachio, Chestnut Caramel, Chocolate Hazelnut, Maple Glazed Walnut, Salted Almonds, Toasted Sesame Seed

Spicy Flavours -Fresh Ginger, Mayan Chocolate, Wasabi, Chinese Five-Spice, Sweet Curry

Aimee Ryan Coconut Milk Ice Cream

Dessert Inspired Flavours – Rhubarb Almond Crumble, Lemon Poppy Seed Muffin, Pumpkin Pie, Apple Pie, Red Velvet Beetroot Cake, Coffe & Walnut Cake, Christmas Pudding

Boozy Flavours – Pina Colada, Rum & Raisin, Apple Cider, Irish Cream, Roasted Cherry & Whiskey, Mojito, White Wine

Floral Flavours -Blueberry & Lavender, Chamomile & Vanilla, Elderflower & Lemon, Orange Blossom, Rose Raspberry Ripple

Herbal & Tea Flavours – Chai Tea, Lemon Green Tea, Fresh Basil & Mint, Malted Maca Chocolate, Earl Grey

Aimee Ryan Coconut Milk Ice Cream

With all these lush flavours to choose from, we ended up practically filling the entire book with stick it notes! We’ve decided we’re going to work our way through all the recipes (adapting the boozy flavours to make them child friendly) and, to kick off our ice cream making adventure, Lil’ L chose the Chocolate and Salted Caramel flavours 🙂

Following reviewers’ recommendations, I chilled the ice cream maker for 10 minutes before pouring in the chilled ice cream mixture. I didn’t bother using the pouring hole. I just poured the mixture straight into the bucket, slotted it into the machine, screwed on the lid and pressed the button. You can choose different churning times and for our initial trials, I chose 40 minutes. This was pretty much spot on. The ice cream was soft serve consistency and the paddle started to have difficulty rotating.

Making Ice Cream

We could have served it straight away as soft serve, but we decided to freeze it so it could be scooped into cones. Aimee recommends storing the ice cream in a wide, shallow dish so I used my Pyrex lidded glass dish (which I’d previously chilled as my house is so hot at the moment). After three hours we checked on the ice cream, and it was ready for scooping.

All the ice cream recipes in Aimee’s book are dairy free, egg free, gluten free and vegan. Though, at the time of writing, Aimee wasn’t vegan herself, she simply believes that coconut milk makes the best ice cream. The healthiness of her recipes is an added bonus. For the Salted Caramel ice cream, the flavour and colour comes from delicious coconut sugar.  After three hours in the freezer, the consistency of the caramel ice cream was perfect. It was silky smooth and soft enough to scoop right away. And it had the most amazing caramel flavour. I find most commercial ice creams sickly sweet, but Aimee’s got the sweetness levels spot on. It was utterly delicious

Salted Caramel Coconut Milk Ice Cream

The chocolate ice cream uses maple syrup as the sweetener (as do most of Aimee’s recipes) and, in addition to cocoa powder, it has dark choc chips melted into it to add even more chocolatey goodness. As a budget-friendly alternative to pure maple syrup, I use Clark’s Original Maple Syrup, which is a blend of maple and carob syrups.

Chocolate Coconut Milk Ice Cream 500 copy

After freezing for a few hours, the chocolate ice cream was a lot firmer than the caramel one so, as Aimee recommends, we left it on the worktop for ten minutes and I heated my metal scoop in hot water. It then scooped perfectly. The flavour was incredible! It’s by far the best chocolate ice cream I’ve ever tasted, and Lil’ L said that it was easily as good as the quality ice cream he’s eaten in Italy. And I couldn’t believe it when ‘M’ enthusiastically tucked in and said how good it was. He isn’t usually an ‘ice cream person’ and tends to decline if you offer it to him. However, these coconut milk ice creams have won him over.

It’s great that Lil’ L’s on his school holidays as he makes a very handy ice cream model 😉 It was pretty hard for him to resist the temptation to lick it…

Salted Caramel Coconut Milk Ice Cream

Five seconds later he caved in 😉

Salted Caramel Coconut Milk Ice Cream

I am so pleased that I finally took the plunge and got an ice cream maker. I know it’s going to get used a lot. It will probably take me the rest of the year to work my way through Aimee’s recipe book. I’m especially looking forward to trying the Christmas Pudding flavour! I’m also looking forward to making fruity sorbets, hopefully using fresh berries from my garden.

Many thanks to Betta Living for providing the ice cream maker for these tasty new recipes Both the Andrew James Ice Cream Maker and Aimee Ryan’s Coconut Milk Ice Cream recipe book are available to purchase from Amazon UK. For our US & Canadian friends, Aimee’s book is also available from Amazon.com.

Do you have an ice cream maker? If so, what’s your favourite recipe? If you’ve posted any vegan recipes online, please do share below.

Lovely readers, I just want to let you know that I’m about to take a little break from blogging & social media. I’ll be back towards the end of August. Have a wonderful summer and I look forward to catching up with you all on my return xx


Mezze Lunch Platter – Sun-Dried Tomato Houmous, Baba Ganoush, Confetti Salad, Marinaded Olives, Flatbreads

There’s something really fun about tucking into a platter of mini dishes, and Middle Eastern mezze contains some of my family’s all-time favourites, such as houmous and baba ganoush.

If mezze is on a restaurant menu, we’ll order it. If the platter isn’t 100% vegan, I find that the staff are always willing to substitute the non-vegan dishes. Back home, we love to eat mezze for lunch at weekends and during the school holidays. It’s also great for serving to friends when they come over for ‘drinks and nibbles’ (or ‘dribbles’ as we like to call them). Today, I’d like to share some of my favourite dishes to serve as part of a mezze lunch platter.

Middle Eastern Mezze Platter

UK supermarkets now offer a great selection of flavoured houmous, so feel free to use shop-bought houmous in your mezzes if you wish. I still enjoy making my own as I love playing around with different flavour combinations. One of my current favourites is sun-dried tomato with Dukkah spice topping. As you’ll notice in the recipe, I prefer to use water instead of oil in my home-made houmous. I find that it doesn’t compromise the flavour, yet it greatly reduces the calorie content (which is a bonus as it means I can eat twice as much 😉 )

Dukkah – the Egyptian aromatic mix of nuts, seeds, herbs and spices – has become the new salt and pepper in my house, and I sprinkle it on pretty much everything. While you can make it yourself, it’s fairly cheap to buy ready mixed. No two places make Dukkah the same, so their flavours can vary a lot. A favourite of mine is made by Olives et Al. You’ll find them in health food stores and farm shops across the UK, as well as online.

Sun-Dried Tomato Hummus with Dukkah Spice Topping

Baba ganoush is an aubergine (eggplant) dish, used for dipping or spreading on flatbreads. It’s usually made from the flesh only, but I prefer to blend up the whole aubergine. I think the skin adds to the flavour and texture of the dish, as well as adding more nutrients and fibre (feel free to omit the skin though if you prefer!)

Tahini is an essential component of houmous and baba ganoush. It varies in flavour and consistency depending on the brand. Some tahinis I’ve tried have been too bitter for my taste. My current favourite brand is Achva (available from Tesco and Morrisons). This tahini is creamy, has a beautiful flavour and a pourable consistency (so great for dips and dressings).

Baba Ganoush

The salads on mezze platters tend to be dainty so I make a ‘confetti salad’ of finely chopped cucumber, tomato and red pepper. On top, I drizzle one of my all-time favourite home-made tangy creamy dressings. The dressing is oil-free, and the creaminess comes from ground hemp seeds. The hemp also adds a lovely boost of protein and omega 3 to the salad.

Confetti Salad with Creamy Tangy Hemp Vinaigrette

And the final dish is full of beautiful olives. My favourite olives are those marinaded in herb or spice-infused extra virgin olive oil. Once the olives have been eaten, the oil can be used for dipping bread, mixing into pasta or drizzling on pizzas.

Olives et al Olives

Olives et al kindly sent me some of their new Smoky Chipotle Chilli Olives to try. These feature whole Amphissa olives, marinaded in extra virgin olive oil infused with Chipotle chillis. They were so tasty, and perfect for me as the chilli flavour is very subtle. I find that supermarket marinaded olives can be a bit ‘hit and miss’, but I’ve loved every single jar of olives that I’ve tried from Olives et al. They have an amazing selection so, if you’re in the UK, do check it out.

[print_this]

Middle Eastern Mezze Lunch Platter
The components of this mezze platter can easily be made in advance. While the aubergine is roasting, prepare the houmous and salad dish. Adding a couple of extra dishes, such as falafel and stuffed vine leaves, will elevate the platter to dinner status.

Serves 4

Sun-dried Tomato Houmous with Dukkah Spice Topping
Hands-on time: 5 minutes    Ready in: 5 minutes

Ingredients
400g / 14 oz can chickpeas, drained (or 1½ cups of cooked chickpeas)
1 TBSP tahini
1½ – 2 TBSP sun-dried tomato paste
1 small garlic clove, crushed
½ tsp salt
4 TBSP water

Method
Place all the ingredients in a food processor (or use a bowl and stick/immersion blender) and blend smooth. Start with the smaller quantities of sun-dried tomato paste. Once blended, taste test and add more paste, if needed. If the houmous is thicker than desired, blend in a touch more water (or a little oil). Spoon into a bowl and sprinkle Dukkah spice on top. This houmous will keep for up to two days in the refrigerator, or weeks in the freezer.

Baba Ganoush
Hands-on time: 10 minutes    Cooking time: 30 minutes
Ready in: 45 minutes

Ingredients
2 medium aubergines (eggplant), stalks removed
2 TBSP tahini
½ tsp ground cumin
½ tsp salt
½ TBSP freshly squeezed lemon juice

Method
Preheat the oven to 200C / 400F / Gas 6. Line a baking sheet with non stick baking paper.

Slice the aubergines lengthwise, remove the green stalk and place cut side down on the baking sheet. Pierce the skin a few times, then place in the oven for 30 minutes or so, until the flesh is soft and the skin is slightly wrinkled. Leave to cool slightly.

If you want a light, smooth, creamy dip, then scoop out the flesh and discard the skin. If you like a courser texture, smokier flavour and extra nutrients, then leave the skin on and chop the aubergine into chunks.

Place the aubergine in a food processor, along with the tahini, ground cumin, salt and lemon juice, and blend smooth. If you’ve kept the skin on, it will take a little longer to blend. Stop now and then to scrape down the sides of the bowl. Taste test and adjust the seasoning to suit. Spoon into a bowl and lightly sprinkle with cumin, smoked paprika or Dukkah spice before serving. This dip will keep for up to four days in the refrigerator.

Confetti Salad with Creamy Tangy Hemp and Tahini Vinaigrette
Hands-on time: 10 minutes    Ready in: 10 minutes

Salad Ingredients
1 cucumber, peeled, deseeded and finely chopped
1 large tomato, deseeded and finely chopped
1 red pepper, deseeded and finely chopped

Vinaigrette Ingredients
1½ TBSP shelled hemp seeds
1 TBSP tahini
2 TBSP apple cider vinegar
1 TBSP maple syrup
2 TBSP water
Pinch of salt

Vinaigrette Method
Place all the ingredients in a mini food processor or blender (I use the bowl attachment on my stick/immersion blender) and blend smooth. Pour into a small bowl and leave to rest for a few minutes and thicken up. This vinaigrette will last up to a week in the refrigerator.

Olives
Arrange a dish of olives marinaded in extra virgin olive oil. Once the olives are eaten, the oil can be used for bread dipping.

Flatbreads
Gently warm four wholegrain pittas, then slice into segments before serving. (For a GF option, use gluten-free pittas found in the ‘Free From’ section of major supermarkets, or GF wholegrain crackers).

[/print_this] Mezze Platter

 Do you like mezze? If so, what are your favourite dishes?


Healthy Snacking – ‘Crispy Kale’ (Kale Chips) with Gomasio

One of my first ever blog posts, back in June 2011,  was about ‘crispy kale’ and, to this day, it remains one of my all-time favourite snacks

While a lot of health food bloggers are currently enjoying raw kale salads or kale smoothies, my taste buds aren’t quite there yet. I do, however, LOVE crispy kale and will happily munch my way through handfuls of the stuff.

Crispy kale is also one of the best ways I’ve found to encourage Lil’ L to eat kale. I often put a bowl out as a starter or as a side dish and, before I even get to sit down at the table, the whole lot’s been demolished!

Kale

Over the past three years, I’ve been refining the way I make my crispy kale. In the early days, I had the oven temperature too high, so the kale would quickly burn on the edges. I’ve slowly lowered the temperature from 180C, and found 150C to be spot on – the kale becomes totally crispy with no burned edges or soggy leaf in sight.

Roasting the kale at the lower temperature also makes it stay crispier for longer. In an airtight container, it will stay crispy for days. (I’ve only trialled storing it for test purposes mind you, as there’s never any leftovers in my house!)

Crispy Kale

My favourite way to serve crispy kale is with a touch of salt, sugar and sprinkling of toasted sesame seeds. I tend to grind the sesame seeds first, as it helps them to stick to the kale leaves. As you probably know, ground toasted sesame and salt is a Japanese seasoning called ‘gomasio’. You can buy it ready made in health food stores, but it’s super simple and cheap to make yourself.

Gomasio (Toasted Sesame Seeds & Salt Seasoning)

I use gomasio as a seasoning for lots of our Asian dishes, including stir fries. Since I like to liberally sprinkle it on, I only add a small amount of salt. I find that toasted sesame has a great flavour anyhow. It just needs a touch of salt to make the flavour ‘pop’.

Thanks to the two main ingredients – kale and sesame – this is one super healthy snack! Just one cup of cooked kale provides 354% of the recommended daily amount of vitamin A, 89% of the vitamin C, and 1328% of vitamin K! Kale also provides good amounts of calcium and iron, as well as protein, dietary fibre and omega 3 essential fatty acids. Sesame seeds are also packed with antioxidant and anti-inflammatory compounds, rich in minerals including calcium and iron, and a good source of protein, dietary fibre and B vitamins.

Crispy Kale (Kale Chips)

Here’s the recipe for what is, for me, the perfect crispy kale. I hope you enjoy it as much as I do!

[print_this]

Crispy Kale (aka Kale Chips)
Great as a starter, side dish or as a snack on its own, its taste is not dissimilar to the crispy seaweed served in Chinese restaurants. We love to flavour our crispy kale ‘sweet and salty’, but feel free to experiment with your favourite spice mixes.

Serves 2-3
Hands on time: 6 minutes    Ready in: 20 minutes

Ingredients
4 large handfuls of curly kale, thick stalks removed (about 100g)
½ – 1 TBSP coconut sugar or unrefined caster sugar
¼ tsp salt
½ TBSP olive oil
3 TBSP gomasio (see below) or sesame seeds

Method
Preheat the oven to 150C (130C fan) / 300F. Line two large baking sheets with non stick baking paper.

Wash the kale and tear into large bite-size pieces (the kale will shrink as it cooks). Use a salad spinner (or kitchen paper) to dry the kale. Place the kale in a bowl and give it a final dab with kitchen paper. Sprinkle in the sugar, salt, oil and sesame seasoning. Massage the kale with your hands until it is fully coated in oil.

Spread out the kale out on the prepared baking sheets. Make sure that none of the leaves overlap or are folded over,  otherwise they will steam (rather than roast) and won’t crisp up. Depending on the amount of kale you have and the size of your baking sheets, you may need to cook the kale in two batches.

Place in the oven and cook for 14 minutes. Check the leaves. If they are not 100% crispy, continue cooking and check at 2 minute intervals.

Crispy kale is most delicious eaten warm, straight from the oven. However, it can be stored in an airtight container where it will keep for up to a week.

[/print_this]

[print_this]

Gomasio
This makes a wonderful seasoning for stir fry dishes as well as crispy kale. The authentic version is made with unhulled sesame seeds but I tend to use the hulled variety (as that’s what I have in my store cupboard!) The traditional ratio of seeds to salt is about 15:1, but I prefer to use slightly less salt so I can sprinkle to my heart’s content!

Makes: about 80g / ¾ cup
Hands-on time: 5 minutes    Ready in: 10 minutes

Ingredients
80g / ¾ cup sesame seeds
¼ tsp salt

Method
Toast the sesame seeds in a dry frying pan (skillet) on a medium heat, stirring continuously until they start to turn golden and fragrant. Tip onto a plate and leave to cool. Roughly grind the sesame and salt with a mortar or pestle, or electric coffee/spice grinder. If using an electric grinder, you will only need a couple of quick blasts and the gomasio is ready (too much grinding and you’ll end up with sesame butter!)

Store the gomasio in an airtight container in the fridge, where it will keep for weeks.

[/print_this]

Crispy Kale (Kale Chips)

Do you make crispy kale / kale chips? If so, I’d love to hear what your favourite seasoning is. Have you tried Chinese, Mexican or Indian spices yet?

SaveSave

SaveSave

SaveSave