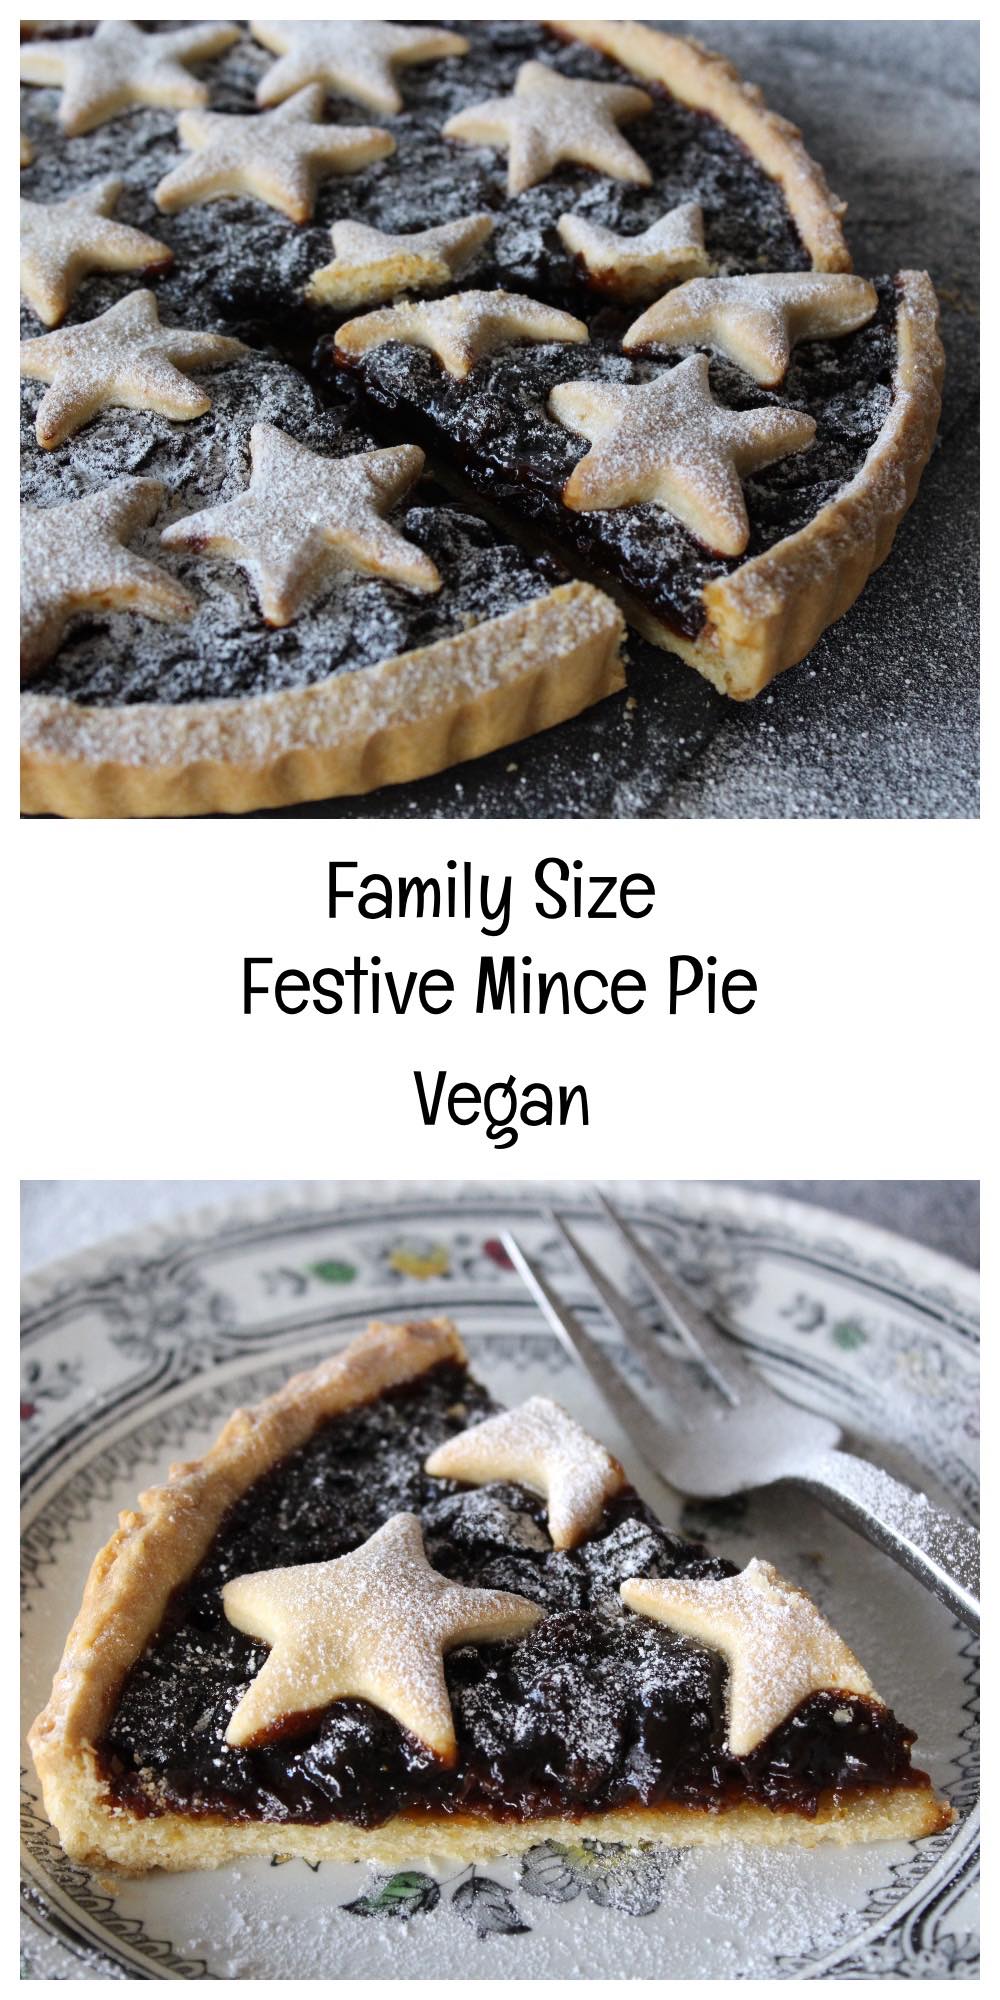
Family-Size Festive Mince Pie [Vegan]

Jump to Recipe

* This recipe was first published in December 2017. The page was updated in December 2019

Hello everyone! I hope your preparations for the festive holiday are going well. Hopefully you’ve been a bit more organised than me. As usual, I’ve left a lot of shopping and food preparation to the last minute, so today – Christmas Eve – is going to be one very busy day for me! However, before I crack on with the preparations, I thought I would share one last recipe on the blog before 2017 comes to a close. The recipe is for a giant-sized mince pie, which is just perfect for sharing with friends and family this season. I’ve already made three of these pies in the past week, and no doubt I will making more in the lead up to the New Year.

Vegan Mince Pie Tart

During the festive season, my family loves to have home-made mince pies for dessert, drizzled in custard or cream. However, while they taste delicious, individual mince pies do tend to look a bit lost on dessert plates and aren’t what I would consider ‘special enough’ to serve to dinner guests. To resolve this, I’ve played around with my favourite mince pie recipe and created a family-sized pie instead, which can be sliced and served on a plate with a more appealing presentation.

It took a couple of attempts with different pastry quantities and baking methods, but I’m really pleased with how it finally turned out. The pastry is lovely and crisp; it’s robust enough to slice without crumbling and, most importantly, it has been given the thumbs up from the recipe testers in my house.

Vegan Mince Pie Tart

I used my favourite organic mincemeat for this pie, which is made by Meridian. For the flour, I used Doves Organic White Spelt flour. For a while now, spelt has been my flour of choice for pastry-making. Personally, I find it gives pastry a nicer taste and texture compared to plain (all purpose) flour. As an added bonus, I find that some of my friends that generally avoid gluten/wheat, can tolerate spelt. It does make me wonder whether it’s specifically modern wheat that’s causing tummy issues for a lot of people.

Recipe Card

Vegan Mince Pie Tart

Family-Size Festive Mince Pie [Vegan]

This giant mince pie is perfect for serving to friends and family in the festive season. It’s easy to prepare, even when making the pastry from scratch!
Cook Time 1 hour 20 minutes
Hands-on Time 15 minutes
Course Dessert, Treat
Cuisine English
Servings 8

Ingredients
 

Short crust pastry*

  • 250 g / 1¾ cups white spelt flour or plain (all purpose) flour
  • 100 g / ½ cup dairy-free spread/vegan butter or aroma-free coconut butter
  • 20 g / 2 TBSP icing (confectioner’s) sugar
  • pinch of salt
  • 1 – 4½ TBSP chilled orange juice

Filling

  • 410 g / 1 cup mincemeat (make sure it's suitable for vegans)
  • soya milk for glaze (optional)

Suggested accompaniments

  • Dairy-free custard or cream

Instructions
 

  • Place the flour, dairy-free spread/vegan butter/coconut butter, icing sugar and salt in a food processor and whiz to combine. Add the orange juice through the funnel, ½ tablespoon at a time, until the mixture just starts to come together. (The amount needed will vary depending on the type of flour and butter used. I find that I need about 1-2 TBSP of juice when using dairy-free spread and about 3½-4½ TBSP when using coconut butter).
  • Scoop the dough together and press into a ball. Cover in cling film (plastic wrap) and rest in the fridge for 30 minutes.
  • Grease a 20cm / 8 inch loose-bottomed tart or quiche tin. Preheat the oven to 190c (170c fan) / 375F.
  • Once the dough has rested, break off a small chunk (about a fifth) and set to one side (this will be used for the star decoration). Place the remaining dough on a lightly floured surface. Arrange the cling film/plastic wrap on top and roll the dough to a thickness of about 0.3cm / ⅛ inch. Transfer the dough to the prepared tin and press into the edges and up the sides to a height of 2.5cm / 1 inch. Trim off the excess and place with the reserved dough for the stars.
  • Prick the dough in the base of the tin all over with a fork. Place in the pre-heated oven and bake for 20 minutes.
  • Five minutes before the pastry is cooked, roll out the reserved dough and cut out about 16 mini stars using a metal cutter (re-rolling the dough scraps as needed).
  • When the pastry case is cooked, distribute the mincemeat evenly on top, followed by the stars. Brush the stars with soya milk (if you’d like them to brown). Place in the centre of the oven and bake for 20 minutes, or until the stars are dry to the touch.
  • Leave to cool slightly before slicing (the pastry will firm up as it cools). Sprinkle with sieved icing sugar before serving. This tart is delicious served on its own, or with a drizzle of vegan cream or custard. Stored in an airtight container in the fridge, the tart will keep for five days.

Notes

*Alternatively, you can use shop-bought short-crust pastry (Jus-Rol is suitable for vegans)
Keyword Vegan Christmas Food, Vegan Mince Pie, Vegan Treats
Tried this recipe?Let us know how it was!

Pin for later ⬇️

Vegan Family Size Festive Mince Pie

If you make this Vegan Festive Mince Pie, I’d love to hear your feedback and any suggestions for adaptations! Tag your photos with #bitofthegoodstuff on social media – I always love to see your creations! You can also connect with me on my social media channels here: InstagramFacebook, Pinterest.   

Happy holidays everyone! ❤️

With love,

Sharon xx
SaveSave

SaveSave

SaveSave

SaveSave

SaveSave

SaveSave

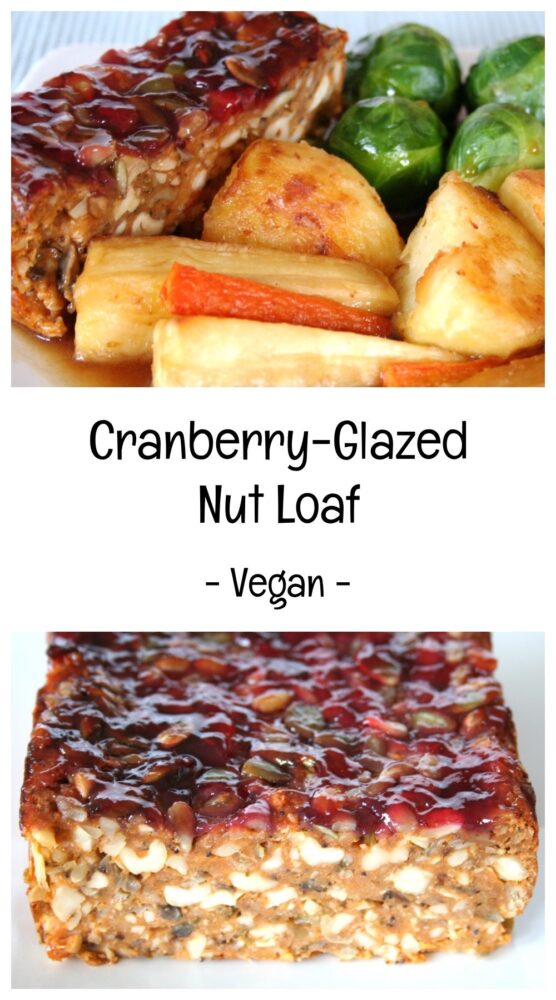
Cranberry-Glazed Nut Loaf (Vegan)

Jump to Recipe

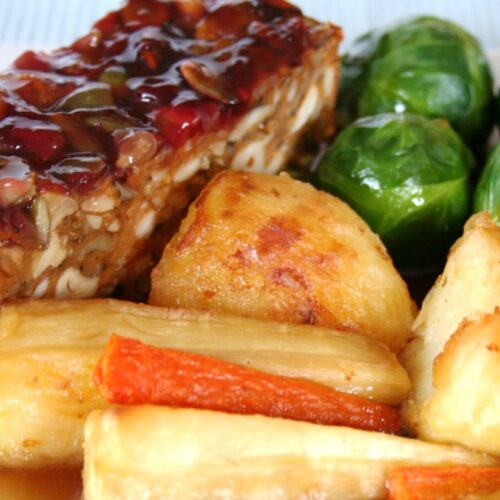
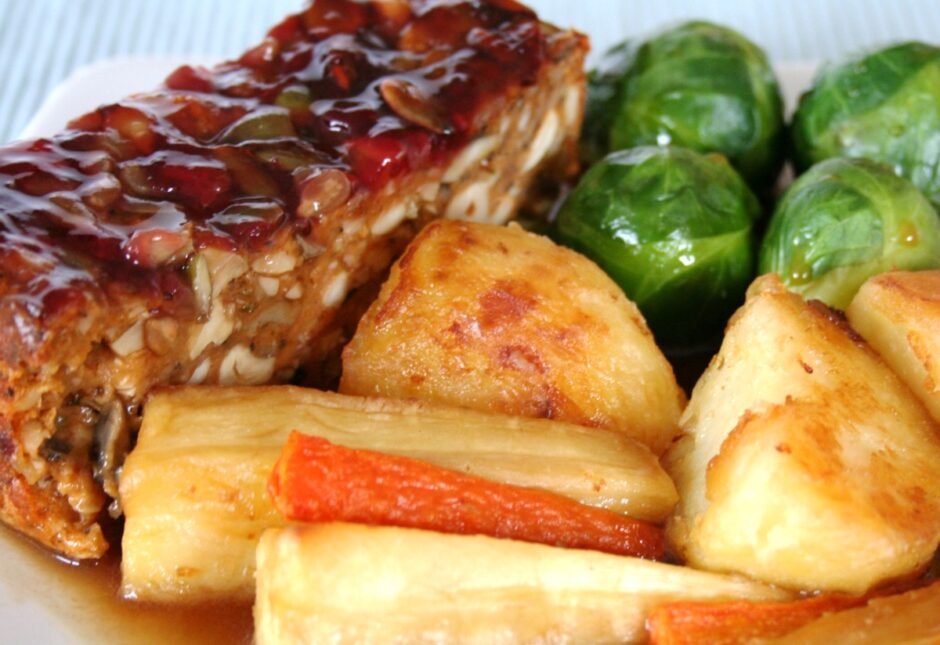
When it comes to Christmas dinner, for me, nothing can beat a nut loaf served with a big pile of roasted veggies and onion gravy ♥ 

My mum made me my first nut roast for Christmas when I was 12 and it was by far the best Christmas dinner I’d ever had! In contrast to turkey (which I’d always found pretty bland), the nut roast was packed with beautiful flavours and textures. Since then, I’ve always chosen to have nut loaf as the centre piece of my Christmas dinner… and for many years now, my mum has chosen it over turkey too!!

In fact, pretty much everyone I know loves a nut roast, regardless of whether they’re vegetarian, vegan or not, so this is a great meal to serve to friends and family over the Christmas holidays, or as a special Sunday roast dinner.

Cashew Nut and Red Lentil Loaf

The nut loaf recipe I’m sharing today has be my family’s all-time favourite. It’s the one we’ve chosen as the centre piece of our Christmas dinner for the past ten years or so. We only make it at Christmas (to keep it ‘special’) and I’m already looking forward to tucking into it again this year!

Not only does it taste delicious, but it is easy to make too! It also stores really well, which means you can make the loaf a few days in advance of Christmas (or Thanksgiving) then simply heat up some slices before serving. The last thing I want to be doing in the Christmas holidays is slaving away in the kitchen and missing out on the fun, so this kind of ‘make ahead’ meal really suits me!

Cashew and Red Lentil Nut Loaf

This Cranberry-Glazed Nut Loaf has proven to be popular with our lovely readers too. I first posted this recipe back in December 2013 and I’ve absolutely loved reading your feedback and seeing your photos on social media. Thank you so much to everyone that’s taken the time to do this. It means a lot to me!

This blog post was in desperate need of updating (especially since we moved our website to a new format this year) so I’m really happy to have finally found the time to do so. This is one recipe that I’m sure my family is going to be making for many years to come!

Recipe Card

Cranberry Glazed Nut Loaf (Vegan)

Cranberry-Glazed Nut Loaf

This nut loaf is perfect for sharing with friends and family over the festive holidays or as the centrepiece to a Sunday roast dinner. It can be made two or three days in advance and warmed through in the oven or a microwave just before serving. It also makes a delicous sandwich filling served with caramelised onion chutney or sweet pickle.
5 from 2 votes
Hands-on Time 30 minutes
Total Time 1 hour 40 minutes
Course Dinner, Lunch, Main Course
Cuisine American, English
Servings 6

Ingredients
 

  • 250 g / 1½ cups cashew nuts
  • 125 g / 1¾ cups fresh wholegrain bread
  • 200 g / 1 cup red lentils
  • 500 ml / 2 cups vegetable stock (broth)
  • 1 TBSP olive oil
  • 1 large red onion (160g) finely diced
  • 2 celery sticks (140g) finely diced
  • 2-3 garlic cloves minced
  • 100 g / 1 cup mushrooms finely chopped
  • 1 tsp dried sage
  • 2 TBSP tomato purée (paste)
  • 40 g / ⅓ cup wholemeal (whole wheat pastry) flour or chapatti flour
  • 2-3 TBSP fresh parsley finely chopped
  • ½ tsp salt
  • 1 TBSP each of pine nuts, pumpkin seeds and sunflower seeds
  • 4 TBSP cranberry sauce

Instructions
 

  • Preheat the oven to 190C (170C fan) / 375F.
  • Grease a large (3lb) loaf pan (about 24cm x 13cm x 7cm in size) and line with a strip of non-stick baking paper to cover the bottom and long sides. Leave a little excess paper hanging out to make it easy for you to lift out the loaf. (Alternatively you can use a non-stick loaf liner).
  • Pulse the cashews in a food processor until coarsely chopped, then place in a large mixing bowl. Process the bread into breadcrumbs, then add to the mixing bowl.
  • Place the lentils in a fine mesh sieve and wash under running water, agitating them with your hand until the water runs clear.
  • In a pan, bring the vegetable stock and lentils to the boil, then reduce the heat and gently simmer uncovered for 15 minutes, or until the lentils have become a soft purée and all the water has been absorbed. Stir regularly towards the end of the cooking time to prevent the lentils from sticking.
  • Meanwhile, heat the oil in a large non-stick frying pan (skillet) and cook the onion and celery until they start to soften. Add the garlic, mushrooms and sage, and cook for a further three minutes. Stir in the tomato purée and flour, then remove from the heat.
  • Add the contents of the frying pan to the mixing bowl with the cashews and breadcrumbs. Add the cooked lentils, parsley and salt, and stir until thoroughly combined.
  • Spoon the mixture into the prepared tin. Gently press down and level the top. Sprinkle with pine nuts and seeds, and press them into the loaf. Spread the cranberry sauce on top. Cover with foil and bake for 30 minutes. Remove the foil and bake for a further 30 minutes. When ready, the loaf should feel firm to the touch. Leave to cool in the tin for at least 20 minutes, before turning out and slicing (it will firm up more as it cools). If you’re making it ahead of time, you can leave it in the pan until completely cooled.
  • This loaf will keep for five days in the fridge, and for weeks in the freezer. If you’re not planning on eating the loaf in one go, you can slice it and freeze it in portions. The loaf can also be served cold and makes a great sandwich filling.
Keyword Lunchbox Ideas, Vegan Christmas Dinner, Vegan Dinners, Vegan Roast Dinner, Vegan Sandwiches, Vegan Thanksgiving
Tried this recipe?Let us know how it was!

Nutritional Breakdown

N.B. The above values are estimates. The actual nutritional values will vary depending on the brands and ingredients used.

Pin for later ⬇️

Cranberry Glazed Nut Loaf

If you have any leftovers, I can highly recommend stuffing them into a sandwich or pitta bread, along with some caramelised onion chutney or sweet pickle. My family calls this our ‘Boxing Day’ sandwich. It’s delicious!!

If you make this Cranberry-Glazed Nut Loaf, I’d love to hear your feedback and any suggestions for adaptations! Tag your photos with #bitofthegoodstuff on social media – I always love to see your creations! You can also connect with me on my social media channels here: InstagramFacebook , Pinterest.   

With love,

Sharon xx
———————————-

YOU MAY ALSO LIKE…

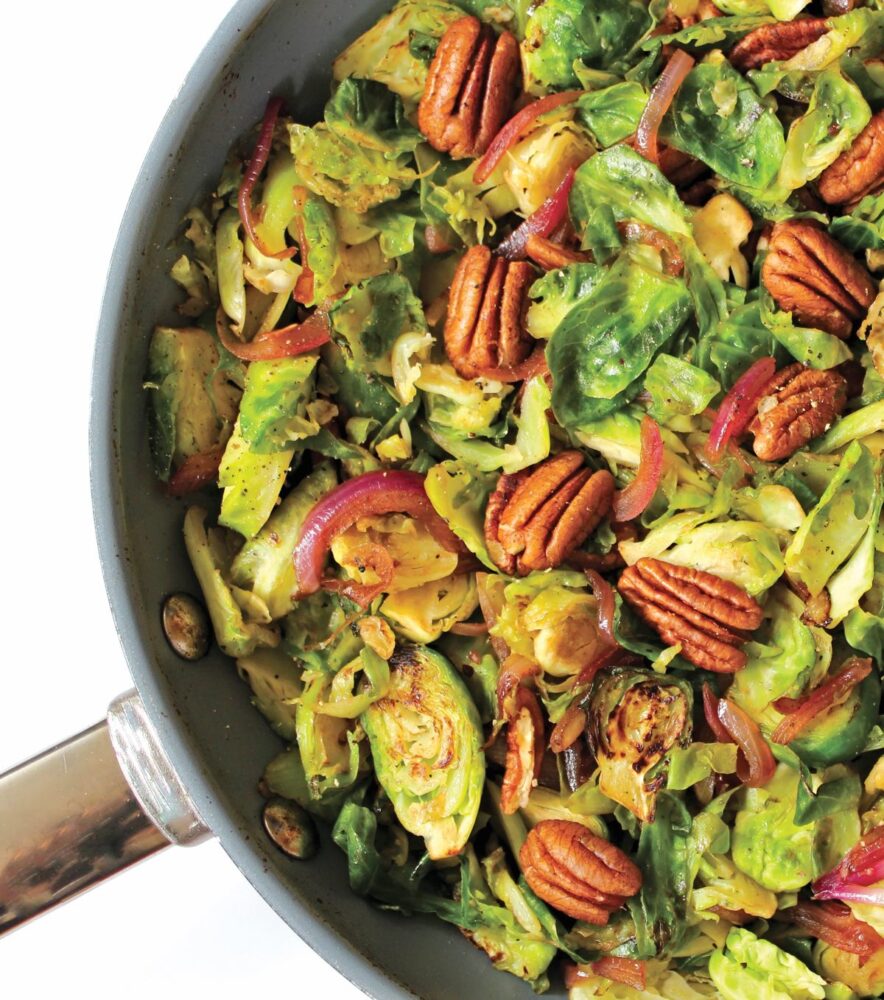
Brussels Sprout Hash with Balsamic Red Onion & Toasted Pecans

Brussel Sprout Hash

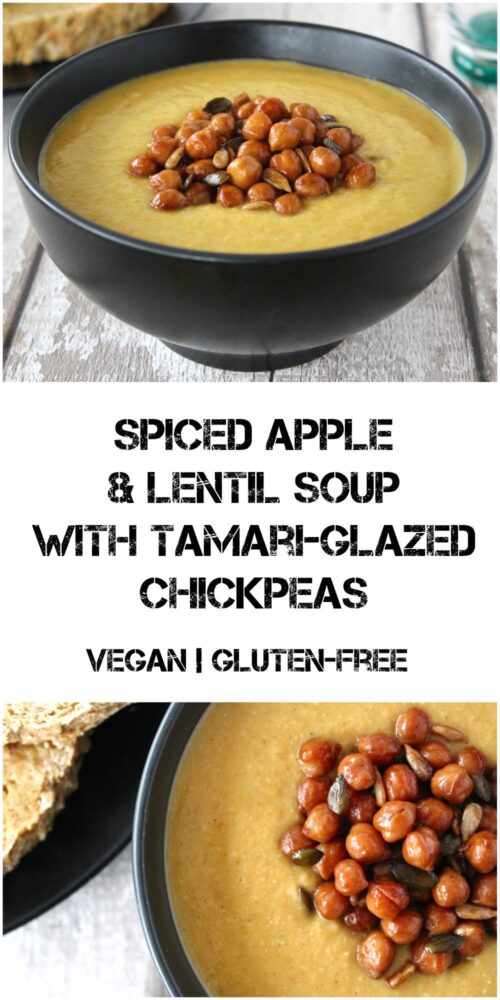
Spiced Apple and Lentil Soup with Tamari-Glazed Chickpeas

Jump to Recipe

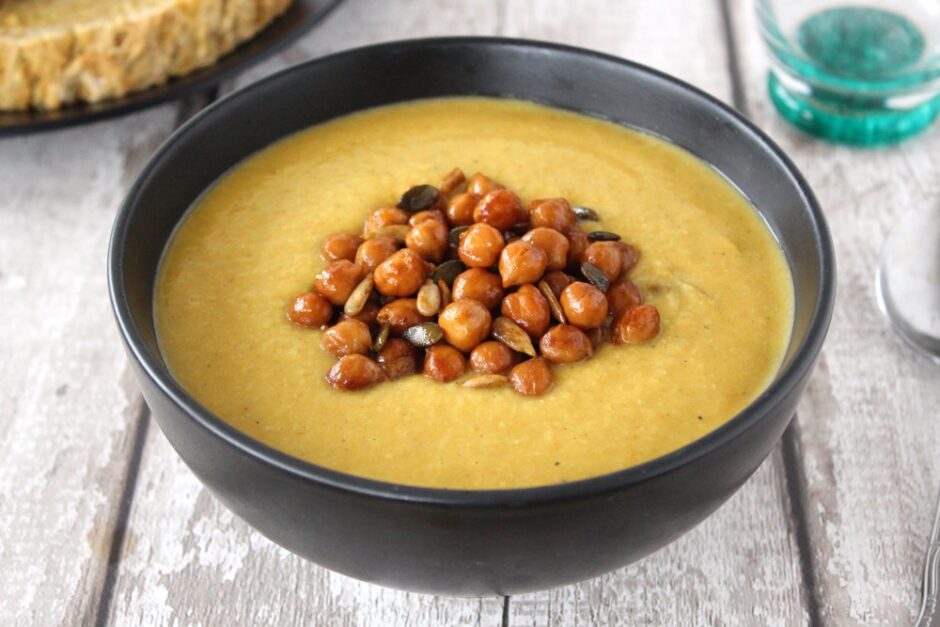
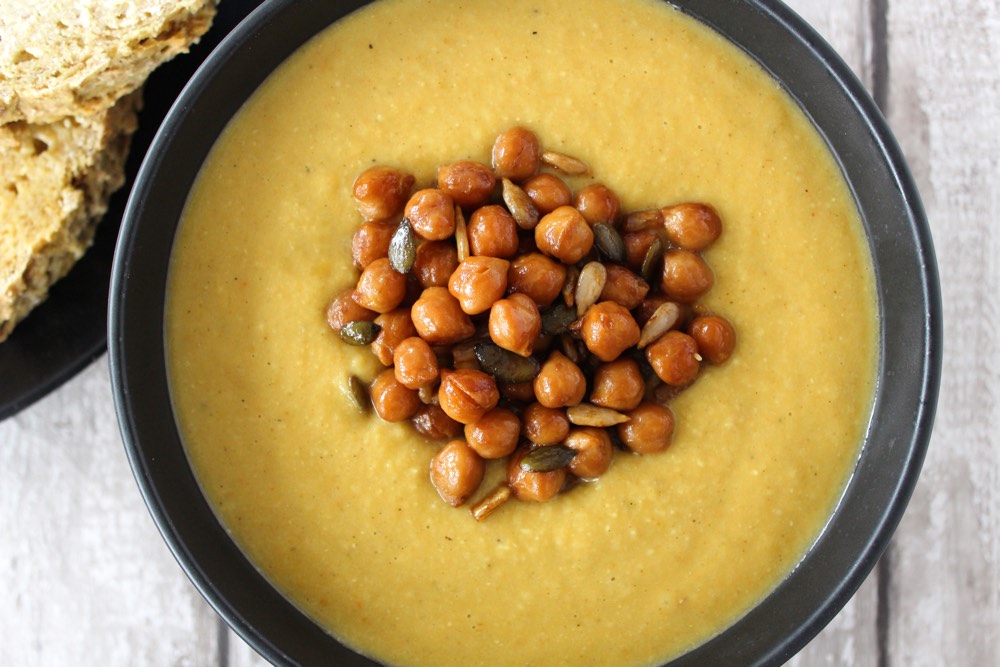
In today’s post, I’m sharing a delicious soup recipe that’s just perfect for the cold weather season. It’s creamy, filling and flavoured with spices that will warm you from the inside out. Topped with tamari-glazed chickpeas and seeds, and accompanied with a slice or two of wholegrain bread, this soup makes a wonderful evening supper or weekend lunch option. It is also budget-friendly. It cost me just £3.00 to make, which equates to 75p per portion. Bargain!

This soup is my idea of the perfect winter comfort food. As well as being tasty, warming and filling, it is also packed full of nutrients that help to keep our immune systems strong. It is rich in antioxidant vitamins A and E, as well as B vitamins and a whole host of minerals. Thanks to the lentils, chickpeas and seeds, this soup is also high in protein. Serve with a couple of slices of wholewheat bread and it provides over 27g of protein!

Spiced Apple and Red Lentil Soup

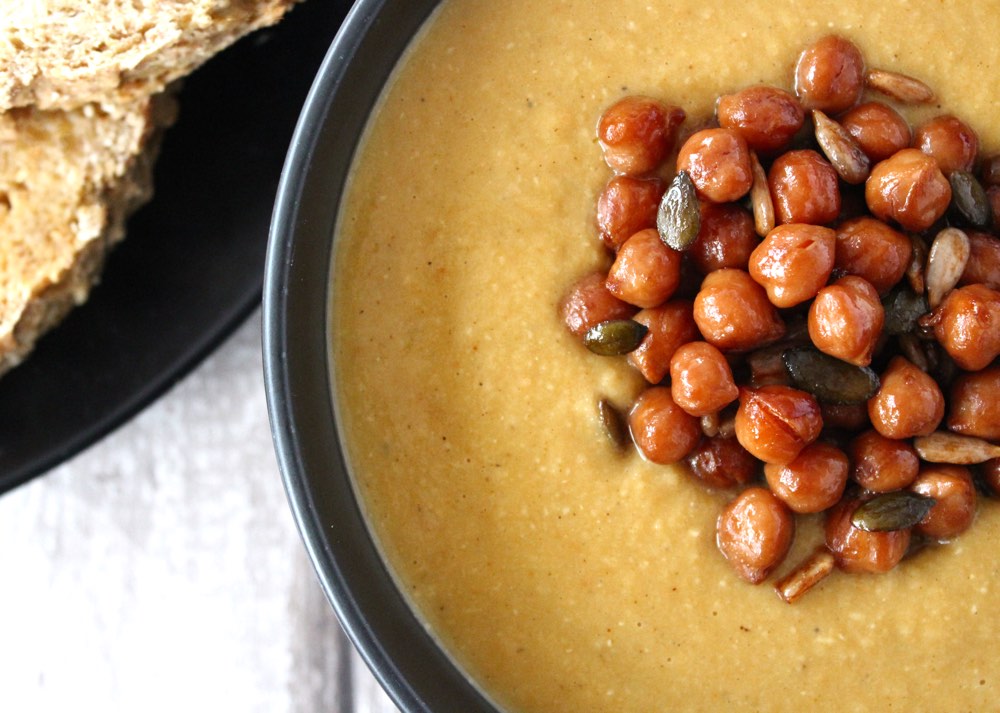
I love adding lots of toppings to my soups. Not only do they add interesting flavours and textures, but they also boost the nutrient profile of the soup and make it more filling. Inspired by my Creamy Butternut Squash Soup, I chose to top this soup with some chickpeas and seeds glazed in tamari soy sauce, which gave them a rich, umami flavour that complimented the spices in the soup.

Delicious!

Spiced Apple and Red Lentil Soup

Recipe Card

Spiced Apple and Lentil Soup with Tamari-Glazed Chickpeas

This soup is a great winter warmer. It’s creamy, filling and flavoured with warming spices. Topped with tamari-glazed chickpeas and seeds, and accompanied by a slice or two of wholegrain bread, this soup is substantial enough to serve as a main evening meal. It also makes a delicious, nutrient-rich lunch option. Pack into a wide-necked flask for a warming lunch ‘on the go’.
Hands-on Time 25 minutes
Total Time 35 minutes
Course Dinner, Lunch, Soup, Supper
Cuisine Indian
Servings 4

Ingredients
 

  • 1 TBSP olive oil
  • 1 large onion chopped
  • 2 medium carrots halved lengthwise and thinly sliced
  • 3 celery stalks trimmed and sliced
  • 1 large apple cored and chopped
  • 2 tsp minced garlic
  • 2 tsp garam masala
  • 1 litre vegetable stock (broth) (I use boiling water and 4 tsp vegetable bouillon powder)
  • 130 g / ⅔ cup red lentils
  • 70 g (about ⅓ of a 200g / 7 oz block) of creamed coconut roughly chopped
  • salt to taste

Toppings

  • 400 g / 14 oz can chickpeas rinsed and drained
  • 2 TBSP pumpkin seeds
  • 2 TBSP sunflower seeds
  • 1 tsp olive oil
  • 1 tsp maple syrup
  • 1 tsp dried oregano
  • ½ TBSP tamari soy sauce

Instructions
 

  • Gently heat the oil in a large saucepan. Add the onion, carrot, celery and apple to the pan. Stir through, cover with a lid and leave to cook on medium-low heat for 4 minutes.
  • Meanwhile, place the lentils in a fine mesh sieve and wash under cold running water, agitating them with your hand until the water runs clear.
  • Add the garlic and garam masala to the saucepan, and continue cooking for 2 minutes.
  • Add the vegetable stock, lentils and creamed coconut to the pan. Bring to the boil then reduce the heat, cover with a lid, and simmer for 20 minutes.
  • When the lentils are tender, remove the pan from the heat. Leave to cool for a few minutes then transfer to a jug blender and whizz until smooth. Depending on the size of your blender, you may need to do this in two batches. Return the soup to the pan and gently heat through before serving. Season with salt, to taste.
  • For the toppings: Heat the chickpeas and seeds in a large frying pan (skillet) on medium heat. Drizzle in the olive oil and stir through. Add the maple syrup and oregano and stir through. Finally add the soy sauce and continue cooking until the liquids have evaporated, stirring regularly.
  • This soup will keep for up to five days in the fridge. I haven’t tried it yet, but I’m pretty confident that it will freeze well too.
Keyword Budget Vegan Meals, Easy Vegan Meals, Family Friendly, Gluten-Free, Student Vegan Meals, Vegan Dinners, Vegan Lunch
Tried this recipe?Let us know how it was!

Nutritional Breakdown

N.B. The above values are estimates. The actual nutritional values will vary depending on the brands and ingredients used.

Pin for later ⬇️

Spiced Apple and Lentil Soup

If you make this recipe, I’d love to hear your feedback and any suggestions for adaptations. Tag your photos with #bitofthegoodstuff on social media – I always love to see your creations! You can also connect with me on my social media channels here: Instagram, Facebook, Pinterest.   

With love,

Sharon xx
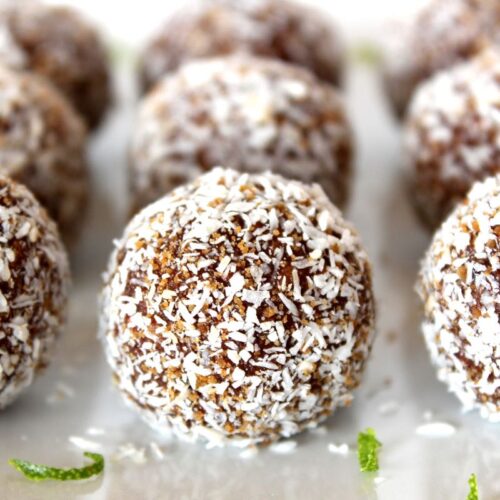
Cocoa Lime Energy Balls

Jump to Recipe

* This recipe was originally posted in March 2015. The page was updated in October 2019.

Have you ever tried making your own energy balls? It’s so easy! You simply throw all the ingredients in a food processor, whizz for a few seconds then shape the mixture into balls. It couldn’t easier! 

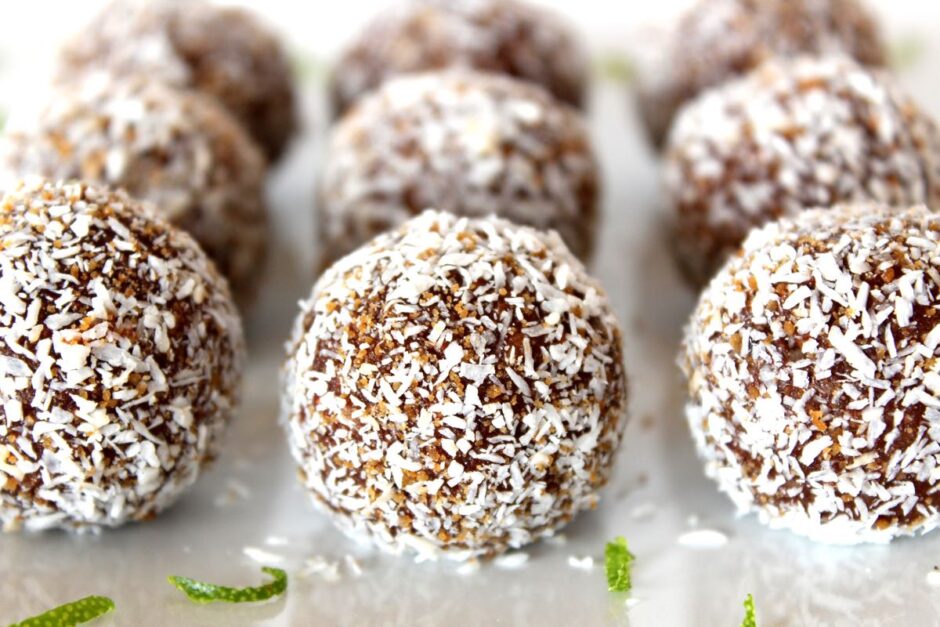
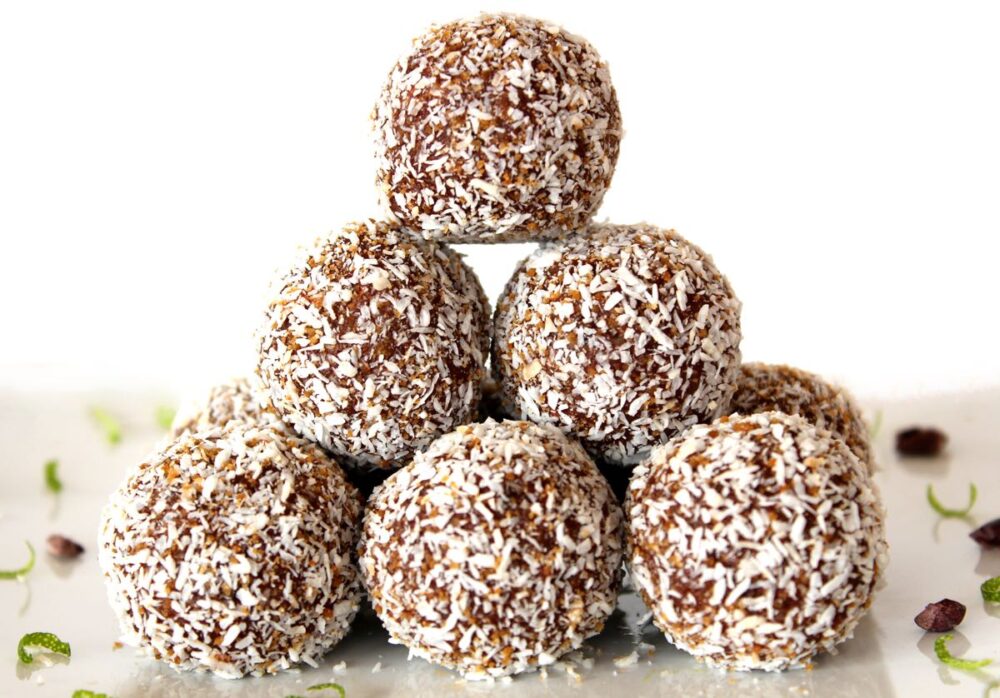
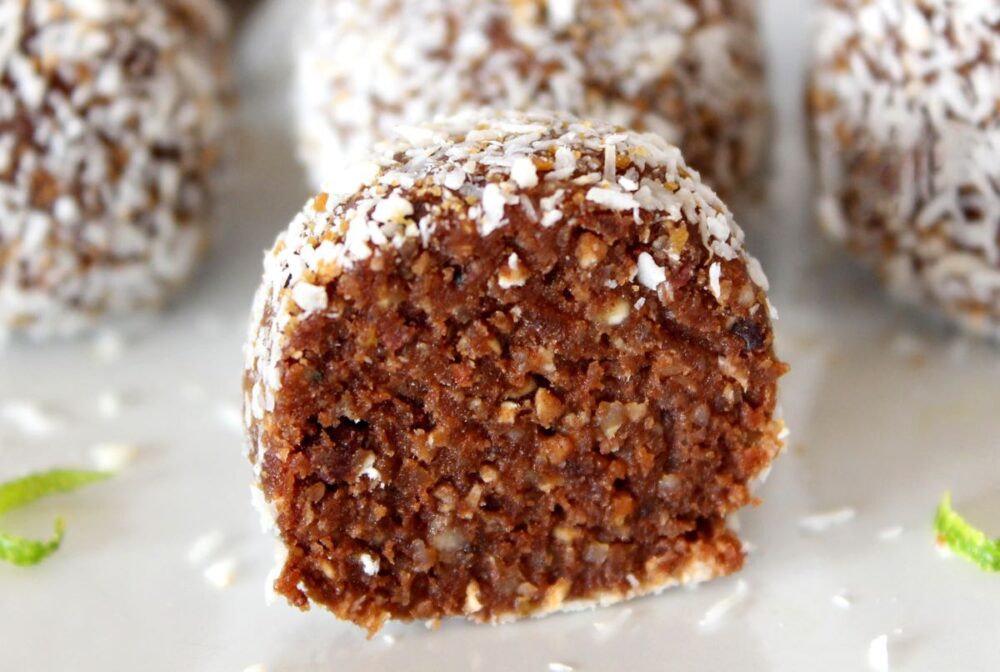
Cocoa Lime Energy Balls

What I especially love about these balls is that they taste decadent, yet they’re packed full of nutrient-rich ingredients that are not only going to increase our energy levels, but also boost our health in general. Each ball is filled with protein, heart-healthy fats, complex carbs, fibre, plus a whole host of minerals and antioxidant compounds. It’s amazing just how much goodness you can fit into one little ball!

And not only does it work out much cheaper to make your own rather than buying the branded versions, but it also means that you get to flavour them however you wish! In today’s recipe, I’m using one of my favourite flavour combinations – cocoa and lime. I love anything chocolatey, but especially when it’s combined with a citrus flavour like lime. It help cuts through the richness of the chocolate, and adds a delicious fresh, zesty taste to every bite.

Cocoa Lime Energy Balls

Since I originally posted this recipe back in 2015, I’ve made literally hundreds of these balls to share with friends, family and vegan festival goers, and they’ve proven to be a big hit with everyone that’s tried them. Even little kids have given them a thumbs up, which has made me super happy! These balls make a great after-school snack and (provided you carefully supervise the food processor part) children could easily help you make them. They could even experiment with their own flavour combinations!

Recipe Card

Cocoa Lime Energy Ball

Cocoa Lime Energy Balls

These Cocoa Lime Energy Balls are chocolatey but not too rich, fresh and zesty thanks to the lime, and lighter than the classic energy ball as I've reduced the nuts and used oats instead. Delicious, nutrient-rich and energy boosting, these balls make the perfect snack. Their handy size makes them easy to transport and stash in your bag for snacking 'on the go'.
Hands-on Time 15 minutes
Total Time 15 minutes
Course Snack
Servings 12

Ingredients
 

  • 22 g / ¼ cup desiccated coconut
  • 1 TBSP coconut sugar
  • 50 g / ½ cup rolled oats (quick oats, not jumbo)
  • 43 g / ¼ cup cashews
  • 35 g / ¼ cup walnuts
  • 2 TBSP cacao or cocoa powder
  • 120 g / ½ cup soft sticky dates, pitted
  • ½ – 1 tsp zest from an unwaxed/organic lime
  • 2 TBSP freshly squeezed lime juice
  • 1 tsp maple syrup
  • pinch of salt
  • 2 TBSP cacao nibs, optional

Instructions
 

  • Mix together the desiccated coconut and sugar in a shallow container.
  • Place the oats, cashews and walnuts in a food processor and whizz into crumbs. Add the cacao/cocoa powder, dates, lime zest, lime juice, maple syrup and salt. Process until the dates are broken down. Add the cacao nibs, and continue processing until the mixture comes together in a ball. Taste test and add a touch more cacao/cocoa, lime zest or sweetener, if desired.
  • Scoop level tablespoons of the mixture. Roll into balls, then roll in the coconut sugar mixture. Repeat until all the dough is used. Chill in the fridge (ss they chill, they will firm up).
  • Stored in an airtight container, these energy balls will keep for a week in the fridge, or for weeks in the freezer.
Keyword Healthy Snacking, Plant-Based, Vegan Snacks
Tried this recipe?Let us know how it was!

Nutritional Breakdown

N.B. The above values are estimates. The actual nutritional values will vary depending on the brands and ingredients used.

Pin for later ⬇️

Cocoa Lime Energy Balls

If you make these Cocoa Lime Energy Balls, I’d love to hear your feedback and any suggestions for adaptations! Tag your photos with #bitofthegoodstuff on social media – I always love to see your creations! You can also connect with me on my social media channels here: InstagramFacebook, Pinterest.   

With love,

Sharon xx
——————————–

YOU MAY ALSO LIKE…

Chocolate Orange Energy Balls

Chocolate Orange Energy Balls

Chocolate Banana Ice Cream Smoothie Bowl (Dairy-Free)

Jump to Recipe

* This post was originally posted in July 2016. The page was updated in August 2019.

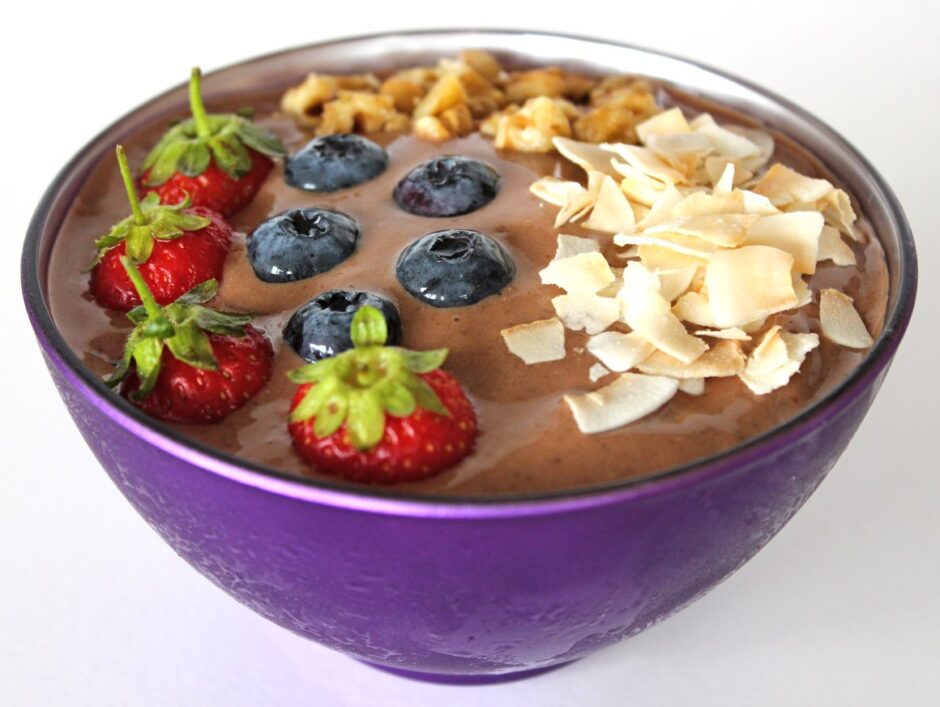
In the hot summer months, nothing beats a cooling bowl of ice cream smoothie for breakfast. It might sound a bit indulgent to eat ice cream for breakfast, however this is no ordinary dairy and sugar-laden ice cream. The base is a blend of frozen banana and plant milk that magically transforms into the creamiest, smoothest soft serve. This is one ice cream that you can indulge in to your heart’s content!

As well as a great warm weather breakfast option, this ice cream smoothie bowl also makes a delicious post-school and exercise snack.

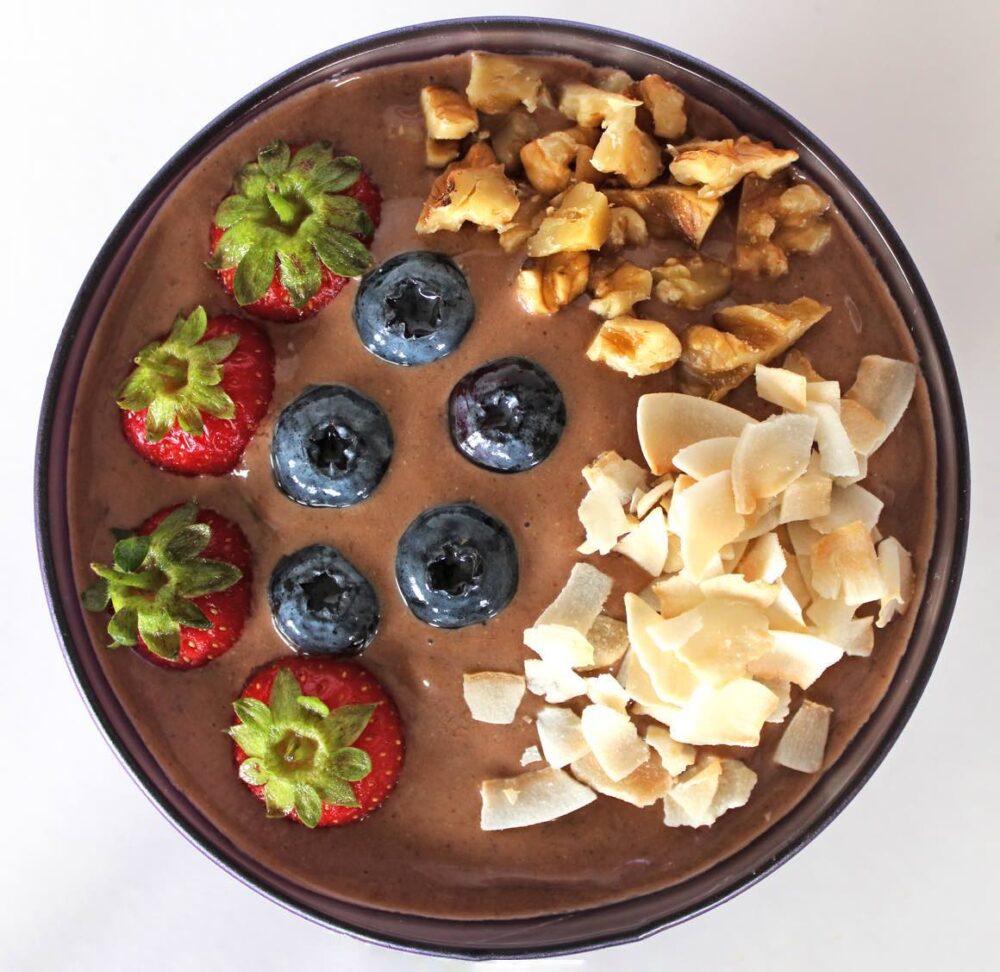
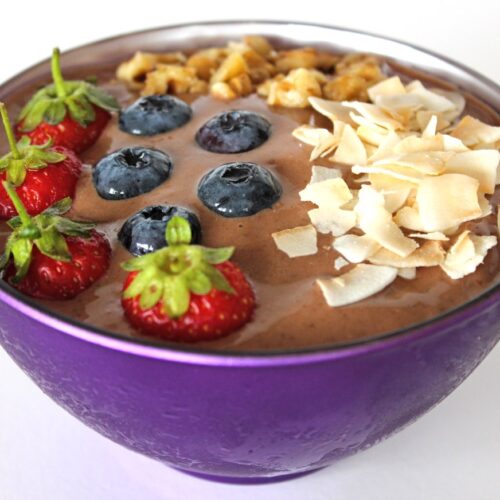
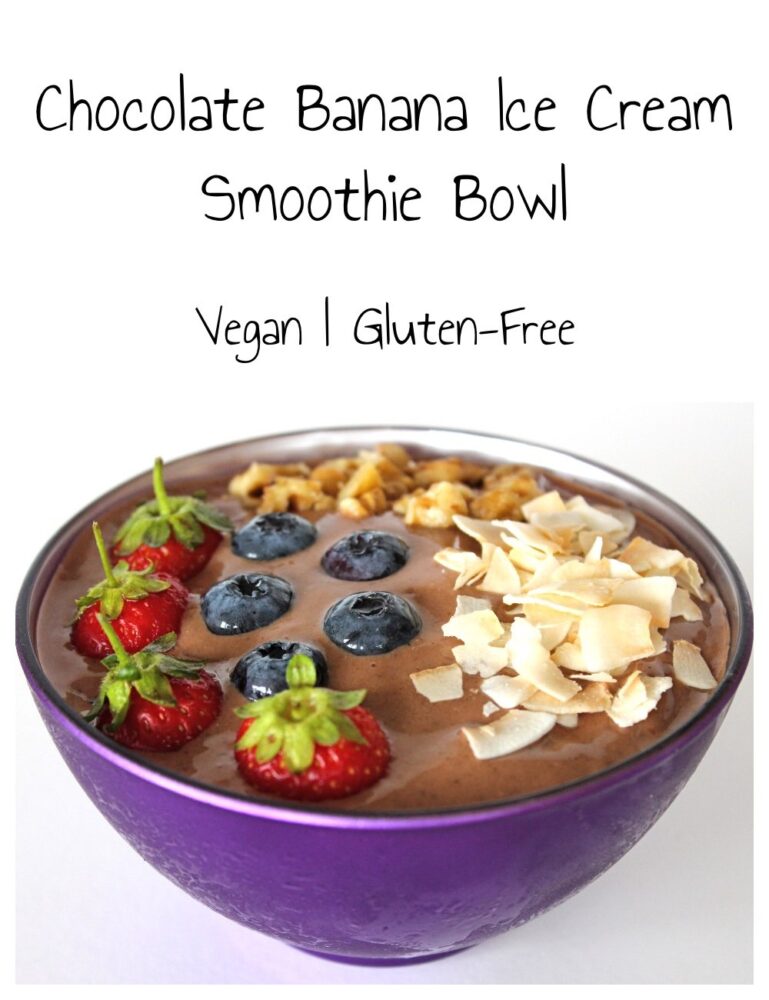
Chocolate Banana Ice Cream Smoothie Bowl (Vegan / Dairy-Free)

The chocolate version that I’m sharing today is not only one of my personal favourites, but it has also proven to be very popular with kids too! It always feels great to give kids a treat that’s delicious and healthy, and this one is packed with goodness. It contains a whole host of vitamins, minerals and antioxidants, and is especially rich in vitamins C and E, calcium, magnesium, manganese, potassium and phosphorus.

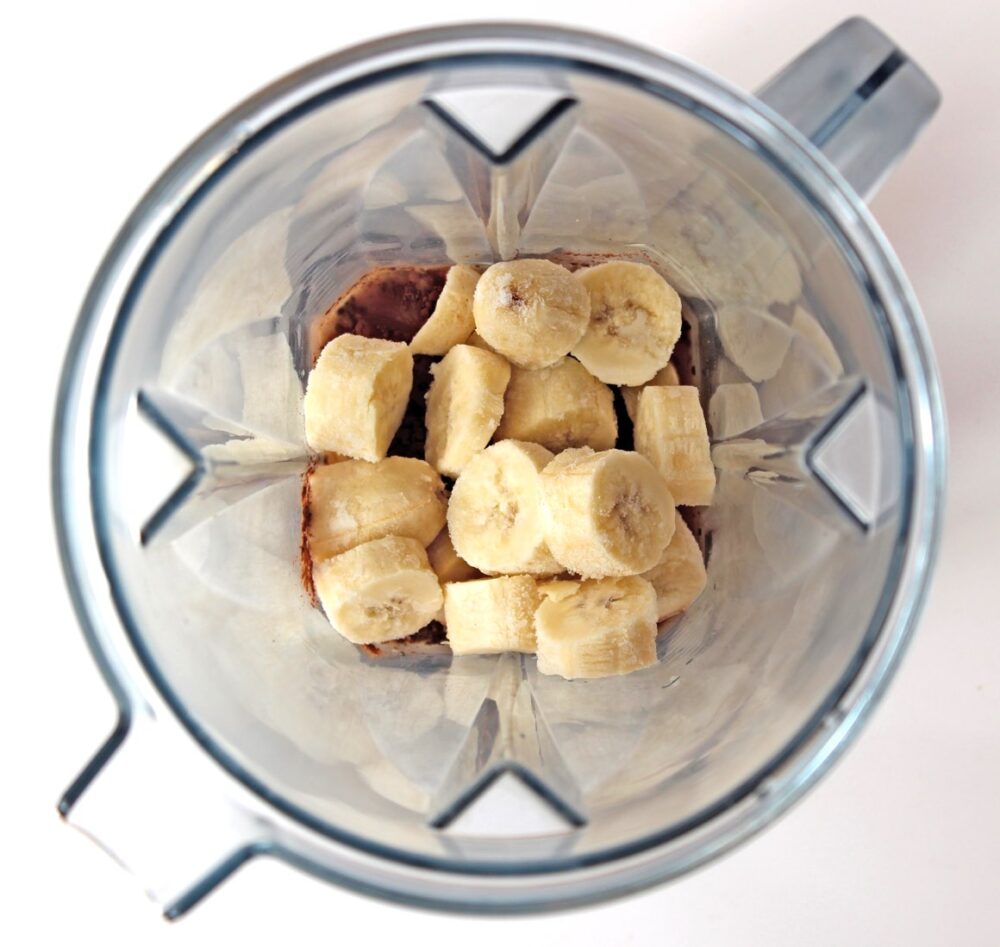
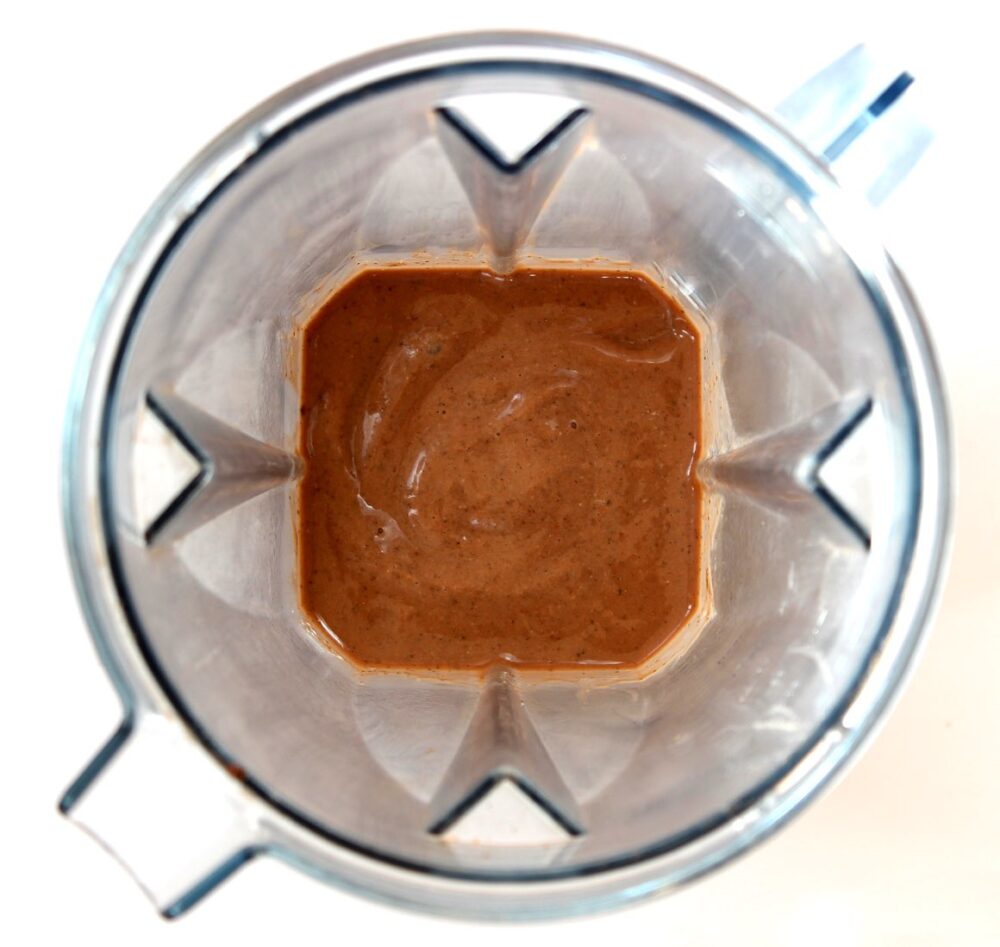
These ice cream smoothie bowls are so quick and easy to make. It’s simply a case of freezing the bananas, then whizzing the ingredients smooth in a power blender or sturdy food processor.

Chocolate Banana Ice Cream Making

I always like to include a tablespoon of almond butter and ground linseed (flaxseed) in my smoothie bowls for extra protein and heart-healthy fats, including omega 3. Adding these two ingredients also helps to make the bowl a more ‘complete’ breakfast and keeps me feeling full up for longer.

Recipe Card

Chocolate Banana Ice Cream Smoothie Bowl (Vegan / Dairy-Free)

Chocolate Banana Ice Cream Smoothie Bowl

This ice cream smoothie bowl is just perfect for serving for breakfast on a hot summer's day, or as a post-school or exercise snack. It tastes really decadent, yet it's packed full of goodness!
Hands-on time 5 minutes
Total Time 5 minutes
Course Breakfast, Snack
Servings 1

Ingredients
 

  • 180 ml / ¾ cup soya milk (or other plant milk)
  • 2 frozen very ripe bananas
  • 1 TBSP cacao or cocoa powder
  • 1 TBSP ground linseed (flaxseed)
  • 1 TBSP almond butter
  • ½ tsp vanilla extract

Suggested toppings:

  • Fresh berries, nuts and seeds (I used strawberries, blueberries, walnuts and toasted coconut chips)

Instructions
 

  • If your house is warm, place your bowl in the freezer for a few minutes.
  • Using a sharp knife, slice the frozen bananas into coins.
  • If using a power blender: Add the milk followed by all the remaining ingredients. Using a tamper tool, push the banana onto the blades. Start blending on low then move to high speed. Add a splash more milk, if needed, to get things moving.
  • If using a food processor: Add all the ingredients and whizz until smooth. Stop now and then to scrape down the sides and redistribute the banana round the bowl.
  • Scoop the ice cream into your bowl. Add your desired toppings and serve immediately. If you are going to hold the bowl in your hands, wrap a tea towel round it to stop the ice cream from melting.
Keyword Banana Ice Cream, Family Friendly, Gluten-Free, Plant-Based, Vegan Breakfast, Vegan Snacks
Tried this recipe?Let us know how it was!

Nutritional Breakdown

N.B. The above values are estimates. The actual nutritional values will vary depending on the brands and ingredients used.

Pin for later ⬇️

Chocolate Banana Ice Cream Smoothie Bowl (Vegan / Dairy-Free)

Ice cream, parfaits, chia puddings, pancakes, waffles…. we love interchanging breakfasts and desserts in our house, and it appears that we’re not the only ones! Here are some more ‘desserts for breakfast’ ideas from some of my favourite bloggers…

Blueberry Bread Pudding Breakfast Cake by Blissful Basil

1-Hour Cinnamon Rolls with Aquafaba by Vegan Richa

Peanut Butter and Jelly Muffins by Minimalist Baker

Strawberry Cheesecake Mess by Wallflower Kitchen

Cherry-Strawberry Chia Seed Fool with Vanilla Bean Coconut Whipped Cream from Oh She Glows

Easy Peasy Pumpkin Spice Bread Pudding by Unconventional Baker

If you make this Chocolate Banana Ice Cream Smoothie Bowl (or any other recipes on my blog), I’d love to hear your feedback and any suggestions for adaptations! Tag your photos with #bitofthegoodstuff on social media – I always love to see your creations! You can also connect with me on my social media channels here: InstagramFacebookPinterest.   

With love,

Sharon xx
———————————-

Moroccan Fruity Couscous

Jump to Recipe

* This post was originally published in July 2013. The page was updated in August 2019.

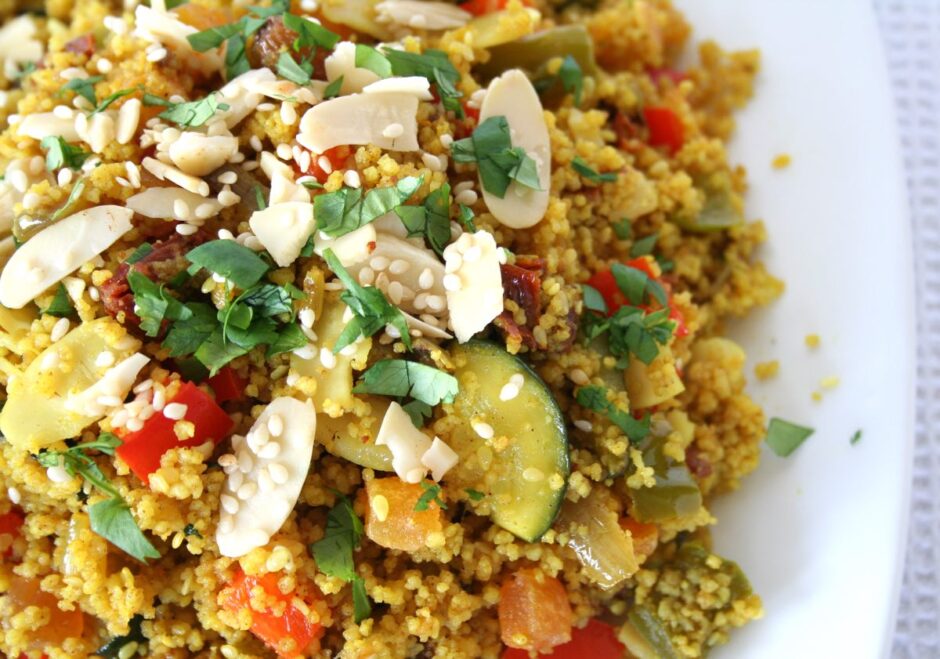
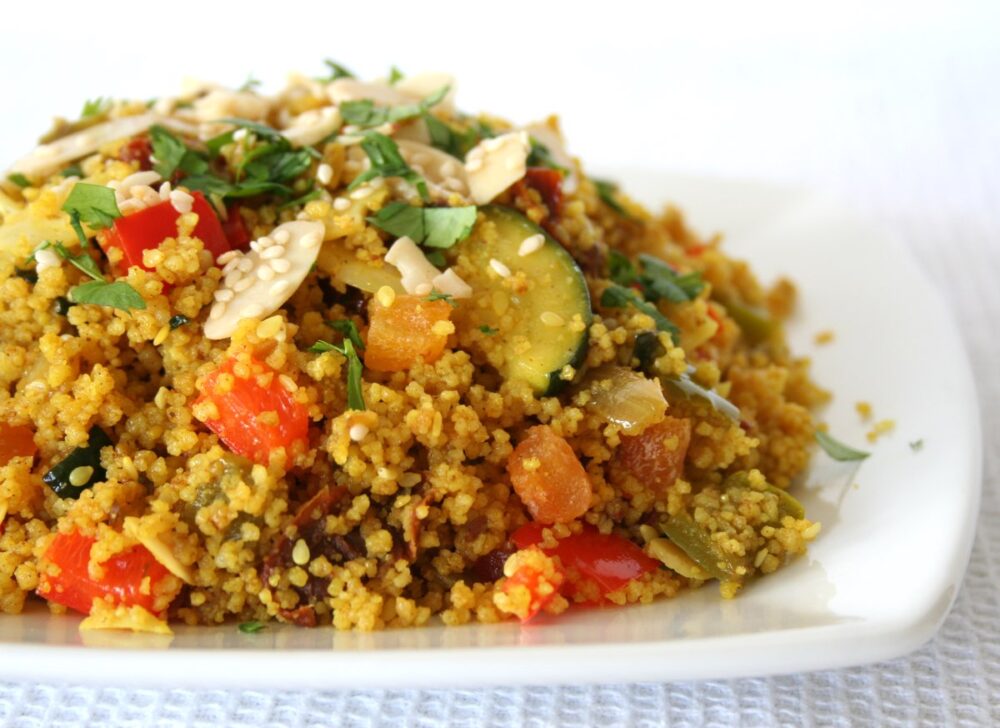
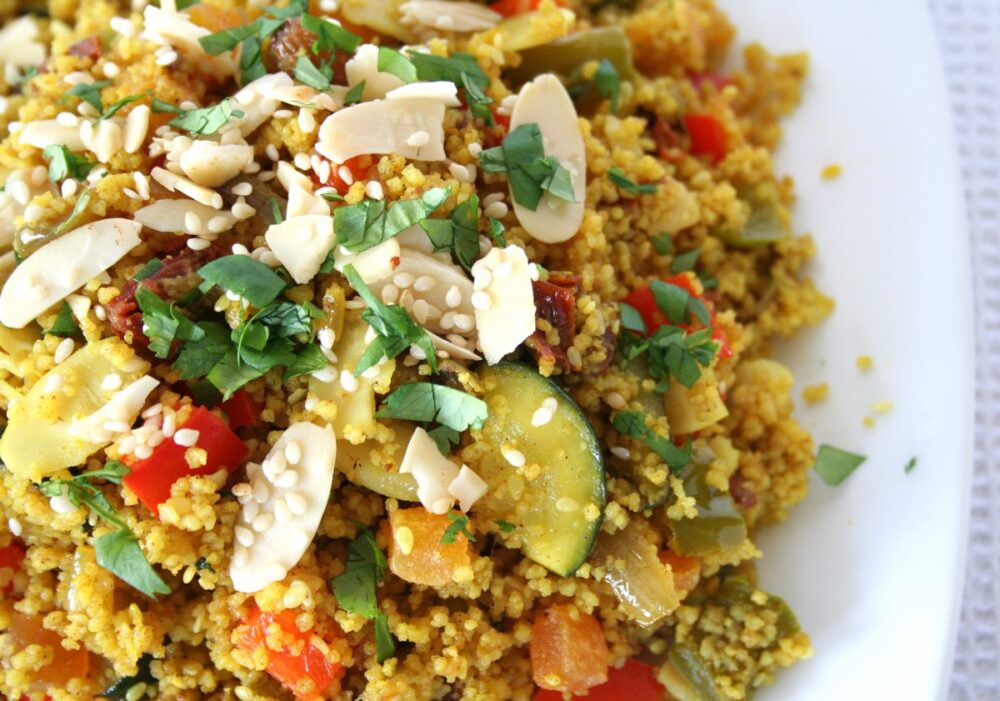
Today I’d like to share another one of my family’s current favourite dishes – Moroccan Fruity Couscous. This is such a pretty dish, full of flavour and ready in just 20 minutes!

Moroccan Fruity Couscous

It makes a lovely summer weekend lunch or speedy weeknight supper. It’s equally delicious served hot or cold, making it perfect for al fresco dining, picnics and buffets. As a main meal, we love to serve it with strips of warm pitta or garlic bread, some baby salad leaves and a large dollop of hummus. Moroccan-spiced or roasted red pepper hummus is especially good!

Moroccan Fruity Couscous

July 30 2013 – I made this dish for dinner last night, and was intending to blog it in the evening and join in Meatless Monday. However, after a day of thunder, lightening and heavy rain, the weather had finally cleared by 7pm and the three of us were itching to get outside and make the most of the ‘best part of the day’. Our short stroll turned into a 6 mile circular walk along the Kennet & Avon Canal & across Bath City centre. It was such a beautiful evening! Everything smelt so fresh after the rainfall, and the late sun was making everything sparkle.

Kennet and Avon Canal by Sydney Gardens in Bath

So here’s the recipe, a day late but I’m sure you’ll forgive me 😉

Recipe Card

Moroccan Fruity Couscous

Moroccan Fruity Couscous

Sharon
This gently spiced, fruity couscous makes a lovely summer weekend lunch or speedy weeknight supper. As a main meal, we like to serve it with strips of warm pitted bread or garlic bread, baby salad leaves and a large dollop of hummus. I've kept it mild enough for children, but feel free to spice it up with some chilli.
Hands-on time 20 minutes
Total Time 20 minutes
Course Lunch, Main Course, Supper
Cuisine Moroccan
Servings 4

Ingredients
 

  • 245 g / 1⅓ cups couscous, preferably whole wheat
  • 8 sun-dried tomatoes in olive oil drained and sliced
  • 8 dried apricots chopped
  • 30 g / 3 TBSP dried cranberries or sultanas
  • 480 ml / 2 cups boiling hot vegetable stock (broth)
  • 1 TBSP olive oil divided
  • 1 medium onion (140g) finely chopped
  • 2-3 garlic cloves minced
  • 1 bell pepper (190g) deseeded and diced (or use a mix of different coloured pepper pieces to make it extra vibrant!)
  • 1 medium courgette (zucchini) (240g) quartered lengthwise and sliced
  • 1 tsp ground cumin
  • ½ – 1 tsp sweet paprika
  • ½ tsp ground cinnamon
  • ¼ tsp ground ginger
  • ¼ tsp ground turmeric
  • small handful of fresh coriander leaves (cilantro)or parsley roughly chopped
  • salt to taste

Garnish

  • 4 TBSP toasted flaked almonds
  • 2 TBSP toasted sesame seeds

Instructions
 

  • Place the couscous, sun-dried tomatoes, dried apricots and cranberries/sultanas in a heat-proof bowl. Pour the boiling hot stock on top, cover with a plate and leave for 7 minutes. Drizzle on ½ TBSP olive oil (or oil from the jar of sun-dried tomatoes) and fluff up with a fork.
  • Meanwhile, heat ½ TBSP oil in a large frying pan (skillet) on medium heat and cook the onion, garlic, bell pepper and courgette for a couple of minutes. Stir in the dried spices, reduce the heat to medium-low and continue cooking for 5 minutes. If the vegetables start to stick, add a splash of water to the pan.
  • Once ready, tip the couscous into the pan along with the fresh herbs. Gently stir through to combine. Season with salt, to taste.
  • Divide between four bowls. Sprinkles on the nuts and seeds and serve.
  • Any leftovers can be stored in the fridge for three days. They’re great for packing into lunchboxes as an alternative to sandwiches. Be sure to add a dollop of hummus to the bowl. It helps the couscous stick together!

Notes

Super Speedy Version
To save on chopping time, substitute the fresh vegetables with a bag of frozen grilled Mediterranean vegetables.
Keyword Buffets, Couscous, Lunchbox Ideas, Plant-Based, Vegan Dinners, Vegan Lunch, Vegan Picnics, Vegan Supper
Tried this recipe?Let us know how it was!

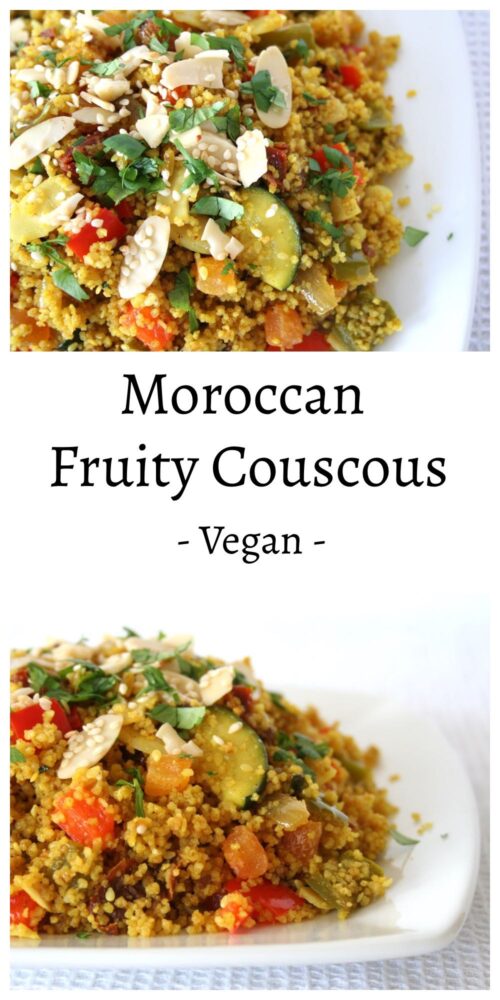
Pin for later ⬇️

Moroccan Fruity Couscous

If you make this Moroccan Fruity Couscous (or any other recipes on my blog), I’d love to hear your feedback and any suggestions for adaptations! Tag your photos with #bitofthegoodstuff on social media – I always love to see your creations! You can also connect with me on my social media channels here:
InstagramFacebookPinterest.   

With love,

Sharon xx
———————————-

YOU MAY ALSO LIKE…

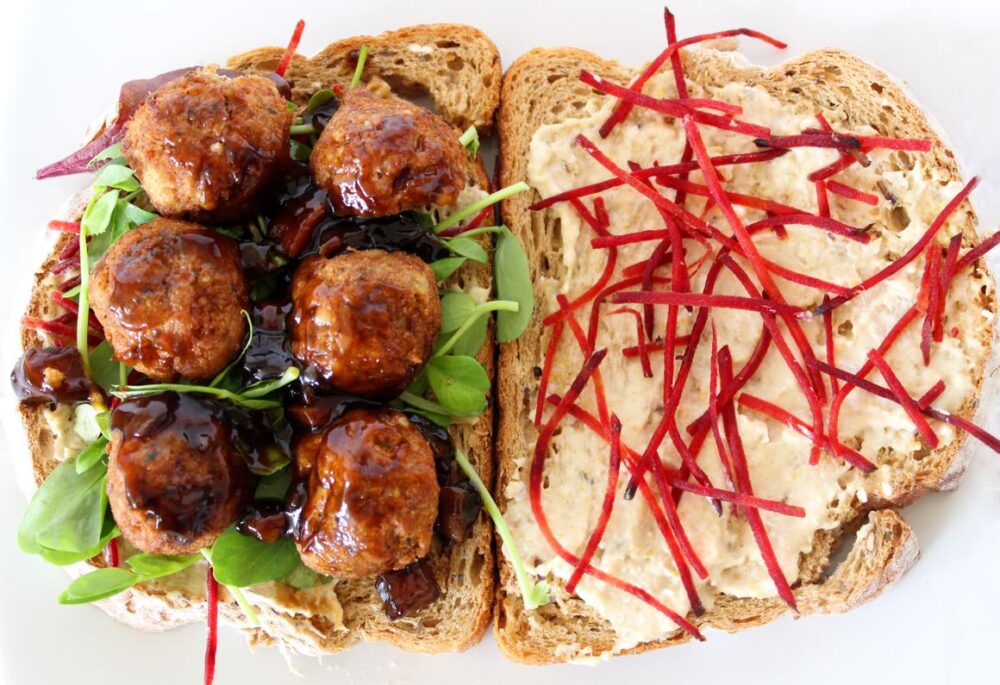
Moroccan-Spiced Falafel

Falafel Sandwich